I just wrote a comment on Mark Boyce's thread, but the wheely thing just kept going around and around and I killed the upload. This site does that a lot.

As to my project, I've finished the landscaping and refurbishing. When all the scenic cement fully dries tomorrow, I'll start dealing with the snow. It looks a whole lot better than it did when I started. The inner part… the building base and sidewalk… is still masked, but that comes off tomorrow.

I painted the Gazebo and temporarily cleared a spot for it and took some images. I had to do some minor surgery in the tunnel at the transformer end. The plaster I added was in the way of the rolling stock. Clearances are tight!

I trimmed up and filled out all the ballasting, added more grass and did some shrubery work. Considering the height of an n-gauge person, the "shrubs" are more like large bushes like and Oak Leaf Hydrangea or bid Rhodadendron. I added another coat of paint to the wood framing.

NHH160 Fixup Finished 1NHH160 Fixup Finished 2NHH160 Fixup Finished 3

N-gauge is so small that the "Fine" ballast I use for the walkway up to the gazebo looks like river rock and not fine gravel.

NHH160 Gazebo Painted

Here's a before image to refresh your memory.

NHH169 Plan View

Attachments

Images (5)
  • NHH160 Fixup Finished 1
  • NHH160 Fixup Finished 2
  • NHH160 Fixup Finished 3
  • NHH160 Gazebo Painted
  • NHH169 Plan View

It certainly is an adjustment moving between modeling in scales as different as O and N.  You have done a great job with it!  I am assuming with as much detail as you are including, you are going to model a light dusting of snow, whichever method you use.  The layout is a big improvement, but I’m sure the original served well for an activity for the boys.

I've made an executive decision today after doing a little experiment with the "snow". I'm not going to add it. Since the layout is fully covered with green materials, snow doesn't work as nicely as it would if I did it over a white surface to begin with. Furthermore, I didn't like the partical size and how it was going to react with wetting solution and scenic cement. Ergo, no snow. I will still use the trees without leaves. Also, we haven't had that much snow these days anyway. The layout looks really nice as it is and I started installing the tree lighting.

Instead of attempting to make the gazebo walk out of "fine" ballast, I made a cardstock pavement. I adhered both the gazebo to the pavement and the pavement to the layout using the transfer adhesive.

NHH160 Gazebo Pavement

The kids and I installed some Atlas n-scale girder bridge sides to simulate the crossings. With the angular trajectory the rr follows precluded from putting in a normal bridge. Previously, the girders were held just with hot glue. I repainted them and weathered them a bit. Then I installed 0.032" phos-bronze pins to give some more substance to the mounting. Then I used the hot glue. This was the best choice since the mounting surface was very irregular.

NHH160 Bridge Girder Install

I pulled the masking off the center section and did some cleanup painting of the edges after first masking the street. I drilled the #43 holes for the lighting at the tree bases, and then, using my scooter under the layout, inserted the LED harnesses into the holes and used some hot glue below to keep them from falling out. The red micro-LED is a smaller diameter than the other two. Don't know why. As a result, they went clean through the holes whereas the others need to be pressed into place. As a result, two of them were sticking out about a 1/2" above the pavement. I didn't know this until I had hot glued them under the layout. This made it very difficult to pull them back to the surface.

NHH160 The Great Unmasking

Lastly, I put the buildings in place to check on some final fit issues. One was the rear exterior staircase that goes behind the hardware store. I got worried that there wasn't enough room between the store and the street since I actually didn't size the base with the stairs in my thoughts. Luckily, it will just make it. Folks will have to walk out into the street to get around the staircase. I'm also still deciding on the adhesive to use to hold the buildings in place. I thought about the transfer adhesive, but now I'm leaning to using epoxy. It will give me some working time for final alignment. The transfer adhesive is a one-shot deal. Where you put something on it is where it's going to stay.

Without snow, this railroad could be done tomorrow (no later than Thursday).

NHH160 Building Install Begin

Attachments

Images (4)
  • NHH160 The Great Unmasking
  • NHH160 Building Install Begin
  • NHH160 Gazebo Pavement
  • NHH160 Bridge Girder Install
Last edited by Trainman2001

Buildings are glued and graphics are in place. I'm already having trouble with one of the Atlas switch machines. Those darn things are so delicate. One of them already started overheating and the plastic case is deforming due to excess heating. I may have to replace it before I give it to the client. And I'm being very careful to not hold the button down too long. The switch wasn't cycling fully to the lock position in one direction. In attempting to keep cycling it, it started to overheat. My Z-stuff machines are over 25 years old and still work very well.

I added operating instructions for the switch operation to hopefully prevent any field failures. I color coded the looks and the loop switches to hopefully make it more understandable.

NHH160 Graphics Applied

I used Gorilla construction adhesive to glue down the buildings. I was going to use epoxy, but decided against it… to sloppy. This stuff sets in 30 minutes and is fully cured in 24 hours. I used gravity clamps to keep them tight down for the 30 minutes.

NHH160 Gravity Clamps on Bldgs

I got the stairways installed. In this case I went with epoxy first, but it wasn't working. I added CA, still not working. Finally, when I glued the buildings down I used the Gorilla glue to reattach the stairs and it worked.

NHH160 Hardware House Stair

I put the clock in place. It's looks a bit cockeyed to me. May have to fix it. Due to the narrowness of the base, the bank is getting pretty close to that tree (soon to be planted).

NHH160 Bank w Clock

I painted the benches and the dumpsters and placed them on the model. They are not permanently fastened. I decided against installing the parking meters. They are simply too frail to exist in this scale. They wouldn't last a week.

NHH160 State Street Benches

I briefly thought about making n-gauge "Waste Management" decals for the dumpsters, but they would be way to small to be practical. The colors give them away.

NHH160 Dumpsters

Tomorrow, when the glue is set, I'll wire it all up, install the power supply and add the power switch for the lighting and this will be done… unless I'm still entertaining the snow question. I sent the client a progress picture and explained about the lack of snow. We'll see what he says.

Attachments

Images (6)
  • NHH160 Graphics Applied
  • NHH160 Gravity Clamps on Bldgs
  • NHH160 Hardware House Stair
  • NHH160 Bank w Clock
  • NHH160 State Street Benches
  • NHH160 Dumpsters

They're huge. You should see the crane that lifted them on top of those buildings.

I got the LED power supply fastened to the layout along with the wired switch. I mounted this on the outside of the layout to allow easy access to it and its cord. This is the side that facing into the store. Those looking at it from the window will not see it.

NHH160 LED Power

I'm still using the DPDT switches that I got in Germany when I did the original building of the big layout. Rather than purchase a single pole single throw switch I just keep pressing these into service. I have two left and one will be assigned to the lighting on the new turret model. Therefore, I wired both sides of the switch as "ON", and the center as "OFF". I just took the two hot output leads and joined them about 3" from the switch.

NHH160 Light Switch

And with the label which actually took about 10 minutes to draw, print, add fixative, and mount with transfer tape. Pretty neat how those faux screw heads look totally 3D.

NHH160 Light Graphics

And I pulled a magnificent booboo. I decided to drill a new hole through the layout frame to pass the lighting wires. I used a healthy drill size and was very near the hole that passed the track power to the #3 position. When the drill broke through, it grabbed the + wire, twisted the heck out of it and then tore it in two. I had to do a field splice, which, needless to say, did not make me happy.

Attachments

Images (3)
  • NHH160 LED Power
  • NHH160 Light Switch
  • NHH160 Light Graphics

Looks great!  Consider your boo-boo minor.  We had a guy at the phone company who was mounting a control head for a mobile radio on the floor hump beside the driver’s seat.  He drilled through the floor and right into the transmission.  🤦‍♂️  Brand new car.  He was promoted to engineering and later to management.  None of my installs were pretty, but I never damaged the vehicles.  I guess that’s why I never amounted to much!  😆

Took one more image to send to the grandsons. I don't think the client is going to pick it up before early next week, so I'm enlisting my younger grandson, Jack, (Sophomore at Wash U at St. Louis mechanical engineering) to help me get it out of the basement. The basement steps take a sharp 90 degree turn that may preclude getting it upstairs with the legs attached. I removed them when bringing it from my daughter's house, but would like to not have to this again.

NHH160 Near Completion

Attachments

Images (1)
  • NHH160 Near Completion

Lighting is done, but I may add one more to light the freight station. I have two more open ports on the driver board. Looks pretty good with the lights dimmed, but they're bright enough to show in full lighting.

I did all the wiring sitting on my scooter under the layout. It wasn't fun on my back or my neck, but I perservered. The hardest part (for me) when working under the layout(s) is my head's position puts my vision out of the top… non-bi-focal… part of my glasses, so I have to bend my head even further back to get things in focus. Using my Opti-visor helps, but has it's own problems constantly snagging wiring that directly above it, and it too is at the wrong angle for comfortable viewing. I don't know if any other senior guys out there run into this problem.

Here's the power board with all the wiring hooked up. I fastened it to the cross-brace in the horizontal position to facilitate making the connections. The hardboard out of which I created this layout is old, very high density stuff, that came from my dad's garage. It doesn't accept the wire-capture staples well. They penetrate a short distance and then fold up on themselves, but it was enough to keep the wiring from hanging down.

NHH160 Light Block

Here's the lights in ambient:

NHH160 Lights On 5

And with the lights dimmed:

NHH160 Lights On 2

Still to be done:

  1. Emplant the rest of the trees.
  2. Glue down the benches and dumpsters
  3. Add people and vehicles
  4. Light the station

I replaced the distressed switch machine. These fragile devices worry me...

When I was halfway through the wiring, I plugged in the power supply to see if they worked. They DIDN'T! Oh my! What have I done wrong?? Checked the polarity of my hookups and they were correct. Then, my brain turned on. I have a SWITCH on the control panel, and that switch was in the center OFF postion. When I turne it on, I was rewarded with all the lights working perfectly.

Attachments

Images (3)
  • NHH160 Light Block
  • NHH160 Lights On 5
  • NHH160 Lights On 2

Thanks guys! I started wearing Varilux lenses in my 40s, so it's not for really old guys. And with my cataracts done, I'm actually seeing better than I did in my 20s. Age is just a state of mind.

I am declaring the layout finished. I put in the trees, people and cars, then ran the train to see if it still worked. It stopped running when entering zone 2. It was the connection at the control panel switch that wasn't secure. I reattached and it all worked well. I also found that some cars, due to the various couple types they're using, don't like to couple to certain other cars. Therefore; I'm giving the client a picture of the car order that works best. Also found that setting the power pack at much over 50 on the dial asks for trouble when negotiating that switch at the bottom of the hill. It gets a pretty good head of steam and can miss the switch. I'm going to make another label instructing that 55 is a speed limit.

The grandsons are impressed with how this thing cleaned up. Frankly, so am I.

NHH160 Finished 1NHH160 Finished 2

There are at least 3 dfferent types of knuckle couples on this train: Kato, Kadee, and some I can't identify. While they all couple…eventually… when coming down grade and when slack develops, some let go and that can't happen if you want this to run unattended. I'm also suspect of that box car. It wobbles a bit through switches and I don't like that.

NHH160 Train Order

Let's try again.

NHH160 Finished 1NHH160 Finished 2

This a good workable lash up. There are variations in the knuckle couplers that work better in some combinations than others.

NHH160 Train Order

Then yesterday, I was running the train for my daughter and it derailed again at that switch! I filled more track gaps with Bondic and filed then very smooth, and then did some run bys with the engine along and guess what? It wasn't the trackwork at all. It was the faux airline, uncoupling thingy that was impacting one of the guard rails on the Atlas switch. Most of the times it didn't do it, but when it did, it either jostled the heck out of it, or abruptly threw it off the track. This was causing a problem all along, but I couldn't see it. It was also afecting some of the cars with Kadee style couples. I clipped them all off since I'm not using any form of uncoupling appliance. If I had my druthers I'd glue all the couplers together. Now the train ran perfectly. No hitches. I probably spent a whole of lot time fixing things that didn't need fixing, but all's well that ends well.

All y'all have a wonderful Thanksgiving. Our kids and grandkids will all be together and it's the one time in the year that this happens.

I've made another movie of the big trains which I will post when I've edited it.

Attachments

Images (3)
  • NHH160 Finished 1
  • NHH160 Finished 2
  • NHH160 Train Order

Speaking of inspecting tiny things, I just got an iPhone 15 Pro, which has a camera with a 3x optical zoom. Combined with its excellent focus algorithms, it is a remarkably good tool for observing tiny things at a distance. It is kind of a microscope and a telescope at the same time. It is proving exceptionally useful for problems like the one that Miles described.  The 15 Pro Max has a 5X optical zoom, which would presumably be even better.

Also, if you are an iPhone owner and haven't played with the Magnify app that comes with the phone, take a look. It is pretty amazing.

Last edited by Avanti

Part of the reason besides being so small was my problem solving bias. I was so sure that the track work was the problem since it had been up till that point, I had no reason to think beyond it. And I have used my phone as a microscope, especially when reading that insanely small lettering on the instructions that accompany some medicine bottles. I also used it to decipher the serial numbers on Apple products.

Good news! I got paid for the remainder for the n-gauge railroad. He'll be picking it up in a couple of weeks. Now I have to make sure nothing happens to it between now and then.

Then I wanted to ressurect some cars that I hadn't taken out of the box for over 14 years since we moved here. This was a nice full-length, aluminun extruded Weaver passenger set of the Pennsy "Fleet of Modernism" design that looks so spiffy behind GG1s, the one and only S1 and the T1. But these cars were terrible. They had the worse couple sets of any cars I'd ever owned and when I rebuilt the layout I didn't take them out of the box. In my old Pennsy iteration of the layout, my track spacing was too narrow (3.5" c-t-c) so when a train ran on the outisde with these long cars, some equipment clipped them on the inside of the curve. With my new layout, I purposely spaced everything wider than that so I could run any length equipment. Now the only restricted rolling stock is my very nice MTH railway crane and my Schnable car which can't make it through my tunnels.

I decided to find out what I could do to fix the awful couplers and approached it two ways. Here was the problem: Not only was there this height mismatch, but the lock pins wouldn't stay put and I was resorting to orthodontic rubber bands in some cases and twisted wires on others.

5IP Weaver Coupler Problem

I shimmed one set so it would raise the coupler height. This worked.

Layout Weaver Car Fix 1

While it did work, I realized there was a better way. I undid the chassis so I could slide it out of the extrusion enough to give more room around the coupler, and then simply bent the frame that held it all, upwards which raised the couple height. The shimming method created its own problem by forcing me to re-bend the uncoupling lever so it would engage the coupler sufficiently to work.

With the cars functioning, I lashed up a train and ran it around a bit. The uncoupling buttons on some cars are still too low and cause some sparking when the pass over some of the switches. It's not causing any electrical glitches so I'm not worrying about it. Here's the train.

Layout Pennsy Super Train 1Layout Pennsy Super Train 2Layout Pennsy Super Train 3Layout Pennsy Super Train 4Layout Pennsy Super Train

The set also has a baggage car, but it doesn't have any trucks on them and I haven't found them yet. So it has a heavy weight baggage car, which, if I'm not mistaken, is not so far from reality. These cars were designed and built by weaver before the days of separate grab irons, sprung trucks and spiffy interiors, but the paint job is specatular. Most Pennsy fancy trains did NOT have round end observation cars. They had flat-ended ones. I don't know of anyone who's made them in O.

Attachments

Images (7)
  • 5IP Weaver Coupler Problem
  • Layout Weaver Car Fix 1
  • Layout Pennsy Super Train 1
  • Layout Pennsy Super Train 2
  • Layout Pennsy Super Train 3
  • Layout Pennsy Super Train 4
  • Layout Pennsy Super Train

I did get paid for the little railroad, but he's not picking it up yet. He's trying to navigate going to Charleston, and then to Louisville and then back to Bucks County, PA. He's going to make a very large triangle.

Meanwhile, I've been spending some serious hours designings more parts for the 5" gun mount project. This last bit is the complete projectile and powder hoist system that takes shells and powder cartridges from the ready service room up one level to the gun house. In an American battleship, like the Iowas, the gun house sits on a box-like structure that's also exposed. This structure, the ready-service room, has a small store of ammo for quick transport to the guns, and then receives replenishment from the magazine two decks below.

Missouri Finshed Superstructure

I'm modeling all of this, but the most complex was this hoist machinery. In fact, I'd say without exaggeration, that it's the most complex SketchUp drawing I've ever completed. It took over two weeks of work (I have no idea about how many hours).

5IP Hoist Comp Frt5IP Hoist Comp rear

Here's how they're situated in the gun mount.

5IP GH with Hoist

All of the really complicated stuff is now drawn/andor/printed. I entertained the thought to print the entire hoist system as one piece, but reconsidered. I separated the projectile and powder portions and added some structure to help key them together during assembly. They're on the printer now and will be done around 10pm. Then I'll know if my setup worked.

Screenshot 2023-12-09 at 4.19.19 PM

Here's how it ended up for the printer.

Screenshot 2023-12-10 at 11.41.32 AM

Now I'll just have to figure out how to remove the supports without removing any of the delicate details. I added some additional supports on all the long accuating links so they'll print better. I took artistic license a lot in this design.

Attachments

Images (6)
  • 5IP Hoist Comp Frt
  • 5IP Hoist Comp rear
  • 5IP GH with Hoist
  • Screenshot 2023-12-09 at 4.19.19 PM
  • Screenshot 2023-12-10 at 11.41.32 AM
  • Missouri Finshed Superstructure
Last edited by Trainman2001

Everyone have a safe and wonderful New Years celebration!

Lots of work on the turret is going on, plus we've been dealing with a family health crisis.

My wife had a lumpectomy 16 years ago, and is genetically disposed to breast and ovarian cancer. As a result, she's been under a very tight regimen of mammograms, MRIs and bi-annual exams by her oncologist. The mammogram didn't pick up the new cancer, but the MRI did. It was in almost the same spot as the original and hidden by scar tissue. It's not identical in physiology. The old one was estrogen receptive, while this one is triple negative—not receptive to any hormone or Her2. That makes it a little harder to tamp down. Since she had radiation 16 years ago, she was not eligible for it this time. That made a second lumpectomy not a good choice. Instead she chose to do a double simple mastectomy. While emotionally radical, the surgery and recovery is relatively easy since all you're removing is skin and fat. The tumor was caught early, and even though moderately agressive, was only the size of an M&M peanut and was far away from the chest wall. No muscle had to be touched. Also, there was a clean pathology report after surgery. Prior to surgery she had body cat scan and bone scan and they too were negative. Since radiation and hormone treatments were off the table, Michele will undergo a short series of chemotherapy that will end in mid-March and she will be done.

I was able to do a lot of drawing while nursing he back to health.

Here's where the project stands now.

5IP Gun House 98%5IP Gun House Status 12-19-25IP Gun House Status 12-19-35IP Gun House Status 12-19

This was a test to see if all the floor panels fit. I was able to print respectable, scale diamond plate flooring. Can't see it in these pictures, but after paint and dry-brushing some wear on it, it should show up nicely.

5IP Floor Fit Test

Assembly of the gun house is underway, but I still have a few more details to design. I'm getting superb prints now that I finally lined out the exposure times. No matter how small the details, the printer will reproduce it. Whether or not it will stand up to handling in the real world is another question.

Attachments

Images (5)
  • 5IP Gun House 98%
  • 5IP Gun House Status 12-19-2
  • 5IP Gun House Status 12-19-3
  • 5IP Gun House Status 12-19
  • 5IP Floor Fit Test

Myles, I was so sorry to read of Michelle's cancer return, but glad she was a good candidate for successful surgery.  I will keep her, you, and your family in mind as the weeks' chemo treatments progress.

I'm glad you are getting consistent good prints now that you have the exposure time correct.  The drawings and the test assembled assembly look great!! 

Did the Newtown Hardware client pickup the layout and set it up in the store yet?  I just wondered how it worked out for him?

Thanks guys! Really! We truly appreciate the sentiment from our extended modeling family.

No Mark, it's still here, but he paid me. Once he missed the Thanksgiving window, he didn't feel any time pressure. He's going to combine the L'ville trip with a trip to South Carolina and it's on his time schedule. He's going to keep it at his house so it will be well taken care of. Meanwhile, I have to worry that I'm going to break something. It's like after you've sold your house, but haven't moved out yet. Bad things start happening...

Happy new year guys.

Thanks Guys! Everyone have a wonderful year. And… if anyone tells you that Chemo is nothing to worry about, needs to have their head examined. Chemo can turn a healthy, vibrant women into an old lady in about 2 weeks. Hopefully, in mid-March, when this is over, she'll return to her old self. All of this to increase her 10 year life chances by an additional 3%! Is the cure worse than the illness??

Quick update. The oncologist reduced the dosage of her chemo infusion with very good results. Still not a normal situation, but greatly improved. Yesterday was her third infusion session. 3 down and 1 to go. That will take place on March 13. Four weeks after that her imune system will be back to normal. Even with that, her blood chemistry has been quite good.

Next: The little layout was picked up this week by Bill Newell. I made a protective cardboard cover for it from an old flat TV carton. Lots of cutting and hot glue. Made it so vertical ribs lie on the the lower straight tracks and it's high enough to clear all buildings and scenery. Flaps on the edges fold over the sides and I duct taped it to the layout side rails. It worked. We bumped the door knob taking it out of the basement and the protector kept anything from getting damage.

He brought his wife and they were heading from my Louisville home to Nashville. They made me run the big trains and, needless to say, we duly impressed. They got a real kick out of seeing the store in 1:48 on my big layout and the little tiny 1:160 version on the little layout. I am very happy to have it out of my basement. He paid me for it months ago. I didn't want anything untoward to happen to it.

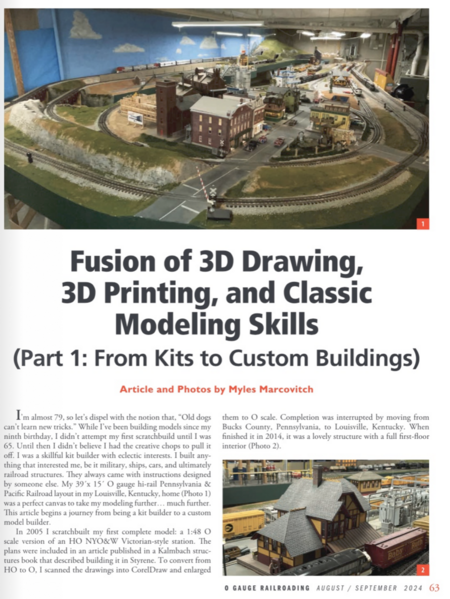
Lastly: Finally, Allan Miller and I are on the same page. I am writing four articles for OGRR. It took a long time for this to happen, but I'm happy it did. I gave him a very long manuscript with lots and lots of images, but it was four times longer than OGRR prefers. Allan suggested making it into four shorter articles. I am in the process of doing that. The theme is "21st Century Modeling: Fusion of 3D Drawing, 3D Printing and Classic Modeling Skills to Create Unique Models"

Part 1: : The Journey from building kits to building your own

Part 2: Using 3D drawing programs to design your own structures

Part 3: Laser cutting your own designs to make unique structures

Part 4: 3D printing and model structure creation

This arrangement hasn't been approved by Allen yet, so it could change, but it's how I'm approaching it now.

Attachments

Images (2)
  • mceclip0
  • mceclip1

I'm glad your wife is doing well with her treatments.  I'll keep praying!

I'm glad Bill Newell is in possession of that great looking layout.  I'll bet the difference between his building in N scale and O scale was remarkable to them!

That will be great having a series of articles on 3D drawing and printing!!  You have certainly gained a lot of expertise on the subject. 

Thank you for all the thoughts of encouragment! Michele completed her chemo treatment on Wednesday, March 13. We're not expecting any additional problems as she recovers from this round.

Just wanted to let y'all know that my first OGRR article is slated for run 340 (I bleieve that's Feb 2025). I have to be patient.

I was goingt include some more details about 3D vis a vis model building specifically, but quickly it was forcing the word count well over the 2,000 words per article desired by the magazine. I started writing articles on the subject, but they too quickly exceeded the word count. That lead to thinking about a book on the subject.

The book, 3D Printing for Model Makers, seemed like a good idea. With my latest Apple OS Sonoma and Apple Pages, includes abook templates. There is a one for instructional books. The template's pretty complete and automatically builds tables of contents based on chapter titles. But wait, there's more!

You can upload the book to Apple eBooks for no charge. Apple takes a cut of the sales. Marketing is no included. I'm looking for support from OGRR in that regard.

I've noticed a gap in the instructional material on 3D printing. There's lots of information on running the machine and dealing with setting up work for successful printing, but there's not much on the specific needs model makers have especially when they want to do custom work. If you look at 3D printing videos, they generally print either fantasy creatures and figurines or trinkets and other 1:1 scale items. They are not printing critical components for models that must conform to rigid technical requirements of scale and interconnectiblity. And they don't teach about using the design software to accomplish those ends. I intend to close that gap. SketchUp only recently has started noting on the models uploaded to their 3D Warehouse (inlcuding mine) about their readiness to be 3D printed. Designing for 3D printing is more difficult than designing images just for viewing. I want to explore that with readers.

While I've written articles on the topic, a book is a whole different animal. I will keep you all up to date on the progress, so stay tuned. And give me feedback about interest levels.

Add Reply

Post

OGR Publishing, Inc., 1310 Eastside Centre Ct, Suite 6, Mountain Home, AR 72653
800-980-OGRR (6477)
www.ogaugerr.com

×
×
×
×
Link copied to your clipboard.
×
×