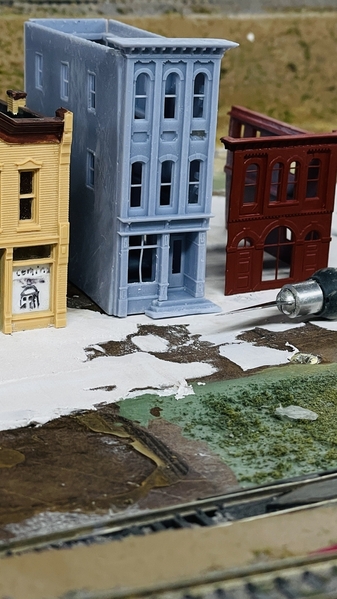
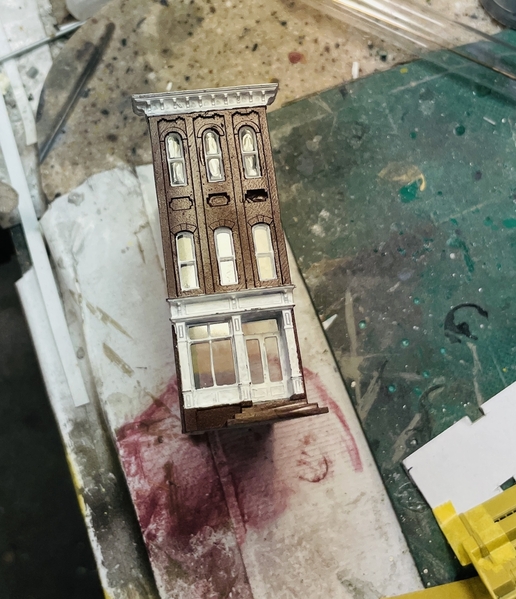
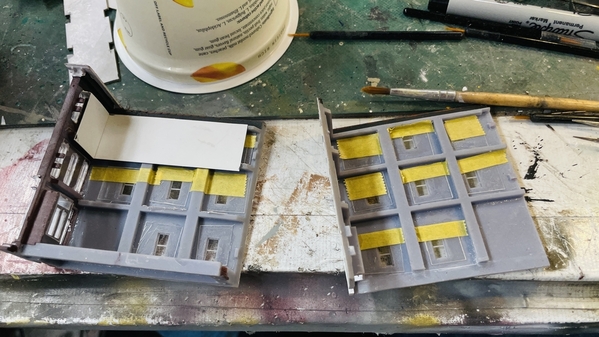
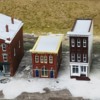
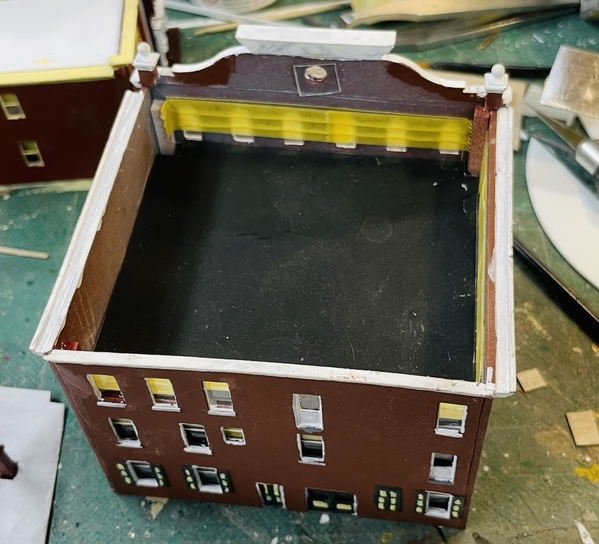
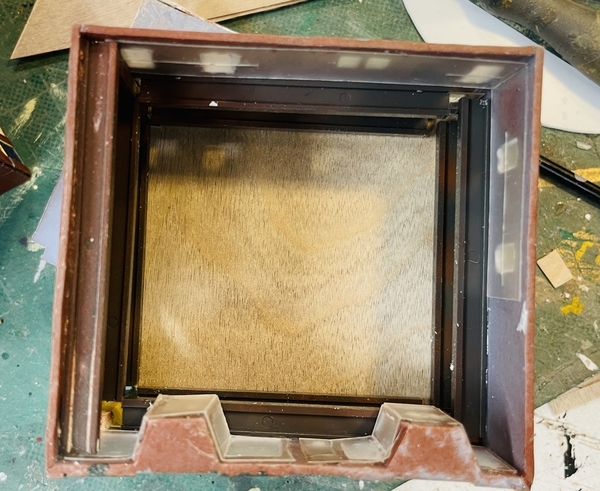
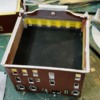
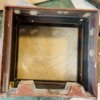
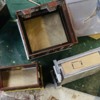
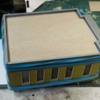
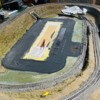
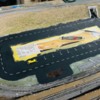
Truth be told as I recall, I forgot to add glazing until I had glued it together.  When I realized my error, I decided I couldn’t tell the difference anyway.  

I think I would break the stairs handling the building to paint, but you are right the glue would probably hold better if not painted first.

Your drawing of the Temperance House Hotel look great!  The Bird in Hand house looks like something from Williamsburg.  It was built over 100 years before the first cabin in Butler County!

Thanks for the "likes"!

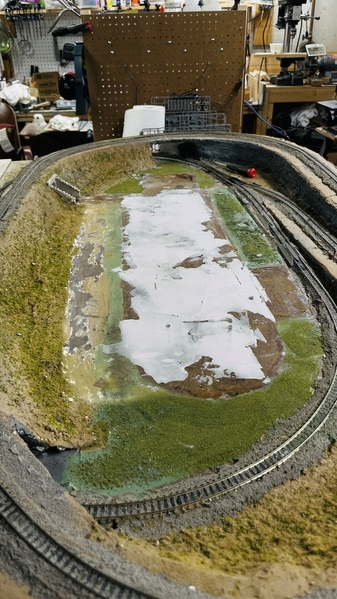
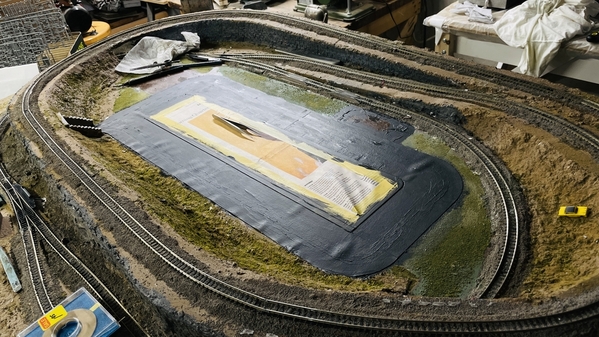
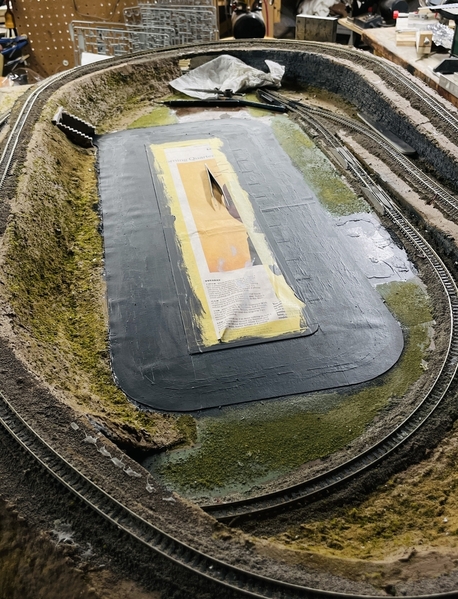
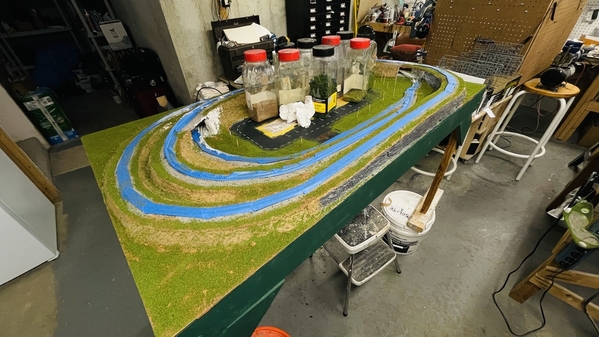
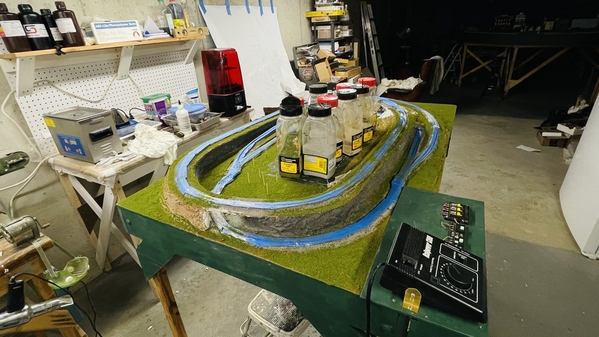
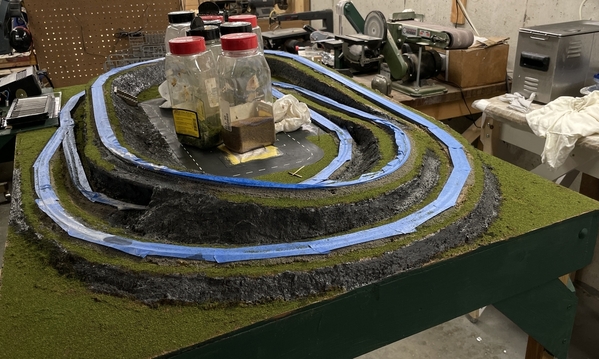
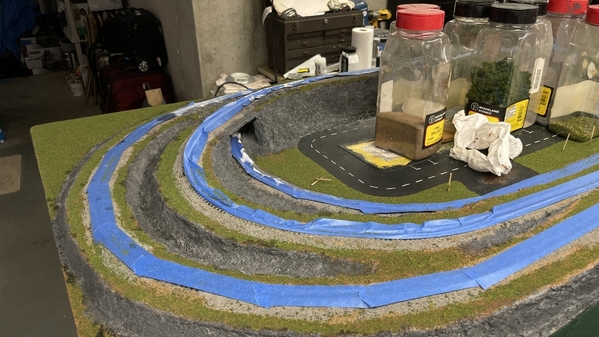
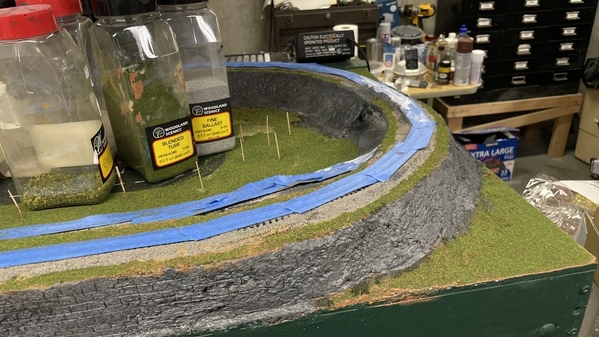
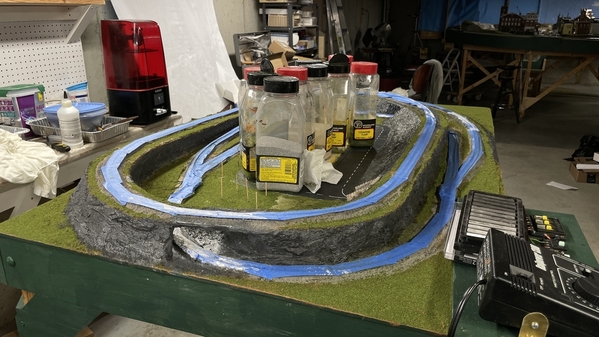
Made significant progress today. I put the layout on top of four, 5-gallon paint pails to elevate it to a comfortable working height and to give me access to the underside without laying flat on the floor. The original height was to accommodate a six year-old kid.

Instead of digging out a plaster wall to enlarge the back street to fit the new buildings, I ripped out all the streets (they were shot anyway) and will realign main street so the new deeper structures fit nicely. Getting the streets up was a mess and required a razor scraper. I then spackled the surface so it will be nice and flat to accept the new streets.

Streets removed

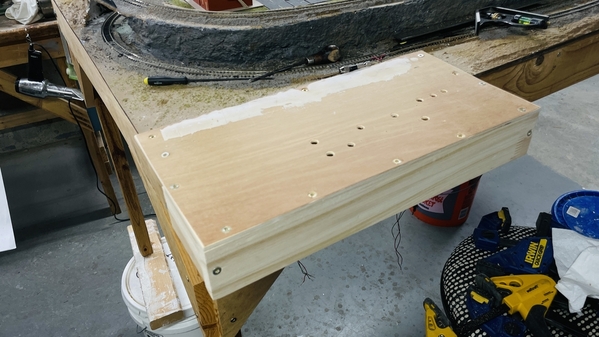
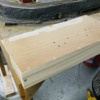
I also built and affixed a new control panel base. The previous one was cobbled together out of some terrible scrap plywood. This one is created out of some much nicer scrap plywood. It's all going to be painted my dark green that I'm using for the BIG railroad's skirting. I located and pre-drilled all the holes for wiring and mounting screws.

New Control Panel

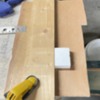
To use my saber saw as a reasonably accurate panel saw, I use a wooden fence spaced off of the saw blade by 1 -7/16" and have a gauge block of this thickness to streamline setting the fence. It works well as long as I keep the saw's base plate in constant contact with the fence. This plywood was left over from some old valances we removed when our replacement windows were installed. They came with the house. I never throw out scrap lumber.

Saber Saw cut guide

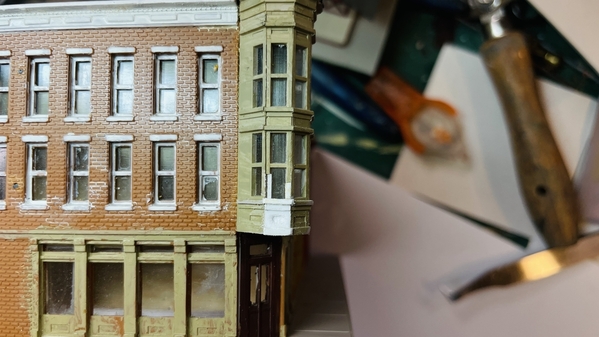
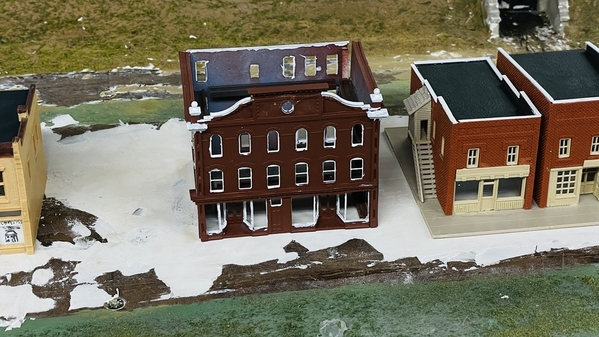
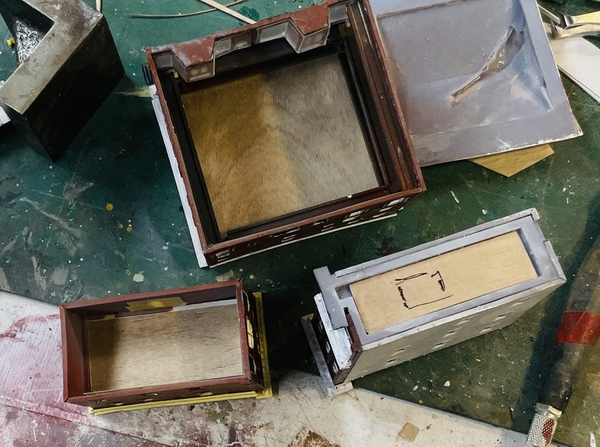
With all the little buildings off the layout I took the opportunity to repair and refurbish them. These were built by Alex and his friends so the workmanship was kid-like. It was a great kids project. I repainted all the roofs, fixed and replaced broken/missing parapet capping, and rebuilt part of a Victorian turret structure. It was missing a lower window frame and paneling. Don't know when this happened, but I seem to remember it breaking during assembly. The buildings were glued to the base with hot glue so I doubt that it broke once installed.

Using little bits of styrene, I was able to make a reasonable fix. The hardest part was creating the recessed panel.

NHH160 Building Repair

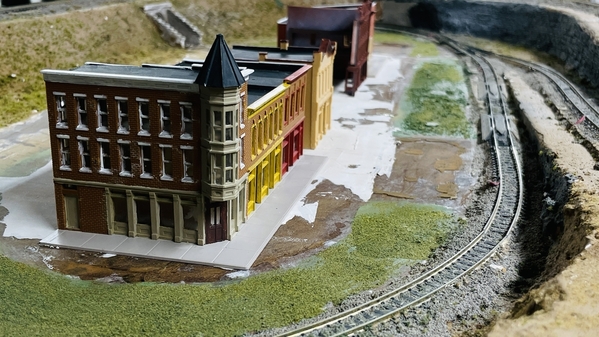
I repainted all the tan and it looks respectible. This shows the new street alignment. There will be some back lot kind of view, but that's not facing the front store window. It should probably have a plexiglass fence around it to prevent trains from hitting the floor and keeping little fingers at bay.

NHH160 Repaired building

I started painting the trim on the new buildings. It looks sloppy now, but I will back paint all the defects and when done it will be okay.

NHH160 Hardware Store Paint Start

The Temperance House Hotel first 3 sides will be coming off the printer shortly. From the looks of it, the narrower sides are already out of the vat and look perfect. The long side is finishing.

I'll post these when they're cleaned up and presentatble. I'm thinking about how to light all this stuff and do some holiday-themed stuff.

Attachments

Images (6)
  • Streets removed
  • New Control Panel
  • Saber Saw cut guide
  • NHH160 Building Repair
  • NHH160 Repaired building
  • NHH160 Hardware Store Paint Start

Work continues. The Temperance House hotel print was quite successful. I tried something new here by building in alignment lugs on the opposing sides at each corner. They interlock and automatically keep the sides correctly located. Each of these three little buildings incorporated steadily improving methods. I also gave slight clearances on the drawings between the joining tabs so they wouldn't be a force fit. When drawing, I simply interface the surfaces so the tab on one side marks up the solid block on the other telling you where you need to remove material. But that creates an interference fit. I then took a .1" at 1:1 scale which gave just a skosh of clearance in n-gauge.

The building's 1:1 counterpart scales at 70' deep, but I selectively compressed to 40' so it would match the hardware store in depth.

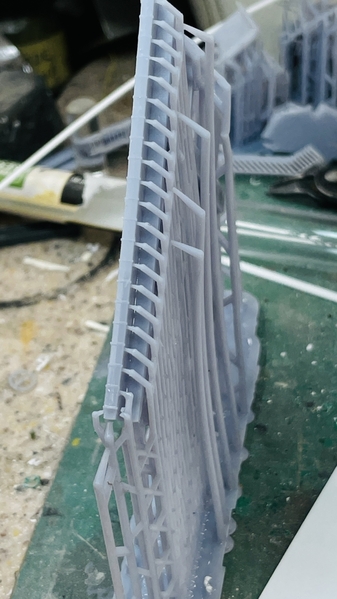
I swear that changing the LCD has improved the printer. Even before the great crack up, the printer was showing some anomalies with supports failing, bases separating from plate, etc. I continued doing the detail painting. Very tiny work. What you see here is still not final. It's a game of zeroing in on the perfect paint line. The building sits on an elevated foundation so for this one I designed and printed a base that includes the front steps and the steps leading up to the back door. The base keys into the facade and I was very happy that it worked as I drew it. The Xacto gives sense of scale. I've got printing the tiny window mullions down pretty well.

NHH160 TP Test Fit 2

You may not notice it, but I was able to download some actual prototypical terra cotta parapet cap tiles. They required a little doctoring to make them printable, but print they did. There was a tiny tip that was going to create an island and needed supporting. With the fine supports I was able to catch each one. I use a MircoMark Tweezer-like sprue cutter nip these supports and it's not difficult.

NHH160 TP Parapet Cap Supports

Here's some more progress on painting the hardware store.

NHH160 NHH paint WIP

I just shrunk the graphics and changed the name back from Woodbourne Hardware House to Newtown Hardware House. I'm using Vallejo paint. I found the Tamiya alcohol-based paint was not adhering well to the Rust-oleum oxide primer. The Vallejo has no trouble. The green is Vallejo Deep Green with about 30% black added. Never, ever thin it with IPA. It immediately clumps up and turns to a messy gel. If you're airbrushing it, it's even worse and will clog the gun quickly. Only use thinner for acrylics. I will decant some of the Rust-oleum to back paint any brick areas that have erroneous color on them. Won't do this until I'm all done the color work. I sanded all of yesterday's spackle and will be ready to start doing some urban renewal.

I also bought a string of multi-color LEDs lights. I'm thinking of running them under the layout, and bringing them up into each building lighting their interiors. For lighting the various trees, I'm probably going the fiber optic route. Never did a snow layout before, and being of my religious persuasion, never did a Christmasy one either. I might sneak in a little Hanukkah stuff. Newtown, PA is a pretty diverse community. My friend, Chris Bowling, has a lot experience with these asian LED string lights and will help me out. He built a fabulous F-105G for a museum display with all of the instrument and running lights working with these kind. I helped him converted the battery operated LED power supply to an AC powered one so no one will have to worry about battery changing. I'm going to do the same thing with this display layout. (and as I did with the 16" project)

Attachments

Images (3)
  • NHH160 TP Test Fit 2
  • NHH160 TP Parapet Cap Supports
  • NHH160 NHH paint WIP

With the High Holidays behind me did some n-gauge work today. Got one of the new Atlas switch machines installed, but couldn't find the two tiny screws needed to install the second one AND the new machines don't come with screws. How bad is that?

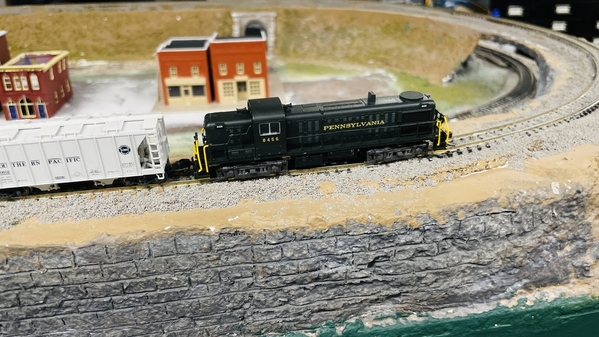
I had purchased a new ALCO RS1 body for the working chassis that I had. The kids beat up the Delaware and Hudson body of that engine pretty badly. The new body was much cheaper than buying a completely new engine. My client wanted a Pennsy engine anyway and this gave me the opportunity to make it one.

Unfortunately, the engine I have is actually an ALCO RS3, and the Atlas/Kato RS3 chassis does not fit in the RS1's body shell. I assumed it was an RS1 since to me all those old ALCOs look alike. I should have checked the little plastic box it came in, since it was clearly marked ALCO RS3.

I called Atlas directly and a very nice fellow spent a few hours searching their stock and found a brand new RS3 body in Pennsy livery. My chassis slipped right in and the engine runs nicely. Only problem was the light gray undercarriage from the D&H. Today, I took care of that.

NHH160 New RS3 Body

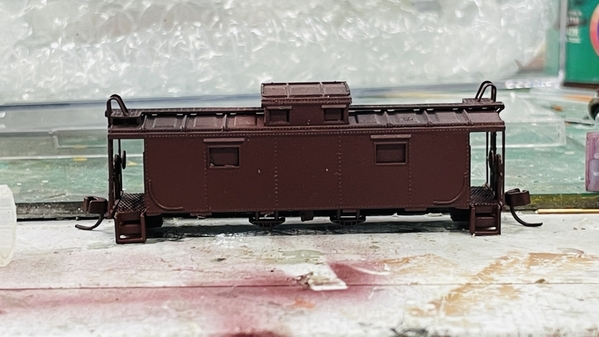
I'm now in the process of converting some other caboose into a Pennsy one. Since I can't get the body off the frame without breaking everything, I used liquid mask to block out the windows and airbrushed it Badger Model Tech Pennsy Maroon. Don't know if Pennsy ever had this specific model, but when it's fully lettered, nobody will know the difference.

NHH160 Pennsy Caboose Mod 2

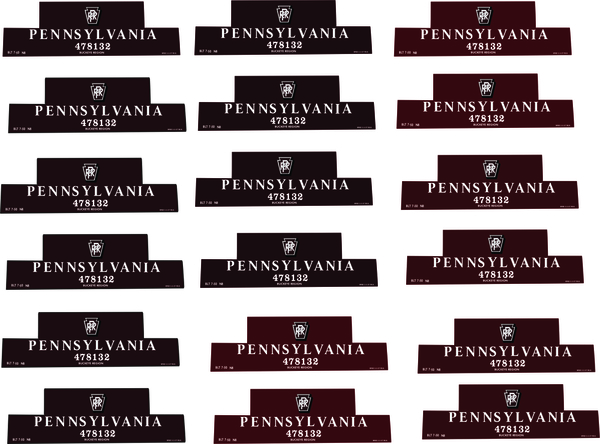
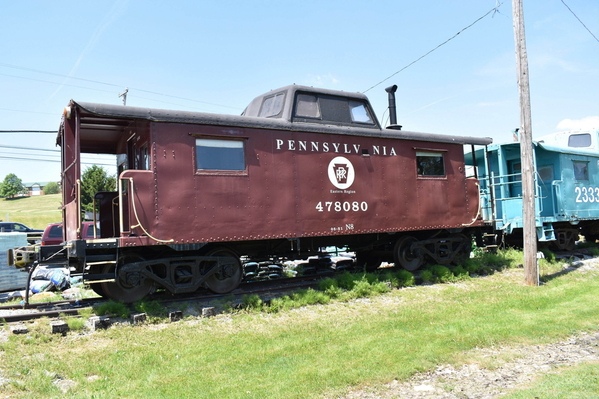
Since I can't print white decals I have to print on white decal paper. This means any white lettering would have to be hand cut out of the decal film. With big lettering this works, especially when I put a very fine outline to let you see where to cut. But in n-gauge, this becomes impossible. Solution? Print the decal with a colored background that matches the surrounding color and makes it much easier to cut out and apply. The trick is matching the color. I used this photo (above) to get the initial color match and then made a few of each with slight shade changes. If I don't get a good match, I'll just keep printing variations. I perfected this when printing tiny white tail insignia on the aircraft of a 1:350 scale USS Essex in late WW2 configuration. It took about 10 takes to get the dark sea blue a dead match. You can't tell that the whole tail is a decal.

Pennsy Caboose Mod Graphic

Had to search a lot to get a close match to the Pennsy type face, and hand drew the logo using the MTH photo as a guide.

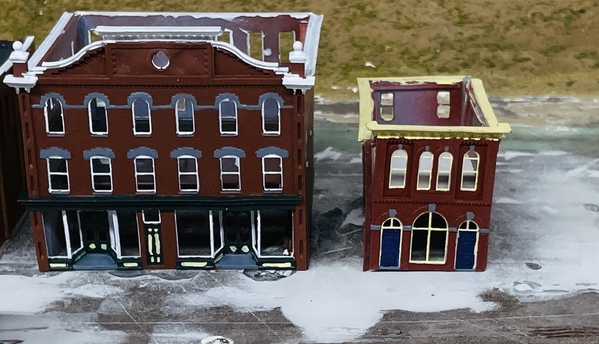
Almost finished painting the little buildings. One more to go.

NHH 160 Newtown Bldgs Painted

And my Sikiorshy SH-60B took a silver metal in our Military Modelers Club of Louisviile's large exhibition and contest this past weekend. Gold was won by my friend Chris Bowling. Chris's models are amongst the finest I've ever seen. They are perfection! I was told that getting a silver when Chris is in the contest is like getting a gold in any "normal" contest.

The SH-60 was behaving very badly. I had to fix some minor things which quickly escalated into major ones. I got it together, got it to the show (along with four other of my models) and was showing it to someone and realized that one of the four tail rotor blades was missing! I retraced my steps, checked the carrying boxes, and the car, and could not find it. That was Friday. The showed closed at five and when I got home went down to the shop and found it on the shop floor. To make maters worse (Murphy was around here somewhere!), I must have rolled over it with my desk chair or stepped on it since all the paint was worn off on one side. Got it repainted, and drilled and pinned it with 0.020" phos-bronze wire. Then took all my tooks and glues to the show on Saturday and had to drill the hub holding the completely finished and very fragile helicopter in one hand and drilling with the carbide drill in a pin vise in the other. I did it successfully, got the model back on display, just before the judging was to begin. Whew! Too much stress! This is supposed to be fun.

Attachments

Images (4)
  • NHH160 New RS3 Body
  • NHH160 Pennsy Caboose Mod 2
  • Pennsy Caboose Mod Graphic
  • NHH 160 Newtown Bldgs Painted

Thanks Mark and Pat!

My MTH N8 caboose was what I photographed foe the graphic design. The N8 was a late model caboose with the radio antenna. The n-gauge one has the same side window arrangement. I'm printing them this morning. We're getting our new COVID booster at noon and I'll maybe get them on this afternoon. I have gloss coat first for good adhesion.

My wife keeps ribbing me about each thing I buy to make this project better is cutting into my profits. She's never worried about my commission jobs before. I suppose I was bragging about how much I was selling it for and she assumed that it was ALL profit. I actually didn't think that. I knew there would be costs incurred and set the price to include this. It's a running gag. She assumed that the kid's railroad was just going to be transferred to the hardware store without any additional expense. I did not think that. It was 12 years old and beat up by a couple of great kids. There was no way it was going "as is".

Last edited by Trainman2001

We had a great time. Toronto is a fabulous city, way exceeding all of our expectations. They are building tall buildings like crazy (kind of reminds you of Dubai), lots of traffic, lots of diversity, great dining, very nice people. We did four days there staying at the Four Seasons in the Yorkville Area (like Rodeo Drive on Steroids). All of the restaurants were within walking distance. Yorkville Rd have more supercars in one block than I've ever seen. Two Mclarens were parked 30 feet from each other. I've never seen one Mclaren on the street let alone two.

We then did 4 days at Niagara on the Lake. A total change of pace. Lovely town and again, nice folks. Lots of wineries and all of the output is required to be sold in Ontario only. Very strange. We did a full day at Niagara Falls and did the "Behind the Falls" tour through the tunnels, and the old Powerhouse which has been dramatically refurbished and was a great place to visit. They've opened the 2,200 foot outlet tunnel that was the discharge for the turbines that exited an opening in the canyon wall between the Canadian and American Falls on the Canada side. They've paved the tunnel and built a nice observation deck that's just above water level. Great view of the Falls. I made a movie of all this and will put it on my FaceBook Page.

I haven't been sitting still model-wise. Glazing windows, final painting, continuing to tuneup the trackage, etc. I drew and am printing the last of the four buildings I'm doing: The First National Bank & Trust Company. This project was drawn entirely from Google Earth overheads and street views. You can measure the foot print in the overhead shots and estimate the wall height looking at the change in elevation as you move the mouse pointer from the base to the roof. I used SU "Match Photo" to the initial proportions correct.

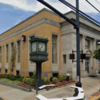
Here's the building. Screen print from Google Earth Street View.
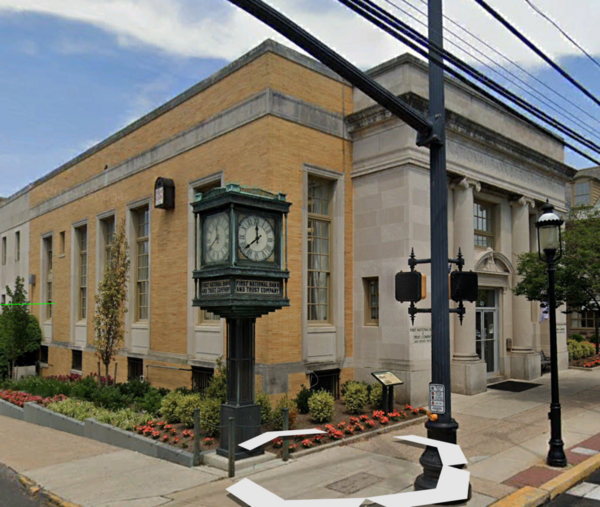
Screenshot 2023-10-09 at 7.06.00 PM

Here's a screen print of the above in the Match Photo Mode with my drawing superimposed over it.
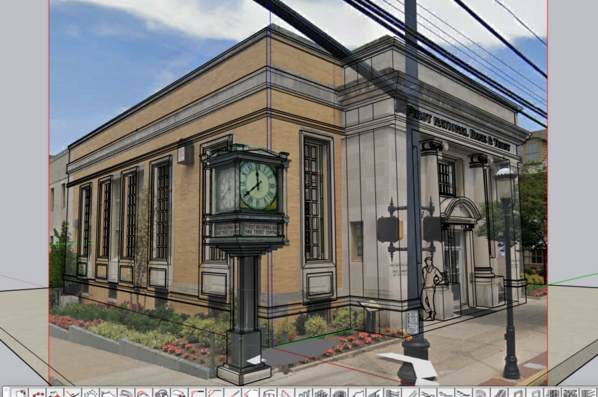
Screenshot 2023-10-14 at 4.32.04 PM

And here's my drawing of same. Pay no attention to the mismatched clock faces. I'm not going to have clock faces. In n-Scale, the faces come out to the size of a period. If I can I will attempt to make a decal out of the graphics, but it's a long shot.
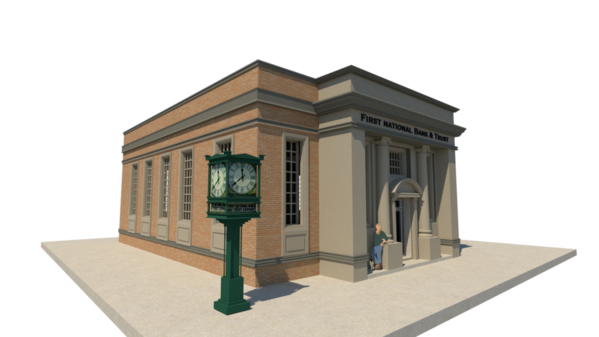
FNBT

Now for a techical aside.

As many of you probably have gathered from my 3D printing experience, I had a fairly high failure rate, and warpage problems. Very fine details were very fragile and as a result, I tended to avoid them. I set my printer up when new with a flat test article that's used frequently, so I was under the mis-guided impression that my exposure time for my 80/20 resin mix was correct, so the errors I was experiencing were just the nature of the beast.

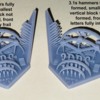
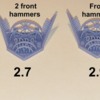
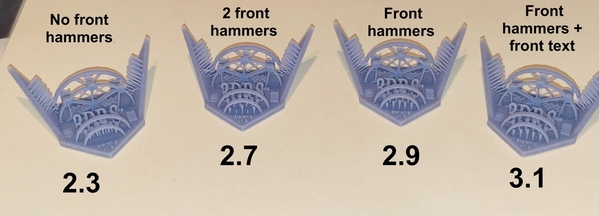
Then last week, on the Elegoo Mars3 Facebook group a discussion about exposure times led to a specific test article that was much more discerning than the flat ones. Since I had nothing to lose, I downloaded it, and ran tests from 2.1 seconds per layer to 3.1 seconds per layer. I was using 2.5 seconds. The test was very enlightening. I didn't just test lateral resolution, but also vertical capacity.  And I found that I was underexposing by .5 seconds. The best result was at 3.1 seconds. That's a 20% difference and the results were dramatic.

The "starship", as it's called, has 10 "hammers" in the front, that have a stalk with and enlarged head on it. The head is twice the stalk diameter. At my 2.5 exposure, only one stalk in the front had a head and most didn't form at all. There was also some very fine vertical relief lettering that just washed away in cleaning. At 3.1 all the hammers formed perfectly and the fine lettering was intact through post-printing and you could rub your finger over it without it breaking away.

Here's what the test results looked like:
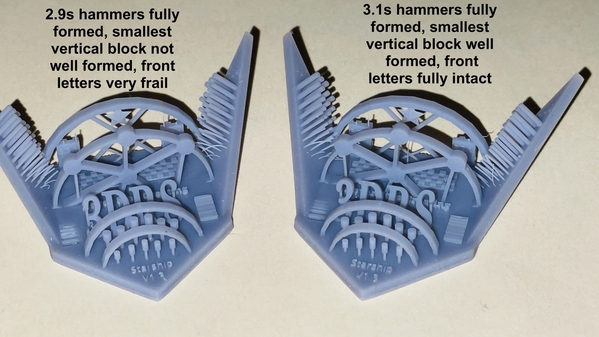
Starship Success CompsStarship Test Results

I'm tellin you all this for two reasons. First anyone out there who's doing resin printing may want to try this test if they haven't already done so.  Here's where you can download the Starship, plus instructions on interpretation of results.

https://3drs.com/pages/3drs-st...KfFrmHiuXiRETpgBD9cI

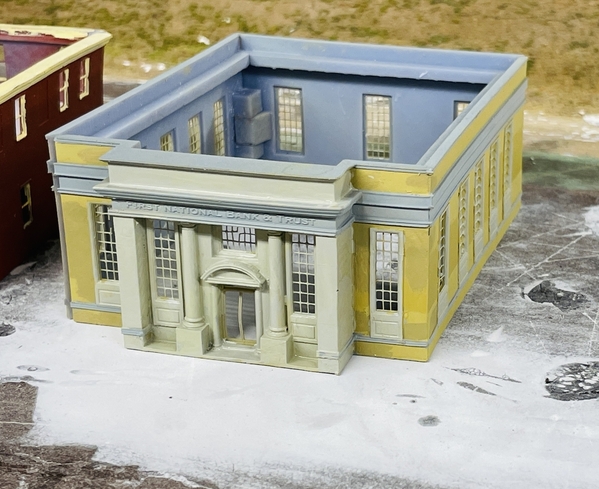
The other reason, is that I've been struggling with the results of underexposure for over a year and half, and today I printed the front and side of the bank building with no warpage and got pretty wonderful results on the multi-light windows. The lettering on the bank is perfect. There's a slight breakage on one of the windows, but I'll live with it. I could not have pulled off those mullions with the old exposure setting.
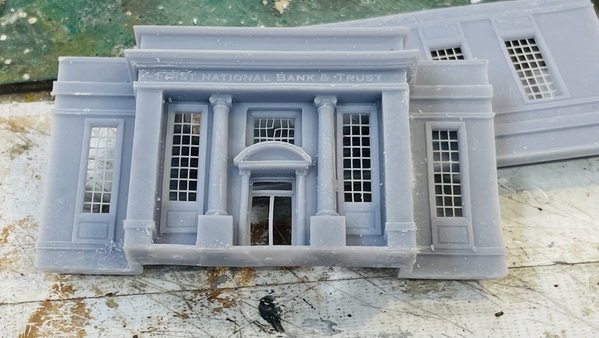
NHH160 NB Front Print

Here's the building assembled (sort of) showing the large lugs I'm now incorporating in the design to facilitate assembly. The corner miter is very tight and true and will probably not need any filling.
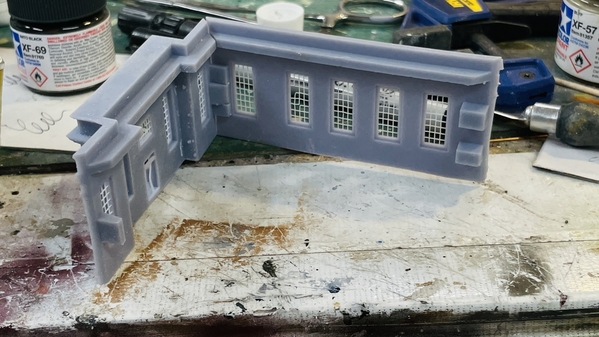
NHH160 Little Building Assm Tabs

The rest of the building is printing now including the lovely bronze clock tower that's so iconic with this structure. It will be finished around 8 this evening.

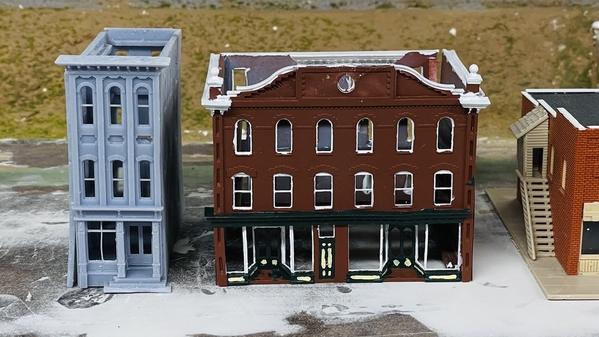
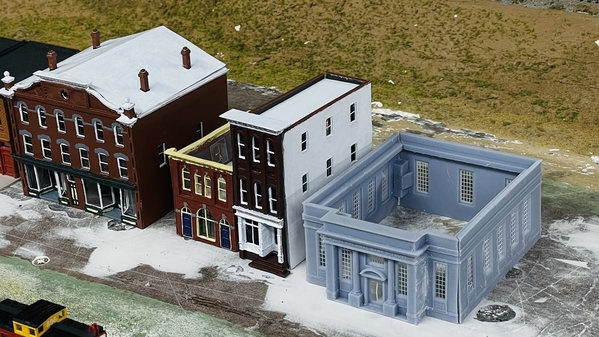
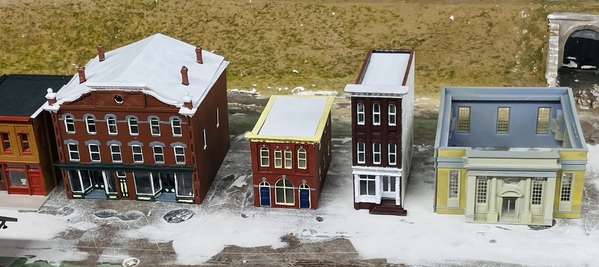
So here's the four Newtown, PA buildings I've custom designed and printed(ing) that will make this little layout more special. I got the glazing in the Hardware House and Newpaper Building. I finish painted the parapet caps on the Temperance House Hotel and got the chimney's final painted on hardware. I'm going to put the bank on the corner as it is in real life so the clock can sit on the corner.
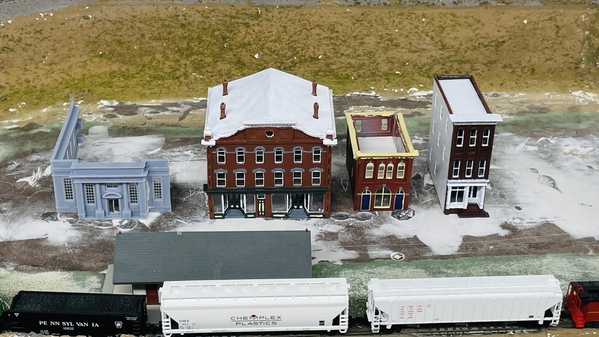
NHH160 4 Newtown Bldgs

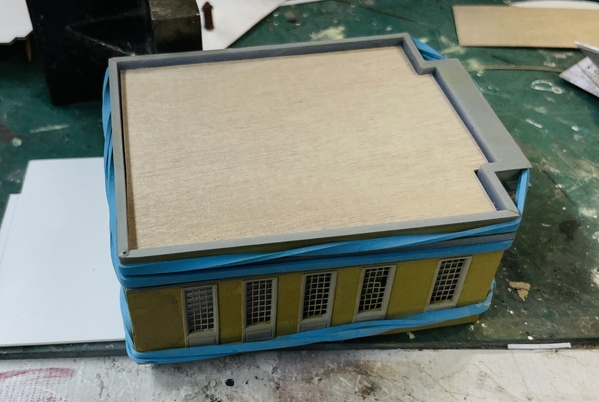
Glazing the Hardware House store windows was challenging due to narrow glue surfaces and some irreglarities. This building would benefit from a complete reprinting, but I'm not going to do that. I was initially going to apply individual pieces of clear styrene, but changed methods to use larger pieces creased and bent around the window frames.
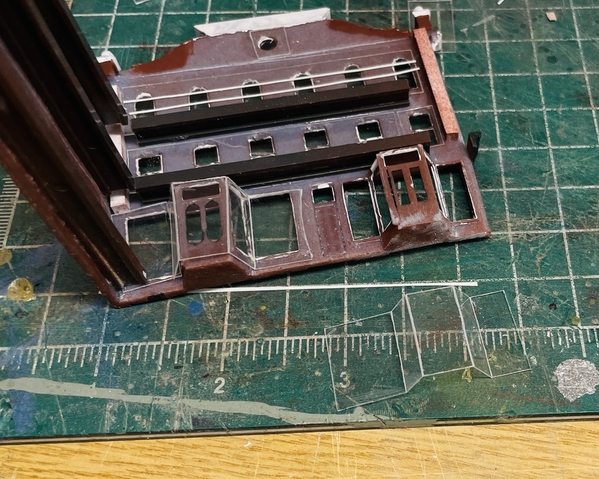
NHH160 NHH Glazing Scheme 2

I have one spot on the track work that needs more attention. There's a dip and it's causing derailments. I don't want to re-lay track since it involves a lot of demo. I'm thinking to level it with some solder. But i have to do something.

My last area of quandry is how to do the Christmasy lighting. I have some of those inexpensive string LEDs and am also planning to do something with fiber optic lighting, but I've haven't decided just how to approach it. If it were O'scale, it wouldn't be a problem for me. But at this scale, I'm still not sure just what I want to do. With fiber I could light the trees individually, and use the colored string lights in the lower levels of the buildings, but I'm not there yet. Your thoughts would be welcome.

Attachments

Images (9)
  • Screenshot 2023-10-09 at 7.06.00 PM
  • Screenshot 2023-10-14 at 4.32.04 PM
  • FNBT
  • Starship Success Comps
  • Starship Test Results
  • NHH160 NB Front Print
  • NHH160 Little Building Assm Tabs
  • NHH160 4 Newtown Bldgs
  • NHH160 NHH Glazing Scheme 2
Last edited by Trainman2001

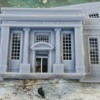
Here's the completed print job. Not glued… obviously. I think the Newtown compliment of buildings is complete. There will only be one other plastic building group for the street. This picture demonstrates how nice and flat the walls came out. If I hadn't expended so much effort painting all the other buildings, I would reprint them too.

NHH160 NB Printed

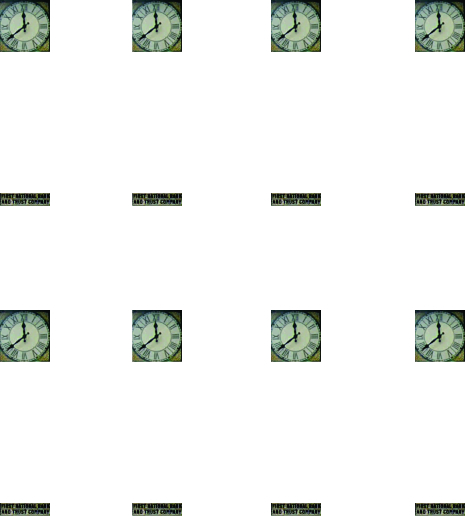
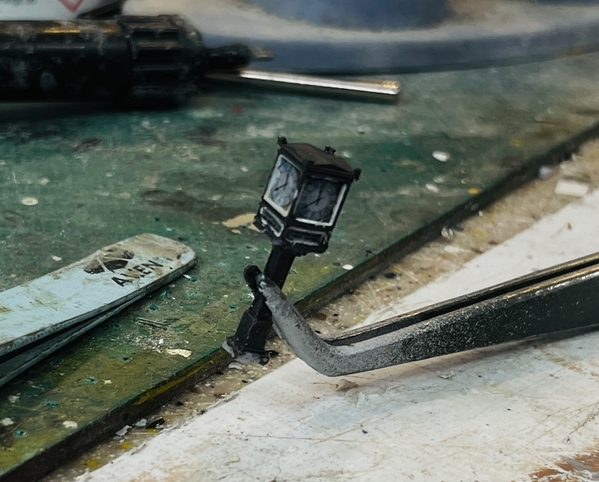
I'm reprinting the clock. It had a drawing defect and the lower decorative columns were too fine to be viable. They printed, but are like 0.010" in diameter and the resin just isn't strong enough to remain viable. I did find out that I CAN print a decal clock face and produced a decal set for them. They're 0.079" across. It will be small, but intriguing.

Clcok Faces

I"m also reprinting all the outside stair assemblies. The set I was going to use wasn't so hot, and I'm anticipating that with the new settings, they too will benefit by the new setup. They'll be done in a couple of minutes and I'll check them out.

Attachments

Images (2)
  • NHH160 NB Printed
  • Clcok Faces

Well then you need to practice and get your chops back. I keep telling myself that when I stare at my Fender Stratocaster in our bonus room while doing my morning stretches. While I can still play, I have no callouses and I'm pretty much finished after playing for 20 minutes. And to think that when young I could play a four-hour gig and not break a sweat.

Working on the n-gauge setup on multiple fronts.

Got the tiny clock tower decaled. It was more difficult than it was supposed to be. The new clear decal film I just started using didn't respond well to slicing just the film to isolate the tiny decals. Instead, it just kind of grooved it and when I wet the larger chunk the whole film was still attached to the graphic. Trying to trim the film when it was now free of the backing paper was not going well. I wrestled the clock face on and trimmed the excess film while on the part. The tiny lettering decal below was a lost cause. It why I always print many more than I needed. For the rest of them I cut the entire decal out of the backing and used tweezers to hold it while wetting and then using it and a toothpick got the decal into position.

NHH160 NB Clock w Decals

Here it is next to a building, although not the correct one. The post needs a bit of touch up and I'm going add some patina to make it look more like old bronze. My wife asked if anyone's going to notice this tiny thing? I said, "Maybe… But I know it's there." Besides, the bank building is only 100 feet away from the hardware store where the layout will be in the window and they may realize that the clock is in their view.

NHH160 Clock Test

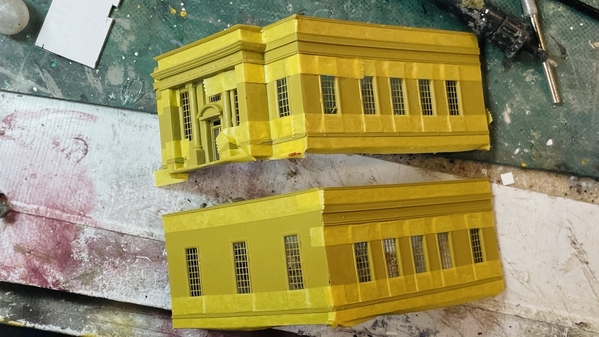
I masked the bank building to airbrush the trim granite gray. I was thinking about just freehand brushing it, but decided it deserved a better treatment. The building is tri-colored. The bricks are a dark yellow, the front is light sandstone as are the window frames and the trim is granite.

NHH160 NB MaskingI

I overcoated it with Dullcoat to seal the Tamiya paint so subsequent colors wouldn't bleed the yellow. I then went to use my Badger fine line air brush and it was clogged up. I hadn't done a deep cleaning in months, so it was due. By the time I got it cleaned out it was time to quit.

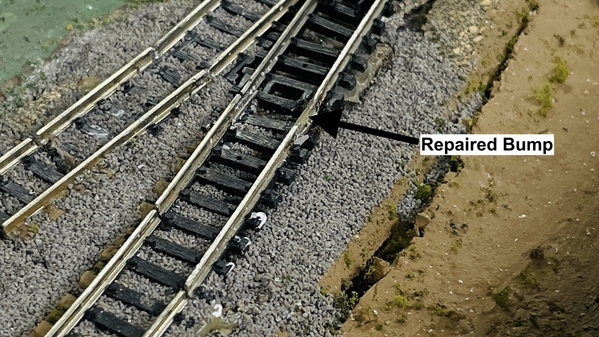
I also found two more bad spots on the layout and fixed them. The first was a distinct bump/gap/dip on the little piece of straight track joining the diverging track on the switch. I thought I could fill it with solder with my superior soldering skills. It didn't work. The solder didn't pile up enough and kept running down underneath. I then tried Bondic UV cure resin which worked. After removing the excess on the flange side and then filing the running surface, the track was smooth and the trains no longer derailed there. It was hit or miss. The engine with train would make 20 revolutions and then… flop!…derailed. My O'gauge monsters do not go "Flop" when they derail. In fact, if I bump the n-gauge train, the whole deal falls over.

NHH160 Bump Repair

There was a piece of plaster that got in the way of large, modern cars going under one of the poorly designed tunnels. I filed the culpret away and the trains now operate smoothly over all trackage.

I also finished glazing the Temperance House Hotel. I used clear styrene for all windows except the curved top, front windows. For them I used Microscale Kristal Kleer. Looks different optically, but no one should notice. I'm not going to light the upper floor anyway. I have to do selective block outs of all the buildings.

I don't what's going on with this site tonight, but uploading is very, very sluggish.

NHH160 TP Kristal Kleer Windows Outer

See y'all tomorrow.

Attachments

Images (8)
  • NHH160 NB Clock w Decals
  • NHH160 Clock Test
  • NHH160 NB Masking
  • NHH160 Bump Repair
  • NHH160 Bump Repair
  • NHH160 TP Kristal Kleer Windows Outer
  • NHH160 TP Kristal Kleer Windows Outer
  • NHH160 TP Kristal Kleer Inner
Last edited by Trainman2001

You are absolutely correct, I need to “practice and get my chops back”

Your persistence on the clock faces paid off.  I can see your wife’s point of view, but you are correct that you will know and there will be one customer who will really give it a look over and recognize the clock!

Thats a good tip about spraying the Dullcoat to seal the yellow.

Yes N scale track and trains are very fussy to be sure.  The pilot wheels on my N scale steam engine would always jump track, but the engine kept running so I quit trying to fix track or weight the pilot.  I just ran it that way.  🤷‍♂️🤦‍♂️

Thanks Mark! I should heed my own advice and start practicing my guitar… again. I was a decent guitarist when I was young, but my poor Stratocaster just stares at me when I do my stretching exercises every morning in the bonus room over the garage. It's on a stand, 30 years old, pristine and plays like butter, but my chops are so atrophied that I can't get more than 20 minutes of playing before my fingers are too sore to go on.

I'm waxing about music because I just learned today that the marvelous vocalist and keyboardist in my college band, Rog Edwards, is failing and is not expected to live much longer. Aging is very strange. My drummer and keyboardist have both had significant health issues that were serious enough to jeopardize their life. My bass player and I are both in relatively good health and have very similar lives. None of use abused drugs in college. I've never even tried grass, but Rog, the keyboardist smoked until a relatively short while ago and had two bouts of lung cancer that has left one lung useless and the other is failing. Ron, the drummer didn't smoke, but used smokeless tobacco, and was seriously overweight. It saddens me. When Rog first took sick, the other three of use went to his home in Oklahoma City in 2015 and had a wonderful 2-day jam session. I'm glad we did. Rog talked like an Okie and sounded like James Brown.

Back to hobbies and my happy space.

I'm almost finished with the little buildings. The trains now run without derails so that part of the project is complete.

Finished painting the bank building and almost blew it.

I masked the building in anticipation of brush painting it, so I didn't cover EVERYTHING. Then I made a field decision and airbrushed it so it would be a more even job. When I started spraying I realized that there was a wide swath of unmasked wall that was now getting hit with haze gray. Whoops!

While this wasn't a complete screwup, it was close. That's because I used the last of my Tamiya Buff that I had mixed with some yellow to make the wall color, and the Buff was now in the trash. I masked the remaining open areas and finished the gray. Then I found Tamiya Dark Yellow which looked close and I brush painted to repair the overpainted areas. But the dark yellow isn't an exact match. It's close, and I'm probably going to leave it as is.

For the sandstone fascia, I mixed Flat White, Neutral Gray and a touch of Yellow (all Tamiya) and brush painted all of this. Not only the central front area got this color, but all the window frames and the raised panels beneath them. I'm hoping that people will be so impressed to see the First National Bank & Trust building in miniature, that they'll ignore the crappy paint job. I have to add the glazing. I may frost that glazing to hide the interior.

NHH160 NB PaintedNHH160 NB Painted 2

I then finished the Hotel and Newspaper buildings with window shades of Tamiya masking tape, black outs of black airbrushed thin styrene, and glued them together. The 3rd floors in these buildings will be dark. I also painted the inside of the newspaper building's front windows with Tamiya Clear Flat to frost them. I'm not putting any interiors in these tiny spaces and frosting prevents people from peering inside.

NHH160 Shades and Blackouts

I expect all these little buildings will be done tomorrow. Then it's on to lighting and finally fixing/adding streets and scenery. I have to airbrush and paint those delicate staircases and install them. Almost forgot them. One goes on the side right side of the newspaper building and the other in the rear of the hardware store. I'm painting the roof on the hotel black. I have some small chimneys I printed to add to them. I have to make pavement bases for all of them. I could print some tiny dumpsters for the rears since I have the drawings I used for their O'gauge big brothers.

NHH160 Getting There

I'm anticipating finishing the job with time to spare since scenery is something I have experience with and this layout is tiny.

Attachments

Images (4)
  • NHH160 NB Painted
  • NHH160 NB Painted 2
  • NHH160 Shades and Blackouts
  • NHH160 Getting There

Thanks for the kind thoughts Mark. While the band was only working for 3.5 years, the bonds we developed have lasted a lifetime. I only saw Rog in person three times since graduation, but for the last 30 years all the band members (guys mostly) have been in constant contact through other means. We totally loved playing music together and if it weren't for Viet Nam pushing us in various places we didn't necessarily choose, who knows what could have been. I've often fantacized about it.

Finished the bank with the gluing together and roof making. I also prepared all the other buildings for the lighting activity that's going to commence today. I got a line on some micro-LEDs that will solve the "Christmas Light Challege." And I painted the stairs and will mount them once handling of the building is over. I had to reattach those crazy windows on the front of the  Hardware Store.

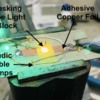
To facilitate soldering surface mount LEDs on copper foil, I find that doing it on styrene doesn't work so well since the styrene melts below the melting point of my solder. Therefore, I've developed the practice to use very thin (1/64") ply as the soldering surface. I've also just purchase a ton of Pre-wired Micro-LEDs in Blue, Red and Green to do the Christmasy stuff both in the store windows and the trees that I'm going to add. The trees are just Woodland Scenics Armatures since this is Bucks County in the winter and trees ain't got no leaves. I'm going to add snow to the boughs and haven't yet figured out the best way to do this. Suggestions are in order.

I finished adding all the window shades and am not lighting the 3rd floors so I installed light blocks between the 2nd and 3rd.

NHH160 NHH black out

And prepared the wood ceiling under the black out for the overall store lighting. I frosted the first floor windows with Dullcoat and did the same with the bank building to keep out the voyeurs.

NHH160 NHH Lighting Roof

Did the same treatment with the other three buildings.

NHH160 Ready for Lights

The bank got its glazing and then I glued it together and made the roof which will also serve as the lighting base. I may overlay some fine, black abrasive paper to simuate a gravel roof. It would also hide the wood grain.

NHH160 NB Roof

I had printed some extra chimneys and fitted one to the Newspaper buillding. I'll add that today and paint it. This roof too will be painted Nato Black.

NHH160 NB New Chimney

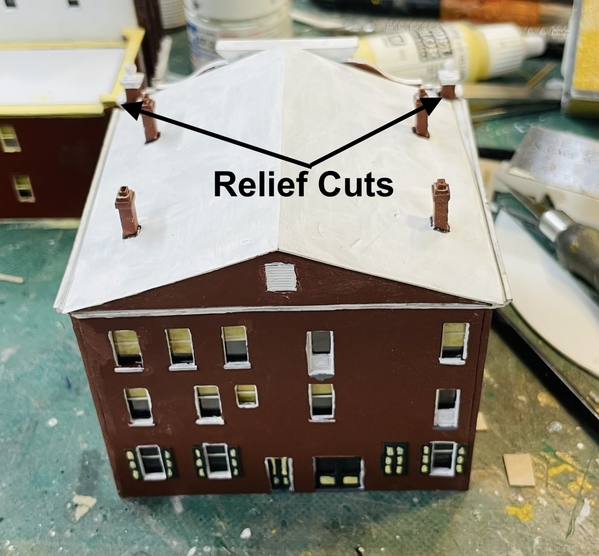
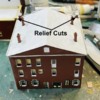
I final fitted the Hardware House roof. It needed some relief cuts around the corner thingys, and the lower back edge of the sub-frame had a crown that needed to be sanded off. Did that on the belt sander… wasn't messing around. It's now ready to be permanently fastened.

NHH160 NHH Roof Final Fit

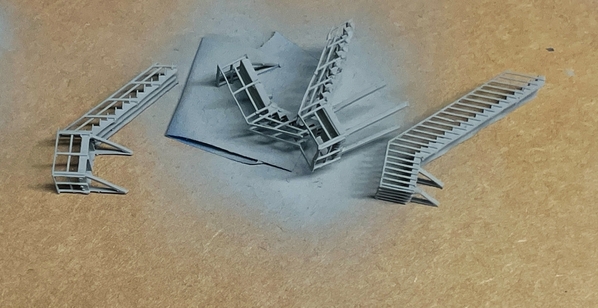
I painted the stairs Haze Gray and will install when the time is right. With the new print setting, fine details like this are now quite doable. When producing parts like these, the hardest part was removing supports that were in very tough places. They were also too fat. Even my "Light" setting was too big. I am adjusting the support parameters to go as fine as possible without breakage since the new settings are allowing that.

NHH160 Stairs Painted

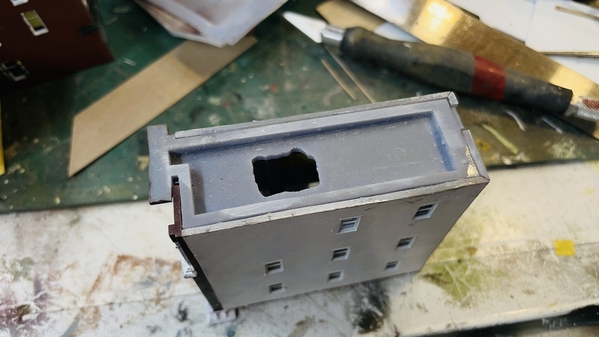
I had one "Whoops". I forget to account for lighting the Hotel and buttoned it all up. I opened a hole in the base and will have to work something out. Putting LED colored lights will be a challenge.

NHH160 TH Lighting Fix

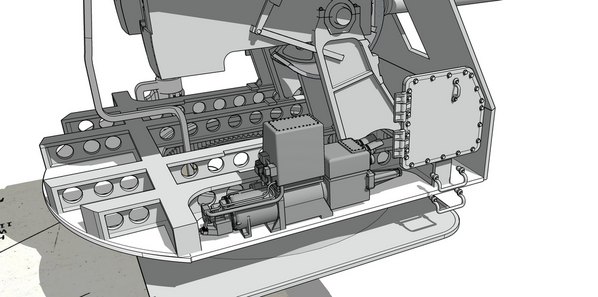
Meanwhile, work continues on the turret project. Last night I finished designing the training gear hydraulic system. While I didn't have specific dimensions, I do have scaled drawings upon which I can overly the drawing. I then can make final adjustments on my drawings, but didn't have to.

5IP Gun House w Training Pump

Attachments

Images (9)
  • 5IP Gun House w Training Pump
  • NHH160 NHH black out
  • NHH160 NHH Lighting Roof
  • NHH160 Ready for Lights
  • NHH160 NB Roof
  • NHH160 NB New Chimney
  • NHH160 NHH Roof Final Fit
  • NHH160 Stairs Painted
  • NHH160 TH Lighting Fix

Just a short Sunday note...

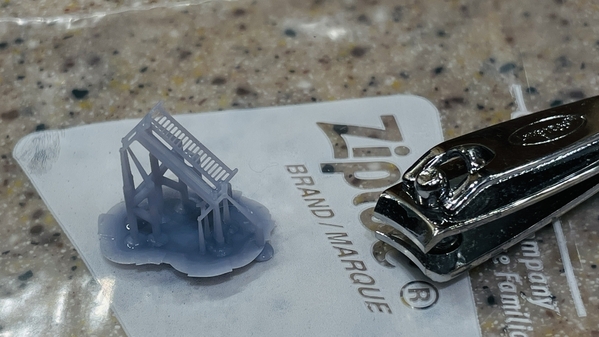
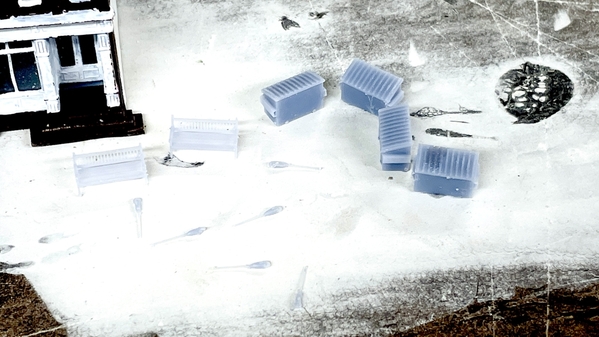
When I said that the exposure changes on my printer was a quantum change in capability, I was not be hyperbolic. I'm making some n-scale accesssories for the layout project. The hardware store in 1:1 has a part bench in front. I found a perfect one in the SketchUp 3D Warehouse that was print-ready. Not only did every tiny slat print perfectly, but the very tiny supports I created worked also. No supports broke… none!

NHH160 N-Scale Park Bench 1NHH160 N-Scale Park Bench 2

And that's not a giant-sized nail clipper for scale. It's actually a pretty small normal nail clipper. I also printed n-scale versions of the Waste Management dumpster I did for my o'scale layout. I made it al one piece since it's so small, it didn't have to be hollow. And I produced a bunch of n-scale parking meters.

Frankly, the printer performance blows me away and I'm not easy to impress. And it drives me crazy that it's doing things I didn't think it could and actually shied away from.

And the printer just finished those complex hydraulic units for the turret project. And to think a couple of months ago I didn't have anything to print and was getting worried. I'll take pictures of all this tomorrow.

Attachments

Images (2)
  • NHH160 N-Scale Park Bench 1
  • NHH160 N-Scale Park Bench 2

From what I'm told, it can even do better than that...

I'm almost finished installing all the lighting in the buildings. While the CL2N3 LED drivers provide a trouble-free means to power LED of all stripes with any voltage from 5-90 VDC, there's a caveat. You can only put as many in series as the supply voltage allows, in this case a 12 VDC LED power supply, and the sum of the voltage drops of the LEDs in series. In my case 3.3 volts per LED restricts the series circuit to three of them. With four, you're dropping 13.2 volts and they barely light. It would be easy to fix, just tie the series LEDs into a parallel wired network. Ah… but there's a rub. The CL2s don't play well with parallel circuits. I don't know how this happens, since it a micro-circuit and basically magic. This necessitates creating parallel circuits, but with each branch having its own individual CL2 driver chip. With the parallel arrangement, all that limits the number of LEDs to the current output of the power supply and each LED only consumes 20 milliamps. The supply is rated at 2.5 amps. I calculate that it could power 125 LEDs.

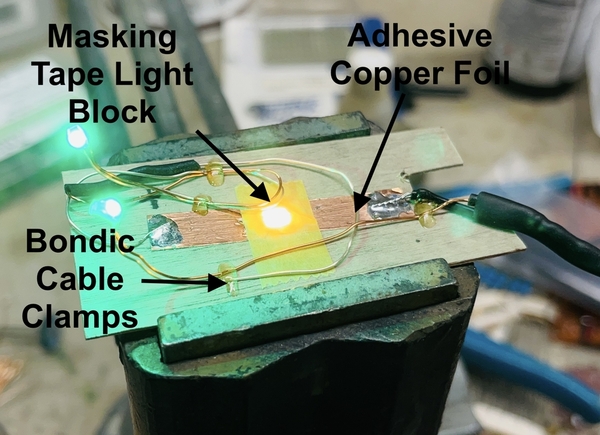
I'm telling you all this (again… since I believe I've explained this before several years ago, but it's worth a refresher) because it explains why there are so many lead wires coming out of one of the buildings.  Here's the circuit in the first building I did.  The surface mount LEDs are quite bright so I covered it with a piece of Tamiya tape to dim it down a bit. The colored LEDs are a bargain, at $9.00/25 and current limiting resistors. I bought three packs red, green and blue. They already have leads attached so soldering is simplified.

NHH160 Lite Scheme

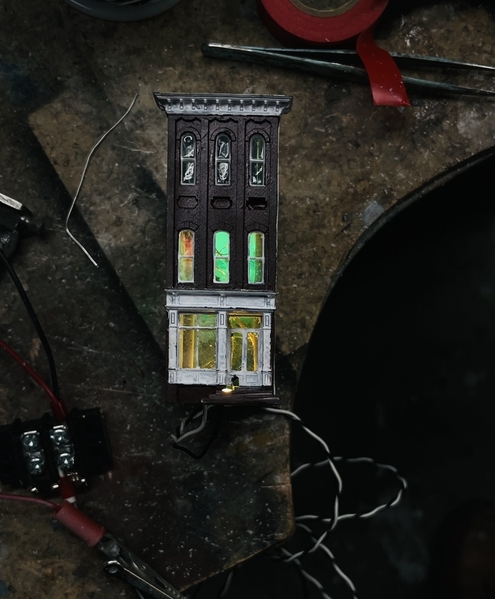
Here's the building.

NHH160 Building Lites Test

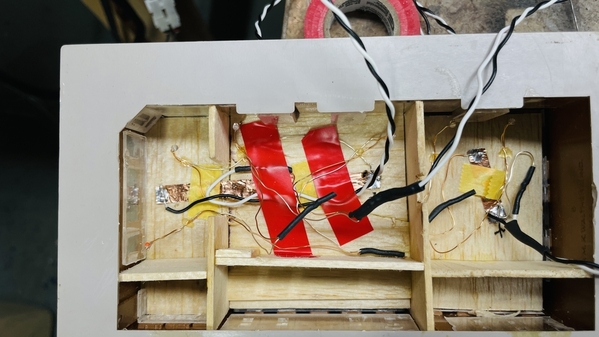
The most complicated building is one of the only legacy plastic buildings that the kids built 12 years ago. It's three stores and it represents three circuits. I was running short of time and after buttoning up the last circuit on the right, it didn't light when I tested it. I broke a cadinal rule. I didn't test before shrinking all the insulation in place, which just makes trouble shooting more cumbersome.

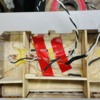
NHH160 Multi-Lite Circuits

Here's the rest of those tiny accessories. That's the same dumpter I printed in O, but it even came out better. The square tubes' wall thickness is very, very thin and intact. I am still amazed. And get a load of those parking meters. The poles are so tiny I almost can handle them.

NHH160 Little Accessories

I'll have all the houses wired tomorrow and build the circuit board to power all of this, plus the lighting for the trees, streets, etc.

Attachments

Images (4)
  • NHH160 Lite Scheme
  • NHH160 Building Lites Test
  • NHH160 Multi-Lite Circuits
  • NHH160 Little Accessories

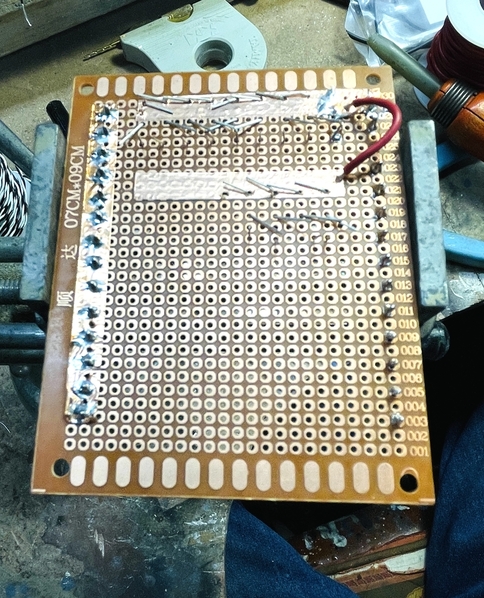
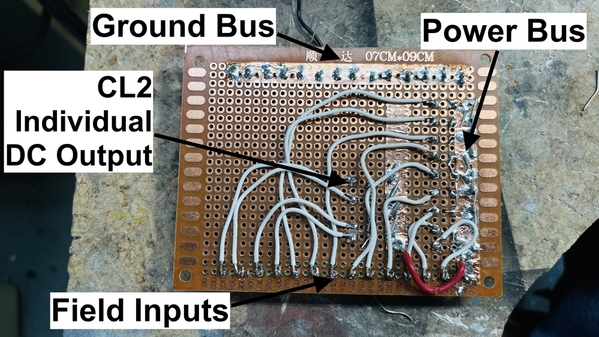
I got the power board built today. I did it this way for the first time when I had to wire the nine light circuits of the 16" turret. In this case I set it up for 13 seperate parallel circuits all driven by their own CL2N3 LED Driver Chip. I used a perf board to hand wire the circuit with the copper foil serving as bus bars for all the grounds and the input side of the LED drivers. The output from each driver goes to its own designated port on the output barrier strip. In this image the ground bus is on the left.

NHH160 Power Board WIP

Then I had to wire each CL2 output to an individual terminal of the barrier strip. The solder on the CL2s and barrier terminals are just to hold them into the circuit board.

NHH160 Power Board WIP 2

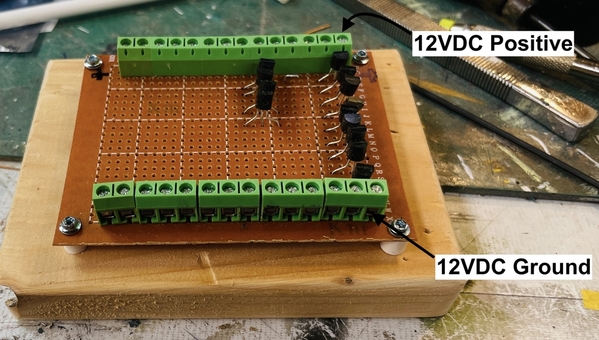
I mounted the circuit board on a chunk of 1X4 that will be screwed to the frame underneath the layout. I will put it in a central location so the drop leads from each building should reach it.

Notice that the barrier strip on the far side is nice and compact compared to that in the foreground. That's because, I found—after soldering all the power bus side—that each module has a little key-shaped connector that can lock them to each other to form longer strips. I did that for the far side. "Better late than never".

NHH160 Power Board Mount

Attachments

Images (3)
  • NHH160 Power Board WIP
  • NHH160 Power Board WIP 2
  • NHH160 Power Board Mount
Last edited by Trainman2001

Thanks Mark!

The lighting won't give trouble, but I'm still dubious about the track work. I had a modeling buddy over today working on a 1:15 scale Space Shuttle restoration for a new aviation museum in Bowling Green, and was running the train around and around. All was well for about 15 minutes and then it hit that trouble spot (that I thought I had fixed) and flop! the engine fell over. Obviously still needs some work. Started working on the styrene pavement when Chris came over.

It's Monday, so I'm back to work. I use that term loosely.

Got the positioning of the pavement and roadway finalized and measured parallel to the layout's sides.

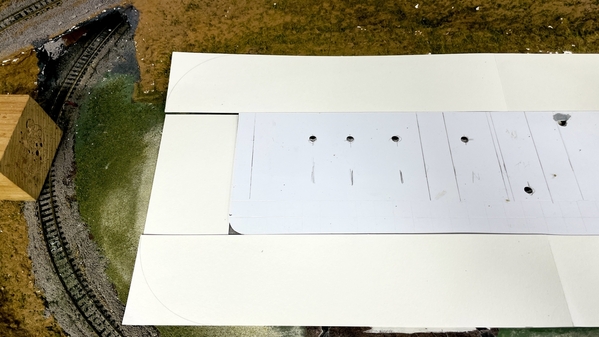
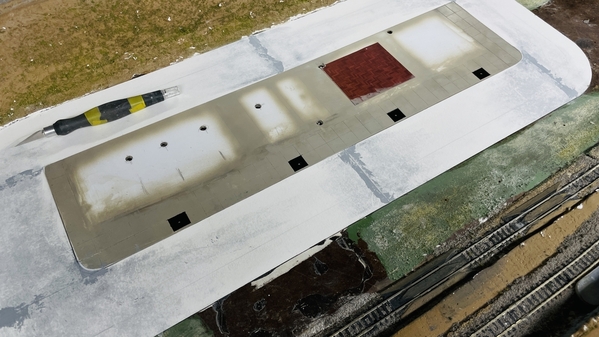
I measured the pavement from the layout edges so it was parallel to them. I marked the layout base to be able to put it back correctly. I located each building roughly on the pavement, and then, off the layout, laid in some perpendicular lines from the pavement edge. I held each building over its location and marked the x-y position of where the power leads will drop through. I drilled the holes in the styene on the drill press, and after positioning the pavement back on the layout, using those holes as a drill jig, drilled the holes through the layout. To drill through the plastic I use a drill sharpened to a 90° plastric-drilling and for the Masonite I used a spur bit.

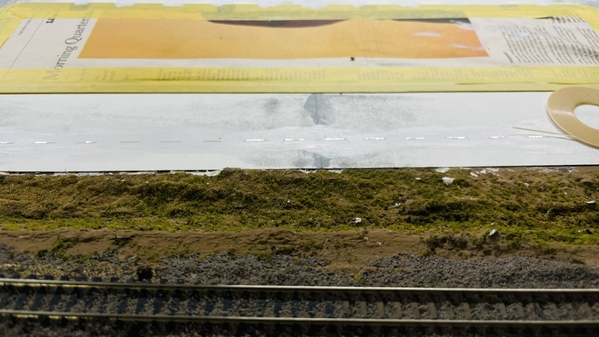
In n-scale a 3-lane road (33 scale feet) is roughly 2.5". I using that number. I'm having two driving lanes and one for parking with each lane 11 scale feet. I'm making the roadway out of thick water-color painting paper. In this way I can use water-based paint without the fear of the paper curling up too badly. I laid out the paper old school using compass, straight edge, paper cutter, scissors and a pencil. Long cuts were made on the paper cutter. Curves and trims were done with #11 blade. After trimming I temporarily held the sections together with Scotch Magic Tape.

I needed to do some minor excavation around the back road perimeter to remove a little bit more of the Sculpt-a-mold so the road would sit flat on the layout surface.

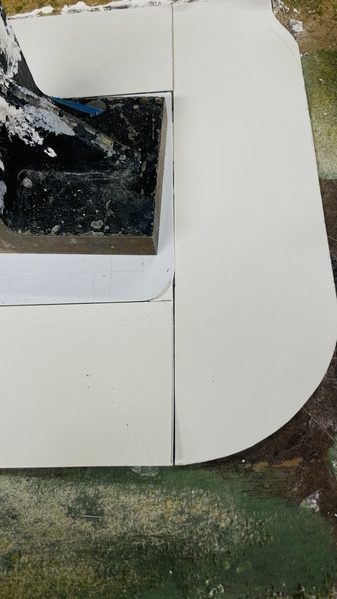
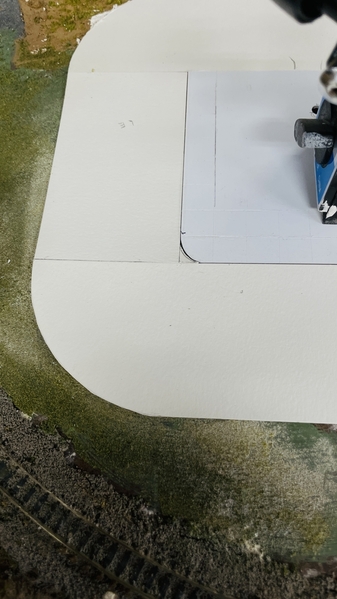
After taping the long pieces together and fitting in the ends, I used a compass to swing the corner radii to make a 'steerable' turn for the tiny n-gauge cars.

NHH160 Laying out street corners

I first freehand cut these with the #11, but realized it would be easier with a scissors. After cutting the corners and taping them to the rest of the road, I cut some small filler pieces to complete the road around the corners.

NHH160 Corner Fills 2NHH160 Corner Fills

There was one area left that needed a lot of fiddling. The kids had some up with the idea to have a tunnel under the mainline, but it couldn't exit because there was a lower level track behind it. So we did a "Roadrunner" bit with a flat wall painted like a tunnel. I didn't change this for this new application. But the street needed to go into it and it was at right angles. I had to custom fit the paper road into this space.

NHH169 Corner Fit Adjust

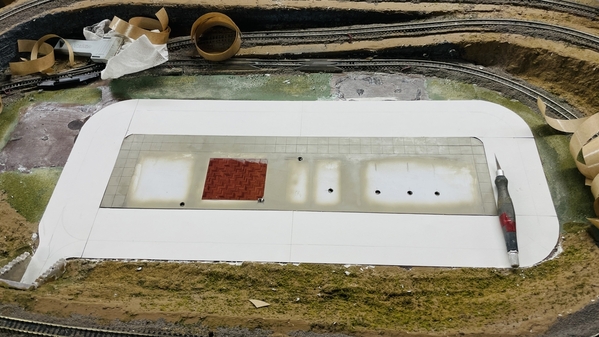
Here's the road fit up for the next operation.

NHH160 Road Fitted

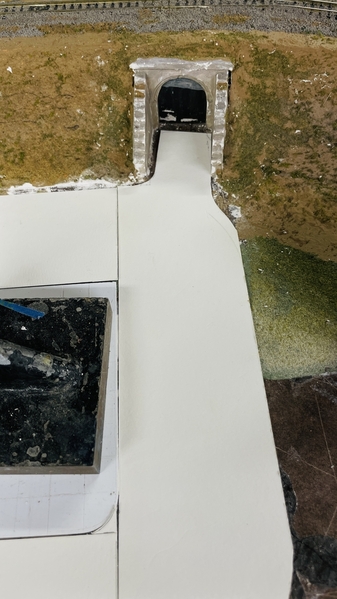
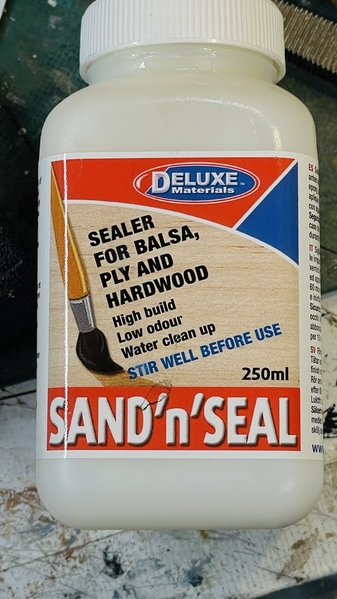
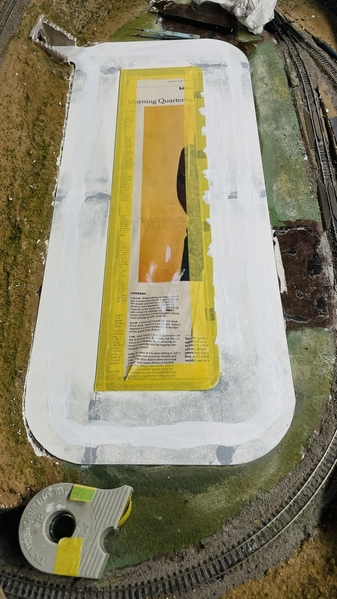
While I haven't finalized just what kind of adhesive I'm going to use to hold all of this in place—I'm leaning towards the 3M Transfer Adhesive Tape—I needed to seal the sub-surface so it was a good surface for the adhesive. I used this. It's a very good water-based sealer that dries quickly and cleans up with water.

NHH160 Sanding Sealer

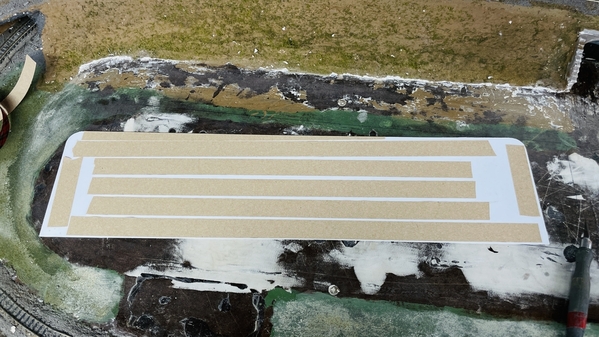
And this is the surface prepared for attaching the pavement/base and roadway. It was still wet when I took this.

NHH160 Glue Area Sealed

I'm going to airbrush the pavement a concrete color, gloss coat it, put on an aging wash to bring out the sidewalk expansion grooves, and then Dullcoat it.

For the road, I marked the road line locations, but not sure which approach to take: paint it all asphalt-color and then add thin white/yellow tape to simulate the lines, OR paint the line areas on the bare paper, lay the thin masks down and paint the asphalt color and then remove the tape to expose the road lines. I've done it both ways, but lean towards the latter. I means redoing all the layout I did since it will be painted black. Either way, I will be doing this tomorrow.

Oh... one more thing. I found that the point where the train derails randomly... the track gauge was just a skosh tight. A little filing on the inner surface of the rail with gap repair and the train slides through without a hitch. I think I've finally got it.

Attachments

Images (7)
  • NHH160 Laying out street corners
  • NHH160 Corner Fills 2
  • NHH160 Corner Fills
  • NHH169 Corner Fit Adjust
  • NHH160 Road Fitted
  • NHH160 Sanding Sealer
  • NHH160 Glue Area Sealed
Last edited by Trainman2001

Thank you Mark!

I got the base fixed in place with the 3M Transfer Adhesive Tape. I was thinking about adhesive options and settled on it. It's clean and holds like crazy especially in big flat surfaces.

Before adding the part, I lightly sanded the sealer, and added the strips to the bottom of the plastic. You press it on with the cover strip attached, pull the strips off and it leaves a contact adhesive behind. I carefully aligned it with the marking on the surface AND the wire lead holes and then pressed it home.
NHH160 Transfer Tape on Base

I mixed up some concrete color (Tamiya Sky Gray and Buff in about equal proportions) and airbrushed the base plate. I then went back and overcoated with some gloss in preparation for the slight weathering. In this case I errored. I used a water-based ALLClad Aqua Gloss, and used a water-based wash. The wash absorbed into the overcoat and was very hard to remove. It took a lot of scrubbing with a wet paper towel and then makeup sponge to get most off and I also rubbed off some paint exposing raw styrene. That had to be touched up. Needless to say, the results weren't what I wanted. I should have used Tamiya panel accent with is solvent based so it wouldn't have soaked in.

I also cut a piece of parquet flooring for the base of the Hardware Store since it's the only one you can really peer into. I used transfer tape for this too.

I trial fit the street again and found there was still some areas with the old ground cover that needed scraping down to expose native Masonite. In the streets case, I added the tape to the base board first since the street assembly was very floppy and would have been trouble trying to get the tape on without screwing up. I pulled the backing on one half and got the street aligned and then pulled the rest. It is well secured. I will the mask the base tomorrow and add the white paint for the traffic lines, then mask and brush paint an acrylic tube paint a weathered gray mix. When dry I'll pull the road masks off. I made the sidewalk in front of the stores wide enough to add some street trees.

NHH160 Road Attached

Still haven't decided the best way to handle the tree lighting. One thought is embedding the micro-LEDs at the trees' bases and having the light projecting up. It will make it easier since I won't have to deal with all the visible wiring.

Attachments

Images (2)
  • NHH160 Transfer Tape on Base
  • NHH160 Road Attached

Progress! Filled the seams in the road, masked the center, painted the line base, masked the traffic lines and first-coated the road color.

Before I did any of the above, I determined where the trees would go, and "planted" four street tress in the front of the stores, plus a gaggle of them in other places in the "Valley". I'm using those bendy plastic tree armatures from Woodland Scenics which work for n-gauge. It's Christmas time, i.e., winter, so no foliage. I'm going to coat the upper surface of horizontally-oriented limbs with snow.

NHH160 The Trees

The mounting hole is a #53 drill, and some won't even need glue. I painted the pseudo-black iron tree bases using the scribed pavement squares as a guide and masked them. I painted them semi-gloss black.

NHH160 Tree Plots

I filled the road seams with Tamiya gray fine filler. While it was curing I did some making of the trees. I sanded the filler, touched up any thin areas and let it cure some more. After sanding, I vacuum the dust with a Dust Buster and then used a tack rag to finish it off.

After masking the center section, I laid out the car parking lines on the store-side of the street. With my street size, I have two-way driving lane and a full-sized parking lane. With the penciled-in lines, I was able to paint the white traffic lines with tube acrylic white. It took a couple of coats to hide the gray filler.

NHH160 Traffic Lines Paint

I could just see the pencil lines through the white so I could add very narrow Chartpak tape where the lines will actually go. I used a dividers to mark off 8 scale feet lines and gaps. Then, with a single-edged razor, cut the tape and removed every other piece of tape all around the road. Took a while. It's kind of hard to see the masks, but they're there.

NHH160 Dotted Line Mask

After all the masking was done, I mixed up some very dark gray with the same acrylic paint and liberally applied it to the road. I was a little upset when I noticed the road buckling due to the water-based paint saturating it. I was hoping the water color paper wouldn't do that.

NHH160 Road Buckles

I suspected that as it cured, the buckles would recede, and I was correct. After dinner I checked up on it and they were diminished from what they were before and I suspect, by the time it's fully cured tomorrow, They will disappear. Any of those at the edges, I will inject some wall-paper seam paste and weigh them down.

NHH160 Buckles Receding

I decided to go minimalist for the tree lighting. I'm going to use one colored LED at the base of each tree facing upward. This will simplify wiring greatly.

Attachments

Images (6)
  • NHH160 Tree Plots
  • NHH160 Dotted Line Mask
  • NHH160 Road Buckles
  • NHH160 Buckles Receding
  • NHH160 Traffic Lines Paint
  • NHH160 The Trees

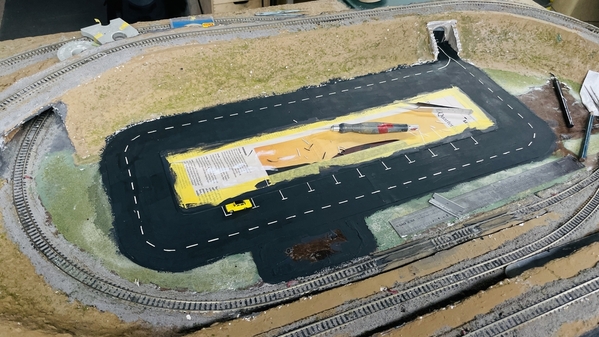
When the road was fully cured, most of the ripples disappeared. I added a coat of Tamiya NATO Black to kill the shin and removed some of the light spots left by the first coat. I didn't even try to pull the line masks without first incising their edges with a new #11 blade. The tube acrylic paint film is very thick and I was sure it would pull away with the masks. This was painstaking work and I was very glad that I had raised the layout off the floor high enough so the bending wasn't too bad.

This shot shows the beginning of the mask removal and also shows how flat the road is now.

NHH160 Flat Road

Here's all the lines in place.

NHH160 Lines Complete

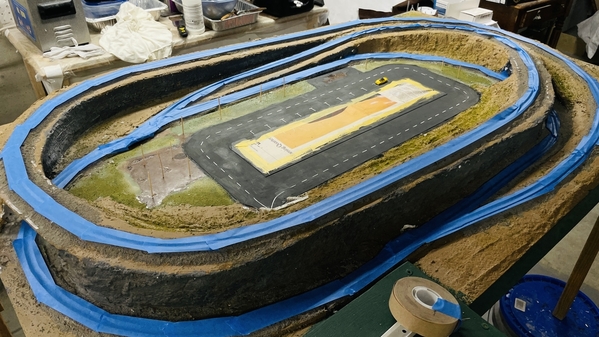
I masked all the track in prep for the next operation; refreshing the landscaping. I put toothpicks in all the drilled holes for the trees so I can find them after the new grass is "planted".

NHH160 Track Mask

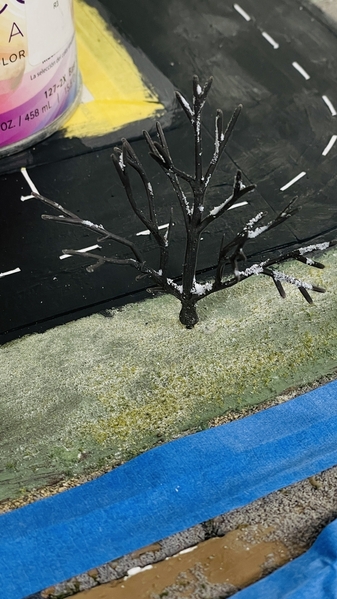
I got the trees covered with snow. Here's one planted for fun. I used W-S scenic cement judiciously applied to any horizontal surface and the crotches between vertical branches.

NHH160 Snowy Trees

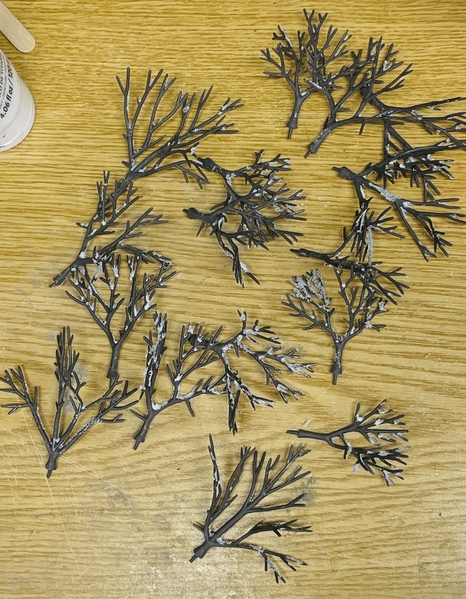
And here's the rest of them.

NHH160 Wintry Trees

Have a dental appointment in the AM, and then need to go to the hobby shop, but I'll get some work done.

Attachments

Images (5)
  • NHH160 Flat Road
  • NHH160 Lines Complete
  • NHH160 Track Mask
  • NHH160 Snowy Trees
  • NHH160 Wintry Trees

I figured out how to handle the festival lighting without creating a monster.

NHH160 Lighting Solution

Instead of attempting to thread LED strings into tiny trees where the LED wiring is almost the same size as the braches, I'm going to light each street tree from below with the three colors of micro LEDs that I have. This will look better when the layout is viewed after dark. During the day, they won't be very noticeable.

This solves a challenge for me. Using the LED string lights would have been a wiring nightmare, and I'd have to use a Buck converter to change the 12VDC from my LED transformer to 4.7VDC that the string lights run on. And putting them into the trees just didn't seem very good.
I also have 13 CL2 driver positions on my power board and am only using 7 to light the buildings. I can easily tie in another batch of LED circuits to it. So I built 4, 3-LED arrays each of which will be powered by one of the CL2s on the power board.

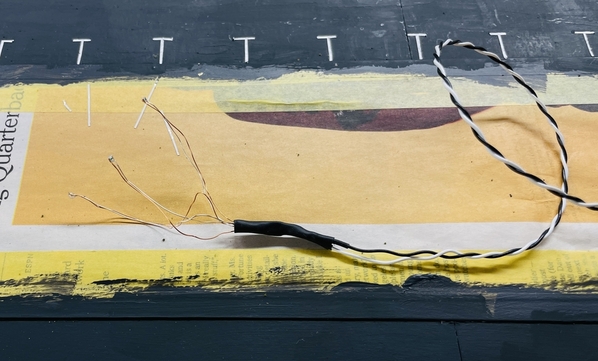
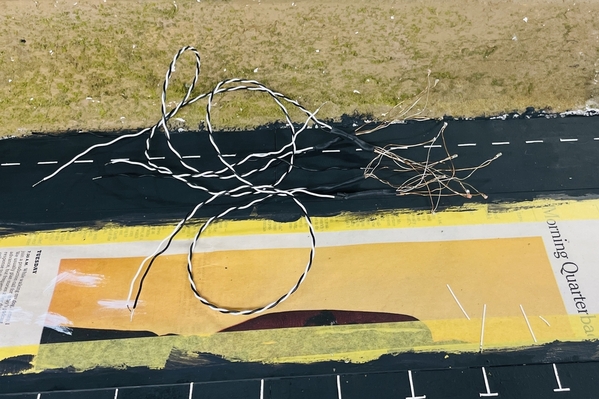
Here's the first harness that I built. It took the longest (as usual) to get the procedure down pat.

NHH160 Lighting Harness

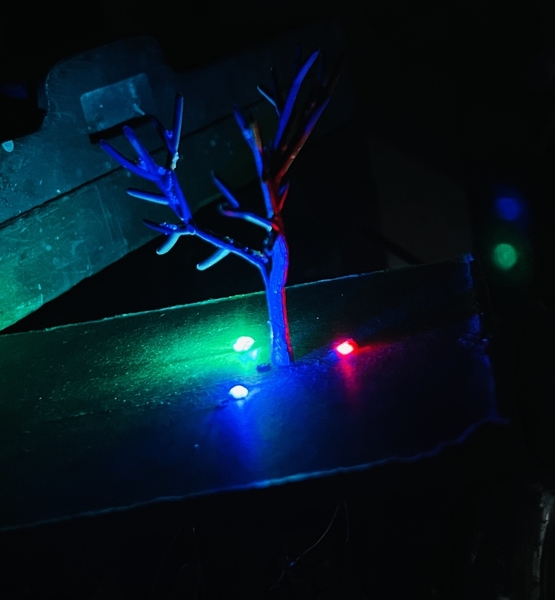
And here's all four. I'm only doing this effect on the four street trees. All of them are tested and performed perfectly. The lights will be installed from below in three #43 drilled holes. I will hold them with ???… maybe clear silicone selant. It's nicely transparent. W-S Scenic Cement might work also. There won't be any stress on the LEDs since the wires will be adhered to the layout's underside. Like it or not, I will be doing some work underneath the layout. It's just about the same height as my big trains so working on my scooter should do the trick. White is + and black –.
NHH160 Tree Light Sets

I also found that dark yellow mix that I originally used on the bank building. It was mixed in the remains of a bottle of Tamiya Buff. I used it to fix that paint mismatch caused by thinking that I threw that bottle away. The mismatch bugged me.

It's Friday, so no work on the weekend. In the next session, I'll be doing the ground cover rework. All of that should take no more than one session. It's quite possible that the layout will be finished by the end of next week.

Attachments

Images (3)
  • NHH160 Lighting Solution
  • NHH160 Lighting Harness
  • NHH160 Tree Light Sets

Thanks Mark!

Got a head start on the ground cover today, although I'm still not sure about what/how to do the snow and how much of it.

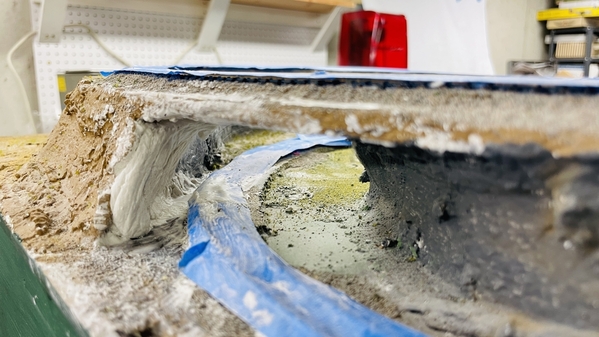
When the kids and I built the layout, we really didn't pay much attention to the interior of the two tunnels. I took care of this with some paper towels (Bounty) and Plaster of Paris. It was a sloppy job, and not meant for beauty, just to fill up some holes that showed the back side of the landscping.

NHH160 Adding Tunnel Wall 1NHH160 Tunnel Walls 2NHH160 Tunnel Walls 3

It should be fully cured tomorrow so I can paint it. I'm not going to do anything fancy.

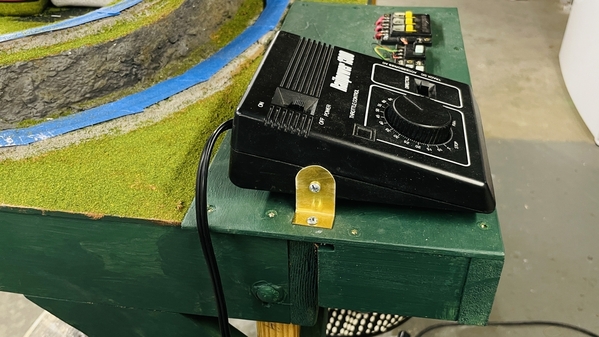
I made brackets to lock the transformer in place. I drilled holes into the transformer housing and… hopefully… didn't impact any electronics inside. I plug it in and turned on the power and didn't smell anything burning. I wanted to remove the cover to see what clearances I had inside, but found that the fasteners on the bottom were stacked in and not threaded fasteners. It's not going to go anywhere.

NHH160 Transformer Binders

I then mixed up some earth color. My previous go-to earth latex paint was used up on the road project last year so I have to create a custom color. I went over all the bare horizontal areas and some of the those with sub-par ground cover with fresh paint and then generously sprinkled fine grass. When it's all set up tomorrow, I will vacuum all the loose stuff and start adding more interesting things and repair all the ballast damage.

Here's some views of the ground cover. It's a mess, but it's always this way before it isn't.

NHH160 New Grass 1NHH160 New Grass 2NHH160 New Grass 3

Landscaping should be done tomorrow or Wednesday at the latest. Thursday will be dedicated to adding building and lighting. Friday will be punch list items and and touchup painting the green banding.

Attachments

Images (7)
  • NHH160 Adding Tunnel Wall 1
  • NHH160 Tunnel Walls 2
  • NHH160 Tunnel Walls 3
  • NHH160 Transformer Binders
  • NHH160 New Grass 1
  • NHH160 New Grass 2
  • NHH160 New Grass 3

Thanks for the "Likes". Work continued today in a short session. I got the gray rocks painted that the kids and I didn't do 12 years ago. I gave it all an alcohol wash, and started to add highlights, but it wasn't fully dry so that will wait until Thursday. Tomorrow we're doing a day trip to Danville, KY to a new glass museum that opened up. I don't know the specific day that Bill Newell is planning on arriving next week which is why I'm pressing to finish this week. I suspect I have some time next week too. Reviewed a bunch YouTube vids last night on applying snow to model scenes. Lots of variations to choose from, none of which conform specifically to my needs. It's still a bit of a quandry, but I am leaning towards Baking Soda, even though I bought the W-S Soft Snow. Partical size is huge when viewed in n-gauge.

Here are images from today's session. Many of these escarpments were earth colored when originally built. I went around and painted them an acrylic tube paint mix of white and black before doing an India Ink/IPA wash. I will be using chalks to add some more contrast when it's all fully cured.

NHH160 Rock Work 1NHH160 Rock Work 2NHH160 Rock Work 3NHH160 Rock Work 4

When I pull the tape, there are lots of track areas that will need ballast touch up. I have the W-S fine gray mix ballast that will do the trick. If I have time, I may want to make a small part at this end (above image) and put some kind of monument in there. I'll see if I can find any in SketchUp's 3D Warehouse that I can print without too much fuss. Don't have a lot of time for fussing.

Attachments

Images (4)
  • NHH160 Rock Work 1
  • NHH160 Rock Work 2
  • NHH160 Rock Work 3
  • NHH160 Rock Work 4
Last edited by Trainman2001

The tunnels turned out good, and the other improvements make a good scenery base for the snow.  I have never tried to model snow in any scale.  I have only used cotton batting for the temporary setups for holidays.  You certainly don’t need much of whatever you use for N-scale.  
Have a good trip to Danville.  That name rang a bell, so I looked it up.  Yes along Rt 68 on the other side of Lexington from Paris.  I was through there long, long ago; before the major Interstate highways were completed.  

I don't know. I have both baking soda and W-S Soft Snow. I'm going to do a test piece before I screw up the layout. The deadline is next week and I can't afford any rework.

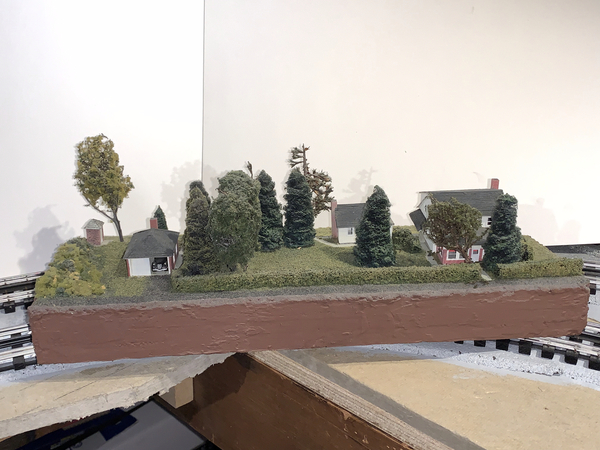
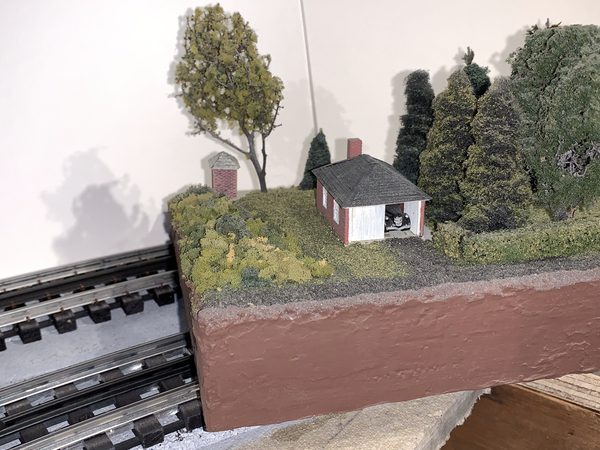
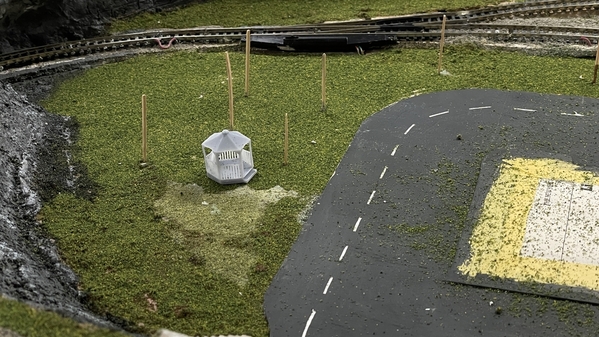
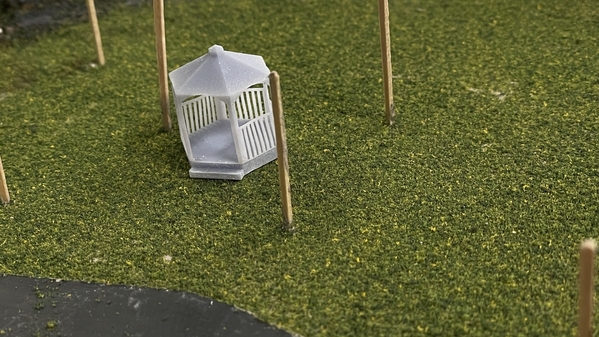
The little gazebo printed perfectly as I suspected. It's quite delicate. Those are toothpicks holding the tree positions as a scale comparison. I didn't want to fill the holes with ground cover… although I could just redrill the holes. Overthought it!

I will paint it white with a gray roof and greed trim. I can put some of those park benches in it.

NHH160 The Gazebo

NHH160 The Gazebo 1

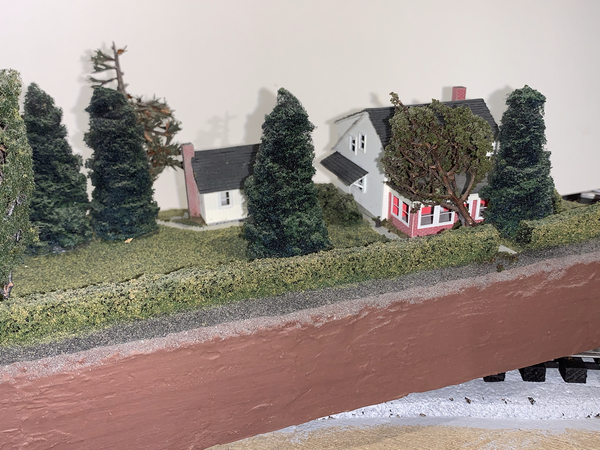
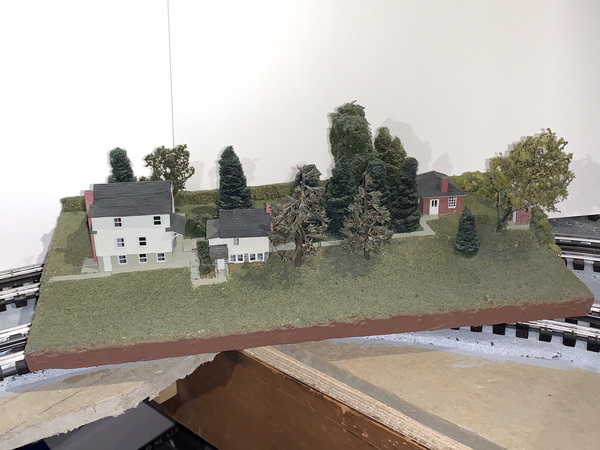
I put in a path to the gazebo and put some low shrubs around them. It will add interest to a basically bare area. When the kids and I built this 12 years ago, there was a building in that space.

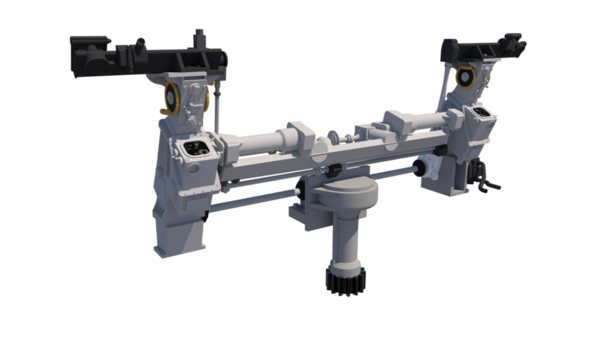
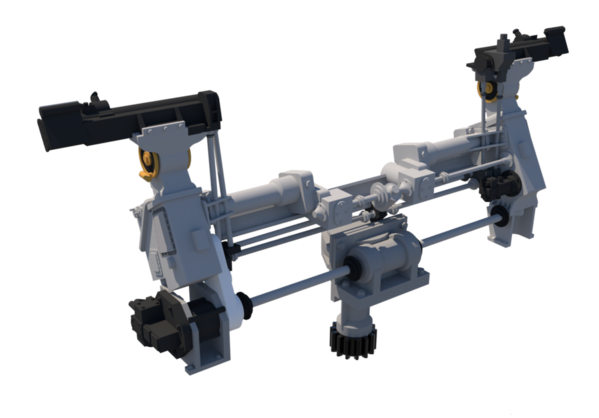
Last night I finished two weeks of drawing of the very complex sighting/control system for the 5" turret project. It was difficult in every degree of freedom, starting with having no dimensioned drawings of all of this equipment and ending with having to get all the connecting shafts for tie into their respective components. I also had to constantly think about how to print it and would it hold together. What helps was designing it attached to the frame and engine mounts so I knew it would fit into the model when done. Or that's how it's supposed to go.

This is the operator's view point. The Pointer's (elevation) station is on the left and Trainer's (traverse) station is on the right. The two telescopes project out of the shield and I had to ensure that they were aligning with those openings. I've made decals for the dials that show up in the regulator console.

Sight System Frt

All of this apparatus is smack up against the armored front shield and is out of sight and almost impossible to work on. Even if I have unfettered access to the turret, I could not get to these parts to measure them. My guess is to service it they must detach the entire amored shield.

Sight System

This is the slicer setup for 3D printing. I'm doing the whole deal as a single part. The support scheme is complex, but I think it will work. I'm making two copies. With the printer adjustments working, this level of detail is entirely possible. Just look at how the railing slats showed up on the gazebo. This part is on the printer now and will be done later tonight. I'll let y'all know how it works out.

Screenshot 2023-11-08 at 11.07.00 PM

I was really anxious about modeling this ridiculously complex assembly. It was a critical path part and a deal breaker if I couldn't pull it off. Much of the rest of the job, including the relatively complicated powder and projectile hoists are not going to be as difficult. Ryan Syzmanski is getting a kick out of this because, even as curator of the ship, he will never see this part separated from the whole as it's shown here.

Attachments

Images (5)
  • NHH160 The Gazebo
  • NHH160 The Gazebo 1
  • Sight System Frt
  • Sight System
  • Screenshot 2023-11-08 at 11.07.00 PM

Add Reply

Post

OGR Publishing, Inc., 1310 Eastside Centre Ct, Suite 6, Mountain Home, AR 72653
800-980-OGRR (6477)
www.ogaugerr.com

×
×
×
×
Link copied to your clipboard.
×
×