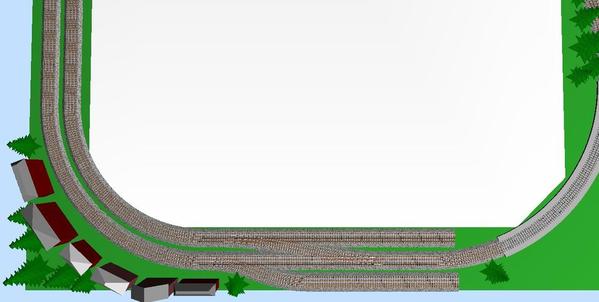
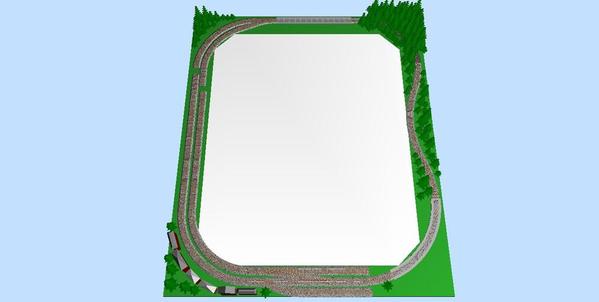
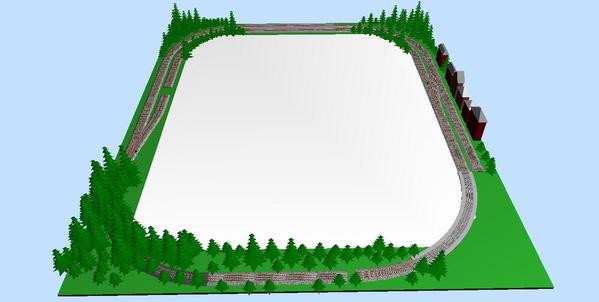
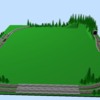
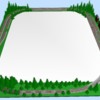
Thanks Dave Yes I did see your design but for my First O Layout I wanted to keep it simple..

As for a lower shelf layout I just don't have the room like you Guys lol...

I do plan on keeping a small fold up ladder for operating and working.

What I came up with from floor to ceiling is 8' for my door I got 14" on top of door trim to ceiling my window is 15" and the closet is 16"

Originally Posted by DoubleDAZ:

No problem keeping it to one level, but given the photo I posted, you might have missed that my dual main example had a crossover as well as a spur if you didn't look at the SCARM file. Personally, I think I'd keep it to one level too, but I have no experience operating a ceiling layout. I'd probably stand on something to bring it to eye level, looking up for long periods just doesn't appeal to me.


Did you ever do the measuring? Have you considered a lower around-the-room shelf layout with lift-outs for the entrance and closet?


Dave I hope I did this right...

 I hear what you are saying about the track and all the brands but I do want to do this right the first time.

I have many plans and I must tell you that this layout won't be your everyday ceiling layout...

If you didn't see any of my Youtube videos that I posted in my first post that is a very small 2'x4' Z scale layout with onboard sound.

The Donner Pass Layout will be featured in next months Z Track Magazine.

With Atlas track would you use cork or woodland foam?

With this being a ceiling layout I would like to keep the sound low as possible so maybe Atlas would be better???

Thanks Mike

Attachments

Images (1)
  • Ross
Last edited by UPMike

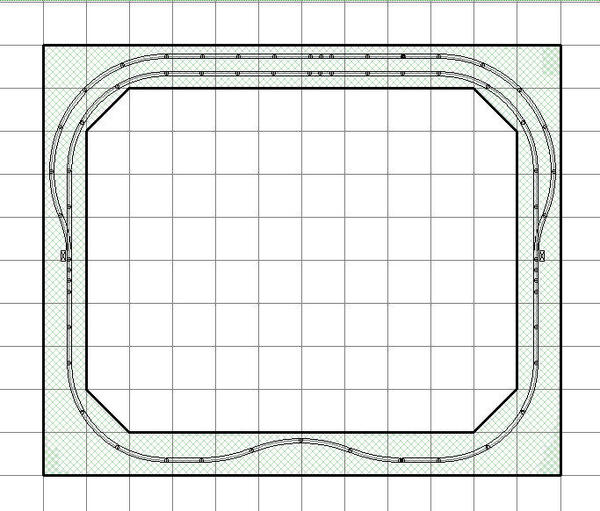
Sorry, Mike, but I'd like the .scarm file itself, not a picture of the layout. If you named the layout Ross, it would be the Ross.scarm file. That way I don't have to try to figure out what each track piece is from the photo. I know each piece is named, but the names are too blurred for me to figure them out. The file might upload as a text (.txt.) file, but I can use it.

Originally Posted by UPMike:

I'm lost Dave I'm not sure how to do it lol...

That's okay, Mike, I'll try to recreate the layout in SCARM using the photo. But I would like to help you figure out how to upload the .scarm files. I thought you had uploaded one before, but I guess those were all .jpg files.


Anyway, you upload the .scarm file the same way you did the photo. When you select Add Attachments, instead of looking for a .jpg file, you look for a .scarm file. If you are using the default SCARM settings, the .scarm file should be with the .jpg file. What folder was the .jpg file that you uploaded in? When I export a jpg, it goes in Documents/My SCARM and that is where the corresponding SCARM file is.


Don't get discouraged if you don't follow, we'll get it eventually.

Mike, don't bother to upload the .scarm file unless you want to keep trying for practice. The Ross library in SCARM is again missing key components, namely 3" and 10" straight track pieces, and you'll never get things to line up without them. Ross makes 3", 10" 14.5" and 29" straights, but SCARM only has the last two.


I'm attempting to construct the design using RR-Track and hope to finish sometime tomorrow morning. So, hang in there and I'm sure I'll have something tomorrow. I must say I'm surprised, but then again there probably aren't a lot of folks testing some of the libraries.

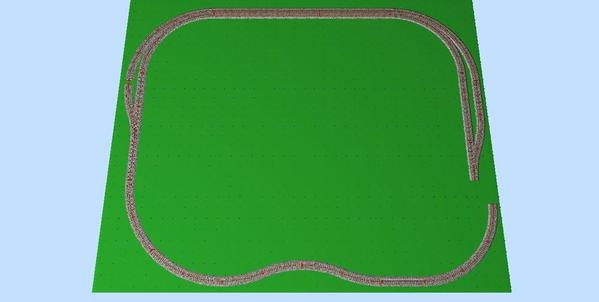
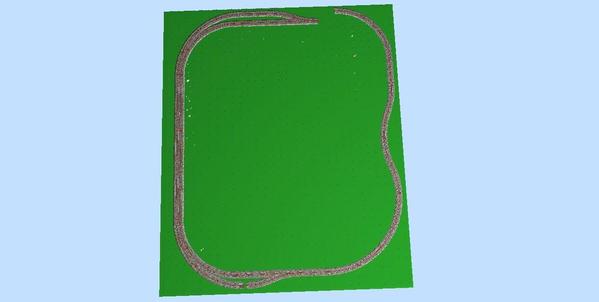
Mike, I hope you realize you have some reverse ("S") curves in this design (2 with the O64 turnouts and 2 with the O72 curves) and I don't know how these will affect operation. Since this design uses Ross components, you can swap out the O64 turnouts for #4 turnouts and mitigate the effects of the 2 reverse curves at the turnouts. You could also mitigate the effects of the others by using flextrack instead of the O72 curves, but that would involve fitting/cutting. I tried using larger standard curves, but they didn't fit because of their size. I don't think any of these will cause any real problems, but then I don't know what equipment you intend to run or how fast and I felt I needed to mention it.


Anyway, here is the same design using #4 turnouts for you to compare. The differences are subtle, but there doesn't seem to be any cost difference. Please note that Ross turnouts don't automatically come with remote control. Ross offers 2 Ross-Ready remote options, Dz1000 and Dz2500, so you have to consider the higher cost of those if you are comparing prices to other brands. I don't know the difference between the 2 remote switches.


In case you don't know, standard turnouts have a curved diverging track while numbered turnout have a straight diverging track. The only curved part is at the points that switch between the straight through track and the diverging track. The effect is basically the same as if you have added a straight track between the standard turnout and the first curve, thereby eliminating the reverse effect when the train moves through the turnout to the siding.


FWIW, the #4 turnout is pretty much equal to an O72 turnout as far as the points curve is concerned, but allows you to choose between 3 widths for a transition track (3.5", 4" and 4.5"). In this case, I chose 3.5" so the siding tracks are further from the wall. The width between the main and siding is the most obvious difference. I tried 4" and 4.5" transitions and they don't fit, so you're choices are pretty much limited to these 2 designs. I suspect some will say that it will be better to use the O64 design because the siding in the #4 design is too close to the main for trains to pass safely, especially on the curves, and I wouldn't disagree with such an assessment.


I hope I'm not complicating things for you, I'm just trying to give you all the options. I felt we unduly influenced your choice of track, but then I've also tried converting this design to Atlas, GarGraves, Lionel and ScaleTrax with no luck, and I must admit I'm surprised. The problem is the lack of the same turnout/curve options.
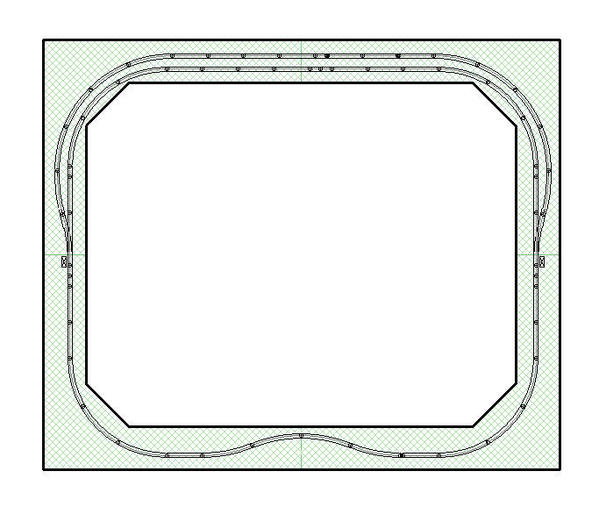


Mike1-Ross#4

Attachments

Images (1)
  • Mike1-Ross#4
Files (1)
Originally Posted by UPMike:

I guess the question is which track Atlas/Ross switches or All Ross...

I will be using cork roadbed to keep sound down


That I can't answer. I can tell you that you will HAVE to use the Ross turnout WITH the transition curve. After the transition, you can use Atlas O63 curves instead of the Ross O64 and things should still line up. If you use Atlas, you will have to replace all the Ross 3" pieces with two Atlas 1.75" pieces. Of course, that all depends on how things actually "fit" as you lay track and I didn't try replacing ALL the straight sections with whatever lengths Atlas offers. Nor did I try using the long straights in place of the 10" straights.


When it comes to the #4 turnouts, I like the look too, but you need to look at the track separation so trains don't hit each other when passing. Like I said, the only transition piece that worked was the 3.5" and that simply might not be enough. I suppose you can test that by putting2 tracks side by side and put some cars on to see what width works best. I'm particularly concerned about the curves because of engine overhang.


If you don't have track yet, which I assume you don't, I think you can print full sized pieces in SCARM and use those to line things up. Maybe someone with some experience will chime in. If not, maybe ask the question in a separate thread with a an appropriate title.

Post
The Track Planning and Layout Design Forum is sponsored by

AN OGR FORUM CHARTER SPONSOR

OGR Publishing, Inc., 1310 Eastside Centre Ct, Suite 6, Mountain Home, AR 72653
800-980-OGRR (6477)
www.ogaugerr.com

×
×
×
×
Link copied to your clipboard.
×
×