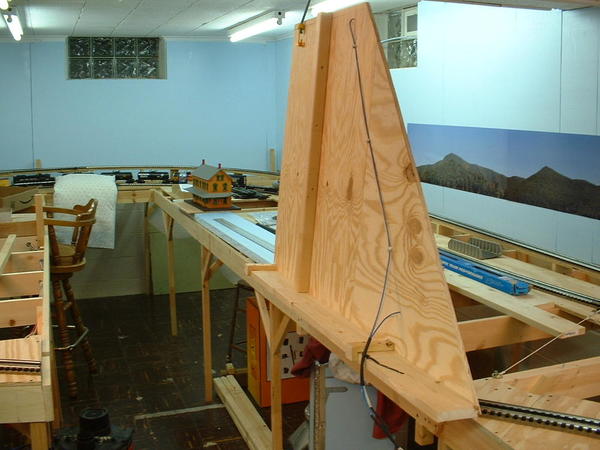
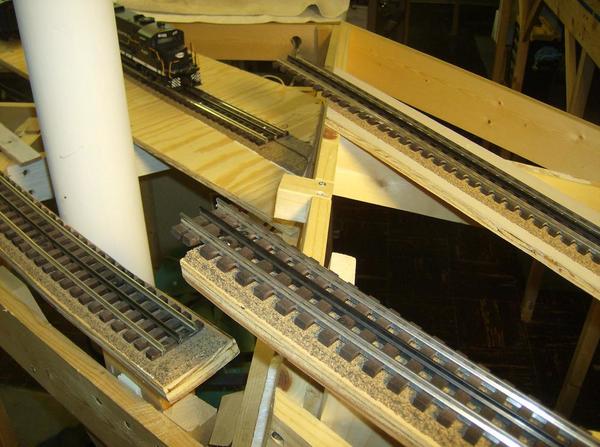
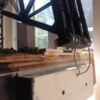
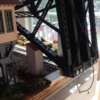
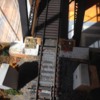
I am in the process of building a new layout and at the entry door to the room I have created roughly a 44" opening where I would like to build a hinged lift bridge.  Originally I planned on a lift out section but after much thought I have decided to change to a hinged lift bridge.  I have been researching the forum and have seem some very good ones.  However, I would just like to ask the members for any tips and tricks or lessons learned about building one of these for that size span.  Anyone with any assistance, ideas, tips, tricks, etc.. that they are willing to share would be greatly appreciated.  I will post some pics here shortly.  Thanks.


Todd

Attachments

Images (5)
  • Left Side of Entry
  • Overview of Entry with finished ground cover
  • Overview of Entry Bench work Frame
  • Right Side of Entry bench work
  • Left side of entry bench work
Last edited by TheBigT
Original Post

Replies sorted oldest to newest

Todd,

Looks great so far and just my opinion but I feel hinged vs. lift out is the way to go.  I went through the same decision process some time ago and also went with hinged, never regretted it.   In addition to the forum, if you haven't already, you may want to search on youtube for some examples.

For my 30" application I went with the MTH Double track bridge and the electrical connections are via hidden male / female DB9 connectors (tracks 1 & 2 power & ground,1 & 2 insulated rails and power connection to the blinking light on the top of the bridge with a mini toggle switch for on / off).  I used a single strap hinge modified to fit.  I tried to camouflage it as best I could as seen in the photos.  The wiring runs in a channel in the support that was added to the bottom of the bridge.  One mistake that I made was to install the hinge and DB9 connectors on the wrong ends of the bridge which results in having to run the isolated rail connections around majority of the layout.  Still very workable but would have made life a little easier, so you may want to give that some thought if you intend on using isolated rails.

Wishing you the best of luck with your build, please keep us posted.

bd


Attachments

Images (4)
  • Bridge 1
  • DB9 1
  • DB9 2
  • Bridge 2
TheBigT posted:

 Anyone with any assistance, ideas, tips, tricks, etc.. that they are willing to share would be greatly appreciated.  Todd

  • Hinges, we used stainless steel door hinges. The hinge pin needs to be as close to the top of the rail as possible.

  • Make the lift-up out of MDF and brace it to prevent warping.
  • Use locating pin(s) and sockets to ensure that the lift-up aligns the track correctly..

  • Use a hold-down quick clamp to secure the lift-up when it is in the down position.

We just built one for our modular club layout

Last edited by Gilly@N&W

All,


Thanks for all the feedback.  The feedback has led me to additional questions:


1.  Can the pin of the hinge be higher than top of the rail or do I need it to be as close to top of rail as possible?

2.  Do I need to bevel the rails to allow for lift up action at the hinge side?

3.  I am using gargraves track and was wondering if allow the track length to extend an inch or so off the lift up end and use the gargraves connector straps to help with track alignment along with the locating pins and sockets?


Thanks,


Todd

If the hinges are higher that the track you will not have a binding problem.  Here are some photos of my simple bridge.  You will want a seat for the lift end and some sort of positive locater so the bridge always seats exactly in the same spot each time.  I used a 2x2 notch and mating 2x2 screwed to the bottom front edged shown in the first picture. After you have built and installed the lift section, screw a long board across it with screws on each side table and into the bridge itself before you make your track cuts and install the hinges.  Remove this holding board after all that is done and everything will be exactly placed and will join properly every time.


Dennis1. Lift end of span2. Lift end closed3. Lift end track cut closeup4. Hinge closeup5. Lift span upFront end, raised slightly 2Front end, raised slightlyHinged end of span. Span closedLift span hinge end track cut cleaned & closed

Attachments

Images (9)
  • 1. Lift end of span
  • 2. Lift end closed
  • 3. Lift end track cut closeup
  • 4. Hinge closeup
  • 5. Lift span up
  • Front end, raised slightly 2
  • Front end, raised slightly
  • Hinged end of span. Span closed
  • Lift span hinge end track cut cleaned & closed

Todd

You are "on the right track" with good advice from other hobbyists who have "walked the walk" before you. The Central Arkansas Model RR Club (CAMRC) designed and installed a lift-up bridge in a modular layout with Atlas O track and used a MTH two-track bridge to accommodate the dual main lines.  The hinge was custom made by Jack Adams, a club member and pro machinist who also designed the lift-up-circuitry with make/break switches for a safety feature when the bridge is up. The pivoting pin was slightly higher than the rail head; no beveling required. A steel locator pin at the "open" end kept the tracks on the bridge in alignment with the entry and exit tracks on the layout platforms. The connecting wires were hidden underneath the bridge deck. These photos were taken during a work session, so the wiring wasn't "dressed up " yet.

The lift-up bridge was installed on the portable modular layout so that it could be removed and stored when not in use at a Train Show; then quickly and easily re-installed for operations with color-coded Molex connectors.  This bridge allows convenient access to the inside area of a large (20x26 feet) rectangular O-gauge layout. No duck-under! The club concept was to place yard tracks and a roundhouse in the center area on add'l platforms.  But that bold step forward hasn't been taken yet.

 DSCN0581 CUDSCN0588 CU

Mike

Attachments

Images (2)
  • DSCN0581 CU: Jack Adams at work.
  • DSCN0588 CU: Wiring circuitry for the lift-up bridge.

All,


thanks for the great advice.  I will be posting pics as I progress.  Mine will have three tracks, which may result in two lifts or three depending on how things layout.  I will probably be using plywood and we have a custom elevator company nearby that sells 2' x 4' sections of walnut, cherry, oak, birch, etc leftovers from jobs on the cheap.  It will contain safety sections and I will be utilizing banana plugs and connectors for the wiring.  Again many thanks to all and watch out for the pics.


Todd

Add Reply

Post

OGR Publishing, Inc., 1310 Eastside Centre Ct, Suite 6, Mountain Home, AR 72653
800-980-OGRR (6477)
www.ogaugerr.com

×
×
×
×
Link copied to your clipboard.
×
×