
With more and more folks asking about how to model water, I thought it would be helpful showing pictures of water scenes on our layouts for those that are thinking about such a feature.  Even explaining how you did it would help even more.  So...please show us what you have done or what you are planning on doing.  Lets see how many different ideas you all have...  Here are few pictures of a harbor area and a canal I have on my layout.  The canal ( water that is more blue ) is in an isle and folds down for access during operation of the layout.  Some of the pictures I have posted before but there are a few new ones...


Thanks,

Alan

DSCN1393

101_2425

101_2457

101_2630

101_2633

DSCN0375

DSCN0381

DSCN0387

DSCN0696

DSCN0718

DSCN0721

DSCN0869

DSCN0893

DSCN1131

DSCN1165

DSCN1167

DSCN1179

DSCN1387

DSCN1389

DSCN1390

DSCN1392

Attachments

Images (21)
  • 101_2425
  • 101_2457
  • 101_2630
  • 101_2633
  • DSCN0375
  • DSCN0381
  • DSCN0387
  • DSCN0696
  • DSCN0718
  • DSCN0721
  • DSCN0869
  • DSCN0893
  • DSCN1131
  • DSCN1165
  • DSCN1167
  • DSCN1179
  • DSCN1387
  • DSCN1389
  • DSCN1390
  • DSCN1392
  • DSCN1393
Original Post

Replies sorted oldest to newest

I have a large water area that presented some challenges. After doing the research, I decided on using high gloss latex paint and non-yellowing urethane. If I remember, it was 8 years ago when I applied the water effect, I applied twelve coats of the high gloss paint and an equal number of costs of urethane. The effect produces a high gloss that is very reflective just as you would see on a lake or the ocean. The beach pictured has sand that nicely corresponds to the water.


If I had to do it over again, I would use the same procedure.


water

Attachments

Images (1)
  • water

I use Woodland Scenic's realistic water; just open and pour.  Very, very little odor.  They also make little bottles of blue colored material, that I actually squirt a little into the bog bottle just to tint it slightly since blue water doesn't exist in my neck of the woods.


First I start with painting the surface and sealing it (3 hour shower Silicone II works well).  Then, I add the bottom of the canal bed; sand and gravel.  Pour on the Realistic Water, and let cure.  Lastly, I used white glue and fake snow to add the ice and drifting effects.


IMG-20131209-00029

IMG-20131209-00025

IMG-20131209-00024

IMG_1301

IMG_1296

IMG_1293

Attachments

Images (15)
  • IMG_1290
  • IMG_1291
  • IMG_1292
  • IMG_1293
  • IMG_1294
  • IMG_1295
  • IMG_1296
  • IMG_1297
  • IMG_1298
  • IMG_1299
  • IMG_1300
  • IMG_1301
  • IMG-20131209-00024
  • IMG-20131209-00025
  • IMG-20131209-00029

Crumpled and painted aluminum foil under decoupage works well to created the illusion of moving water. As you move, the foil changes the reflective surface you view giving the impression of moving water. But I like the textured glass as well for still water. 


CHANGING TOPICS:The issue I have is not the water but getting O-gauge looking LARGE ships, liners and boats. Lionel's tugs are great, but finding a comparably large ship to tow is difficult. The Disney Magic is 960 feet by 110 feet (by 10 passenger decks above water) So in "O" that's  20 feet by 2.3 feet (by 3 ft high)

But if selectively compressed you might get by by 6 ft by 1 ft by 1 ft. where is that found?


Last edited by AlanRail

Alan...the large liner that you see in some of my photos above was available for a short time by a seller on Ebay.  It is around 5 feet long and is a very close to a scale model made of wood, metal, and resin...of course way to small for O-scale but large enough that one could convert it to a private yacht and it still be believable.  It was shipped to me in a wooden crate and even has a display base...a very nice model.  I just have not had the heart to cut the bottom to make it a waterline model.  Several forum folks have suggested that I make a drydock so that it looks like it is being painted, etc.


Great pictures everyone!!...keep them coming...


Alan

Originally Posted by leavingtracks:

With more and more folks asking about how to model water, I thought it would be helpful showing pictures of water scenes on our layouts for those that are thinking about such a feature.  Even explaining how you did it would help even more.  So...please show us what you have done or what you are planning on doing.  Lets see how many different ideas you all have...  Here are few pictures of a harbor area and a canal I have on my layout.  The canal ( water that is more blue ) is in an isle and folds down for access during operation of the layout.  Some of the pictures I have posted before but there are a few new ones...


Thanks,

Alan


DSCN1131


DSCN1179


So how did you do yours?  Is the bridge resting on the glass or the glass cut around the bridge support?  Are the boats sitting on top of the glass?

The bridge and the boats are just sitting on the glass...  I used "shower door" glass.  It sits on top of a frame which is covered by a piece of 8th inch Masonite, smooth side up.  Then I painted the Masonite...followed by laying the glass on top.  One side of the frame is mounted on hinges, the other side has two legs.  Lifted up, as you see in the pictures, it occupies an aisle way and is in this position for pictures only.  During times when guests are visiting, the boats and bridge are taken off and stored adjacent to this area and then the "canal" swings down.  The glass is secured by a metal strip which is hidden when in the up position....  The entire area is about 8 feet long and 30 inches wide....


Alan

Whenever I can, I use Woodland Scenics Realistic Water.  Important to realize that although very thick it is a liquid and that it eventually settles out absolutely level -- and finds any and all leaks in any area you prepare for it.  This mountain stream is not quite 3/8 deep, painted on the bottom and then done in 1/8 inch layers: with the trout you see in the second photo inserted before the final top layer.  

Foyle and Gently 1

Foyle and Gently 2

 This is the smaller of two lakes I have on the layout that are just painted cabinet-grade plywood.  This is hatch cover to a popup where I can work on the layout.  I left the plywood out overnight several nights in a row in early fall.  It got a bit of moisture on it and the surface got just a traces of waves.  I then let it dry inside, primed, and painted it with a 4:3:1 mixture of blue/greenblack oil based enamel.  It really is quite satisfactory: a quiet mountain lake.

Mountain lake

Attachments

Images (3)
  • Foyle and Gently 1
  • Foyle and Gently 2
  • Mountain lake
Originally Posted by DennisB:

This is Aquatex. The only thing that I did was paint the underside Camouflage Green. The reflections pull everything into the water.

How do you cut the Aquatex to fit all the structure?  Also, how do you float your boats?

The structures are sitting on the Aquatex. Using a paper template of the roughed in harbor area, the glass company cut the glass using long straight cuts to connect the largest areas. The piece of glass ended up with 5 straight line cuts.


The boats sit right on the surface just like everything else. The reflections pull them down into the water. The beauty of the glass is that you can freely move or remove objects sitting "in" the water.

Originally Posted by AlanRail:

Crumpled and painted aluminum foil under decoupage works well to created the illusion of moving water. As you move, the foil changes the reflective surface you view giving the impression of moving water. But I like the textured glass as well for still water. 


CHANGING TOPICS:The issue I have is not the water but getting O-gauge looking LARGE ships, liners and boats. Lionel's tugs are great, but finding a comparably large ship to tow is difficult. The Disney Magic is 960 feet by 110 feet (by 10 passenger decks above water) So in "O" that's  20 feet by 2.3 feet (by 3 ft high)

But if selectively compressed you might get by by 6 ft by 1 ft by 1 ft. where is that found?


here you go Alan

use magic water.  Thin layers tinted according to area. Mix in caulk for rapids. Magic water is not brittle and doesn't crack when moved around.


A bit of iridescent white is added to rapids below


This has modpodge coating for rippled wind effect.


when clear caulk (white out of tube is added to wet magic water it doesn't go completely clear. a toothpick is used to spread it, and pick out the heavy lumps


Last edited by wsdimenna

The raw shower door glass received by the glass company comes in untempered sheets. I could have had it tempered after it was cut but there was no reason to do so. The shower door glass is called Aquatex. Actually, it's a specific style of pattern glass and it's also used for patio tables.


 Plexi simply does not have the same reflective qualities of glass nor have I seen plexi with the same pattern as Aquatex.

Last edited by DennisB
Originally Posted by hrspla:

You don't have to use shower door glass witch is made of tempered glass that can not be cut. I'm a glazier aka glass worker. You can buy plexi glass with the same texture and cut it to size. It is called aquatech. It can be bought at any local glass shop in ether 1/4 or 1/8 inch.

I had heard that, but when I bought mine, which was not cheap, they cut it to the size I needed, which was a trapezoid for Lake Chiemsee, as shown above. They gave me the left overs pieces, and I used one of them as a smaller, side lake to Lake Chiemsee, and I was able to cut it myself without any problems. I imagine the glass they used for me was not tempered? Lake Rowena was Envirotex.


Brian wrote:

"Alex: Beautiful water effects."


Art wrote:

"Alex - I really like the effect that you have created.  Great scene!"


Thank you! I was pleased with the results. Other examples posted by our other friends here are simply superb.


Alex

Last edited by Ingeniero No1

I model my water a little differently than most people. For most of my water scenes I use real water. Personally I can do more with real water, I just love to make waterfalls with real water.


83-22

Above was 3 tanks with real water for a sea world attraction, there was a dolphin swimming and jumping through a hoop, another dolphin jumping to get food from a trainers hand and a seal swimming around pushing a ball on it's nose

85-19

86-10

Above near the top right side is a working dam between the different sections of the waterfalls. The dam has 1 gate in the middle which would open every 1 minute to release water from the back side of the dam. Just before each minute the water would start coming over the top of the dam and then the gate would open.

92-33

Near the back of the lake are 2 men, each one balancing on their own log and as the logs roll in the water both men try knocking the other one off of his log.

92-51

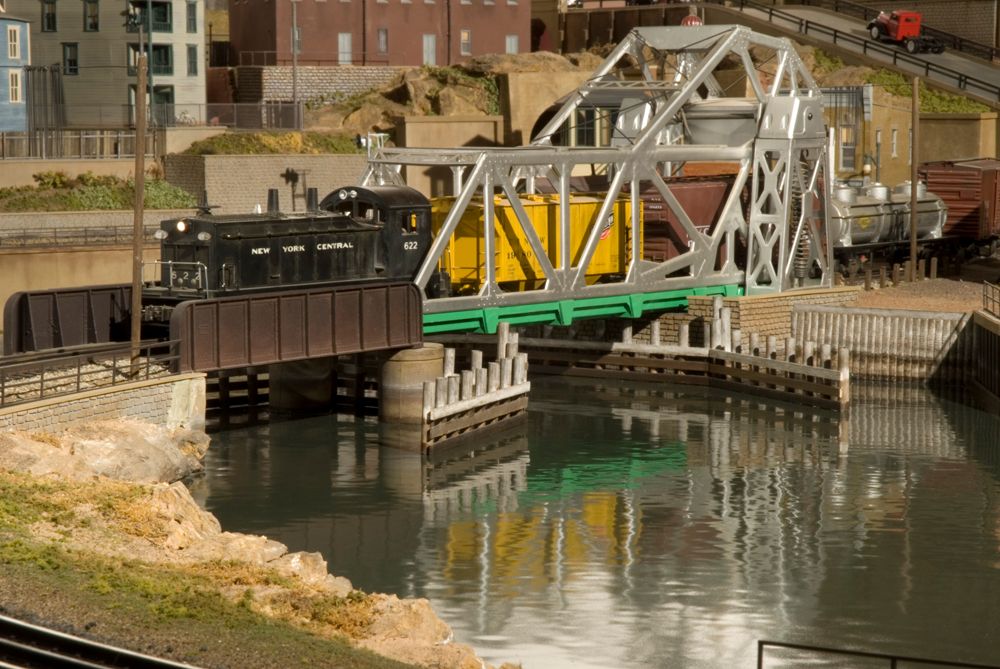
A bridge opening and closing.


92-52

92-55

480

2 separate waterfalls dumping into one lake

528

Here are 2 fire dept. ladder trucks squirting into the building which is on fire.

534

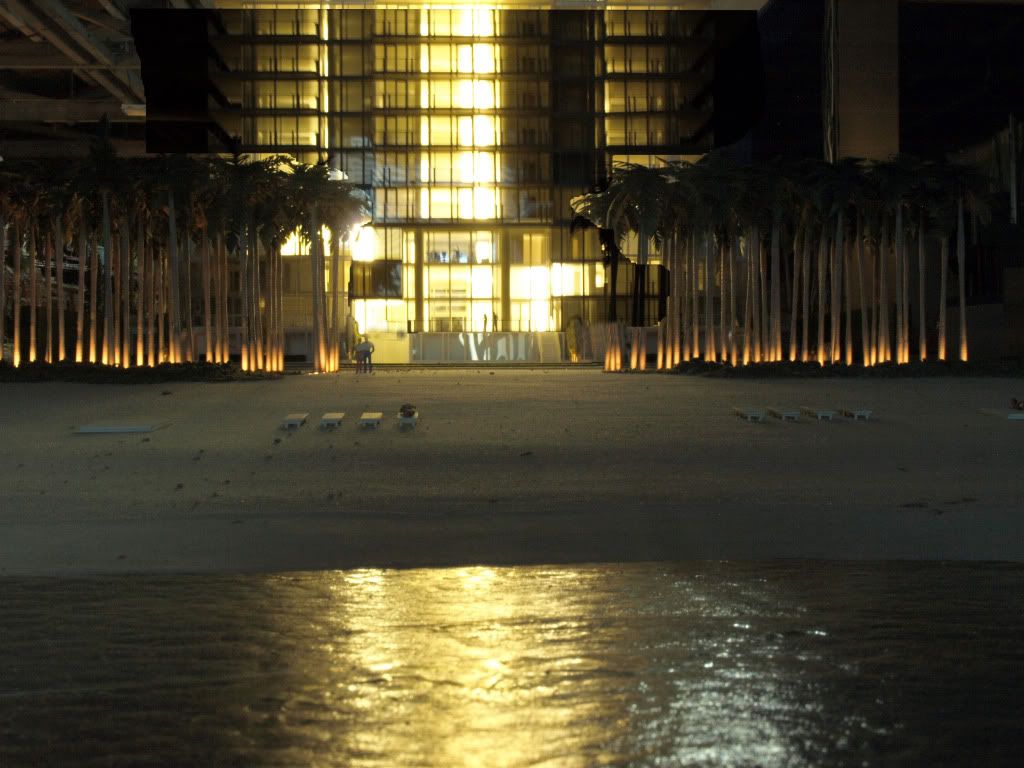
Here are a couple of water fountains operating with color lights underneath changing colors.

DSC00016

Above is a operating highway which crosses the lake. On the backside of the highway fog is rising off of the water.

DSC00042

dsc00817

dsc01923

Above is some simulated water which I used since this was a very small & remote area of the display.

pict0079

Real water used to make the waterwheel turn on the grist mill.

Plastic lake

Another simulated water which I used since this was a very smallarea to work with..

Waterfalls [1)

I have also had scuba drivers and assorted fish swimming under water. Along with boats moving and many other animations that I have built over the past 45 years.

Waterfalls


Attachments

Images (18)
  • 83-22
  • 85-19
  • 86-10
  • 92-33
  • 92-51
  • 92-52
  • 92-55
  • 480
  • 528
  • 534
  • DSC00016
  • DSC00042
  • dsc00817
  • dsc01923
  • pict0079
  • Plastic lake
  • Waterfalls (1)
  • Waterfalls
Originally Posted by AlanRail:

Using REAL water. My concern with using real water is rust, mold, humility all affecting the electronics. Also real water will not model scale water behavior.  


Otherwise. . . 

I understand some of the concerns on using real water and I had some minor problems in the beginning. But I learned from them and how to correct them. And to me they were minor(stupid on my part) and none of them affected any of my trains.


The main reason I play with trains is the action, and I don't mean just the actions of the trains. In my layouts I want more action, I want everything to move if it is possible. What I want in my layouts is simple, if people do it in real life then I want them to do it on my layouts. And that is why I started building my own animations about 45 years ago.


I guess my love with using real water is that I can do more with real water then imitation water. Please don't me wrong, there are times that I do use imitation water in my layouts. But if I have the room to use real water I will use it. You can see by some of the animations that I described in my earlier post why I like using real water.


Over the years I have taught some others on how to plan and build with using real water. But I do have to say that most of them never did understand and learn what I had taught them. They almost always made something that was so simple into a complicated monster. I do believe they thought that they could do better by doing it their way. There is a public display that I started over 30 years ago that I am no longer involved with that no longer uses real water for the simple fact that no one knows how to build with it.


May I point out that 3 icon train displays use real water in their displays. Two of the oldest displays are Roadside America and The Choo Choo Barn which I have got to give credit to for inspiring me from my young age to building my animations. I will always cherish the time that I talked to George Groff and him taking the time to show his work shop. The 3rd and newest display is Miniatur Wunderland in Hamburg, Germany. All of them use real water which is impressive to all that visit them.


Add Reply

Post

OGR Publishing, Inc., 1310 Eastside Centre Ct, Suite 6, Mountain Home, AR 72653
800-980-OGRR (6477)
www.ogaugerr.com

×
×
×
×
Link copied to your clipboard.
×
×