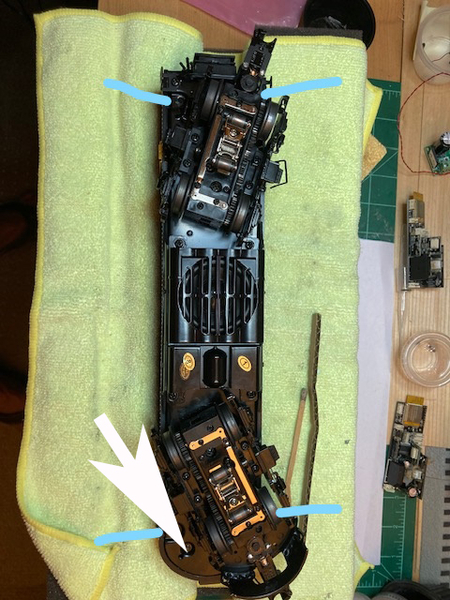
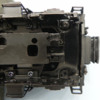
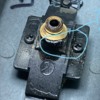
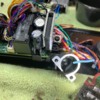
The smoke unit generates smoke, but the fan motor apparently is not running. I performed a 'feature reset' but the smoke motor is not pushing the smoke. I tried to remove the shell to get access to the motor, but when I removed 4 body mount screws per the manual (screws as shown below) the shell would not budge. I pulled the sides away from the frame, still it didn't budge. If anyone has pulled the shell from this engine, please advise. Thanks.
Replies sorted oldest to newest
Ed, I think there is a screw under the rear of each truck. Plus there are tabs that connect the shell to the chassis that have to be separated on the side of the shell....
I believe two of the screws on the tank are body screws, it ain't coming off without removing them. They're easy to spot, look for shouldered screw heads, they look like they have a washer under them.
@ToledoEd posted:The smoke unit generates smoke, but the fan motor apparently is not running. I performed a 'feature reset' but the smoke motor is not pushing the smoke. I tried to remove the shell to get access to the motor, but when I removed 4 body mount screws per the manual (screws as shown below) the shell would not budge. I pulled the sides away from the frame, still it didn't budge. If anyone has pulled the shell from this engine, please advise. Thanks.
Just went through this with a Premier GP30. Instructions were wrong in the manual. Maybe yours are the same.
1. Remove side frames from trucks.
2. Swivel trucks to the side
3. Two screws underneath each truck. They are shoulder screws that are tapered and screwed into plastic posts that extend down from the roof of the body shell.
John
@gunrunnerjohn posted:I believe two of the screws on the tank are body screws, it ain't coming off without removing them. They're easy to spot, look for shouldered screw heads, they look like they have a washer under them.
What John said. ![]()
Jim
Ted: I saw the tabs. They appear not to actually go into anything, rather it appears the shell sits on them. There is no screw head under the rear of the trucks
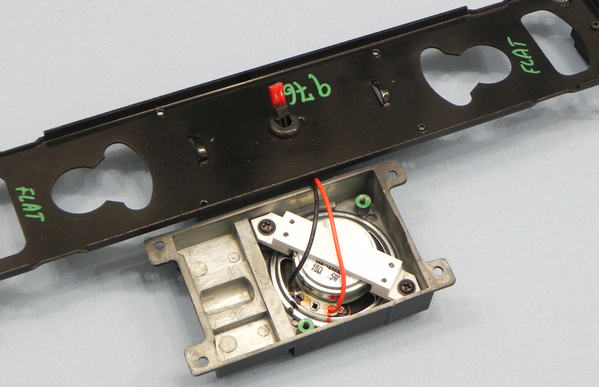
John, there are four screws that hold the speaker (the tank) to the chassis. None of them are body screws. No attached washer, like the 4 body screws I removed. Removing the tank screws just allows the speaker case to be removed. Nothing affecting the shell and the frame
John (Craftech): I removed the side frames from the trucks. No screws under the trucks. There are what appear to be the bottom of screws, but no screw heads.
I can move shell sides away from the frame, but that's about it. The only other possibility is the trucks themselves? I've never removed trucks...
@ToledoEd posted:John (Craftech): I removed the side frames from the trucks. No screws under the trucks. There are what appear to be the bottom of screws, but no screw heads.I can move shell sides away from the frame, but that's about it. The only other possibility is the trucks themselves? I've never removed trucks...
Don't remove the trucks.
I found another F-7 Manual with a different photo concerning body mount screws. This one has 8 body mount screws. I can't see the bottom of your engine very well from the photo so compare them to this screen capture.
Hope it helps.
John
EDIT: Actually the other four do not look like the tank/speaker mounting screws so I corrected above.
Attachments
Attachments
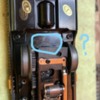
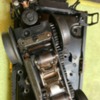
Thanks for the help. I looked at the screen shot and compared it to the bottom of my engine. I do not have the 4 screws indicated behind the trucks. Notice there are two screws in front of the rear truck, but they look like screw bottoms.
Attachments
Do you have a closeup of the extreme ends?
John
@ToledoEd posted:
Yes,
After you removed the original four screws you said you put something between the body and the chassis and levered that something to try and pry up the shell and it wouldn't budge. Is that correct?
If the fan wasn't working on the smoke unit the unit may have gotten hot enough to melt something which may be preventing the body from separating from the chassis.
You may have to work on prying it a little at a time, but to be safe unscrew the four screws holding on the tank/speaker enclosure. Then try to pry up the body. Maybe the speaker screws also hold on the body on your unit in addition to the other four.
John
@ToledoEd - if you look closely at the pictures you posted that shows the fuel tank, you will see that on each end of the fuel tank, there are two screws, however one is a slightly larger Phillips head screw that looks like there is a slight metal ring (or washer) around it - that screw holds both the shell and the fuel tank to the body and is about 3/4 inch long when removed - the smaller screw only holds the fuel tank to the frame and is about 1/8 inch long. Same thing applies to the other end of the fuel tank. Basically, the fuel tank screws that hold shell are diagonal across from one end to the other, the screws that only hold the fuel tank to the frame are also diagonal across the tank.
You also have to have remove the 2 screws on each of the frame (which you have already done). In other words, the shell is held onto the frame by 6 screws, all of which are the same screw in most cases.
@Craftech posted:Yes,
After you removed the original four screws you said you put something between the body and the chassis and levered that something to try and pry up the shell and it wouldn't budge. Is that correct?
If the fan wasn't working on the smoke unit the unit may have gotten hot enough to melt something which may be preventing the body from separating from the chassis.
You may have to work on prying it a little at a time, but to be safe unscrew the four screws holding on the tank/speaker enclosure. Then try to pry up the body. Maybe the speaker screws also hold on the body on your unit in addition to the other four.
John
I have removed the speaker screws. They are short and only attach to the chassis. However, the middle fan on the top of shell is a bit melted and popped out. You may be correct and something has melted making it stick. I’ll get more aggressive with prying. Frankly, that makes the most sense since all the screws have been removed.
@DG posted:@ToledoEd - if you look closely at the pictures you posted that shows the fuel tank, you will see that on each end of the fuel tank, there are two screws, however one is a slightly larger Phillips head screw that looks like there is a slight metal ring (or washer) around it - that screw holds both the shell and the fuel tank to the body and is about 3/4 inch long when removed - the smaller screw only holds the fuel tank to the frame and is about 1/8 inch long. Same thing applies to the other end of the fuel tank. Basically, the fuel tank screws that hold shell are diagonal across from one end to the other, the screws that only hold the fuel tank to the frame are also diagonal across the tank.
You also have to have remove the 2 screws on each of the frame (which you have already done). In other words, the shell is held onto the frame by 6 screws, all of which are the same screw in most cases.
Dudley, the four screws holding the tank/speaker on are small and only screw into the chassis. I’ve removed all four and the shell still sticks.
You may have to wiggle and jiggle. There is a metal brace in the nose for the number board lights. The wires from the ditch Lights can get caught on that metal brace and give you a hard time.

Attachments
Ron045, thanks. I do see the number board lights you mention.
Well, all my attempts to remove the shell have failed. The shell is connected, somehow, to the chassis. I just can't figure out how. I've removed the only four screws that are clearly body screws. Removing the screws holding the tank/speaker does not help in any way. I used far more force to remove it than I ever had to do do on any other loco, and I'm afraid if I used anymore, the shell would crack. Craftech suggested something may have melted creating the bond holding the shell to some component inside. I can't see to confirm, but as I said earlier, one of the fans on top melted a bit and it popped out. It's not molded as part of the shell. I looked in there to try to locate something that may be the problem...nothing. I'm stumped. I guess I'll run it without smoke and call it a day. Unless someone has another suggested solution, I'm going to quit. Thanks for all the help.
Do you have any thin metal blade or knife that you can get between the side of the plastic shell and the metal frame/chassis? Maybe something melded enough to cause a sticky situation. If you can, try sliding it all along each side of the chassis as well as the rear/back. Just a thought to try.
Ed,
Are you prying at the ends? That is what would most likely free it. Can you get an end to lift?
Also, you have a question mark after the part number. Is the part number incorrect or is that just because the title is a question?
John
ToledoEd
This is not bragging, but just to give you some background so you can assess my credentials:
I have extensive experience with the MTH Premier F7a. In my case its number 20-21360-2. These are only three numbers off than your model, and while the ones I worked with are two rail versions, I am sure the construction is the same. I made over 150 modifications to these locos to make them look closer to the prototype. The modifications were published in O Scale Trains #70 and 71.
Among the modifications were to lower the shells. Which I did by shortening the mounting posts. I can fully attest that there are only four (two at each ends) and they are the ones you found. There are no posts in the middle of the chassis. In all four units that I worked with (I had an A-B-B-A set) the shells come off quite easily.
It looks like you have removed the chassis screws, so it may be a previous owner got glue stuck somehwre in there, or worse, something got melted in there. Possible sticking points are the shell to the chassis, the smoke unit gasket, the mounting posts, the number board, and the tether connector at the back. The last three are unlikely. The fact that your smoke unit failed suggests something has melted up there
The first thing I would do is what Dudley suggested Run a #11 blade around the chassis to see if something has melded the two together
Next, try rocking the shell on the chassis
Next stick the #11 blade between first the back of the shell, then the front. Try to pry up that end of the shell. If it does not come up (even a little bit) then it’s not the tether socket, mounting posts or number boards.
If that end does come up a bit, then the problem is at the other end
If none of these techniques move the shell at all, the more some more drastic measures are called for. If you are going to replace the smoke unit, try sticking a punch in there and tapping down on the unit. Or maybe just push hard on while trying to pry up the shell The idea is to break the melted gasket, if that is the case
Next, try a hair dryer, set on low, and gently warm up the shell around the chassis. Exercise extreme caution here. Try the prying up either end as you do this. Warm up the top as well.
If none of these work, squirt some WD-40 under the chassis mounting holes. Then screw the chassis screws a little bit of the way in, and rap on them with a ball peen hammer. Don’t bash them, just light taps. You are trying the break the shell loose from the chassis
Some of the attached photos may help
Good luck!
Attachments
I have an idea Ed.
Do you have guitar picks?
Insert them all the way around between the chassis and the body and then start prying.
John
In all the years and all the locomotives I've disassembled, I've never had to resort to the extreme measures that John is talking about. I can't believe all that will be necessary!
Gunrunner, I’m going to video this engine and show what I have done/tried. Have you ever experienced a meltdown preventing a shell removal?
@ToledoEd posted:Gunrunner, I’m going to video this engine and show what I have done/tried. Have you ever experienced a meltdown preventing a shell removal?
I've never had one I couldn't get off. Truthfully, one of the 3rd Rail steam was the trickiest one I encountered. It appeared they actually add a final pipe after putting it together, and the only way to get it apart was to actually remove that permanent piece of trim! I didn't expect that, so I spent over an hour trying to jockey the boiler off before I gave up and removed the pipe. I recently had fun with a Lionel 4-8-4 Northern, in order to remove it's boiler shell, you had to pry the engineer out of his chair!
Diesels normally give me very few issues.
@Craftech posted:Ed,
Are you prying at the ends? That is what would most likely free it. Can you get an end to lift?
Also, you have a question mark after the part number. Is the part number incorrect or is that just because the title is a question?
John
The part number is correct. The question mark is for the title
Yes, I can get the front to raise up. Also the back. The sides can be separated from the chassis as well. But the chassis will not separate from the shell. It’s as if there’s a bolt right through the center of the chassis holding it to the shell.
@John Sethian posted:If none of these work, squirt some WD-40 under the chassis mounting holes. Then screw the chassis screws a little bit of the way in, and rap on them with a ball peen hammer. Don’t bash them, just light taps. You are trying the break the shell loose from the chassis
Not a bad idea to try, but I'd take a slightly different approach...
Rather than have the threads absorb the raps of the hammer, find a drift pin...or finishing nail...that will reach to the bottom of the post holes (shell molding). I don't believe the hole depth goes very much farther than the screw length. Regardless, unless the hole depth is so deep as to risk having the drift pin/nail punch through the shell, you'll do less damage to the already threaded area of the post hole.
BTW...If you use a finishing nail, be sure to cut/grind the point to flat or well rounded.
Don't have guitar picks?...I've used the flat type of wooden toothpick to maintain a gap for disassembly.
I'm really surprised that at least one end of the shell wouldn't yield sufficiently to give some clue as to where the evil grip lies.![]() I also find it hard to believe excessive heat has created a weld tough enough to resist your efforts so far. That amount of heat, I should think, would've created smoke/odor/deformity during operation to suggest something dire was in process.
I also find it hard to believe excessive heat has created a weld tough enough to resist your efforts so far. That amount of heat, I should think, would've created smoke/odor/deformity during operation to suggest something dire was in process.
By all means, though, let us know what finally lets go!! Would like to add to the list of incredible possibilities in problem-solving!![]()
KD
@ToledoEd posted:The part number is correct. The question mark is for the title
Yes, I can get the front to raise up. Also the back. The sides can be separated from the chassis as well. But the chassis will not separate from the shell. It’s as if there’s a bolt right through the center of the chassis holding it to the shell.
If you can raise the front and raise the back and separate the sides then it doesn't sound like a screw or other fastener is your problem. The center is caught on something.
Rocking back and forth and lifting doesn't help?
Do you know how to open a RailKing passenger car? The twisting action? Can you try that gently. Maybe that will free it.
John
John, I am familiar with the twist action. I’ll try that tomorrow. Thanks
Gents, THANKS FOR ALL YOUR HELP. IT WAS INVALUABLE. I REMOVED THE SHELL!!! Here's the chronicle.
I found this in a string on the "Model Train Forum" addressing the same problem I'm having with the same MTH engine:
"I put the problem "A" unit away for a while, then I took it back down again and went to my work bench. I pulled all the screws, removed the fuel tank and truck frames to get a better look along the edge of the chassis where it met the car body shell.
Seeing nothing, I took a small flat screw driver and levered against the chassis at the rear of the unit. It slowly started to give and finally popped loose.
Why was it stuck? It seems the smoke unit suffered severe overheating and actually had melted to the shell where the smoke chimney meets the carbody. The chimney looked fine except the hole where the fluid runs down and the smoke comes up, was sealed shut with melted plastic. I can probably drill it out. It almost seems it was a faulty plastic casting that didn't allow the hole to be formed in the molding process.
Here is the unit. The resistors where so charred, they disintegrated when I touched them. I figure I can get the smoke feature working if I can get a new smoke unit top PC board. The tank and hood are salvageable and the motor seems okay...
I removed the whole smoke unit for now...
Tom"
Gunrunner: you were also on the above string and gave advice about the smoke unit itself...2018!
My problem appears to be the very same. The front will separate with a bit of pressure. The very rear will not. I used a putty knife to put pressure on the chassis and shell...just when I thought the shell would crack "SNAP!" the shell separated. Indeed, the smoke unit was fused to the shell. As I dug out the wicking, it 'crunched' and I found what appeared to be metal, but was fused wick. I guess the fiber glass was so heated it melted and hardened. I never saw this before. Here's the post shell removal pics:
Smoke port in shell. First before I removed the brass holder. As you can see the exit hole is completely melted shut! Explains why the shell fan topside was also melted. Looks like a real blowtorch in there!
1, as I opened the shell; 2. I removed the unit holding the bras; 3. Smoke shell exit hole fused closed.
 Plastic melted into the smoke unit!
1. 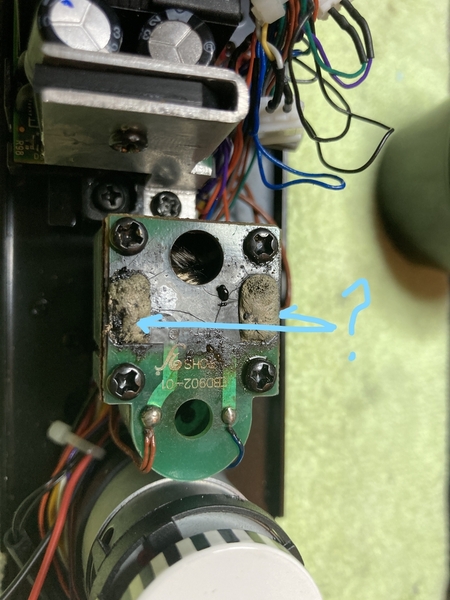 What is this?
 What's this, part of a gasket?

 Circled wick was fused into 'chunks' of melted fiberglass
I checked the MTH parts list and the smoke unit is 'out of stock.'
| AA0000033 | SMOKE UNIT / PS 2 & 3 / 18.75mm POST HEIGHT / 25mm W x 36mm L / BRASS CUP 3.9mm H (Out of Stock) |
Just my luck... I have a motor. I have Lionel resistors. Not sure replacing the motor and resistors makes any sense. By the way, any ideas why this happened in the first place? My wife observed and asked "what prevents this from happening again?" Good question.
Attachments
Happy you finally got it open Ed.
John
Thanks John...
In 2019 John (GRJ) posted using two 16Ω wirewound resistors in parallel (producing 8Ω) for MTH smoke units. They were 5W Ceramic coated ones with the ceramic coating cracked off.
I am also pretty sure the fan blades for the motor are the same as the ones on Lionel smoke units. Jeff at The Train Tender may have those.
The gaskets you can make yourself from automotive gasket material.
1/4" Tiki Torch wick can be used for the smoke unit wick.
John
John, thanks for the info. I’m going to try to do just that. I will also drill holes to open the brass and plastic stack. I’ll check with Jeff at The Train Tender as well.
Will this lionel resistor work:
SMOKE ELEMENT / 16 OHM / WIREWOUND - 691RS16OHM / ALT 691RESC016
Why not buy the whole PCB with resistors from MTH?
You can also buy the impeller.
And the smoke motor as well.
While you're there, why not just buy a new smoke funnel and forget about trying to use the melted one?
Attachments
@gunrunnerjohn posted:Why not buy the whole PCB with resistors from MTH?
You can also buy the impeller.
And the smoke motor as well.
While you're there, why not just buy a new smoke funnel and forget about trying to use the melted one?
Just looked: The PCB with resistors is Out of Stock
John
I think I still have some of the smoke PCB's in stock.
Gunrunner, I'll take one PCB please.. I've ordered the other pars as well. For the $64,000 question, do you have any of those pesky little screws that hold the motor in? I sent one into a different dimension a few minutes ago. Thanks.
Good Grief'... and yet another success'... Good work Ed'... However, Nancy's question needs to be addressed'.....😁


