Hello everyone.  

Like many on this forum I’ve decided to have a dedicated space in my basement to a proper 3 rail scale layout. I primarily plan to run more 1:48 scale locomotives and equipment as opposed to o-27.


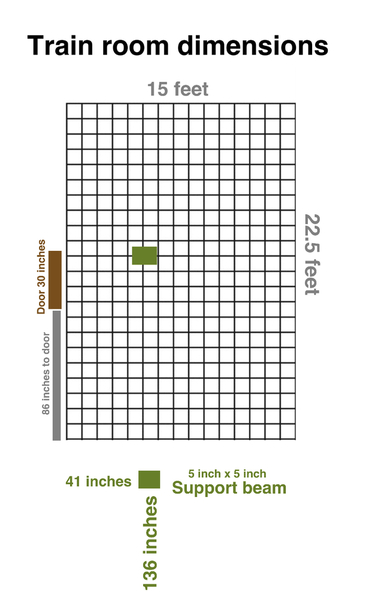
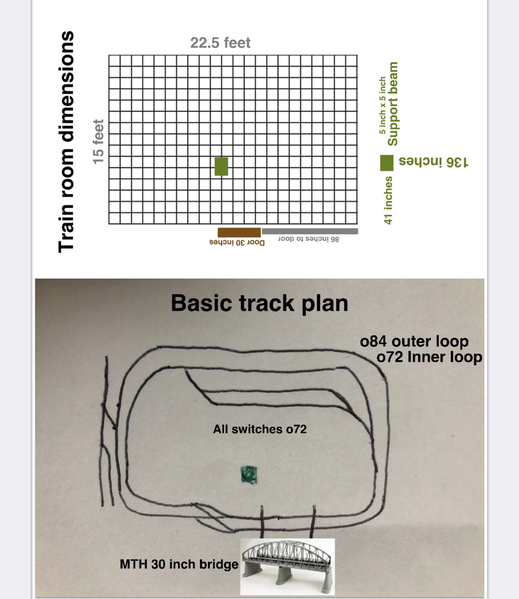
provided below is measurements of the space. It’s 15x22 and it’s not terribly large but that confinement has lead me to the idea of a wall based layout vs a table in the center. I’ve seen a couple of layout that have lift away bridges to reach the center. I’d like to implement those to access the center.

49F01CB5-7C93-4E35-9E49-278F41F4D508

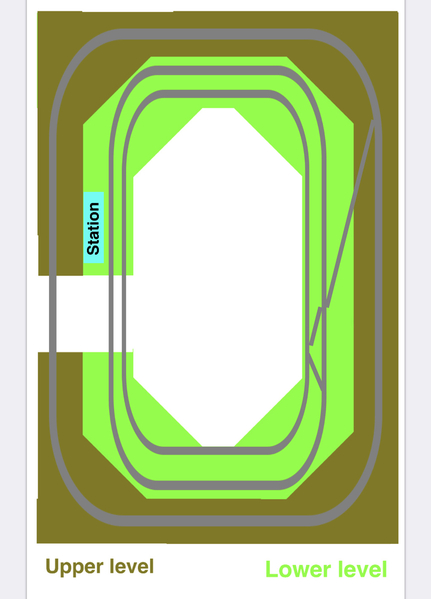
I haven’t access to any fancy softwares to experiment with layout designs. I’ve got a rough idea of what I’d want so I used clip art to create a rough sketch.  

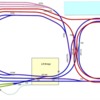
An upper level with a single oval loop with a couple industrial sidings and a lower level with a duel track mainline. I don’t want just giant ovals of course but the rough clip art mock up shows an idea of the track layout id like.

DA94A305-0883-410C-89AB-6E0E52FAD200

I’m very open to suggestions! I just want the type of layout where I can have 2-3 larger trains running simultaneously and I can sit back and enjoy.

Have you seen layout like this? Have ideas to improve? Better ideas to utilize the space? I’d love your input.

thank you.

Attachments

Images (2)
  • 49F01CB5-7C93-4E35-9E49-278F41F4D508
  • DA94A305-0883-410C-89AB-6E0E52FAD200
Last edited by The Bellcaptain
Original Post

Replies sorted oldest to newest

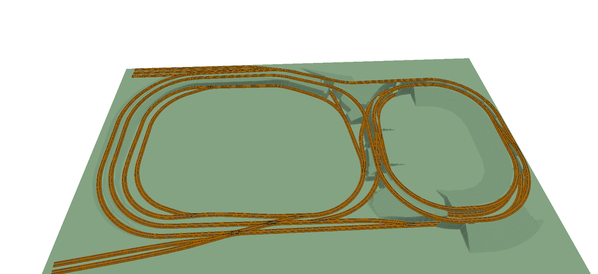
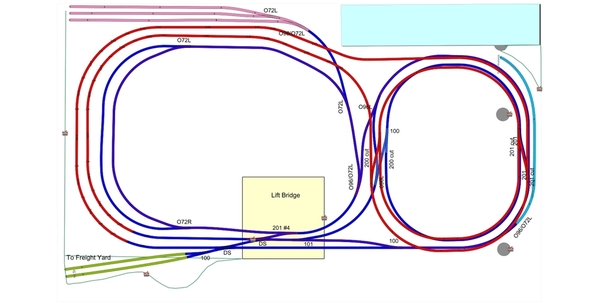
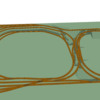
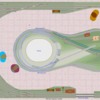
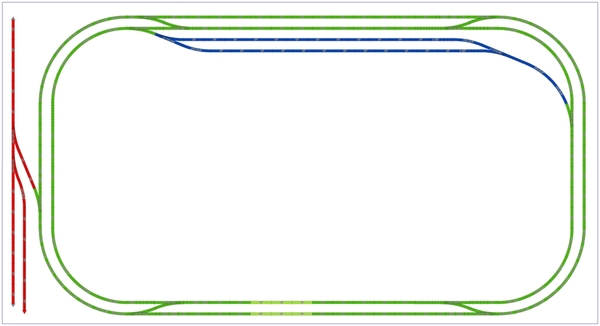
15 x 22 is plenty big for a nice layout.  I'm working in a similar space, my actual platform is 23 x 12.5 narrowing down on one end to 10.5.  I'm doing a two level folded dogbone as my main track, it will have about 140 foot of track for running trains as long as I like within reason.  All my curves are O72 or larger to accommodate all my big iron.  The two tracks at the lower left go out to an 8 track yard that's not shown.  Also not shown is the lift bridge that goes into the open center.

New Train Room Finally Getting A Layout!

John's Track Plan 3DJohn's Track Plan

Attachments

Images (2)
  • John's Track Plan 3D
  • John's Track Plan
Last edited by gunrunnerjohn

Bellcaptain,

You have tons of room for a nice layout.

Since you asked for comments, I will give you one that I think many others will give as well.    Your diagram indicates that the current plan is for three large ovals.   I can tell you that you will soon get tired of watching your trains go in nothing but ovals.   Figure eight type designs in the middle, with diagonal and 90% crossings really add interesting movement and countermovement to the motion of the trains.

Also, for simplicity, you are currently planning to have basically straight track runs connecting the ends of the ovals.   I believe you will also get  really tired of watching your trains just travel past you in straight lines.    Adding curves and bends in the straight runs will really bring the running trains to life.

Hope this helps.

Mannyrock

@Mannyrock posted:

Bellcaptain,

You have tons of room for a nice layout.

Since you asked for comments, I will give you one that I think many others will give as well.    Your diagram indicates that the current plan is for three large ovals.   I can tell you that you will soon get tired of watching your trains go in nothing but ovals.   Figure eight type designs in the middle, with diagonal and 90% crossings really add interesting movement and countermovement to the motion of the trains.

Also, for simplicity, you are currently planning to have basically straight track runs connecting the ends of the ovals.   I believe you will also get  really tired of watching your trains just travel past you in straight lines.    Adding curves and bends in the straight runs will really bring the running trains to life.

Hope this helps.

Mannyrock

First off Mannyrock thank you for your input! I realize this is a bit rough on paper right now. I do not want just 3 giant ovals with straights and 90 degree turns. I apologize for the poor visuals I provided. I was just trying to explain in a very basic bare bones way the design of the layout I'd like.

My biggest suggestion is get SCARM. It is free for up to 100 pieces of track but I can tell you the paid version is worth every penny and it is reasonable. My second suggestion is make sure you can get from any loop to another without having to BACK UP! That means two sets of switches. Third is DON"T BE AFRAID. Especially to ask anything on this forum. The Best people are right here to help you.

Curtis

@CurtisH posted:

My biggest suggestion is get SCARM. It is free for up to 100 pieces of track but I can tell you the paid version is worth every penny and it is reasonable. My second suggestion is make sure you can get from any loop to another without having to BACK UP! That means two sets of switches. Third is DON"T BE AFRAID. Especially to ask anything on this forum. The Best people are right here to help you.

Curtis

SCARM Isn’t really an option for me as I use a Mac. I realize there are various 3rd party websites that provide semi-untested workarounds for windows programs on macs but I’d rather not purchase an item just for the “chance” of it working on my current laptop.


I have tried Railmodler off of the Apple Mac store and need to fiddle with it more before I’d purchase the full version.

I run Scarm under Linux using WINE.  I “believe” you can run a version of wINE on Mac OS.  As mentioned there is a free version of Scarm which is fully operational, except for the 100 track limit.  So you shouldn’t need to purchase anything before you try it out.

Scarm is a very good product, and their support is great.


EDIT BTW... I just saw that there is a PlayOnLinux version  for Mac called PlayOnMac.  this simplifies the WINE process greatly

Last edited by EastBay

I would highly respectfully suggest to you to not simply run around in circles.  That has been over done.  Those types of layouts keep the average person's attention for a very brief period.

You have the kind of space most people can only dream of!  Make the most of it.  There are options other than large loops or circles of track.

Do NOT NOT NOT duck-under or crawl or climb on top of a layout.  With your space, that is completely unnecessary and inconvenient.

With the kind of space you have, you can come up with a plan whereby you may access everything within easy reach, 24 inches or less.  Your knees and back will love you for it.  TRUST ME.

Take your time.  Before you start laying a big circle / oval of track, you need to consider how you and others will be involved in this layout after its built. 

You need to locate and carefully research model railroad DESIGN information; not just look at track arrangements. 

The very most important thing to consider is PARTICIPATION.  How will you and others have fun interacting with this creation once its completed?  And, make sure everything is with 24" inches of reach.  Down the road, with more experience, you will be glad you did this.

I should have added ensure your aisleways are 36 inches wide so people may get by one another.

What are your layout goals?  What exactly do you want to do?  How are YOU going to be involved and this is 50 plus years of experience telling you this: your answer should NOT be standing idly by looking doing nothing.

Who (name) is your layout?  Where is your layout?  What is going on on your layout?

I would recommend you consider constructing an operational (instead of a display) layout because that will provide you with hours and hours of potential fun.  Display layouts are good for places where the public passes by and just want to see the trains roll.

Too many builders in our great hobby take away half the fun by eliminating the need for human interaction in a layout.

Sorry, I've given you way too much to think about.

I just hope you aren't another, like I was many years ago, who builds an-overly wide layout where track and switches are out of reach and there's nothing to do less watch.  Then when you get bored, you've spent all that money and invested all that time, and are starting over from scratch.

Good luck and best wishes...read and research DESIGN prior to laying track.  In the short term, lay some track on the floor and enjoy it until you come up with a good design plan.

My thoughts so far:

1. If you go with a layout and want to watch the trains just go by, make sure you leave floor space for a good chair or small sofa.  Don't want to have to leave the room if your feeling tired and need to sit for a while!

2. How high is the upper layer you mention in your plans? is it tall enough you could build a 'massive bridge' across the width of the room connecting both sides without impacting walking space?  Might be an opportunity to add quite the unique showpiece to your layout! (something magnificent with a vehicle deck and trolleys lines as well perhaps).

3. Consider a second smaller station servicing the upper line on the opposite side of the room too.  Your passenger services will thank you for having somewhere to go to.

4. Streetcars.  Streetcars will add an extra layer of enjoyment to control when your trains roll into town.

Last edited by DylTrains
@John C. posted:

I would highly respectfully suggest to you to not simply run around in circles.  That has been over done.  Those types of layouts keep the average person's attention for a very brief period.

You have the kind of space most people can only dream of!  Make the most of it.  There are options other than large loops or circles of track.

Do NOT NOT NOT duck-under or crawl or climb on top of a layout.  With your space, that is completely unnecessary and inconvenient.

With the kind of space you have, you can come up with a plan whereby you may access everything within easy reach, 24 inches or less.  Your knees and back will love you for it.  TRUST ME.

Take your time.  Before you start laying a big circle / oval of track, you need to consider how you and others will be involved in this layout after its built.

You need to locate and carefully research model railroad DESIGN information; not just look at track arrangements.

The very most important thing to consider is PARTICIPATION.  How will you and others have fun interacting with this creation once its completed?  And, make sure everything is with 24" inches of reach.  Down the road, with more experience, you will be glad you did this.

I should have added ensure your aisleways are 36 inches wide so people may get by one another.

What are your layout goals?  What exactly do you want to do?  How are YOU going to be involved and this is 50 plus years of experience telling you this: your answer should NOT be standing idly by looking doing nothing.

Who (name) is your layout?  Where is your layout?  What is going on on your layout?

I would recommend you consider constructing an operational (instead of a display) layout because that will provide you with hours and hours of potential fun.  Display layouts are good for places where the public passes by and just want to see the trains roll.

Too many builders in our great hobby take away half the fun by eliminating the need for human interaction in a layout.

Sorry, I've given you way too much to think about.

I just hope you aren't another, like I was many years ago, who builds an-overly wide layout where track and switches are out of reach and there's nothing to do less watch.  Then when you get bored, you've spent all that money and invested all that time, and are starting over from scratch.

Good luck and best wishes...read and research DESIGN prior to laying track.  In the short term, lay some track on the floor and enjoy it until you come up with a good design plan.

I’d like to thank everyone for the kind words of advice. Especially the reply by John C.

Area and era? The NYC/NS mainline between Elkhart and Chicago. Duel track mainline was what I worked on so it’s what I want to capture when running trains. As well as the vast array of roads, equipment and historical landmarks that you see in the Chicagoland area.

Burkuscircus52 thank you so much for sharing Kens layout plans. I love the idea of a large mainline that can run round a centered peninsula of sorts. (I’ve provided my favorite of his designs in this post

Once again I apologize for seeming to give the intention of just wanting 2 massive ovals to run on. I do have a clear vision of what I want this to be I just fail to clearly articulate vision that at times.
thank you.

Attachments

Images (1)
  • 195B03D7-FCD1-4FA9-9177-1191939CAEAD

SCARM Isn’t really an option for me as I use a Mac. I realize there are various 3rd party websites that provide semi-untested workarounds for windows programs on macs but I’d rather not purchase an item just for the “chance” of it working on my current laptop.


I have tried Railmodler off of the Apple Mac store and need to fiddle with it more before I’d purchase the full version.

I saw a post recommending SCARM and I tried downloading it to my iPad with no luck.  Probably not enough memory for it.  My laptop has been requisitioned by the boss for work.  I didn’t think to look in the App Store.

I built a 6x8 layout originally with a large oval and then a separate inner oval with a loop and a long dogleg.  With Santa slated to deliver a new engine for my son, I recently reworked the inner track.  I eliminated the loop and and I created 3 doglegs so we can have all 5 of his trains on the layout.  It’s in an 18x11 room in our basement so I made it tall enough to store barstools under it as well as room for storage.

Its not going to be the final layout as my son is still relatively young and he likes to have some flexibility.  We have acquired a few accessories too over the last two and a half years that haven’t been worked in yet.  I need to learn more about wiring to do that.  I would like to utilize one of these programs to maximize our space.  
Thanks for sharing!

Never having owned an iPad, please take these comments with a big grain of salt!

You can probably download anything small enough to an iPad, but SCARM is a Windows only program.  To have it work on an iPad, you would have to find a piece of Apple software that allows you to open and work with Windows software which would be a very convoluted process.  SCARM is a very small program, so most any old second-hand Windows-based laptop with internet connectivity, 2GB of memory and a small hard drive would allow you to use it.

Alternatively, there is a completely free, but more complex, track planning software called XtrackCAD which works on Windows, Linux and MacOS.  Since it creates its own file extensions, you can even create a plan in Windows and share it with someone using a different operating system.  The time, money and frustration you save with planning now will be well worth it in the end.

Be warned, though, that I don't know if any of this will work well, or at all, on an iPad only.

Chuck

Last edited by PRR1950

AFAIK nothing will run on an iPad. The App Store has apps that pretend to be design software, but they just let you fool around with limited non-scale track that have no relationship to any track you can actually buy. They’re more for kids who just want to fool around.

That said, you can always post a drawing of what you have or what you’d like and someone might put something together in SCARM for you to review. You need to provide dimensions of the work space, brand of track you want to use, etc., and have a lot of patience, but there are plenty of helpful folks here who might find some time to help. While it’s always helpful, and quicker, for you to have the software and learn to use it, don’t let not having it stop you from starting a thread and asking for help.

OGR Forum members have already offered helpful suggestions.  You mentioned that you have some accessories on hand.  Consider installing them with a plan based on real-world placement -- like actual railroads do. Trackside features give your trains meaningful work to do; i.e., pick up raw materials and deliver them to a factory or processing plant:

*  Dairy farm with a loading platform - send milk cans to a diary processing plant with a Lionel Milk Platform and Operating Milk Car nearby

*  Install a forest with logs to be leaded onto an Operating Log Dump Car -- send the car to the Lionel Sawmill for cutting

*  Operating Oil Derricks in an oil field; place an Oil Drum Loading accessory nearby

*  Install a factory and add your own signage to it, as:  METALWORX, Inc. (a steel culvert manufacturing company} with the Lionel Culvert Unloader and Culvert Loader at a nearby siding

*  Place a large RR station in the downtown area then place a Country Station on the opposite side of the layout; i.e., give a reason for passenger service to exist

*  Create a Main Street strip with these iconic accessories by MTH:  Fire Station, Gas Station, Car Wash. Then place some Ameritown buildings along that street (Bank, Post Office, Hardware Store, Rexall Drug Store, etc.). Then add people figures and period vehicles for added realism.

Once started on this trek to RR reality, you'll think of more possibilities. Carry on ...

Mike Mottler     LCCA 12394

I hope I didn’t hijack your thread, Bellcaptain.  I certainly didn’t mean to do that.  This is a great forum and a great resource because of the people here.

I joined about two weeks ago and I have learned a lot.  I had learned some before I came here from some other model railroaders at my local club that I joined this year.  It’s nice to have experience and passion to be able to lean on and show you the way.  I have experienced a lot of that here.  I really appreciate it.

I like your avatar pic, by the way.  

Whelp here we are 2 Months later. I've acquired nearly everything for the "tech" side. Legacy remote and base, DCS board and remote etc...

I've really narrowed down some definitive ideas. I really have to thank Ken-Oscale here on the forums for some of his fantastic layout plans.

It's between a 2 track mainline curved dog-bone style layout. Or a large 3 track main oval that hugs the walls of the room with a lower internal loop for industries to interchange cars with and have small switching sessions. I've got these plans down on rough paper but they both need revisions.


Hope to have a more physical update soon!

Lots and lots and lots of planning. I suggest you look through a few or more than a few layout magazines that are out there. See stuff you like and start planning.

Mine is 22' 6" x 12' 4". 2x8 main girders with a 1x4 flange and 2x6 legs. The grid is 1x4 at 16" o.c. The top is 5/8" AB plywood with homasote roadbed 45 degree router cut to simulate a high roadbed on the mainline. THAT was a lot of work! Atlas 3 rail throughout, mainly because I like the solid rail and it looks good.

SCARM software worked great for my uses. Stare at it, then stare at it some more. My revisions took more than a year until I finally worked out the kinks. Well 98% of them anyway. Then I printed it full scale. Then stared at it  and starred at it some more. Probably the best step I made in the planning because I saw the scale and how things looks full scale. Then I made a bunch more revisions and printed it again. I have made other posts that show it. Plan your bench work in case you ever have to move it.

Building this layout taught me tons. I always been an accomplished tradesman and know how to use tools. The really big lesson for me was learning to properly lay the track. Working with flex track and how to make accurate cuts (mostly with a table saw and some dremel). Making sure the radii and transitions were correct and that everything 'fit'. Again, and I can't stress it enough, planning, planning planning. Do a bunch of testing also to see how things work together. glue materials, cut materials, bend flex track, etc. It will be time and money well spent. I promise.

Currently completing the wiring and final track tweeks. Presently running conventional control but have everything in place to transition to command control.

To be honest, after I wired the inbound and outbound mainline, I've been enjoying just running trains. However, the next stages of construction and coming up.

Hope you like the attachments.

Much much more to come...


Rogue

Attachments

Images (1)
  • RRR Bench Work
Videos (2)
Layout 12.20.2020 01
Layout 12.20.2020 02
Files (1)

Based on what has been presented in the thread thus far, you might have too much room.  A 15x22 room with an oval-shaped 24" train layout all the way around leaves a clear space 11x18' (191 sf.) in the center.  If that open space in the center was 6x18' or so, everything would make perfect sense from an access perspective.  However, your leftover space is the size and shape of an entire room.  If that is what you want, then by all means go for it.  I personally would be curious to know what you were planning to do with all that leftover space in the center of your layout after your plan was realized.

So I’ve been experimenting with this design. I believe it came from board member obsidian? Please forgive my bad memory.

the issue I’m running into is the fact that I plan on using FASTRACK as a opposed to Atlas which is the track used in the models below.

any chance I could get some help or possibly commission a recreation in Lionel FASTRACK?

the yard and turntables can be excluded as I’m relocating both of them. I need the “mainline” design


thank you!

Attachments

Images (2)
  • 72565F89-8355-4DBA-BA85-DF5CA4C052DA
  • FB26D08A-7319-42C3-B5C2-CE66065BAFC2

Lionnn,   Your layout is one of the nicest builds I have seen on these pages.  The way you patiently tested the idea and slowly brought it all together was a very wise move.   Just like the GRJ project, you did not rush it.

Any encouraging bench work construction photos you have to post?  It seems like you may have a lot to share.

Thanks for your video post.

Having a worked out plan, pacing the construction, using quality benchwork & track elements, careful assembly and an interesting track plan provides a solid basis for the future.

Could you please comment on your curves?  It seems that you used multi radii or spiral transitions.

Last edited by Tom Tee

Belcaptian

Those dimensions are pretty similar to my room  You are on the right track with a track plan  The accessibility of reach(24)and walk arounds of (36) is spot on and very important. One day I will need a sawsall to rectify reach issues (but not today)

Other suggestions

Plan the view. From your main viewing area, (control area?),figure what you will see, your layout is big enough some areas will eclipse others. Figure your and your guests main ‘viewing location and work from there. Elevations are your friend

Don’t be discouraged by the quality of work you see on the forum, some, most is on a professional level. I’m not saying yours will not be, but is very easy to compare and get discouraged.This hobby is so multi faceted everyone excels in one aspect or another.

Don't  stop building if you can avoid it. Run trains as soon as possible. It’s one of the few areas in life you have large control over, enjoy it. Like is frequently said on the Forum it’s your Railroad

I also found the book Model Railroad Scenery and Detailing by Albert Sorenson helpful in its step by step approach.

Have fun.

Steven Taylor

Westfield P & S RR

Lots of stuff here that I find interesting, as I have a similar space - including a support column in almost the same location.

There's nothing wrong with being a loop runner if that's your objective - it can be very relaxing.  Curves, elevation changes, and scenery can add to the interest.  Having a few sidings for accessories or industries can allow for an occasional change of pace.  Running a point-to-point railroad isn't for everyone.

A lot of planning can be done just with pencil and paper, especially since you'll probably end up using a lot of flex track. 

My only specific suggestion is to accept the fact that you'll probably do something that you will end up wanting to change, so don't ballast the track until you've let it run for awhile.

So, both designs are a folded dogbone.  Do you care if your column is in one of the bone ends or do you want it to stay outside of your layout?  What minimum size curve do you prefer?  What orientation of the dogbone ends do you prefer in the room (long side or short side)?  People here are willing to help, but don't want to recreate the wheel if you don't provide detailed information.  The biggest problem with FasTrack is getting all the fitter pieces in the right locations to close the loops.  This will also impact where you might be able to cut switches in for sidings, yards and industries.

Chuck

I GIVE UP!

Sort of...

Hello to any and all revisiting this thread. Ive had quite the struggle trying to piece together this layout ever since I began. Track plan after Track plan. Large purchase after large purchase! Switches and transformers and Bridges. Hoping that if I eventually Cobbled together enough pieces that it would somehow assemble itself.

Yet the track remains unconnected on a bare concrete floor under dull shop cord lights. What was it I was trying to build? Was this what I wanted?

E3417289-0834-4513-A7AC-2C8BD0822A13
(Yes I really did use a pen and paper. Sorry)

And after months of pondering and shaping I've come to a simple answer. No! Im not having fun! Model trains have always been my escape. The realization that I was genuinely hating the chore this had become made me want to completely start over. (Not that hard with just track on a floor...)

So why am I posting this tiny mini rant? Because I really do want your help. I've a loose idea what I wanted the track plan to be.

All my hard work was for 2 Ovals and some Sidings? No! Surly we can Do better! So I come before you all hat in hand. PLEASE give me some ideas! Advice!


At the very least I’ve finally come up with a name!

09B212A5-7452-4DF5-953A-A6E46338CBC7

Ideally Id like to Incorporate the Items I already have

- Complete Loop of o84

- Complete Loop of o72

- 4 RH o72 switches

- A whole gaggle of straight track

Id chosen the Ovals for the sheer simplicity of reaching any and all parts of the layout without needing to crawl under anything or have parts of the trains obstructed against a wall I couldn’t reach.

What I’m struggling with the most is the fact that I’ve somehow over complicated 2 ovals in my mind. Any idea where to take this project would be very much appreciated. A central island table layout? Perhaps a different configuration with my current wall mount design?

I really do appreciate the folks that have helped me get this far at the very least. Hope for a better update soon!

Attachments

Images (2)
  • E3417289-0834-4513-A7AC-2C8BD0822A13
  • 09B212A5-7452-4DF5-953A-A6E46338CBC7
Last edited by The Bellcaptain

I think you are having trouble coming up with a plan because you haven't decided what it is you want. Asking other people "what do I want" is going to get you a bunch of "this is what I would do if I were you."

So here is my "this is what I would do if I were you" and you don't have a definite track plan. Make a decision on what your physical boundaries are. Around the room or up against the wall? How wide and how high will your benches be? One level or two? You can sketch this with a drafting compass and scale ruler. This will give you a list of bench work items to plan for and also a check list to use to determine if your track plan will work. You have started a good list of what you want so keep those thoughts going. Don't forget, it's your layout.

Enjoying the exchange of ideas - MANY good suggestions above.

I especially like the suggestion of sweeping curves that don't run parallel to the wall or table edge - it will greatly enhance the visual appeal.

Your folded dog-bone plan looks interesting - a combination of running and operations if desired.  Some find loop running to be tedious, but it depends on your interests - if you enjoy focusing on creating scenery and details, it can be satisfying, but it's YOUR choice.  Just be sure to have a comfy place to sit.  And don't expect to create the perfect plan the first time around.  Also, consider storage and accessibility for the items that aren't on the layout. 

@The Bellcaptain - Based on the road name you've chosen, I'm wondering if you're located in northern Indiana.  I grew up in South Bend.  In case you aren't familiar with them, there are several interesting clubs and other resources in that area - I don't want to clutter the thread with the details, especially if you don't need them, so send me an email if I can help (I don't have messaging on the forum, and your profile doesn't include an email address).

One thing about planning, it prevents you from wasting money on "stuff" that will not fit on your railroad when finally built.  If you look around this forum and other model railroad forums, you will find that most model railroads fall into one of several classes; 1. ovals (folded and otherwise), 2. dog-bones (also folded and otherwise), 3. out and backs (a yard on one end with a main line run that ends with a reversing loop), 4. double ended reverse loops, and 5. variations of point-to-point.  All of these topics, and many others, are discussed in John Armstrong's Planning for Realistic Operation book which is readily available.

As others have said, nobody can give you an idea of what you want.  You have to read, look at examples and then decide what you want.  Then, find a way (invest in a cheap windows laptop (maybe even used) and use free software) to get your idea into an easily viewed image where constructive comments can be made by assisters.  The nice thing about planning software is that it allows you to "build" using the track type (FasTrack, Atlas, whatever) you have, or plan to buy, and see how well it will all work out.

Chuck

Alright for the sake of clarity I hope my biggest problem thats coming across is my indecisiveness. Of course another member isn’t going to magically going to know what I want. I don’t just want Track plan ideas. I want your advice! When did you decide on your layout? How? What would you do first? What’s some of the pitfalls to avoid? Have you seen layouts in a similar space/configuration to mine?

I thank everyone here again for their time. Mallard I already am a Part of a club! But I’d like to run more than 2 weekends a month 3/4 of the year!

@The Bellcaptain - I feel your pain. This post begins 11-2020 - at this rate looks like nothing gets built for a long long time.  Time to start building your layout.  Just go ahead with your double loop idea and start building. Get the bench work done, lay the track and run your trains. You might quickly find things you like and others not so much - you can always change your layout. I am on my 5th or 6th iteration and I know this one will change again.

If you don't have it already pick up a copy of Linn Westcott's book "How to build Model Railroad Benchwork"  I think you will find it helpful. The construction method makes it easier to change your layout - IMO.

I could add a lot more - but just lay some track and run your trains.

Jeff

In my similar space, the thought process was "how much surface can I fit in here, without a duckunder, while allowing for display shelves?".  Several years later, I still don't know if that was the correct approach, and folks have offered a lot of good insight in the preceding posts. 

I built a table that can be walked around (2-3' clearance to the walls), and then I built shelves along the walls.  In hindsight, it might have been better to go around the walls.  However, had I done so, it would have been difficult to create accessible storage for the items that aren't on the track.  So I guess that one question to ask yourself is how much stuff do you have that won't fit on the layout, and how easily do you want to be able to get to it.  One can build shelves along the front of the benchwork, but doing so exposes the shelved items to knees, feet, and curious children.

As for indecisiveness, I'm a member of that club.  My advice on that is to build benchwork that you think will work (use screws, no glue), lay some track (don't ballast it), run it for awhile, and see if you like it.  Chances are that you won't like some or all of it - so remove the track, reconfigure the benchwork, and try again.  If you go with L-girder benchwork, it's easy to make areas larger or smaller.

At your club, make notes about what you like and what you don't (the layout, not the people!) and apply that information to your planning.

Don't feel like it has to be perfect the first time, and don't be afraid to change direction on something that isn't working.

@ScoutingDad posted:

@The Bellcaptain - I feel your pain. This post begins 11-2020 - at this rate looks like nothing gets built for a long long time.  Time to start building your layout.  Just go ahead with your double loop idea and start building. Get the bench work done, lay the track and run your trains. You might quickly find things you like and others not so much - you can always change your layout. I am on my 5th or 6th iteration and I know this one will change again.

If you don't have it already pick up a copy of Linn Westcott's book "How to build Model Railroad Benchwork"  I think you will find it helpful. The construction method makes it easier to change your layout - IMO.

I could add a lot more - but just lay some track and run your trains.

Jeff

You type faster than I do!

Bell Captain,

To answer some of your specific  questions:

I did not decide on my layout, until  putting  a masking tape outline of my proposed table top on the concrete floor of my basement,  hooking together all of the track of my proposed layout  on the floor inside the tape boundaries, running a few power lines to the tracks, and running my locomotives with cars on it, on and off for  about 4 weeks.   Don't worry about wiring the switches, just turn them by hand.  Don't worry about building raised levels, this is just  a prototype test track. 

You are then going from the theory of the drawing board to the practical issues of construction.

Sounds like a silly process, but it is not.  Problems with the initial layout will quickly reveal themselves.   Tight turns, short pieces that need to be custom cut, overhang areas, curves and sections that should fit on paper but don't quite fit in real life, boring curves, boring long runs, delays or  problems in changing from outside loops to inside loops with the proposed switch locations, etc.   

And then you start eliminating these problems one by one, on the floor, by adding extra switches, altering curves, altering long straight runs, cutting a few custom pieces, etc.   Then you test again. 

More problems will be seen.  Alter again however you like to fix them.

After you do this about 3 times, you will be confident in the layout you are proposing.  Your trains will run fine.  You will gain lots of new insight.

Then, unhook i(disassemble) the track in large track runs, leaving 3 or 4 tracks sections hooked together when you do it, and reassemble the whole thing on the table top.   Oops, your table may be 2 inches too short or long here and there.  No problem, alter the layout a bit or add to the table a bit.  Reassemble the entire thing on the table top and just lightly tack it down.

Now, hook up the wiring and run the trains again. 

Oops, an uneven place on the table top.  Oops, coming around this sharp turn too fast will throw a fast PostWar engine over the edge.    No problem, make final adjustments.

Now,  in my mind, you are ready to actually put down the layout on the board.  Use a pencil to outline the outer edges of the track,  pull up your tacked down track, and start building your ramps etc.

For me, this designing and building a layout.

I honestly think that you are way overthinking the layout design, because you feel that once you choose a design, you MUST assemble THAT design and screw it down on the table top, and then you are stuck with it.  The great thing about the O gauge hobby is that you are not stuck with it.   Constantly re-thinking, adjusting, adding and subtracting are part of the process.

So, just get started!  You will feel better about it.

Hope this helps.

Mannyrock

You have done some thinking about what you want to do with the trains.   I think that is most important consideration.    The spectrum runs from 3-5 loops with trains continously circling without interference while you watch and sip to the other end of a really operations based point to point layout with no continous run that requires you run the trains hands on and do a lot of switching and movements.     And there is everything in between.   

My personal experience is that the continuous loops lost my interest pretty quickly once I had scenery built and the thing wired.    I built at least 3 like that ranging from 4x12 to single car garage size.      Then I moved on to add more switching based operations and converted the garage layout to point to point but it still had a continuous loop on one level that I seldom used.     The layout became a lot more fun to run and I wanted to add various additional cars to provide more "service".      I designated to 2 stub tracks on the layout as "interchanges", one with the C&O and one with "PRR".     Then I had 8-10 industrial spots to set cars in and out of.    My basic operation was that cars came off the interchanges onto my RR and were moved to the industies.    Empties and shipments were then delivered back to one or the other interchange.    To make this somewhat random, I cut one inch long pieces of plastruct I-beams.     I put white tape on the webs.    On one side I would write the name or initials of one of the industries and on the other side the initials of one of the interchanges.    I think separated these by car types appropriate to the industries, ie boxcars, hopper, gondolas, flat cars, etc and placed these in little boxes above eye level.     When the cars were on an interchange, I would reach into the appropriate container for the car type, say a boxcar and take one out and place it on the car on the interchange with the name of the industry facing up.    I would do this for all cars on the interchanges.     then I would pick up the cars and move them to their destinations with my locomotive.    when I was done, I would flip the tabs over on top of all the cars at the industries to tell me which interchange to deliver them to, the next time I ran trains.     I found that to be a lot of fun and generally with about a 15-20 cars on the layout,  doing the "work" took me at least a half hour.

so my advice is to think about what you want to do, come up with a track plan for that, and then finally decide what the "table" or benchwork will be to create that.

Hello Bell Captain,

Yes indeed, time is always a constraint and issue and also finances are too.  I am in the process of tearing down my Missouri Plywood RR (a hi-rail plywood nearly scale to scale mix of prototypical and collectible rolling stock and power units of all eras).  My layout to replace will take years to get even the mainlines and yards in place on the benchwork.

In planning my new layout, I took my planned allocated space, thought about what size curves, how I have operated the past 25 years, and incorporated that into my thoughts about my new set up.  But I first thought about the space and benchwork.

Thinking and wondering, planning is awesome, and when contemplating your start, do think about doing it in stages, and getting part of your benchwork down so you can just lay loose track to run a few things.  Having meets and clubs can scratch that operating itch in a great way.  You are thinking ahead, and that is always a great first step.  Kudos.  

Last edited by Commodorefirst

Well guys, there's thinking ahead, . . .and then there is agonizing ahead.

I think our Poster is getting exhausted with all of the possibilities and problems just floating around in his head, which is understandable, because you can't solve real world mechanical issues with things just floating around in your head.  At some point, you need to start building and solve as you go.   By doing this,  you convert theoretical issues, which you can't actually put your hands on, to mechanical issues, which you can easily solve by simple hand tools and track pieces.

We aren't building a space craft here.  Nothing is going to explode and nobody is going to perish if we end up with a curve that is too tight or a design plan that is a little off.   

Bell Captain, . . .start building and be happy!  You can easily solve any problem that comes up, especially with the advice of all of the experts on this board!

Mannyrock
@ScoutingDad posted:

@The Bellcaptain - I feel your pain. This post begins 11-2020 - at this rate looks like nothing gets built for a long long time.  Time to start building your layout.  Just go ahead with your double loop idea and start building. Get the bench work done, lay the track and run your trains. You might quickly find things you like and others not so much - you can always change your layout. I am on my 5th or 6th iteration and I know this one will change again.

If you don't have it already pick up a copy of Linn Westcott's book "How to build Model Railroad Benchwork"  I think you will find it helpful. The construction method makes it easier to change your layout - IMO.

I could add a lot more - but just lay some track and run your trains.

Jeff

Ballcaptain, I have to agree with ScoutingDad.  The plan I showed back in November is what I call Plan D.  Plan A was scrapped before I started building benchwork.  Plans B and C were started, some benchwork and track laid.  Your freehand drawing a day ago looks a lot like the computer drawn plan from back in November.  That's okay, but it sounds like you are running into 'analysis paralysis.'  I would suggest just building some benchwork, lay some track, and see how it works out.  It is only then that you will start to figure out what you want.  That's what happened to me.

Mark has a good idea and one I was hoping to guide you to. It would be of great benefit to you to set up a couple of loops and a few sidings to play with for a while. This is not intended to be your final layout, just enough to allow you to loop trains and or do some switching of cars.

I did something like this for about a year before starting my current layout built. I was getting much of the same advice about loops, sidings, industries, etc. My experience with that prototype layout led me to realize that I do like occasional switching but I'm not really interested in industries at all. Switching cars showed me the many issues with couplers, weight, etc. that start impacting those operations. These can all be addressed but they aren't going to be high on my list of things to do.

Get after it... and, be thankful you are not stuck in the attic!

Go around the room (because you can).

After a month of planning and realizing I was spinning my wheels...  I decided to build it and that they would come.

I started construction on 8/30/20 (68" x 21')...

and, on 9/22/20 I had this... (my own structural take on things)... @ 240lbs I can easily crawl around on it.

Attic RR - 02

Running TRAINS 10/27/20 (my B'day)!

IMAG0291

Never stop improving!  The PUNCH-A-HOLE through the knee-wall project started 2 months later.

Attachments

Images (2)
  • Attic RR - 02
  • IMAG0291

Turkey Hollow Dan filled in some more detail of what I was getting at.  My Plans B and C had turnback loops with 042 track.  The first concept was to build a rollout section to clamp onto the stationary layout to give me access to the back side of the loop when necessary.  The prototype actually worked.  The second concept had the same end loop, but two stacked on each other for an out and back.  I finally decided I didn't like the depth of either, and went with the around the room with a lift up bridge to get into the center of the layout.

Dennis has done a fine job building his layout in stages, and yes he has to work around his attic room.  His addition with a loop into his knee wall has worked out well, and it is surprising how he has good access.  I am not like him.  Though I only weigh in the 170s, with one replaced knee and lumbar fusion, there is no way I am going to be climbing up on things anymore.  Believe me, in my working days, I was always climbing up, over, into tough spots.  Those days are done, and I built high enough that I can wire sitting on my little two foot-high padded roll around work stool.   

The original track plans that you posted are ones that Obsidian and I did.

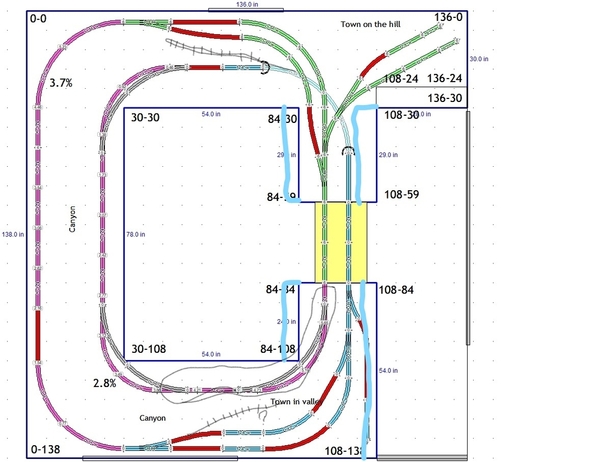
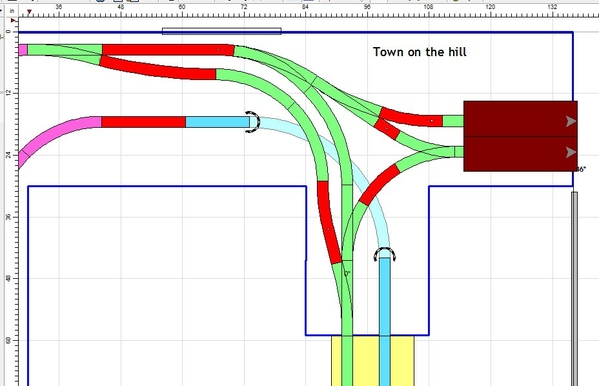
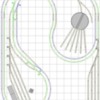
I've posted a first take on an around the wall layout based on your sketch.  I did change your crossovers to something more prototypical and operationally useful.  My interest is in operations, and my designs reflect this.

Mainline spacing is 6" between centers.

Jan

Bellcaptain v1

Attachments

Images (1)
  • Bellcaptain v1
Files (1)
Last edited by Jan
@trestleking posted:

All good suggestions !   I went down to the basement tonight & threw down a 6’ x 16’ loop and ran some trains.  My space has somehow “shrunk” so it’s back to the planning, but putting down the track helped me gain perspective.

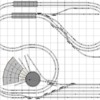
Not as easy to follow as the digital versions but it works for us.   Sorry the scan is so bad.   But you get the idea.  This is 13x21 roughly.   A lot can be put in a small space.   7E0A499E-471D-4804-B9B9-1E43B2BFA8B1

Attachments

Images (1)
  • 7E0A499E-471D-4804-B9B9-1E43B2BFA8B1

Add Reply

Post
The Track Planning and Layout Design Forum is sponsored by

AN OGR FORUM CHARTER SPONSOR

OGR Publishing, Inc., 1310 Eastside Centre Ct, Suite 6, Mountain Home, AR 72653
800-980-OGRR (6477)
www.ogaugerr.com

×
×
×
×
Link copied to your clipboard.
×
×