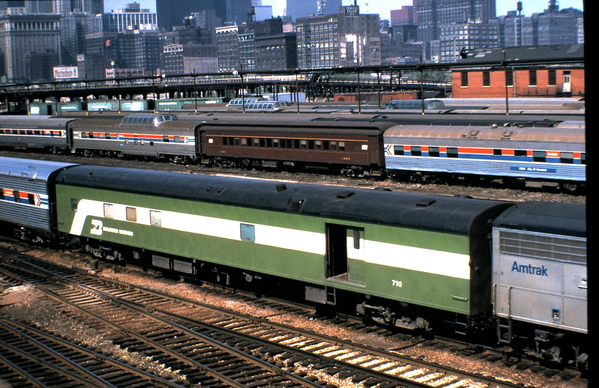
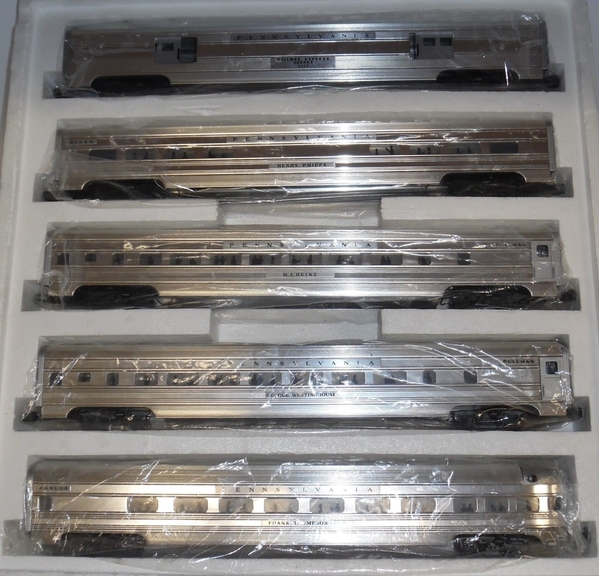
I believe I just rode exactly that car on the Coast Starlight. They call it a "Parlour" car, and told us it was converted from a Santa Fe car. They also told us management wanted to get rid of them. It was very nice, but I remember it being even nicer ten years ago before they decided to sell meals in it - the tables are ok if you are 5'5" or shorter. The wine tasting was nice in 2003, but very regimented now. You have to sit in your seat and do exactly as you are told, and you get a couple of drops of wine to taste.
Larry any up dates on your project? Hope you can share more pictures.![]()
I am working slow as molasses (more like a diminished motivation). The interior is about ready for paint and I will share pix soon. I am much better at beginning than finishing projects. Update relatively soon.
Larry, thanks for the update!
Yep....I too am looking forward to an update since many of us got all fired up and excited about this project!!! Would love to see some pictures especially of how the exterior and windows turned out....
Alan
Larry....any update on the project (yeah, I brought back a 4 year old thread!)....Anybody else do this K-line conversion?
Alan, glad you did! I have many 18" and 21" alum K Line cars. The Golden State and Cal Zephyr are my favorite. Always looking for more K Line alum cars, and for ways to improve details, though not many are necessary.
Jesse TCA
Jesse....I am sort of a passenger car freak...so I enjoy all of the manufacturers versions but I especially like the Kline 21" cars. A set of the Texas Special cars produced with Kline tooling by Lionel are on the way to my home and should be here hopefully by the weekend or early next week....!
Argh, I knew you fellows wouldd find me out. I worked diligently on the scratch built interior until I diverted my attention to completing the second level trackwork (probably late 2014). I determined how many passenger figures I would need to populate a 1957 El Capitan prototypically--and came to a dead stop. The pieces are sitting on a table behind me as I write this. I have yet to determine how to glaze the new window cutouts, but the layout has developed all sorts of ghosts and gremlins and I just never come back to it. Someday I will get back to it and I guarantee pix of the finished product. Only burnt out switch motors, TMCC signal problems, and my inability to remember just how I wired the layout so I can troubleshoot some voltage loss stand ahead of the Lounge Car. Hopefully this thread revival will get me off my backside.
Larry the Procrastinator
Larry posted:Argh, I knew you fellows wouldd find me out. I worked diligently on the scratch built interior until I diverted my attention to completing the second level trackwork (probably late 2014). I determined how many passenger figures I would need to populate a 1957 El Capitan prototypically--and came to a dead stop. The pieces are sitting on a table behind me as I write this. I have yet to determine how to glaze the new window cutouts, but the layout has developed all sorts of ghosts and gremlins and I just never come back to it. Someday I will get back to it and I guarantee pix of the finished product. Only burnt out switch motors, TMCC signal problems, and my inability to remember just how I wired the layout so I can troubleshoot some voltage loss stand ahead of the Lounge Car. Hopefully this thread revival will get me off my backside.
Larry the Procrastinator
Dear "Larry the Procrastinator".....there are quite a few of us that have wondered about a follow up about this project as we are interested in seeing how it went. Even if you are not finished with the car, PLEASE post some pictures....those would be VERY helpful. As far as your layout problems, I am sure that you can get the help and motivation you need from our great group here on the forum. We are counting on you Larry....!!
All My Best,
Alan
Larry posted:Argh, I knew you fellows wouldd find me out. I worked diligently on the scratch built interior until I diverted my attention to completing the second level trackwork (probably late 2014). I determined how many passenger figures I would need to populate a 1957 El Capitan prototypically--and came to a dead stop. The pieces are sitting on a table behind me as I write this. I have yet to determine how to glaze the new window cutouts, but the layout has developed all sorts of ghosts and gremlins and I just never come back to it. Someday I will get back to it and I guarantee pix of the finished product. Only burnt out switch motors, TMCC signal problems, and my inability to remember just how I wired the layout so I can troubleshoot some voltage loss stand ahead of the Lounge Car. Hopefully this thread revival will get me off my backside.
Larry the Procrastinator
I hear you Larry. I have the same problems with distractions and procrastination. The start of this topic coincides with my return to the forum after years of absence, and I only vaguely recall seeing it. At the time, I didn't have any K-line passenger cars, but now I do. It's a very cool project, and it looks like you have the really hard part done, namely cutting out the windows.
Why not just do what K-line did and use acetate for the curved glass. It is held in place with 2 mil hi-tac transfer tape (a 3M product). It comes on a wax paper roll, and you stick it to the aluminum, and peel off the paper, leaving only the adhesive behind.
When it comes to people, Lionel makes sets of seated passengers. Pretty good, but not cheap.
Alan was asking if anyone else was doing modifications to K-line passenger cars. I am, but not this one
I'm taking a standard 21" combine and baggage, and turning them into a couple specific cars for my early Amtrak Empire Builder. The two Pennsy cars are the ones I'm working on.
This is an ex-GN baggage/dorm that was used on all early Empire Builders.
Nothing really special about this NP baggage, but I wanted the paint scheme in the train.
For this project, old openings have to be plugged and new ones cut. Skirts have to be removed, then both cars have to be repainted.
I've got a good start on the combine, with the skirts off and all the openings plugged. I'm about ready to start cutting the new openings using a jewelers saw. Wish I had a mill, but I don't do much of this kind of work.
Attachments
OK! well They are NOT K-line but they are 21" Aluminum cars!
Oh yeah... I am still on the hunt for this one as well:
Attachments
I am feeling my motivation growing (shame seems to be a significant stimulant. I shall revisit the lounge car very soon. I just received my DM TMCC Buffer and need to do a tiny bit of rewiring before hooking it up and hopefully resolving one issue.
There is not much else to show right now. I need the passengers installed before I can finally install the interior which I need before I glaze the windows which I need before I can install the interior before I can reassemble the floor inserts and reinstall the trucks. Then I can shoot some pix.
As to the glazing technique; all prototype photos suggest the "glass" needs to be flush with the curved roof. I have been thinking of glazing individual windows from the top of the car body with the thinnest acetate I can find. I will use chrome/aluminum striping tape to simulate the exterior framing as well as conform the acetate to the curvature of the roof.
Less prototypically, I have been" considering" (for 4+ years) vacuum forming inserts that would match the appearance of the rest ot the K-Line inserts, but haven't made the investment yet.
As to passengers, I do actually have two bags unknown manufacture (45 males and 45 females) that are in different poses and different "outfits" that will work.
So, in my humble defense, I have been thinking about the project a lot...ugh, that seems feeble even to me. Gotta stop writing and get back to work...soon. Updates soon. Please don't hold your breath yet.
Larry
bags (n= 45 males) I found in a local hobby shop that are painted with more variety than any of the others out there.
Larry posted:I am feeling my motivation growing (shame seems to be a significant stimulant. I shall revisit the lounge car very soon. I just received my DM TMCC Buffer and need to do a tiny bit of rewiring before hooking it up and hopefully resolving one issue.
There is not much else to show right now. I need the passengers installed before I can finally install the interior which I need before I glaze the windows which I need before I can install the interior before I can reassemble the floor inserts and reinstall the trucks. Then I can shoot some pix.
As to the glazing technique; all prototype photos suggest the "glass" needs to be flush with the curved roof. I have been thinking of glazing individual windows from the top of the car body with the thinnest acetate I can find. I will use chrome/aluminum striping tape to simulate the exterior framing as well as conform the acetate to the curvature of the roof.
Less prototypically, I have been" considering" (for 4+ years) vacuum forming inserts that would match the appearance of the rest ot the K-Line inserts, but haven't made the investment yet.
As to passengers, I do actually have two bags unknown manufacture (45 males and 45 females) that are in different poses and different "outfits" that will work.
So, in my humble defense, I have been thinking about the project a lot...ugh, that seems feeble even to me. Gotta stop writing and get back to work...soon. Updates soon. Please don't hold your breath yet.
Larry
bags (n= 45 males) I found in a local hobby shop that are painted with more variety than any of the others out there.
Larry.....do you know if OK kept the template for your project? I am ready to do this now and so would appreciate any info you can share as it appears you may be a while before we see your project....unless you can be tempted to submit an article and get paid for it!!
Hi Alan,
I believe OK did keep the templates, etc. However that was some time back. It was a long time ago, but the job was not an easy one for them as I recall so I fell certain they would have wanted to do the prep only once. It does make a nice addition. The interior layout can be found online but the consstruction entails a lot of plastruct shapes and cutting and fitting.
I don't know if there is enough generic work to make an article feasible. I will know more after I get those windows glazed. The secret is getting those extra windows cut in. Someone less compulsive than I might have simply painted and done limited kitbashing on the interior. I am pretty sure any additional cars that get "improved" will be mainly interior paint and adding those darned passengers. BTW, I have been searching for more of these two maverick bags I found locally. They do have bar codes with "STK0115017071" and "Made in China" on them. I paid $12.49 for each bag. I can find bags of 50 and 100 painted seated folks, but none with as many poses nor the variety of paint. If I can find more of these I will definitely have to populate the entire train. Then My Super Chief. Then a set of Heavyweights. Oops! I am nearly 74. At the rate I have been working I won't have time to finish all these!
One final post for the evening. Here are the basic reference materials I used to construct the interior of my K-Line Hi-Level Lounge car:
This first provides the overall floor plan for the lounge car (actually for all cars in the El Capitan consist):
ctr.trains.com/gallerie...e-hi-level-car-plans
This second website is from MODEL RAILROADER Magazine and provides the basic colors suggested to duplicate the El-Capitan. Hobby Lobby is where I found nearly all the colors listed. They are latex, inexpensive, and dry flat.
cs.trains.com/mrr/f/88/p/205795/2269542.aspx
The photos on this website are simply awe-inspiring and my source of data for scratch-building the interior furnishings from PLASTRUCT shapes and styrene sheets. The first couch or chair you assemble may have you pulling your hair, but past that task you can cut out parts for several others and the mass assembly goes fast. It is amazing how much realism a simple coat of paint creates.
s806.photobucket.com/us...en%20El%20Cap?sort=6
Well, this flurry of activity has assuaged some of my guilt/shame for being so slothful. I will try to take some progress pictures in the next few days (that will be one of my New Year's Resolutions.
Larry
NOTE: I had to disable the live links because of copy right... Just copy and paste them into your search engine.
Larry posted:One final post for the evening. Here are the basic reference materials I used to construct the interior of my K-Line Hi-Level Lounge car:
This first provides the overall floor plan for the lounge car (actually for all cars in the El Capitan consist):
ctr.trains.com/gallerie...e-hi-level-car-plans
This second website is from MODEL RAILROADER Magazine and provides the basic colors suggested to duplicate the El-Capitan. Hobby Lobby is where I found nearly all the colors listed. They are latex, inexpensive, and dry flat.
cs.trains.com/mrr/f/88/p/205795/2269542.aspx
The photos on this website are simply awe-inspiring and my source of data for scratch-building the interior furnishings from PLASTRUCT shapes and styrene sheets. The first couch or chair you assemble may have you pulling your hair, but past that task you can cut out parts for several others and the mass assembly goes fast. It is amazing how much realism a simple coat of paint creates.
s806.photobucket.com/us...en%20El%20Cap?sort=6
Well, this flurry of activity has assuaged some of my guilt/shame for being so slothful. I will try to take some progress pictures in the next few days (that will be one of my New Year's Resolutions.
Larry
NOTE: I had to disable the live links because of copy right... Just copy and paste them into your search engine.
Larry
Thanks for sharing your links. Great information. Now I am even more unsatisfied with my generic "bamboo" colored K-line interiors.
Two of the modified links do not work. The "..." means there are more characters in the URL. I had just viewed the links, so I went back in my browser history and copied the full URLs. These will work:
"http://ctr.trains.com/galleries/magazine-galleries/santa-fe-hi-level-car-plans"
"http://cs.trains.com/mrr/f/88/p/205795/2269542.aspx"
"http://s806.photobucket.com/user/Trainsforyou/slideshow/Al%20Willcoxen%20El%20Cap?sort=6"
Got it right on my 3rd try.
Hoop.La automatically creates a URL link. I had to put the URLs in quotes to prevent that.
Bob Glorioso
Well, I changed my priorities and took these photos of the lounge car interior in progress. I apologize that photography is not one of my favorite hobbies. I am forcing myself to remember these are good enough for interior modeling, but photos do exaggerate every "imperfection." The carpet is an image of dollhouse wallpaper found online and resized. The table tops are missing so I can insert passengers. I have also reduced images of magazines, newspapers, and games to strew about the lounge level. After all the remaining fiddly work I then have the task of reassembling the car itself. Wish me well!
BTW, I am beginning to feel the need to get back on this project, so all is well.
Larry
Attachments
Glad to see Larry back "at it"... no rest for the weary! Alan, I agree about the likes of passenger consists. With The 12 K Line Cal Zephyrs added to my fleet, that put me over 300 for pass cars. Albiet that does include Lionel PW cars, but, they are all pass cars and even more now are of 18" to 21" size. Oh, and the more recent 8 Weaver 21" St Fe streamlines..... And you know what that means! More motive power to pull those long passenger consists!
Jesse TCA
Jesse....yep, hundreds of passenger cars......I am probably in the 600 or so range now in just the scale cars over 18" in length....just crazy!
Now you are making me feel good. I estimate 30 passenger cars, including about 15 K-Line 21" cars, and the rest a mix of Walthers, Kasiner, Mac, Speer, and scratch. I was actively seeking professional help . . .
Locomotives seems to be my major obsession - over 40 scratchbuilt, and a truly frightening number of kit-built, many over 3/4 of a century old. There is a symptom buried in there . . .
Has anyone successfully replaced the 4-wheel trucks with 6-wheel trucks on one of their full-length dome cars?
The K-Line full-length dome cars are really nice, but most of the prototypes had 6-wheel trucks, and not the 4-wheel trucks that K-Line used.
Jtrain posted:Has anyone successfully replaced the 4-wheel trucks with 6-wheel trucks on one of their full-length dome cars?
The K-Line full-length dome cars are really nice, but most of the prototypes had 6-wheel trucks, and not the 4-wheel trucks that K-Line used.
See this thread. I have acquired the MTH 6 wheel trucks to do the conversion on my Milwaukee dome car, but I need to work up the courage to grind away at the skirting. Or I'll send it out to be done.
Bob
RRDOC posted:Jtrain posted:Has anyone successfully replaced the 4-wheel trucks with 6-wheel trucks on one of their full-length dome cars?
The K-Line full-length dome cars are really nice, but most of the prototypes had 6-wheel trucks, and not the 4-wheel trucks that K-Line used.
See this thread. I have acquired the MTH 6 wheel trucks to do the conversion on my Milwaukee dome car, but I need to work up the courage to grind away at the skirting. Or I'll send it out to be done.
Bob
That looks great! Thanks. The 18" cars have those retractable skirt ends to negotiate sharper curves. The 21" cars do not have those, but my guess is that the wheel well opening might be big enough to accomodate the 6-wheel trucks without enlarging the opening. But I am not sure if they would still make it around O-72 curves.
How was that post for a "tease?" The photos seem to be attached now. Sorry for the senior moment.
Larry
RRDOC posted:Jtrain posted:Has anyone successfully replaced the 4-wheel trucks with 6-wheel trucks on one of their full-length dome cars?
The K-Line full-length dome cars are really nice, but most of the prototypes had 6-wheel trucks, and not the 4-wheel trucks that K-Line used.
See this thread. I have acquired the MTH 6 wheel trucks to do the conversion on my Milwaukee dome car, but I need to work up the courage to grind away at the skirting. Or I'll send it out to be done.
Bob
I was afraid of removing the skirting on my project, but it turned out to be the easiest part. Granted I was removing them from the entire length of the car, I'm guessing that you just need to trim them on your project, to allow the trucks to turn properly.
I used my Bosch jigsaw with a metal cutting blade, then a bench top belt sander, and finally a file to finish.
Making that first cut is tough, but you'll get over it. Just go slowly and be careful. It'll be great.![]()
Attachments
Jtrain posted:Has anyone successfully replaced the 4-wheel trucks with 6-wheel trucks on one of their full-length dome cars?
The K-Line full-length dome cars are really nice, but most of the prototypes had 6-wheel trucks, and not the 4-wheel trucks that K-Line used.
I haven't figured how to do it yet, but the El Capitan diner car should ride on six-wheel trucks as well. The table spacing is all wrong I think, but I have the feeling I will live with it and just do a paint and detail job on that one.
Larry
Larry posted:
The carpet is an image of dollhouse wallpaper found online and resized. The table tops are missing so I can insert passengers. I have also reduced images of magazines, newspapers, and games to strew about the lounge level. After all the remaining fiddly work I then have the task of reassembling the car itself. Wish me well!
BTW, I am beginning to feel the need to get back on this project, so all is well.
Larry
Larry, can you, or anyone who reads this and knows how, direct me to a source on how to do what you did--capture images and resize them? I ask because I am planning to detail the interiors of Texas Special cars and would like to capture their unique decor--not exactly, of course, but similar.
Thanks.
prrhorseshoecurve posted:
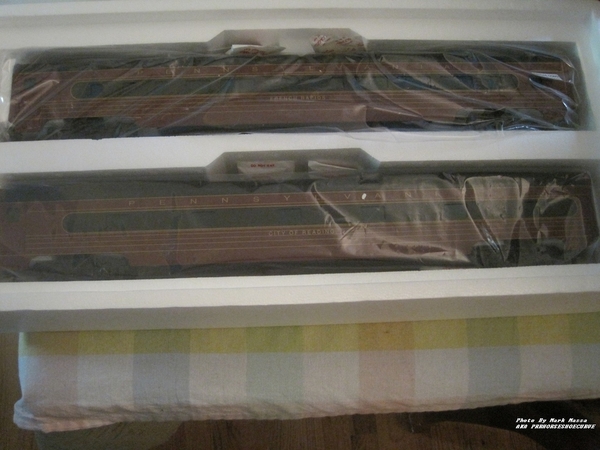
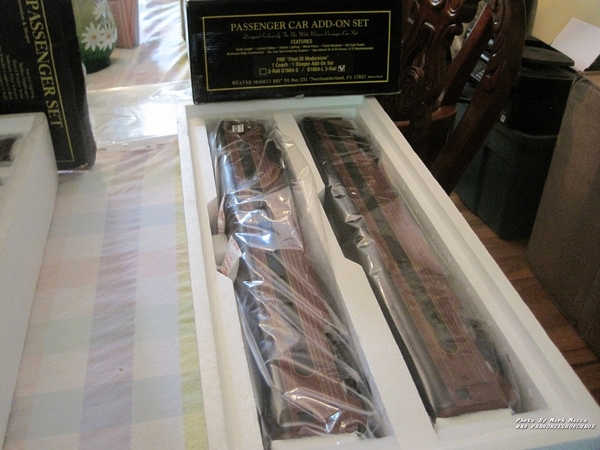
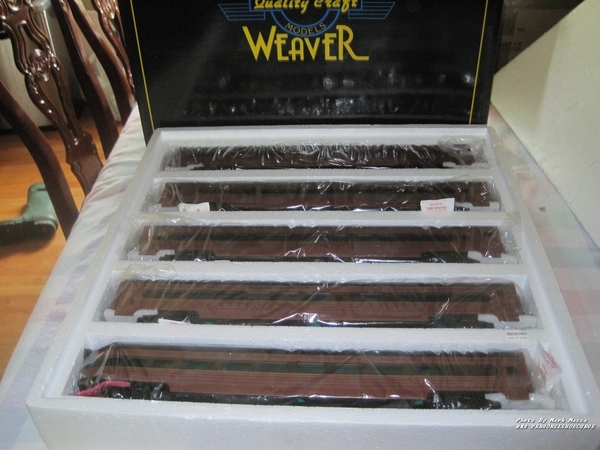
I am pretty sure that the Weaver cars are 20" long, so they are 80' scale cars, and a little short for most prototypes. As we know, the K-Line cars are 84' scale cars, so just about spot on (1/4" short, actually, which is close enough for the eye test).
Pingman posted:Larry posted:
The carpet is an image of dollhouse wallpaper found online and resized. The table tops are missing so I can insert passengers. I have also reduced images of magazines, newspapers, and games to strew about the lounge level. After all the remaining fiddly work I then have the task of reassembling the car itself. Wish me well!
BTW, I am beginning to feel the need to get back on this project, so all is well.
Larry
Larry, can you, or anyone who reads this and knows how, direct me to a source on how to do what you did--capture images and resize them? I ask because I am planning to detail the interiors of Texas Special cars and would like to capture their unique decor--not exactly, of course, but similar.
Thanks.
I can only speak for myself because I suspect there are more elegant techniques of which I am not aware. The only specialized device needed is access to a xerox machine (my combo printer/scanner/copier/fax machine cost just over $100 on sale).
Using Google (even though I have reservations) I simply scan various images until I find one that seems to have potential. Double click to get a single image on the screen. Right click on the image and select "save image as." Type in a name you will remember. Then just click on pictures and locate the newly saved image. Here is where I go back to the late 20th century and just start copying, reducing each time, until I reach one that seems "right" (in cases where size is known you can use a scale ruler to verify that you have it right).
The actual interior chairs and couches depend more on your imagination than anything. I cut up the "diner" interior for most of the tables and benches. The curved couch backs were the most troubling until I noticed a package of HO pipes and culverts in a local hobby shop. Some were about the right diameter and were simply cut down to the right height and glued together. Evergreen styrene strips were all I needed for everything else.
And that is/was my method. Of course you might want to use it with caution. I did start this project about 5 years ago. But I thought about it nearly every day. Just don't take photos along the way or you will become obsessed over details that will never be seen. . You will be surprised how good your work will look with just a coat of paint. Just have fun until you hit on the technique that produces an interior which looks right to you.
Larry, thanks for taking the time to explain your "process." It gives me a starting point.
At the risk of inspiring more "shame" for motivation, I am re-emerging from a period of distractions and beginning to think about eventually returning to this project. I am actually close to having the entire layout functioning and ready for scenicking, so I have done little work on the lounge car project. In fact I was googling around to find the current draw of one of those 21 inch K-Line cars so I can replace a blown ERR Mini-Commander EX to provide light control for the entire El Capitan.
My main holdup is (and has been) how to appropriately glaze those additional windows. Just flat glazing doesn't seem enough after all this work. I am considering vacuum molding, so would appreciate any experience any of you may have had with a simple machine like that offered by Micro-Mark.
So, I am still alive, not kicking very well, but working as slowly as ever (actually I do an awful lot of thinking--I am fast at that) and way too little implementing. So let me have it. Give me more shame. I have to finish this project!
Larry the All-Time Super Procrastinator
Larry posted:At the risk of inspiring more "shame" for motivation, I am re-emerging from a period of distractions and beginning to think about eventually returning to this project. I am actually close to having the entire layout functioning and ready for scenicking, so I have done little work on the lounge car project. In fact I was googling around to find the current draw of one of those 21 inch K-Line cars so I can replace a blown ERR Mini-Commander EX to provide light control for the entire El Capitan.
My main holdup is (and has been) how to appropriately glaze those additional windows. Just flat glazing doesn't seem enough after all this work. I am considering vacuum molding, so would appreciate any experience any of you may have had with a simple machine like that offered by Micro-Mark.
So, I am still alive, not kicking very well, but working as slowly as ever (actually I do an awful lot of thinking--I am fast at that) and way too little implementing. So let me have it. Give me more shame. I have to finish this project!
Larry the All-Time Super Procrastinator
Hey...I gave up on you! Some of us can't wait much longer because we are getting close to the finish line in life if you know what I mean....![]() I believe you started talking about this in September of 2013....!! So....get with it already.....LOL!!
I believe you started talking about this in September of 2013....!! So....get with it already.....LOL!!


