
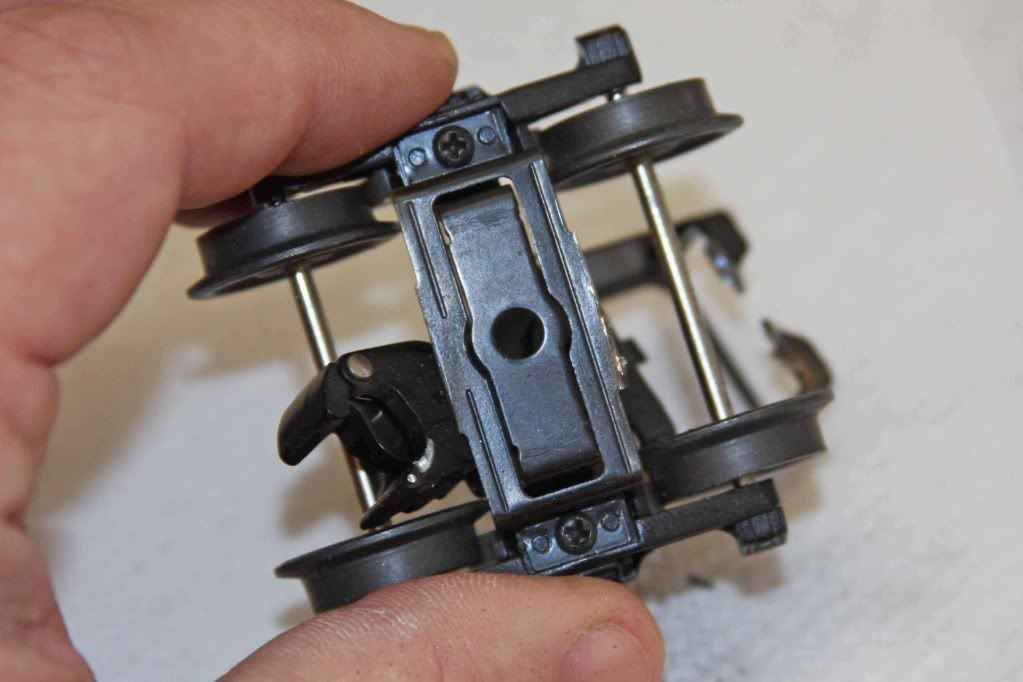
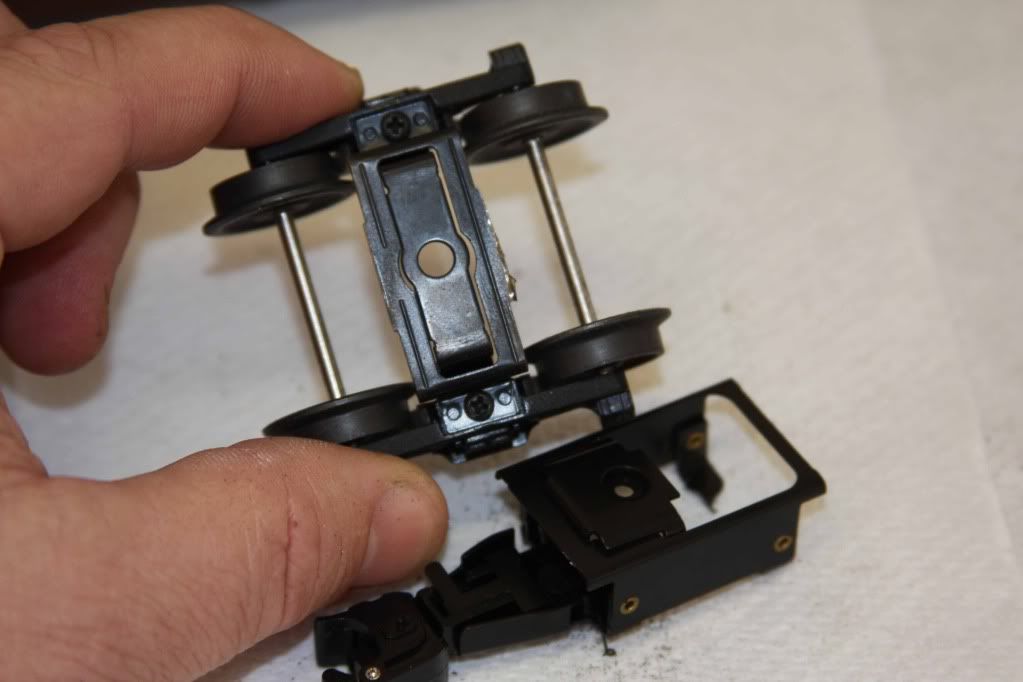
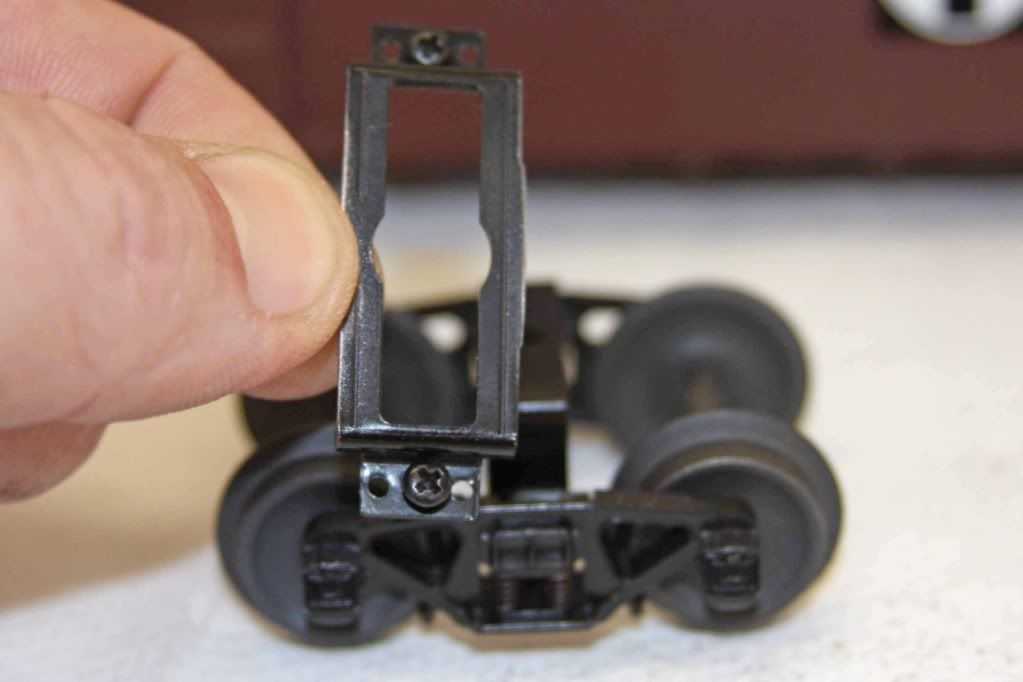
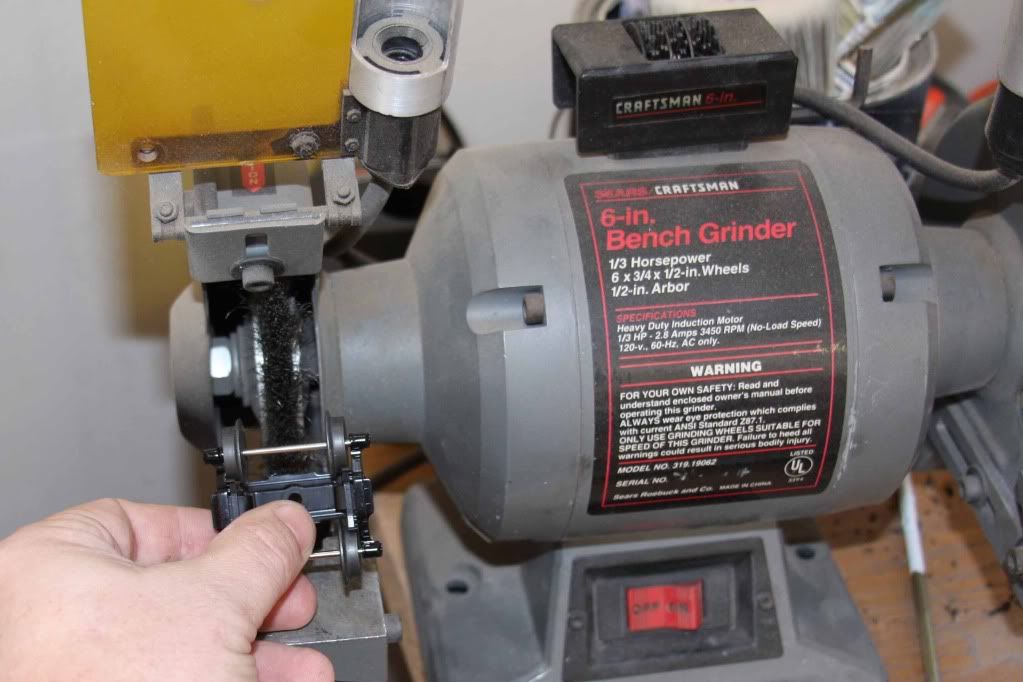
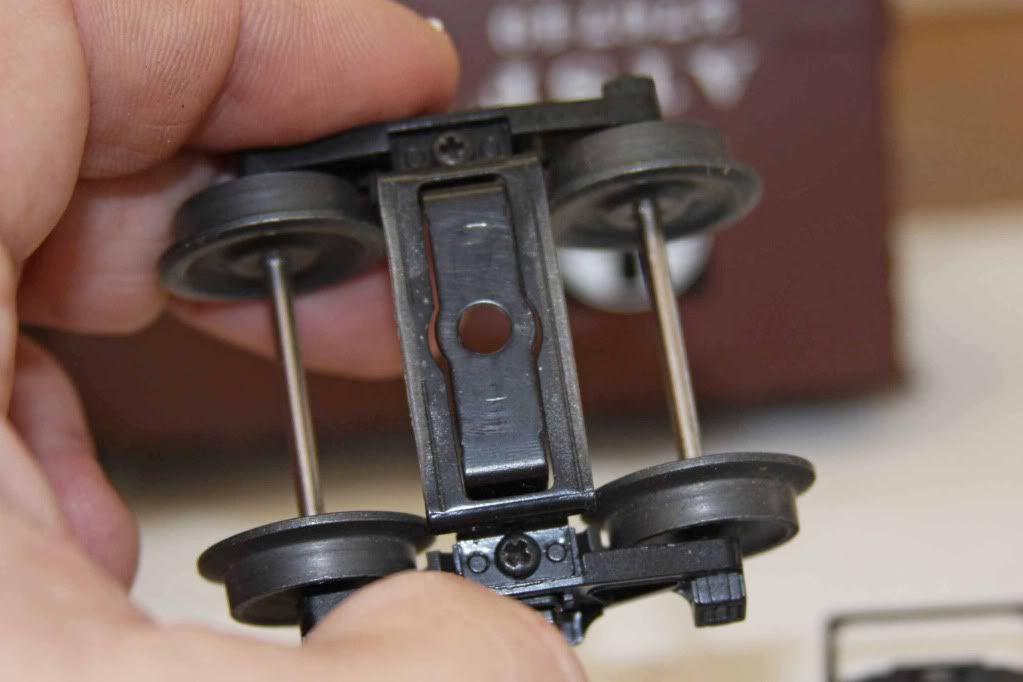
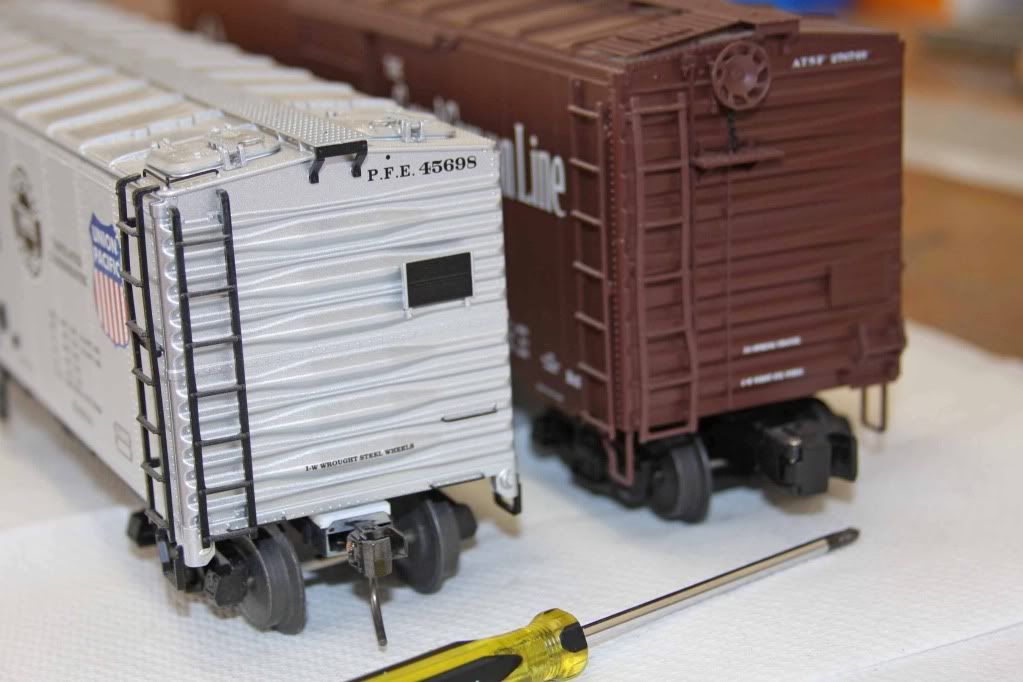
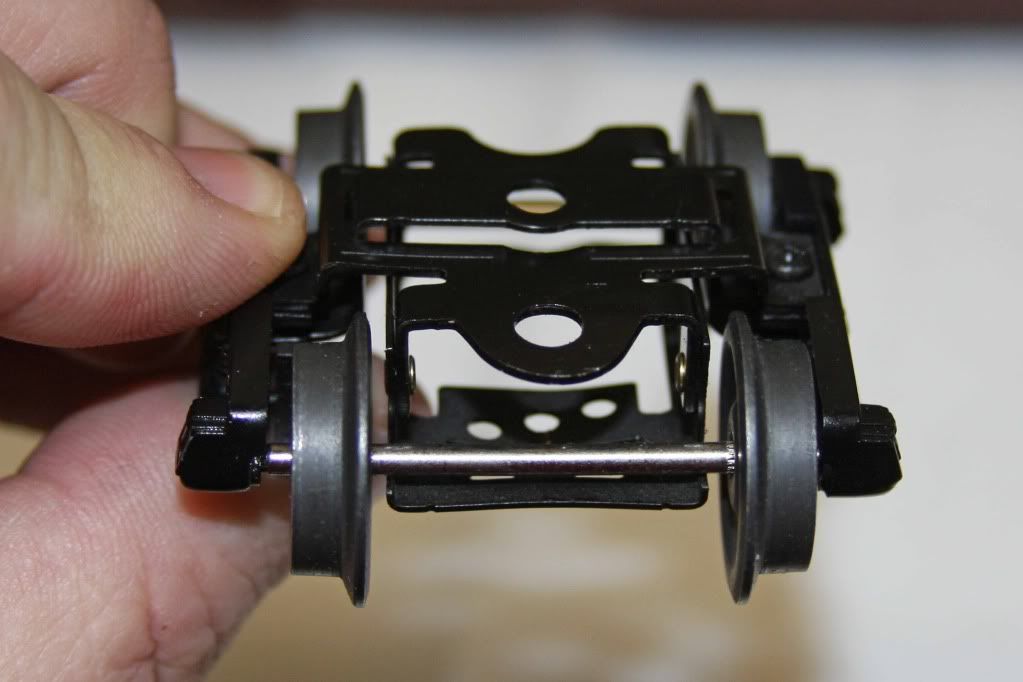
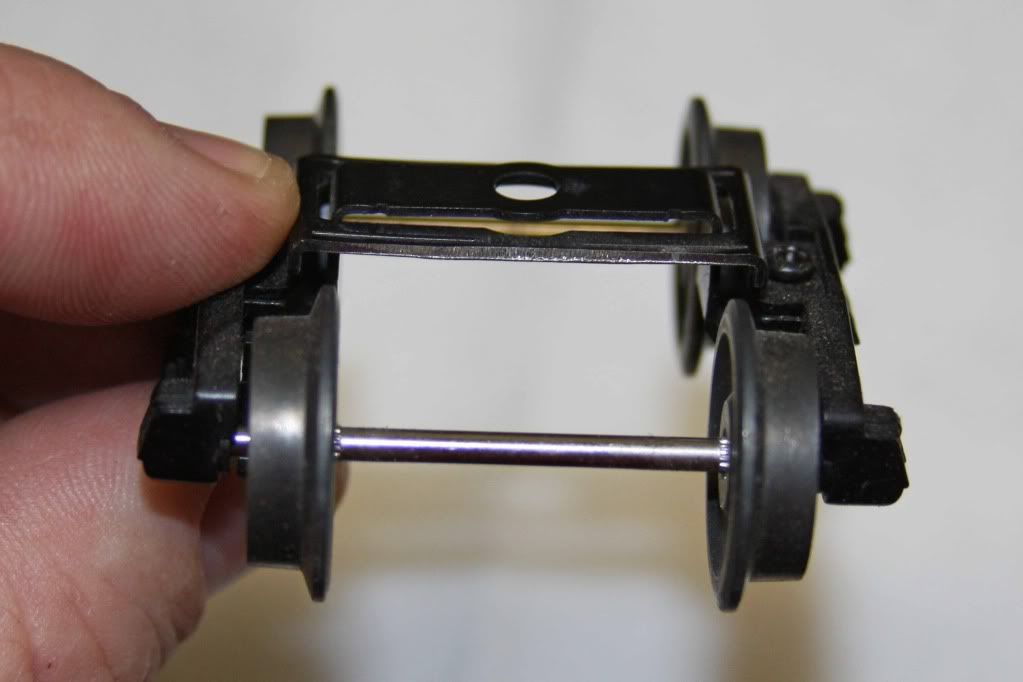
So far the Kaydee conversion for my Atlas, MTH, Kline and Weaver has been straight forward. One Lionel has been done and yes it is more of a challenge. Creating a"pad" to mount on is not too hard. Cutting the diecast coupler from the truck is a pain. Has anyone done this and what technique did you use? I read the thread on kaydee installation and only references to Lionel are made. In advance I thank you for your information.

Ray Marion
Original Post

Replies sorted oldest to newest

Ray,

Probably the reason that not much discussion appears on up-grading Lionel freight cars to Kadee couplers is due to the difficulty. Not to mention the price is quite high for a Lionel "scale" car that also has "built by Lionel 11/2011" painted on each side!

Have have done about 4 of the Lionel 50 foot, wood floor flat cars and vowed to never purchase ANY Lionel cars again. I think I finally secured the styreen shim and Kadee coupler assembly to the underside of the flats with J-B Weld or J-B Kuick.

Removing the lobster claw from the truck assembly was a whole new adventure with the Dremel and heavy duty Snap On, very long handle, side cutters!
I've converted almost all of my Lionel cars now. Yes it is time consuming but once I get started, I usally do it in an assembly line process. I just cut off the entire uncoupling assembly with a dremel and a cutoff wheel, assemble the couplers, and cut the mounting pads.

I've found the biggest issue with the Lionel cars is the height. The same 2 types of reefers don't always come out to the same height with the same size of mounting pad. This is due to the truck bolster. The center of it bends very easily (which also causes some cars to wobble severly), and if you look at different sets of trucks you will notice that center section of the bolster is at a different height. Easy fix as you just push it up or down with your thumb, and if it's not flat, lay it on the bench and hit it with a flat punch.

I was going to do some step by step pictures of this in the past but it didn't seem like anyone was interested. I'm sure everyone does the same basic thing, it just takes more time than installing Kadees on an Atlas car.
I hate to say it but converting to Kadees is almost a hit or miss project. Unless you're talking about cars that have been made in the last 2-3 years, there's so much variety within brands and from brand to brand that you'd have to group your cars by brand, then look at each car. Boxcars are different than flatcars, tank cars are different than cabooses, the list goes on. Then you have engines and passenger cars. Eek

Still, it's worth the effort, the operation and looks of the Kadees simply exceeds that of those old couplers.
Stopping by the woods on a snowing evening.....

Sheesh, takes a minute to remove a lionel coupler, without any cutting or chopping. The only "tools" you need are a screwdriver and a needle nose pliers. I had a nice picture post on here many moons ago but when you recently become part of the aged and infringed like Jack you can't remember anything anymore.

Once the new forum is live maybe I'll post it again, unsafe in the knowledge that years of 3RS conversion threads on everything from Lionel to MTH will no longer be regulated to the dustbin of internet history. Where they rightfully belong.
Lionel PS-1 box car truck assembly with claw:


You can remove just the claw by removing the lock ring shown in the truck on the right. However, if you use Kadee "between the rails" uncoupling magnets as I do, you'll want to remove the whole claw assembly as seen in the left photo.


Cut lines shown in the right truck made with the Dremel and a cutoff disk:


Just cut as shown:


The claw and the hidden uncoupling assembly will fall right out:


Leaves you with just the truck and some jagged edges.


You can remove this if you wish to grind it smooth on a bench grinder:


Nice clean edges when you put it back together.


I use strip styrene of various sizes to get the proper coupler height.


Finally the difference between the Claw and the Kadee. You can hit the white styrene with some black paint if you want to hide it, but I get that all covered up once I get to the weathering process of the cars.

Last edited by Former Member
Hot Water, thank you. I've done about 100 cars or so now, so it's a pretty quick process for me. Believe me, when I first started converting cars, I would fart around with one car for an hour or more until I got it down the way I liked. Smoothing the edges for a couple reasons. 1: the rough edges were "catching" on a couple of the underframes. Took me awhile to figure out why those cars would derail in a curve. 2: I'm just anal sometimes when it comes to certain details like that. 3. SAFETY of course lol Did I mention I wore safety glasses while using the cutoff wheel? sure I did!
LOS

Thanks for answering the question with the great photos. The only Lionel I had done so far had the one piece diecast truck. Now that all the others have been inspected, your solution looks a lot easier to do as they are just as you pictured.

Jack Next problem is how to remove the built by Lionel date!

Thank you all again

Ray Marion
quote:
Originally posted by Lackawanna1223:
Stupid question: do you glue the styrene mount/spacer to the floor? CA?

I really need to man up and try this -- I've already taken off the claws...

Brian


I've done it both ways, glued the styrene pad to the car, and just let the screw and coupler hold it there. Either way works fine. I don't glue them any more, just my preference.
Last edited by Former Member
Ya Pete, so simple, just bend that little tap and it all falls off. Ever tried putting it back together?

If you guys that cut them up ever change your mind and want to restore them to 3 rail with lobster claws I have this big box of brand new Lionel and K-line trucks.

Since I did so many conversions to 2 rail I standardized my rolling stock with Atlas 2 and 3 rail trucks with Kadee couplers. I can change cars between 2 and 3 rail with just 2 screws. Right now all my Atlas, Lionel and K-Line coal hoppers have 3 rail trucks. Most everything else has 2 rail.

Mostly buy Atlas and Weaver in 2 rail now.

Have a whole bunch of Lionel flat cars 40' and 50' that I made frame extensions and cast them in resin. Add Kadee couplers and Atlas trucks.
102_2867

Hopper conversion
Lionel hopper 3RS bottom
Boxcar


Just click on the pictures. Going to be great when I can post pics from my files. Trying to post pics from hosts is a pain.

JoeW
Last edited by JoeW
What I don't understand is why so many people are turned off by a little extra work for a very nicely-detailed piece of rolling stock. I have done at least 15 Lionel conversions and once you start , they are not that hard. If you guys are already swapping wheelsets, detailing and weathering, it just seems odd that some don't want to go through the trouble of drilling a hole.
Brian

i know exactly what you are asking. For Lionel, they have more than one type of truck which changes the techniques. Some are one solid diecast piece that requires a big "hacksaw" cut. Some are like the previous pictures which are easier.
The different types of car will also change what you have to drill into to mount the kaydee. You will have to measure and do a little math to figure out which screw length to use. It should be long enough to go through the mount and frame.
You must get the kaydee height gauge. It will help determine how thick your shims should be.
Hopefully others will share their knowledge and experience here also.The kaydee website has some helpful information also.
Don't worry about any of the snarky old guys. They are just jealous that the hobby is getting better and we will have more time to enjoy it. Just kidding; they have a wealth of knowledge to share.

Ray Marion
Here's the hardest Lionel I've converted. The couplers was the easy part. This one has the short couplers because at that time it had Lionel trucks and the sheet metal got in the way. Since modified with scale wheels on brass trucks. Pickup roller from small engine.
Started work on a second I-12 that has been sitting on my bench since 2007 cause I couldn't get the ERR dummy board to work. Maybe this time. Spent last night and today modifying a pair of Atlas trucks for it. Pickup rollers next.

Yep! there it is below the capital dome emblem. Had to use a mag glass to read it but dang it says "Built 2007 by Lionel". And it's on all my flat cars too. Took awhile to find though. Now I'm all bummed out. Roll Eyes


New Atlas truck


JoeW
Last edited by JoeW
Here's a pair of Kadee frame mounts ready for another 50' Lionel flat. Those 3 white dots are plastic "rivets" that I started using for cars like the flats and the I-12 caboose where there's no frame to screw into. For the flat car hole are drilled (Kadee box pattern) in the plastic and styreene rod glued in the holes to hold the Kadee coupler box. Mounted the Kadee, snipped the rods to length, then heated the ends to form a rivet. This frame assembly hooks on the frame, end super glued to the sill, then the truck mounting screw finishes holding it. It's surprizingly stong.
For the Caboose I'll do the same with a styrene block super glued to the deck.


Check out the rust "weathering" forming on the NWSL wheel sets. Should almost look real someday.


This is an older Lionel cattle car with cast frame. Used Kadee spacers, the first couple cut short until reaching the edge of the sill, then a full length spacer or two if needed. These cast frames are tuff on the little drill bits. And you don't want to break a tap in it.

On this Lionel reefer I used flat head 2-56 or 1-72 brass screws. Just counter sink the coupler box. Prefer using the brass screws for a nice clean look.


JoeW
Last edited by JoeW
Perhaps the easiest (if not the cheapest) method is to substitute Intermountain trucks and wheelsets for the Lionel trucks. Use two or three 2-56 washers as spacers and the car will be lowered to the correct height, eliminating the need for a shim for the Kadees. This, of course, is assuming that your track is compatible with IM wheels.

Allan
Joe, Your I-12 Conversion. What did you use on top of the Atlas truck in one of your pictures. It looks like a brass piece to me. How does it fit the floor hole?

Basically that is the only barrier I have to completing mine, that and fabricating something to get power off two rails that I run.

Some of you posted pictures with the claw off and new kadees on. Did you not care about three rail/Two rail electricity on the wheels? (Warning, dumb question...)
quote:
Originally posted by Lee 145:
Some of you posted pictures with the claw off and new kadees on. Did you not care about three rail/Two rail electricity on the wheels? (Warning, dumb question...)


Lee, since this was posted in the 3RS forum, powering up from 2 rails wasn't an issue I guess. Originally it was just a simple question about converting Lionel cars to Kadee couplers. I posted my process as a simple solution, 10 minutes worth of time, and no extra cost other than the Kadees themselves.

As Joe's post shows, different types of cars will have a bit of a different process when it comes to actually mounting the couplers. I have converted many cars to 2 rail cars as well, usually just by swapping out the trucks to Atlas 2R, but I've never had to worry about picking up power from the track. That would be a great discussion for the 2R forum. Wink
quote:
Did you not care about three rail/Two rail electricity on the wheels?

As a 3RS modeler, I/we do NOT have to be concerned with insulated wheel sets, since the electrical "polarity" of the two outside rails is the same, i.e. common or "earth ground".

Also, I NEVER planed/plan of operating ANY of my 3RS locomotives and rolling stock on a 2-Rail O Scale layout. Without that center rail, none of the locomotives would get power to move anyway, not to mention that the oversized wheel flanges would most likely ride on the ties of a 2-Rail track system.
Ok, I accept your answers, I did not want to be treated badly for forgetting about the common ground.

I managed to install MTH trucks onto a Atlas Bolster and cut down the bolsters off the caboose and now am within a half coupler of the correct height. I have some shimming to do and it will all be over except maybe a battery for the markers and interior light.

I share a little between two rail and three rail equally. I try to learn what I can because Lionel three rail equiptment sometimes looks very well to me but the conversions is what I wish to learn.

I hope everyone has a good weekend. Cheers and once again thank you for your inputs.
No one is gonna be slapping themselves in the head. As I stated above in the "How To" photos, you CAN remove the Claw without any cutting. Simply pop the snap ring off (shown on the truck to the right in the 1st photo) with a srewdriver and then use some needle nose pliers from underneath the claw, and bend the tab that holds the claw and uncoupler tab in the frame.


That will leave you with this:


For many of us, that's not quite enough. The frame that holds the claw and the uncoupling tab must come off. That piece is clearly visible when your cars are rolling around on the track. In order to get that off, it HAS to be cut off. It's a 1 piece part that screws to the truck side frames which creates the "sprung" truck. In order for your truck to look like the one below, you have to cut.


To cut or not to cut???? That's completely up to YOU.
Post

OGR Publishing, Inc., 1310 Eastside Centre Ct, Suite 6, Mountain Home, AR 72653
800-980-OGRR (6477)
www.ogaugerr.com

×
×
×
×
Link copied to your clipboard.
×
×