I agree with John. My uncle used to say if I show you once, I shouldn't have to show you again. When I was much younger, it would be twice. The older I got, I only needed to be showed once. Of course there were few occasions where he wasn't completely clear, and that became a mess.

Bruk, the way you show is the best detailing possible probably in just about everyone's opinion. I know I wouldn't be worth a you know what because I'm sure I would crush, split, mar and destroy something. It's just best for me to pull out my wallet and let the pros handle stuff like this.

Update: 

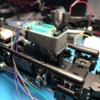
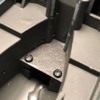
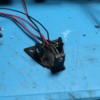
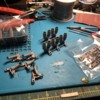
More 3d Printed Parts: 

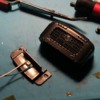
-Main Smoke Unit Funnel and “Bracket”

-LED Holder for the Number board and Headlights.

I attached a video of the Main Smoke unit. A quick test before the PLA funnel starts to melt to show the improved smoke output. 

I’m working on the Whistle Steam Smoke unit currently. 

There are lots of test fitting, re-measuring and reprinting, restarting way the part will fit best .... all very time consuming but will make my life easier in the end. 

Attachments

Images (3)
  • FCB34B1B-511F-469A-BE5A-745370A3ED52
  • DDF01F4A-5847-4607-B452-4380456AE61C
  • 0ADD3A64-003B-4178-9D3B-5A2CF01D1972
Videos (2)
0A1E4EE5-EEEC-4072-A652-E5F56A5F6C9B
3B861C64-0518-4AE0-A70C-3F0D50366C11
@Bruk posted:

Update: 

More 3d Printed Parts: 

-Main Smoke Unit Funnel and “Bracket”

-LED Holder for the Number board and Headlights.

I attached a video of the Main Smoke unit. A quick test before the PLA funnel starts to melt to show the improved smoke output. 

I’m working on the Whistle Steam Smoke unit currently. 

There are lots of test fitting, re-measuring and reprinting, restarting way the part will fit best .... all very time consuming but will make my life easier in the end. 

Looks great. I don't know much about 3d printing, so correct me if I'm wrong, isn't there types of printing material that are more heat resistant?

Looks great. I don't know much about 3d printing, so correct me if I'm wrong, isn't there types of printing material that are more heat resistant?

There is, but my printer is not capable of doing that. So I’m just test fitting everything before I have it professionally printed in the proper materials instead of me buy a whole new printer. 

Update:

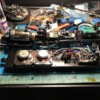
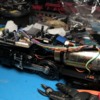
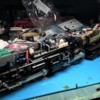
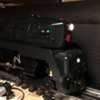
I have been slowly chipping away at this project. I’m not in any hurry. I’m waiting for my Shapeways prints to show up later this week. Hopefully those fit. I got the tender all wired up. The locomotive is mostly wired up less the lighting. I am still working on how to mount those properly. Everything functions between the engine and tender, that means full Legacy control. Some of you doubted that the older generation of Legacy electronics wouldn't work, but it does via IR. So here is proof that it does. I had a defective speed encoder so the locomotive took off like a rocket first time around. Thankfully John here was able to supply me with a replacement and everything worked as it should. Thanks again John!

More to come this week. 

Attachments

Images (4)
  • 42FAE3EE-76D1-408D-9AE7-E4397DDA7CC8
  • EC92A962-F2B2-4D56-9FB9-4016355F944F
  • AA67693E-7B9F-4057-80EF-E171256C90E2
  • DFE51C1E-9420-4E49-9650-F0867B9184A1
@Bruk posted:

Update:

I have been slowly chipping away at this project. I’m not in any hurry. I’m waiting for my Shapeways prints to show up later this week. Hopefully those fit. I got the tender all wired up. The locomotive is mostly wired up less the lighting. I am still working on how to mount those properly. Everything functions between the engine and tender, that means full Legacy control. Some of you doubted that the older generation of Legacy electronics wouldn't work, but it does via IR. So here is proof that it does. I had a defective speed encoder so the locomotive took off like a rocket first time around. Thankfully John here was able to supply me with a replacement and everything worked as it should. Thanks again John!

More to come this week. 

Looks great as always Bruk👍

Bruk, my experience has been that the older Legacy RS 5.5 and RS 6.0 boards work with the RCMC, but the new RS-Lite boards don't work properly with the R4LC.  You lose commands in the process.

It some point I will have to take a look at this. I would think I have experimented with that before. Ill have to look at that sooner than later. 

Jon Z. explained to me that the issue is they actually made the RS-Lite a little less smart, so stuff like the bell is handled by the RCMC, and not like the old TMCC where the bell starts and keeps ringing in the sound card until you stop it.  The Legacy RS-Lite just does a single operation when you command it, if you want the bell to keep ringing, you keep sending ring commands to the sound board.  This was to concentrate all the "smarts" in one place, the RCMC.  That way things don't tend to get out of sync.

Jon Z. explained to me that the issue is they actually made the RS-Lite a little less smart, so stuff like the bell is handled by the RCMC, and not like the old TMCC where the bell starts and keeps ringing in the sound card until you stop it.  The Legacy RS-Lite just does a single operation when you command it, if you want the bell to keep ringing, you keep sending ring commands to the sound board.  This was to concentrate all the "smarts" in one place, the RCMC.  That way things don't tend to get out of sync.

I wish John Z would write a book 

Update:

3D printed parts are in and fitment couldn't be any better! I am very happy with that. I have attached a video. 

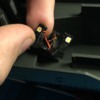
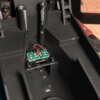
I got all the parts needed and installed. I have wrapped up the remaining wiring for the lighting in the loco which include; upper and lower headlights, marker lights, number boards, and cab lights. The Number boards are being powered off the track power and everything else is driven by the RCMC board.

On my T1 model I used (Warm White) 3528 SMDs for the number boards and headlights. For customer upgrades I will be using 3mm MTH bright white LEDs for the lighting. I also added green markers/lens instead of the red ones. I used green 0603 SMD's to light them. The original way they where lit was with the number boards. I will most likely not offer this as an option for future customer conversions due to the delicacy of installing them. I had to use a 15k resistor on top of the RCMC board output to dim them down enough to not be blinding bright. 

I also spruced up the cab and painted a few items on the back head and installed a single 0603 LED for the cab lighting. 

Attachments

Images (13)
  • A12B3A9E-D5CE-4ACB-A298-0445B1568DDF
  • 64F823BE-79EC-4E86-B0B9-A0CF749D9FD1
  • AF7D0E23-911D-4CA6-B889-BE8E154765D5
  • 7B428C36-938B-4FF4-A3A9-F14A7855DE24
  • 3718D238-9021-4068-8994-9EC5E89CBD68
  • 8B6B073A-9913-47F0-BDE4-CF9C1A60889E
  • 9565A579-C394-4FED-B4FB-819FF634ADFC
  • A068B7C8-EB5E-4060-9DC5-C2A8767EBF9A
  • 1C887A60-0782-4A6A-9794-A66E60E31D65
  • DEB53E58-728D-49E1-9373-76580C9394EC
  • CCFC9AB4-2A7D-45C1-9F0F-47EEFC14082A
  • 07EBA8BD-604C-4562-B501-5FCC1235D380
  • FAA3DC07-4FB3-4087-9247-31C33526C0C7
Videos (1)
B39FB39F-358B-4552-8BEA-9D87394D0B14
Last edited by Bruk
@Bruk posted:

Update:

3D printed parts are in and fitment couldn't be any better! I am very happy with that. I have attached a video. 

I got all the parts needed and installed. I have wrapped up the remaining wiring for the lighting in the loco which include; upper and lower headlights, marker lights, number boards, and cab lights. The Number boards are being powered off the track power and everything else is driven by the RCMC board.

On my T1 model I used (Warm White) 3528 SMDs for the number boards and headlights. For customer upgrades I will be using 3mm MTH bright white LEDs for the lighting. I also added green markers/lens instead of the red ones. I used green 0603 SMD's to light them. The original way they where lit was with the number boards. I will most likely not offer this as an option for future customer conversions due to the delicacy of installing them. I had to use a 15k resistor on top of the RCMC board output to dim them down enough to not be blinding bright. 

I also spruced up the cab and painted a few items on the back head and installed a single 0603 LED for the cab lighting. 

That looks amazing Bruk. Love the 3D printed parts and the led work. Looks great and sounds great as well. Amazing work as always. 

Add Reply

Post

OGR Publishing, Inc., 1310 Eastside Centre Ct, Suite 6, Mountain Home, AR 72653
800-980-OGRR (6477)
www.ogaugerr.com

×
×
×
×
Link copied to your clipboard.
×
×