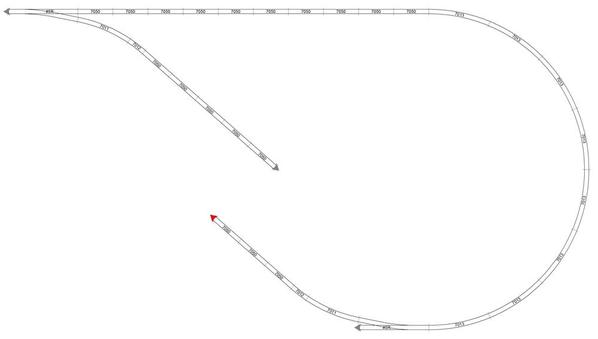
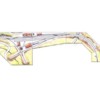
Here is an idea I had for a 2-Rail track plan that focuses on hauling lumber from a logging area to a sawmill. The layout takes up a 8'x12' space, or the size of my layout in the garage. The track is all Atlas O 2-Rail track. Now there is also a steep hill dividing off the two halves of the layout, to separate the scenes from logging to an industrial area processing the lumber. What do you guys think? I liked as it would provide me with some interesting operating capabilities. By that I mean I could fiddle around with various operating accessories that I could build to make operation more fun. For example one accessory could be and Arduino operated crane that could be used to load logs on to the log cars in preparation for delivery to the sawmill. What improvements do some of you think could help make this better?


2 rail

Attachments

Images (1)
  • 2 rail
Original Post

Replies sorted oldest to newest

Keep your mill and log loading area on each side of the divider but rearrange your sidings so they connect  through the center of the divider with two parallel tracks. you now have a loads in and empties out setup. Two sets of cars, one empty and one loaded start out sitting on the two parallel storage tracks, each roughly halfway through the divider. The empty cars  get picked up on the mill side and are trundled around on your loop and  get pushed into the "empties" siding  on the log loading side. They  pop out on the mill side and are uncoupled. These empties can then picked up by the mill engine and the cycle repeats.  

A separate set of permanently  loaded cars are then picked up by the engine on the loading side  and trundled around to the mill, pushed into the mill and through the divider and pop out on the loading side of the divider. They are then uncoupled . Conceal the opening for the two tracks in the divider by using a tunnel of building or trees.

This is not my original idea. John Armstrong and Ed Rappe both used this many years ago.

What switches would go where? I only have this 8x12 space to work in, and I'm not sure where this would all go?
 
 
Originally Posted by Fred Lundgren:

Keep your mill and log loading area on each side of the divider but rearrange your sidings so they connect  through the center of the divider with two parallel tracks. you now have a loads in and empties out setup. Two sets of cars, one empty and one loaded start out sitting on the two parallel storage tracks, each roughly halfway through the divider. The empty cars  get picked up on the mill side and are trundled around on your loop and  get pushed into the "empties" siding  on the log loading side. They  pop out on the mill side and are uncoupled. These empties can then picked up by the mill engine and the cycle repeats.  

A separate set of permanently  loaded cars are then picked up by the engine on the loading side  and trundled around to the mill, pushed into the mill and through the divider and pop out on the loading side of the divider. They are then uncoupled . Conceal the opening for the two tracks in the divider by using a tunnel of building or trees.

This is not my original idea. John Armstrong and Ed Rappe both used this many years ago.


The easy way would be to start with your existing loop minus the switches. inset two right hand switches in the long horizontal straight track in the bottom.  Insert two left hand switches in the straight track along the top. Connect one of the right hand switches on the bottom to one of the top left hand switches using the same radius  that you show in your diagram. Connect the second right hand switch on the bottom to the second left hand switch on the top using an identical radius . Now you have two parallel tracks in the middle of the layout.

You can place any remaining switches anywhere you want for added switching. 

Fred had a good idea in his post, but didn't describe it correctly.  As the attached "very rough" SCARM picture shows, to connect two tracks across an oval, you will need two switches of the same curve (right or left) to connect your compatible industries through the scenic divider.  For 2-rail use, you will have to be careful about power breaks because this empties in - loads out connection also creates a reversing loop in your oval, even if not used for that purpose.

Empty-Loaded Product Scenario

Attachments

Images (1)
  • Empty-Loaded Product Scenario

With all due respect I did describe correctly.  If you follow what I said you will not have any shorts. The first lower right hand switch (R!) is connected to the first upper left hand switch (L1) with a  curve that flows from the lower switch to the upper switch. NO shorts.

The second lower right hand switch (R2) is connected to the second upper left hand switch (L2)  in the same manner. NO shorts. You now have two parallel tracks in the center one for empties  in and the other for loads out. Because you have two tracks, each can contain a stored empty or load and your other switches can be used  for whatever you want. I did not use the plan above because it could short out. Mine does not. The curve in each storage track is the same radius as your loop curves.


   L1      L2

   (        (

   R1      R2


&nbsp        


Last edited by Fred Lundgren
Put in a small wye or turntable to be able to turn the engines without having to pick them up.
 
 
Originally Posted by littleevan99:

Here is an idea I had for a 2-Rail track plan that focuses on hauling lumber from a logging area to a sawmill. The layout takes up a 8'x12' space, or the size of my layout in the garage. The track is all Atlas O 2-Rail track. Now there is also a steep hill dividing off the two halves of the layout, to separate the scenes from logging to an industrial area processing the lumber. What do you guys think? I liked as it would provide me with some interesting operating capabilities. By that I mean I could fiddle around with various operating accessories that I could build to make operation more fun. For example one accessory could be and Arduino operated crane that could be used to load logs on to the log cars in preparation for delivery to the sawmill. What improvements do some of you think could help make this better?


2 rail


I like your plan.


Jim Policastro, of OGR fame, has or had a similar simpler layout built around his fuel oil tank. He didn't have room for a run around. So he used the main loop to accomplish the same thing.


Do you intend to run steam or diesel? Diesel engines don't need to be turned. A Rich Yoder 44 Tonner would work real well.


Good luck. Keep us posted on your progress.

I agree, a layout that size does not have space for a turntable or wye.   But on the very good size, a prototype operation like that would never turn engines.   It would be a waste of resources for a small operation like that.   Speeds are low, distances short, and the motive power can run in either direction.

Well you see guys, I already have the layout. So around the walls wouldn't work anyway. Plus it's in the garage with other stuff life boxes and two cat zillas. The plan was intended for running small switchers like Atlas O SW-7/8's or some of those nice RY switchers. I like the tips you are all giving. I plan on using the Atlas O track to start, and then in the future I'll probably go back and hand-lay the track for a better look.
Originally Posted by PRR1950:

mwb,


What prototype is that, please?

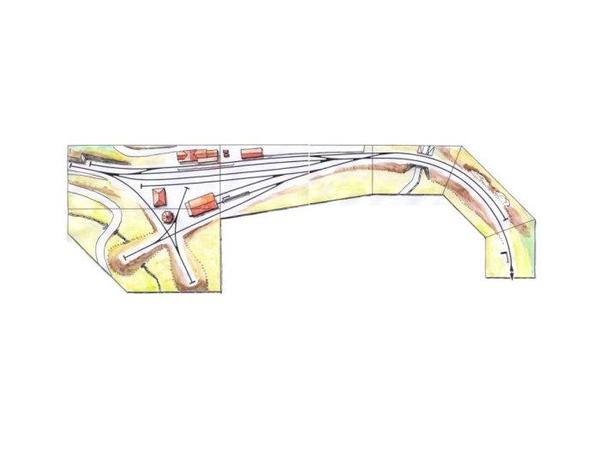
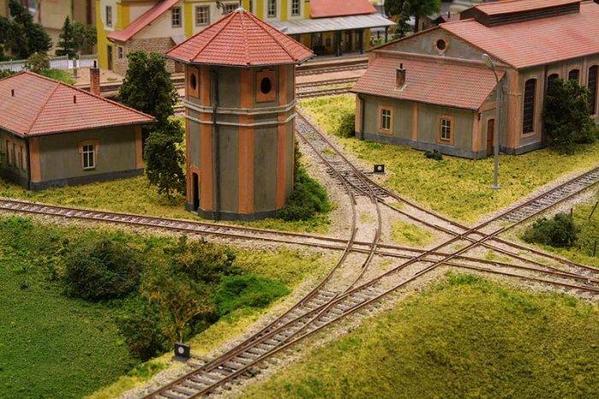
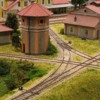
It's called a turning star and was designed for the smaller European locomotives. While it does take up less real estate than a normal wye and doesn't have the maintenance issues of a turntable, the track work and operation is complicated.


Presents a wiring nightmare in a two-rail model configuration, though this guy pulled it off:


Turning Star Operational Model -- Fremo Module Set

Turning Star Operational Model H.O. 2

Turning Star Operational Model -- H.O. 1

Turning Star Example 2006

Attachments

Images (4)
  • Turning Star Operational Model -- Fremo Module Set
  • Turning Star Operational Model H.O. 2
  • Turning Star Operational Model -- H.O. 1
  • Turning Star Example 2006
Last edited by AGHRMatt
Originally Posted by flanger:

Now that's what I call an interesting small layout indeed! Wow Matt, I appreciate seeing something so well done.


Bob

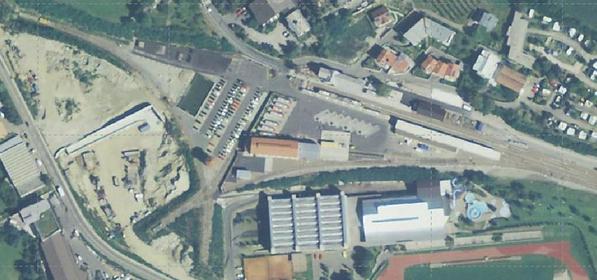
I stumbled across it a couple of weeks ago while trolling European Fremo (Free-Mo) module designs. In O scale it would be huge, especially if modified to accept American steam. Over 64 square feet not including the tail and the approaches.

Turning_Star-O_Scale

Attachments

Images (1)
  • Turning_Star-O_Scale
Last edited by AGHRMatt
Originally Posted by ctr:

AGHRMattt,


What track components did you use in your drawing?

Looks like an 072 wye with 072 switches??

What cross overs?

(1) #4 Right

(1) #4 Left

(1) 11-degree wye (+/- 5.5 degrees)

(1) 90-degree crossings

(2) 60-degree crossings

(2) 16-degree 60" radius curves

(2) 9.6-degree 60" radius curves

Assorted straights trimmed to fit.


I set it up with Ross turnouts because it was convenient, but if I was building something this elaborate, I'd probably bite the bullet and do it with 2-rail track (in for a penny/in for a pound).


You'd also have to connect the two straight tracks on the right side of the crossings to the same tangent track at some point to use the star.

Last edited by AGHRMatt
Really interesting Matt.  Thx for sharing.
 
Originally Posted by AGHRMatt:
Originally Posted by PRR1950:

mwb,


What prototype is that, please?

It's called a turning star and was designed for the smaller European locomotives. While it does take up less real estate than a normal wye and doesn't have the maintenance issues of a turntable, the track work and operation is complicated.


Presents a wiring nightmare in a two-rail model configuration, though this guy pulled it off:


Turning Star Operational Model -- Fremo Module Set

Turning Star Operational Model H.O. 2

Turning Star Operational Model -- H.O. 1

Turning Star Example 2006


Originally Posted by ctr:

AGHRMatt,


Are these really 60" radius and not 060 curves. It seems strange to see #4 switches with 60"radius 120" diameter.

Yes. I normally use 60" radius (O-120) as a base radius when I design (one reason 2/3 of my designs have almost no chance of being built). Used #4 turnouts as they were shorter and diverged quicker, but did think about using #6's. I also bounced around the idea of designing with #8 turnouts for big non-articulated steam but now we're talking about HUGE.


I put all of the information in a photo album here.

Last edited by AGHRMatt
Post

OGR Publishing, Inc., 1310 Eastside Centre Ct, Suite 6, Mountain Home, AR 72653
800-980-OGRR (6477)
www.ogaugerr.com

×
×
×
×
Link copied to your clipboard.
×
×