
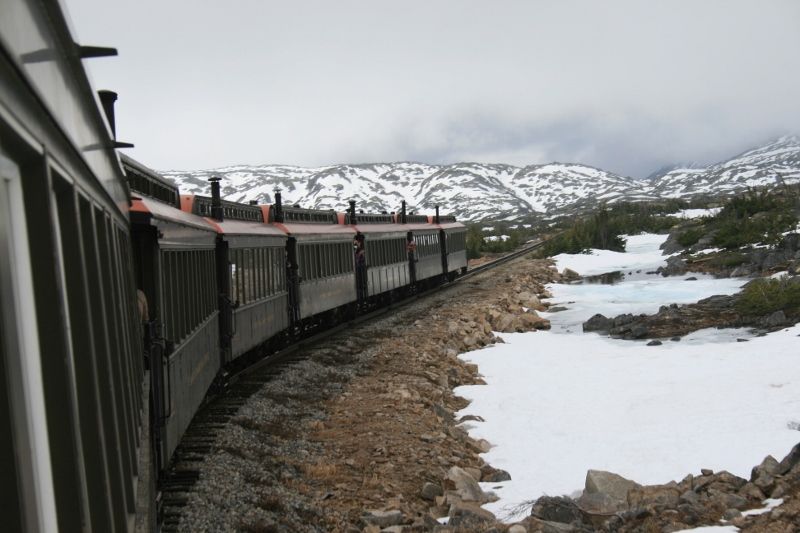
I started in the layout design forum, but since initial design and construction are done, it is time to move to the scenery forum.  I live in Anchorage Alaska, and when MTH released the passenger cars and engines in the Alaska line, I made the switch from N gauge to O.  I am modeling (somewhat loosely) the line from Potter Marsh to Portage with major scenicing areas of Potter Marsh, the Seward highway along the inlet to Girdwood, and the Wildlife center at Portage.  I have used commercial backdrops in the past, but really wanted to incorporate my own photography this time.  I went out to Potter Marsh last weekend and took some pictures--of course it is difficult getting the scenes to line up, but not to shabby--I like it so far--

backdrop [1 of 1)

My highway is coming along too

Road construction [1 of 1)

Once October comes around the landscape/scenery work will pick up.

Attachments

Images (2)
  • backdrop (1 of 1)
  • Road construction (1 of 1)
Original Post

Replies sorted oldest to newest

A mix.  There is a local shop that carries O, and it does specialize in carrying anything Alaska.  I purchased my MTH passenger cars from them, but they did not have an SD-70 or GP 40 in stock, so I mail ordered those.  Also, they did not have the DCS control system, so that was mail ordered.  Coal cars from Menards was too good a deal to pass up, so mail order on that.  I was able to get almost all of my track from the local shop, but I did mail order some switches.  I try to do what I can with the local shop.  Shipping costs fro O scale equipment can get expensive fast, but the occasional free shipping specials can even that out.  Even my photo developing was mail order since I wanted 24x36 prints (I can get 20x30 local no problem at Costco). 

I still have a fair number of Alaska locomotives and rolling stock items that I am planning to sell, so get in touch if there's something you might be looking for. Most are MTH PS2. Still very much like the Alaska RR, but have had to pare-down my inventory to something a bit more manageable and am pretty much sticking with U.S. Army Transportation Corps as a theme.


Bubbles and wrinkles are messaged out of the first two panels--still need to work on the corner photo some.   Also started to spray in foam for the mountains.  I will keep building them up, then they get shaped, plaster cloth, plaster (joint compound), colored, and of course miscellaneous brush, treesbackdrop 3 [1 of 1)

Attachments

Images (1)
  • backdrop 3 (1 of 1)

Work has been a bit slow the past month or so--new pump in the septic lift station, demolition and rebuild of the tile surround in the secondary bath, and the whole end of summer/start of winter changeover chores kept me busy.  I have been working on my mountain range--lots of spray expandable foam and lightweight spackle serve to build up a large area with not a lot of weight.

mountain maiking

Attachments

Images (1)
  • mountain maiking

I've had a hard time getting back in sync with this forum since our road trip to Nova Scotia in August, too many other things to do, So, I've only been reading threads I've been subscribed to and completely missed that you moved to the Scenery forum. The layout is really looking good and I'm looking forward to following your progress and seeing more photos.

Last edited by DoubleDAZ

      Looking really good Orind.  Capturing the look and feel of Turnagain Arm.

      I've been along that stretch a few times. I live in Wasilla myself.

      You'll need a few sheep on the mountains and Orcas along the waters edge.

                                                                                                       Dan

I really like the way that you captured the "grayness" of everything. When I first started to research Alaska, I noticed that there wasn't a lot of brown. The streams and rivers even have a gray mixed in with the beautiful blue from the glacial silt (there's a cool scientific name for it).

Are the trees spruce? I have been trying to identify the most prodigious trees. They seem to have that thin look.

The layout is only going to look better as you continue. Nice work! Your vision is coming to life.

Black spruce trees is our main spruce--that and Birch trees.  The back spruce tends to be really tall and thin because of the density of trees, but if you thin it out and give them room, they can develop nicely.   I placed one of the sheep next to a passenger figure I have--yep, sheep are just way to large (and too well fed).  Interestingly, the moose I also ordered (same scale) are correctly sized.  I guess I could go with a "chemical spill" type scene and have mutant sheep--Nah/baah.

Moonman posted:

I really like the way that you captured the "grayness" of everything. When I first started to research Alaska, I noticed that there wasn't a lot of brown. The streams and rivers even have a gray mixed in with the beautiful blue from the glacial silt (there's a cool scientific name for it).

Funny you'd mention that, as I was in AK last year and on a White Pass train, a passenger from back East noticed how grey/subdued the ground really was in color:


ORIND, you really have captured the Alaska landscape. Always loved the Alaska Railroad colors. You mentioned you are focusing on certain areas. What are the dimensions of your layout?. Do you have room to expand past that if you want?. I have watched the Alaska Railroad on Discovery and have been interested in its operations. Especially down in Seward with the loading and unloading of the barges. That would make for some interesting train movements......Paul

Thanks Paul--the layout construction/dimensions are in this thread:  https://ogrforum.ogaugerr.com/t...railroad-plan?page=1

Expansion--I do periodically eye the rest of the space I am in, but realistically, no--I consider myself a lucky person to have the space I have--but, the idea does fester in the back of my brain.

I am more of a watch the trains go through the scenery guy than operations.  I knew I wanted to model the mountains/Seward highway/coast--and even with that, I did not have enough space to incorporate as much of the inlet as I wanted to (really wanted to have some surfers on the bore tide).

Potter Marsh with its boardwalks was another element I wanted.

Up next, a Glacier scene.

The guard rail is double d profile window insulation strip from home depot, painted "Aluminum", set with styrene I beams.  The road --I started with the black cinder (ballast)/glue method--looked amazing, but the surface was too rough for the paint pens, so I top coated the "asphalt with Spackle, then painted it with Woodland scenics asphalt paint, then striped with the paint pens.

This is Alaska--I figure I will just let the real things in--Mosquitos big enough to carry small children away!  Now I need to find scale size cans of DEET for the folks on the boardwalk to use.  It amazes how much "stuff" a small area can consume in scenicing supplies--good thing its expected to be very cold for another 2 weeks--lots of time fill in the marsh.  Tomorrow morning it is off to home depot to pick up some clear silicone caulk--going to use it to give the creek some depth.  Then it is off to Michaels to find some material a bit coarser and stiffer than the marsh grass I have been using to continue planting marsh grass--Now, if model railroading only burned off calories! 

rail police, perhaps? Hobo slang... bull, dick, flatfoot, gumshoe

So, there will be ducks, eh...M R Ducks?

The move to the scenery forum is appropriate. What gets lost is the fact that there were many "more track " suggestions during the layout design (Layout forum) that didn't see your vision for the space.

Nice work in capturing the local features!

By the way, there's some interesting reading about how engineers and firemen choked on the fumes in tunnels and how they attempted to handle it. The cab forward was one railroads' answer for safety in their really long tunnels.

simple oval

Well, as I mentioned, I am looking at modifying the left side of the layout--Reason--need a place to stage locomotives/cars not being run at the time and the viewing focal point is from "within" the layout--the side of the oval facing the bay windows was not going to get much "viewing".modified

Attachments

Images (2)
  • modified
  • simple oval
Last edited by Orind

Orin,

Sounds like good reasons.  I would put more staging/storage tracks if I had a room as big as yours.  Please clarify, do you mean you are putting the tracks there because it won't be viewed much?  Or do you mean you are changing the bench work so you can get in to view?  I am on the smart phone, but it isn't smart enough to let me scroll back to your previous layout plan easily.  Thank you!

Those are 30 inch track sections--the longest be 4 sections.  I need to keep space for entrance to the living room--(right side room).  Pony wall creates a partial separation between rooms too.  I find 50 inches (given the table height) is as tight as I want to go, but yes, I will push it as far as I can.

ORIND, this may not be a good idea but what if you came down a bit further off the mainline, not much, put in a wye off that curve but instead of coming straight across with the staging yard curve it or angle it up toward the other corner of the layout leaving enough space to walk around that wall that juts into the room. Hope that made sense.............Paul

Orind posted:

Those are 30 inch track sections--the longest be 4 sections.  I need to keep space for entrance to the living room--(right side room).  Pony wall creates a partial separation between rooms too.  I find 50 inches (given the table height) is as tight as I want to go, but yes, I will push it as far as I can.

That's fine.  Don't want to crowd.

Ah, now that I am looking at the plan on my PC and not the smart phone, I can see what you mean about the clearance at that corner that caused you to have the angled bench and shorter yard tracks.  Sorry I didn't see the wall corner on the small screen.  So the marsh is at the other end, and you can turn trains both ways.  I'm looking forward to seeing this plan come to life!!

Orind, I have to laugh because we've come full circle. When you started the planning thread, I remember offering some designs that included ways to reverse directions. When they were taken out, I was disappointed, but understood. However, I never stopped wondering how long it was going to be before the capability was added back in. I guess I have my answer.

I'll be watching to see how you decide to scenic that area because I think there are ways to "hide" the switches along the back with either a grove of tall trees or something removable for access in the event of a switch problem.

Thanks Dave--yep, full circle.


Hiding the switches will be easy.  Where the train splits from the front edge of the layout to the back--going to have to punch a hole  "under" the highway--cool tunnel portal opportunity.  I am going to try and work in "Bird Creek" in the extra space formed by the turnaround area, and the mountain rise I the back ground should hide the switches (access from underneath in case of issues).  Here is a picture of Bird Creek:

bird creek

Attachments

Images (1)
  • bird creek

I can understand that--I am a put it in place/action and adjust type of thinker/doer--

There are folks who can perform thought experiments and then put together a very cohesive project.  I start with a concept/idea, have to get some things to touch--watch how it flows and fits, then continue.

I have been running the layout for several months.  I started landscaping the areas I knew were fixed points in the design, and left the other areas--now that I have more data points defined, I am adjusting.  When I started this I really did not anticipate having 5 locomotives and as much rolling stock as I do--famous last words.


The left lobe is likely going to be Girdwood--I need someplace to put my "Hippies"

I will have to post an updated track plan--installed a reversing section so the train does a twice around--get to see both sides of the train/passenger cars now.  Once it started snowing here I was back to winter activities--xc skiing, snow biking, so train work stopped for a while.  the layout will get a bit of work here and there over summer--especially on raining days.  Here is a video of the current state of the layout:

I thought about tying in the siding, but that puts the switch on the bridge, and I did not want that.  The rock face along Turnagain arm is very popular with climbers--ice climbers in the winter, and rock climbers in the summer.  The inlet also sees a lot of kite boarders, and during the bore tides, surfers--so many features and so little space to model them.

I finally got out to Potter Marsh and took a panoramic picture--used a DJI Osmo +.  Ordered up a panoramic print on canvas--30 inches tall, 130 inches long.  I really like that it was cloudy when I took the picture-I think it really adds depth to the image.    Next up--I need to build a glacier on the other side of the layout and a bridge over the corresponding ice field.

fullsizeoutput_b5fullsizeoutput_b6

Attachments

Images (2)
  • fullsizeoutput_b5
  • fullsizeoutput_b6

Yes, it is time to move on from Potter Marsh.  This fall's project is the other side of the layout--I have a rather ambitious bridge to build that will be 3 sections of O-48 and 30 inches of straight--it is the front of the layout.  Behind the bridge will be a glacier scene--All still a thought experiment currently, but it starts with opening up the front of the layout--building the bridge and getting rid of the front part of the board. 

ORIND, I have enjoyed watching your progress. That print really brought out that corner and the angle which the land goes back in it works well into your scenery. First I am not a knit picker for sure because I have no room to throw stones. But in your second picture the back ground hill in the new mural ends abruptly. Is there any way you could blend it into the backdrop next to it. All and all great job..........Paul

It has been raining for a few weeks, and will rain for a few more, so I am actually getting some work done on the railroad.    The left corner of my layout has been a thought experiment for a year now.  I did not like how much the table intruded into the room, and I just wasn't not sure what I was going to do with landscape.  I am trimming the table back and building a bridge for the front 4 048 and 30 inch straight section of the loop.  Not necessarily going for an authentic looking type of bridge, but I want to install a mountain, glacier scene in the corner with a melt runoff stream--I will drop the stream some two feet or so below the bridge--will give me access to the back track from behind the mountain, and give some nice depth and openness to the corner--at least that is the image in my brain.  the 3/4inch stock is epoxied to the track and I will build up a beam (from 1/16x1inch stock laminated) to run under the 3/4 stock.  One support post should be sufficient (about where the curve goes to straight) to support the structure.

IMG_0229fullsizeoutput_b7

While I am at it, I am reconfiguring the track a bit too.

Oh--and all that stuff in the corner--the wonders of children moving out and not taking all their stuff--time to put it in containers and get it into the crawl space.

Attachments

Images (2)
  • IMG_0229
  • fullsizeoutput_b7

One of the aspects of model railroading I enjoy is the creative problem solving.  How to make my beam to curve 4 o-48 sections and a 30 inch straight--now, there are all ways to do this, and I enjoy an excuse to by nice tools, but sometimes you just need to try the cheap creative approach.  1/4 inch is the thinest our home stores carry, and without steaming or planning down 1/16 it did bend nicely.  I traced out the track on some scrap plywood, and screwed in screws to act as bending guides.  A liberal coat of wood glue on the wood strips, clamp, and we will see if it holds it shape in the morning. 

IMG_0232

Attachments

Images (1)
  • IMG_0232

That is one effect that is difficult to achieve - the blue of the glacier water inside of the white

I think it is the same for Alaskan rivers - the blue of the water and the gray of the glacial silt bottoms. I reverse painted 4 mil vinyl to get close to the river look with the gray primordial silt. (I forgot the real name for the glacial silt)

The new corner will turn out looking good - I think you are managing to capture the look of the immense size of the Alaskan mountains.

I don't think I like the support pole. Is it really needed with the laminated beam? Glacier or mountain side to the floor.

would love to not have the pole, but yes, it is needed--and, it is a lot better than the full table coming all the way out.  The beam provides enough support that if I need to remove the support pole, like for installing new flooring in the room (this is in the living room and dining room), I can, but it does flex too much without the post.  I will bring the landscape down below the track, but nothing to the floor that can not be readily removed--that is a constraint I have to work with.

I am hoping a light thin white over the blue foam will give the desired effect. 

On the train line--no.  I am taking "poetic license"

As I look at the glacier scene this morning I am thinking I may switch over to using a photograph (like I did in my potter marsh area) of a glacier--I am thinking I will get my drone out to portage glacier later this month and see if I can  get a decent "Close-up" that gives the perspective I am after.

If not, once the portage lake freezes over I can take my snow bike out closer to the glacier face and try that.

ORIND, it is your railroad and you can take as much poetic license as you wish. The idea of a stopping point in front of the glacier is a cool idea. Maybe a photo of the glacier would fit better giving you more room for the platform without over crowding the scene that is going to look great once it is done. All  and all I enjoy watching your progress..........Paul

Orind posted:

On the train line--no.  I am taking "poetic license"

As I look at the glacier scene this morning I am thinking I may switch over to using a photograph (like I did in my potter marsh area) of a glacier--I am thinking I will get my drone out to portage glacier later this month and see if I can  get a decent "Close-up" that gives the perspective I am after.

If not, once the portage lake freezes over I can take my snow bike out closer to the glacier face and try that.

Might have a good idea there, although I think your carving looks pretty good

IMG_2549


Attachments

Images (1)
  • IMG_2549

Got out to Byron Glacier today with my drone--while not the commonly thought of field of ice, this may be a good look for area--having a 30x36 canvas print done.  The video is just to give you an idea of the are.  The train does pass by portage and goes through a tunnel to Whittier--other side of the lake in the video.


trainA

Attachments

Images (1)
  • Byron Glacier

Orind,

The concept is coming along as well as the layout. Nice work!

If that print can be curved, I would teardrop shape a foam mountain behind it and blended to the edges with a tunnel for the back straight.

Option 2

Place it in the rear and continue the mountain/rock part under the trestle in foam like your first approach.

I see the temp has been dropping. When do you stop cycling?

I cycle year round--Fat Tire bike--only time I do not ride is when the temps are below +10F.  One option, after having placed this in, is to take a panoramic shot and print to about 130 inches--take photo from full left, out past trestle, then curve back--going to have to ponder this idea for a bit.  I am going out to the Matanuska Glacier this Sunday so I will be scouting for a potential panoramic shot.  I was out at Portage Glacier this last Saturday (hiked the Portage Pass Trail) and captured this picture--this is more the type of glacier I was trying to mimic with the foam approach.  I find I like the more gravely mountainside look of the current photo I am using.

Glacier 2

Attachments

Images (1)
  • Glacier 2

ORIND, your project is coming along. MOONMAN posted this.....

If that print can be curved, I would teardrop shape a foam mountain behind it and blended to the edges with a tunnel for the back straight.

Option 2

Place it in the rear and continue the mountain/rock part under the trestle in foam like your first approach.

I kind of like the curved idea. What would happen if you curved the picture on the back corner, cutting off a bit of the bottom and then building the scenery from that point out from the sides and down through the front  maybe giving you a bit more room for going under the trestle. However you build it, it is going to be an eye catcher.............Paul

I sent the Portage glacier image off for printing--there is enough mountain on the left to have the train pass through, and the water should look good with the trestle--otherwise it is spring time before I can get out and take a panoramic shot--unless I want the left end of my layout to be a winter scene.

Last edited by Orind
Orind posted:

Found some time to work on the layout some more.  One of my challenges was how to terminate the mountain scenery  and highway on the way to the glacier.  I decided the highway will enter a tunnel.


Orind,

It will look fine. Disney changes the transitions abruptly and visitors never notice when going from one land to another. Excellent solution!

Hi Orind,

We've had a run of Alaska type weather here in the lower 48. It was colder here than where you are for short stretch.

Have you tried hacking up 2" foam board for the mountain? I see that you have a process going and was curious why you chose that method.

The glacier corner is a good result! The train looked great passing it.

Orind posted:

I use the 2 inch foam board as a start, then use spray foam to get close to the shape I want, then spackle over the spray foam to finish.  The spackle takes paint well.  I was not able to get the look I wanted shaving the foam board when I tried--hence my method.


Thanks, for the reply. I, too, take the same approach. I couldn't tell if you were using the old method completely. I have been able to get good results with foam board, but it's too expensive. I take a 4/  1/2 angle grinder with a cutting wheel to it. Then I use multiple tools, like electric carving knives, kitchen knives, hacksaw blades with duct tape and about anything to hack it into a rock texture.

I found the Great Stuff to leave too many air holes. I found a low expansion spray foam product by Loctite with a very fine texture. I can slather on enough latex paint to hide the fine holes and make the process faster than finishing with plaster or mortar. So, this is my second layer over foam board or Great Stuff on wire mesh(screen).

Again, thanks for sharing your technique. The result is good.

Last edited by Moonman

The layout is 29 feet long, 3 feet wide, except the end loops which are O48 curves.

Why Fastrack--because that is what I could get in Anchorage Alaska, and shipping track mail order is pricey.  If it would have been available up here, I would have gone with Gargraves, but the fastback works flawlessly, and I have never had a derailment.  The layout even handled a 7.9 earthquake last week without issue.

5 switches.  I enjoy letting the trains run, so switching operations was not a priority to me.  I throw the switches with the included Lionel switch controls.

Mark Boyce posted:

Hey Norm!!  Glad to see you joined us here!  Yes, Orin is doing a whale of a job with his Alaska layout!!  I'm sure there are a lot of folks here who would like to see your Tribute to the ARR!

Again, welcome to the OGR Forum!!

Thanks Mark. I'm beginning to think less as a tribute and more of a financial investment in my insanity ! ;-)

I'm still figuring out this forum thing. A lot different than the Facebook pages we usually chat on! 

I checked out your youtube channel--nice collection of trains--well organized/displayed.  I am fortunate  that my wife is very flexible--we did not use the dining room/living room for anything, so now it gets used.  I thought about setting up in the crawl space--huge open space--but then I would be the creepy old dude hanging out in his crawl space--not good.

Norm Odsather posted:
Mark Boyce posted:

Hey Norm!!  Glad to see you joined us here!  Yes, Orin is doing a whale of a job with his Alaska layout!!  I'm sure there are a lot of folks here who would like to see your Tribute to the ARR!

Again, welcome to the OGR Forum!!

Thanks Mark. I'm beginning to think less as a tribute and more of a financial investment in my insanity ! ;-)

I'm still figuring out this forum thing. A lot different than the Facebook pages we usually chat on! 

Financial investment in my insanity ! ;-)

Yes, I can say the same here!!  

If you have a question about using the Forum format, just holler.  Someone will help.  There are pinned posts from the OGR Administrators that can help too.  I like the format much better than Facebook Groups, but as you know I frequent a few of those too.  

Orind posted:

I checked out your youtube channel--nice collection of trains--well organized/displayed.  I am fortunate  that my wife is very flexible--we did not use the dining room/living room for anything, so now it gets used.  I thought about setting up in the crawl space--huge open space--but then I would be the creepy old dude hanging out in his crawl space--not good.

You and I had the same thought about the crawl space and the same outcome... I did wonder how many bucket loads of dirt would it take to get down to the foundation footing... But decided when I tunneled down that far, the house would probably collapse in on me... That would solve that idea... But I need a world more in the shelving department. I have more in other rooms hanging out needing a more proper place to go. Its amazing what one can collect. I'm the sole proprietor of my house so it's just me to talk to myself about the crazy that I've gotten into... Then there is the displays of aviation, automotive and other stuff... Some day when I grow up...

I have a friend in Fairbanks that does O gauge and specializes in ARR too, along with a lot of other road lines. He makes my show and collection look like the armature hour.

Thanks guys, but Orin, he's got the heat on the good show here! Wow! I'm impressed. I've seen a lot of people model Alaska, some made up rail locations, but Orin nailed it, I know exactly where the place is he is modeling and he nailed it!

My scenery is pretty basic due to a lack of skill but I keep a lot of it Alaska themed. I'm a 4th generation Alaskan so it's the home team or bust! Though I do have a lot of other stuff in my stable since I have everything from prewar tin to modern DCS and TMCC and eventually I'll get Legacy. I already have the Legacy command base. So a Legacy locomotive is a matter of time and money...

Add Reply

Post

OGR Publishing, Inc., 1310 Eastside Centre Ct, Suite 6, Mountain Home, AR 72653
800-980-OGRR (6477)
www.ogaugerr.com

×
×
×
×
Link copied to your clipboard.
×
×