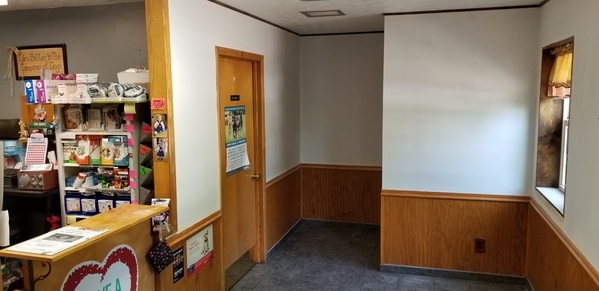
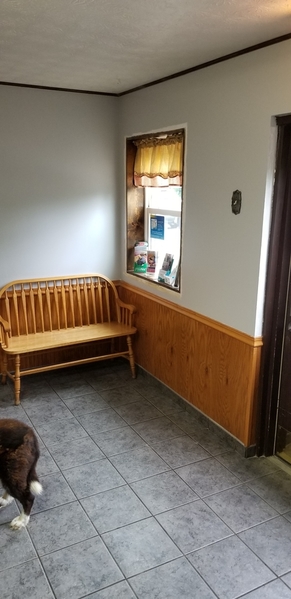
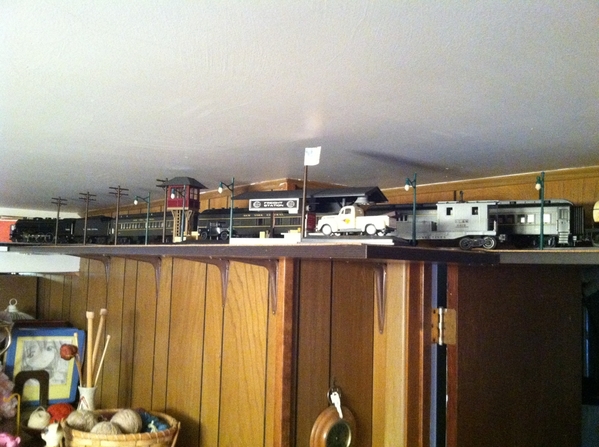
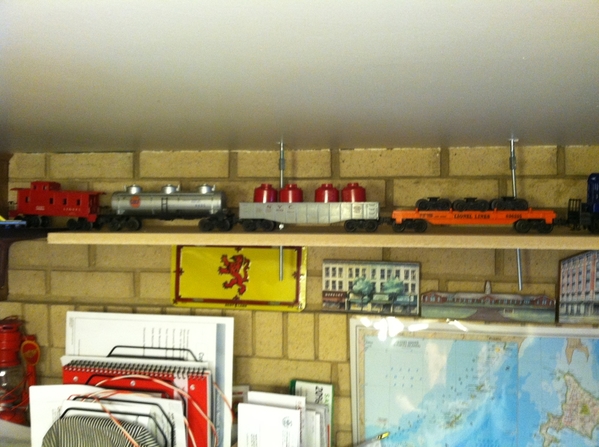
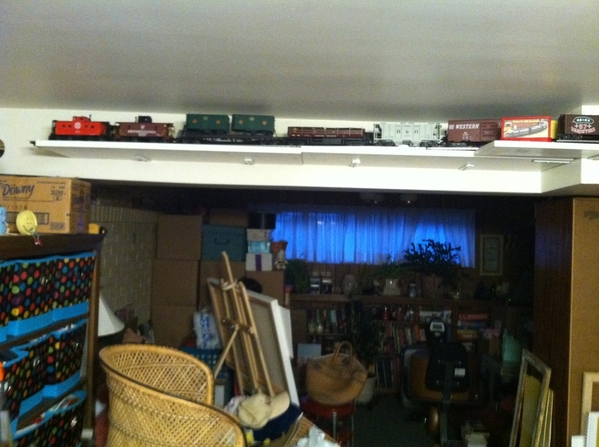
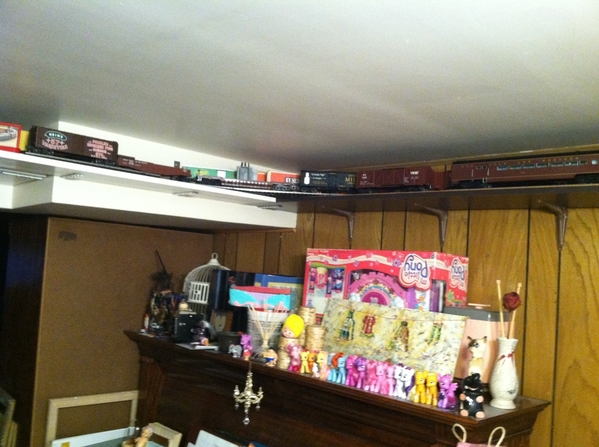
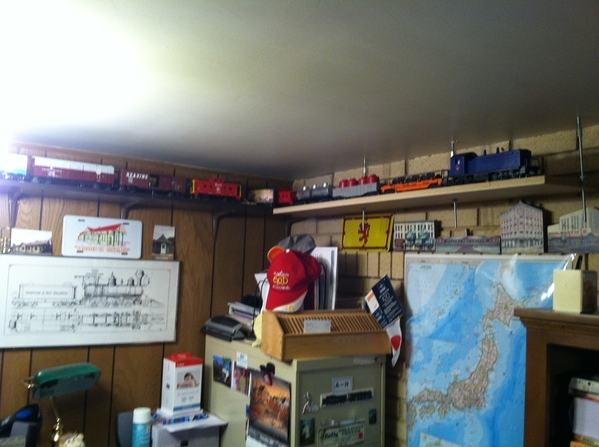
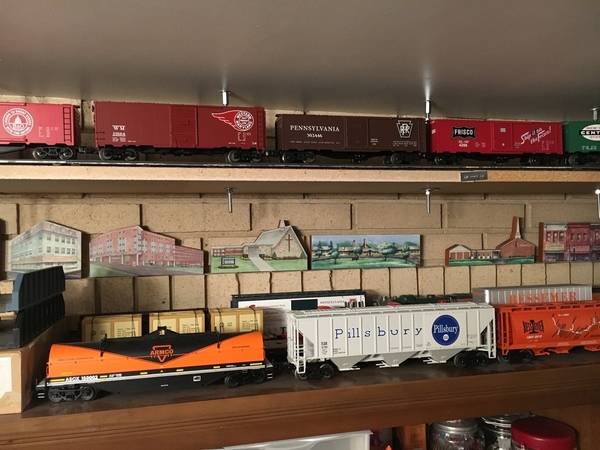
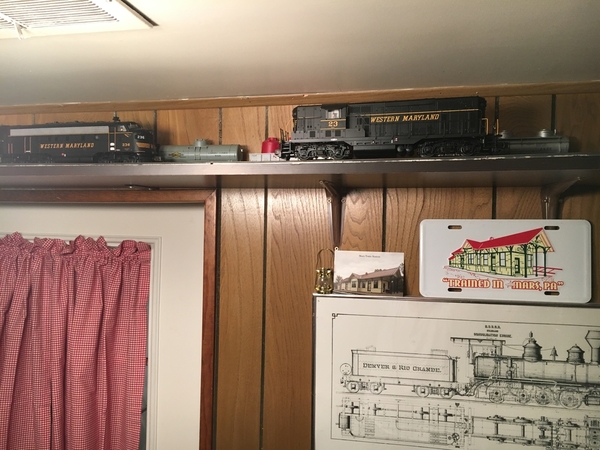
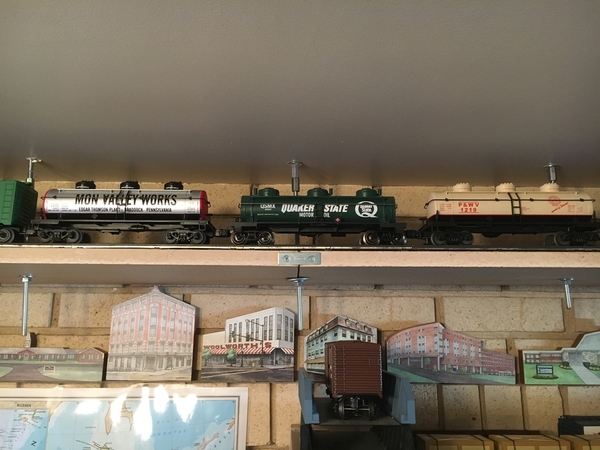
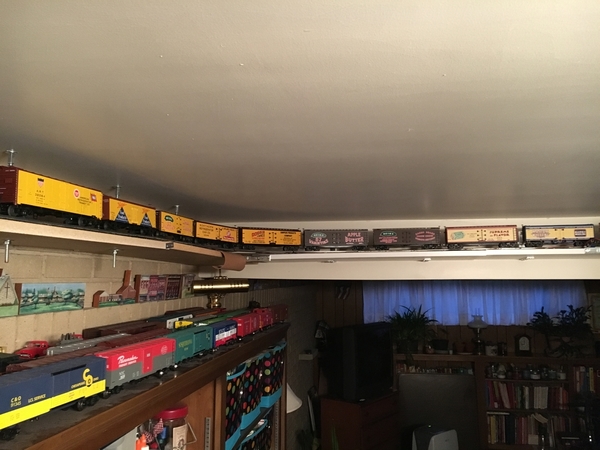
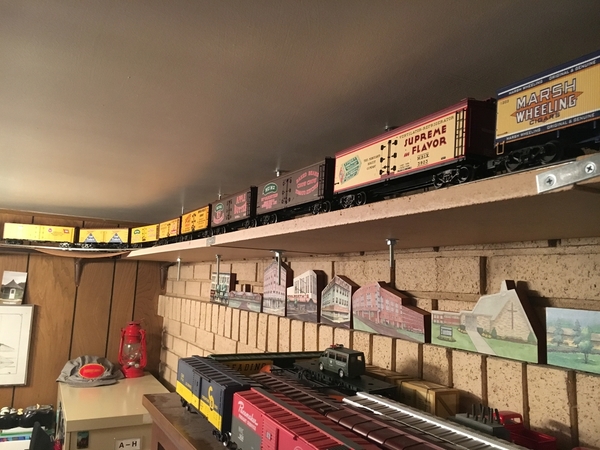
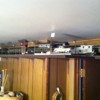
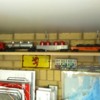
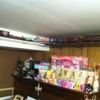
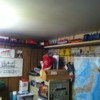
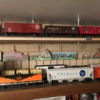
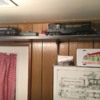
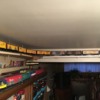
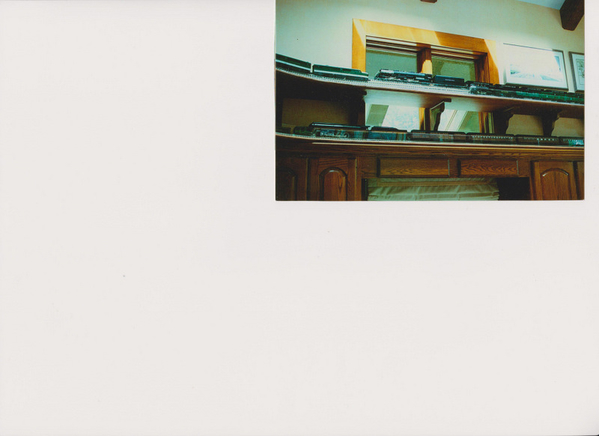
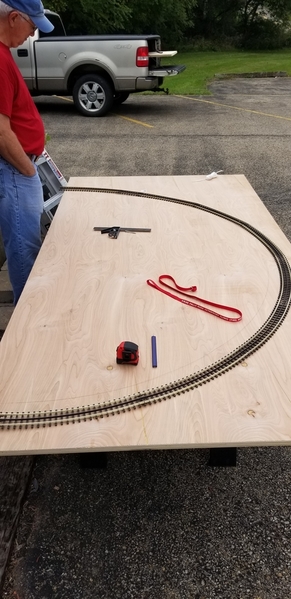
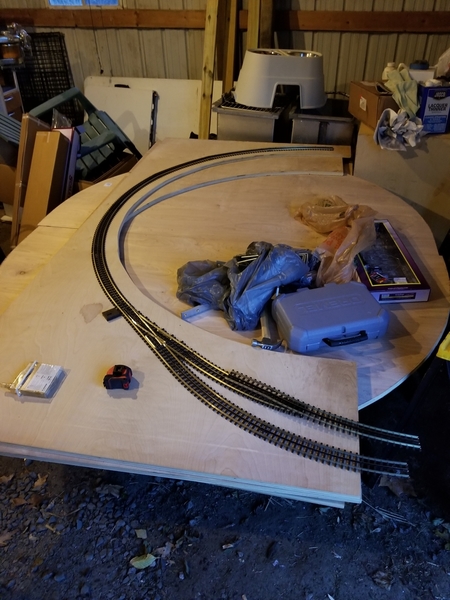
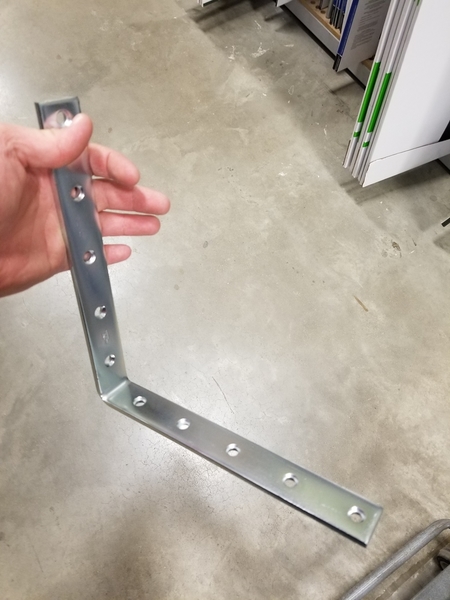
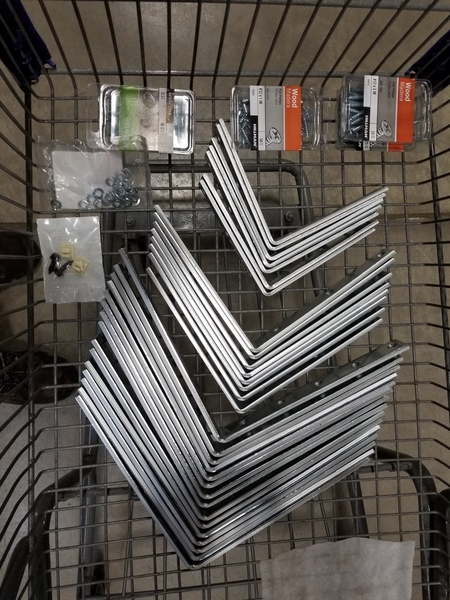
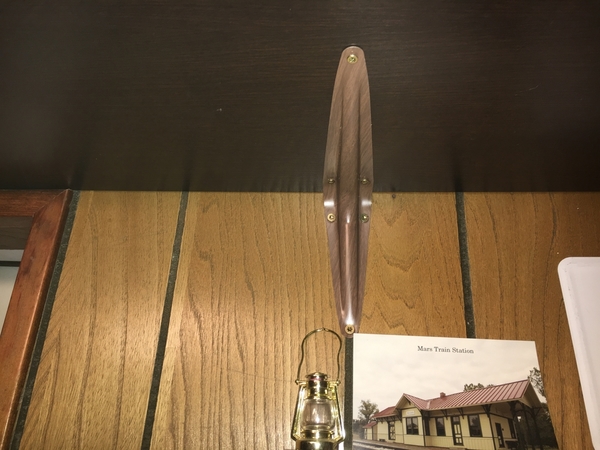
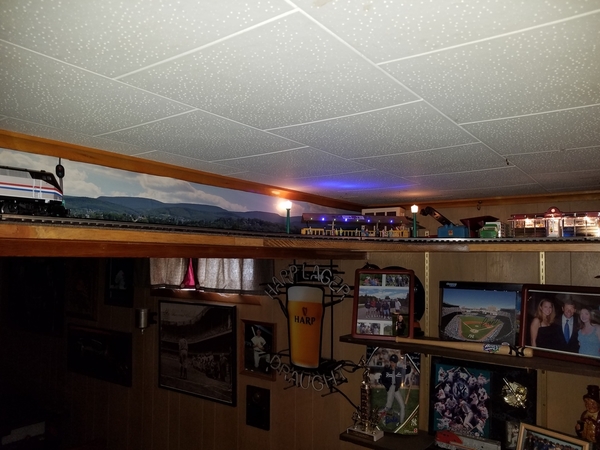
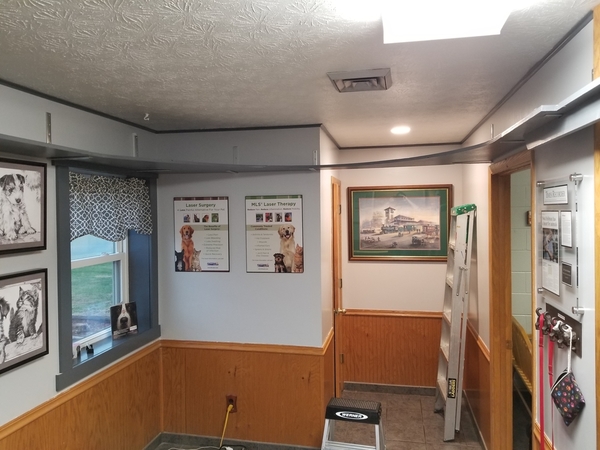
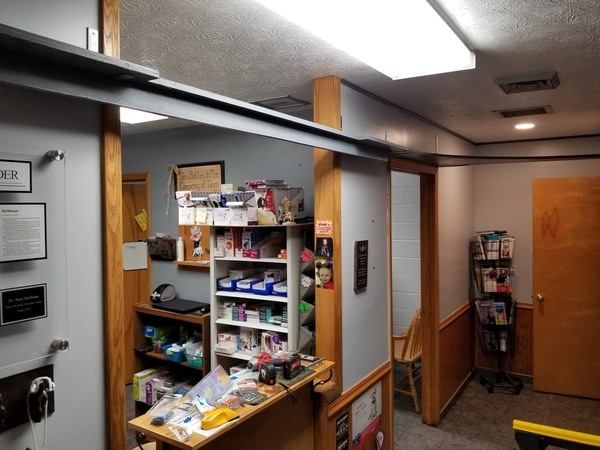
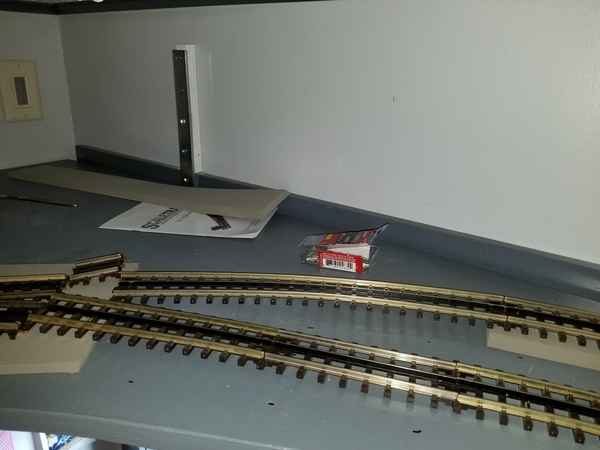
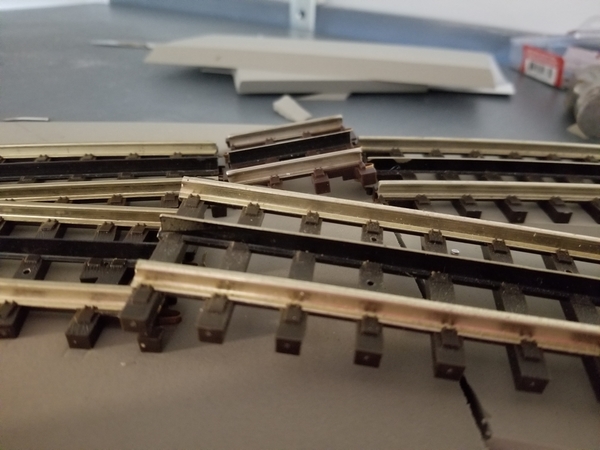
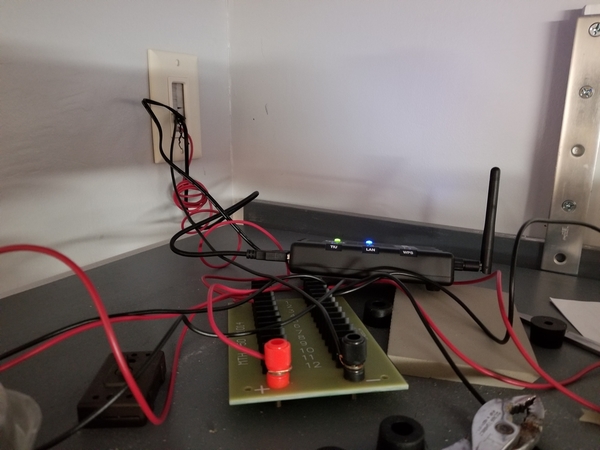
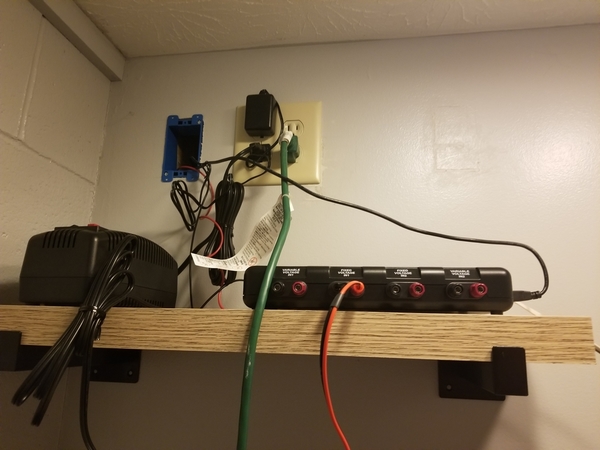
I'm finally taking the plunge and putting a loop of track around the lobby of my office.  After 4.5 years of owning the place I've decided to go w/a bit of a railroad theme, as the railroad ties marking off the front beds outside still had tie plates & spikes in them.  That's my story, and I'm sticking to it.  However, it also provides other benefits, such as: 1.) Giving me a place to run my trains before I can get around to building a home layout, 2.) Giving my wife less train stuff at home to see/deal with/hear about, etc., and 3.) My hobby becomes, in part, a business expense.  

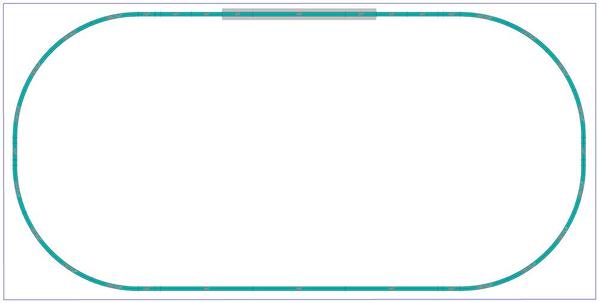
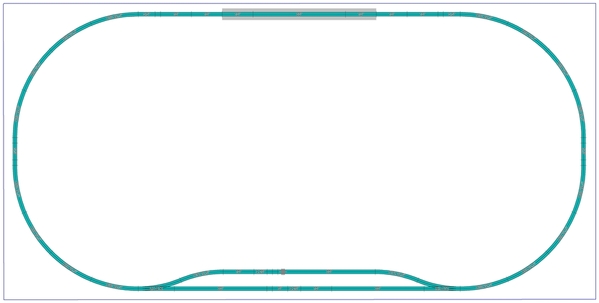
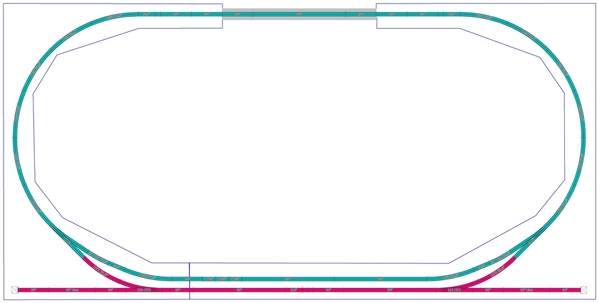
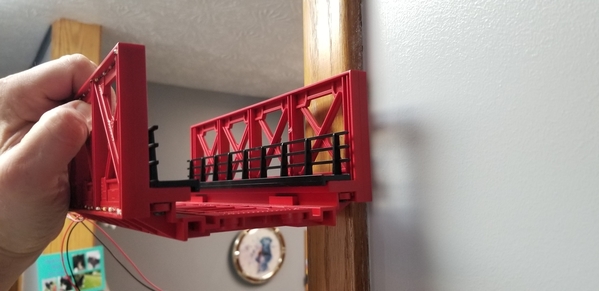
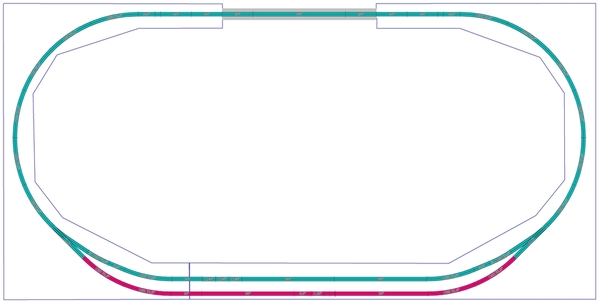
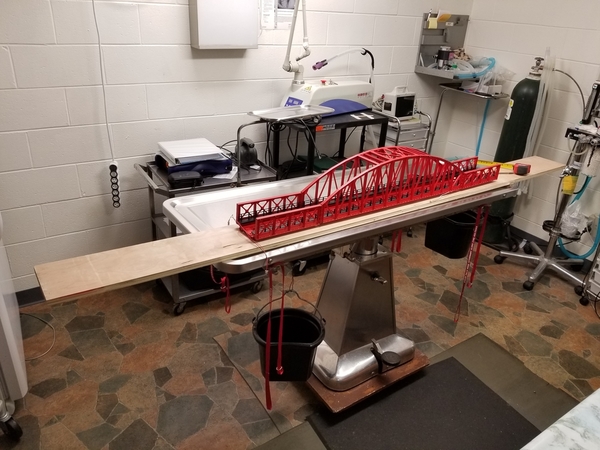
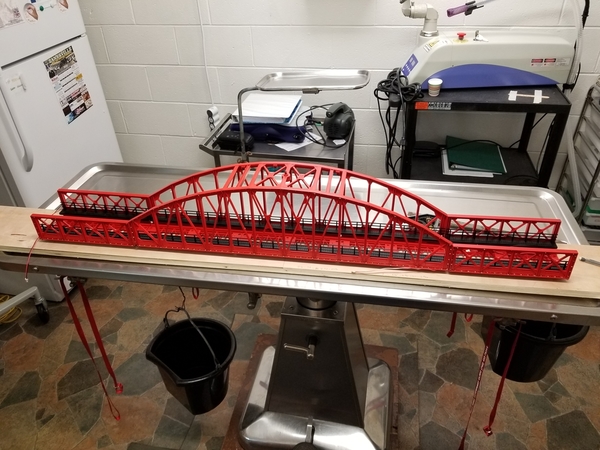
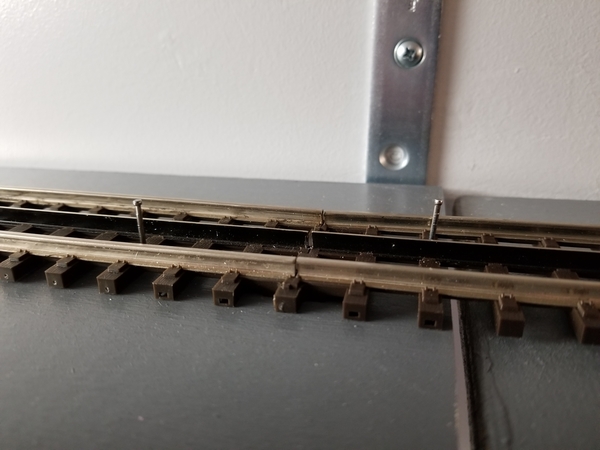
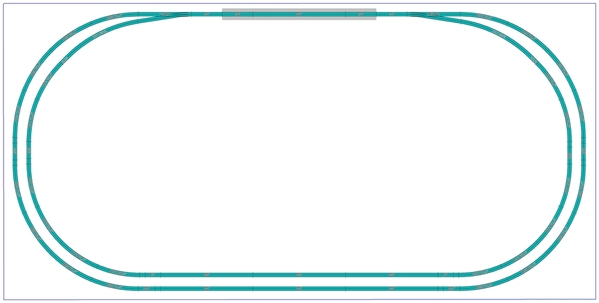
The area is exactly 8' x 16' and I've ordered a loop of ScaleTrax with O80 curves and 4 lock-ons.  I've always wanted to try ScaleTrax and figured this would be a good way to test it out.  I wanted a solid rail for noise issues, and plan on using Flexxbed underneath for additional sound suppression.  I plan on using either 0.75" Plywood or 0.75" MDF for the shelf itself.  I'll be using the MTH Arch Bridge w/holiday lights (40-1115) and two extensions (40-1116) to span the gap over the Dutch door.  Expecting it from Pat's Trains on or about Tuesday.  I also wanted to try MTH's new DCS WiFi, as I would like to eventually add this system to the LEGACY that I have at home.  The hassle of keeping track of a remote control at the office is also something I can do without.  I ordered the MTH DCS WiFi bundle Mr. Muffin's Trains is advertising, and should arrive about the same time. A Lionel power brick should provide the juice - I don't have any conventional engines, nor do I plan to get any.  

Lobby Loop

I will likely be using metal "L" brackets into the studs with the wall mounts above the shelf & track, with the shelf sitting on top of the horizontal leg.  I may need to mount a few above the board to clear the window trim (can notch the boards for a tighter fit, but can't alter the bracket).  I've seen in at least one thread (I can never seem to remember/find the same old thread(s) again after I read them) where I believe someone used 3" brackets top-mounted on MDF, but the security of that hold would worry me, I think, especially if not gluing in addition to screwing the shelf on.  

The bigger construction concern that I have are the two 46" gaps between the side walls and the back wall (see crude diagram of the room below).  Is either board rigid enough to span the gap without significant flexing?  I was planning on leaving the corners on the board for additional support (I was going to just cut a "U" out of an 8x4 sheet and mount the entire thing in each corner, with 6-8" wide planks connecting the two).  rather than make a curved cut on the outside to follow the track.  

20180106_180236

I would love to hear any feedback tips, & tricks those of you that have built shelf layouts have, especially w/respect to ScaleTrax, mounting brackets, shelf material, and the aforementioned gap concern.   I'll also keep searching through old shelf layout threads.  Thanks!

- Neal


Attachments

Images (2)
  • 20180106_180236
  • Lobby Loop
Last edited by Fridge56Vet
Original Post

Replies sorted oldest to newest

Progress has begun on re-doing the lobby in preparation for the layout.  I have reviewed multiple topics on these forums concerning shelf layouts, and was wondering if anyone had any new preferences or thoughts for MDF vs. Plywood.  From what I've read there can be more distortion over time w/plywood, but better screw security over MDF.  This would be in an air conditioned & heated lobby; moisture & humidity haven't been major issues in the past.  Comments would, as always, be appreciated. 

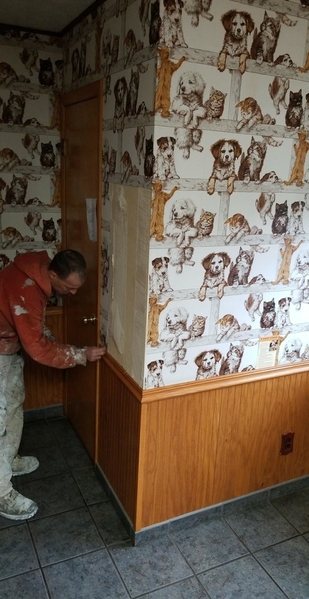
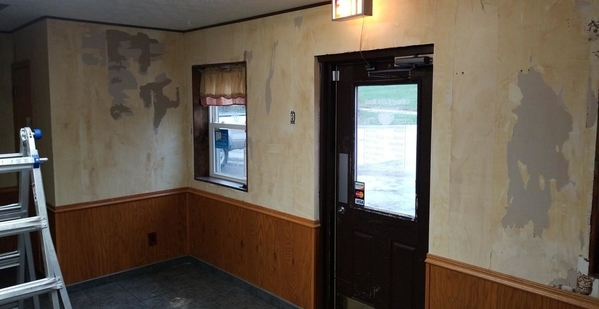
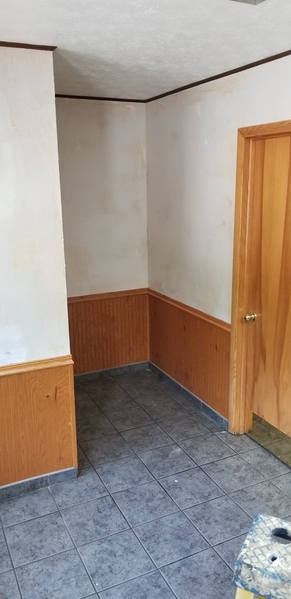
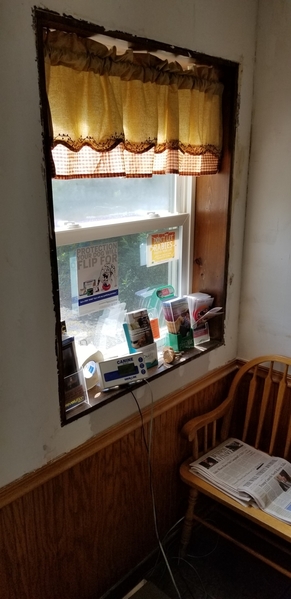
I'm trading services with a client and we were able to get the wallpaper down a couple weeks ago.  A minor roof vent leak we discovered has been fixed.  Today we've started mudding & will repair a patch of drywall that we partially removed with the 40 year-old wallpaper. 

30728839_10214650419589128_732146724008624128_n30706866_10214651144407248_350113626457112576_n20180520_125403


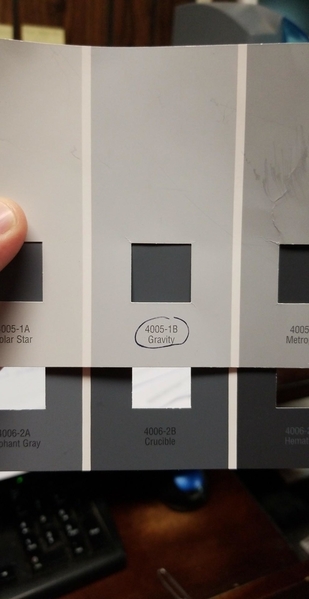
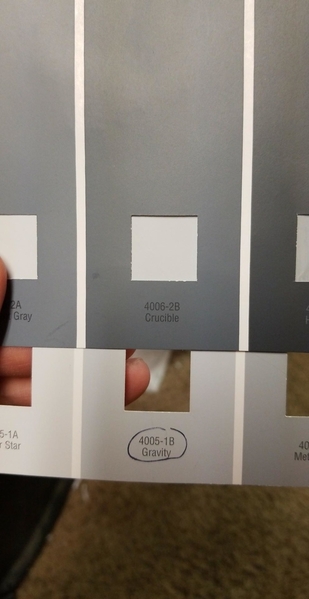
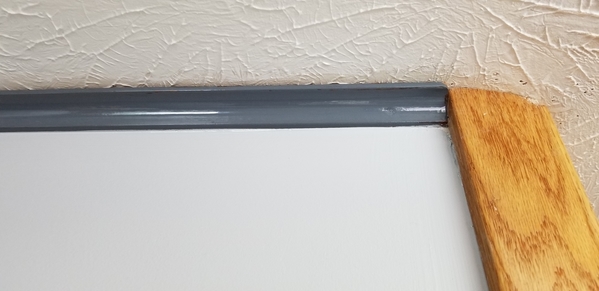
It'll be at least 2 coats of mud, plus touch-up, before we can paint. Going to use a light grey ("Gravity")_ for the walls and a dark grey ("Crucible") to go over the dark brown trim (crown molding, door, windows).  The grey should make for a nice autumn/winter sky backdrop.  While trains will be running year-round there will definitely be a special focus on Halloween (have MTH train on order) & Christmas (should have full scale PE train as well as CP Christmas train for this year).  

33020172_10214911703881072_587562392360058880_n32940186_10214911800603490_1286277662167269376_n

I should have about a foot between the ceiling and top of the board for scenery and plan on using foam board and several MTH buildings with Christmas lights to scenic a small passenger station area, as well as residential, and commercial areas in the corners of the layout. 

That's all for now.  Hopefully these pictures load ok - they look fine on both my computer & cell phone.  Will post again when there's progress. 

Attachments

Images (5)
  • 20180520_125403
  • 30706866_10214651144407248_350113626457112576_n
  • 30728839_10214650419589128_732146724008624128_n
  • 32940186_10214911800603490_1286277662167269376_n
  • 33020172_10214911703881072_587562392360058880_n

The room is looking really good!  I used MDF for my Ceiling Central RR, and it has worked out okay.  I agree on the statement that it has less chance of warping, but doesn't take screws as well as plywood.  Since mine is in a basement family room, I used precut and finished shelving.  A foot clearance should work nicely.  I only have 7 inches because of the low ceiling and it makes it harder to see what I'm doing, and leaves less room for scenery, which I only have made a minimal effort to date.

Thanks to all for the replies! 

John - I would definitely do that at home (if I ever get around to that layout...)  but I'm not sure if I'll do too much scenicing re: background, as it is still an office lobby.  I'm hoping the grey paint serves as a somewhat effective October-December Midwestern sky.  Not sure if I'll paint the shelf itself white or dk. grey yet.  I may eventually ballast the inside edge of the track, though at over 6.5' high most low things won't be visible.  I plan to do some small hills & elevations of foam as sands for buildings & scenery given the time.  Probably several, spanning multiple seasons - one in snow, one green & lush, & for autumn.  Would be good use of the corners of the 4'x8' boards at the end, which I'll be preserving for structural integrity. 

Would love to be able to get the paint up by the end of the week. I'll keep y'all posted!

- Neal

Last edited by Fridge56Vet

Doug - Very nice!  Thank you!  Have you noticed any issues w/the wood warping, etc.?  I'm probably leaning that route vs. MDF right now. 

Also, the drywall is patched & 1st coat of mud complete.  Just have to find a time to do 2nd coat & sand, then painting can begin.  Won't get done this weekend, though, with my stepson's graduation and holiday.
20180525_095041

Attachments

Images (1)
  • 20180525_095041

No problem at all with any warping, the Baltic Birch plywood is extremely stable, after cutting and some fine sanding the polyurethane gives it a furniture grade finish. If the price has risen like that common plywood be prepared for sticker shock, this was done some years back before most building materials went nuts.

I will make one very strong recommendation, based on a lesson learned with this project. Before cutting and doing your sub-assembly for final installation not only do you need your dimensions to be accurate but also check your dimensions from opposite corners. This is a step I didn't think about but learned when I started installation. The "cookie-cutter construction"  of homes tends to leave rooms that don't have square corners. Was a real pain going up-n-down that step ladder to make minor adjustments so everything fit properly.

+1 on Birch plywood.  I have pieces (circular and straight) for elevated track on seasonal layouts that get stored in the garage.  No warping over several years of crappy summer storage in mid-Atlantic heat and humidity.  Cannot say the same for softwood ply.  I would not touch MDF as it needs support on all edges to retain its shape over time.

I concur with leaving the outside corners on for stiffening.

To support a long bridge, use angle or square tubing under the bridges.  I find that aluminum angle with 1/8" walls is stiff for supporting bridges.  You might consider aluminum U-channel of a width that matches the underside of the bridges - it will be very stiff even over long spans.  Check out onlinemetals.com for available shapes.


Another vote for Birch plywood...

BTW, fastening the wall brackets firmly is paramount.  Fastening the sub roadbed (birch ply) to the wall brackets is next most important. 

However, fastening the track to the roadbed is, IMHO, a matter of keeping the track from shifting side-to-side.....because gravity does a pretty good job of keeping things 'down'.  IOW, don't fret too much about a lot of thread power in keeping the track in place.

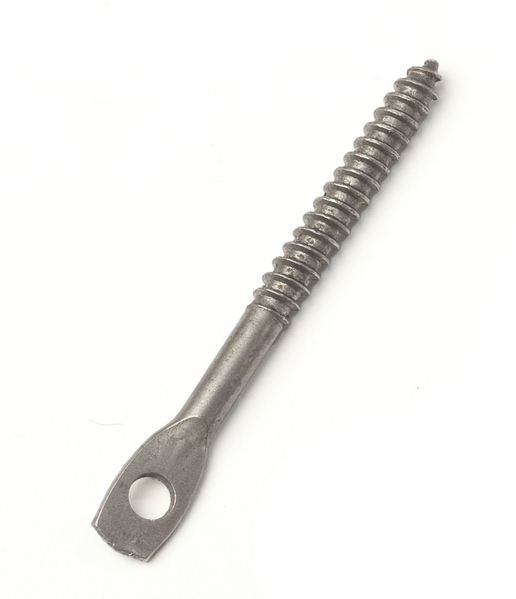
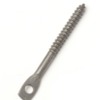
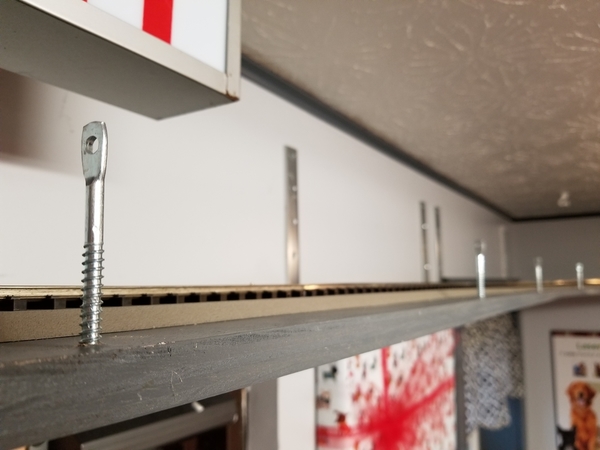
Now then, I would strongly suggest the addition of a safety wire/railing on the outside of the shelf to retain locos and cars that would like to be Tootle....off the rails, picking daisies.  If there's a chance a client or co-worker could find themselves under attack from falling trains, your insurance company would probably appreciate this addition.  It need not be celebrated.  That is to say a run of wire about a half inch above rail height should be adequate and not obstructing the view of the trains that much.  On the commercial installations I've done, I found that the eye lag screws...

eye lag screw

...used mainly in the hanging of suspended ceiling rails/panels are a very handy, inexpensive, quick way of providing support for a safety wire....for which I use a very thin steel cable, such as included in picture hanging kits but certainly available in bulk, cut-to-length at larger hardware, home improvement stores.

Other than that....have fun. 

Oh yes, another lesson from the School of Hard Knocks....keep your train controls out of reach of curious customers.  There's 'hidden', and there's 'locked'.  One client found that 'hidden' doesn't mean much to determined Easter egg hunters and masters of playscapes....or bigger kids who never were smacked for inappropriate curiosity!

FWIW, of course...

KD

Attachments

Images (1)
  • eye lag screw
Last edited by dkdkrd

Thank you all for the advice!  I will definitely look for birch plywood & try to avoid soft.  KD, I do like the safety wire idea - more subtle than a couple inches of Lexan screwed to the edge.  Surprised only 1/2" is enough, but will do!

I think I'm leaning towards painting the wood that dark grey to match the rest of the trim. Any suggestions for wall-mounted supports?  I was thinking I might craft those out of plywood, too, especially if I can't find prefab wood ones and for areas where a longer support is needed. 

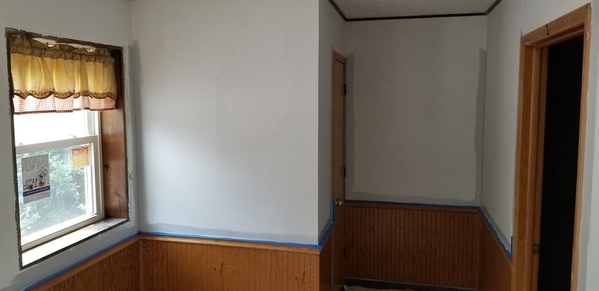
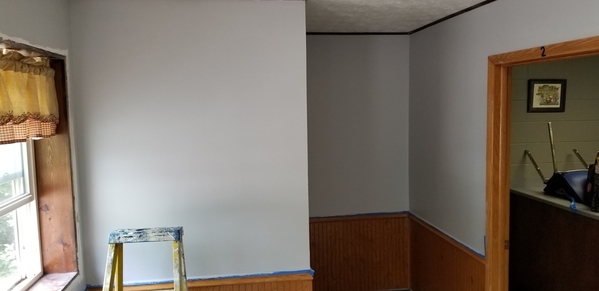
The main walls of the lobby have been mudded, sanded, primed, and painted!

20180609_14593220180610_11554620180610_13092620180611_150831

Hoping to get trim pieces, sills, and door done soon.  After that I can work on the shelving! 

Thanks for your interest and input; I'll keep you posted!


- Neal


Attachments

Images (4)
  • 20180611_150831
  • 20180610_130926
  • 20180610_115546
  • 20180609_145932
Last edited by Fridge56Vet

Neal, I used dimensional birch for the support brackets. The vertical pieces are 1x2 with the horizontal pieces being 1x3 or 1x4 depending on how long they need to be for proper support. They are assembled using screws and dowels as well as a really good quality carpenters glue.They are all attached to wall studs except for the ones in front of the ceiling height closet doors which are attached to the ceiling joists.

I do not trust dry wall hangars for anything that will possibly have to support the weight of an articulted steam engine or possibly some die cast hoppers, etc.

Doug - Thanks!  I will definitely consider that for the supports if I go with the wood look.  I agree w/respect to drywall hangers.  Even if I did use metal brackets everything would be screwed into the studs.  

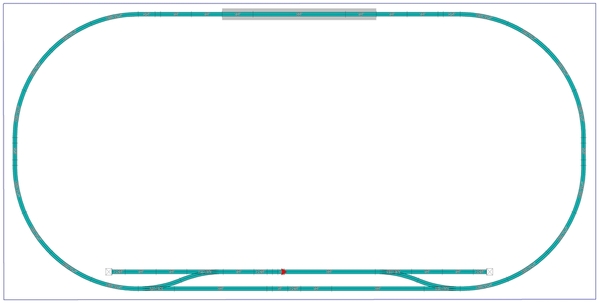
It's been a busy summer & I apologize for the lack of an update.  The lobby is basically done (save the door) and my father & I will get to work on the layout in the coming weeks (once they get back from vacation).  In the meantime I couldn't help but toy with the layout & added a super-long siding.  This would allow me to park a train while running another.  I believe I've got 4.5" center rail to center rail at minimum.  It would require 1 foot shelving on the front side of the layout vs. 8", though.  A neat idea, or should I leave well-enough alone?

Lobby Loop 2

Attachments

Images (1)
  • Lobby Loop 2
Last edited by Fridge56Vet

I think the siding is a good idea. You have to get a 1' piece of cardboard or something and place it up on wall and decide if you think that it extends outward too much. being able to alternate trains will save on maintenance and wear and provide an option to avoid boredom. heck, you could even time them to alternate.

I would make the route of the active train on the room side for a single.

Here's a thought that makes folks shudder for some reason. In a thread discussion of a shelf layout upside down supports were proposed. Many went ballistic thinking it would fall. The member that proposed the idea, then, provided photos of his work.

The bracket wall leg was virtually invisible above the shelf because of the viewing angle. Doing it this way, he was able to install crown molding under the shelf for a very nice finished look.

Fridge56Vet posted:

Thank you all for the advice!  I will definitely look for birch plywood & try to avoid soft.  KD, I do like the safety wire idea - more subtle than a couple inches of Lexan screwed to the edge. Surprised only 1/2" is enough, but will do!


- Neal


From your 6/11/18 post - here is a sagulator  to calculate the load bearing capacity of a shelf. They only offer fir for a material choice, but, birch is stronger and has more plys and better glue.

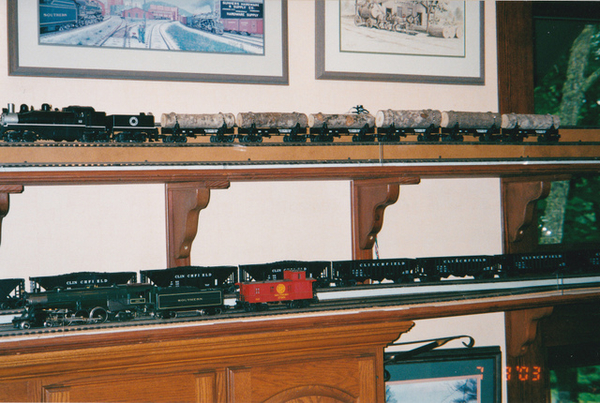
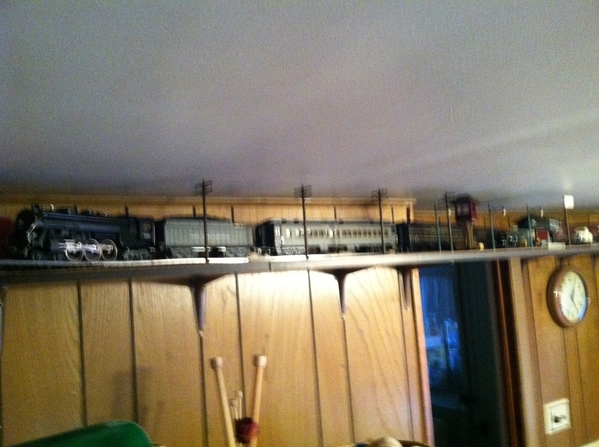
Here are some photographs of my shelves.  They are in a basement family room, where the ceiling is split with the bulkhead for the load bearing I beam and ducts.  The trouble is, there are jogs on two adjacent walls.  With 12" wide shelves, I can run 2 separate loops, with 2 trains running.  I am fine with my engines that need only 042 and 40-foot boxcars, but I run in trouble with my 60-foot passenger cars.  The overhang, just barely clips cars going the other way on the jogs.  042 inside loop, and 054 outside loop.  I have shelf brackets underneath, screwed into studs on the 2 paneled walls, brackets from above on the bulkhead, and anchors in the joists coupled to all-thread on the brick wall.  I never dressed it all up because no one really sees it but me and my wife.

2014-02-22 17.04.562014-02-22 17.05.112015-08-10 11.46.072015-11-28 16.38.432015-11-28 16.38.512015-11-28 16.39.462017-11-20 19.42.102017-11-20 19.42.242018-01-04 10.32.012018-06-11 21.01.312018-06-12 20.14.33

Attachments

Images (11)
  • 2014-02-22 17.04.56
  • 2014-02-22 17.05.11
  • 2015-08-10 11.46.07
  • 2015-11-28 16.38.43
  • 2015-11-28 16.38.51
  • 2015-11-28 16.39.46
  • 2017-11-20 19.42.10
  • 2017-11-20 19.42.24
  • 2018-01-04 10.32.01
  • 2018-06-11 21.01.31
  • 2018-06-12 20.14.33
Moonman posted:

I think the siding is a good idea. You have to get a 1' piece of cardboard or something and place it up on wall and decide if you think that it extends outward too much. being able to alternate trains will save on maintenance and wear and provide an option to avoid boredom. heck, you could even time them to alternate.

I would make the route of the active train on the room side for a single.

Here's a thought that makes folks shudder for some reason. In a thread discussion of a shelf layout upside down supports were proposed. Many went ballistic thinking it would fall. The member that proposed the idea, then, provided photos of his work.

The bracket wall leg was virtually invisible above the shelf because of the viewing angle. Doing it this way, he was able to install crown molding under the shelf for a very nice finished look.

That's a pretty neat link, Carl!!!

Here's another alternative I may consider, though only good for shorter trains (only 50" of straight siding).  I'm worried that a double track will be just overkill for an office lobby, though this could be a compromise plan. 

Lobby Loop 3

The "bridge" over the front desk space has been purchased & is sg. track so I'm locked into that.  I'm thinking about just mounting the whole thing to a sg. 8' board & foregoing the pylons (would have to re-mount electronics for Xmas lights). to maintain structural rigidity.  I'm a fan of late steam & scale passenger cars, so weight is very much a factor for me. 

A big thanks to all who have posted in reply of late.  Summer's been a bit crazy at the clinic but hoping to start actual layout construction in a couple of weeks.  I will keep you posted!


- Neal

Attachments

Images (1)
  • Lobby Loop 3
Last edited by Fridge56Vet

Neal   

i used 3/4" plywood in 1992 when i installed my twin shelf operation at our mountain cottage. At the time a friend in the cabinet business was having difficulty with MDF and he didn't like its extra weight. Anyway, the plywood shelves were located in the Domestic CEO's  14x32 kitchen/ breakfast room and she insisted that it be stained to closely match the cabinets. Our deal was that I got the wall space in exchange for getting my RR off her Den carpet.  Sadly old age intervened so I removed the operation in 2008 in anticipation selling and relocating to our Greensboro Condo and source of better medical facilities. 

Airborne ladder railroading , nothing like it.


IMG_0001IMG_0003

IMG_0004

Attachments

Images (3)
  • IMG_0001
  • IMG_0003
  • IMG_0004
Last edited by Dewey Trogdon

I already have the O80 loop of ScaleTrax, so I'm a bit locked in there.  Wish they had O80 switches; I'd just have a couple spurs into the corners.  I prefer (& have) scale passenger cars & articulated steam so I want to take advantage of the larger curves.  May just stick w/my original loop....

Dewey - I've seen your pics before & I do like those supports - I've been considering something similar.  I can see the screw holes at the bottom, but how did you anchor the rest?  I presume they're set into studs?  Thx.

- Neal

banjoflyer posted:

For better grip in MDF make sure you use "coarse" thread drywall screws. It really makes a difference. There are many brands to choose from.


Also avoid "overdriving" the screws as that can lead to stripping out the screw hole. Essentially the screw becomes a drill bit and reams out the threads it just cut in the MDF.

Mark

I would recommend SPAX star drive screws. I have used them for quite some time. Get 'em at the Depot.

Dick

Fridge56Vet posted:

I already have the O80 loop of ScaleTrax, so I'm a bit locked in there. Wish they had O80 switches; I'd just have a couple spurs into the corners.  I prefer (& have) scale passenger cars & articulated steam so I want to take advantage of the larger curves.  May just stick w/my original loop....

- Neal

A ScaleTrax #4 can be used to make a siding off of the curve, then, with a cut ScaleTrax O80 curve to bring the mainline back to parallel you could make a nice smooth move to long siding that only requires about 8" in width.


Attachments

Images (1)
  • ScaleTrax_O80_Siding_using_No.4_Turnout

Neal-"Fridge",etc

RE: Your question on attaching wooden supports to studs on shelf RR-showing bottom shelf of two:

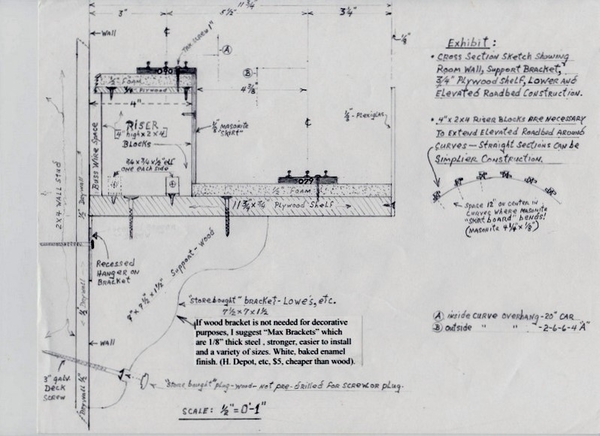
The store-bought (Lowe's-1992) decorative wooden supports had a recessed metal bracket or hanger on the back near the top for hooking over a screw head. The bracket had a round hole to receive the screwhead with a slot above to slide down on the bracket ( the wood support was recessed enough to allow the screwhead to slide up into the bracket slot)  First, I replaced the short screws holding the bracket to the support with longer ones. Then I ran a 3" screw into the stud leaving only enough of the screw head out to clear the drywall surface to receive the support w/ bracket, tapped down in the bracket slot for a very snug fit. Then I installed the bottom 3" screw into the stud through 2 pre-drilled holes. One shallow hole for the screw head diameter to receive a covering plug and one for the stud screw shank diameter. Hopefully with your magnifying glass the old crude, faded sketch below will show some of the detail:

002-001

My track was all Gargraves flex due to the non-standard curves. For example O-156 on the track nearest the wall at one end of the room. I had to bring the raised elevation of the lower shelf( 7'-6" above floor) wall track down to cabinet shelf level to enable tunneling through the Domestic CEO's pantry which had only an 8' ceiling whereas the room ceiling was 20' at the ridge. 

Photo below shows Clinchfield Challenger with 30 hopper consist on high track of top shelf above kitchen sink. Photos were low quality due to point and shoot camera and reflection from plexiglas safety fence and skylight. 

Shelf CC&O 001


Attachments

Images (2)
  • 002-001
  • Shelf CC&O 001
Last edited by Dewey Trogdon

I think I've tentatively decided on version 4A below.  Will try to order more ScaleTrax & Flexxbed this week.  Unfortunatley, my grandmother is starting to decline & was moved last week, so dad & I may not be able to synch our schedules to get this done by Halloween.  Will keep you posted, though. 

Dewey:  I've seen similar things at Lowe's/Home Depot, but they may not be wide enough for the corners.  Thinking about maybe using some solid metal (~1/8: thick) L-brackets that I came across there to mount into studs & bolt shelf above.  Could paint to match wall, shelf. 

As always, all thoughts & suggestions are greatly appreciated. 

Lobby Loop 4A

Attachments

Images (1)
  • Lobby Loop 4A

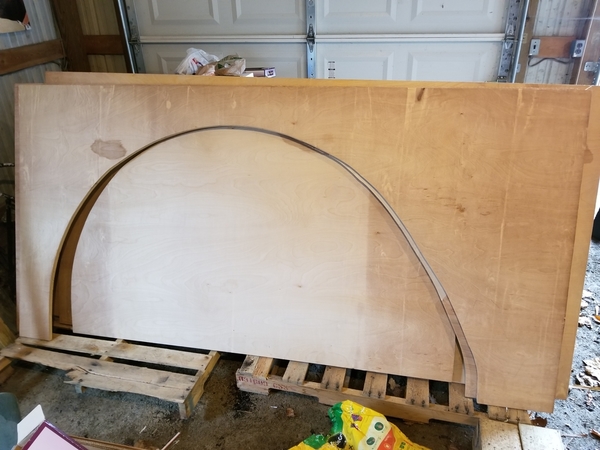
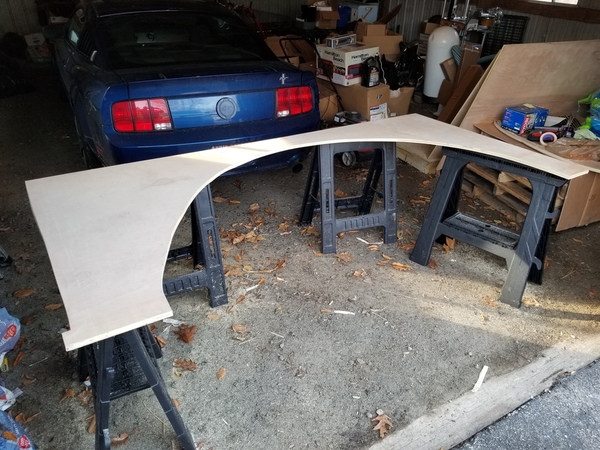
Began measuring & cutting the 8x4s for the ends of the layout today!  Discovered that the room is, of course, not perfectly square as we'll have up to 1/2" gap depending on the corner.   We determined that we wanted the center rail of the office side (vs. front door side) to be a good 3.5" from the wall, which would allow clearance of the girder bridge past the trim of the Dutch door. 

20180923_153356

We also calculated for 3.5" center rail to end wall at the apex of the curves.  We then drew an arc with a radius consistent with an additional 3.5" from center rail (7" from wall) along the inside of the curve.  There will be about 4" straight track entering that 8x4 plywood piece before the curve & we measured accordingly. 

20180923_13443020180923_140711

As I do not have the #4 turnouts yet I was unsure exactly how much shelf I wanted to leave on the front door side.  I kept it simple & just finished the arc 180 degrees, knowing I can trim more precisely once I get the remaining pieces in stock.  At about $55/sheet I'd rather be safe than sorry - can always cut more later. 

I'm also happy to report that it seems I'll have plenty of structural rigidity in the open corners, at least based on a quick wiggle test.  I'm pretty sure I'll use thick metal brackets mounted vertically above the shelf.  Not sure I have the cojones to mount the plywood to the bottom of the brackets, though.  Will probably top mount & anchor w/screw & washer or bolt & washer. 

Also, I decided to not bother with the spurs after seeing the plywood sheet tentatively placed up high.  There's no way to easily access back there & you can't really see anything anyhow.  I'll keep the siding but will otherwise stick with my original plan of placing lighted buildings on top of 1" or so foam sheeting & decorating for the season.  I've already got the north pole station on order, which will probably go in the lower right corner.

Lobby Loop 4

Thanks again to all who follow my progress and as always, any comments or suggestions are appreciated.

- Neal


Attachments

Images (4)
  • 20180923_140711
  • 20180923_134430
  • Lobby Loop 4
  • 20180923_153356

Finally getting back on track (I know, bad pun) with respect to the layout.  We got Grandma moved into the assisted living facility in Septmeber and now I've got all the track pieces I'll need.  I have tentatively tacked them to the layout with 1" brads to make the final cut-downs on the 4'x8' end pieces.  Then we can route an edge onto the boards, prime, paint, and mount. 

20181105_172517

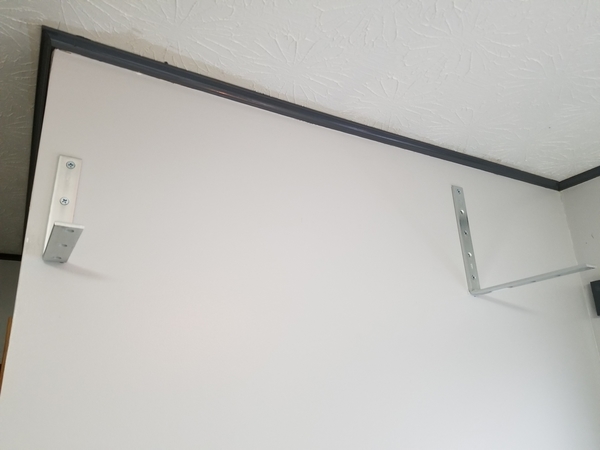
I managed to find an assortment of brackets at Lowe's that should do the trick.  They're about 1/4" thick steel with 6", 8", and 10" arms with several pre-drilled screw/bolt holes, respectively. 

20181104_14203520181104_142026

I believe this should provide enough stability, even in the corners, especially if all holes are utilized.  I plan on using 1" long #12 screws to come up from under the horizontal arm of the bracket into the plywood for the hole(s) away from the wall, and using a bolt up through with a lock washer & hex nut on top for the hole closest to the wall.  I'll use 3" #12 screws through the vertical arm of the bracket to anchor into the studs.  If I need additional support between the studs I could always use extra-heavy duty wall anchors and additional brackets. 

If anyone sees any red flags with this, please let me know BEFORE I start drilling in the coming weeks.     Thanks again!

- Neal


Attachments

Images (3)
  • 20181105_172517
  • 20181104_142035
  • 20181104_142026
Fridge56Vet posted:

Finally getting back on track (I know, bad pun) with respect to the layout.  We got Grandma moved into the assisted living facility in Septmeber and now I've got all the track pieces I'll need.  I have tentatively tacked them to the layout with 1" brads to make the final cut-downs on the 4'x8' end pieces.  Then we can route an edge onto the boards, prime, paint, and mount. 

20181105_172517

I managed to find an assortment of brackets at Lowe's that should do the trick.  They're about 1/4" thick steel with 6", 8", and 10" arms with several pre-drilled screw/bolt holes, respectively. 

20181104_14203520181104_142026

I believe this should provide enough stability, even in the corners, especially if all holes are utilized.  I plan on using 1" long #12 screws to come up from under the horizontal arm of the bracket into the plywood for the hole(s) away from the wall, and using a bolt up through with a lock washer & hex nut on top for the hole closest to the wall.  I'll use 3" #12 screws through the vertical arm of the bracket to anchor into the studs.  If I need additional support between the studs I could always use extra-heavy duty wall anchors and additional brackets. 

If anyone sees any red flags with this, please let me know BEFORE I start drilling in the coming weeks.     Thanks again!

- Neal


Those brackets won't support a lot of weight - in this application, I think they will be prone to bending unless you use a lot of them - like about 6" apart.  IMO, stamped shelf brackets, while not particularly attractive, would be less likely to bend.  Or, make some wooden supports. 

Neal:  That should work well.  I love shelf layouts.  Here are some additional ideas to consider....

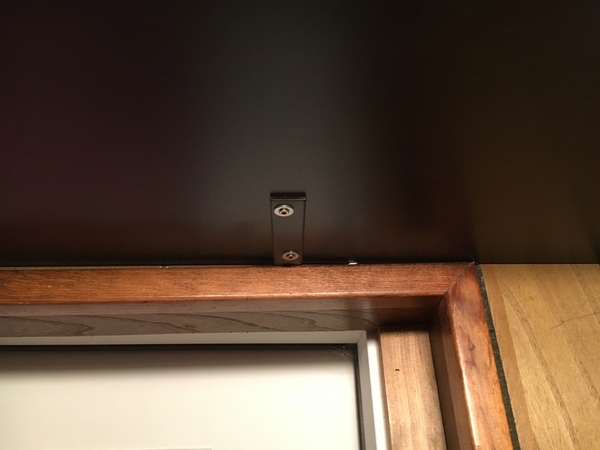
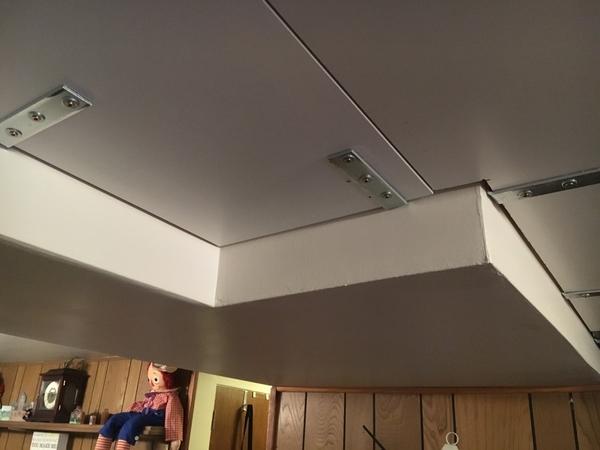
These are 6 X 6 brackets from Lowes.  VERY heavy duty.  You can see the small brackets that add additional support.  On each 10 x 8 board, I used two large brackets and one or two smaller brackets.  Use as few screws as you can.  I only put two apiece in each bracket.  It's been up there four years and not a budge.  Also, If you can dowel them into each other, that makes the whole shelf a LOT stronger.  None, of the many boards, are glued.  That also means it will be simple to take it down, if such an abhorrence should occur!!

By the way, this is a 12 X 12 board, because I wanted a long spur to go into a small yard at the back of the layout.  It's the only one of that size.  You can see the roadbed that cuts down the noise and vibration.  Also, it sounds really cool hearing those trains just rolling along over those tracks, roadbed, and boards.

100_0602

100_0603

Think about backdrops.  Also, lighting.  These rope lights can't be seen from below, give a pleasing striated effect on the backdrops, and are simply plugged into a regular 110V outlet.

100_0654

I see you are laying your track on the shelves before you put them up.  IMO, that's the way to go.  All spurs, and yards should be pre-wired and tested, especially any switches and controllers.  Saves you a lot of grief.

100_0615

I hung the doweled boards from above.   Each board was stained, sealed, and sanded multiple times.  Regardless of color or arrangement, it should look like part of the wall or furniture, from below.  There are no brackets, wires, or accessories, visible from below.  The height of your shelves will hide all your wiring, lighting, and other things you add.

20170507_105202

It looks like you will have space, in the corners, to add some structures.

20180201_131250

I consider this borrowed tool, essential to the overall strength of my shelf layout.  I used 1/4 inch dowels, with 3/4 inch pine shelves.

20181105_201346[1]

Here is one example of the overall effect of all that work...

I hope some of these pics will give you some ideas that will help you complete your project.  Feel free to comment or ask questions.  Don't forget to take lots of pics, and keep us posted on the forum.

Jerry

Attachments

Images (7)
  • 100_0602
  • 100_0603
  • 100_0654
  • 100_0615
  • 20170507_105202
  • 20180201_131250
  • 20181105_201346[1]

Neal, Jerry did the same as I did, but his looks much neater because I was concerned about not having metal underneath the boards.  His boards look better than mine too.  I wasn't as concerned because mine is in a rather tacky room to begin with.  

I plan to do like Jerry suggested in putting in a backdrop and that rope lighting would make a big improvement also. 

Too many projects, too little time and money.  Actually, this is a pretty low cost project.  

Jerry :  Thank you very much for sharing.  Yours was one of the layouts I'd found in an older thread when I was just starting to kick around this idea.  Those look like the brackets I've bought - I got not only 6x6 but also 8x8 & 10x10 to use in the corners.  planning on using the longest length possible mounted into each stud.  Not sure I have the stones to under-mount the shelf to the brackets, though it's tempting for aesthetic reasons.  I'm trying to avoid having much underneath the shelf.  What kind of screws did you use?  Everything shelf-wise is going to be painted the dark grey seen earlier in the thread. 

Using FlexxBed under the track to help with noise.  I chose ScaleTrax for the solid rail to help with this too.  The track pictured is only there temporarily for measurements before the final cut.  I'll jigsaw the final edge, then use the one 4x8 sheet as a stencil for the other.  I'll definitely toke your advise & get the worst of the track laying & wiring done before mounting the shelves. 


Also, I think I'll just use molding on the inner edge rather than trying to use the router.  That should mask small variations in curve from the jigsaw.  Also an excuse to use the nail gun I got for Christmas last year.  (Would be good practice for the crown molding at home that I promised the wife....)  Could then fill any gaps, sand, & paint.  Assuming I can get the molding to bend to a 6.5' diameter, at least.  If I do mount the shelving underneath the brackets I could also use some to mask the gap between the wall & shelf. 

Well, I should probably get to bed. Thanks again for all the advice, photos, etc.  I'll keep you guys posted.

- Neal

Last edited by Fridge56Vet

Neal:  Since I used 3/4 inch boards, I bought the thickest 1/2 inch screws I could find that fit the 6 inch brackets.  The smaller brackets (4 inch) come in their own plastic bag and have the proper screws to fit. 

Mine is 35 feet on either side, plus another 15 feet across, making it 100 feet of track, times two.  That's a lot of board weight to support, and that's why I doweled everything.  If you pull down on it, it will bend.  That's a good thing.  I also have four engines and nearly 100 cars up there.  They really don't weigh that much, and the boards never bend with their passing.  If I ever find a weakness, I can pull down the backdrop and add another bracket.  I hung the backdrop with velcro for two reasons:  First, you can't nail it, and glue is out of the question because it would ruin the surface of the beam boxes.  Second, in case I need to add a bracket, it's easy to get access to the wood.

I thought about adding molding for the outer edge.  The inner can't be seen due to the height of the shelves and the backdrop.  I decided against it.  First, it would be VERY tough to bend it through the corners.  Second, any molding would have as many seams as it would cover.  I like the look of the natural wood, and the shelves were stained and sealed to match the boxed beams they're attached to.  Finally, when the painting is done, shoot the artist.  Constant tinkering with the shelves would probably ruin them, in my case. 

Good luck and keep us posted.

Jerry

Jerry:   Thanks.  How tight are your corner curves?  Mine will be O80, and I have a thing for larger articulated locomotives.  Do you still think I'll be ok even with 10" brackets, then?  Planning on having one in each stud, which should be 16" on center.  I've never doweled anything before but will look into that.  I'm using 3/4" birch plywood as opposed to solid board, would that make a difference?  Looking for one locally.  I assume you used wood dowels?

- Neal  

Neal:  My curves are all slightly different.  Most are between 050 and 060, but there are a few near 045.  It's all flextrack with gargraves screws.  080 should be fine for your big engines, but make sure you check their ratings if you put any monsters up there.  I don't have any large engines because mine is double-tracked and those long Superliners (or long engines) would have trouble clearing the consists on the opposite main, when into a curve.

For your brackets, I would check to see if you can bend them with your hands.  If so, I recommend you exchange them for something thicker.

This is the first 8X10 I ever put up there.  It was a test for overall strength.  I even took a hammer to the thick brackets to see if I could bend one before I screwed it to the board.  This board convinced me I had enough support for the whole project.  You can see there are only four brackets holding it up, two big and two small.

100_0588

Putting a bracket that won't bend on every 16 should give you plenty of support.  Your other ideas about additional support should solve any issues that come up.  Plywood is fine, most guys use plywood on their layouts.  I couldn't because it had to match what was already there, and I like the look of the stained and sealed boards.  I put a lot of time into each one, sanding and sealing three times.  Oh, yeah, since this is my basement, I make sure the dehumidifier is running, spring, summer, and fall.

This pic shows one way to put things together.  You can't dowel perpendicular boards at both ends, so you fasten one end with these small connectors.  You can also see the large bracket coming under the roadbed, and the gaps in the roadbed for that bracket and the next board.   I glued the roadbed to each board, and screwed down as much track as I could before putting it up.  Pre-drill the ties where screws will go, slide the connecting track together, then use a short handled driver to put them through the roadbed and into the wood.  In my case, I only have 7 1/2 inches to work with up there.

20181114_082544[1]

Yeah, I'd never doweled anything either.  You need that doweling tool.  You'll find packets of dowels where you buy your wood.  I recommend 1/4 inch by 1 inch.  Three dowels in each board.  Not only does it add overall strength, your pieces should fit together perfectly with no sagging edges between boards.

Sounds like you're about to have a great experience doing this project.  Looking forward to seeing it....

Jerry

Attachments

Images (2)
  • 100_0588
  • 20181114_082544[1]

Jerry:  Good to know.  Don't forget, though, that the plywood will be unsupported for roughly a 4' span on the single rail half of the short ends (hallway beneath).  Though I suppose I could run a 2" plywood strip perpendicular to the main board under & along the back edge.  That's what I plan to do to reinforce the plywood for the bridge span.  

Also - is there a specific reason for using fewer, rather than more, screws? I'm a doctor, not an engineer....  😜

Thanks again for the input and photos!

- Neal

Last edited by Fridge56Vet

Jerry:  Indeed. Just wanted to make sure there wasn't a structural reason for less screws.  The 10" brackets can accommodate 5 screws.


Dodged a bullet this week re: plywood   the garage roof has apparently developed 3 leaks - right over where I was storing the wood.  Thankfully most of the water hit the cutout "scrap" pieces & while water had absorbed there is no major delamination.  Only trouble spot I see on the actual shelf wood is about a 3/4" spot of bubbling way back in a corner out of view.  Got all pieces vertically stored & the tops covered w/some old plastic, just in case.

- Neal

Neal:

Your project is an inspiration to me and other hobbyists who have filled-up the platform space of a layout resting on legs or sawhorses in the train room. Perhaps the easiest way to expand is to "build upward" with a ceiling-hugging, shelf-mounted route. 

I initially planned a shelf-mounted "pretzel" route with computer-based track software for my L-shaped train room (16x19 feet), but I soon met real-world obstacles:  a downward projecting, load-bearing support beam at the angle of the "L" that shouldn't be notch-cut (for fear of bringing down the ceiling), and walls of different materials -- two brick walls and two stud walls covered with paneling.  Further, installing a ceiling-mounting train shelf around the perimeter of the train room would be blocked by the layout already in place in that room.  A classic case of "building a boat in the basement before realizing there's no doorway to get it out of there." 

I liked the idea mentioned in this posting about installing "plain Jane"metal L-brackets to the wall - showing its vertical leg on the wall above the shelf with its horizontal leg on the wall underneath the shelf; along with crown moulding underneath the shelf for a "finished" look. The moulding would have some additional (but not a lot of) shelf support - mostly a touch of elegance.

Keep posting info gathered along your "learning curve" for the benefit of others!

Mike Mottler    (ritrainguy)
mottlerm@gmail.com


After a crazy Thanksgiving week I was able to get the final cuts done on the end pieces.  I used a tip my dad got regarding fine cutting nice plywood.  After making your line in pencil, cover on both sides with masking tape to keep the edge from fraying, even with a high-quality finish blade.  I must say it worked rather well & got nice, clean cuts. Now to measure & cut the straights and then on to sanding, priming, & painting.

20181126_125029

Attachments

Images (1)
  • 20181126_125029

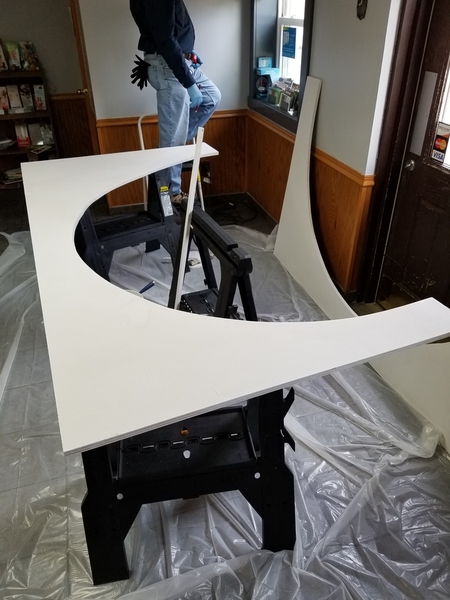
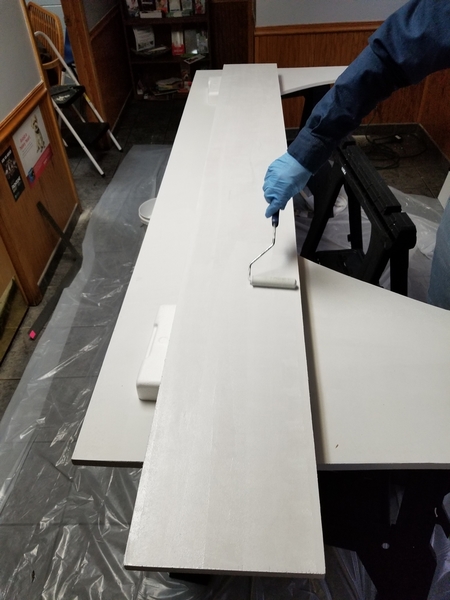
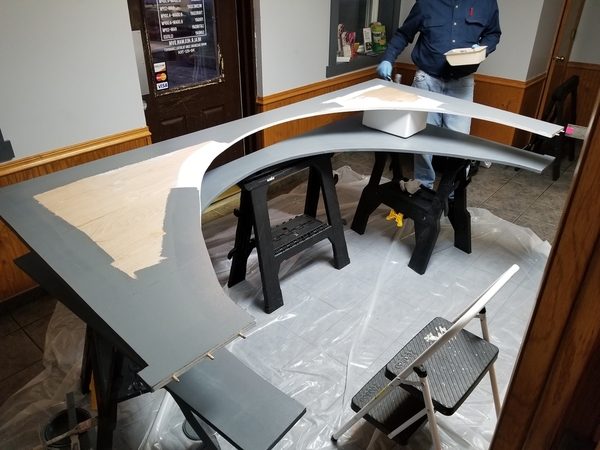
Lots of progress this past Wednesday as Dad was able to come by & lend a hand.  Lots of priming & panting got done on the end pieces and also the front straight board over the entrance.  Also got a coat of the grey paint on the one side of the ends. 

20181212_14311620181212_16265820181212_171750


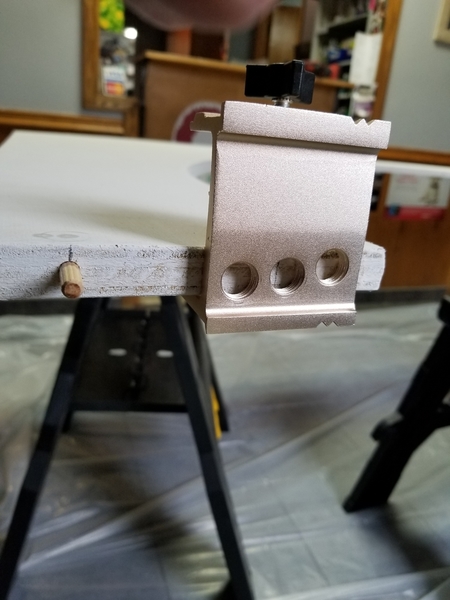
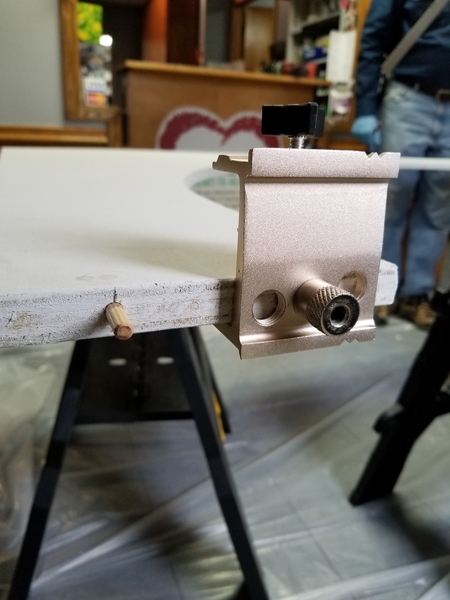
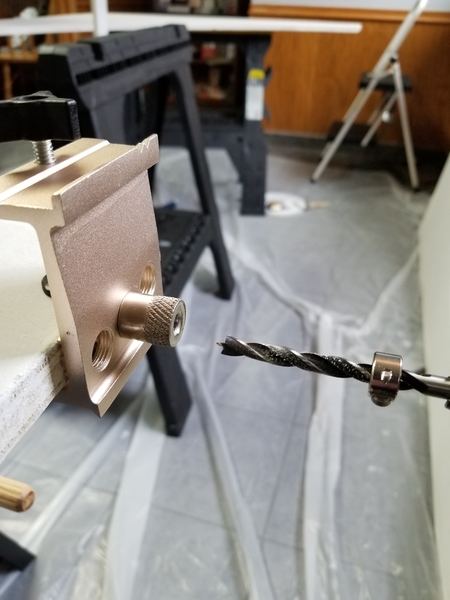
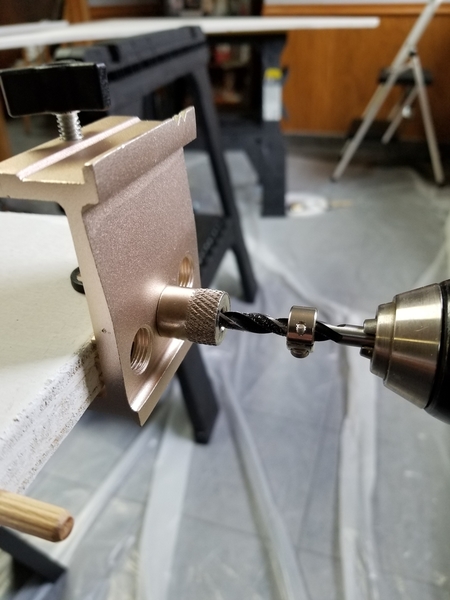
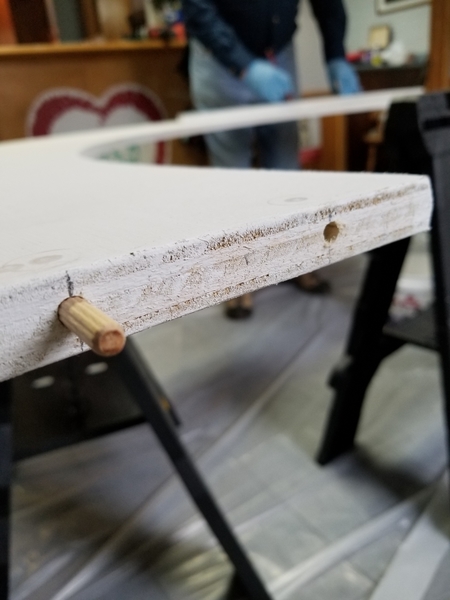
I also messed around with the dowelling jig I bought at Home Depot.  Was the only one in stock & was back by the wood trim, not the tools.  Seems to work pretty well.  Came with 3 different bit diameters, guides, & bump stops.  It's pretty simple.  Use the guide & jig to figure out how deep your hole needs to be, then clamp the stop to the bit.  Take the jig & clamp the edge where you want to make the hole (remember - measure 2x 1st...), screw in the appropriate guide (easier to see your mark if you unscrew the guide after measuring depth), and drill.  I found I needed to jiggle the bit a little to make the hole large enough to fit the dowel in to the half way point.  I only did the one end board.  I'll see how challenging it is to line up the holes later. 

20181212_14561320181212_14562320181212_14563220181212_14563820181212_145702


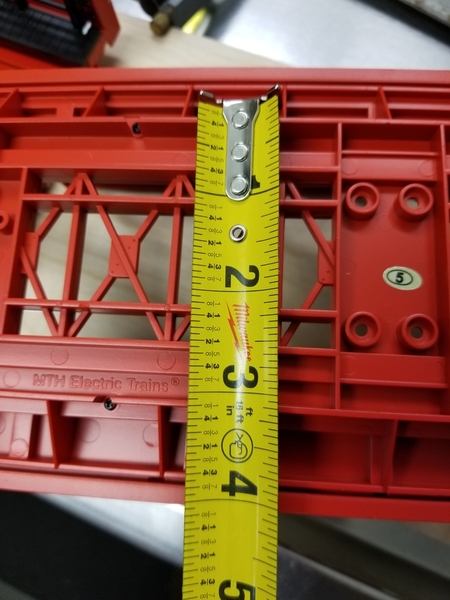
The one board we didn't have time to do much on is the back straight over the reception station.  I will need to cut this down to the width of the bridge base (~3 & 3/16"), as well as the width of the doorway & trim on the back side.  then it can be primed & painted.  I will add a 2" plywood strip perpendicularly along the midline underneath this board for structural rigidity as well as a place to mount the electronics for the bridge sections that come housed in the pylons. 

20181212_16394920181212_16391220181212_163943


Finally, we did get a few brackets mounted.  Pleased w/the security of the ones we have so far, so I'll probably go every other stud, as convenient.  May also have to use some of the large, screw in 50# drywall anchors just to keep it from sagging in one or 2 corners that don't line up with a stud.

20181212_152211


There's an outside chance I'll get more stuff done Sunday, but probably not.  We'll definitely have to mount the power brick, TIU, & Legacy base in the equipment closet.  Unfortunately, there's no outlet in there (it's actually the bathroom we don't use, converted to storage).  I'm planning on running a heavy duty extension cord from the one below the large bracket in the picture above through the ceiling & down to the shelf that will be above the toilet.  I can then run wire back out to that corner of the layout, where the DCS WiFi, AIU, & a terminal block will be.  The cord will be masked on the lobby side by one of those stick-on cable bundlers they use for hiding Ethernet cable, etc.  That should keep kids from tugging on it or it generally getting caught.  The outlet is behind a bench, which ought to prevent further interference. 

Thanks again for all the interest in this build.  As always, thoughts & suggestions are appreciated.  If I don't post before, everyone have a very Merry Christmas & a Happy New Year!

- Neal 

Attachments

Images (12)
  • 20181212_171750
  • 20181212_162658
  • 20181212_143116
  • 20181212_145702
  • 20181212_145638
  • 20181212_145632
  • 20181212_145623
  • 20181212_145613
  • 20181212_163949
  • 20181212_163943
  • 20181212_163912
  • 20181212_152211

Neal, nice post.  Interesting way to do the dowels.  Hope they line up OK.

That bridge is MTH?  Pretty awesome, pretty big!  I used two old Lionel girder bridges on my table layout, for the upper level.  Too high for those plastic pylons, so I used a 3 inch basswood plank underneath them for support.  Works fine, no sagging at all.  I'd be really interested to see that baby up there, and how you mount it.  Also, those boards and brackets.

20180201_130716_001

Jerry

Attachments

Images (1)
  • 20180201_130716_001

After a long hiatus I have news to report on the lobby layout project!  Finally able to get back to work after what's been a crazy 2019 so far.  Now the final push to have the layout operational by Christmas.

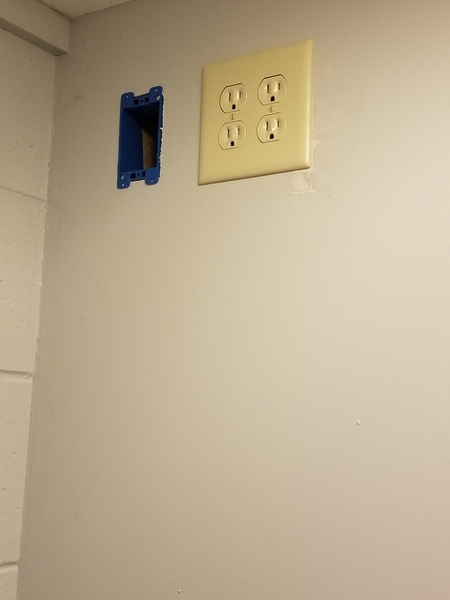
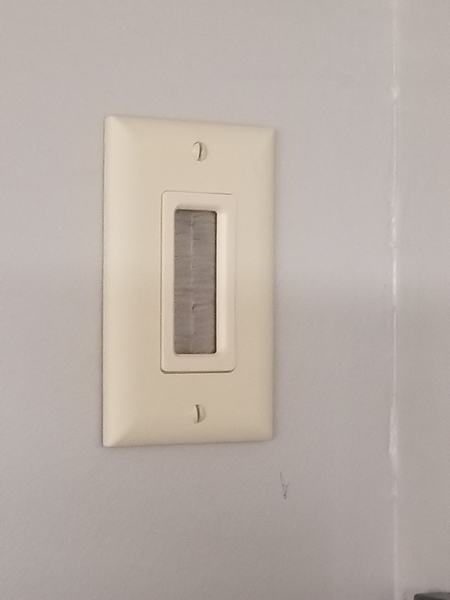
Had the electrician install outlets into the second bathroom/storage room, as well as a pass-through for wiring, while here to install some additional ceiling lighting at the office.  Gave it a nice, finished look on the lobby side.  I've also installed 1 of 2 shelves beneath installed to hold the electronics (not pictured).

20191123_13572920191123_135717

Got all the brackets up & the boards fitted into place ok.  Had to do a little trimming but everything lined up pretty well.  Very solid.  Ended up not using the dowling & simply installing a 2nd bracket near the other side of the joint (there are only 4 sections to the shelf).  The plan was to take it down & lay roadbed, track, & wire on the ground.  Unfortunately, the end pieces are especially difficult to fit as the walls aren't quite plumb.   Therefore, it looks like I'll be on the ladder next week. Good thing I'm tall & have long arms. 

20191123_14502220191123_145012

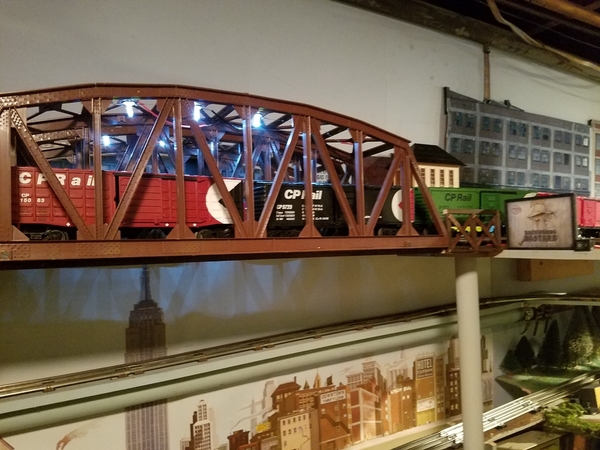
Finally, I was able to mount the bridge to the board spanning the doorway to the reception desk.  Looks good, now just need to wire.  It looks like I'm maybe a circuit board short on the main arch section?  Only 1 present in the pylons included, has 1 plug socket, but there are 3 plugs for the bridge lights.  Would be very appreciative of anyone w/experience w/the MTH Christmas light bridge that can help.  The boards from the extensions look ok.  

20191123_17141920191123_174051

Well, that's it for now.  Hopefully more to report after Thanksgiving weekend!

- Neal

Attachments

Images (6)
  • 20191123_174051
  • 20191123_135717
  • 20191123_135729
  • 20191123_145012
  • 20191123_145022
  • 20191123_171419

Neal, the office looks great.  The boards look good up there, and the bridge is definitely awesome!

I have zero knowledge of the bridge and how the lights are connected.  I'm interested to see how you wire the layout and where your control and power panels connect.  Will you add backdrops?  More lights?  Have you decided what tracks and trains are going up there?

Here is a possible car for the office.  It's called Hunting Rabbit Season, Lionel 6-84798.  Also, it's mechanical, no track power required.  A really basic car but, everybody loves it, especially the little ones.

Looking forward to seeing your progress.  Happy Thanksgiving.

Jerry


Attachments

Videos (1)
20190113_180526

So...after checking the instruction manual for the bridge, it seems I am indeed missing the plug.  I can't imagine I removed it & set it somewhere away from the bridge parts.  Will call MTH & order a new one.

Have begun temporarily tacking track down to check fitment & position.  Will then mark so I can lay down roadbed. The shelf boards are only attached w/a sg. screw at this point in case any movement is needed; the leveling issues should be improved if not fixed when all screws are in place.

20191202_08591520191202_085932

Will keep you posted!

- Neal

Attachments

Images (2)
  • 20191202_085932
  • 20191202_085915

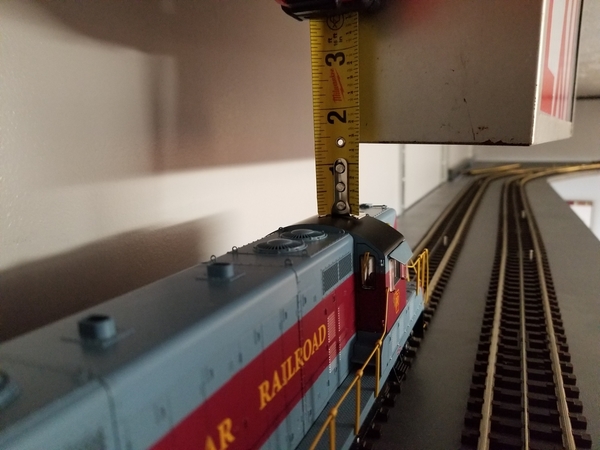
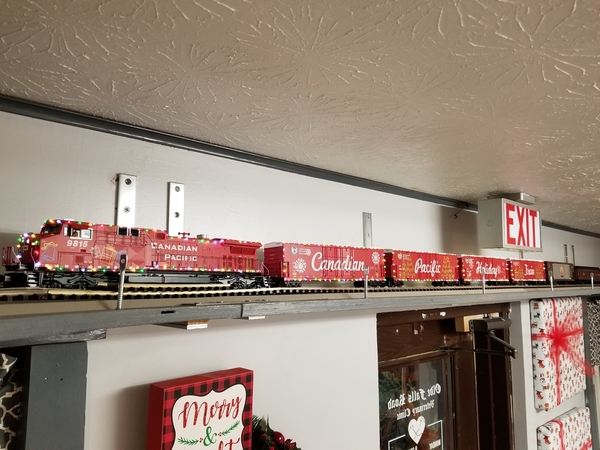
Got the track fitted & marked this week - now to lay down the roadbed (Flexxbed).  Before doing so I decided to double-check my clearances under the exit sign - had nearly 1.5" - more than enough once the roadbed is in. 

20191204_12333320191204_12323120191204_123219

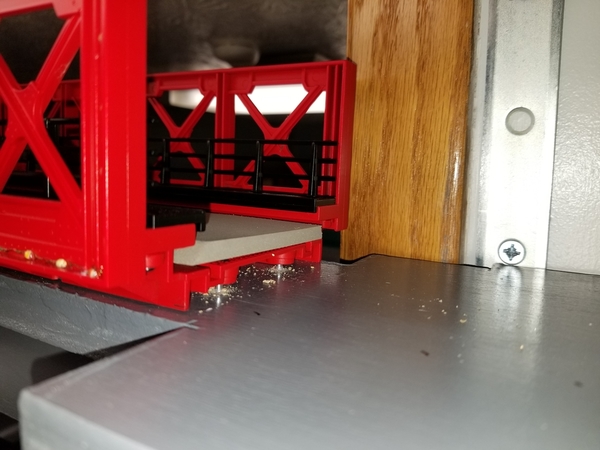
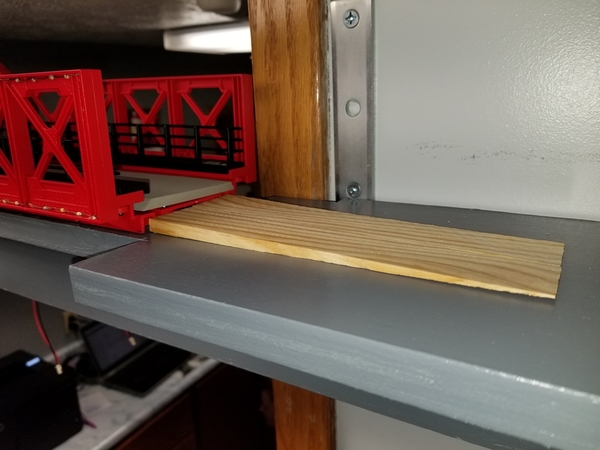
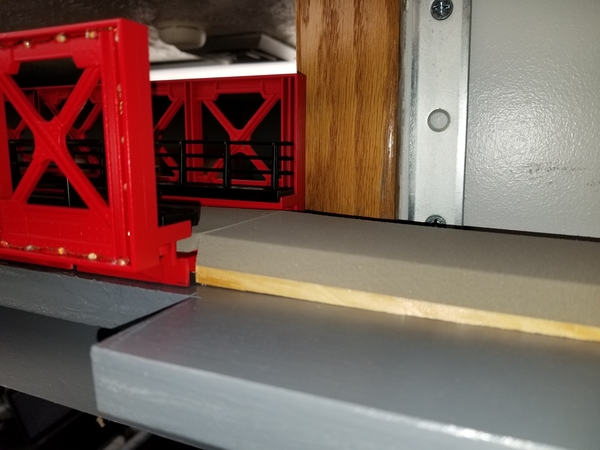
One issue to resolve is the height of the bridge above the main board.  Fortunately, I had accidentally ordered some of the shorter height roadbed after I realized the initial order may not be enough. 

20191205_140713

A pair of shims at each end made up the rest of the height difference nicely, and with a nice, easy grade at that!

  20191205_14075820191205_140814

Hoping to get the track in place & wired by the end of next week!  Will be crazy but so far looking good to be operational before Christmas!

- Neal
Attachments

Images (7)
  • 20191205_140814
  • 20191205_140758
  • 20191205_140713
  • 20191204_123408
  • 20191204_123333
  • 20191204_123231
  • 20191204_123219

Have the Outer Loop fit, Flexxbed in place, & ready to finish nailing the track down.  Inner "siding" - though it will likely be the main line - needs some custom fitting but then should be good to go. 

20191212_11293420191212_113911

Hoping to have wired in next few days & running trains this coming week! 

- Neal 

P.S. - The wife's been decorating the lobby and I scaled the ladder again to hang lights outside, so we should have some very festive photos when all is done! 

Attachments

Images (2)
  • 20191212_113911
  • 20191212_112934
Last edited by Fridge56Vet

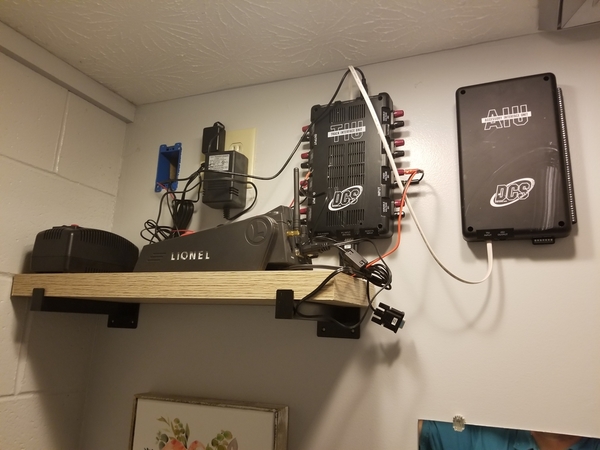
Last night my father & I got the outer loop of track set in place & the basic wiring finished.  Able to position the WiFi  unit on the shelf ouside, with the TIU & AIU to be eventually wall-mounted in the closet/bathroom.  That should leave room for the LEGACY unit on the shelf.  Left wires long for now; they can be trimmed once final positions for everything are determined. 

20191220_170421

20191221_121646

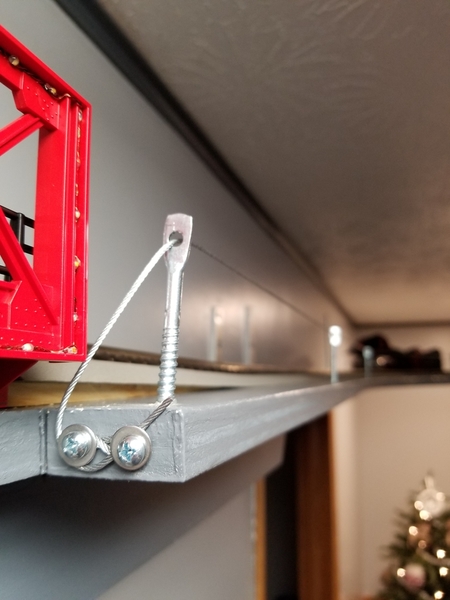
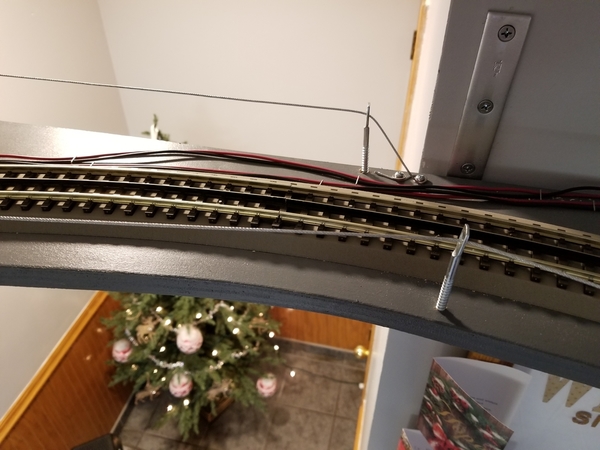
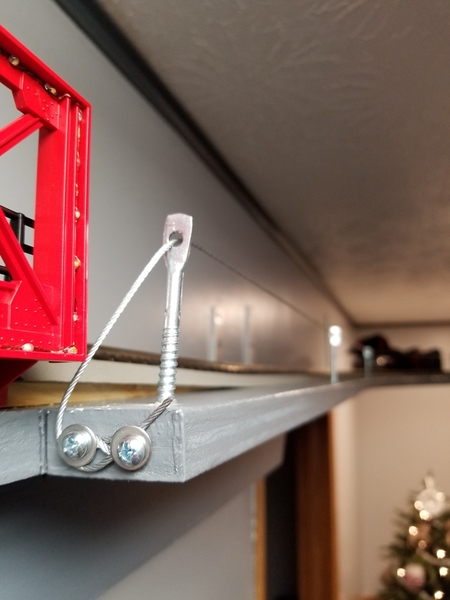
Dad screwed in the eye lag screws - hard to find & larger than I would have preferred, but they should work fine.  Will run wire (or perhaps 20# test fishing line) for a safety barrier should a derailment occur.

20191220_170408

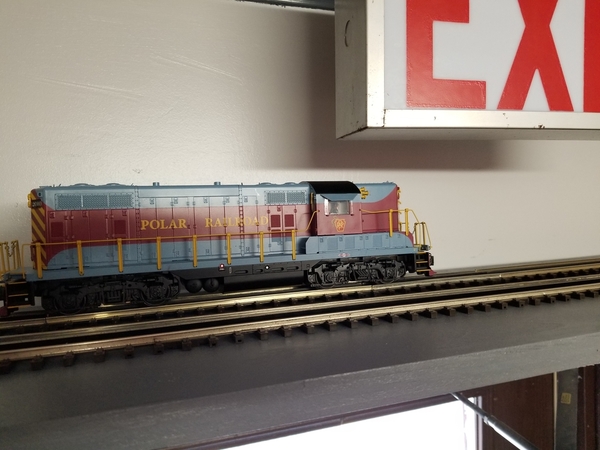
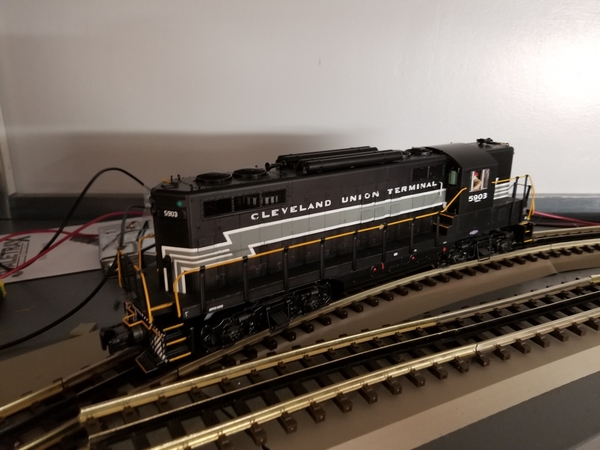
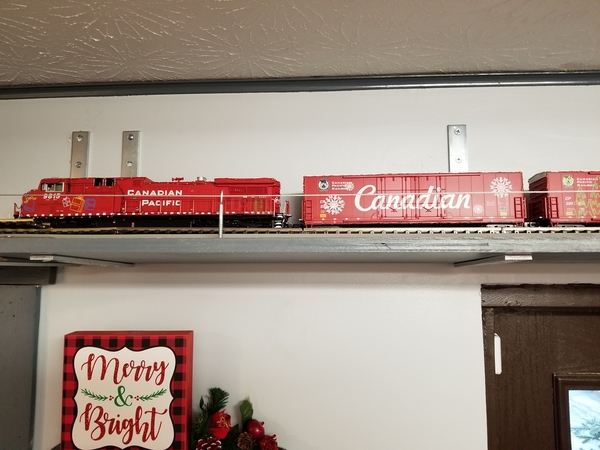
The initial electrical test was a success!  MTH DCS Wifi worked as expected.  After an initial test lap w/my Cleveland Union Terminal GP-9 we performed a clearance test with the CP Holiday Train.  One of the eye lag screws needed to be repositioned at an angle for clearance, but that easily fixed the problem.  May need to reposition a few more screws when I run 21" passenger cars, but so far so good.  Still have yet to finish fitting the inner track, which will eventually be the main line, as well as wire the switches & some buildings. 

20191220_17043220191220_181243

I will keep you posted on my progress, & I hope to have some more pics & maybe a video or two up soon!  Take care & Merry Christmas to all! 

- Neal
Attachments

Images (5)
  • 20191220_170421
  • 20191220_170408
  • 20191221_121646
  • 20191220_181243
  • 20191220_170432

Neal, nice!  Looking good.  The layout will be great.  Is that an AIU in the first pic?  I've never felt the need for one on either layout.  Love to hear how you like it.

You've seen my double-tracked, 8 X 10's, with the 1 1/2 inch clearance to the edge.  In five years, the only way anything fell was when I was talking instead of looking and one train caught up to the other on the same track.  Being O gauge, there are numerous derailments, especially in the first year.  Since then, all those little track issues have been resolved.  BTW, after falling six feet to a very hard tile floor, the only things that have ever broken were those cheap plastic trucks on the old Lionel stuff from the 80's.  Haven't had one in years, but, I was amazed the cars themselves always survive completely intact.

Your trains look great up there.  The CP holiday train is always cool to see.  Have you considered a backdrop to hide the brackets?

Keep them coming, it's fun to see the progress. 

Jerry

Got the main safety wire up today - just got about 60' (will have PLENTY left over) of 1/16" galvanized wire off the spool at Home Depot.  Able to get adequate tension by hand & coarse enough to secure easily w/screws & washers. 

20191223_16464920191223_164659

Don't want to forget the back side....

20191223_164709

Now time to finish what will be the main line, & start adding some buildings, too!

Merry Christmas, Happy Hanukkah, & a Happy New Year to all!

- Neal

Attachments

Images (3)
  • 20191223_164709
  • 20191223_164659
  • 20191223_164649

Wow, can't believe I uploaded this to YouTube & forgot to post here. 

CP Holiday Train - 1st run!

Can't remember how to embed the video in the post, but I got the link.  Christmas train is switched out now, should have video soon of what's currently running.    Thanks again for the help & interest with this project, & enjoy!

- Neal
Last edited by Fridge56Vet

Got the TIU & AIU wall mounted.  Got the LEGACY CAB-2 hooked in, too, though now the WIU seems to be having issues.  Will try to program in some 3rd Rail TMCC engines. 

20200111_142403

Once all the command stuff is situated I'll finish fitting the front track and clean up some of the XS wiring.  Then I'll get some 1" & 2" foam board to shape for several of the corners & wire the buildings.  Still thinking about doing 3 sets of corner boards: spring/summer, fall, & winter. 

- Neal
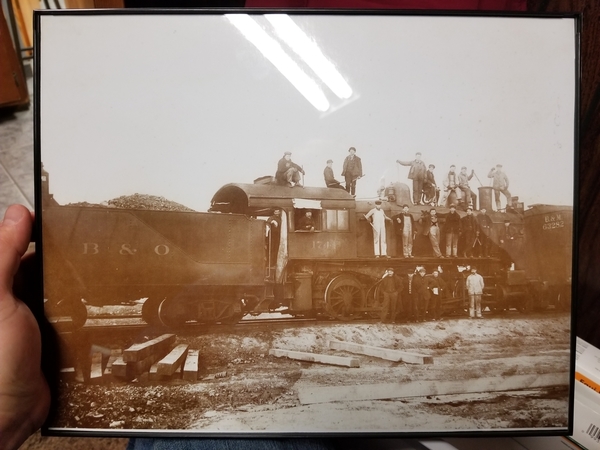
So...there has been an unanticipated side effect to the layout.  Much to my enjoyment (and wife's dismay), people have started to bring in or talk about bringing in, old train-related stuff they no longer use or need.  My first gift arrived earlier this week - a photo print of a B&O 2-8-0 Consolidation. 

20200116_113902

The client said it was taken in the 1920s, but not much else known, & nothing written on the back.  A quick search on rrpicturearchives.net seems to suggest it would be an E16 class, though there are only 2 photos of such an engine in the collection that I found, and they're both from the other side.  Still, a lot of the subtle details seem to match, & the time period of those photos is consistent w/this one. 

- Neal
Attachments

Images (1)
  • 20200116_113902

Have to bump this thread.  Can't believe that I never saw this one before with me building a ceiling layout.  It came across as a search result.

Great job Neal and I enjoyed reading all of the posts (many from folks who are helping me on my own ceiling expedition) from Step 1 to the the completion.   .  I liked the use of the eye lag screws and wire instead of Lexan/PlexiGlas for flying train protection.  Great idea!.

Last edited by Amfleet25124
Amfleet25124 posted:

Have to bump this thread.  Can't believe that I never saw this one before with me building a ceiling layout.  It came across as a search result.

Great job Neal and I enjoyed reading all of the posts (many from folks who are helping me on my own ceiling expedition) from Step 1 to the the completion.   .  I liked the use of the eye lag screws and wire instead of Lexan/PlexiGlas for flying train protection.  Great idea!.
You can get plastic coated cable too for more scratch resistance. (hvac and plumbing supply house item.... only maybe at a bigbox)

Add Reply

Post
The Track Planning and Layout Design Forum is sponsored by

AN OGR FORUM CHARTER SPONSOR

OGR Publishing, Inc., 1310 Eastside Centre Ct, Suite 6, Mountain Home, AR 72653
800-980-OGRR (6477)
www.ogaugerr.com

×
×
×
×
Link copied to your clipboard.
×
×