
Let me start by sharing an expression I first heard in connection with Amway (I discontinued my part-time Amway business back in 1985 after being a part time  distributor for 4 years): "If I can do it, you can do it."

I now apply that Amway expression to those scroungers out there who, like me, enjoy economically decorating their layouts with scenery and structures.

Before:

20210313_173746

The above photo shows a kitbashed double track tunnel portal made from pieces of an International Hobbies 2 or 3 stall engine house. It is made of plastic to look like red brick. When I made that kitbashed tunnel portal, I struggled using non-powered saws.

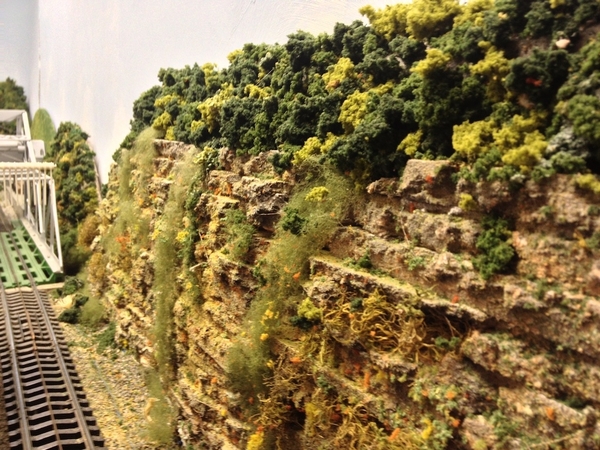
After (photo taken this morning showing work in progress):

20211011_104855

This photo shows 2 single track stone (ceramic) tunnel portals cut with Dremel tool to make 1 double track ceramic tunnel portal.

About 3 weeks ago I purchased these ceramic single track portals from my LHS (they didn't have any ceramic double track ones). The ceramic material and gray coloring looked like they had the potential to be a big improvement over my existing kitbashed red plastic tunnel portal. The ceramic product was manufactured by www.ChoochEnterprises.com, and the product is #9940 Single Cut Stone Tunnel Portal O Scale.

Let me digress for a moment concerning my use of a Dremel tool and power tools in general. I begrudgingly use power tools very sparingly because I'm terrified of them. One reason for that is that many years ago I heard that a great former professional athlete (I think it was Phil Rizzuto), far more coordinated than me (and I have good eye hand coordination), lopped off part of a finger using electric hedge clippers. Once I heard that, I stopped regularly using any power tools.

Two weeks ago I got together with 2 outstanding model  railroaders, one of whom has had articles published in train magazines about his former layouts. He told me that he uses power tools with great care, including doing much preparation in advance and he refrains from plugging in a power tool into the electric socket until he is 100% ready to proceed to use it. He also said that if you use power tools a lot, no matter how careful you are, "blood will spill."

Boy, did that resonate with me.

The other model railroader at the get together, who has an enormous and fascinating layout spanning 2 large rooms in the 2 lower levels of his spacious home, mentioned that he uses power tools with great care, and yet once he cut himself so badly that he needed to go to the Emergency Room where he had 8 stitches to stop the bleeding.

Why am I telling you all of this? Because it was a big deal for me to use my Dremel tool to cut the ceramic single track portals to make the ceramic double track tunnel portal shown in the photo above, and to make the case that "If I can do it, you (or anyone) can do it."

Also, I think it is a good thing to share the experiences of others that highlight the importance of taking great care whenever using power tools.

In addition to being a scrounger, I'm also a pack rat.  I think scroungers like me tend to also be pack rats in order to save money in the future.

When I built my existing layout 25 years ago, I built the mountain in the photos above. The materials I used included Woodland Scenics Plaster Cloth and Hydrocal. I had extra plaster cloth and Hydrocal (which I saved for 25 years) that I used today to fill in the seams between the portal and the mountain. The plaster cloth was particularly useful for filling the seams.

20211011_151244

20211011_151236

The next step is to do some touch up painting and adding a little  scenery material, probably lichen, to complete the project. I will do that and post some final photos in the next day or two.

If you are a scrounger like me and have made some structures or scenery, or plan to do so, you can share it here. Arnold

Attachments

Images (4)
  • 20210313_173746
  • 20211011_104855
  • 20211011_151244
  • 20211011_151236
Last edited by Arnold D. Cribari
Original Post

Replies sorted oldest to newest

@mwb posted:
That would seem to take considerable skill given all considerations.
Probably not the tool I would use to cut ceramics.

MWB, I don't know the details of the hedge clipper accident, but if one was using them on a ladder and fell, I think it is possible to cut oneself with them. I think it could also happen if one is using them, fumbles, and lost control of the power tool.

Concerning cutting stone or ceramic material, what power tool would you use to cut that?

Arnold

Here is my ceramic double track tunnel portal after some touch up painting and adding some lichen, which I did this evening:

20211011_212949

I think it's better, but looks a little contrived. It looks like I added the lichen to hide the seams, which is, indeed, the case. I will let it rest and revisit it in a day or two.

For my next project, I have another pair of ceramic single track portals. They will be used to replace the plastic red brick portal shown in the photo below:

20211011_213052

Arnold

Attachments

Images (2)
  • 20211011_212949
  • 20211011_213052

Another great thread by the one and only Arnold!!!  Thanks Arnold!!  

In the photo below I used real rocks which I got from the river near my home.  I glued them together with Sinbad glue and made this rock cliff for my rock climbers.  The only cost was the glue which I already had and the Woodland Scenics rock climbers.  

In the background you will see part of a canyon wall to the left of the bridge pier.  I made the entire canyon wall from heavy gauge aluminum foil.  First I crumpled the foil.  Secondly I attached the foil ( using a staple gun ) to the upper and lower wood surfaces which were already in place.  Next I painted the foil with a couple coats of cheap black spray paint, followed by spraying some cheap green in splotches over some of the black, then used some cheap brown spray paint ... a squirt here and there.  Once the paint was dry, I sprayed the entire surface with glue. Next step was to through scenic material at the wall.  What scenic material ( such as tallis, soil, grass, sand, etc.) did not stick fell to the bottom just as it would in nature.  Since I had already purchased the spray paint and glue for other layout projects, why not use those materials on this project.   The only real cost was the roll of heavy gauge aluminum foil which was about $3.00 back in 2015 when I did this project.  IMG_0163

In the photo below I used a real rock to create a steep cliff.   I hauled rocks from the nearby river.  The rock is seen just to the left of the K line double tunnel portal on the lower level.  It stretches from the base of the lower level to the top of the side of the portal and is bracing the smaller rocks in front.   Again, I used Sinbad glue to adhere the rocks to one another.  I used real stones on top of the wooden tunnel portal as well ... just behind the aircraft beacon.   At first stages of creating scenery for the layout I would go to a place on the river where a dam once stood and walk along the banks and choose stones and rocks that I thought would be a good fit.  I looked for rocks that had the right texture, size, shape, and color wise ( although I'm color blind ... lol ! )  I  would fill my back pack and walk the mile home ... great exercise too !!  Cost zero.  Loss ... lots of calories.

IMG_0561

Heavy gauge aluminum foil canyon walls form a semi-circle around my lake.  Here a camper rests at her camp site at the base of the canyon. IMG_0583IMG_0080

I needed to do something creative with a corner of my layout so I solved the problem by using this big rock in the above photo ... again hauled from the nearby river.  I thought the shape, size, lines, and smooth surface of this rock would be ideal.  Once in place the rock looked out of place ... so I added some scenic material around it and the rock looks right at home sitting in the northwest corner of my layout.  The little guy sitting on the rock playing his guitar is my one and only " rock guitar player"  bada boom!!  The cost of the scene was only for the surrounding shrubbery, the fencing I purchased for about $1.00 at a train show, and for the Artista guitar player probably came in for about $6 -7 bucks back in 2015.

Attachments

Images (4)
  • IMG_0163
  • IMG_0583
  • IMG_0561
  • IMG_0080
Last edited by trumptrain
@trumptrain posted:

Another great thread by the one and only Arnold!!!  Thanks Arnold!!  

In the photo below I used real rocks which I got from the river near my home.  I glued them together with Sinbad glue and made this rock cliff for my rock climbers.  The only cost was the glue which I already had and the Woodland Scenics rock climbers.  

In the background you will see part of a canyon wall to the left of the bridge pier.  I made the entire canyon wall from heavy gauge aluminum foil.  First I crumpled the foil.  Secondly I attached the foil ( using a staple gun ) to the upper and lower wood surfaces which were already in place.  Next I painted the foil with a couple coats of cheap black spray paint, followed by spraying some cheap green in splotches over some of the black, then used some cheap brown spray paint ... a squirt here and there.  Once the paint was dry, I sprayed the entire surface with glue. Next step was to through scenic material at the wall.  What scenic material ( such as tallis, soil, grass, sand, etc.) did not stick fell to the bottom just as it would in nature.  Since I had already purchased the spray paint and glue for other layout projects, why not use those materials on this project.   The only real cost was the roll of heavy gauge aluminum foil which was about $3.00 back in 2015 when I did this project.  IMG_0163

In the photo below I used a real rock to create a steep cliff.   I hauled rocks from the nearby river.  The rock is seen just to the left of the K line double tunnel portal on the lower level.  It stretches from the base of the lower level to the top of the side of the portal and is bracing the smaller rocks in front.   Again, I used Sinbad glue to adhere the rocks to one another.  I used real stones on top of the wooden tunnel portal as well ... just behind the aircraft beacon.   At first stages of creating scenery for the layout I would go to a place on the river where a dam once stood and walk along the banks and choose stones and rocks that I thought would be a good fit.  I looked for rocks that had the right texture, size, shape, and color wise ( although I'm color blind ... lol ! )  I  would fill my back pack and walk the mile home ... great exercise too !!  Cost zero.  Loss ... lots of calories.

IMG_0561

Heavy gauge aluminum foil canyon walls form a semi-circle around my lake.  Here a camper rests at her camp site at the base of the canyon. IMG_0583IMG_0080

I needed to do something creative with a corner of my layout so I solved the problem by using this big rock in the above photo ... again hauled from the nearby river.  I thought the shape, size, lines, and smooth surface of this rock would be ideal.  Once in place the rock looked out of place ... so I added some scenic material around it and the rock looks right at home sitting in the northwest corner of my layout.  The little guy sitting on the rock playing his guitar is my one and only " rock guitar player"  bada boom!!  The cost of the scene was only for the surrounding shrubbery, the fencing I purchased for about $1.00 at a train show, and for the Artista guitar player probably came in for about $6 -7 bucks back in 2015.

Outstanding scenery and structures, Patrick, and you have provided a wealth of information to help others adorn their layouts beautifully and inexpensively, as you have. Arnold

All "tools", including a hammer for missing a nail and mashing your thumb, to backing your car out of , or rolling off the jack in, your driveway demand your full care and attention.  Dunno what the statistical odds are, but l'd guess driving is the biggest threat.  Many drive.  My feared tool is a soldering iron, which handling l give most attention to.  But l carefully attempt to solder.  For hedge trimmers, (and soldering irons), just keep your eyes and hands, on the tool, and know where both hands are.  The trick is to not get sloppy with familiarity.

Beware power tools, and many unpowered tools as well.

Two weeks after moving to Arizona I was removing some excess foliage in my back yard when a 10" electric chain saw attacked me without provocation.  That led me meet Dr. Shere Khan (REALLY) at the VA emergency room.  Dr. Khan is a great doctor but a terrible tailor....lousy stitching, but it worked.  Over the next eight years I've kept him busy with other injuries, but none have involved power tools because I got very careful.....pronounced "paranoid".....after that.

Last edited by Forty Rod

MWB, I don't know the details of the hedge clipper accident, but if one was using them on a ladder and fell, I think it is possible to cut oneself with them. I think it could also happen if one is using them, fumbles, and lost control of the power tool.

If you were using them on a ladder that right there depicts poor judgement; fumbling about probably falls into the same category.  Falling off a ladder with a power tool - you throw the power tool away from you as hard as you can.  Learned that with a chain saw long ago.  Bad decision making does seem to be something that too many have good luck in pursuing...

Concerning cutting stone or ceramic material, what power tool would you use to cut that?

Arnold

I'd find a tool specifically designed for cutting ceramic tile and not a hand tool at all. Small table saw with a blade for that purpose would be my 2nd choice.  1st choice would be to visit a tile shop and pay someone else to cut it.

Cutting stone; I do that using a set of hand tools specific to that task; something that I was taught how to do by my grandfather. I have a set of chisels, a mallet I like, and I used to have a set of feather & wedges.  I've not cut stone at that level in 20(?) years; did some landscaping stones with just a cutting wedge a few years ago.  Not unlike riding a bicycle; one remembers "how to".

I have a very funny and true story about one of my 1st experiences with power tools.

I was always a good student.  In Junior High School, a required course for boys back then was metal shop. I did not do well, probably because of my fear of power tools. In fact, I got a D in metal shop. My father was furious, not at me but at the metal shop teacher for giving me such a poor grade. LOL.

The next day, my father drove me to school, parked the car, marched in to my metal shop class, and told the teacher he was a horse's xxxx for giving me a D and ruining my average. LMAO.

My fear of power tools and general lack of natural talent at using tools and making things related to model railroading hobby is a major reason why I say, " If I can do it, you can do it."  Arnold

I use the icing container from Pillsbury Cinnamon rolls and the containers from Crystal Light drink packets IMG_0702IMG_0703IMG_0707for a variety of things including creating screens for motors in diesel engines without cab interiors.  I've printed out pictures of engineers that I paste onto the screens cut out of these.

IMG_0700IMG_0701

I've even used the smaller one to make my Union Terminal Information Booth modeled after the one in GCT.

METRO TERMINAL INTERIOR 2

Attachments

Images (6)
  • IMG_0702
  • IMG_0703
  • IMG_0707
  • IMG_0700
  • IMG_0701
  • METRO TERMINAL INTERIOR 2

Not sure if it's scrounging or a tip, but to make the inside of your tunnels look realistic, cut a sheet of heavy duty aluminum foil (not the flimsy standard kind) to just slightly larger (1/8") than the inside height and length of each side of your tunnel walls.

Crumple up each sheet and then uncrumple, leaving each sheet relatively flat. Spray paint each sheet lightly with flat black paint so that a little of the silver shows through. Glue each sheet to the inside of the tunnel walls and trim, as necessary.

When a train goes through, the headlight and other lamps shine on the tunnel walls and the crumbling effect creates all kinds of angles that makes the walls look like cut rock faces with some metallic impurities shining through.     

Here is my ceramic double track tunnel portal after some touch up painting and adding some lichen, which I did this evening:

20211011_212949

I think it's better, but looks a little contrived. It looks like I added the lichen to hide the seams, which is, indeed, the case. I will let it rest and revisit it in a day or two.

For my next project, I have another pair of ceramic single track portals. They will be used to replace the plastic red brick portal shown in the photo below:

20211011_213052

  Looking at the lichen Arnold , I would probably start from the greenery on the hill and work to a larger pattern at the tunnel.   Then maybe a few more hanging greenery pieces on the face of the portal. 🤔

It's always fun to work on things like this.    A little at a time to see what is taking shape..    I worked like that when I had a lot of  landscaping to do in the yard. 

Have fun

Another Arnold classic thread!  Thank you!

It’s been a while since my last post…April of this year…but hey, it’s time to get back to the layout.

Lots of great ideas presented.

Here is a pavilion that I crafted from a bird feeder and left over doll house parts.  The musicians on the layout needed a place to jam.

Fendermain115A5C6C-B2A2-4B13-A3D8-767D58AB2A88

Attachments

Images (1)
  • 115A5C6C-B2A2-4B13-A3D8-767D58AB2A88
Last edited by Fendermain
@Avanti posted:

The oldest trick in the book:

Take some leftover ceiling tiles and break them into pieces by hand. Glue them together lining up the broken edges. Instant rock strata:

Great looking rock strata.         Great weight savings over some of the conventional methods.     Great savings in time .       Great savings cost wise using the ceiling tiles  (  as long as the little lady doesn't spot the missing ones from the ceiling 🤣😃😅😄😂  )             

Great idea Pete. 👍

@Avanti posted:

Awhile ago, I built a little diesel engine shed entirely out of stuff from my junk box. The victorian window muntins were tricky:

IMG_7480IMG_7481IMG_7482IMG_7486IMG_7487IMG_7520IMG_30IMG_80

Really nice Pete.

Even though the inside isn't paid much attention to on regular running of the trains , this interior is too beautiful to miss.     Maybe an enlarged poster photo of the interior hanging near the layout would be great. 🤔

Wow Bill ..

After spending time seeing the woodlands around here near central Pa. , I have to admire your  representation of this scene.                                                                               I never thought of using sedum for the trees.  I've tried some dried wild flowers that were given to me in a commercial kit, but they always seemed too fragile and would fall apart.

Nice job Bill. 👍

@third rail posted:

Thank you.  How about some scrap metal gondola loads.  Regular aluminum foil balled up then formed into a cube with a hammer.

20211002_094905

Painted some with black and rust colored acrylics.

Another good look Bill. 🤓

Never saw this done before.    It certainly doesn't have the appearance of my OEM scrap loads .  You definitely are having fun with your creative approach to the scenery and accessories.     Nice 👍

Another good look Bill. 🤓

Never saw this done before.    It certainly doesn't have the appearance of my OEM scrap loads .  You definitely are having fun with your creative approach to the scenery and accessories.     Nice 👍

Thank you.

I think I found the ultimate scroungers product.  I'm building a steel mill layout so I need a number of different scrap loads for the furnaces and gondolas.  After finishing a box of shredded wheat,  there's plenty of crumbs left.  If you looked hard at the texture,  it kind of resembles shredded scrap metal.  I'm away from home right now but when I return,  I'm going to try making a scrap load by gluing it to some foam then spray painting it silver.

@third rail posted:

Thank you.

I think I found the ultimate scroungers product.  I'm building a steel mill layout so I need a number of different scrap loads for the furnaces and gondolas.  After finishing a box of shredded wheat,  there's plenty of crumbs left.  If you looked hard at the texture,  it kind of resembles shredded scrap metal.  I'm away from home right now but when I return,  I'm going to try making a scrap load by gluing it to some foam then spray painting it silver.

OH  BOY , .........now I'm going to have to go buying cereal again Bill !!!  😁

Power tools indeed do need 100% of the user’s attention. Always wear eye protection when grinding, or sawing or hammering any metal or wood. That goes especially for anyone who does their own gardening. Easy way to sustain an eye injury is to use a weed whacker without protective eyewear. Have seen this over and over. Never managed any model train related injuries, though!

Last edited by Mark V. Spadaro
@third rail posted:

Thank you.

I think I found the ultimate scroungers product.  I'm building a steel mill layout so I need a number of different scrap loads for the furnaces and gondolas.  After finishing a box of shredded wheat,  there's plenty of crumbs left.  If you looked hard at the texture,  it kind of resembles shredded scrap metal.  I'm away from home right now but when I return,  I'm going to try making a scrap load by gluing it to some foam then spray painting it silver.

DO NOT DO THIS!!!

I few years back to took some uncooked rice, painted it yellow and made a corn crib for my farm.  It looked awesome until the mice invaded.  They ate the painted rice.  Never found any dead mice from paint poisoning either. They are probably mutant mice living in the sewer now ready to attack.

See my post on this thread about half way down.  All of the rice is gone.

O Scale Chickens? | O Gauge Railroading On Line Forum (ogaugerr.com)

No food products on the layout.

Have Fun!

Ron

Last edited by Ron045

Great advice Ron.

Ordinary mice will eat through a plastic bucket to get to grain inside. 

And, once you get mice in your house, they are there virtually forever.  You will never be able to trap or capture them all.

They love attics and they love basements.  And, they love to create little cities underneath your tub, in the hollow space between the tub and subfloor, because it is warm there.

Mannyrock

Add Reply

Post

OGR Publishing, Inc., 1310 Eastside Centre Ct, Suite 6, Mountain Home, AR 72653
800-980-OGRR (6477)
www.ogaugerr.com

×
×
×
×
Link copied to your clipboard.
×
×