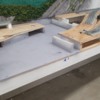
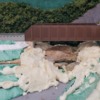
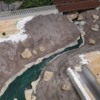
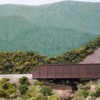
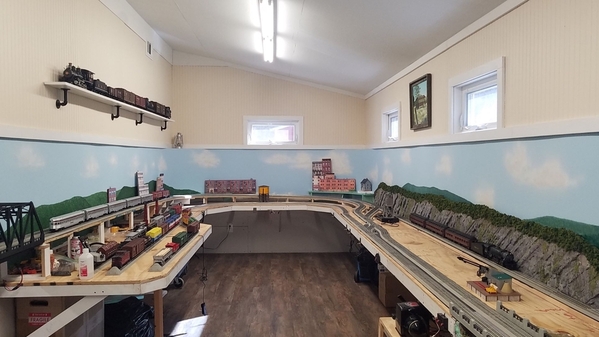
Here are some photos and progress updates on my Fastrack shelf layout. I use a wheelchair, so everything has been planned ahead of time to enable me to reach as much as possible without barriers. Thus, I’m literally working from the top down and the outside in. The whole layout—from concept to creation—is a series of calculated compromises.

I can’t take credit for the big stuff: I hired the construction work and paneling, and am assisted by an individual who used to build layouts for clients in the Southeast (before retiring). Bobby Allen lives near me, so I was able to lure him into helping for a reasonable fee.

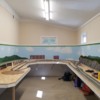
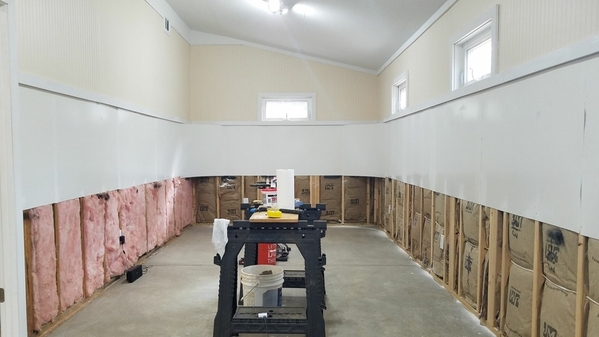
Last year, I added a 28 x 10 addition to my detached garage for the train room.  The upper walls were finished with beadboard to give the room an old-time train terminal atmosphere. Later, the upper walls can display some railroad memorabilia. I grew up in Central PA less than an hour from Altoona, so I'm partial to the PRR.

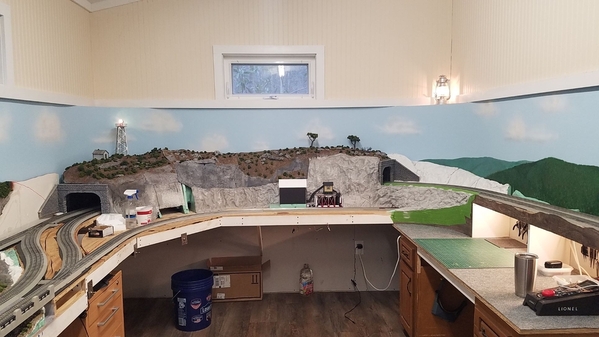
The background mural was formed with Homasote panels (aka Masonite) with radiused corners. I had never attempted a such a large painting project, but I watched a couple of YouTube how-to videos, then took a whack at it. Using acrylics and inexpensive brushes, I dabbed thousands of “trees” to create mountain slopes.  After a short but steep learning curve, the work went quickly. The “clouds” were created with an airbrush. Again, YouTube proved invaluable.

I had a stack of 1x6 primed lumber left over from another project, so it was ripped lengthwise into 1x3s to build the benchwork. This size proved more than adequate for strength. The framing sits at a height of 32 inches off the floor and is anchored directly into the wall studs. The cantilever design gives me almost uninterrupted space underneath the benchwork for my legs. It’s extremely sturdy, with all joints glued and screwed together.

Because of my limited ability to reach, the benchwork is only 26 inches deep. The exception is an area that extends out to hold a Millhouse River Studios 24” turntable (already delivered and ready to set up). Due to the limited amount of space, I’ll probably have to scratchbuild or kitbash a small roundhouse.

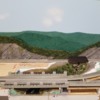
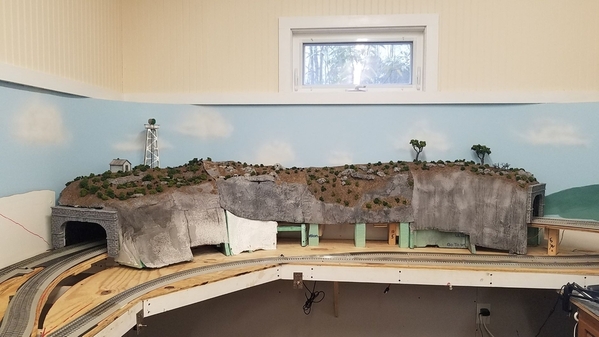
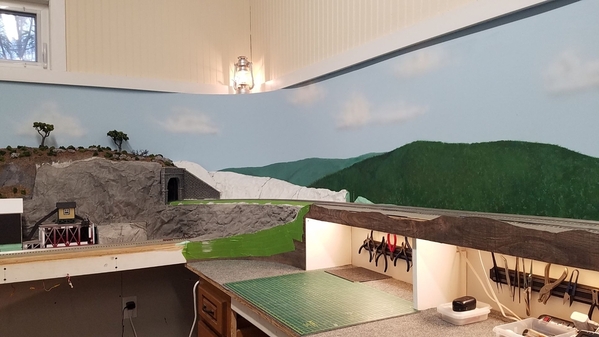
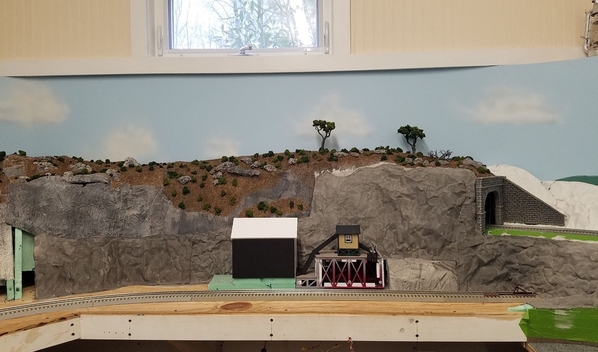
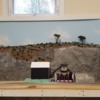
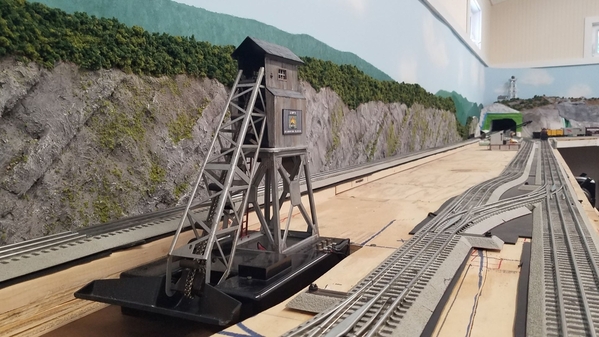
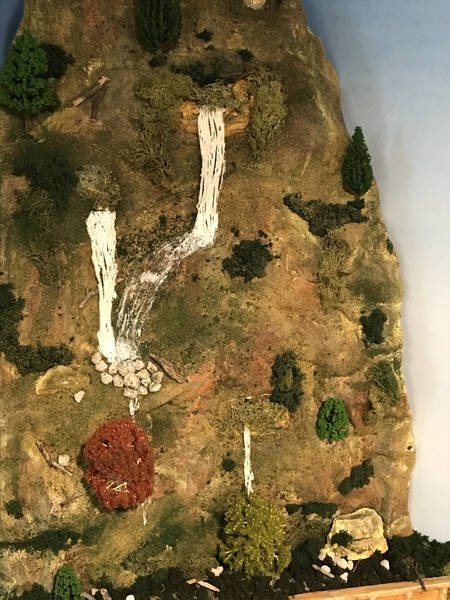
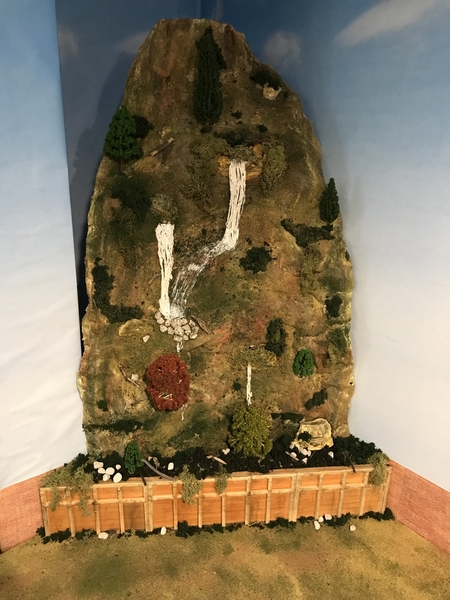
In addition to painting the backdrop, I created a long 3D “flat” along the rear wall to represent a railroad cut through a hillside. It’s made of polystyrene foam strips cut with a hot knife, then glued to panels of Homasote screwed to the wall on ½ inch spacers. The “excavated cut” is 21 feet long (about 1,000 scale feet) and more than 14 inches high, yet it’s only one and a half inches thick. The foam was covered with plaster mixed to the consistency of a smoothie, then sprayed with washes of acrylic paint. My goal was to work fast and not worry too much about fine detail or even geological accuracy. Its sole purpose is to create a little dimensional depth without sacrificing space, just like any backdrop scene. I used rattle cans of red oxide primer and gray primer to give the “rock” some tone, then dry-brushed the high spots lightly with white paint. Spray adhesive was used for all clump foliage and vegetation. The project went much faster than I thought it would, with a total cost of under $200 for all materials.

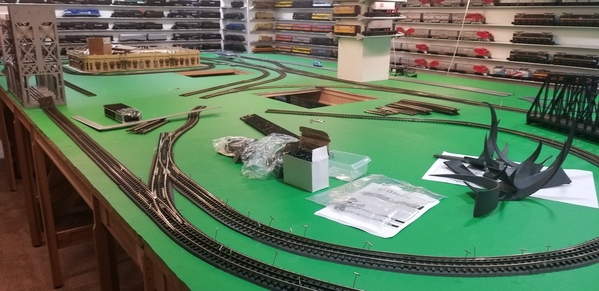
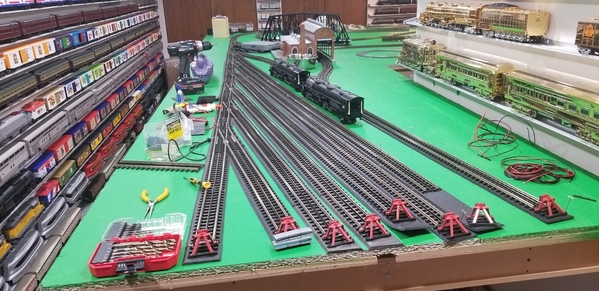
Currently, ½-inch plywood has been tacked down with a few screws so that the track can be mocked up. Later some of the elevated areas will be built over open grid benchwork.

That’s it for now--more updates to follow as work progresses.

Attachments

Images (7)
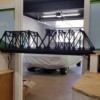
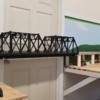
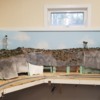
  • 1: The basic backdrop in place. A through-truss bridge (liftout) will span the entryway.
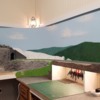
  • 2: One corner of the layout will have an integrated workbench--mocked up temporarily.
  • 3: Polystyrene strips form the "excavated cut" backdrop
  • 4: Early mockup of Fastrack
  • 5: Two coats of plaster and washes of black acrylic--voila, rock!
  • 6: The end result, with Woodland Scenics clump foliage and coarse turf applied to adhesive spray.
  • 7: 1000 scale feet of foam "rock"
Last edited by BruceG
Original Post

Replies sorted oldest to newest

What a great start!  And the rock formations are super.  Looking forward to following your progress.

Suggestion:  when you update this thread with new info and photos, edit the thread's title to include the date of the update.  Doing alerts readers that new material has been posted by you.

Thanks for the info and photos.

Last edited by Pingman

Thank you for all of the supportive feedback! To answer Rob Johnson's question, I do plan to feature the PRR in the Alleghenies, but I've decided to let the character of the layout develop on its own over an extended period. This is because my primary "audience" and players (aside from myself) will be my two grandsons, Tucker and Jesse. Tucker is 7 years old but Jesse is not yet 1, so he'll primarily be a "watcher" for quite a long time. 

And this was also my rationale for choosing to go with O scale and Fastrack. I found it to be comparatively trouble-free and kid-friendly. I don't want the boys (or any other children who visit) to hear the words "You can't touch that." I want to encourage them and let them create their own backstories with the miniature world I'm creating.

sidehack posted:

Bruce, great job on painting the walls, very nice and those rock walls are fabulous only wish I could replicate them on my layout. Keep us informed on your progress.

Is that because there's nowhere on your layout for an escarpment? Honestly, I'm no artist and you would be astonished at how easy and fast that rock wall went up. If interested, I can supply more photos and a quick step-by-step. This is my first layout--first rodeo, so to speak, although I've been studying the hobby and tinkering for probably decades, and have built models for decades.
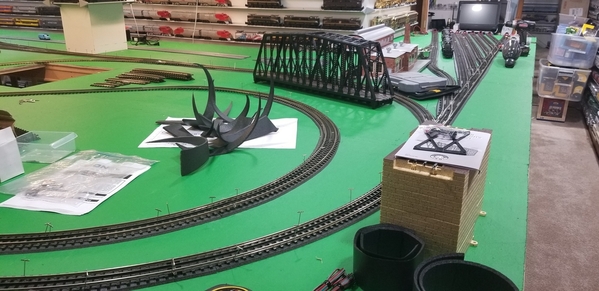
Bruce: When you feel you are ready, please consider doing a full feature article for O Gauge Railroading magazine. What you are doing looks great to this point, and an article about building a layout that conforms to your wheelchair requirement may be very inspirational to others who have physical restrictions that can be overcome with a bit of creative thinking. Just get in touch with me when you feel you are ready, and be sure to continue documenting the layout construction with a good series of hi-resolution images.
BruceG posted:
sidehack posted:

Bruce, great job on painting the walls, very nice and those rock walls are fabulous only wish I could replicate them on my layout. Keep us informed on your progress.
Is that because there's nowhere on your layout for an escarpment? Honestly, I'm no artist and you would be astonished at how easy and fast that rock wall went up. If interested, I can supply more photos and a quick step-by-step. This is my first layout--first rodeo, so to speak, although I've been studying the hobby and tinkering for probably decades, and have built models for decades.

Bruce I would have answered you as yes more pics on how you did them but in reading Allan Millers post you may want to save them for a great magazine article, I can hardly wait. Anyway super job.

Allan Miller posted:

Bruce: When you feel you are ready, please consider doing a full feature article for O Gauge Railroading magazine. What you are doing looks great to this point, and an article about building a layout that conforms to your wheelchair requirement may be very inspirational to others who have physical restrictions that can be overcome with a bit of creative thinking. Just get in touch with me when you feel you are ready, and be sure to continue documenting the layout construction with a good series of hi-resolution images.

Thank you, Allan. I'd be delighted. I have already sent a message to your magazine email contact. 

BruceG posted:

Here are some photos and progress updates on my Fastrack shelf layout. I use a wheelchair, so everything has been planned ahead of time to 

In addition to painting the backdrop, I created a long 3D “flat” along the rear wall to represent a railroad cut through a hillside. It’s made of polystyrene foam strips cut with a hot knife, then glued to panels of Homasote screwed to the wall on ½ inch spacers. The “excavated cut” is 21 feet long (about 1,000 scale feet) and more than 14 inches high, yet it’s only one and a half inches thick. The foam was covered with plaster mixed to the consistency of a smoothie, then sprayed with washes of acrylic paint. My goal was to work fast and not worry too much about fine detail or even geological accuracy. Its sole purpose is to create a little dimensional depth without sacrificing space, just like any backdrop scene. I used rattle cans of red oxide primer and gray primer to give the “rock” some tone, then dry-brushed the high spots lightly with white paint. Spray adhesive was used for all clump foliage and vegetation. The project went much faster than I thought it would, with a total cost of under $200 for all materials.


Bruce,

I never saw this method or style before, it looks great and is going into my "scenery" file

Since my first post several weeks ago, I have been working on the next major step in my Fastrack layout. To recap briefly, I use a wheelchair and have some major limitations regarding access and reach. The majority of my layout is only about 2 feet in depth—not a lot of room to work with!

There are few things more entertaining on a model train layout than watching trains as they cross bridges. My setup will feature a 48-inch lift-out bridge across the entry to the room (a future project), and I also wanted a creek or river somewhere along the layout. These features look more realistic using lowered benchwork, but because I need to roll my wheelchair (the front, at least) under the benchwork to reach everything, the river section could only be lowered a few inches. Furthermore, because of my limited reach, I knew that I would have to complete the entire area, including scenery, before putting the track and bridges down permanently.

The Bridges: Two would be required, one being a double-track. To save time and money, I chose to use relatively inexpensive bridges available from retailers: a 10-inch Lionel girder bridge, and a 24-inch Menards through-truss bridge. I was pleased with the quality of both, but unfortunately the truss bridge simply overwhelmed the scene with its size. It just looked too tall and boxy, especially on my narrow benchwork. Many of you will cringe, but I decided to whack the truss members off to create something that resembles a concrete bridge with steel railings. (I saved the truss members, which are nice renditions.) It’s not prototypical, but I can live with it.

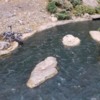
The Creek: Making a water feature look natural in a confined space is a bit of a challenge. I decided to use forced perspective to create a winding creek that has a hidden origin. The most fun aspect was incorporating some real rocks that my grandson collected when he was about four years old. They were locked into place using expanding foam. I also used Creek Bed Ready Rocks from Woodland Scenics.

As the photos show, I combined several proven scenery methods. Layers of foam board insulation were covered with Rigid Wrap plaster cloth and a thin layer of Hydrostone plaster mixed with brown pigment. Ground cover and clump foliage were built up in layers to achieve the desired effect. The creek bed was painted, then covered with five separate pours of clear resin, topped with wavelets made with Liquitex gloss gel.

Although much of the effort appears to be hidden by the bridges, I’ll have a little gimmick for visitors to get them to take a closer look: Find the troll!

Attachments

Images (7)
  • River 1
  • River 2
  • River 3
  • River 3b
  • River 3c
  • River 4
  • River 4b

Bruce, You have done an excellent job on the creek scene.  I have one of the single track Menards through truss bridges awaiting my layout build also.  Yes, they are tall!  Taller than I expected when I ordered online, but I think it will work for my 30" deep 11 x 11 room.  It definitely would have dominated your scene.  You did a nice job modifying it.  The water looks great!!  I'll look forward to seeing more!!

Bruce, your layout looks great!

If you don't mind though, I'll set the record straight on Homasote vs. Masonite- not the same at all. Homasote is a sound deadening material like compressed cardboard usually about 1/2" thick. Model railroaders have used it for track underlayment for years. Makes a horrible mess when sawn!

Masonite is a thin 1/8" or 1/4" hardboard manufactured panel that model railroaders use for back drops and fascias. I assume you used masonite for your backdrops, since homasote would not bend without kerfing it.

Pingman posted:

Bruce, why did you choose to describe your layout as a "shelf layout?"  

Carl, somehow I missed your question, so please accept my apology for answering almost two months later. We all have bigger concerns on our plates these days, but that's not an excuse.

So to finally answer, I think it qualifies as a shelf layout because of the shallow depth of the benchwork and the fact that it's braced to the wall with a completely open floor below. It's also an around-the-room layout. I guess I'm building a hybrid.

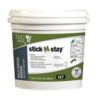
Thanks, Don. Yes, the ground cover includes some real dirt. I had some work done to my gravel driveway last summer, and later scooped up some dirt around the edges (where stuff gets washed to the side during our Georgia downpours). I made sure it was fully dried, then sifted it. For an adhesive I used Stick and Stay. It's used for flooring such as tile or vinyl, and a full quart costs only $13 at the big box stores. It's fairly thick (it can be thinned slightly with water, I discovered), and I just gobbed it on with a cheap bristle brush. When the real dirt and pebbles were sprinkled on, they stuck. After it dried overnight, I locked everything down with diluted white glue, applied with a plastic eyedropper (this actually goes faster than you'd expect). I also sprinkled on some Blended Turf from Woodland Scenics, and misted everything with a spritz of gray primer from a rattle can. I try to keep things basic and inexpensive. 

Here's another view of the creek, without the bridge.  

Attachments

Images (2)
  • Adhesive
  • The Creek

Hi Bruce, it looks like your on your way to a really terrific layout.  I really like what I've seen so far and I look forward to following you thru the rest of it.  Everything seems to be coming together in a great way, I really like your scenery and if you happen to have a plan of your track plan, I'd love to see what you have in mind.  You're doing a great job so far and the creek scene is really great.  Keep up the great work and thanks for sharing with us.

Thank you, Lance and J. Motts!

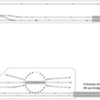
I have been meaning to post an image of my track plan, and also want to mention one of my favorite aspects of the train room: the integrated workbench. So I'm posting this as a new update.

Track plan: I used SCARM to create the basic plan, and made lots of little alterations as the actual layout progressed. I'm happy to say that the Fastrack has all been fitted together successfully, although no cuts have been made for the lift-out bridge and the buss wiring is not yet connected. My primary goals were to have a two-track mainline with two trains running continuously. I also wanted ample space for structures, roads, and scenery. This meant making some compromises due to the narrow depth of the benchwork, namely that trains on the inside loop will have to snake through a couple of turnouts, all of which are 060. The good news is that the dimensions of the room (10 x 28) allow for 060 minimum curves, with 096 on the outer track and 084 on the inner mainline. The wider portion of the benchwork, to the left of the entryway, will accommodate a 24-in Millhouse River Studios turntable. The SCARM image shows it as being in conflict with the inner mainline track, but that's actually not the case.  In my wheelchair I can duck under the entryway bridge, which rises to approximately 40 inches above the floor ("zero" level on the benchwork is 32 inches).

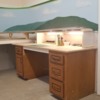
The workbench: I remodeled my kitchen a few years ago and kept some of the cabinetry, including the base cabinets that formed a built-in desk. They were repurposed to create a workbench that is integrated with the layout, with the mainline running on a shelf at about eye level. I have to add trim to the edges of the plywood top, and I haven't decided yet on the material to cover the top: something that will be glued down, but that can be scraped off and replaced fairly easily when necessary.

Attachments

Images (2)
  • Integrated workbench
  • Fastrack Final Plan
Last edited by BruceG

Amen to turntables. They're a fascinating example of engineering and machinery. I am really looking forward to installing mine, which has been sitting ready for several months. I think I'll have enough room for a scratch-built 3-stall roundhouse as well. Like the turntable, it will be limited to locomotives/tenders of 24 inches.

It's shaping up to be a neat layout. The long straights run about 20 feet in length. At the rate I'm going it will be months and maybe years before all of the scenery is complete. It will include a large mountain on the right side of the layout, with a tunnel about 8 feet long. A lift-out section in the middle will allow access in case of stalls or derailments. But that's a long ways off. Still, I'm hoping to have trains running within a few weeks. 

Where does the time go during the COVID-19 lockdown? Hard to believe that more than a month has passed since my last update, but I'm pleased with the progress overall.

I spent a lot of time wrestling with different ideas for the bridge spanning the entryway into the train room. The doorway is 36 inches wide and the bridge supports two tracks, which meant it had to be sturdy. Also, both ends of the bridge extend several inches beyond the door frame to accommodate future abutments and scenery, which brings the total length of the bridge to 50 inches. To span that length without sacrificing strength, I chose to use 3/4" plywood (or whatever equates to that these days) with two lengths of 3/4" square aluminum tubing underneath to prevent sagging. The tubing also serves as a conduit for the track wiring, which has quick-disconnects at both ends. Micro-switches will be installed at both ends to cut track power when the bridge is lifted out.

Lifting a bridge of that size is awkward from a wheelchair, so it will stay in place about 95% of the time as a "duck under." An elevation rise of about 8 inches from "ground zero" puts the bridge at roughly 40 inches off the floor, so I can roll right under it by bending over slightly. When the bridge needs to be lifted, I'll use a pulley system suspended from a hoist point a couple of feet above the center of the door frame (future project).

As luck would have it, Menards has been selling their two-track through truss bridges for less than $100 shipped. So I purchased two, and they fit perfectly end-to-end. I plan to fill in the horizontal gap in the center by cannibalizing beams left over from another Menards bridge that was modified (see my earlier post on 4/8/2020).

The track has been connected to the buss wires and is just about ready to screw down. Trains are running smoothly! Soon it will be time to start the remaining scenery projects and really bring the layout to life.

Some of you might have noticed that I have not yet named this little railroad empire. That will probably be the final step.

Attachments

Images (3)
  • Train room progress 1
  • Train room progress 2
  • Train room progress 3

Looks great, Bruce.

I just ordered a 24" TT from MRS and, like you, have a limited space within which to work. Remember that the TT needs a 25" hole.

I also ordered and am assembling the smaller, 3-stall Korber Roundhouse - #320. You will need approximately a 25 1/2" square footprint (plus the length of your whisker tracks in that direction) but, at less than $200, it may be a viable alternative to a scratch-built one.


@Richie C. posted:

Looks great, Bruce.

I just ordered a 24" TT from MRS and, like you, have a limited space within which to work. Remember that the TT needs a 25" hole.

I also ordered and am assembling the smaller, 3-stall Korber Roundhouse - #320. You will need approximately a 25 1/2" square footprint (plus the length of your whisker tracks in that direction) but, at less than $200, it may be a viable alternative to a scratch-built one.


Thank you! That's good info on the smaller roundhouse. I'm also toying with the idea of a two-stall engine shed, with a whisker track alongside it.

@BruceG posted:


I plan to fill in the horizontal gap in the center by cannibalizing beams left over from another Menards bridge that was modified (see my earlier post on 4/8/2020).


I wouldn't mess with it. I think it looks great as is, and there's plenty of prototype examples of multiple trusses spanning a gap. You're forgiven that you don't have the supporting column underneath the middle.

@Mark Boyce posted:

Bruce, I have one of the Menards bridges.  I have been contemplating whether it will hold up as a lift-up bridge, which I’ll open every time I run trains.  I think not.  I’ll use it around the bend where I never touch it and use something else more substantial for the lift up, I think.

That is probably a smart choice, Mark. The bridges are quite amazing works of art considering their relatively low cost, with excellent detail in the trusses and beams. But I've already had to repair a couple of pieces of thin particle board that detached from the structure, apparently during the shipping process. On the flip side, it's easy to repair using CA glue and accelerator. As long as people don't grab onto the bridge structure or lean against it, I'm hopeful these will hold up. If my plan for a hoist system succeeds, I won't have to touch the structural pieces at all.

@BruceG posted:

Thank you! That's good info on the smaller roundhouse. I'm also toying with the idea of a two-stall engine shed, with a whisker track alongside it.

@Richie C. posted:

Looks great, Bruce.

I just ordered a 24" TT from MRS and, like you, have a limited space within which to work. Remember that the TT needs a 25" hole.

I also ordered and am assembling the smaller, 3-stall Korber Roundhouse - #320. You will need approximately a 25 1/2" square footprint (plus the length of your whisker tracks in that direction) but, at less than $200, it may be a viable alternative to a scratch-built one.

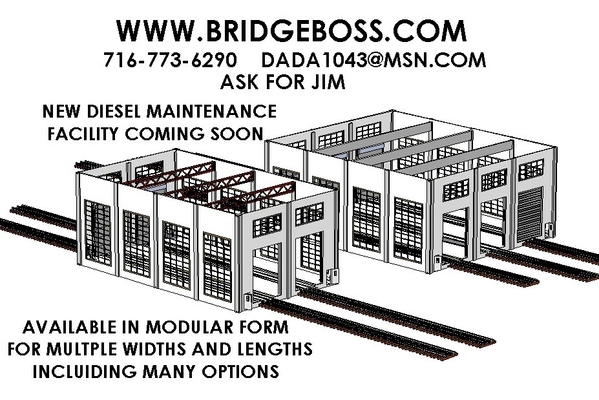
Looks like Jim at BridgeBoss is coming out with new engine sheds that may fit your needs.


BB ENGINE SHED


Attachments

Images (2)
  • BB ENGINE SHED
  • BB ENGINE SHED

Today is the 6th anniversary of moving into my little country house near Madison, GA. The feature of the property that caught my attention first was the detached garage. Starting in April 2019, a project to expand and remodel the building got underway. It is now almost complete with a 10 x 28 addition and HVAC. The addition on the rear wall provided, at long last, a dedicated room designed from the floor up for the sort of layout I have envisioned for much of my adult life. An so, on this sixth anniversary, it’s time to finally announce the name of my fictional empire.

Welcome to the Happy Valley Railroad!

Happy Valley logo

The name isn’t really all that original, but it suits my needs very nicely. As I mentioned in my first post, I’m hoping to create a layout that is really kid friendly while still providing plenty of serious modeling. It’s a challenge to find the right balance, and I’m always up for a challenge! From a kid’s point of view, the name Happy Valley is pretty much a sugar-coated delight. And if that isn’t a strong enough foundation, I happened to grow up in the real “Happy Valley,” the regional nickname for the postcard setting of State College, PA and University Park (the main campus of Penn State). So the name gives a strong nod to my childhood home, which was within an hour’s driving distance of many of the great Pennsylvania Railroad’s renowned sites: the Horseshoe Curve, the Rockville Bridge, the Altoona works, and much more. Therefore my logo is meant to look almost like an authentic subsidiary line of the PRR. Many thanks to my older brother, Larry, for some inspired ideas. I also "borrowed" some styling cues from logos found online, particularly at the Pennsylvania Railroad Museum.

I was born in the late 50s and will have fun modeling that transitional era with a mix of diesels and steam on the roster. Passenger trains will be PRR, but my grimy work trains will have HAPPY VALLEY lettering on long hoods and tenders in the same font and color as the famed PENNSYLVANIA. Structures and scenery will fit the time and place, but I won’t mind if some modernity creeps in from time to time, or even if a few LEGOs appear. Whatever lights up someone’s imagination. I plan to avoid things that are easy to break, such as telephone poles, tall trees, and street lights—and that’s because of my own periodic clumsiness while working from a chair.

One last observation: obviously this isn’t a cheap hobby, especially when prices of over $2,000 for a single Lionel locomotive, albeit a highly desirable one, are considered almost commonplace, and brass imports command many thousands of dollars. I’m making a strong effort to keep the budget reasonable by searching for good deals on lightly used or store-display items where appropriate, and so far I’ve been thoroughly pleased.

This promises to be a fun journey!

Attachments

Images (1)
  • Happy Valley logo
@BruceG posted:

Where does the time go during the COVID-19 lockdown? Hard to believe that more than a month has passed since my last update, but I'm pleased with the progress overall.

I spent a lot of time wrestling with different ideas for the bridge spanning the entryway into the train room. The doorway is 36 inches wide and the bridge supports two tracks, which meant it had to be sturdy. Also, both ends of the bridge extend several inches beyond the door frame to accommodate future abutments and scenery, which brings the total length of the bridge to 50 inches. To span that length without sacrificing strength, I chose to use 3/4" plywood (or whatever equates to that these days) with two lengths of 3/4" square aluminum tubing underneath to prevent sagging. The tubing also serves as a conduit for the track wiring, which has quick-disconnects at both ends. Micro-switches will be installed at both ends to cut track power when the bridge is lifted out.

Lifting a bridge of that size is awkward from a wheelchair, so it will stay in place about 95% of the time as a "duck under." An elevation rise of about 8 inches from "ground zero" puts the bridge at roughly 40 inches off the floor, so I can roll right under it by bending over slightly. When the bridge needs to be lifted, I'll use a pulley system suspended from a hoist point a couple of feet above the center of the door frame (future project).

As luck would have it, Menards has been selling their two-track through truss bridges for less than $100 shipped. So I purchased two, and they fit perfectly end-to-end. I plan to fill in the horizontal gap in the center by cannibalizing beams left over from another Menards bridge that was modified (see my earlier post on 4/8/2020).

The track has been connected to the buss wires and is just about ready to screw down. Trains are running smoothly! Soon it will be time to start the remaining scenery projects and really bring the layout to life.

Some of you might have noticed that I have not yet named this little railroad empire. That will probably be the final step.

Fantastic job so far.  Very impressive.  I can't wait to read your OGR article!


So what's that sitting in the garage under the cover?  GNX?

Last edited by Chris Lord
@BruceG posted:

You get the "Sharp Eyes" cookie as the first person to ask. Heck, maybe you're even the first guy to notice! The car under the cover is my 1967 Mustang convertible, a vehicle I've had for almost 26 years. Model railroading is not my only hobby.

'67, nice!   What engine and tranny?  I had a 64 1/2 262 automatic convertible years ago.  I had a girlfriend, apartment and the car but couldn't afford all of them so I sold it (the car that is!)    I married the girlfriend so I guess it was the right decision but man do I wish I still had that car!

Been looking for a mustang for years...just brought my wife this mustang a couple of months ago.  I wanted something cool and nasty but not offensive.  I was thinking H-pipe on 69 fastback...she was think this...this is in our garage...not just a train guy either!

Not in progress...but this is my layout.  I enjoy daily and share with my neighbors.


Attachments

Images (6)
  • 2018 GT Prem
  • lay1
  • lay2
  • Lay3
  • Lay4
  • Lay5
Last edited by Team Ridley
@Team Ridley posted:

Been looking for a mustang for years...just brought my wife this mustang a couple of months ago.  I wanted something cool and nasty but not offensive.  I was thinking H-pipe on 69 fastback...she was think this...this is in our garage...not just a train guy either!

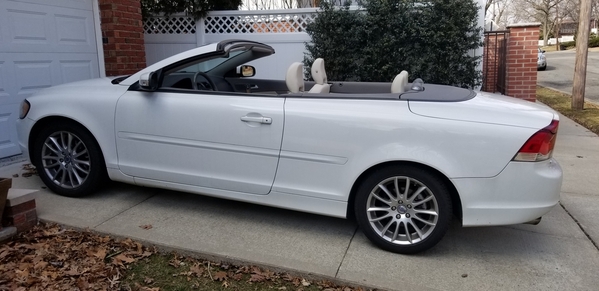
Also very nice. I'm still a convertible guy but I've gone the retractable roof route.  Absolutely love it.  I'm getting a little tired of this one though.  It's a 2008, 12 years is a long time.  My next one will be an M4 Comp.

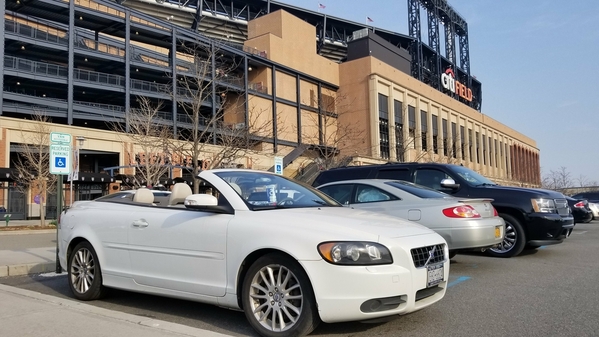
Oh, it's a Volvo C70 with the Polestar upgrade.  

And I also have a layout under construction.  When the world gives you lemons make ......................... A LAYOUT! (5/7 Update)

20200513_21055420200513_21055720200513_210610 

20180414_17243120190315_150744

Attachments

Images (5)
  • 20180414_172431
  • 20190315_150744
  • 20200513_210554
  • 20200513_210557
  • 20200513_210610
Last edited by Chris Lord
@Chris Lord posted:

'67, nice!   What engine and tranny?  I had a 64 1/2 262 automatic convertible years ago.  I had a girlfriend, apartment and the car but couldn't afford all of them so I sold it (the car that is!)    I married the girlfriend so I guess it was the right decision but man do I wish I still had that car!

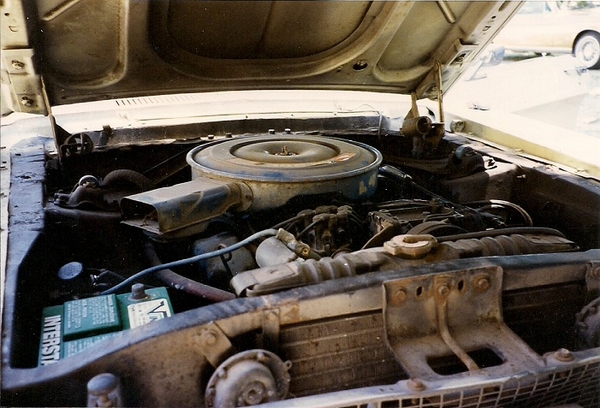
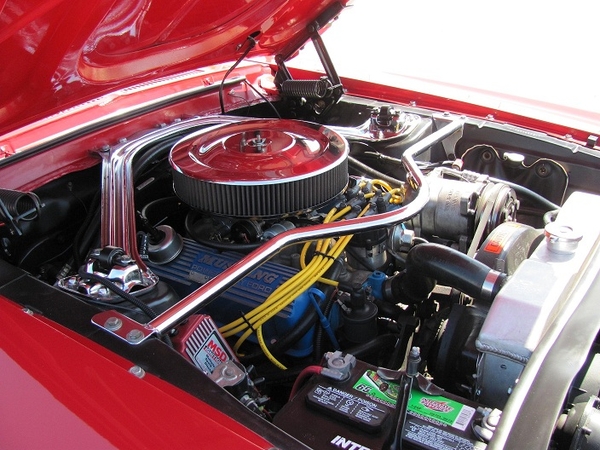
If you have a good marriage, then you definitely made the right choice! Old cars are fun but at the end of the day they're just things. Mine was a rusty basket case when I found it in 1994, but it was loaded for that era: front disc brakes, factory a/c, power top, and more. Still has the original 289, but the old 3-speed automatic was replaced ten years ago with an AOD. Having that 4th gear is superior in every way. The car has a lot of other modifications now, including Dakota Digital instruments and cruise control, among other things.

dirty engine

Clean engine

Attachments

Images (2)
  • dirty engine
  • Clean engine
Last edited by BruceG
@Team Ridley posted:

Been looking for a mustang for years...just brought my wife this mustang a couple of months ago.  I wanted something cool and nasty but not offensive.  I was thinking H-pipe on 69 fastback...she was think this...this is in our garage...not just a train guy either!

Not in progress...but this is my layout.  I enjoy daily and share with my neighbors.


The GT Premiums are surprisingly nice cars. I have a 2013 (not all that new anymore) that now has over 100K miles, mostly highway, and it's so much fun to drive. Those 420-plus HP Coyote engines are beastly--yet the car is smooth and quiet on the interstate.

Love the fact that you enjoy your layout daily and share it with neighbors. For kids from 1 to 92, right?

@BruceG posted:

If you have a good marriage, then you definitely made the right choice! Old cars are fun but at the end of the day they're just things. Mine was a rusty basket case when I found it in 1994, but it was loaded for that era: front disc brakes, factory a/c, power top, and more. Still has the original 289, but the old 3-speed automatic was replaced ten years ago with an AOD. Having that 4th gear is superior in every way. The car has a lot of other modifications now, including Dakota Digital instruments and cruise control, among other things.

dirty engine

Clean engine

Wow! What a difference.  You're really making me feel bad about not having my 64 1/2 anymore.  Mine had AC and a power roof also. And of course I put in an 8 Track!

@Chris Lord posted:

Wow! What a difference.  You're really making me feel bad about not having my 64 1/2 anymore.  Mine had AC and a power roof also. And of course I put in an 8 Track!

Sorry about that, Chris! You can still find them. My favorite of that 1st generation was the '66: best front grille. The 67/68 years had the best overall appearance (IMO) of the various Mustangs in the '60s. The new ones are even more fun because they handle so well and have gobs of power.

@3rail posted:

Hey Bruce.

Here are (2) pics of the above Diesel Shop that Jim built for me back in 2011. At that time it was a prototype that he designed. Mine was not modular but came fully assembled.

Donald

IMG_1103IMG_1107

That's truly impressive. And right in line with some of the off-topic stuff in this thread, the cars parked in the lot are some of the best of the 1960s and early 70s: Pontiac Grand Prix, Ford Mustang Fastback, and what looks like a Ford Bronco. I'm more interested in the cars! What's the source?

@BruceG posted:

That's truly impressive. And right in line with some of the off-topic stuff in this thread, the cars parked in the lot are some of the best of the 1960s and early 70s: Pontiac Grand Prix, Ford Mustang Fastback, and what looks like a Ford Bronco. I'm more interested in the cars! What's the source?

Hey Bruce. Most of my diecast collection was purchased a number of years ago thru American Excellence or EBay (for the older Matchbox). On my Layout you either drive a muscle car or a truck! 

I do have a "Bullitt" for you....

IMG_1902

And for all you Ford guys, here is some true American muscle. The '69 is a fully restored numbers matching museum piece. I just sold it to a collection out in Michigan and it gets picked up in a few weeks. The Stingray is my current ride.

IMG_0044

IMG_0360

IMG_0023


Attachments

Images (4)
  • IMG_1902
  • IMG_0044
  • IMG_0360
  • IMG_0023
Last edited by 3rail
@3rail posted:

Hey Bruce. Most of my diecast collection was purchased a number of years ago thru American Excellence or EBay (for the older Matchbox). On my Layout you either drive a muscle car or a truck! 

I do have a "Bullitt" for you....

IMG_1902

And for all you Ford guys, here is some true American muscle. The '69 is a fully restored numbers matching museum piece. I just sold it to a collection out in Michigan and it gets picked up in a few weeks. The Stingray is my current ride.

IMG_0044

IMG_0360

IMG_0023


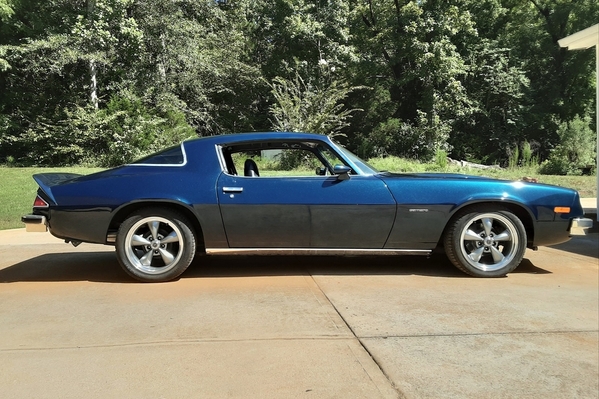
Sweet! I'm not a Ford guy, necessarily, though I do have 2 Mustangs. I also have a 75 Camaro that's partially restored. Currently it has no interior other than seats and the steering wheel.20190721_14082220190721_140936

Attachments

Images (2)
  • 20190721_140822
  • 20190721_140936

My available time to work on the Happy Valley Railroad took a hit this summer. No, I wasn't laid up by COVID or some other ailment, it was simply a matter of putting a big priority on other projects--which includes getting my 8th nonfiction book underway. 

But I haven't been completely idle, and just uploaded a video to YouTube:  https://www.youtube.com/watch?...JY&pbjreload=101

I hope y'all enjoy it!

Bruce, I was just thinking of you and your layout the other day.  I'm glad all is well with you!  The video is great!  All the train activities you visited were great, and your photograph of your boyhood layout was great!  The photographs of your grandson with the controller and big grin was priceless!!!  That is a really nice addition you put on your garage for the layout!

Thanks, Mark, and Peter, and Jon! Sometimes I think I'm falling way behind, so I have to remind myself how far the project has come since April of last year, when the slab was poured for the addition that became the new train room. From this point forward, with lots of scenery and structures and lighting to complete, the project will still take years. 

Last edited by BruceG
@BillYo414 posted:

That's a great logo and I'm a little jealous of your trees/rocks! Would you happen to have the link to the tutorials you used? Or did you kind of pick from a few tutorials?

Thanks for the compliment! The rocks/foliage were pretty much experimental. I don't recall any specific links for the backdrop tutorials. I watched a bunch of YouTube vids under the general heading of "how to paint backdrops." Most of them were related to model railroading, not surprisingly. One thing I just thought of: I purchased a cheap artist's "start up" kit of acrylic paints from Amazon (tons of choices) there. They came in a box with something like 16 fairly large tubes of all different colors. My advice is to get a foam knife, some foam insulation sheet, and the finishing products from Scenic Express and experiment! 


Bruce,

Thanks for pointing me to this thread! I had not seen it before. Excellent work! Great minds must think alike, b/c some of your ideas I've already used. Like the Menards bridges. I literally just finished my kitbash. I plan to submit an article to Alan on how I did it. I ran into many of the same issues you did, and for the same reasons. But mine is a bit longer: It took 3 Menards bridges. I'm not posting pictures for 2 reasons: 1) this is your thread, and 2) I'm using some for the article.

Chris

LVHR

@BruceG posted:

Thanks for the compliment! The rocks/foliage were pretty much experimental. I don't recall any specific links for the backdrop tutorials. I watched a bunch of YouTube vids under the general heading of "how to paint backdrops." Most of them were related to model railroading, not surprisingly. One thing I just thought of: I purchased a cheap artist's "start up" kit of acrylic paints from Amazon (tons of choices) there. They came in a box with something like 16 fairly large tubes of all different colors. My advice is to get a foam knife, some foam insulation sheet, and the finishing products from Scenic Express and experiment!


I’m glad this thread popped up today.  I just joined a couple of days ago.  I built a 6x8 table in our basement for our son last November.  He’s made a model railroader out of me!  
If you want to feel better about the progress of your layout, I posted yesterday about mine.  It’s just tracks and a roll of grass with some randomly placed trees and buildings right now.  I came here for some inspiration and I am glad I did.

Your layout is ingenious.  I read through the whole thread and it was really enjoyable to follow your progress.  Thank you for sharing and good luck!

@lehighline posted:

Bruce,

Thanks for pointing me to this thread! I had not seen it before. Excellent work! Great minds must think alike, b/c some of your ideas I've already used. Like the Menards bridges. I literally just finished my kitbash. I plan to submit an article to Alan on how I did it. I ran into many of the same issues you did, and for the same reasons. But mine is a bit longer: It took 3 Menards bridges. I'm not posting pictures for 2 reasons: 1) this is your thread, and 2) I'm using some for the article.

Chris

LVHR

Thank you, Chris! I'd definitely like to see some photos of your 3-bridge arrangement. This thread already has all sorts of pics from other viewers, including some that got off topic (but were still fun--namely the gearhead stuff). The main point is that we're sharing ideas.

@NeophyteMRR posted:

I’m glad this thread popped up today.  I just joined a couple of days ago.  I built a 6x8 table in our basement for our son last November.  He’s made a model railroader out of me!  
If you want to feel better about the progress of your layout, I posted yesterday about mine.  It’s just tracks and a roll of grass with some randomly placed trees and buildings right now.  I came here for some inspiration and I am glad I did.

Your layout is ingenious.  I read through the whole thread and it was really enjoyable to follow your progress.  Thank you for sharing and good luck!

Thank you! I can completely relate to where you are, just starting out. Can't tell you how many years I drooled over other peoples' layouts and gathered ideas and inspiration for the day that I could start my own miniature empire. It finally got underway 11 months ago; here's a photo from mid-December 2019.

First stage

Attachments

Images (1)
  • First stage
Last edited by BruceG

Bruce,

I'm impressed that you painted that background yourself. Way to go! I've thought about doing the same thing, and have actually practiced on a 4'x4' piece of cardboard. But I'm not at the point where my work passes the 3' test. I'm interested in more detail about how you actually did it. Paints, colors, brushes, etc. Also please post a closeup of the double ridge section below. Remember: Copying someone else is the sincerest form of flattery!


Chris

LVHR

Howdy, everyone. After a long hiatus I'm finally getting back to work on the HVRR. For about the past year and a half I ran trains occasionally but didn't accomplish much in the way of scenery projects, mostly because other hobbies and commitments kept getting in the way. It's great to be back, so to speak.

I posted earlier about the mountain that occupies one end of my 10 x 28 layout, with its lift-out sections for access to the track. To me it always looked a bit too much like a curved tube--a huge worm--so I relocated trackage to a single spur and added some volume to the side of the mountain.

Dry fit 1

Construction consists of insulation foam board and Shaper Sheet (Woodland Scenics). It's really quite cost-effective and covers a lot of area (a big 18" x 72" roll is currently about $25) and working with it couldn't be simpler.  I use generic hydrostone rather than the expensive Woodland Scenics plaster, mixed to the consistency of paint. It can literally be that thin because the bonded fabric and aluminum give the material its strength after the plaster dries. I add a drop of tube acrylic black paint and some white glue to the mix and apply it with disposable brushes.

This is NOT the finished result, just the first layer, but it shows what can be done with little fuss or mess.

I painted a Lionel operating icing station and am scratch-building a narrow ice house to go with it. The latter is made of 3/16 foam board that will be covered with Evergreen siding and roofing.

At the same time, I'm integrating the scenery over and around my workbench. The fascia is vinyl plank flooring, which is easy to bend and cut. 

Hopefully I'll be more consistent with updates as the Happy Valley Railroad gets back on track.

Shaper Sheet DShaper Sheet BShaper Sheet E

Attachments

Images (4)
  • Dry fit 1
  • Shaper Sheet B
  • Shaper Sheet D
  • Shaper Sheet E
@Mark Boyce posted:

Bruce, I’m glad to see you back working on your layout!  The new mountain is looking much better than the old one already!  Nice fascia idea!  I need to do something for mine, as of yet nothing!

Thanks, Mark. The fascia idea came from the fact that I have a few boxes of 8" x 48" vinyl plank left over--it's the same indestructible (almost) stuff that's on the floor of the train room. It's quite sturdy, especially when backed with polystyrene foam followed by scenery material. It will eventually wrap around the layout and should make for a pretty slick look when finished. The green painters tape looks hideous, but you can get an idea of the look from this view:

20220318_114647

Attachments

Images (1)
  • 20220318_114647
@RJ Shier posted:

I like the looks of the WS shaper sheet. I might need to get some for my current trestle bridge build.

It really is simple to work with. Cuts with household scissors and can be stuck to stuff with staples, hot glue, or gorilla glue. Leftover cuttings can be used to fill in small areas, so there's very little waste. Once the cloth layer is coated with a thin layer of plaster (I spritz it first with water and a drop of dish soap in a spray bottle), the scenery shell dries rock hard and sturdy.

Bruce,

I really like how you incorporated your work area into the layout. It's very classy and clever. It's a great way to watch trains while working if you wish. My work area is near trackside but I found it pretty distracting to have a train running while working on anything. Maybe I'll try it without sound, lol. Thanks for sharing your progress.

Dave

UPDATE MARCH 24, 2022. I'm getting back into the groove of steady work on the HVRR. Spent the past couple of days on scenery aspects of the 084 and 096 curves at both ends of the layout. One end is dominated by a large mountain and portals, while the other will have a combination of structures and industrial flats. I painted more mountain scenery on the backdrop (see the before and after photos) using household latex paint and some drybrush techniques. Probably 90 percent of the new mountains will eventually be hidden by structures, but oh well.

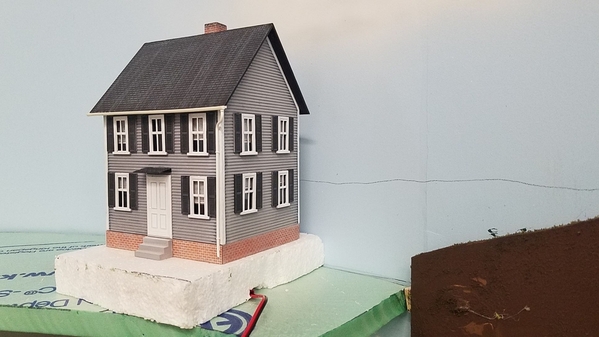
The Lionel "Davis House" kit was a fun build, a gift from my older brother. Davis is a family name, so it has some personal meaning. I added floors with foam board, printed some venetian blinds on my computer, did a bit of light weathering, and wired it with two LEDs.

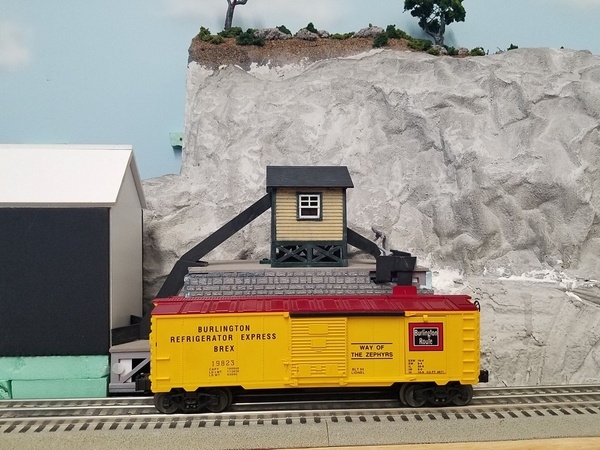
The Lionel icing station was painted with tube acrylics and weathered, with a velcro-mounted foam board covering the mechanism. Obviously it's not a prototypical structure but the kid in me loves watching the little worker (he'll be painted soon) shove plastic blocks of ice into the reefer--and the grandkids will love it even more. A scratchbuilt ice house will go alongside.

The final photo shows how easily the work area can get cluttered. That's one advantage of working from the back of the layout towards the front--the "foreground" serves as a workbench at this stage.

Layout 1

Backdrop mountains 1Backdrop mountains 2Davis houseIcing station 1

20220324_153931

Attachments

Images (6)
  • Layout 1: Mockup, no backdrop mountains
  • Backdrop mountains 1: Backdrop mountains added 3/24/2022
  • Backdrop mountains 2: Closeup of backdrop mountains
  • Davis house: Lionel "Davis House"
  • Icing station 1: Lionel icing station
  • 20220324_153931: Mountain progress

Bruce, Nice work on the house and mountains.  IT looks to me like enough of the mountains will show up behind buildings to warrant you spending time finishing them well.  You will see different portions of the mountain sides behind the buildings as you move from side to side.  One Forum member says he likes to finish all sides of a building even though no one else will ever see the back.  He will always know it is done.

@Mark Boyce posted:

Bruce, Nice work on the house and mountains.  IT looks to me like enough of the mountains will show up behind buildings to warrant you spending time finishing them well.  You will see different portions of the mountain sides behind the buildings as you move from side to side.  One Forum member says he likes to finish all sides of a building even though no one else will ever see the back.  He will always know it is done.

Thanks, Mark. I haven't figured out yet where the various structures and flats will be placed permanently, so that was another reason for doing a fairly complete job on the painted mountains. There will definitely be a few glimpses of them between buildings. I might add a few HO or even N scale backdrop buildings, printed on cardstock, for a bit of forced perspective. We'll see!

Last edited by BruceG

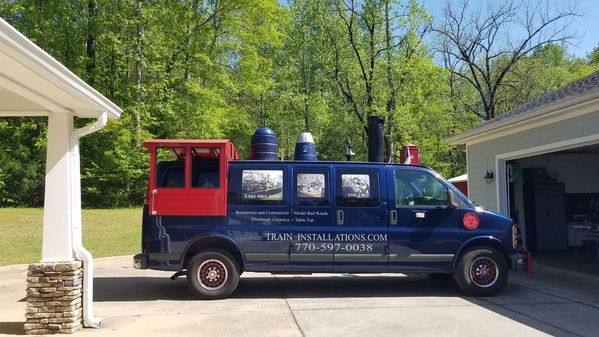
At last, a breakthrough! Progress on the HVRR had stagnated for a long time, in part due to the pandemic but also because I had reached a plateau thanks to my limited reach from a wheelchair. I knew from the very start that I’d need help with scenery in the corners and wiring under the benchwork. The solution was to hire Dave Bennet of Train Installations to accomplish several important tasks.

Dave, who crisscrosses much of the East and Midwest installing layouts for private as well as commercial clients, lives less than two hours from me in Georgia. On April 19 he arrived in his tricked-out van and spent two full days working on the layout. He installed a 24-inch Millhouse River Studio turntable, did some wiring, and worked on some scenery to really get me over the hump. He accomplished a lot in those two days, and I'm glad I decided to hire a professional.

To recap for those who aren’t familiar with the HVRR, it's an around-the-walls layout measuring approximately 10 feet by 28 feet, built on cantilever benchwork. I chose Fastrack, which has its pros and cons, but I’m quite satisfied with its performance, and my Legacy locomotives work fine on it. I especially like the fact that the turnouts are kid-friendly and forgiving (I have three grandsons). The overall concept is sort of a hybrid between elements of realism and the fun of animated accessories, which are especially appealing for kids and kids-at-heart. There are five Lionel operating accessories--icing station, sawmill, coal tower, water tower, and rotating beacon—plus the MRS turntable and a couple of operating track sections for dumping coal loads and logs. Due to the narrow limits of the shelf-type layout, I decided to set the coal tower at 90 degrees to the intended placement. The chute can unload coal into a dump truck rather than a hopper or gondola. Additionally, I’m altering the toylike appearance of the Lionel structures to make them look a little more prototypical.

The layout got underway at the beginning of 2020, just before COVID hit. A lot of progress has been made since then. Trains are running smoothly, but there’s a long way to go regarding scenery and structures to bring the HVRR to completion—though it’s never really “finished,” is it?

20220419_16022520220424_12341620220424_15150620220424_15224720220424_153333

Attachments

Images (5)
  • 20220419_160225
  • 20220424_123416
  • 20220424_151506
  • 20220424_152247
  • 20220424_153333
@RJ Shier posted:

Hey Bruce,

I ordered a roll of the WS shaper sheet over the weekend. On Saturday I prepped the area where it will go.

How easy is it to add trees when using the shaper sheet?

Not to hijack the thread but, because the sheet tends to dry hard, you will have to puncture the surface. I used a drill with a sharp bit slightly undersized to the diameter of the tree trunk I was inserting and used rapid set CA glue to hold it in place on this mountain I made on a table and then set into an unused corner.

MTN - 1MTN 2MTN 3 

Attachments

Images (3)
  • MTN - 1
  • MTN 2
  • MTN 3
@Richie C. posted:

Not to hijack the thread but, because the sheet tends to dry hard, you will have to puncture the surface. I used a drill with a sharp bit slightly undersized to the diameter of the tree trunk I was inserting and used rapid set CA glue to hold it in place on this mountain I made on a table and then set into an unused corner.

MTN - 1MTN 2MTN 3

Glad you answered the question, Richie, since I haven't added any trees or other details to the shaper sheet yet. It certainly is amazingly hard material but drilling holes for trees should be easy. Even a dab of hot glue (the slow-dry version) should work well when gluing trees. Yours is practically vertical!

@Mark Boyce posted:

Bruce, that is a really unique customized van Dave has.    I'm glad he was able to help you get the turntable, do wiring, and get those hard to reach corners sceniced nicely!  The layout is really looking great for only starting the beginning of the pandemic!  I'll look forward to seeing your continued progress now that Dave got those things done.

Thanks, Mark! The work that Dave accomplished has given me plenty of motivation (and inertia) to keep the progress moving forward.

@BruceG posted:

Glad you answered the question, Richie, since I haven't added any trees or other details to the shaper sheet yet. It certainly is amazingly hard material but drilling holes for trees should be easy. Even a dab of hot glue (the slow-dry version) should work well when gluing trees. Yours is practically vertical!

You're right, Brue - it is pretty vertical !  I needed something big to stick in that unused corner before laying track that I wouldn't have to fiddle with later on because I'd never be able to get in there after the track was laid and a "shaper sheet" mountain seemed to fit the bill. It actually looks better in person than the photo's show.

I agree, hot-glue would also work well to hold the trees in position. 

Add Reply

Post
The Track Planning and Layout Design Forum is sponsored by

AN OGR FORUM CHARTER SPONSOR

OGR Publishing, Inc., 1310 Eastside Centre Ct, Suite 6, Mountain Home, AR 72653
800-980-OGRR (6477)
www.ogaugerr.com

×
×
×
×
Link copied to your clipboard.
×
×