This layout keeps getting better!
Love seeing the progress!


|
|
This layout keeps getting better!
Love seeing the progress!
Awesome Layout! i really like the layouts that you can walk around the end!
Darren
Nice progress on the layout.
I think the roundhouse will be great with Als turntable, nice selection.
Let us know if we can be of help with the build. We have updated the instructions for the roundhouse since the kit you have. You may find these helpful
http://www.korbermodels.com/Services___Links.html
Looking forward to seeing more post you have a great looking layout there.
Darren!
This is amazing! Thank you for the inspiration!
Thanks everyone, I got the Turntable wired and running today. Very impressed, even had the family playing with it this evening. I had a few more yard items arrive this week so I will be spending most of my time working on the yard area with trackwork and wiring. I will post some pictures, hopefully by next week, of some progress.
Rich, the completion of the Roundhouse is also on that list, as is working on the other Korber models I have to build. Thank you for sending the updated instructions and the kind words.
Darren
Darren I was reading before that you had a bunch of ScaleTrax that you were going to be using on this layout. It looks like you went with Gargraves? Any chance you still have that MTH track and would you be willing to sell any of it?
Will,
Sorry, I do not. I sold all of it to get the money to buy the Gargraves track and Ross switches.
Darren
I have been hard at work trying to improve the wiring for the layout and haven't got much else done, but I wanted to snap a few pictures to let everyone know where I am with the layout. I am finding that there is more and more I want to do, so I am trying to prioritize by working on the layout functioning properly first, then aesthetics second.
Darren


Ah, yes, the nitty gritty stuff. I follow the same path build, operate, make it look nice.
It's looks better each update.
Coming right along! It looks great and you've made a lot of progress since your last post, even if you don't realize it!
Keep up the great work. Can't wait to see a video of trains running!
Well, it has been a LONG time since I posted anything about the layout. From Spring to Fall our family is busy with sporting events for the boys, Baseball, Hockey, etc. So this is the time of year when I can get some work done on the layout. I took a few steps back, but I think it will produce results that I will be much happier with in the end. You will see from the pictures that the top level is no longer, there is a new area under construction for a trestle bridge, and all of the MTH buildings have been removed and will be placed together as one big city scene, instead of being scattered.
I have a large list of tasks ahead of me, and I will do my best to keep the thread updated.


That is not a layout... its a railroad! Nice work.
Gotta love a guy with the bollocks to cut the sheetrock so the right of way can continue...
Ted
Darren,
after simmering on the layout and running the trains, what caused your dislike of the elevated line?
Ah, it was a distraction for a long corner shot!
Welcome back!
I wondered where you've been and how the layout was progressing. I've missed your updates as this is one thread I always look for when I"m logged in.
Just my opinion, but I like it much better without the upper level. The trestle will look awesome. Can't wait to see more ![]()
Looks great! I'm looking forward to the trestle too!
The top level was separate from the rest of the layout and served no real purpose. I'm constantly trying to make each section of the layout have some purpose besides just filling up space. Bottom line I wasn't happy and I think the changes will produce much more realistic scenes.
As I "knock out" my list I will post pictures of the progress.
Thank you all for the kind words and support.
Darren
Looks great! Can't wait to see more!
great looking layout keep em coming love the updates
Darren,
It's been more than 30 days. Time for an update!!! ![]()
ChessieFan72 posted:Darren,
It's been more than 30 days. Time for an update!!!
Agreed! I want to see more!
Guys, agreed, I will try to post some pics tomorrow. I have been working on the Korber Roundhouse and the Korber Sandhouse. I want to concentrate my focus on that area of the layout before I move on.
Darren
Thanks to my AMAZING wife, I was able to come home after work this afternoon and work on the base of the roundhouse. I think I spent more time measuring and marking than actually cutting the wood. I used a 4 x 4 sheet of 1/4" board and 1/8" Masonite. I still have work to do, but I thought I would post some pics so you all could see the process/progress.
I had my little helper with me this evening.
I also have been working on the Sandhouse and the bracing of the Roundhouse.
Darren


Darren,
It all looks great, but the last photo is the best!!
Great pictures!
Very well done.
Did you use the templates or make your own for the floor?
Do you plan to light it? LOS did a thread about LED lighting for his RH for reference.
I need to build my RH, you're motivating me!
I traced the Roundhouse onto the 1/4" board, then I cut the board. Once cut, I had an outline of the Roundhouse.
I took the base over to the Roundhouse area and placed it into position, (I had also traced the Roundhouse when it was in place, so I had markings on the Homasote). From here I measured and marked the areas where the track was positioned. I used a Sharpie so I could see the lines when cutting.
After I had cut the track areas from the 1/4" board I went and placed it into position, from here I measured again (I also had a tablet with a drawing of the area that I was using as a tool) I marked areas from the beginning of the tracks entering the Roundhouse and the ends of the track in the Roundhouse. Like I mentioned earlier, A LOT of measuring!
Because I did not have a sheet of Masonite large enough I just pieced together what I had. I plan to use wood filler and sand the gaps later. I placed the 1/4" board over the Masonite, traced the outline, referenced my measurements and drew the appropriate lines for cutting on the Masonite.
I next cut the Masonite, then cut eight 1/2" strips for in between the rails, and placed it over the 1/4" board in the Roundhouse area. I had to go back and do some slight trimming, 1/8" in two places, but I wasn't disappointed in having to do that.
I used a table saw and jig saw for all my cutting, the table saw really helped reduce the time and create straight cuts.
I plan on completing the wiring for the track, bevel the Masonite in needed areas, paint the 1/4" board and surrounding yard area the flat black that I have, then work on the Masonite pieces, which will be painted grey.
I do plan on lighting the Roundhouse, I purchased LED lights and I am just waiting on the proper lamp shades. I had purchased ones but they are too small for the 3mm LEDs that I ordered
Hope this helps,
Darren
Thanks Darren, I printed your explanation for reference. Appreciate the info and effort.
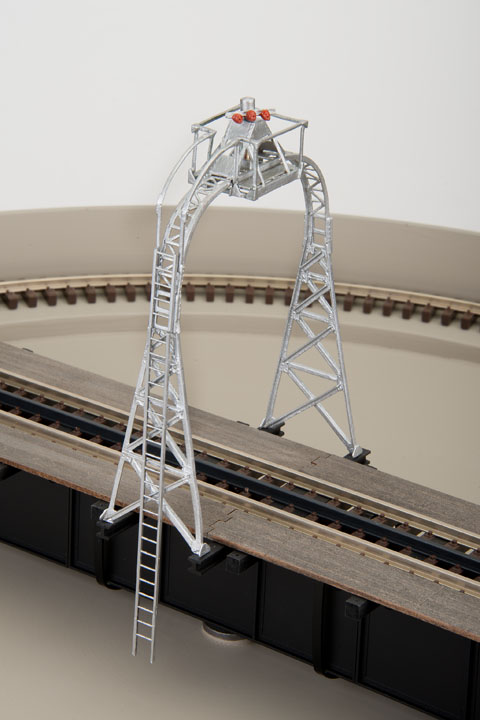
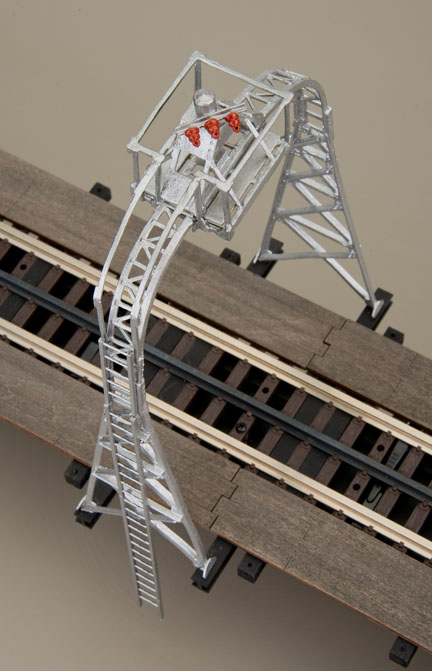
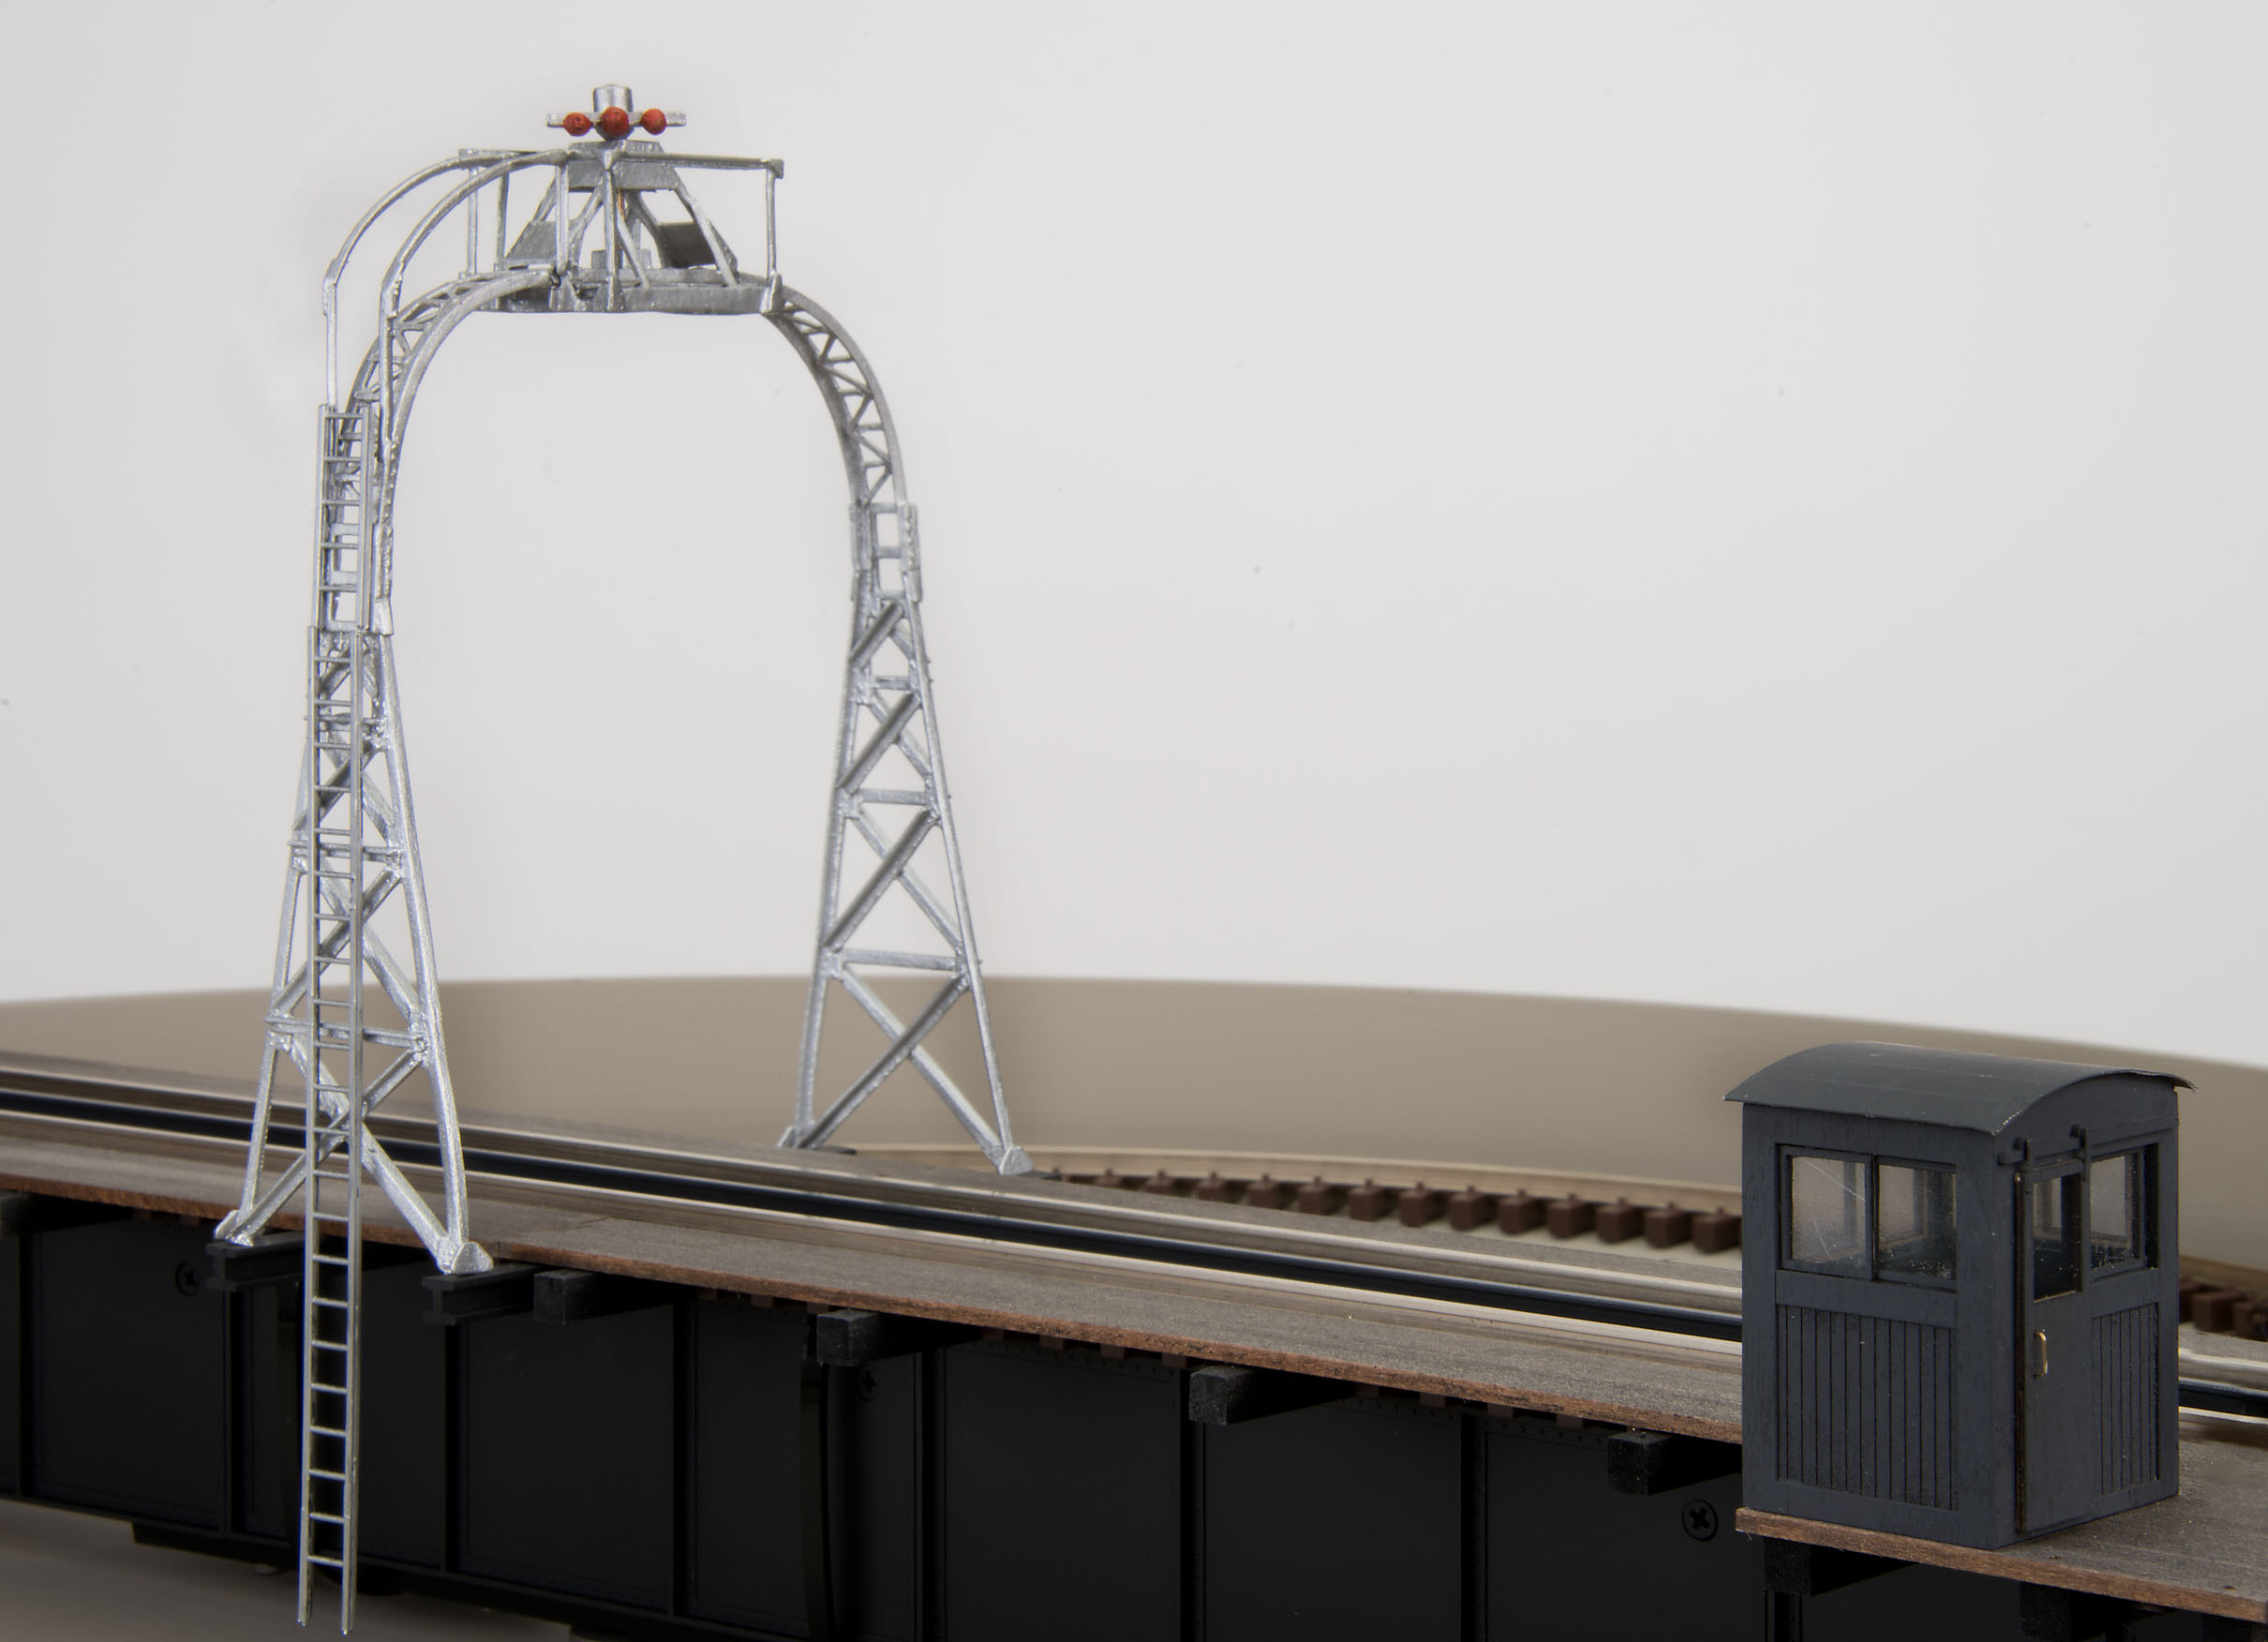
I was able to get some work done on my MHRS turntable deck this week and I thought I would post a few pics of the process. I am not completely done, the cab and ladders still need one more coat of paint and then installed. But, hopefully I will have that completed tomorrow.
As far as the process, the railings were the most tedious and difficult. The rest was not as bad as I first thought, especially when I first opened the bag of a "million" pieces. A lot of filing and sanding to get it just right. Once that was completed the parts fit together great, a little glue and some paint.
I am concentrating my focus on this area (The yard) of the layout before I move on, though I do need to do some trackwork in preparation for the trestle bridge, and some wiring also, lol, its a never ending process but that what makes it fun.
Darren


Would you please post a picture of your track plan - looks very nice
Is that the UP tower on your MHRS TT? If so, could you post a few close ups?
Thanks.
Amazing thread. Love the layout and the build. Any advise you can share would be great.
Thanks
PSU1980, I actually don't have a track plan to post. I changed the original layout and have made several changes this year with more to come. I will try to work on one in SCARM and post it or a picture of it.
86TA355SR, it is the standard arch that Al has with his turntables, you can get a PRR and UP versions, the PRR version is more squared and the UP version is more rounded, from the pictures I saw.
Caljah, thank you, I checked out your thread and it looks like you are well on your way, but if I see anything I think I can help you with I'll let you know, in the meantime, if you have any questions, please ask, and I'll do my best. A lot of what I have learned in this hobby has come from trial & error, asking questions and reading/watching videos.
Darren, Turntable is coming along very nicely.
86TA355SR, here are a couple photos of the UP arch we offer
Very Nice
Darren,
Any pictures would be appreciated
OK, I was able to "throw" something together with SCARM tonight, which I took a picture of. I also finished the turntable, so I took a few pics of that too.
As you can tell, there is a reason I am not a computer aided drawing technician, LOL!
I plan on taking the SCARM printout to Staples and have it resized to 18 x 24, then use it as an outline for my Control Panel. That project is "down the road"


Darren,
Thanks, looks great. You can certainly tell that you have put alot of effort behind the build.
Kevin
Is that Ross or Gargraves Track? Looks like Ross Switches
Kevin,
Thank you, the track is Gargraves and the switches are Ross, haven't had an issue with either. I like the look of the Gargraves track and I like that you have to "work" with it a bit, made the process more enjoyable for me.
Darren

Access to this requires an OGR Forum Supporting Membership
