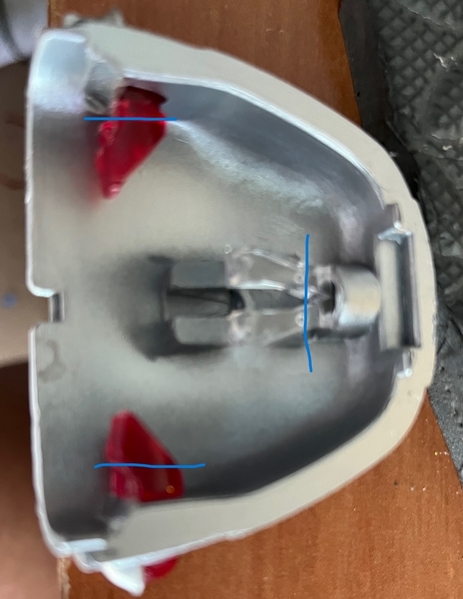
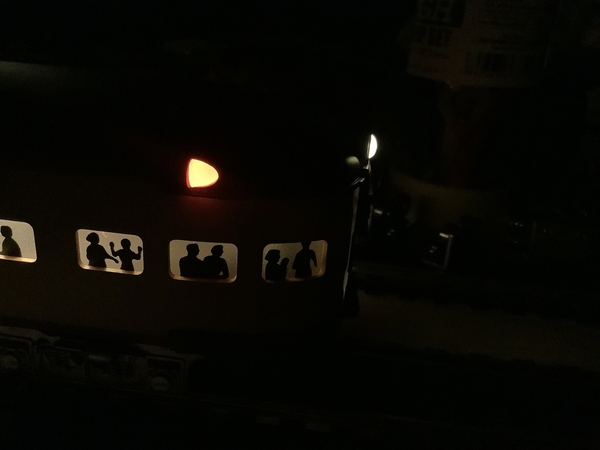
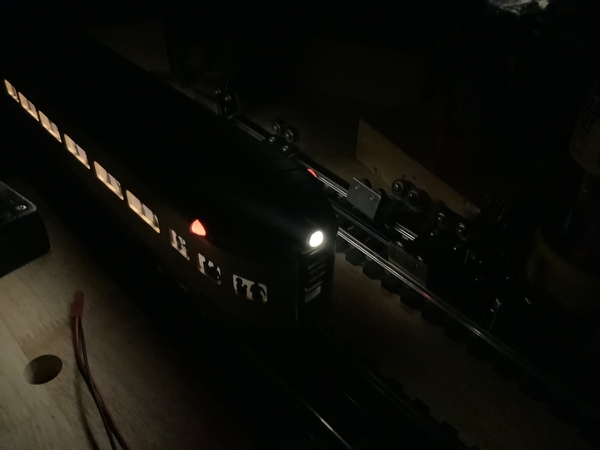
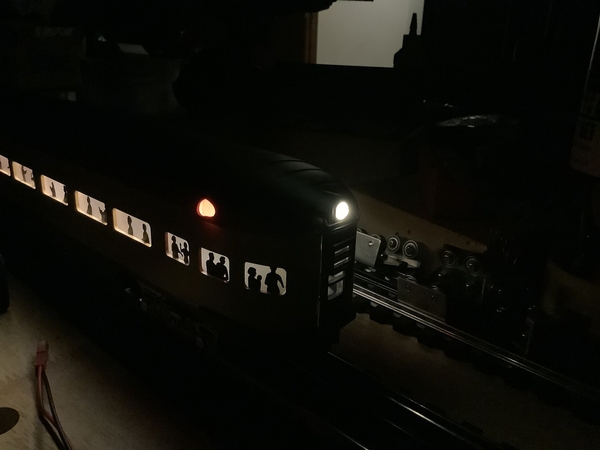
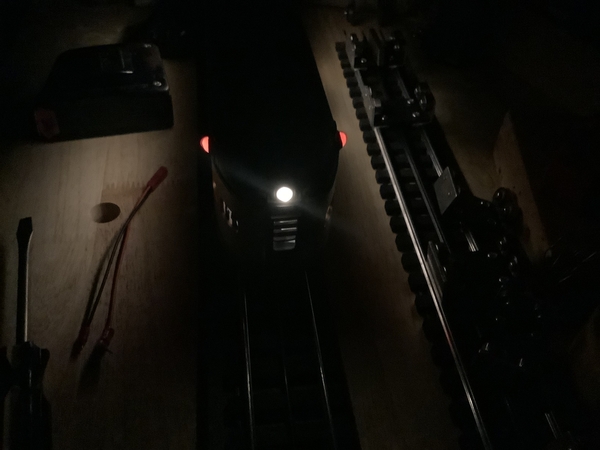
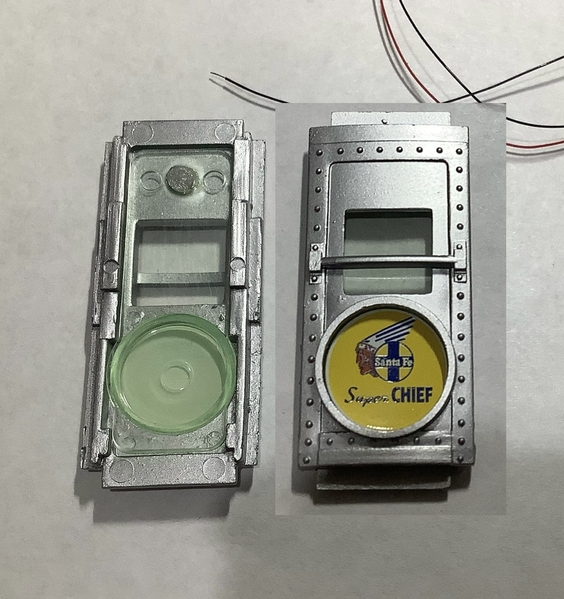
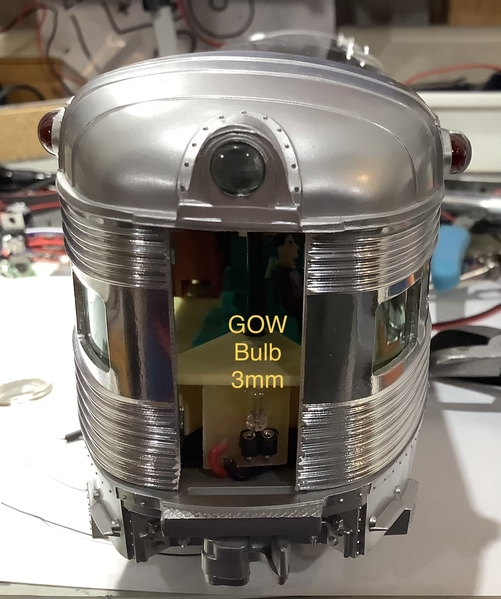
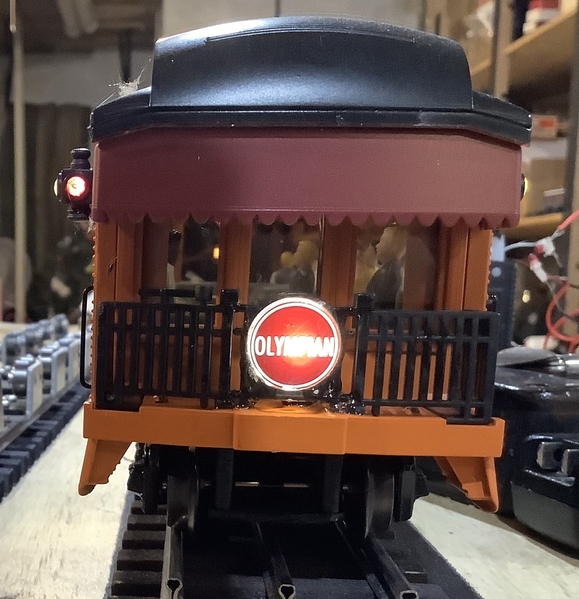
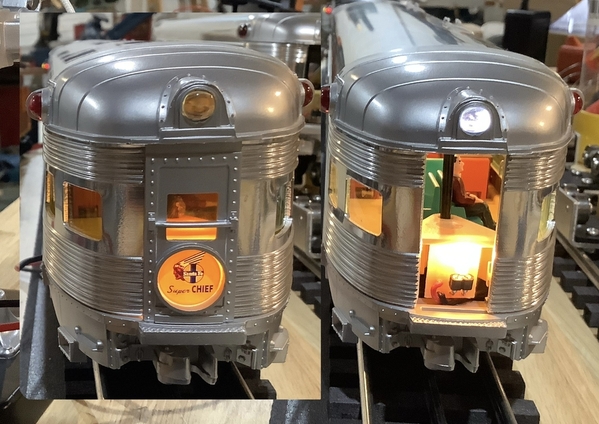
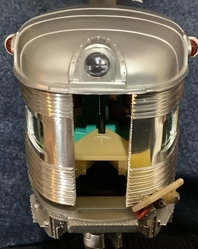
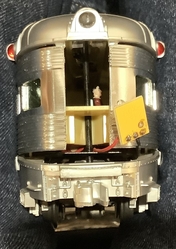
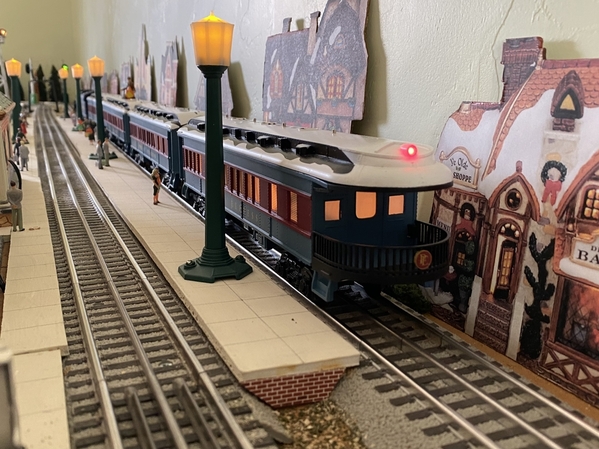
I've been working diligently on updating my 4 Santa Fe passenger cars (people and LED lighting).  I'm on my last one, the 6-19179 observation car.  I am following the suggestions from this thread pretty closely.  My tail lights are very similar (but not exactly) to those posted by @stan2004, but I'm using, basically, the lighting method suggested by @gunrunnerjohn.  I'm planning on using CA to glue 3mm warm white leds to the lenses, but the lenses are so thick.  If you reference the picture at the end I've put in blue lines where I think I'll cut off the excess plastic from the lenses.  There will still be a nib on the lens to hold it in place.  My thinking is that the bulbs will be closer to the where the light is seen, also it makes it a bit easier to work with, especially with the clear lens.

My question is, has anyone done this?  My only concern is that when I cut off the ends of the lenses, the new ends will not be smooth.  Does this cause significant problems on how the light passes through the lens?


IMG_4181

Attachments

Images (1)
  • IMG_4181: Observation Car Marker Lenses
Original Post

Replies sorted oldest to newest

I think that the function of the extended base on the red lights in this generation of observation cars was to collect light from the car’s overhead lighting and use it to illuminate the markers; they had no separate light bulb although in some cases the tail light did. These are not fiber optic materials, just solid plastic, and I think were called light pipes. They really don't make the markers as bright as you might want.

Anyway, I did what the OP suggests and cut them down to mount led’s on the flat cut side, which certainly improved the light. I then actually drilled into the lenses to mount small SMD led’s inside of them, which was a chore but concentrated the light still further. That’s probably unnecessary for most people’s purposes given that the base was designed to collect light anyway, and led's are bright enough to provide plenty.

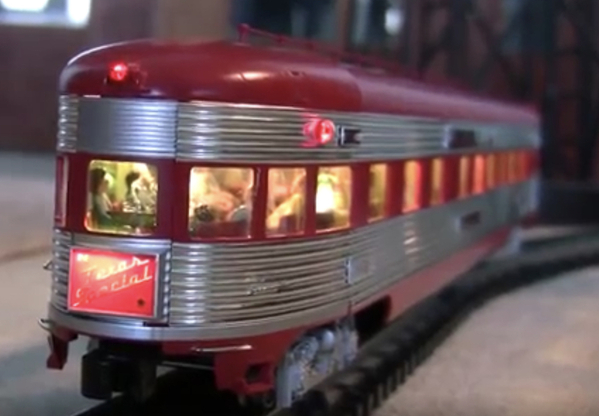
This video still shows how the lighting turned out. The tail light is actually a Mars light as per the original plans of this car, the Texas Special Stephen F. Austin, made using an Ngineering Mars Light simulator board; the car is aluminum-bodied from a Lionel set made some years ago:

63144186-143E-4EDA-B193-74119D10197E

Attachments

Images (1)
  • 63144186-143E-4EDA-B193-74119D10197E
Last edited by Hancock52

GRJ is right, but . . . GGD has routinely used red led's on their observation cars where the lens is actually clear except when illuminated - doesn't look very realistic, though, when there is no power to the car. You can color the lens with any transparent red paint, or stop light red that has been thinned a little bit. I think that the same applies to Lionel lenses.

@Hancock52,

Thanks, I'll be using your method.  I have an LED strip attached to the top beam of the car, so connecting the wires for the tail lights to it should be simple.  I'll be using rounded 3mm warm white LEDs for this.  I'll drill into the modified plastic lenses as far as I'm comfortable doing, and then CA glue the LEDs in.

I tried using the spare LEDs from strips, connected to the strip as per @stan2004, but I was never able to successfully solder them to the strip.  My strip did not look like Stans though.

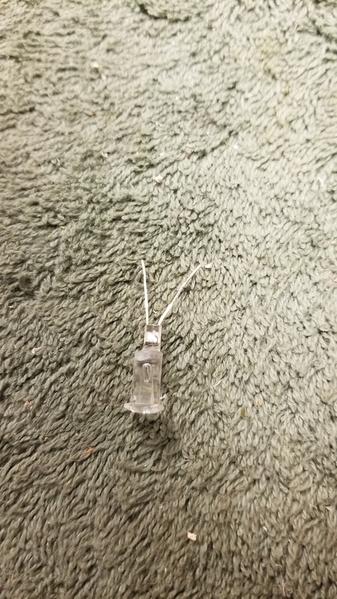
On a related issue, the drumhead (I believe that's what it's called) was lighted with a tiny little incandescent light.  While I was messing around with the lights, and they had been on for a while, I accidentally touched the bulb.  It was incredibly, incredibly hot, so much so that the plastic holder for it was starting to soften.  I'm guessing that after a while, the heat from it would have discolored the plastic drumhead symbol.  I wasn't planning on modifying that light, but I replaced it with a nice 3mm LED.

BTW, these cars are new, and I've only had them on a test track to check out the lights.

@Pingman posted:

...

Has anyone "painted" the clear plastic lens LIONEL uses to replicate the prototype's red lens?  If so, shat did you use?

@Richie C. posted:

If you paint the lens, something like Tamiya Clear Red will work. You may have to re-apply a number of times to get the shade you desire.

What he said.  Any hobby shop that sells plastic model kits will carry it.  The frustrating thing is you'll only need about 1 drop to color all your lenses leaving you with a full bottle of paint which you may never use again!  It has a mildly "sticky" syrup-like texture that helps it adhere to a clear plastic lens. As stated, multiple coats darkens it so you can get it to your liking.

x-27

Attachments

Images (1)
  • x-27
Last edited by stan2004
@texgeekboy posted:

@Hancock52,

Thanks, I'll be using your method.  I have an LED strip attached to the top beam of the car, so connecting the wires for the tail lights to it should be simple.  I'll be using rounded 3mm warm white LEDs for this.  I'll drill into the modified plastic lenses as far as I'm comfortable doing, and then CA glue the LEDs in.

3mm LEDs are generally what I use for Diesel engine headlights and Mars lights on steamers. They are generally very bright and you need to be careful that light does not escape around the base or you will find your car/engine interior brightened up by them. I’ve had to seal bulbs of this size in to prevent that.

In the end I used flat surface mount LEDs in my observation car project, although they had to be installed at a slight angle inside the lens to cast light through the whole of it, which was not an easy task. There are 1.8mm LEDs you can use but the base of these is larger than the bulb. I think that I also used red LEDs from Evan Designs in this project, and they are independently powered from the overhead lighting.

Someone more expert than me can advise on this but I would have thought you’d have no voltage issue with warm white LEDs tapping into a strip of the same kind of bulbs. However, in my last project adding two very small (Z size) LEDs to a stock recent model (2020) Lionel LED overhead lighting strip to illuminate markers at the rear of the car, they dimmed down the strip in a way I did not expect. I swear by GRJ’s passenger car lighting modules, which are better than Lionel’s super-capacitor strips.

Last edited by Hancock52
@Hancock52 posted:
Someone more expert than me can advise on this but I would have thought you’d have no voltage issue with warm white LEDs tapping into a strip of the same kind of bulbs. However, in my last project adding two very small (Z size) LEDs to a stock recent model (2020) Lionel LED overhead lighting strip to illuminate markers at the rear of the car, they dimmed down the strip in a way I did not expect. I swear by GRJ’s passenger car lighting modules, which are better than Lionel’s super-capacitor strips.

Paralleled LED's can be a problem unless they're exactly matched.  Even two different brands that are both claimed as being a single color can react differently with operated in parallel.  The issue is simply the sharp knee of voltage vs current for an LED, a slight difference in the manufacture of the chip can result in poor performance in parallel.

I routinely wire LED's in parallel, but only those from the same manufacturing batch.  Others I use a resistor in series to equalize the currents.  If you look at how the typical 12V LED strip lighting is constructed, there are three LED's in series with a small resistor in the 100-150 ohm range.  The function of the resistor is to swamp out any minor LED characteristic and to insure each three LED segment is the same brightness.

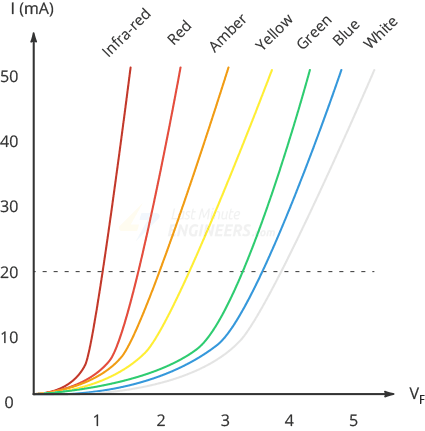
I think many people have discovered that if you parallel a red and green LED that the red one lights and the green one doesn't.  That's easily explained as the green LED has a higher operating voltage then the red LED.  The chart below illustrates the issue.  Note that the green LED at 20 milliamps requires about 3V, and the red one requires a bit less than 2V.  Since LED's are a current mode device, if you adjust the current to 20ma for the red LED, the green one will never get to the voltage to light at all, or might light VERY dimly.

Light Emitting Diode [LED) - Last Minute Engineers

The best way is to add balancing resistors to the two LED's.  Since you almost always need a resistor with an LED unless you have a current limited voltage source, you just use a resistor for each LED.  Let's say you have 5VDC for a power source and you'd like to light the LED's to full brightness.  You'd use a 100 ohm resistor for the green one and a 150 ohm resistor for the red one.

@TedW posted:

So what do we do to get them to both light?  Red and green, add a resistor to one or the other or…?  Thx in advance.

Run Separate power wires with different resistor values  from your pickup connector or somewhere inside to your Red and  Green LED's. Use this to figure your resistor value needed.

http://ledcalc.com/#calc.

Enter in your DC Input Voltage

Dropping Voltage (2.0 for Red) (3.0 for Green) (3.4 for White)

Milliamps (20)

Number of LED's

Move screen to Right and click on for Series Wiring or Parallel Wiring for whichever you plan to use as if using more than 1 LED  like a Green and White light together it will figure differently (just split the difference of 3.0 V and 3.4 V by using 3.2 Volts power drop.)

Go back to left and hit Calculate for your first color LED, it will tell you below what is the actual resistance, look to the right, it will recommend the next higher value resistor that you should use and the resistor wattage needed, usually 1/8 or 1/4 watt. Write it down, then do it again for the other color resistor, and write that down. Get the correct resistors and make sure you connect positive hot power to the resistor and the longer or positive lead of the LED, then you can connect the return leads to your your return power connector. Good luck with your project.

Last edited by Gary P

It's actually pretty easy to calculate resistor values in your head for common 20ma LED's.  You also don't have to be exact, just err on the side of more resistance and not less.

For each volt you need to drop from the power to the rated voltage of the LED, use 50 ohms.

For example, you are using a 12VDC power source and want to light a white LED.  You need to drop 9 volts as the white LED has a 3V operating voltage.  9 times 50 is 450, so a 470 ohm resistor is a very common value and is a perfect choice.

Thanks for all this great info. The conversion cars look great.  I have done some similar but to keep it simple with the wiring use the Evans LED's for variable voltage they work great. I was wondering about a suggestion for an even softer light for the tail end lighted train sign name? The LED's are bright and have a very concentrated light pattern where as the regular bulbs are not as intense and spread the light more. I know you can use light diffusers and dull the light a bit but just curious on ideas for the tail end lighted signs.

https://evandesigns.com/collec...eds-for-transformers

@kj356 posted:

Thanks for all this great info. The conversion cars look great.  I have done some similar but to keep it simple with the wiring use the Evans LED's for variable voltage they work great. I was wondering about a suggestion for an even softer light for the tail end lighted train sign name? The LED's are bright and have a very concentrated light pattern where as the regular bulbs are not as intense and spread the light more. I know you can use light diffusers and dull the light a bit but just curious on ideas for the tail end lighted signs.

https://evandesigns.com/collec...eds-for-transformers

Maybe spraying them with dullcoat, Krylon matte clear or frosted clear.

@kj356 posted:

Thanks for all this great info. The conversion cars look great.  I have done some similar but to keep it simple with the wiring use the Evans LED's for variable voltage they work great. I was wondering about a suggestion for an even softer light for the tail end lighted train sign name? The LED's are bright and have a very concentrated light pattern where as the regular bulbs are not as intense and spread the light more. I know you can use light diffusers and dull the light a bit but just curious on ideas for the tail end lighted signs.

https://evandesigns.com/collec...eds-for-transformers

Lionel uses multiple small LEDs in the drumheads they’ve recently produced - 4 in fact arranged on a circular mount. This spreads the light, which won’t happen with a single LED pointed straight at the back of the sign. I once tried using a single flat “Mega” LED from Evan Designs and actually had to mount it at the base of the sign angled slightly back at a reflective foil insert. It still has a hot spot in terms of brightness near the center of the drumhead.

Thanks for ideas on the tailend sign lighting. I was by the hobby shop today and picked up some more Evans LED's. And some grain of wheat bulbs. I tinkering with putting crumpled foil in the back of the little light box for the sign then aiming the LED backwards (away from the sign) onto the foil. But need the really tiny LED bulbs to fit through the existing holes.

Will try the grain of wheat bulbs first with a light diffuser behind the sign. (can use the foggy/ semi transparent plastic milk cartons or the yogurt lids for diffusers.)

On the red tail end lights I use the red Evans LED's.

Have been looking for a good LED light for the caboose or observation style old style oil lamps that have different colored light lens front, side and back. The LED's again are to directional whereas the Grain of Wheat bulbs give an even spread of light to all sides.   

@kj356 posted:

Have been looking for a good LED light for the caboose or observation style old style oil lamps that have different colored light lens front, side and back. The LED's again are to directional whereas the Grain of Wheat bulbs give an even spread of light to all sides.  

Is there a GOW bulb small enough for this purpose? Below is a photo of a project where I added caboose marker lights to the rear of a Lionel Business Car, which was fitted with them during a UP 150th anniversary excursion. The marker lights are scale brass and far too small to fit a bulb inside. I used Evan Designs Z size flat LEDs, which are tiny and very bright. Mounted slightly recessed in the side of the marker next to the car body, they illuminate all three lenses in it pretty well - in this case with a slightly muted effect as I suppose you might get with an oil lamp. (That was unintentional because this is the car I mentioned above where the marker lights are wired to the overhead LED strip, to which the drumhead lights and tail light are also connected in the stock assembly. The interior is only as bright as it is because there are several separate track-powered LEDs to light fixtures on the compartment walls and a couple of other lamps.)

D59B3D12-3E79-4C75-89CF-488DDAFD3F14

Attachments

Images (1)
  • D59B3D12-3E79-4C75-89CF-488DDAFD3F14
Last edited by Hancock52

It would be a piece of cake to make a small PCB that mimicked the Lionel one, the key is how universal a fit would it be for other brands?
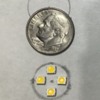
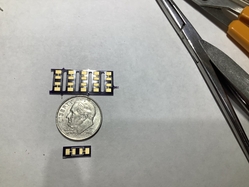
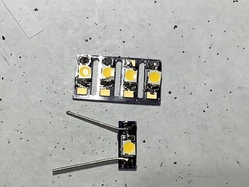
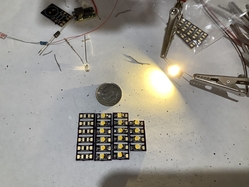
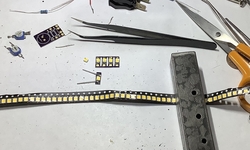
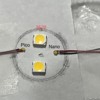
Yup, and as we all know, there are square/rectangle “drumheads” also.  My very unscientific measurement of 10 round ones and 4 “squareish” was 1/2” each.  When I drew a close enough half inch circle and put four 3528 leds in there, I’m thinking that’s gonna be a lot of light.  Would need to be dimmed down quite a bit to reduce or eliminate the glare.  Resistors or something?  Or use Nano/Pico/Z size led.  Very difficult to work with…  (click for larger image)
87F8A4FA-FD80-4EC0-8868-020DCD9EB0AB  E0FF4AA7-A9B8-4BEF-A179-6F32A637B660

Attachments

Images (2)
  • 87F8A4FA-FD80-4EC0-8868-020DCD9EB0AB
  • E0FF4AA7-A9B8-4BEF-A179-6F32A637B660
Last edited by TedW
@TedW posted:

Yup, and as we all know, there are square/rectangle “drumheads” also.  My very unscientific measurement of 10 round ones and 4 “squareish” was 1/2” each.

Do you have some photos or measurements that show the "depth" we are working with?  That is, what is the distance from the back of the drumlight chamber to the back of the logo window?  I realize it varies but trying to get some ballpark numbers.

Did the GOW versions have bulb that fit in this chamber?  IIRC usually the smallest GOW bulbs are maybe 1/8" diameter?  Is that how little room there is to work with?  I'm think of a single LED as thin as possible and as far back as possible with some clever shaped (3D printed?) diffuser.

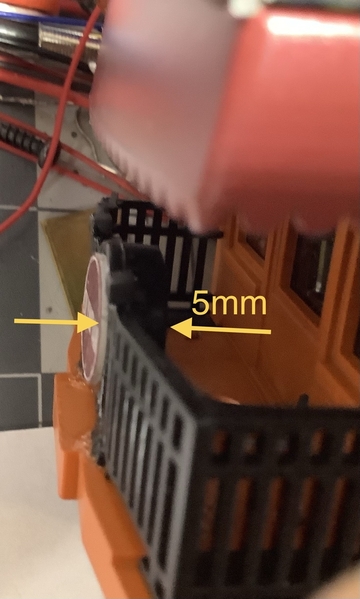
Not sure how helpful this will be, but the measurements I could get readily were so different cause the designs were so different.  MTH heavyweight was 5mm thick, I installed a 3mm led there years ago.  The Lionel streamlined cars have a 3mm “gow” lighting an endcap design, indirectly.  Many weren’t lighted at all.  So I’m pretty sure one has to approach the task on a case by case basis.  But here are some photos if they help any.

093880EB-14F4-4F3F-A5BC-60AF271A1D45D4892533-C614-4094-BDF3-D8EE283FF8943E66B22D-6536-4AC4-BC36-355CB37AF61349E5BB10-DBDA-4634-B492-C46F061F37CD1AB075E3-457A-4623-B227-EEF91F57186D

Attachments

Images (5)
  • 093880EB-14F4-4F3F-A5BC-60AF271A1D45
  • D4892533-C614-4094-BDF3-D8EE283FF894
  • 3E66B22D-6536-4AC4-BC36-355CB37AF613
  • 49E5BB10-DBDA-4634-B492-C46F061F37CD
  • 1AB075E3-457A-4623-B227-EEF91F57186D
@TedW posted:

Yup, and as we all know, there are square/rectangle “drumheads” also.  My very unscientific measurement of 10 round ones and 4 “squareish” was 1/2” each.  When I drew a close enough half inch circle and put four 3528 leds in there, I’m thinking that’s gonna be a lot of light.  Would need to be dimmed down quite a bit to reduce or eliminate the glare.  Resistors or something?  Or use Nano/Pico/Z size led.  Very difficult to work with…  (click for larger image)

87F8A4FA-FD80-4EC0-8868-020DCD9EB0AB  E0FF4AA7-A9B8-4BEF-A179-6F32A637B660

I don’t have a photo of the Lionel LED drumhead board I mentioned earlier in this thread, but I can tell you that it did not have square 3528 LEDs in it; instead they were much smaller rectangular surface mount ones - in shape more like a 5630 but smaller. (Come to think of it, they are about the same size and shape as standard “chip” size surface mount LEDs.)

I actually don’t find the pico or nano or even Z size LEDs I get from Evan Designs hard to work with BUT of course they come pre-wired. Trying to solder wires to LEDs this size is not something I attempt any more!

Last edited by Hancock52

Add Reply

Post

OGR Publishing, Inc., 1310 Eastside Centre Ct, Suite 6, Mountain Home, AR 72653
800-980-OGRR (6477)
www.ogaugerr.com

×
×
×
×
Link copied to your clipboard.
×
×