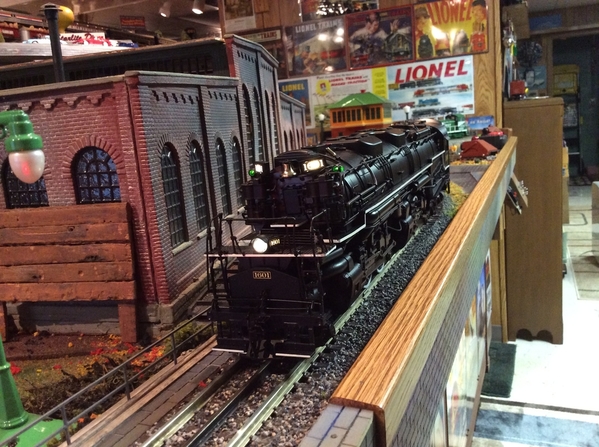
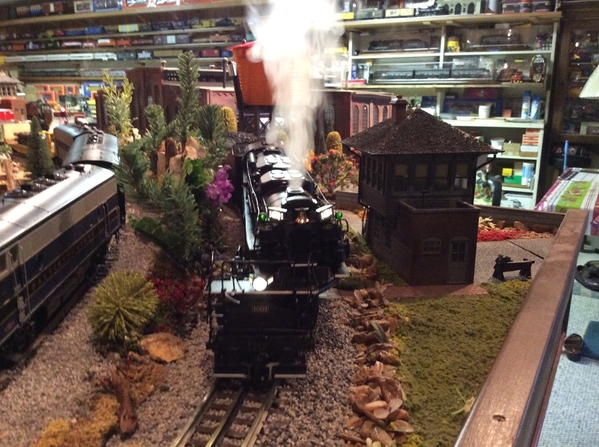
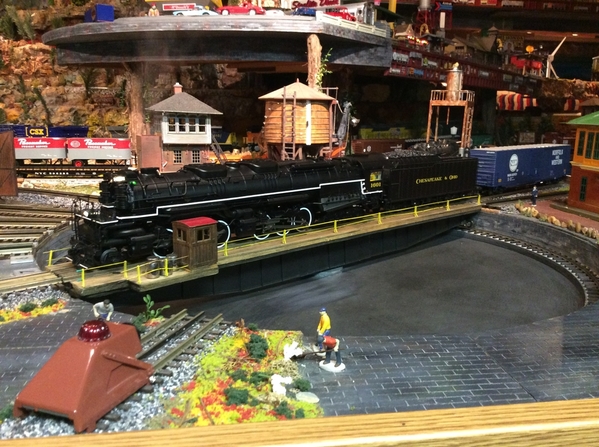
Mike G, it is like Vegas. What goes to the attic stays in the attic. The wood chips hoppers and the Weaver TOFC's are for the attic layout. I have more room in the basement to work on these projects. Also eventually there are engines and rolling stock that will be headed down to the basement. Later tonight I will try to take some different pictures of the attic layout.......Paul
Cool! Thanks Paul!![]()
The unpacking of cars continued last week. That is so time consuming. I unpacked a brand new set of Atlas Maxi-IV well cars only to find the connector tongue missing from the "A" section, making the entire set useless Sent Atlas an email, but haven't heard back from them. I'll give it a few more days and try again if they don't respond.
Patrick came over Saturday, and we worked on a couple different things. First, we extended the 110V accessory circuit from an existing box under Red Wing over to...
a new box under the big helix.
From there, it went under the aisle. up a leg and across the bottom of the benchwork, to a box by my south turnout relay panel. Here Patrick cuts the conduit for the transition from flat on the concrete, to run up the leg.
After that we worked on getting the track laid over to the turntable as well as the garden tracks around it. This crazy little section, connects the diamond in the helix to the rest of the layout. Down a hill with a mild "S" curve. Even the challenger should be able to make it.
The center lines are draw all the way around the pit, but being that is a 4x8 sheet, a number of the lines are too short to be useful. If a switcher or piece of MOW equipment can fit, I'll put it in. This is primarily for looks anyway, as I already owned the pieces from enterTRAINment.
This is how we left it Saturday. It'll be a while before I bring power over here. Then I have to custom build the drive and control system. The original Bowser drive is useless.
Progress has been a little slow this month. I've been fighting a couple new nagging injuries, which I think I picked up at the gym last Thursday. Something is going on with my left calf, and lower back right side. I don't think these are train related.
Attachments
I can' tell you what I'm not doing... running op sessions. ![]()
Right now, it's the 75th anniversary of the timeframe in which my layout takes place (summer to early fall, 1943). I was hoping to do at least one op session for that reason.
Nope, I tried three session dates recently and only one person signed on for one (and said couldn't stay long). I know it's the time of year as here in the Pac NW, everyone looks forward to this time of year.
Maybe August?
Paul, Is there time enough in one visit to see all there is to see in the basement and the attic?? ![]()
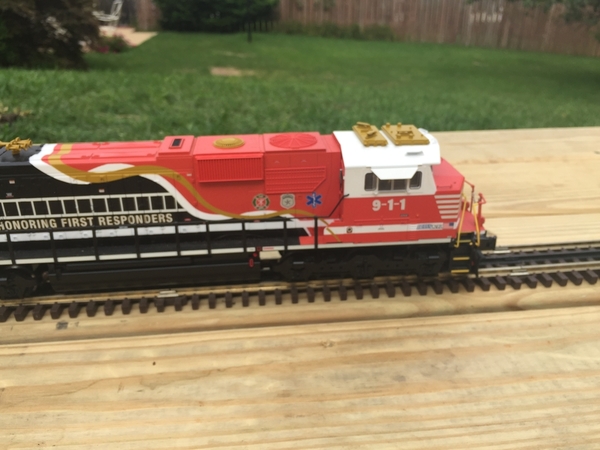
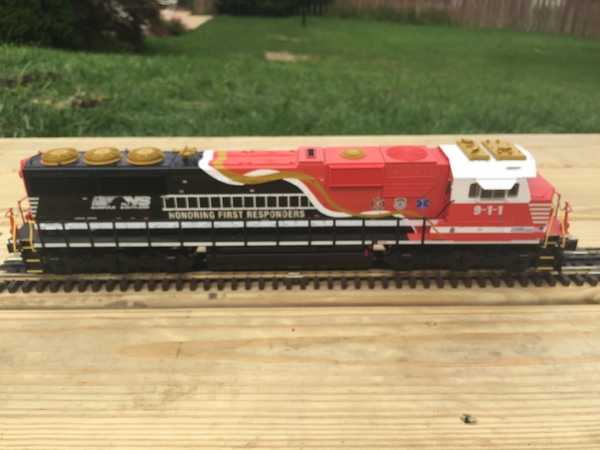
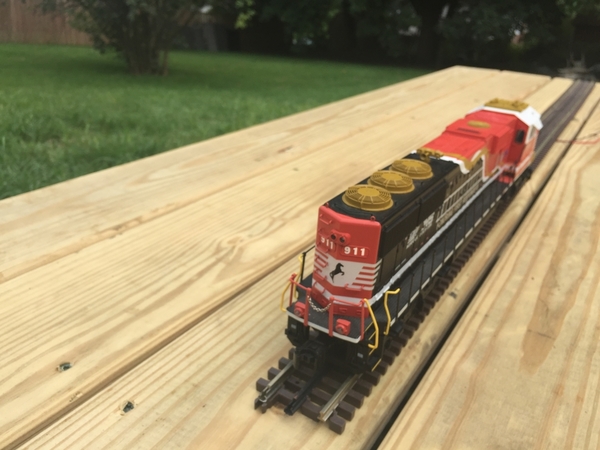
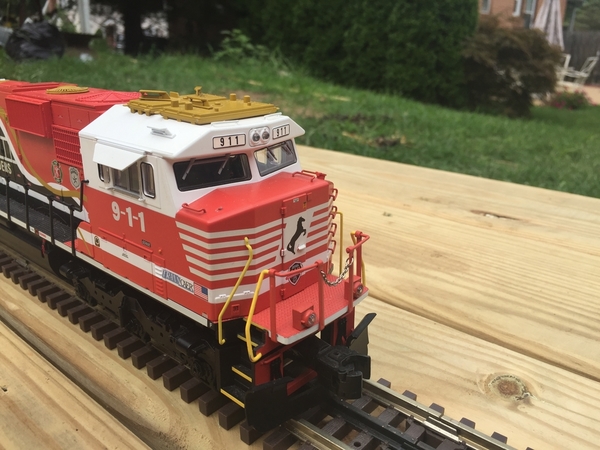
NS6770Fan, That's a very nice engine! NS did a great job with the original First Responders engine, and so did Lionel!
Elliot, The look of modern railroading!!! That's a bummer the head car piece wasn't included! You look happy at the helix lead. Yes, I think anything can handle that minimal S curve. Patrick is doing a great job! You go to the gym to get healthy, and get hurt! Another bummer!
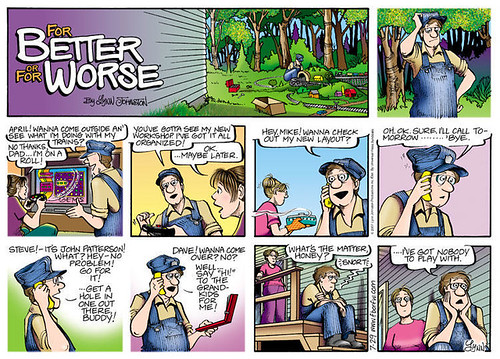
Lee, that cartoon is a classic! You can tell Lynn Johnson is married to a train enthusiast!!!
p51 posted:I can' tell you what I'm not doing... running op sessions.
Right now, it's the 75th anniversary of the timeframe in which my layout takes place (summer to early fall, 1943). I was hoping to do at least one op session for that reason.
Nope, I tried three session dates recently and only one person signed on for one (and said couldn't stay long). I know it's the time of year as here in the Pac NW, everyone looks forward to this time of year.
Maybe August?
I know too well what you're saying. A few years ago we adjusted our regular Thursday night meetings to whatever night most of us could make it in the summer months. Two weeks ago one of the guys as he was leaving said "Good night, see you in September." It's just that time of the year.
Mark Boyce posted:Lee, that cartoon is a classic! You can tell Lynn Johnson is married to a train enthusiast!!!
Was. He left her several years ago.
p51 posted:Mark Boyce posted:Lee, that cartoon is a classic! You can tell Lynn Johnson is married to a train enthusiast!!!
Was. He left her several years ago.
Oh no!! Did he get to keep his trains??? :-o
Mixed up a few batches of fresh, crunchy ballast and set them out to dry over the weekend.
Almost 2 gallons made. Enough to keep me busy for a while.
During that time I endeavored to clear away enough space in this corner so work could continue. Then the beginnings of a stone arch bridge were made of hardboard. Here's the second try, using smaller arches, as the first cutout made the bridge overpower the confined space.
On a slightly different angle the roadbed looks more interesting. A huge adaptation to the bridge to accommodate that lower single track will be tricky but I have a plan.
Bruce
just a reminder guys, Mitch still needs our help, pay it forward
BRWEBSTER, your layout is looking good. I like the curved arch bridge. Elliot, starting to take shape with cars on the layout. I agree with you it is time consuming to take them out of the boxes. Mark, how much time would you have. It won't be too long to view both. However if you want to start looking under the tables that is a different story. That will be a quest. Right now other then around August the 9 TH I am pretty much open. Email me at pstackow@yahoo.com. And Mike G, I am sorry no pics yet. I'll take some tomorrow. Today a couple of more packages came. I got another Weaver TOFC I located in Canada and Mr Muffin sent two tank cars I ordered awhile back. Plus I got out to Menards to pick up some PVC pipe to do some silos for the brewery. Tonight I glued the tops to the wood chip hoppers. Tomorrow I'll finish the bottoms and get the trucks and couplers on and they will on their way to the attic. Pics................Paul
Attachments
The wood chip cars are looking good!
Finally got to the point where I can lay track on a novice's first layout and can actually contribute to this topic! With the table and swing out door completed it's ready for track.
Phase I (of 6 phases!) is an O31 tubular city loop with back-n-forth trolley line and reverse loop. Pretty packed, 8 switches in this one loop so I used (mostly) the 6-23010/11 switch which I had on hand. I cut the lantern housing off as well to give me much needed space (I plan on a panel and trackside lights).
I know about the required fix to these particular (mostly plastic) switches and will do that after I've fitted all the track. I'm hoping that when modified they will be fine. Issues may still occur with Williams engines or so I've read. I have a Williams Crown Edition brass PRR T1 locomotive that will pass through the straight parts of the switch pair shown in the crossover (top right). Since straight I hope it'll barrel on through without issue and glide around the rest of the mostly Ross track for faster running.
Phase II is a yard that attaches to this loop at the top right of the picture. Here I need to modify two 6-23010s to remove even more plastic than the lantern housing. It looks like I can do this with a band saw.
I've run a few engines in conventional mode... so far so good!!!
More to come.
Kirk
Attachments
No matter how the build is going now, keep a loop in running order to avoid "complicated" times resulting in boredom with it all or rushing it ![]() ...'cause it looks real good here
...'cause it looks real good here ![]()
brwebster posted:Mixed up a few batches of fresh, crunchy ballast and set them out to dry over the weekend.
Almost 2 gallons made. Enough to keep me busy for a while.

Wow, does it stay crunchy even in milk?
NS6770FAN, Nice looking engine there! The deck doesn't look bad either!![]()
Elliot, you car collection get's more impressive with every post! Sorry about the missing pin, I sure hope Atlas steps up to the plate and takes care of you! The new work is looking wonderful, sure must be nice to have such great help! Side note, I did notice that you still have to do the mud work over your upper deck where the heat duck is. This gives you a chance to try it one handed with a beer! LOL![]()
Lee, I wished I lived closer, one day I will make it down to see your layout in person. I am not really into ops right yet, but it would be fun to watch!![]()
BRWEBSTER, Looks like you have enough ballast to keep you busy for awhile! I think the arch bridge looks great!![]()
Paul, great work on the wood chip cars! Keep up the great work! Have you thought about installing a dumb waiter to take your stuff from the basement to the attic? LOL![]()
Kirk, you have a great start there! Keep up the good work and keep posting!![]()


Attachments
Brian, you sure your train room isn't on fire! LOL![]()
briansilvermustang posted:
Smoke looks awesome!!
" Smoke looks awesome!!" thanks JIM...
yes, that engine sure smokes pretty good... ![]()

Attachments
Fortescue and friend inspect a Sakai signal and a couple of Marx crossings I got from @Former Member (among a box of other goodies) which will be up for sale in the near future...
All three are in working order, though I'm still figuring out how the Sakai signal (which has a solenoid inside and is apparently a block control) operates... ![]()
Mitch
Attachments
p51 posted:brwebster posted:Mixed up a few batches of fresh, crunchy ballast and set them out to dry over the weekend.
Almost 2 gallons made. Enough to keep me busy for a while.

Wow, does it stay crunchy even in milk?
Sure does! It' s an important part of a nutritious breakfast. Tony says, " Thay'rrr Grrrrrreat! "
Bruce
MIKE G, before I rolled up my sleeves to finish off my wood chip hoppers. I took new pics of the attic layout. I'll say it is beytween 85% and 90% complete. Two upper mainlines with a long sweeping curving grade going to the bottom joining the two lower mainlines. Pics.................Paul
Attachments
very NICE Paul !! thanks for the tour ! looks GREAT !!!

great rock work and scenery !!!

really like this shot !! now to connect to the basement ![]()
Attachments
Paul, I really think you made the most of the attic room with that layout! I like how you have the sweeping curves, lots of conifers, and lots of railroading action! I'm looking forward to getting with you next month. August, I mean! It's almost here. Yes, I'll be sending you an e-mail. I've had a bunch of work to do trying to get setup for the next while in my "semi-retired" state. ![]()
brwebster posted:p51 posted:Almost 2 gallons made. Enough to keep me busy for a while.
Wow, does it stay crunchy even in milk?
Sure does! It' s an important part of a nutritious breakfast. Tony says, " Thay'rrr Grrrrrreat! "
I now have this mental image of an exchange between Dennis Day and Jack Benny on Jack's show during wartime (when Jell-O was in short supply, so General Foods switched Jack to Grape-Nuts sponsorship):
Jack: So what did you do with the case of Grape-Nuts our sponsor sent you?
Dennis: I used it for ballast on my train layout! It worked great!
Jack: Dennis! Grape-Nuts are for eating, not for model trains!
Dennis: That's what my mother said, so I ate it instead. Boy, was that tough!
Jack: Oh? Why...No. No, I'm not going to ask. My blood pressure is high enough as it is.
Don Wilson: Well, SOMEONE has to ask why Dennis had a tough time eating delicious, nutritious Grape-Nuts! Part of a good breakfast!
Jack: Don. Donneleh. Donsy. (pause) Oh, go ahead and ask already.
Don: Dennis? Why did you have a tough time eating Grape-Nuts?
Dennis: The track kept getting caught in my teeth!
Jack: You HAD to ask!
Dennis: And the milk ran all over the layout!
Jack: Dennis!
Dennis: And you don't wanna know what happened to the sugar!
Jack: Sing, Dennis...
![]()
Mitch
This afternoon I completed three wood chip hopper kits. I also reworked a Souther chip car. Then I got out the two wood chip hoppers kits I got from the "B" and glued some of the parts together. After dinner I'll glue the top sections down and when they are dry put the cars together. Pics................Paul
Attachments
paul 2 posted:
Paul, you have a layout in the attic and you're in the process of taking over the entire basement. Well done! Both layouts are looking great, by the way, but your total train real estate is something for all of us to envy! You have a very understanding wife! Keep laying track you lucky man, Dave
Paul, the wood chip cars look mighty good!
On my layout today, I hung a powerstrip connected to a group of switched outlets connected so that one switch will turn on all 12 180 watt powerhouses. And I wired in 4 of the powerhouses. After that, I started mounting and wiring in the two MTH 500s and one 750 that will run my 3 TIUs though their aux power ports. The TIUs are already mounted (vertically, per the instructions in Barry's book). The TIUs are wired into a separate set of switched outlets so I can turn them and the AIUs on prior to applying 18V to the track.
I haven't done anything yet on a third circuit that will control lower voltages for switch machines, accessories, building lights and signals.
The amount of electrical work that it takes to run even a modest sized layout is non-trivial. And it's all behind the scenes. Anyone looking at the layout sees none of it. It's a distinctly unsexy aspect of the hobby. I'm tempted to rate it below even benchwork. But it's a close call.
Don
Unsexy indeed. When it all becomes too much, just remember to chant the electrcians mantra. OHM!
Bruce
Yes, I would rate it below benchwork. However, it sounds like you made great progress towards running some trains!!
After 4.5 years of layout construction and running conventionally, I finally implemented my DCS system. Before I started my construction, I read and followed guidelines outlined in “The DCS O Gauge Companion by Barry Broskowitz.. I Never tested the system before ballasting, scenery, etc., but when I turned it over to DCS, everything works just as planned!! Today, I am a happy camper and able to operate 3 trains on continues loops and two more in the yard.
The only DCS issue remaining is to get the WiFi installed and operational. I might have a cable issue or system set-up issue with my iPhone and iPad. I am unable to find engines with these devices. My DCS system was upgraded to system 5.0 when I had my MTH Yellowstone 2-8-8-4 upgraded to PS2 a couple years ago, and everything works great with the DCS Remote Control. I may need to install a newer version on my TIU. I‘m a Mac guy so it is not convenient to down load MTH files and updates from home.
An earlier problem upgraded: Early on during layout construction, I had issues running my articulated MTH Yellowstone, 2-8-8-4 through the diverting arm of a Gargraves 072 turnout. I received much help on the forum regarding the problem of center driver wheels, on large articulated engines, shorting out on the center (+) section while diverting through the switch. It was suggested I use electrical tape on the side for insulation. This weekend I removed the tape and glued a piece of .010 x .250” (StripSryrene 109) to the side of the center section. I even added a small piece over the top, at the bend, to prevent any chance of electrical contact of the flange-less driver as the engine makes the turn. After filing and trimming the insulated strip, I blacked the visible edges with a magic marker. Results: the engine will divert through the turnout at 1 mph, a big operational improvement. I also made the same modification to the 072 turnout under the summit with the same noticeable improvement of operation.
It has been a productive weekend. Dave
Attachments
paul 2 posted:
Paul, who would have thought that when you look up the stairs that it would be leading you into a great looking layout! What wonderful work you do and have done! Looking at all the cars you have on your layout and all the Weaver boxes stacked around, I would have to say your really trying to catch up to Elliot! I love all the car haulers sure makes a beautiful train! I want to take this moment and thank you so very much for sharing here! Now it will be here forever to look back at!![]()
![]()
paul 2 posted:
Was your house built in the 1950's? My 1956 built house has those same banisters/railings.
Paul, the wood chip cars are turning out great!![]()
Don, You sure have a lot of wire running! How big is your layout?![]()
LOU1985, our house was built in 1912. I put the railing in a few years back......Paul
.
Dave, as you know I am just getting started on my future layout and plan on running DCS! I too also plan on fallowing Barry's book as close as I can! I am just happy there is so much help here on the forum!![]()
Your work on the switch looks wonderful and I bet you like it a lot better then the electrical tape! LOL Great work!![]()
Nothing done in the train room the last couple days, but I have 4 walls up on the She Shed and 3 of them sided! WEEEEEE!![]()
paul 2 posted:LOU1985, our house was built in 1912. I put the railing in a few years back......Paul
.
Railing style hasn't changed much in years I see ![]() .
.
I painted more people for a CSX Executive Coach car. I painted two more boxes of 24 Preiser 65602 and some 68209 China blanks. Ordered two more packs of 48 P4802B #68209 tonight on Ebay. Only have five Preiser 65602 left from the 120 boxes I purchased over the past six years.
Tonight I am placing people in the CSX Executive "Tennessee" Coach which is similar to the green Penn Central Coach. The "Michigan" Coach is next.
Sincerely, John Rowlen
Attachments
Got the top sections glued to the hoppers tonight. Tomorrow I can get the frame and trucks on and pop in the wood loads. Then back to work on the brewery. """Question for you guys""". I bought 3" PVC pipe to make my silos.....can I cut them to length with my circular miter saw with a blade for wood on it or do I have to buy a blade for plastic. Thanks ahead of time. Pics.................Paul
Attachments
Hi Paul, I cut plastic pipe all the time with my chop saw! One trick to know is to get the blade up to speed before cutting, and if you have a high tooth count it really helps!![]()
The wood chip cars are coming right along! Nice work Paul!![]()
John, you sure have drive! I would probably stop after the first 100! LOL
Lou, the read is looking very nice! I sure hope you post pictures when done!![]()
Mike, thanks for the information on the saw..................Paul
paul 2 posted:Got the top sections glued to the hoppers tonight. Tomorrow I can get the frame and trucks on and pop in the wood loads. Then back to work on the brewery. """Question for you guys""". I bought 3" PVC pipe to make my silos.....can I cut them to length with my circular miter saw with a blade for wood on it or do I have to buy a blade for plastic. Thanks ahead of time. Pics.................Paul
I used my wood blade to cut all of my PVC pipe. Make sure the blade is square with the pipe, so the ends of the PVC is 90 degrees.
Attachments
CBS072 posted:paul 2 posted:Got the top sections glued to the hoppers tonight. Tomorrow I can get the frame and trucks on and pop in the wood loads. Then back to work on the brewery. """Question for you guys""". I bought 3" PVC pipe to make my silos.....can I cut them to length with my circular miter saw with a blade for wood on it or do I have to buy a blade for plastic. Thanks ahead of time. Pics.................Paul
I used my wood blade to cut all of my PVC pipe. Make sure the blade is square with the pipe, so the ends of the PVC is 90 degrees.
My local Ace Hardware sells PVC by the foot and will cut it to size at no extra charge.
Nice work Keith!![]()


getting a little dirty...


Attachments
I finished off the last of the hoppers this morning. I have 6 ready to go to the attic. Now out to the garage to cut PVC for my grain silos for the brewery. Pics............Paul
Attachments
WOW Paul- ![]() You are one busy guy. Love the attic layout pix. I guess we know where you learned to use every available square inch for trains. late to the party but when cutting PVC don't push the blade too hard, it will heat up the plastic and cause it to melt.
You are one busy guy. Love the attic layout pix. I guess we know where you learned to use every available square inch for trains. late to the party but when cutting PVC don't push the blade too hard, it will heat up the plastic and cause it to melt.
Bob
Thanks everyone for the tips on cutting PVC with a wood blade. I took my time cutting through each one. I thought the space I had would hold more silos but I was wrong. I cut 5 but looks like three will be the max. I have PVC pipe left over so I think tomorrow I'll cut the rest and use them where I have the grain elevator. Pics........Paul
Attachments
they look great there Paul !!!
Mike,
Bought another five sets of Preiser 65602 Unpainted Seated People from Frankart on Ebay. That will give me ten more packs of 24 to paint, for a total of 125 boxes, or 3,000 people when completed. I am getting ready for the Lionel 21" UP Challenger cars.
I finished the CSX "Tennessee" Coach Car last night … late. That gives me the seven CSX, PC, SP, UP and two 10-car PRR Broadway Limited and an Amtrak Dining car completed since February 25, 2018 (49 cars). Now I know why I am feeling tired in the morning. I have done 44 Atlas O California Zephyr and Amtrak cars and 35 Lionel C&O (14), NYC (14) and Wabash (7) cars a few years ago.
(I got to paint the people. Don't wake me, I'm painting.)
I am eagerly waiting for my 6-82461 CSX F40PH #9999 to return from Lionel Warranty Service. It was received by Lionel Service on June 22, 2018 at 9:32 A.M. Today is August 1, 2018.
I have a Vision Line GG1 #4935 waiting to go in for stiff gears and tripping my ZWL transformer. Dean said to "run the pants off it." last year, but it has not improved after extended use. It will not go forward from start-up, and gives Cab blinks, tripping my ZWL transformer. If I reset it, I can run it backwards slowly, but nor forward. My other VL GG1 #4913 went back twice for pants and stiff gears.
Sincerely, John Rowlen
Attachments
Attachments
Just gorgeous!
HCSader73 posted:Just gorgeous!
Well, I don’t think I’d go quite that far, but thx. ![]()
Brian, nice pictures of your layout with all the smoke!![]()
Paul, the wood chip cars turned out looking wonderful! I was looking at your 3 PVC pipes and was thinking if you added 1 or 2 more that over hang the bench it would block the view of the washer! LOL Looks great!![]()
John, I don't know where you get the energy, I don't know 3000 people let alone want to paint that many! LOL But things are looking very nice I would have to say!![]()
Lou sounds nice! But question whats the clicking in the first video?![]()
Ted, You sure know how to put on a show with your display shelf! That is just wonderful looking, right out of a high class office or hotel! Very Nice!![]()
![]()
TedW posted:HCSader73 posted:Just gorgeous!
Well, I don’t think I’d go quite that far, but thx.
You are too modest Ted. Great work ![]()
Bob
brwebster posted:Unsexy indeed. When it all becomes too much, just remember to chant the electrcians mantra. OHM!
Bruce
Do you know why transformers HUM??????
CAUSE THEY DON'T KNOW THE WORDS.......![]()
![]()
![]()
![]()
![]()
![]()
Lou sounds nice! But question whats the clicking in the first video?
Lionel oil pump is what is clicking.
I thought it was the Cherubs that sing me to sleep, switching to a slow tap dance to finished the job ![]() . That click is embedded in my psyche under ''calm and soothing".
. That click is embedded in my psyche under ''calm and soothing".
I think I found the base of my next small layout today. Still need to meditate on the sight of it though ![]() ..Ohmmmmm
..Ohmmmmm ![]()
A small faux stone fireplace of fiberglass.
Christmas layout #2? A train entering the fire?(mirrors, track bending to 0-22 o.d.), Train in place of log and flames? (Mirror or size) Simple loop around the hearth?(needs spacing from wall) A train running in place with a scrolling background? .. maybe in G scale?... Ohmmm ![]()
 makes me very, very afraid.......
beardog posted:
makes me very, very afraid.......
Oh, just add some gi-raffes and flamingos and it'll be fine! ![]()


Attachments
mike g. posted:Nothing done in the train room the last couple days, but I have 4 walls up on the She Shed and 3 of them sided! WEEEEEE!
here is an idea Mike, put the She Shed on wheels... ![]()

nmp...
Attachments
Paul, The wood chip cars, and the corner with the silos are really looking great!
John, Fantastic job on peopling your cars. They aren't just sitting there straight ahead, many are turned in conversation!! Looks great!
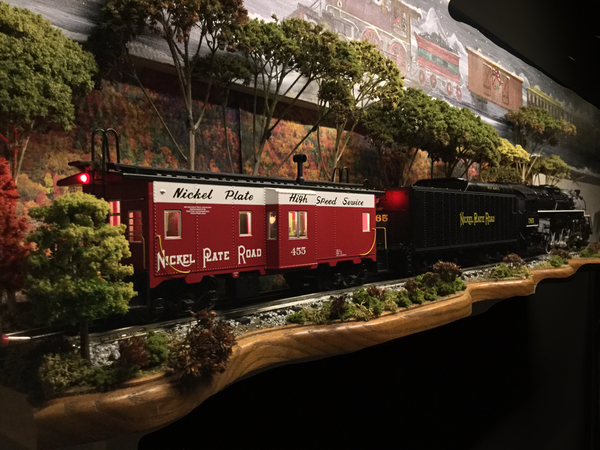
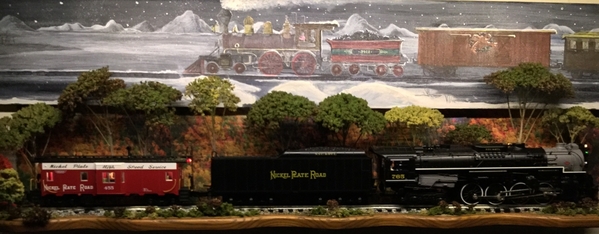
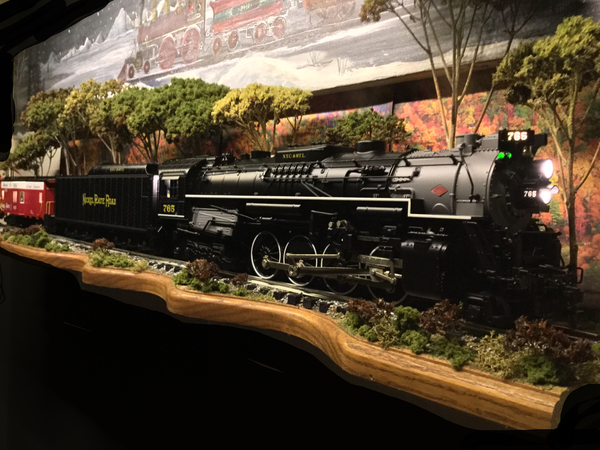
Ted, the diorama looks great as does the NKP pair!!!
Brian, Mobile she shed! looks great!
Brian, thanks for the idea, I just might have to build her one so she can see it on the tracks when it goes by her real shed!![]()
I have done a thing in 4 days now in the train room do to the shed, but I did order a 360 lazer level so I know my ledger boards along the walls will be right! Plus I know I will need it for more down the road!![]()
Finished the CSX Executive "Michigan" Coach. After doing so many cars, I found another Preiser people pairing that looks good: two sisters sitting next to each other.
When I am long gone, hopefully these people will still be cruising the rails on some O-gauge layout. My father and I liked working on our O-gauge Super-O layouts. I credit him for teaching me to do the job well so it will last a long time. He would love the new" Valley of Bridges" layout now under construction.
Sincerely, John Rowlen
Attachments
Sitting at workbench waiting for glue to dry. Don't like this pressed plastic stonework (you spray paint it, then paint individual stones by hand, then over spray with "mud") and it doesn't look as good as the Chooch "rubber" stone or the Ultimate Scenery System foam stone, both about twelve bucks per section. However, l am clamping a section of the plastic to the foundation of my model of Matter's Mill. To see one of these mills done as kit suggests, look it up on the Bay. Mine has been bashed and is getting a wooden flume for an overshot wheel. I am getting in some Chooch's for spillway, so progress will await that arrival. It needs flume built, wheel mounted, and the spillway.
I ran two trains on my Ceiling Central Railroad this evening. One was a freight pulled by my new Premier Western Maryland RSD5. The other was a passenger train pulled by one of my two Premier Western Maryland H9 Consolidations. Photography is bad in that area because of poor lighting. Also, standing in the middle trying to video, I can get dizzy. I need to fix up a way for my smartphone camera to video something. I had a good time.
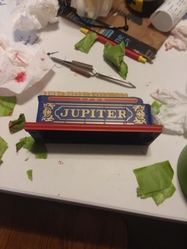
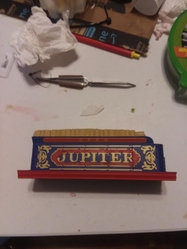
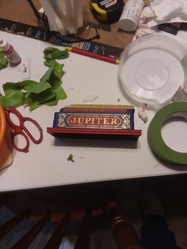
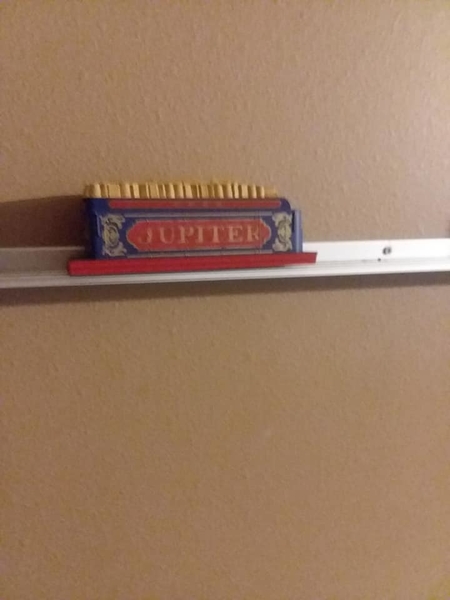
Well, it wasn't today, but a couple days ago, I repainted my MTH Jupiter's tender to be more accurate and this was the end result. All by hand, I might add. The guys down at my LHS thought I was crazy and impressed for attempting it. Might have to bring it down to show them.
Attachments
Mark, Google "selfie stick", one may help keep the blood in your arms from rushing to your head...I get dizzy photographing the ceiling layout too ![]() Heck anymore I get dizzy just standing up,; more often than not too.
Heck anymore I get dizzy just standing up,; more often than not too.
S-sticks range from Dollar Store items to Pro. There are also Bluetooth keychain remote shutter controllers for a phones camera (Some better S-Sticks can do BT remote too, most use the USB port so note the size/type, mini USB do vary. The ones I tried worked either camera (fwd or selfie).(selfie cam has got to be the biggest waste of pennies... In three years I've never felt a twinge of desire for using one, mine have really only gotten used by curious tests of quality and button accidents)
Free apps exist that can steady-cam a badly shot video too. I've got about 8-10 image apps alone. Each with a good enough gimick to bother with so many vs one or two...
HOLD ON!
What's up with Mitch?
Mitch has been on the verge of homelessness for a while now. Had his
power shut off a few days ago. He could use some help. It is time to pay it
forward. His paypal is marmelmm@gmail.com. I have been sending him a few
bucks when I can, plus extra stuff that he can perhaps repair and sell. He has
asked here before, but his requests keep getting removed from the forum.
He is disabled and is trying, and trying to get SSD. So far no luck. Think he has another hearing
soon.
Search gofundme and look for M Mitchell Marmel, a way to help.
Adriatic posted:Mark, Google "selfie stick", one may help keep the blood in your arms from rushing to your head...I get dizzy photographing the ceiling layout too
Heck anymore I get dizzy just standing up,; more often than not too.
S-sticks range from Dollar Store items to Pro. There are also Bluetooth keychain remote shutter controllers for a phones camera (Some better S-Sticks can do BT remote too, most use the USB port so note the size/type, mini USB do vary. The ones I tried worked either camera (fwd or selfie).(selfie cam has got to be the biggest waste of pennies... In three years I've never felt a twinge of desire for using one, mine have really only gotten used by curious tests of quality and button accidents)
Free apps exist that can steady-cam a badly shot video too. I've got about 8-10 image apps alone. Each with a good enough gimick to bother with so many vs one or two...
Adriatic, I can identify about getting dizzy just standing up now!! ![]()
I had not thought of a selfie stick. That's pretty good idea. I'm not into selfies, but if you can turn it around, that would get the camera lens up where you want it. Actually, the orthopedic told me to never work with my elbows over my head, since I have a small non-operable rotator cuff injury. It's no big deal, but it doesn't help when doing something on the Ceiling Central.
Thank you for the ideas!!!
beardog posted:Mitch has been on the verge of homelessness for a while now. Had his
power shut off a few days ago. He could use some help. It is time to pay it
forward. His paypal is marmelmm@gmail.com. I have been sending him a few
bucks when I can, plus extra stuff that he can perhaps repair and sell. He has
asked here before, but his requests keep getting removed from the forum.
I knew Mitch was having financial trouble. I've been out of work for over a month, though I do get a small pension from the company that pushed early "retirements". There is always someone worse off. My wife would not like it, but I will have to see if I can help Mitch with some of the money from my recent train sales. Just an encouragement to others to see if you can help Mitch in any way.
Futurerail, The Jupiter tender looks fantastic!! Does the engine need repainted also?
Many humble thanks for all the help and offers of help! ![]() Now, back to the trains, what say?
Now, back to the trains, what say? ![]()
Mitch
Watering the flowers took precedent today but this afternoon I got my painting table setup ( two resin sawhorses and a piece of plywood ) and brought the silos outside to paint them. I got the first coat on them. I might end up putting three coats of paint on them. Pics..................Paul
Attachments
Installed two Ross switches. Next is too wire them to the controlers.
Finally got the camera out a took some shots of the MTH 40 foot WM Boxcar I lowered and weathered... Put the next one "to do" in the photo as I didn't take a "before" photo.... Both of these cars are about 15 year old purchases from York, and were made with the same MTH tooling.... Lowering these cars really makes a difference in how good they look....
Attachments
Excellent job on the weathering and lowering, Chris!!
Great looking Job Chris! It looks so much better lower! Now the big question, How did you lower it? I have a lot of cars that could use that? LOL![]()
Chris, nice job on lowering the car. Makes a world of differences. So many cars ride too high on their trucks. I managed to get two more coats on the silos. I have them sitting next to the building. They were still a tad tacky sso inside for the night they should dry faster. Not sure what I am going to do on the tops of them yet. Pics........Paul
Attachments
Paul, the progress on the corner looks great, building flats came out really good !
Mike, I haven't screwed the body of that boxcar down yet, I'll take it apart tomorrow and shoot some photos so you can see what I did.... Its one of the older early model MTH O scale cars with the stamped steel floor with the "tophat"... I am glad I bought a bunch of them for short money they're pretty decent cars once lowered and weathered.
Paul, the silos look great! Slap a roof on them, and you’re good to go! What do I know? There aren’t any silos around here! I’m used to coal, oil, and natural gas facilities. LOL
Paul, I think you need to model some ao smith silos, nice shade of blue, lots of details.
Pretty common in the midwest and even see them out here in the
Great Basin area where I live.
BEARDOG, I was trying to deciding on a color for the silos. Right now they are painted with aged concrete. The blue sounds interesting but I think that is a more modern color and I have decided that I am trying to stay with earlier colors. But you never know it may grow on me. Thanks............Paul
Paul The silos turned out very nice! Just trace the pattern on to some foam and glue it down! either way they look great!![]()
Thanks Chris it would be cool to see how you did that!![]()
As for me I got all the walls done on the She Shed along with all the windows installed, the sliding door! Tomorrow the roof starts, then its a She Shed and the rest is up to the wife! LOL![]()
Paul, AO smith has been around since at least the 50's if not earlier. But they
were more individual farm silos. Yours are grain elevator silos and are better in
concrete color. Lots of ones I have seen in the midwest have small sheds on top
to house equipment, motors, etc.
A thought for detailing.
Some time was spent this week pondering the scenery to be built around the curved stone arch bridge. In the mean time I got busy at the work bench on a fantasy crummy.
An extended vision caboose was offered up as the canvas and the beginnings of NYC lightning stripes were added.
White stripe decals took a bit of maneuvering into position. In hindsight it might have been easier had I removed the body grab bars prior to painting.
Jump forward a few days and this is the end result. The body got a dusting of clear gloss lacquer, then glazing and yellow were applied. The entire frame and trucks were left as is, which is why the steps have the red risers from the original Soo paint scheme.
Enough playing around for now....back to the layout.
Bruce
Paul, I like the aged concrete color on your silos... I'd think about a catwalk or platform on top of them, with a ladder going down to the adjacent building roof top. I am not really knowledgeable about silos, but seem like there should be some venting or at least access hatches up top... When I am trying to model structures, I inevitably end up doing a Google Image search looking for ideas...
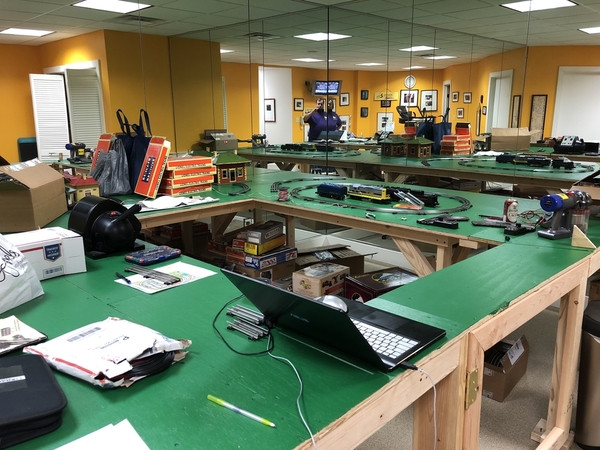
short bad video some recently acquired hornby, the 23-29 LMS 4-4-2 tank loco pulling
9 4 wheel pullman cars








![20180731_211817[1] 20180731_211817[1]](https://ogrforum.ogaugerr.com/fileSendAction/fcType/0/fcOid/12129987997660671/filePointer/80551019519218431/fodoid/80551019519218427/imageType/MEDIUM/inlineImage/true/20180731_211817%255B1%255D.jpg)
![20180731_211817[1] 20180731_211817[1]](https://ogrforum.ogaugerr.com/fileSendAction/fcType/0/fcOid/12129987997660671/filePointer/80551019519218431/fodoid/80551019519218427/imageType/SQUARE_THUMBNAIL/inlineImage/true/20180731_211817%5B1%5D.jpg)


![20180801_173425[1] 20180801_173425[1]](https://ogrforum.ogaugerr.com/fileSendAction/fcType/0/fcOid/12129987997660671/primaryPicture/true/filePointer/80551019531882391/fodoid/80551019531890994/imageType/SQUARE_THUMBNAIL/inlineImage/true/frame/FIRST/thumbnail.jpg)
![20180801_173249[1] 20180801_173249[1]](https://ogrforum.ogaugerr.com/fileSendAction/fcType/0/fcOid/12129987997660671/primaryPicture/true/filePointer/80551019531882392/fodoid/80551019531893636/imageType/SQUARE_THUMBNAIL/inlineImage/true/frame/FIRST/thumbnail.jpg)
