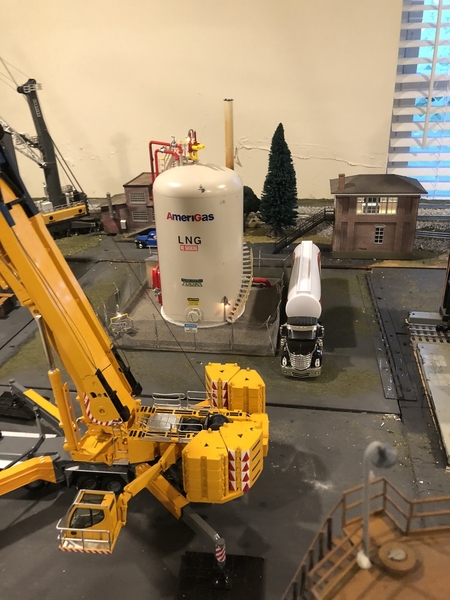
Adriatic posted:

Mark, Google "selfie stick", one may help keep the blood in your arms from rushing to your head...I get dizzy photographing the ceiling layout too  Heck anymore I get dizzy just standing up,; more often than not too.

  S-sticks range from Dollar Store items to Pro. There are also Bluetooth keychain remote shutter controllers for a phones camera (Some better S-Sticks can do BT remote too, most use the USB port so note the size/type, mini USB do vary. The ones I tried worked either camera (fwd or selfie).(selfie cam has got to be the biggest waste of pennies... In three years I've never felt a twinge of desire for using one, mine have really only gotten used by curious tests of quality and button accidents)

Free apps exist that can steady-cam a badly shot video too. I've got about 8-10 image apps alone. Each with a good enough gimick to bother with so many vs one or two... 

Adriatic, I can identify about getting dizzy just standing up now!! 

I had not thought of a selfie stick.  That's pretty good idea.  I'm not into selfies, but if you can turn it around, that would get the camera lens up where you want it.  Actually, the orthopedic told me to never work with my elbows over my head, since I have a small non-operable rotator cuff injury.  It's no big deal, but it doesn't help when doing something on the Ceiling Central.

Thank you for the ideas!!!

beardog posted:

Mitch has been on the verge of homelessness for a while now.  Had his   

power shut off a few days ago. He could use some help. It is time to pay it 

forward.  His paypal is marmelmm@gmail.com. I have been sending him a few

bucks when I can, plus extra stuff that he can perhaps repair and sell. He has

asked here before, but his requests keep getting removed from the forum.

I knew Mitch was having financial trouble.  I've been out of work for over a month, though I do get a small pension from the company that pushed early "retirements".  There is always someone worse off.  My wife would not like it, but I will have to see if I can help Mitch with some of the money from my recent train sales.  Just an encouragement to others to see if you can help Mitch in any way.

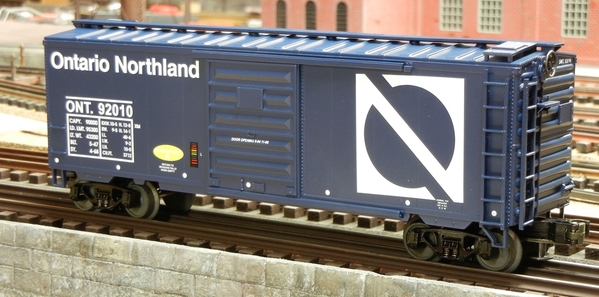
Finally got the camera out a took some shots of the MTH 40 foot WM Boxcar I lowered and weathered...  Put the next one "to do" in the photo as I didn't take a "before" photo....  Both of these cars are about 15 year old purchases from York, and were made with the same MTH tooling....  Lowering these cars really makes a difference in how good they look....  


DSCN4139 [3)DSCN4140 [2)DSCN4141DSCN4142 [2)DSCN4143 [2)DSCN4144 [2)


Attachments

Images (6)
  • DSCN4139 (3)
  • DSCN4140 (2)
  • DSCN4141
  • DSCN4142 (2)
  • DSCN4143 (2)
  • DSCN4144 (2)

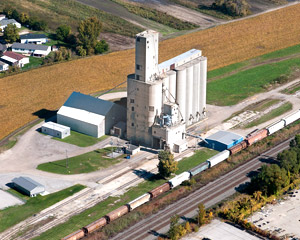
Chris, nice job on lowering the car. Makes a world of differences. So many cars ride too high on their trucks. I managed to get two more coats on the silos. I have them sitting next to the building. They were still a tad tacky sso inside for the night they should dry faster. Not sure what I am going to do on the tops of them yet. Pics........Paul

DSCN2244DSCN2245DSCN2246DSCN2247DSCN2248DSCN2249DSCN2250

Attachments

Images (7)
  • DSCN2244
  • DSCN2245
  • DSCN2246
  • DSCN2247
  • DSCN2248
  • DSCN2249
  • DSCN2250

Paul,  the progress on the corner looks great,  building flats came out really good !

Mike,  I haven't screwed the body of that boxcar down yet,  I'll take it apart tomorrow and shoot some photos so you can see what I did.... Its one of the older early model MTH O scale cars with the stamped steel floor with the "tophat"...  I am glad I bought a bunch of them for short money they're pretty decent cars once lowered and weathered.  

Paul The silos turned out very nice! Just trace the pattern on to some foam and glue it down! either way they look great!

Thanks Chris it would be cool to see how you did that!

As for me I got all the walls done on the She Shed along with all the windows installed, the sliding door! Tomorrow the roof starts, then its a She Shed and the rest is up to the wife! LOL

Paul, AO smith has been around since at least the 50's if not earlier. But they 

were more individual farm silos. Yours are grain elevator silos and are better in

concrete color. Lots of ones I have seen in the midwest have small sheds on top

to house equipment, motors, etc.

A thought for detailing.

Some time was spent this week pondering the scenery to be built around the curved stone arch bridge.  In the mean time I got busy at the work bench on a fantasy crummy.

An extended vision caboose was offered up as the canvas and the beginnings of NYC lightning stripes were added.

White stripe decals took a bit of maneuvering into position.  In hindsight it might have been easier had I removed the body grab bars prior to painting.

Jump forward a few days and this is the end result. The body got a dusting of clear gloss lacquer, then glazing and yellow were applied.  The entire frame and trucks were left as is, which is why the steps have the red risers from the original Soo paint scheme.

Enough playing around for now....back to the layout.

Bruce

Paul,   I like the aged concrete color on your silos... I'd think about a catwalk or platform on top of them, with a ladder going down to the adjacent building roof top.    I am not really knowledgeable about silos, but seem like there should be some venting or at least access hatches up top...   When I am trying to model structures, I inevitably end up doing a Google Image search looking for ideas...

Paul, I used 1/4" birch on top of mine (I had it left over from another project), and then took a router to it to even it up.  I believe I used my Dremel for a few minor touch ups.  I also used some silicone calk where the PVC was connected to the next piece.  I was hoping to emulate an Anderson's silo.  


andersons

Attachments

Images (1)
  • andersons
chris a posted:

Finally got the camera out a took some shots of the MTH 40 foot WM Boxcar I lowered and weathered...  Put the next one "to do" in the photo as I didn't take a "before" photo....  Both of these cars are about 15 year old purchases from York, and were made with the same MTH tooling....  Lowering these cars really makes a difference in how good they look....  


DSCN4139 [3)DSCN4140 [2)DSCN4141DSCN4142 [2)DSCN4143 [2)DSCN4144 [2)


Chris, that is a work of art! DaVinci’s trains would look like that!

mike g. posted:

Ok Guys, I need some input. I am going to be building my bench work with 1x4" and 2x2 legs, so I have 2 questions.

1) What would you suggest for spacing of the "L" girders ?

2) What thickness would you suggest for plywood top?

Thanks in advance!

Mike, I'd use 2x3's for legs -- get a local lumber yard to cut 2x6's down for you - very inexpensive  and strong without being overkill that way - 2x2's can be a little flimsy . On L girders 1/2" ply should be more than adequate if you space the girders 16" or slightly less/more. Take the distance and divide by 16 to see how many girders and then adjust up to 2" in either direction accordingly. On a 6' wide span I've used 1x4 framing with 1x2 cross pieces 12" apart and 1/4" ply covered with 1/2" Homasote. It has supported my 200+LBS for over 20 years now.  Without the Homasote i would have used 1/2" ply. As i read what some of the guys are using for home layouts, i laugh at what is overkill, but it's their nickel; money i'd rather spend on trains.

Last edited by modeltrainsparts
mike g. posted:

Ok Guys, I need some input. I am going to be building my bench work with 1x4" and 2x2 legs, so I have 2 questions.

1) What would you suggest for spacing of the "L" girders ?

2) What thickness would you suggest for plywood top?

Thanks in advance!

Mike,

It is difficult to know the answers to these questions without knowing whether this is a table top layout or one constructed in the classic 'L' girder fashion.  The other determining factor is whether it's an around the wall layout or island table.  When the layout is attached to the wall then lighter construction methods are common.  As noted, over-building is a waste of good trees.

Bruce


We had a great overnight visit with our grandson & great-grandson.  To begin with, our grandson is an IT guy and was able to get my MTH WiFi up and running.  Having an excited almost 3 year old in the train room helped to, in lightning speed, readjust wall pictures and offset switch buttons, among other things.  The misaligned switch caused only one minor derailment.

Controlling the trains on an iPad was quite intriguing to a young lad and, I must admit, also to an old adult.  We quickly learned through trial and error the importance of setting some parameters early on, particularly with speed control.  The screen of the iPad is quite sensitive to little fingers and before we knew it, we had a train racing around the layout at speeds approaching 90-100 scale mph.  We quickly found that it is possible to reset each engine for a maximum speed.  We chose 20 mph so little fingers could not cause too much trouble.  He loved to blow the whistle, ring bells and occasionally run trains backwards.   All in all it was great fun and I look forward to many more years of shared enjoyment.
Cheers, Dave

DSC02579

Note the iPad screen, maximum speed 120 mph.  Touching the lower righthand +square will add incremental speed, but if you miss and hit the speed dial close to the 120, that is what you get!

DSC02583

Little fingers do not always hit the mark!

DSC02580

Important, reset maximum speed to 20 mph!  What a great feature!!

DSC02588

He loved to blow the whistle and ring bells.

DSC02598

Great time had by all!!!

DSC02600


Attachments

Images (6)
  • DSC02579
  • DSC02583
  • DSC02580
  • DSC02588
  • DSC02598
  • DSC02600
Last edited by darlander
mike g. posted:

Ok Guys, I need some input. I am going to be building my bench work with 1x4" and 2x2 legs, so I have 2 questions.

1) What would you suggest for spacing of the "L" girders ?

2) What thickness would you suggest for plywood top?

Thanks in advance!

Mike;

I used Mianne benchwork, so I can’t really address your first question, but the “spacing” on my layout is between 24” and 48”, depending on the area.

As for your second question, I used half inch plywood topped with half inch homosote. While I usually don’t crawl on top of the layout (mostly due to two very bad knees), I have been there with no issues. And I’m 6 foot and 240 pounds!!! Luckily, my benchwork has a max 30” width, so all areas are pretty accessible.

looking forward to see your benchwork in place.

Thanks for all the positive feedback on lowering and weathering the early MTH O scale boxcars....  Did another one today took some decent photos to show how I am doing it....   I remember someone saying they crushed the metal tophat in the floor flat a vice,  I tried that today, and it didn't work out well, ended up deforming the floor and I had to flatten it... So I will keep drilling out the tophat, which acts a standoff.... I have 2 step drill bits which are perfect for this, I suppose there are other tools that would work, but the step drills work well.   The wooden set up jig is essential for ensuring that I don't change the mounting hole point for the wheel trucks....  Its a simple jig, and I used the sheet metal floor as a "drill guide" before I modified the first one, then drove 1/4 x 20 machine screws through my holes the jig to act as the pegs that hold the new mounting washers in place.  As I am putting the 3/16" x 1.25" fender washers on the interior side of boxcar, the car is dropping over 1/4 inch, so the coupler shank has to be relieved to clear the bottom of the car body...... It may be slightly lower than the prototype but I prefer the way it looks, personal taste....

DSCN4145 [2)DSCN4146 [2)DSCN4147 [2)DSCN4148 [2)DSCN4149 [2)DSCN4150 [2)DSCN4152 [2)DSCN4152DSCN4153 [2)2016-09-10 18.40.44 [2)


Attachments

Images (10)
  • DSCN4145 (2)
  • DSCN4146 (2)
  • DSCN4147 (2)
  • DSCN4148 (2)
  • DSCN4149 (2)
  • DSCN4150 (2)
  • DSCN4152 (2): Coupler shank has to be notched with dremel tool about 1/8 inch
  • DSCN4152
  • DSCN4153 (2)
  • 2016-09-10 18.40.44 (2)

Some time ago I bought a set of 5 American Lightweight cars for the Powhatan Arrow for cheap ($100). Apparently, they had been dropped..maybe the whole set in a box. Anyway, they're hurt but repairable. Started with the diner today.
One of the neat things is that the builder daisy-chained the power source car-to-car from somewhere(?); the cars have the Am Std plastic trucks. Anyway, since I'll run them 3-rail (yes, Virginia, with a little work on the couplers they'll run through 36" radius curves on GarGraves track), I can put a rectifier in the tender of my 3-rail "J" and light them on track power with appropriate resistors, etc replacing the GOW bulbs with LED's. The ERR electronics have a 5V output so I can use that.

Add Reply

Post

OGR Publishing, Inc., 1310 Eastside Centre Ct, Suite 6, Mountain Home, AR 72653
800-980-OGRR (6477)
www.ogaugerr.com

×
×
×
×
Link copied to your clipboard.
×
×