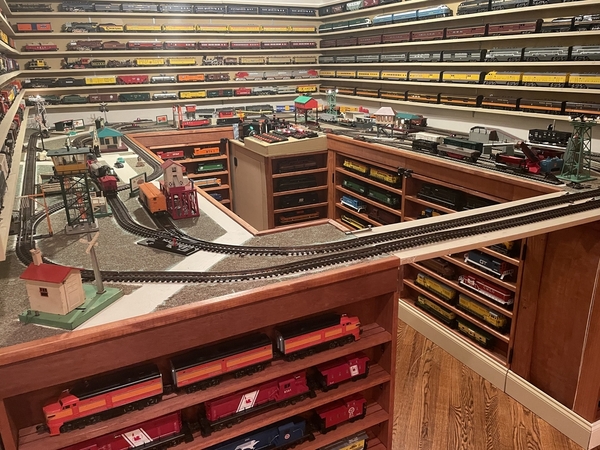
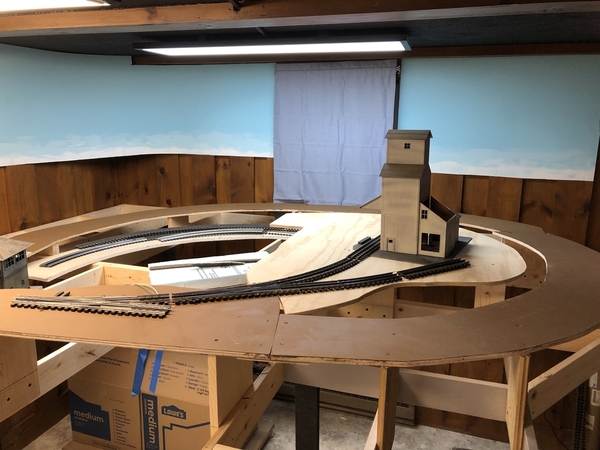
Excellent layout and very professional display shelves.
Morning guys, Sorry Jeff, I try to post when I can and I wasn't sure when I would get back on again!
@Tommy F Wonderful looking layout! Its always a plus when everything checks out and works as it should!
Have a great week everyone and I hope you find time to have fun with your layouts and trains!![]()
Tommy F - Love the postwar dealer display look of your layout - Super O track / 919 grass / painted roadway roadbeds etc
Any more pics available ???
@Tommy_F posted:
Just for something different how about a low lying tunnel EXPERTLY engineered flowing from one side of the track to the other side . Maybe the rest of the ' mountain applied to a swinging access door below Tom !?!
I guess it would have to take some EXPERT engineering.🤔 .
Nicely laid out area Tom. ![]()
Finally got back to working on the industrial complex.... yes moving at a snail's pace, but I have come to peace with that. Got 3/4 of the glazed windows installed in the Korber Flag Factory and fabricated an exterior vent that still needs some details and painting.
I really didn't care for the overly thick and warped Resin molded Korber Loading dock roof, so I made a new one along with .032" wire supports from above, and installed LED lighting underneath.
Then I finally yesterday finished fabricating the multiple section wrap around loading docks for all 3 buildings.
Attachments
Attachments
Nice work Chris. I am planning a similar building to be laser cut by a materials vendor. I have the General Light and Office building which is really warped. Not sure how many stiffeners I will need for it.
Kind if curious, I have seen freight awnings tip toward the tracks and toward the building. Seems to me tipping toward the building would prevent a waterfall at the freight car. So I am inclined to use that design feature, despite how odd that appears at first. Jeff
@ScoutingDad posted:Nice work Chris. I am planning a similar building to be laser cut by a materials vendor. I have the General Light and Office building which is really warped. Not sure how many stiffeners I will need for it.
Kind if curious, I have seen freight awnings tip toward the tracks and toward the building. Seems to me tipping toward the building would prevent a waterfall at the freight car. So I am inclined to use that design feature, despite how odd that appears at first. Jeff
Jeff, Yes very interesting thought about the loading dock roof angle. I thought about the waterfall, then contemplated extending it further over the edge of the boxcars, but the geometry didn't really work out with the loading dock height.
Just an FYI - I read a bunch of posts about adhesives for gluing wood to the old Korber Resin walls. I ended up with 4 braces on each of the 4 walls, and decided I wasn't donating that much Gorilla Super Glue to the project. I ended up using the traditional Gorilla Glue that you activate with water. I just aggressively scribed gouges into the inside of the Korber wall, removed all the factory red paint, and then clamped the wood braces under the Gorilla glue. In my case I had a good size bottle that I need to keep using before it ages out.
Under Piano details added....Some switch numbering (11 needed to be built and painted, From San Juan Details - HEAVY CAST IRON SWITCH STAND (O/On3/On30 Scale) - as well as a Diesel Fulling station (Rail King Pre-Made...)
More zoomed in:


Attachments
Attachments
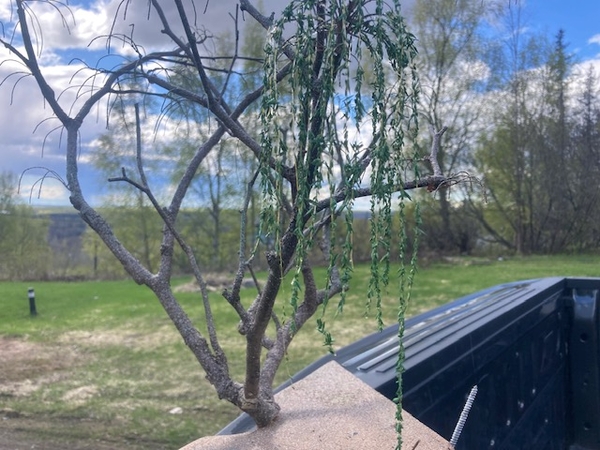
@fast freight - not a bad job at all! At first glance I thought it was a real tree that you were modeling after.
@mike g. posted:Mark your new girder sides look wonderful!
I just noticed that you went with dule actuators for your bridges! I like the idea but I think I will have to stick with the bar on mine to raise both my bridges and road way.
I really like how your layout is progressing and enjoy your updates! Thanks for sharing!
Thank you, Mike! I went with the second actuator when I switched from the single track truss to the double track truss bridge. I was afraid the weight of the plexiglass stability frame may be heavy enough to cause the original arrangement to sag trying to lift the truss. Of course it was nowhere near the weight rating of the actuator, but a bad angle.
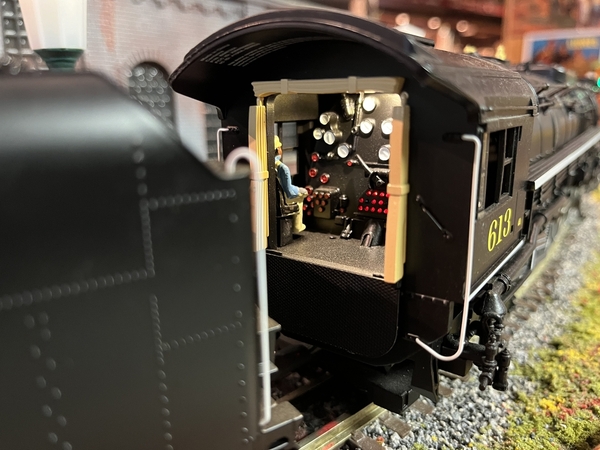
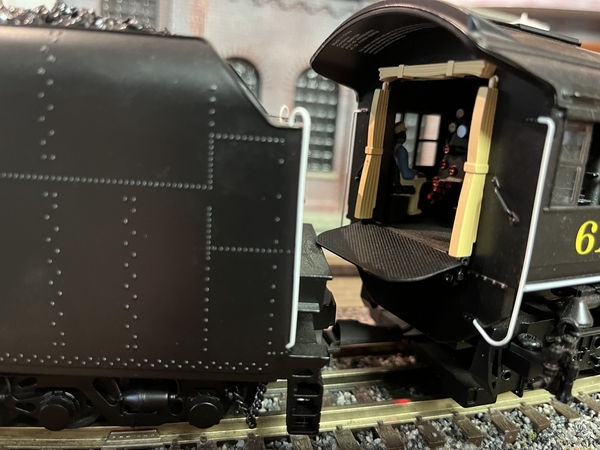
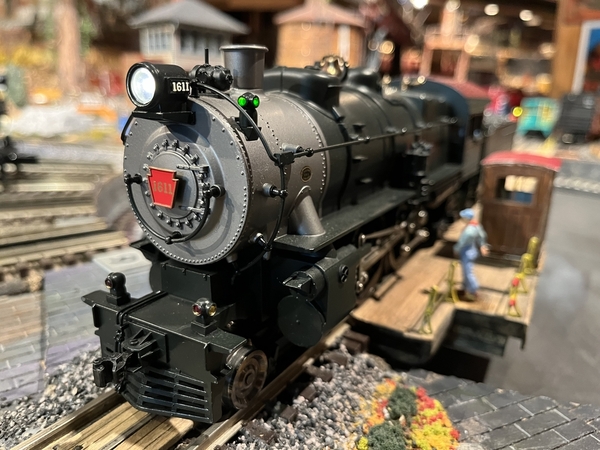
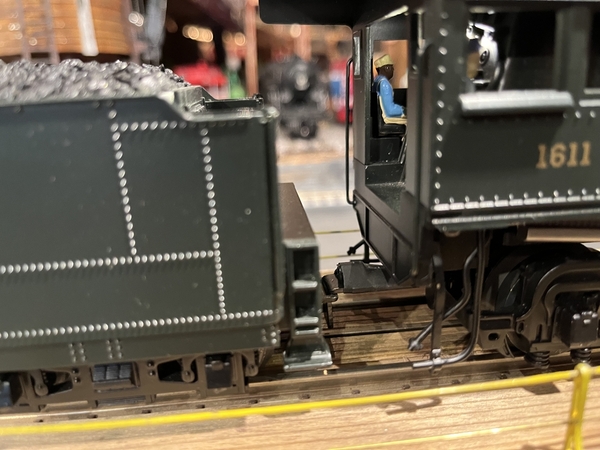
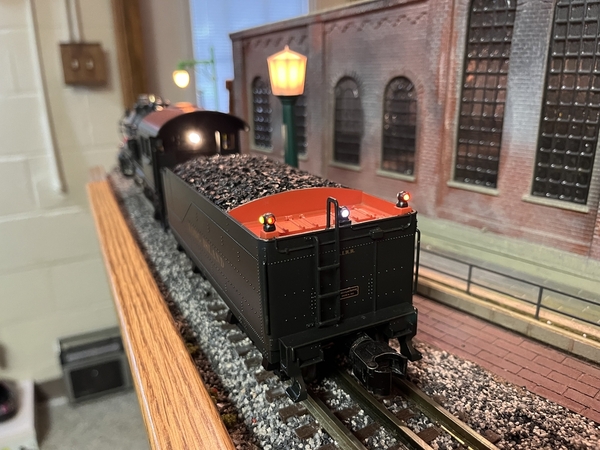
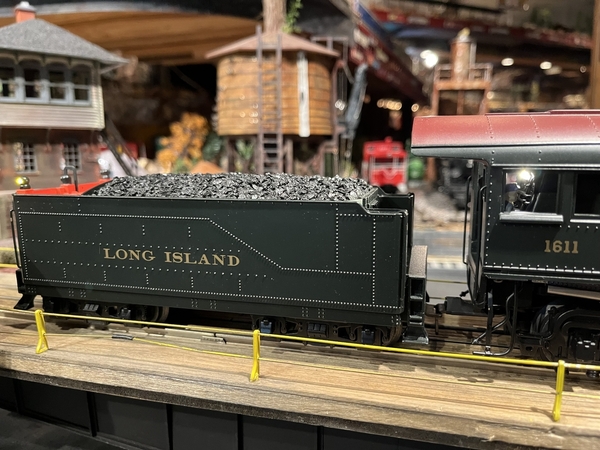
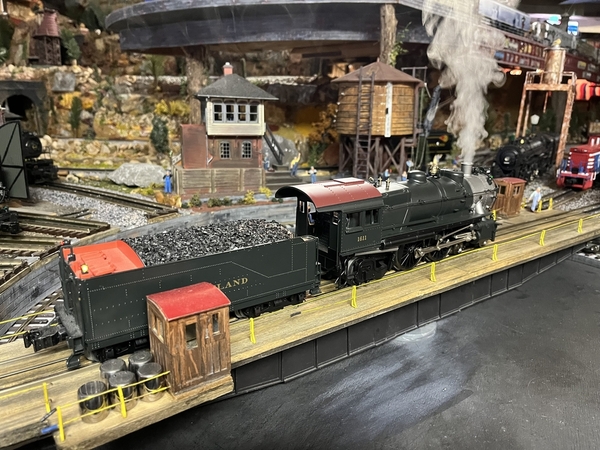
Beautiful pictures everyone, today, a friend brought over his new Lionel #613 Legacy Greenbrier with elephant ears and Lionel did a fantastic job. We also rested a new to me SW1200 Sante Fe switcher, and a like new Lionel Legacy Atlantic locomotive Long Island Railroad, which ran flawlessly. (Actually it has a new home). Happy Railroading Everyone….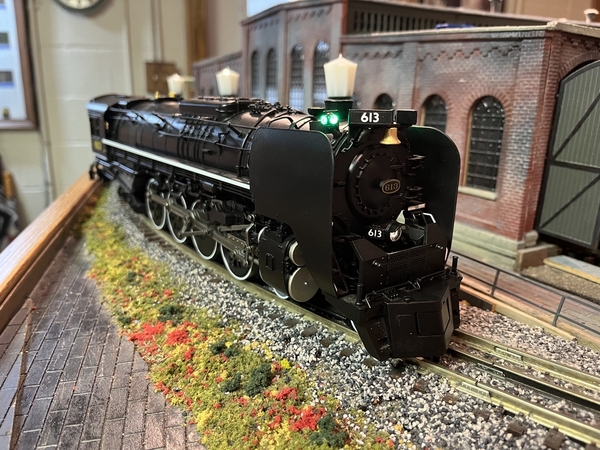


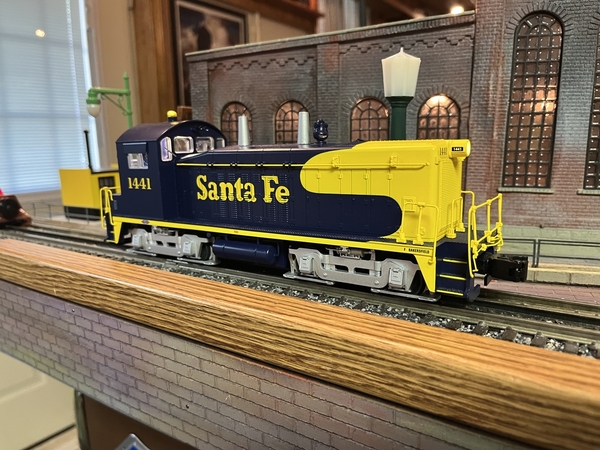
Attachments
@leapinlarry posted:Beautiful pictures everyone, today, a friend brought over his new Lionel #613 Legacy Greenbrier with elephant ears and Lionel did a fantastic job. We also rested a new to me SW1200 Sante Fe switcher, and a like new Lionel Legacy Atlantic locomotive Long Island Railroad, which ran flawlessly. (Actually it has a new home). Happy Railroading Everyone….
I can't for the life of me imagine where this engine may wind up.....hmmmmmmm.......![]()
@RSJB18 posted:I can't for the life of me imagine where this engine may wind up.....hmmmmmmm.......
Long Island Railroad! Hmmmm…I wouldn’t hazard a guess. 😃
Morning guys great work everyone!
@luvindemtrains Dave I have to say that is probably the best dirt painting I have seen in a long time! ![]()
@leapinlarry Larry those sure are some really nice engines and the Santa Fe switcher is sharp looking also! If I were you I would let Bob get to close to the Long Island engine! LOL![]()
I hope everyone has a wonderful day!
@mike g. posted:Morning guys great work everyone!
@luvindemtrains Dave I have to say that is probably the best dirt painting I have seen in a long time!
@leapinlarry Larry those sure are some really nice engines and the Santa Fe switcher is sharp looking also! If I were you I would let Bob get to close to the Long Island engine! LOL
I hope everyone has a wonderful day!
Too late Mike. Just need Mr. Brown to do his job........![]()
@chris a posted:Just an FYI - I read a bunch of posts about adhesives for gluing wood to the old Korber Resin walls. I ended up with 4 braces on each of the 4 walls, and decided I wasn't donating that much Gorilla Super Glue to the project. I ended up using the traditional Gorilla Glue that you activate with water. I just aggressively scribed gouges into the inside of the Korber wall, removed all the factory red paint, and then clamped the wood braces under the Gorilla glue. In my case I had a good size bottle that I need to keep using before it ages out.
Chris - did you try Goop e6000? I am trying that for setting my wooden trusses into the Atlas engine shed - 24 hour cure time unfortunately. Jeff
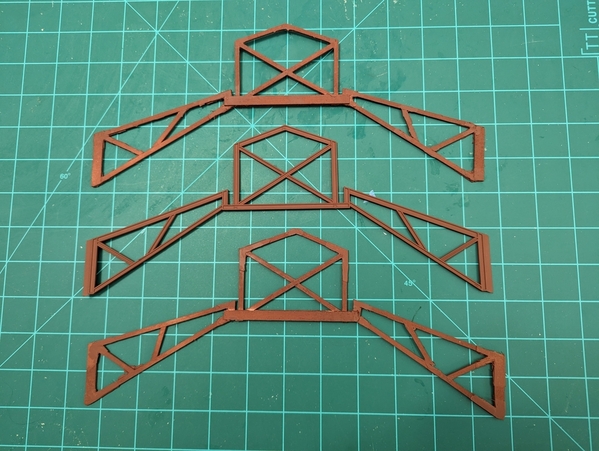
Got some work done on the Atlas Engine shed.
The kit came with 1 truss section so I built 2 wooden trusses. I found the butt joints were not particularly robust so I glued printer paper to the truss joint - similar to a gusset plate. Once dried, the excess paper was trimmed away. I added a double section to the bottom of the "house" truss so that the two trusses coming in from the sides had good joint. Seemed to work well. I could have been more precise on my cuts.
Same trusses with a coating of flat red primer - same as the walls. I may wash these with a black wash to darken or paint an iron black color. Haven't decided as yet.
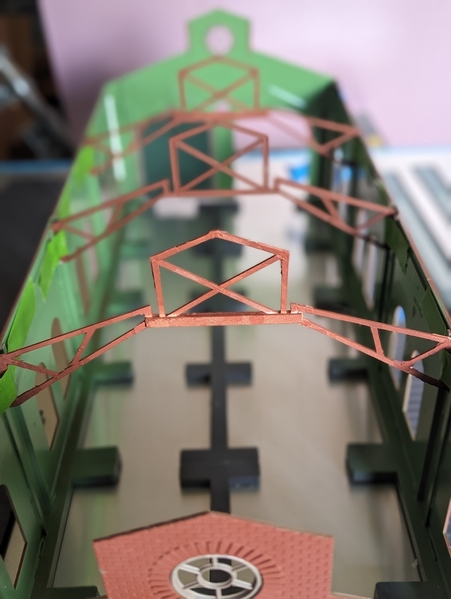
Trusses installed. Hoping Goop e6000 will bond to the styrene and wood and form a decent joint. I'll probably glue the dog house sides and roof in place, but leave the lower roofs removable. I'll run LEDs down the center, but am considering 3 rows so both sides of a loco would be lit. Maybe not - probably too much light. Roof seams will need gaffers tape to block light. I also added 1/4 square styrene for added gluing surface to support the corners.
@luvindemtrains Dave took your suggestion and painted the upper section the door color and inner the same light green as the building interior.
@mike g. I think you know I was just "bustin your chops" in jest for the sequential posts. Keep the comments coming.
Attachments
@ScoutingDad posted:Got some work done on the Atlas Engine shed.
The kit came with 1 truss section so I built 2 wooden trusses. I found the butt joints were not particularly robust so I glued printer paper to the truss joint - similar to a gusset plate. Once dried, the excess paper was trimmed away. I added a double section to the bottom of the "house" truss so that the two trusses coming in from the sides had good joint. Seemed to work well. I could have been more precise on my cuts.
Same trusses with a coating of flat red primer - same as the walls. I may wash these with a black wash to darken or paint an iron black color. Haven't decided as yet.
Trusses installed. Hoping Goop e6000 will bond to the styrene and wood and form a decent joint. I'll probably glue the dog house sides and roof in place, but leave the lower roofs removable. I'll run LEDs down the center, but am considering 3 rows so both sides of a loco would be lit. Maybe not - probably too much light. Roof seams will need gaffers tape to block light. I also added 1/4 square styrene for added gluing surface to support the corners.
@luvindemtrains Dave took your suggestion and painted the upper section the door color and inner the same light green as the building interior.
@mike g. I think you know I was just "bustin your chops" in jest for the sequential posts. Keep the comments coming.
Very nice!
@ScoutingDad posted:Chris - did you try Goop e6000? I am trying that for setting my wooden trusses into the Atlas engine shed - 24 hour cure time unfortunately. Jeff
Jeff, No I have never tried Goop e6000. Got turned on to the Original Gorilla Glue formula when I was searching for a better adhesive to glue foam board and also adhere Hydrocal Castings to Foam board. There was a guy adding a 2 inch thick narrow, (like maybe 6 inch wide) foam board extension to his layout which also had 2 inch thick foam board. The bond with the Gorilla Glue was very impressive after he took the clamps off
I have had such good luck with it on bunch of applications, I never went searching ever again. It's not for everything obviously, but it's wicked tacky, and expands while it cures, so that's why I put deep gouges in the Korber Resin before I put my wood braces on the back side.
The other great benefit, is it's like 90% cured and can be handled within about 3 hours. I think it still takes 12-24 to reach full strength, but at least I don't have to wait till the next day.
I think you'll be fine with what your using for the Atlas Engine Shed. I have no idea what the "resin" is in the old, or new for that matter Korber kits, but it's not adhesive friendly at all.
@chris a posted:Jeff, No I have never tried Goop e6000. Got turned on to the Original Gorilla Glue formula when I was searching for a better adhesive to glue foam board and also adhere Hydrocal Castings to Foam board. There was a guy adding a 2 inch thick narrow, (like maybe 6 inch wide) foam board extension to his layout which also had 2 inch thick foam board. The bond with the Gorilla Glue was very impressive after he took the clamps off
I have had such good luck with it on bunch of applications, I never went searching ever again. It's not for everything obviously, but it's wicked tacky, and expands while it cures, so that's why I put deep gouges in the Korber Resin before I put my wood braces on the back side.
The other great benefit, is it's like 90% cured and can be handled within about 3 hours. I think it still takes 12-24 to reach full strength, but at least I don't have to wait till the next day.
I think you'll be fine with what your using for the Atlas Engine Shed. I have no idea what the "resin" is in the old, or new for that matter Korber kits, but it's not adhesive friendly at all.
I'm a big fan of Gorilla glue too. Just need to watch the expansion and where it's gonna ooze from. ![]()
@ScoutingDad- The building and trusses look good Jeff.
Bob
Bob, that's true, but I have found if I use a sharp XActo blade or Snap blade utility knife, I can clean up what oozed out, pretty cleanly, even on inside corners.
Ok, I've used that stuff before. The expansion will move stuff around if not clamped down. But it is pretty useful. I was concerned about the expansion so I went with the e6000. So far all joints look pretty good. Added the cupola walls the same way and now have the cupola roof glued together resting on the trusses to get the proper roof slant. Thanks for the comments.
I was told to use 2 part epoxy to stick hydrocal walls together - Downtown Deco buildings. Would the gorilla glue be a good alternative? Might be a real mess if it expanded into the cast bricks.
Morning Jeff, I know I am a few days late, but the trusses look great! I think the 3 rows of lighting would be a great idea and just connect them to a buck convertor so you can control the brightness!
After reading a lot of post here I think everyone has had to use some type of tape to seal up light leaking out, no big deal just another step!
Upgraded electrical track power wires and added two more.
The problem: Whenever I ran multiple powered locomotives they would start stalling in the turns on the outer loop and outside siding. For power I use a Lionel brick power supply and Lionel Direct Lock-on with two Lionel Lock-on to track power cables. The Lionel power cables are pretty wimpy.
So, I pulled up a couple of sections of the 3 outer loops Messy, but I was able to pull the track up without much damage to the ballast and scenery.

Below shows the Lionel TMCC Direct Lockon top center of photo

After all that, I forgot to take photos, but I'm not sure it would have added anything interesting. The plan was to upgrade to 18 gauge wire and add new wires to the outer loop and outer siding. I had to locate and drill two new holes to run the wire up from the bottom of the layout. I also changed all the connectors because once they are used they're toast. All four wires then get connected to the TMCC Direct Lockon. It only took about an hour to complete once I got going.
Here it is all put back together, I can't tell the difference before and after! ![]() Well, a couple small ballast issues.
Well, a couple small ballast issues.

I can tell you that it worked very, very well. My layout has never run so smooth since I added the outer siding. Here's a video with 5 powered locomotives, one being WP CZ with powered ABB and one A non powered pulling 9 aluminum passenger cars. And then two FM Train Master H-24-66 pulling a small freight. Running at around half speed, not a single slow down or hiccup.
Attachments
Hey y'all,
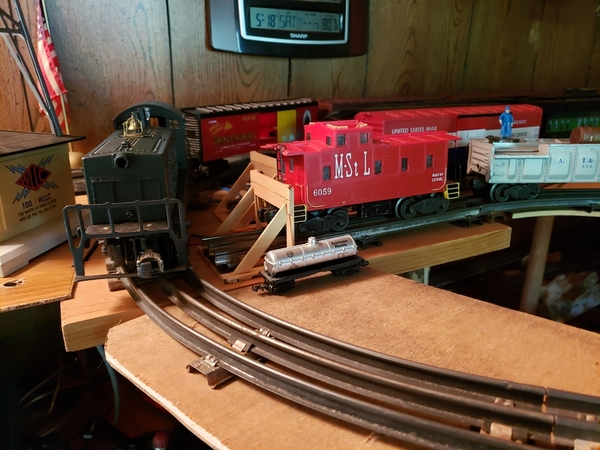
Last night I put new traction tires on my 4501. Today I tested a freshly repaired Lionel post war #610 on the third level. I bought the 610 last winter. It was ugly and didn't run. It just groaned. I had an engine from a MPC era geep hiding among my spares. Now that it runs, I'll work on cosmetics. Like that was not enough, I fixed a no-smoke issue on a LC+ diesel. It smokes great now. It must be time to run trains. Here is #610 pulling empties.
Did you notice the little tanker? It was in a box of stuff I bought. Is it HO?
Bill
Attachments
Well, the Willow tree is slowly coming along. My wife was recently diagnosed with an aggressive cancer which has forced me to to break away from work for awhile and tend to her needs. I try to find a little time in-between to get something done with the layout. I've been wanting to make a weeping willow for years so it seems like the perfect time, to to do a little at a time.
Attachments
@fast freight posted:Well, the Willow tree is slowly coming along. My wife was recently diagnosed with an aggressive cancer which has forced me to to break away from work for awhile and tend to her needs. I try to find a little time in-between to get something done with the layout. I've been wanting to make a weeping willow for years so it seems like the perfect time, to to do a little at a time.
Best of luck to your wife, she will need a strong support system.
@fast freight posted:Well, the Willow tree is slowly coming along. My wife was recently diagnosed with an aggressive cancer which has forced me to to break away from work for awhile and tend to her needs. I try to find a little time in-between to get something done with the layout. I've been wanting to make a weeping willow for years so it seems like the perfect time, to to do a little at a time.
@fast freight - will keep you both in prayer.
@fast freight Praying for your wife's recovery.
Bob
@fast freight- You have my prayers. Went through same thing beginning in 2018 and finally ending in 2023 with her passing. She will need all have and more, hoping your wife recovers and that the Lord gives you the strength to support her.
Best Wishes
Don
Morning guys, I see you all have been nice and busy!
@WesternPacific2217 Scott nice fix and as you said you can't even tell you pulled track up! Run nice and smooth!
@Odenville Bill Bill Looks like a strong runner! Good work, it's nice to see folks that can fix their own engines!
@fast freight First off thought and prayers for your wife! Also I think your doing a wonderful job on the willow tree! We use to have one in our yard and I hated it when it was time to mow!
I hope you all have a great Sunday and fine to have fun with your trains and layout! ![]()
Today I sprayed a coat of High Gloss Clear on a portion of scenery in an area of the layout I call Canyon Creek. I want the scene to appear as though there is a continual rain/mist falling . The glossy effect covers the  bridge walkways, rock surfaces, highway pavement and bridge girders. (both sides). Here’s a look at part of the scene. The coach is a Sunset Models sleeper, “ Douglas Manor.”
Attachments
Attachments
@RSJB18 posted:@fast freight Praying for your wife's recovery.
Bob
Prayers from here fast freight. Stay strong and loving for yourself and your wife sir. Make sure your lady has an abundance of the kisses and hugs. When my first wife pased I continually wished that I would have held her more.
Godspeed sir.


