Finished building my Scorpion Coaster from forum sponsor Coaster Dynamix. Quick review of this project....I ordered from them on Monday night and received the kit on Thursday afternoon. It does take awhile to finish this kit as I put in 7 hours last night and another 5 hours today. Building the actually pieces doesn't take long and the directions are real easy to follow. I was thinking this won't take long at all until the final couple of pages which took forever. Of course this is the part that if you mess up the coaster won't make it around the track. I did have to spend about an hour tweaking the angles until the coaster would make it all the way around but now that I have it locked in it runs smoothly and completely every time. This will definitely be an eye catcher in my carnival area.
That's Cedar Point isn't it?  On30 coming for the train?
Lee - If you can find a smooth thimble without the indentions it might work. I think with the size of that pile, a cart might be called for.
I got the Ye Old Huff N Puff, Old Log Brew reefer yesterday. (Thanks Mike)
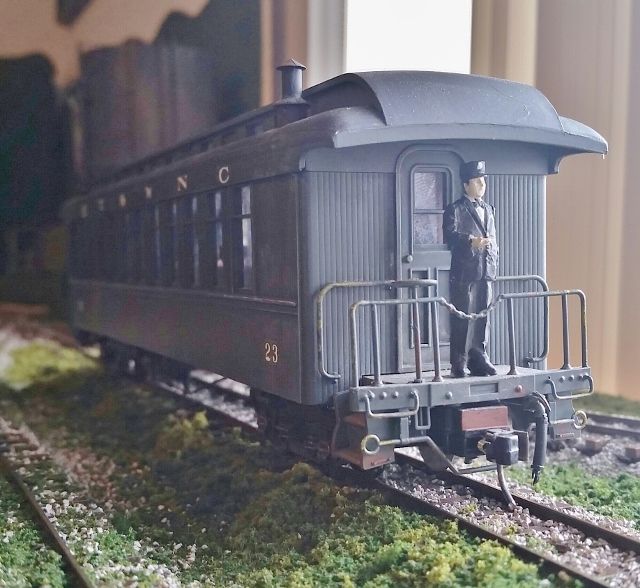
I couldn't wait till I got the MO in the mail. It's nearly done already.
I glued up the main framework, trimmed the details, and painted 90% of the parts in flat black down low and "rusty metal primer" for the roof and ends. ( Rusty metal primer dries to a semi gloss now ! ??? It's more brown, less red too) I tried all flat black, but I just didn't like it.
Fast dry paint and modern glues make this happen fast. I used Gorilla glue on the fat wood frame and gel super glue with an adhesion promoter on the little stuff.
The kit had some minor issues with two eves boards being an inch short, the roofs angle was off (bad bevel cut; exacto-plane to the rescue), the brake wheel hole is much bigger that the thin wire shaft and the roofing was six, scored boards, short of the way it is on the instructions, which themselves aren't the greatest. I couldn't get over the gap in between the roof sections and seperated quite a few to scatter the gaps. The lack of any excess slats mentioned, meant I couldn't hide the gap under the top trim boards either. I'm thinking of giving the doors a frame with the extra wood from the eves. There will be an offset at the hinges; the doors are glued to the sides and the doors thickness will create an offset under the hinge, that a frame can fill.
I always wanted to try to build one, and now that I have; yes, I definitely would do another. At twenty bucks online retail, sans-trucks, it's hard to beat.
Now if I could only find a model of the Casey Jones Cannonball! 
( Check your email Mike G)


![DSC_0952[1]](https://ogrforum.ogaugerr.com/fileSendAction/fcType/0/fcOid/12129987997660671/filePointer/62669288892462613/fodoid/62669288892462609/imageType/LARGE/inlineImage/true/DSC_0952%255B1%255D.JPG "DSC_0952[1]")
![DSC_0952[1]](https://ogrforum.ogaugerr.com/fileSendAction/fcType/0/fcOid/12129987997660671/filePointer/62669288892462613/fodoid/62669288892462609/imageType/LARGE/inlineImage/true/DSC_0952%5B1%5D.JPG "DSC_0952[1]")