


Nice Paul. Just curious, how many woodchip hoppers are you up to, lol?!
Mike g, I have the remote and TIU set coming shortly. This way I will have them for both layouts. Mike W I think I have about 25 wood chip hoppers now.......Paul
Cool Paul, hope you have success in finding more!
Mike
I was just having some fun running my Big Boy and pulling all my cars behind it, not prototypical at all Freight front half Passenger cars back off, and at the very end a caboose.
I also attempted some video editing.
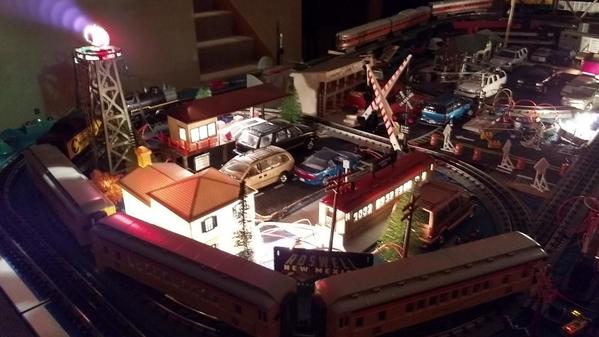
Update from earlier in the week.
Finished most of the electronics and installed a few new things like the Coca Cola loading dock. Now it is cleanup and train debug time.


Attachments
Images (6)


I am working on this scene on the layout. It is slowly coming together. ![]()


Attachments
Images (3)


Datdupa46_Novotronics posted:"Debug time."
Thats some strange camera effects you have going ![]() . Is that light all bleed from the house? Or is there something behind the Roswell sign too?
. Is that light all bleed from the house? Or is there something behind the Roswell sign too?
That light bleeds nothing an empty cereal box, and some tape scissors wouldn't fix if not planned.
....ok, yes, you could paint it inside or lower the bulb voltage too....while eating the cereal ![]() "Quisp"?
"Quisp"? ![]()
Nothing today, but yesterday worked on the model cooling tower that's going into my Petro-chem facility on my railroad.
Marley Cooling tower array as found on the Internet

My version as I drew it on SketchUp

The box made of Evergreen "Corrugated metal" sytrene

The fan housing

And the belt drive (pulleys turned on my Taig Lathe)

Still have a lot to do on it, before it's ready for paint. It along with all the other plant units will be painted at one time.
Lots to do: piping, painting, lighting, chain link fence, terrain, ground cover, loading station, ops building. This started as a Plastruct "kit" (really a massive scratch-build with terrible instructions), but I've added the flare tower with knockout drum, cooling tower and soon-to-be-built ops building. Entire Masonite panel will be installed in spot on the layout. It's gonna look great, but it's a lot of work.

Attachments
Images (6)


Decided to fix up a Lionel Standard gauge baggage car that was painted a bright red. Got it cheap at a show. Tore it apart, cleaned it up, didn't strip the paint, repainted it with Rustoleum light green. Painted the roof a darker green, took the inserts out and cleaned the dirt(most of it) off with skin cream because the baggage doors and window frames were original paint in decent condition. My other two cars needed their roofs repainted so did that. Turned out to be a decent looking consist compared when I got them.
I started the final phase of the hidden yard control panel move. Both the big hidden yard and the small hidden yard will be controlled from the dispatcher's desk. The interface relay panel is similar to the two turnout relay panels I built a couple years ago. I've been holding out on doing this project because once I cut the existing wires, I can't run the layout until everything is hooked back up.
The big hidden yard has five tracks, each has five "parking spaces". When a train leaves from the front end of the yard, all the trains behind it need to move up one space. For now this will be done by hand with an operator moving each train. Eventually, when the C/MRI and JMRI are up and running, I hope to have the computer handle this task.
The whole point of doing this is to allow a small control voltage to turn track power on and off to the stopping sections, 25 in the big yard and 7 in the small. The stopping sections are just 3' long. I'm also building in the capability to turn power off to an entire track. In the case of passenger trains with lighting, they can be kept dark until they are moved.

The new panel will be mounted below Red Wing.

Here's the nearly completed interface panel. A few more connections, and it will be ready to hang, back in its place. The gray cable hanging down in the opening (above) is a 50 pair phone cable that runs over the door, to the desk. It will look much better when I get the wires tied down properly.

Here's the other end of the cable, with the wires sorted out.

Once this panel is moved to the desk, the way will be clear to finish the backdrop and fascia through this section.

All these wires need to be cut and reconnected.

This panel goes too.

With a little hard work I should have the entire project buttoned up by the end of the month.![]()
Attachments
Images (7)

Big_Boy_4005 posted:Here's the nearly completed interface panel. A few more connections, and it will be ready to hang, back in its place. The gray cable hanging down in the opening (above) is a 50 pair phone cable that runs over the door, to the desk. It will look much better when I get the wires tied down properly.
With a little hard work I should have the entire project buttoned up by the end of the month.
Hi Elliot
What are these devices?
Cheers
Max, the white things are relay sockets. I wire them up first, then I have a tub full of the actual relays that plug in. Just add power and listen to them click.![]()
Big_Boy_4005 posted:Max, the white things are relay sockets. I wire them up first, then I have a tub full of the actual relays that plug in. Just add power and listen to them click.
Nifty. ![]()
Yeah, it's a lot easier to wire everything to the sockets with the panel flat on the table. The wires from the layout will connect to the black terminal strips on the left. When I hang the panel back in the opening, I think I'll hinge it so I can open it and sit on the floor in the aisle. I don't have to do that for this one because I can get under Red Wing fairly easily, but it saves crawling.
worked on layout a little bit...
 tried to straighten things up a bit...
some memories.....


a local with empty hoppers on the branch line waits for the main lines to clear....
Attachments
Images (5)


Adriatic posted:Datdupa46_Novotronics posted:"Debug time."
Thats some strange camera effects you have going
. Is that light all bleed from the house? Or is there something behind the Roswell sign too?
That light bleeds nothing an empty cereal box, and some tape scissors wouldn't fix if not planned.
....ok, yes, you could paint it inside or lower the bulb voltage too....while eating the cereal
"Quisp"?
Yes, I was planning on devising a plan for that. Lol the aliens have taken over the house. I think part of the problem was over saturation of visible light from the lack of light in the background. Lenses don't do so well in the dark.
Trying to mock up a better option with this hole in the wall. Thinking about finishing the wall just past the pole at an angle to the ground. This may give me better separation from the two sides and make it blend in a little better. The only problem is that part of the pole cant be painted. It has our kid's growth marks on it. Any thoughts would be appreciated, I suck at this part, but I am willing to learn.....


Attachments
Images (4)
2 questions to start with.
1. what size is the poll?
2. could you get away covering the poll with something that can be removed?
Mike,
its a six inch support pole, but I'm not sure I want to do anything g with it because the layout wasn't to go past it but did. I have a great wife and really don't want to push it. That corner is designed for that section to pull out, just haven't accomplished that goal yet. If I extended the wall a hair, I guess we could use a thin layer of foam to cover it up......
Thaddeus posted:Mike,
its a six inch support pole, but I'm not sure I want to do anything g with it because the layout wasn't to go past it but did. I have a great wife and really don't want to push it. That corner is designed for that section to pull out, just haven't accomplished that goal yet. If I extended the wall a hair, I guess we could use a thin layer of foam to cover it up......
If you have a nice grocery store near by you can always ask the for there empty pepperoni stick containers. Cut the bottom off, slice them length wise. You can paint them any color you want. Then just slide them around the poll.
A guy carrying a box of my trains didn't support the bottom like he was supposed to and my favorite engine(one of the faves) fell a short distance and hit the concrete floor. The front truck broke, I picked up the pieces and put them iin a plastic bag. today, 2 months later I looked at it. I was lucky, the truck side frame had popped off so today I JB Welded back on. When it happened I was too upset to even think about it. Now I will dig two cars out of storage for it.

Trainman2001 posted:Nothing today, but yesterday worked on the model cooling tower that's going into my Petro-chem facility on my railroad.
Marley Cooling tower array as found on the Internet
My version as I drew it on SketchUp
The box made of Evergreen "Corrugated metal" sytrene
The fan housing
And the belt drive (pulleys turned on my Taig Lathe)
Still have a lot to do on it, before it's ready for paint. It along with all the other plant units will be painted at one time.
Lots to do: piping, painting, lighting, chain link fence, terrain, ground cover, loading station, ops building. This started as a Plastruct "kit" (really a massive scratch-build with terrible instructions), but I've added the flare tower with knockout drum, cooling tower and soon-to-be-built ops building. Entire Masonite panel will be installed in spot on the layout. It's gonna look great, but it's a lot of work.
Trainman,
Nice work! How did you do the fan housing? Getting it to be so round and properly tapered must involve quite a bit of math. Can you explain some for me? Thanks.
Brian
Spent the day laying in the hammock in the sunshine planning the next step. ;-)
You can do it the old fashioned way, which is with a compass and dividers like I learned how to do in engineering drafting 50 years ago, or.... you can go to this cool website that MaxSouthOz steered me to. You just pop in your dimensions and out pops a PDF pattern that's full size. I use a light coat of spray glue to hold the pattern onto the styrene and then use Goo Gone to remove any residue and isopropyl alcohol to remove the Goo Gone. I left it a little long since I was unsure the actual diameter my ring would be. I then trimmed the ends so they met and used a doubler at the joint to provide the strength.
https://www.blocklayer.com/cone-patternseng.aspx
Today I built the fan and trash screen. It's starting to look like a machine that can do some work. I also put on some Evergreen 1/2 round beading at the top edge of the venturi. The original photo looks like a flat flange, but the beading was easier to apply and serves the same purpose. It also stiffens the part. Go to my continuously running thread to see the full set of construction details on this project (and a zillion others).
https://ogrforum.ogaugerr.com/...33#73509797426007233

Attachments
Images (1)

I finished the wiring my relay panel today, then hung it back in its place under Red Wing.

Now the real fun begins! I have to wire up the cable to those terminal strips, bring track and relay power over to this location.

Because I'm reusing the control panels that I built a few years ago, I'll remove them when all of that is done, so I can hook them up. Hope to have it all done by the end of the month. ![]()
Attachments
Images (2)

Protip Of The Day:
Got an E-unit with a floppy lever? Wedge a horseshoe truck clip under the spring as a shim!

Mitch
Attachments
Images (1)
M. Mitchell Marmel posted:Protip Of The Day:
Got an E-unit with a floppy lever? Wedge a horseshoe truck clip under the spring as a shim!
Mitch
Great tip!
Great idea Mitch! I haven't seen anything posted from you recently and look forward to your wimsical posts about your herd of geraffe. How are the little buggers?
Mike


")
")
Terry L posted:Terry L posted:A Little further along
updated construction photo. Still a Big mess.
Looking great!
Mike welkie posted:Great idea Mitch! I haven't seen anything posted from you recently and look forward to your wimsical posts about your herd of geraffe. How are the little buggers?
Mike
Thankee! The gi-raffes are fine; had to repair a couple but other than that, no problems to report.
Expect more goofiness in the near future, as I've been working on a couple of projects which have been sitting on the back burner... ;-)
Mitch
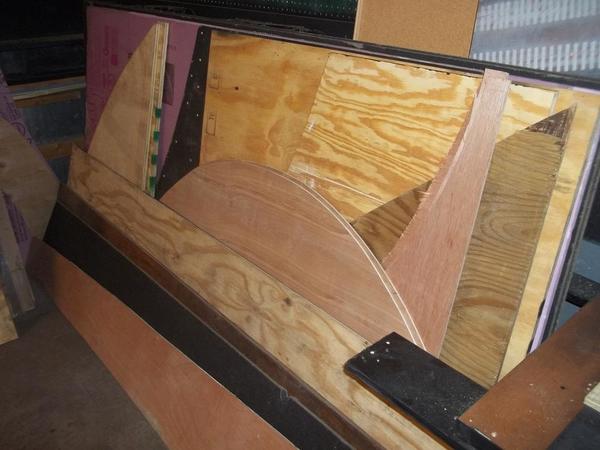
Got a little board at work while waiting for another job. 
Attachments
Images (1)
That's pretty darn niffty, Sir ! Is it scale or three rail ? Just kidding ,lol !


 I worked a bit more on my light house display and set it where I had planed to place it . Not that it is completely finished I think I should get the light house light kit from Evans design have to figure out how to fix up a proper top rather than the cardboard one that came with the light house puzzle need also to make some sort of bridge from main table to the light house .....

Attachments
Images (5)
Well I really haven't done much table work. I think it is because the next table has a lot of cuts to it so although I have measured twice I think I am going to do it one more time. But today I got trains from the front porch to the basement because the last table I built had an empty shelf which had to be filled. Pics of what I brought from the porch. MIKE G, if you noticed I found some more beer reefers along with some other cars. Still pining away for that brewery but also would like a beer distribution building for all the brands. ..............Paul


Attachments
Images (8)
Sorry I left out one more. Pic...........Paul

Attachments
Images (1)
Finished my demo board for the clinic at the NMRA Convention in September.

Now to practice my lines. ![]()
Attachments
Images (1)
Add Reply
Sign In To Reply
