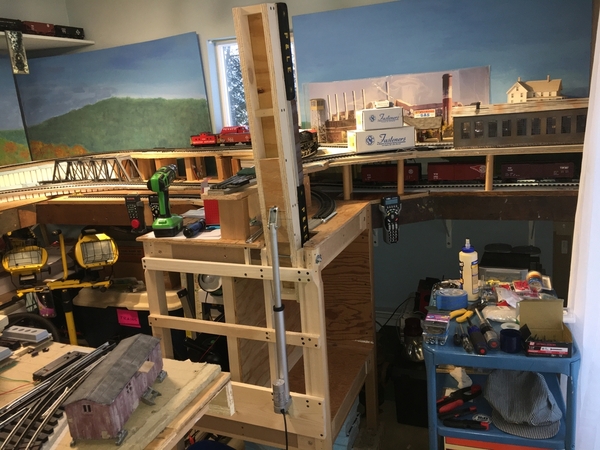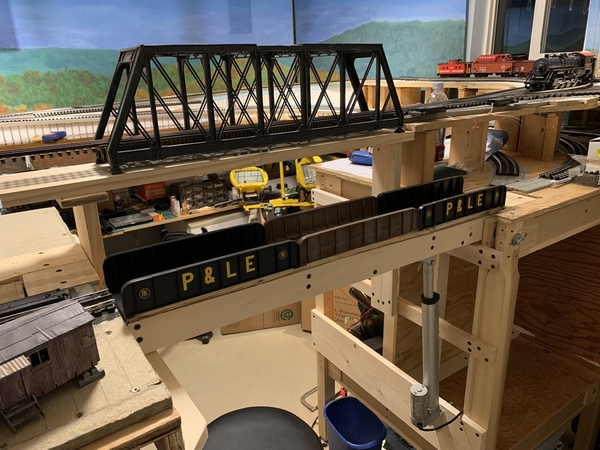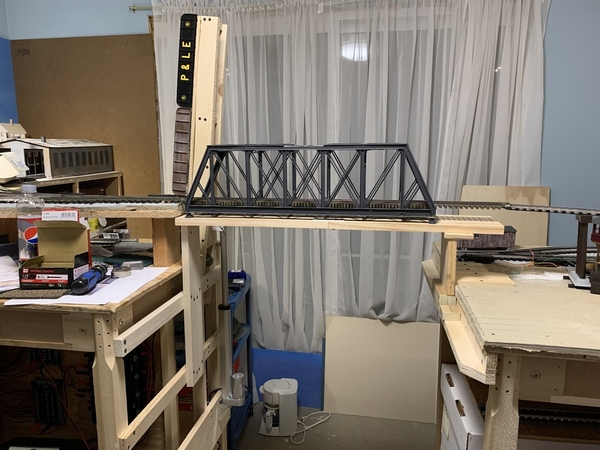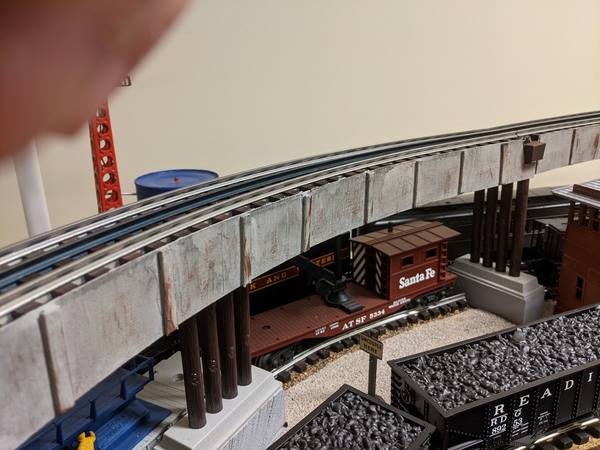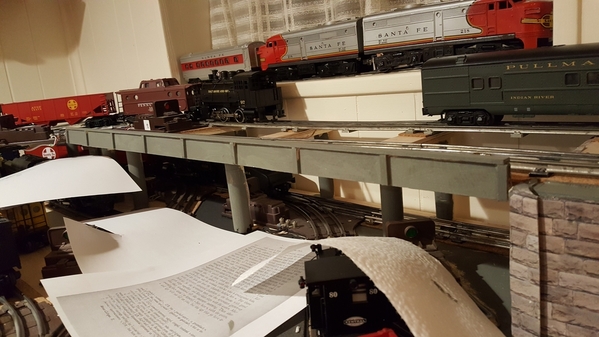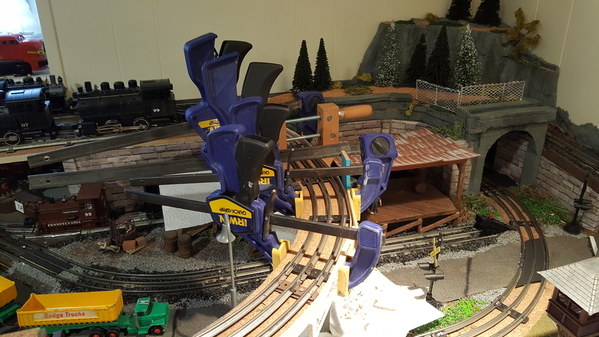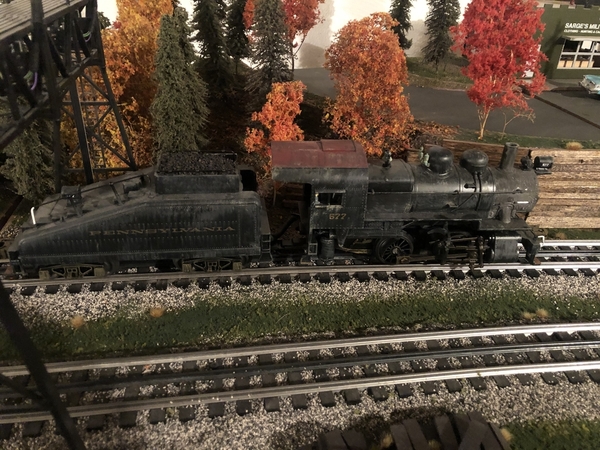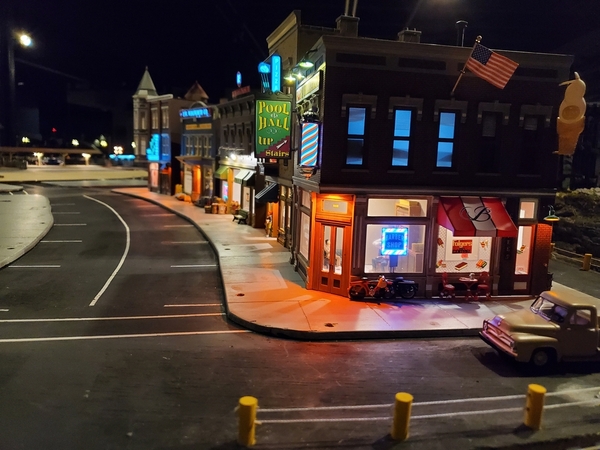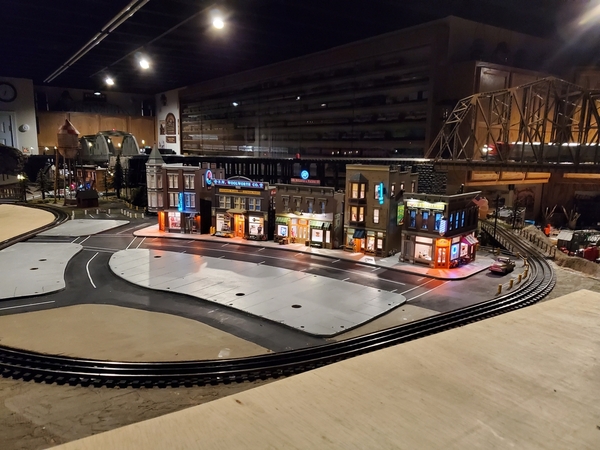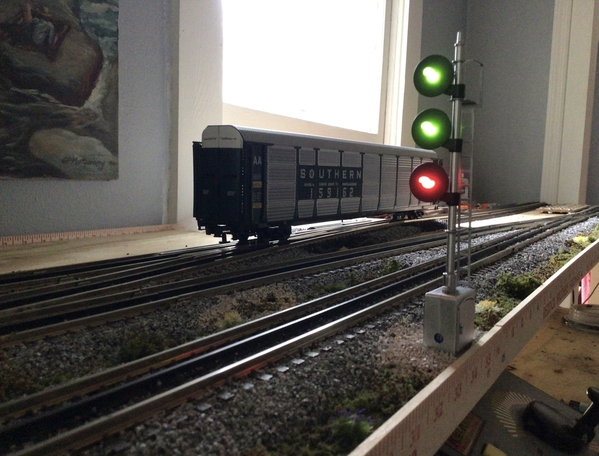
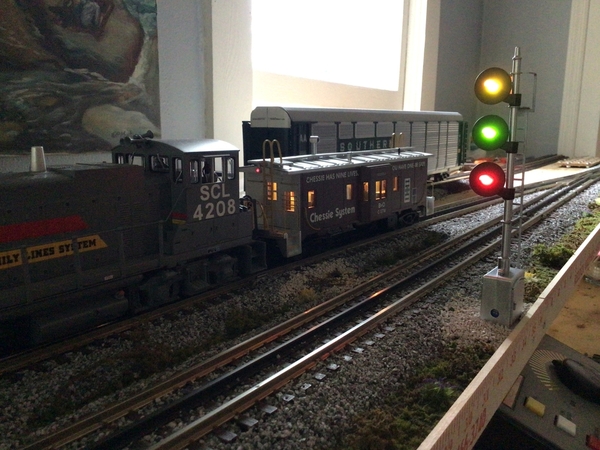
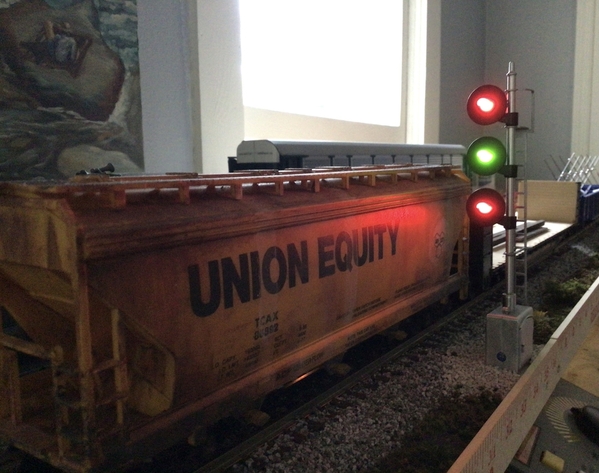
 Installed a new signal that arrived from z stuff for trains. Looks great, works great, super easy to install.
@chris a posted:Jeff Thanks for the compliments:
I think you are referring to the station on the lower level, It's an MTH , read many posts on this forum about taking them apart painting the window and door frames, weathering the brick then putting it back together. Keystone Ed did a great write up some years ago, which is who I copied in terms of removing the plastic base and making my own platform out of MDF, medium density fiberboard. There is also a great video segment on doing this on the Black Diamond Railway videos available through TOYTRAINSONTRACKS.COM
I spray paint all my track with Rustoleum Camou Brown. There may be some sections that were done year's earlier with a red oxide primer, but I much prefer the Camouflage Brown. It's dead flat. I really try to shoot it all outside or in my garage before installing it. I always use the blue shop towels wrapped around a small block of wood to wipe the tops of the rails, dry first pass, then a second pass with Acetone or Lacquer thinner.. I usually cut the towels up before I start and have small sized wipes ready to wrap around the block of wood. Purpose of the wood block is so I only wipe the wet paint off the top of the rail surface. As I finish ballasting sections, I have started to go back with my airbrush and blend everything together with light overspray of acrylics... It blends the harsh blue gray granite ballast with the dark ties and rails. I do add india ink to my diluted white glue when I finally set the ballast to darken it some.
Water tank in the Engine Service Yard is made my Walther's CornerStone 833-3311 I think is the part #... You have to keep an eye out on eBay and on the forum as they don't come up for sale that often. I assume you're asking about the tank in the next photo ? There's a smaller cylindrical tank up by the Coal Mine, but I picked it up from a forum member assembled and have no idea who made it.
Trees: I purchased the Scenic Express Super Trees large bulk pack kit plus numerous bags of their Leaf materials. They do look good, problem for me, is or should I say was, that I watched more than a few videos and thought I would be getting super trees branches that were over 7 inches tall, with decent sized trunks... That turned out NOT TO BE THE CASE..... I complained, they sent me a few more armatures. I also ordered one of their "Sage" Branch tree kits. and followed the directions to glue the super tree branches onto the woody Sage Trunks. I like the product, it's tedious gluing the branches and then the leaves but the results are hard to argue with. My other opinion is that they charge way too much for these branches, but I haven't found any good substitute.
Chris, What color did you use for the brick on that MTH station? It's perfect for brick.
I use Krylon Red Oxide Primer as the base coat, it's extremely "flat", then I went in with a couple of felt tip enamel paint pens from the Testors ( I think) set for weathering track. You have to seal it with dull coat before doing the mortar. For mortar I use the Lightweight Fast Drying Spackling and force it into the mortar lines with a cut up credit card as a squeegee. I mix a small batch of spackling with some india ink to turn it gray, so that not all the mortar is uniform. Then of course wipe it down with a cloth, no water or you'll pull the spackling up, then it has to be Dull Coated again. For buildings I buy the less expensive Krylon or Rustoleum flat clear and save the expensive Testor's Dull Coat for freight cars. It's harder to find the Krylon Red Oxide Primer here where I live, when the local hardware store has it, I usually buy 2 cans.
Hi Randy, Cool, Rich Battista who is also a forum member, did a great job on those videos, step by step, clear explanations of "how to do it"... and just all around well presented video. And of course alot of fun to watch while your learning.
Jeff you can do what you choose with the windows, I sprayed them with a color called Espresso, very dark brown, then went around the high spots with a mortar color like Khaki or Sandstone with a flat artist brush that I could control and only apply the paint to the "high spots".
Thanks Chris a for the info.
In case anyone is interested. The building is an MTH station either 30-9050 or 30-9014 or 30-9005 Amazing how an MTH building can be upgraded to be something special.
Keystoned Ed's post refers to his Tyrone station build. Tyrone Station Link
BTW - I have the Walther's water tower, but have not built it yet. I have been looking at the Plastruct Bulk Oil Storage tank to go along with a near-completed Walther's Phoenix Fuel depot and have a spot for on the layout. I have lots of tanker cars and needed a place to park a few.
Edit 2/18/2021 - found another forum topic regarding modifying the MTH station Enhancing MTH Passenger Station There is so much info on this Forum - its really hard to find unless you know exactly what you are looking for and pick just the right search terms.
This is why I love this place. Every time I come here, I pick up new ideas . Bob’s use of card stock printouts to achieve such realistic results is eye opening as well as the use of tunnel photos. Simple and so very effective. Chris’ mortaring techniques seem a lot easier than the paint method I’ve been using and his results are outstanding. This is all very relevant and timely for me with my current projects. Thanks guys. Great stuff.
@Strap Hanger posted:This is why I love this place. Every time I come here, I pick up new ideas . Bob’s use of card stock printouts to achieve such realistic results is eye opening as well as the use of tunnel photos. Simple and so very effective. Chris’ mortaring techniques seem a lot easier than the paint method I’ve been using and his results are outstanding. This is all very relevant and timely for me with my current projects. Thanks guys. Great stuff.
Now I'm truly humbled.
Thank you!
Bob
Attachments
Excellent projects everyone!
Chris you did a great job on that MTH station!
Bob, The 'light at the end of the tunnel' really makes that scene even better.
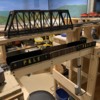
I posted yesterday on my Blackwater Canyon Line topic about my lift up bridge project following the design by Mike g. Here are photographs of the lower bridge up and down along with the upper bridge just set in place to check the height of the piers I'm working on for each side. There is still a lot more to do, but there is defiantly progress, that with all my trial and error, it might just work.
Attachments
Mark, Thanks very much. The lift gate, the layout and the back drops are looking great !!!! I haven't been following your layout thread, so thanks for sharing that here. You have come a long way in a short period of time.
Strap Hanger: Thanks, but the Lightweight Spackling Putty isn't my original idea, I am pretty sure I read about it here, as well as seeing it on the Black Diamond Railway videos. I did the white/gray latex paint brick mortar for years. The spackling is much easier to control, not nearly as messy... I can remember going through tons of rags and paper towels trying to get the paint off the face of the bricks, but leave enough in the mortar lines. Note: Don't skip the step of sealing the brick with flat clear coat before doing the mortar... Don't ask how I know how important that step is !!
I took out my notes on how I weathered my Atlas H21a PRR Red Oxide Hoppers. Boy am I glad I finally started writing detailed notes for weathering cars/buildings wiring diagrams for relays etc. . I was dying to see if I could duplicate the weathering effect, or at least get close, I am pretty pleased so far. So just did 6 more hoppers, the hoppers in the photos below with the wood blocks are from the original batch done 2 to 3 years ago.
I would have been totally starting from scratch if I hadn't documented the colors, the amount of acrylic paint to water in the wash.
Attachments
Great projects everyone! I just love coming here and reading what everyone is doing! Chris after fallowing you for along time I would have to say you could give Rich Battista a run for his money on your methods you use on your layout!
I hope everyone has a great day and finds time for there layout (Something I have been missing) But most of all I hope your all having fun!
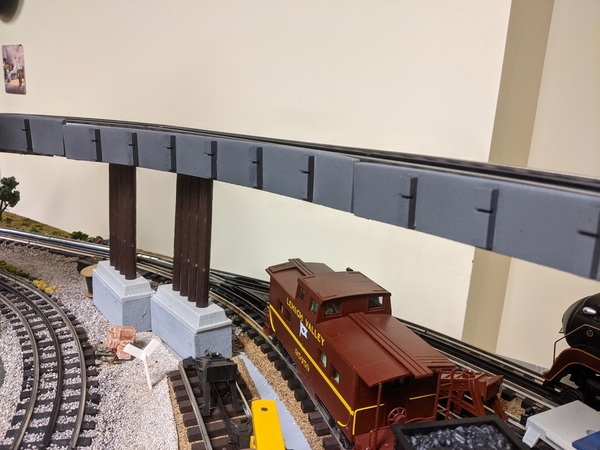
My first Covid/post-retirement train project was to add "girders" to my elevated track which had been "suspended in mid-air by magic" for 18 years. Recently, inspired by all the great work I see on the forum, as well as by learning some new painting techniques on YouTube, I decided it needed upgrading already in less than a year.
Here is the first attempt, which I consider now to be rather amateurish and a bit cartoonish:
Here is the "new and improved" version:
It was also quite simple and inexpensive. It is strips of cardboard cut from tablet backers. The verticals are just narrow craft sticks cut and glued on with PVA glue at a consistent distance via a jig (a piece of scrap wood). Then, all was painted with 2 coats of gray craft paint, then dry brushed with a burnt umber/red mix of craft paint, and finally washed with a black wash. Glued onto the ties with Gorilla Clear Grip Glue (my new favorite glue!).
I toyed with adding horizontal sticks top and bottom between the verticals to be more prototypical, but 90% of the track is curved, so bending to fit and holding in place for gluing with those on there seemed to be far more trouble than it was worth. Not to mention how much longer the cutting/gluing of sticks would have taken.
Attachments
Nice work and great idea Brad. The cardboard easily conforms to the curve. The height of the girder bridges faces in real life are massive and add a nice dimensional element to a model rr.
Edit: Just finished watching your layout video. Cool tidy layout with lots of color and interesting elements. The commuter train under a part of the layout is well done. Cheers
At age 70, I finally added my first Burlington Northern equipment to my railroad. For some reason, I passed the BN on my list of engines and cars to purchase. I have looked at the BN Coal Train, but the new aluminum and green rotary bathtub gondolas finally caught my imagination. The new Lionel SD40-2 with the BN nose markings finally sold me on the Burlington Northern. It is really nice that it has operating ditch lights. Here is a brief video of two SD40-2 engines pulling 16 cars. The third dummy engine had to be returned due to shipping damage and missing parts. Hopefully next week I will be able to add it to the two engines and shoot another video.
Sincerely, John Rowlen
Attachments
@pennsynut posted:Nice work and great idea Brad. The cardboard easily conforms to the curve. The height of the girder bridges faces in real life are massive and add a nice dimensional element to a model rr.
Edit: Just finished watching your layout video. Cool tidy layout with lots of color and interesting elements. The commuter train under a part of the layout is well done. Cheers
Thank you, @pennsynut !
Yes, the girders are tall. 1.5" so I guess that's 6' in scale. The older ones were smaller at just over 1", and I toyed with keeping these that size, but I wanted a more impactful look. Thankfully, I am quite OK with NOT being a true scale guy! ![]()
@Brad Trout posted:My first Covid/post-retirement train project was to add "girders" to my elevated track which had been "suspended in mid-air by magic" for 18 years. Recently, inspired by all the great work I see on the forum, as well as by learning some new painting techniques on YouTube, I decided it needed upgrading already in less than a year.
Here is the first attempt, which I consider now to be rather amateurish and a bit cartoonish:
Here is the "new and improved" version:
It was also quite simple and inexpensive. It is strips of cardboard cut from tablet backers. The verticals are just narrow craft sticks cut and glued on with PVA glue at a consistent distance via a jig (a piece of scrap wood). Then, all was painted with 2 coats of gray craft paint, then dry brushed with a burnt umber/red mix of craft paint, and finally washed with a black wash. Glued onto the ties with Gorilla Clear Grip Glue (my new favorite glue!).
I toyed with adding horizontal sticks top and bottom between the verticals to be more prototypical, but 90% of the track is curved, so bending to fit and holding in place for gluing with those on there seemed to be far more trouble than it was worth. Not to mention how much longer the cutting/gluing of sticks would have taken.
Brad, great idea! I always like it when something can be built from regular stuff just laying around! I do alot of scratch building just because I can't afford alot of the stuff I would like. So I just study what others have and try to build it with what I have!
Nice Job!
@Brad Trout posted:My first Covid/post-retirement train project was to add "girders" to my elevated track which had been "suspended in mid-air by magic" for 18 years. Recently, inspired by all the great work I see on the forum, as well as by learning some new painting techniques on YouTube, I decided it needed upgrading already in less than a year.
Here is the "new and improved" version:It was also quite simple and inexpensive. It is strips of cardboard cut from tablet backers. The verticals are just narrow craft sticks cut and glued on with PVA glue at a consistent distance via a jig (a piece of scrap wood). Then, all was painted with 2 coats of gray craft paint, then dry brushed with a burnt umber/red mix of craft paint, and finally washed with a black wash. Glued onto the ties with Gorilla Clear Grip Glue (my new favorite glue!).
I toyed with adding horizontal sticks top and bottom between the verticals to be more prototypical, but 90% of the track is curved, so bending to fit and holding in place for gluing with those on there seemed to be far more trouble than it was worth. Not to mention how much longer the cutting/gluing of sticks would have taken.
Very nice Brad. I've done similar with balsa. My goal was simply to cover the edge of the luan ply I used for track bed.
Bob
Attachments
@RSJB18 posted:
Yours also looks great, Bob!
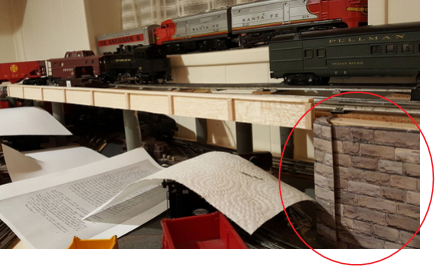
I also like your rock wall. Is that commercial or did you make it? Learning how to make very similar walls is what enhanced my confidence (and desire) to make the upgraded girder.
Attachments
@Brad Trout posted:
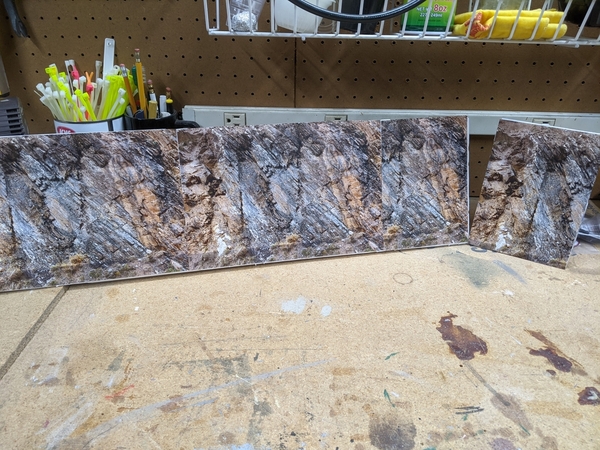
Brad- everyone comments on these walls. They are printed images. I use card stock for the prints and mount them to thin cardboard. Cereal boxes from Costco/ BJ's are perfect. I found them on line on a site called textures.com. You can set up a free account that gives you a limited number of free downloads. I save the files to my cloud file storage and can access it any time I need more prints.
I like using paper prints- cheap, easy, and when I take this layout down to build a bigger one, it won't hurt to throw them away.
Attachments
@RSJB18 posted:Brad- everyone comments on these walls. They are printed images. I use card stock for the prints and mount them to thin cardboard. Cereal boxes from Costco/ BJ's are perfect. I found them on line on a site called textures.com. You can set up a free account that gives you a limited number of free downloads. I save the files to my cloud file storage and can access it any time I need more prints.
I like using paper prints- cheap, easy, and when I take this layout down to build a bigger one, it won't hurt to throw them away.
OMG! Wow they look so realistic (textured), especially in that original photo I circled. Amazing!!
I built mine from foam and then lots of painting work I learned from this YouTube crafter.
Attachments
I love these ideas to help avoid floating track syndrome.
One of several methods I've used is simple, but effective. I used plastic edging from Home Depot, the kind used to put a finishing edge on ceramic floor tiles. They have an "L" shape in profile and can easily be curfed with a Dremel to bend around curves too. While I've used it above the rails, the same method can be used below them.
It comes in white or beige, I painted mine with Krylon rattle can "red" primer
Attachments
Brad, Bob always does a great job with his walls, he also prints up alot of other things for his layout. But I do have to say your wall and portholes look outstanding to me!
John, that edging looks great! Better then tracks floating in air!
Before I start on what I did today I really have to thank a few folks. I would like to take the time to thank Stan2004, Consolidated Leo, and Chris A. without these guys I would have not been about to get my signal bridge working. That being said its been a 2 week project as I am very slow when it comes to electrical stuff. It took me alot of trial and error but I just took what everyone kept telling me and just sat down this morning in the train room thinking it over. I just started from the beginning and went step by step making sure I fallowed all the information. Then low and behold it worked! LOL Here are a couple videos.
The last video and kind of a layout room update. I hope you all enjoy!
Attachments
Mike g., great videos, very nice signal bridges, cool trains, I like it a lot. (Mike g. was that your local news station on TV?) Wow. John Rowlen, beautiful BN diesels and a cool coal train, great video, and the sounds are great, cool trains. I just took a few pictures of the layout area today. Happy Railroading Everyone 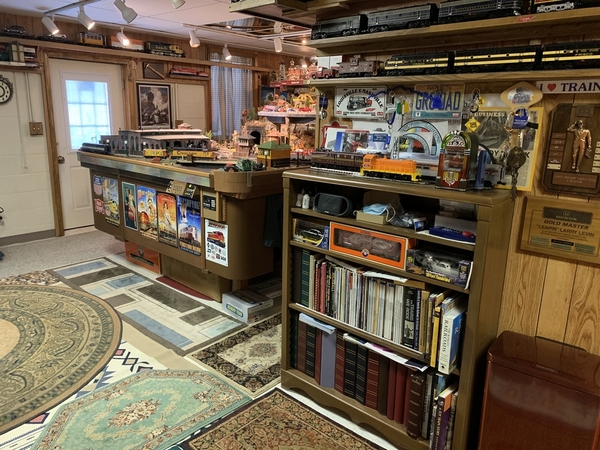


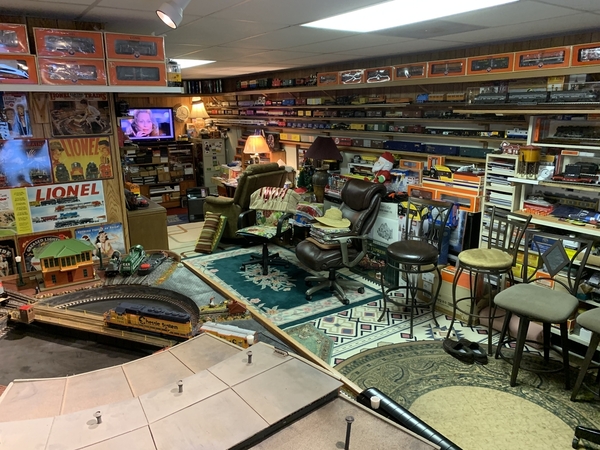


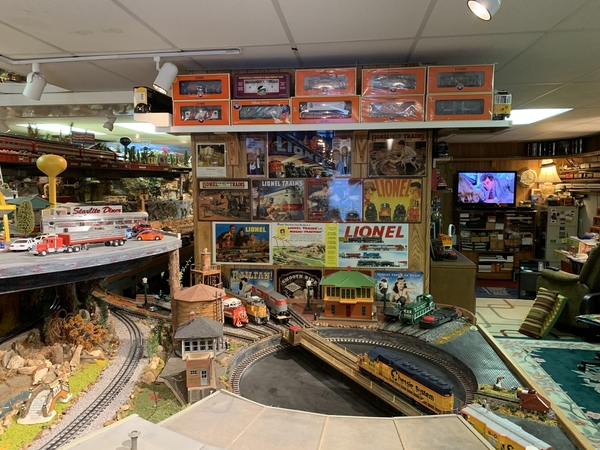
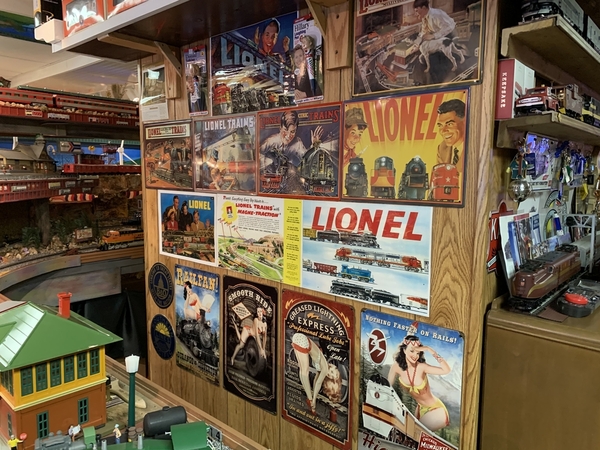
Attachments
Brad, Your elevated track bridges looks great, as does Bob's. Brad, it looks like you used the same plastic timber trestle bents I used on mine. Mine is still floating, but it has only been a year, so I have lots of time. ![]()
Mike, The signals and your layout look great!
John, The BN train looks great!
Larry, Lots to see on your layout as always.
I worked some on my lift up bridges, but nothing new to photograph.
Attachments
Thanks Larry and yes that was the local ABC news at 11 cause they cant come on later or it would clash with ABC National program and soap operas. LOL I know one thing I sure wish I lived closer to you I would give almost anything to see your layout in person!
Mark , thanks for the kind words!
Mikeg: Great layout videos. Busy place. Signal bridge works well. You have made a lot of progress on your layout. Cheers
Great pics and layout LeapinLarry.
Amazing how, within a single hobby, layouts and train rooms can be so different while, at the same time, the same in terms of fun.
How many levels do you have going there? I think I counted seven.
Love the room decorations and displays too.
@mike g. posted:Brad, Bob always does a great job with his walls, he also prints up alot of other things for his layout. But I do have to say your wall and portholes look outstanding to me!
John, that edging looks great! Better then tracks floating in air!
Before I start on what I did today I really have to thank a few folks. I would like to take the time to thank Stan2004, Consolidated Leo, and Chris A. without these guys I would have not been about to get my signal bridge working. That being said its been a 2 week project as I am very slow when it comes to electrical stuff. It took me alot of trial and error but I just took what everyone kept telling me and just sat down this morning in the train room thinking it over. I just started from the beginning and went step by step making sure I fallowed all the information. Then low and behold it worked! LOL Here are a couple videos.
The last video and kind of a layout room update. I hope you all enjoy!
Very nice! So you like Coors a little bit, huh?
@Mark Boyce posted:Brad, Your elevated track bridges looks great, as does Bob's. Brad, it looks like you used the same plastic timber trestle bents I used on mine. Mine is still floating, but it has only been a year, so I have lots of time.
Mike, The signals and your layout look great!
John, The BN train looks great!
Larry, Lots to see on your layout as always.
I worked some on my lift up bridges, but nothing new to photograph.
Mark, hopefully you will do yours once instead of twice, like I did! You'll have a wide variety of choices from this post alone!
You also have the MTH operating station, I see. I do as well and it's one of my favorite accessories, especially when kids come over. It's such a mystery to them!
Lionelski, thank you, however, you have a cool layout and a great train room, lots of wall decor and also some nice trains on neat shelves. I left you a message on the other thread, Encouraging others to enjoy toy trains. I’ve never seen two layouts alike as it seems everyone sees the world differently, that’s why this forum is so much fun. My layout actually has 5 levels. Tomorrow I’ll take pictures of all sides for your review. Happy Railroading Everyone 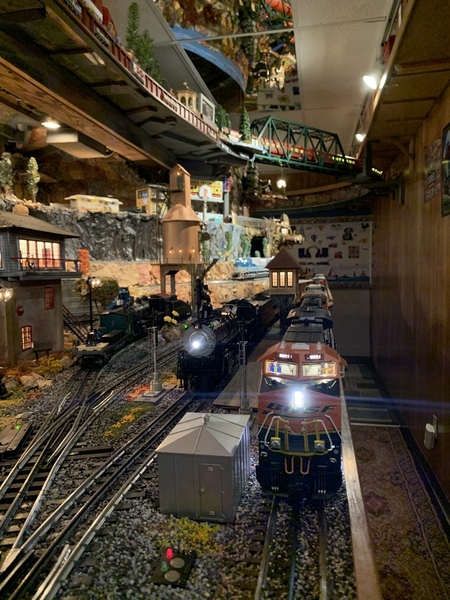


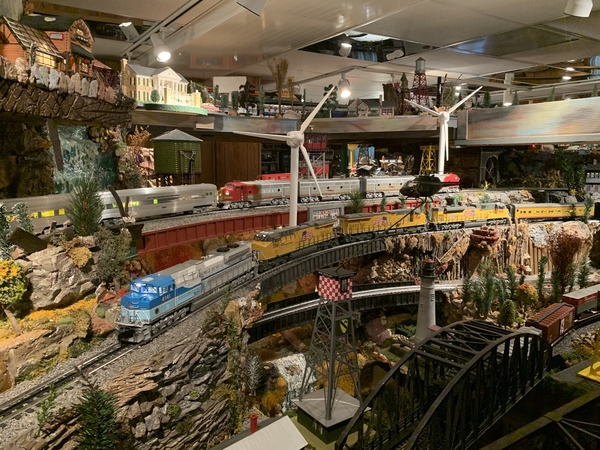
Attachments
Attachments
@Brad Trout posted:Mark, hopefully you will do yours once instead of twice, like I did! You'll have a wide variety of choices from this post alone!
You also have the MTH operating station, I see. I do as well and it's one of my favorite accessories, especially when kids come over. It's such a mystery to them!
Brad, thank you! If all goes with it as the rest of this layout, I’ll end up doing it 3 times! 😄 The operating station amazed one of my adult daughters, in fact!
@farmerjohn posted:
WOW, Dry Gultch, I am getting Thhirsty.. just looking a it. I can bring a shovel, a pick-axe and Canteen if you could use a hand
Farmerjohn: That is nice rock work and what great looking bridges.
Farmerjohn, that’s a Wow, I’m trying to picture in my mind where this scene is located on your layout? Could you post a picture from behind this area? It’s a great looking scenic job. Is this behind your station area? Awesome detailing. I’ll be glad when this pandemic ends and we can visit again. Happy Railroading Everyone
Farmerjohn, thanks for sharing the dry gulch photos. Really exceptional modeling work there, the elevation changes, rock outcroppings, and blending of colors is awesome.
Mike g: Enjoyed your videos ! The layout is looking great Mike, doesn't seem like that long ago that you were finishing the train room, building the "she shed" !!!
LeapinLarry: Your train room is beautiful, love the mix of an outstanding layout plus all the shelves, railroad signs, art work.
I opened up my MTH N6b Woodside caboose yesterday, the one with the operating signalman. Wanted to put the Kadee couplers on it, and lower it. Glad that's done ! Working on that caboose was "character building" to say the least.... Didn't take that many photos, the first 3 show the drilling out of the dreaded MTH top-hat that raises the freight cars too high, then install thin flat fender washer in place of top hat
Ironically, when I installed the Kadee to the MTH pre drilled holes with NO SHIM between, it was dead on with the coupler height gauge.
Attachments
Brad, thank you sir, you might say I like coors alittle! LOL
Larry, what a great shot of your train room. If you haven't maybe one day you can do a walk around video of it for the rest of us!
FarmerJohn, Outstanding work! Looks so real. But I do have a question for you, what is the spacing for your post on your cable guard rail?
I hope everyone has a great weekend, I think I am going to be spending most of my time under the layout cleaning up the wiring and adding TVS's to protect my engines and lighted cars.
Most of all I hope you all have fun!
@chris a posted:Farmerjohn, thanks for sharing the dry gulch photos. Really exceptional modeling work there, the elevation changes, rock outcroppings, and blending of colors is awesome.
Mike g: Enjoyed your videos ! The layout is looking great Mike, doesn't seem like that long ago that you were finishing the train room, building the "she shed" !!!
LeapinLarry: Your train room is beautiful, love the mix of an outstanding layout plus all the shelves, railroad signs, art work.
I opened up my MTH N6b Woodside caboose yesterday, the one with the operating signalman. Wanted to put the Kadee couplers on it, and lower it. Glad that's done ! Working on that caboose was "character building" to say the least.... Didn't take that many photos, the first 3 show the drilling out of the dreaded MTH top-hat that raises the freight cars too high, then install thin flat fender washer in place of top hat
Ironically, when I installed the Kadee to the MTH pre drilled holes with NO SHIM between, it was dead on with the coupler height gauge.
You know Chris if I opened up a caboose and found all that stuff inside the cover would go right back on! LOL Great Job!
Trust me Mike, that thought entered my mind a couple of times, when I opened it up. And then a couple of hours in, and beyond the point of no return I was thinking: "I should have my head examined !"..... I have 2 more of these PRR N6b cabin cars, fortunately not with operating signalmen, so they should be somewhat less challenging. I really like the N6b caboose, but it's so short that when it's sitting too high, it doesn't look right. I think it's time to put all the Kadee parts away for a while, and start my Union Station Kitbash.
Your probably right, plus I cant wait to see the Union Station Kitbash! One question when you made your korber flats, what did you use to cut the walls?
Mike g: my first choice is the 7 1/4 inch 60 tooth Freud Carbide tipped finish cut circular saw blade mounted in my 10 inch table saw with a zero clearance throat plate. I know others choose dremel and razor saws.... I get really clean straight cuts and can even to 45 degree miters on the table saw.
its a really thin kerf so it doesn't remove much material.. i think its a $20 blade at home depot. I buy them when they on sale once a year - 2 for $20. Smaller diameter slows the speed and reduces melting
Thanks Chris, I dont know if a 7 1/4" blade would fit on my armature on my table saw. I will have to check that one out!
Mike I'd be shocked if it didn't work. I have interchanged these 7 1/4 inch blades on 3 different types of table saws, same 9/16" diameter arbor.... I think it's 9/16" ?? If I am not cutting really thick slabs I use the thinner kerf blade for wood too as it makes 1/2 as much saw dust to clean up !!
Attachments
Ok Chris, I will have to give it a try and let you know!
Randy thank you sir! I still have a long way to go, but most of it has been fun! Sometimes the wiring fries my brain though! LOL
@j. constible posted:
J. your platforms are looking outstanding! But your right, your going to need alot more people! LOL
Today, I installed a Tortiose switch machine on a GarGraves turnout. The machine that originally came with the turnout has been a challenge to work properly. Not sure if I'm not wiring it correctly or what. So, I gave up on the original and tried the Tortoise. The wire lever is a bit too small and weak for the O scale turnout. But, after some working, I managed to free up the switch enough that it's working pretty well right now. I really wish Tortiose would send a larger size wire lever for larger scale turnouts. They claim it works for O scale but they leave it up to the buyer to find an alternative wire lever. I'll be installing these on two more turnouts. Wish I could find a stiffer wire lever somewhere. I think it would help.
farmerjohn,
Fantastic modeling. Rock work, ground foam, trees...top notch!
Dave
FarmerJohn, that is truly remarkable. WOW!
Farmerjohn, everything looks great!
I travelled to a train show today in Canfield Ohio. There wasn't a lot to interest me there except one item for the layout. I'll report more on that when I get it to the layout.
UH OH!
Steve
@John Rowlen posted:At age 70, I finally added my first Burlington Northern equipment to my railroad. For some reason, I passed the BN on my list of engines and cars to purchase. I have looked at the BN Coal Train, but the new aluminum and green rotary bathtub gondolas finally caught my imagination. The new Lionel SD40-2 with the BN nose markings finally sold me on the Burlington Northern. It is really nice that it has operating ditch lights. Here is a brief video of two SD40-2 engines pulling 16 cars. The third dummy engine had to be returned due to shipping damage and missing parts. Hopefully next week I will be able to add it to the two engines and shoot another video.
Sincerely, John Rowlen
oOHHH Be Still My Heart! Love it. Coming from ORE country, and now, well they are bringing Oil through Minneapolis and St Paul, I love the pattern of a consist hauling... Very Nice, thanks for the share
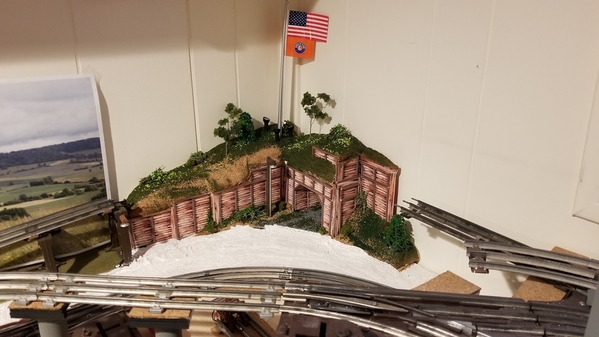
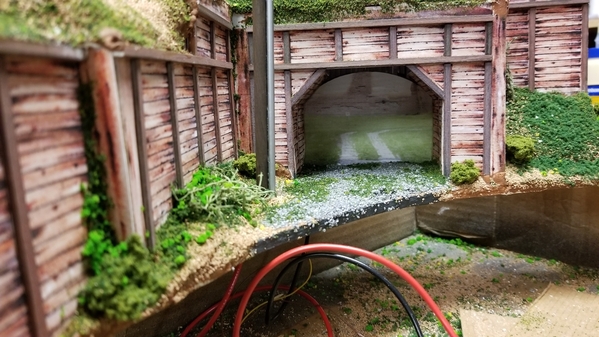
I finally set my tunnel diorama on the layout and put down plaster cloth. Hopefully I can get it finished up soon so I can run trains again.
Attachments
This project has turned out very well. Depending upon what goes in front of the entrance: have you considered using a mirror at the back of the tunnel?
@Tranquil Hollow RR posted:This project has turned out very well. Depending upon what goes in front of the entrance: have you considered using a mirror at the back of the tunnel?
I placed a print of a gravel road behind the tunnel. I thought about a mirror but it just didn't look right to me.
Here's a better pic.
Attachments
The scene looks great, Bob!
Nice, that works.
@Mark Boyce posted:The scene looks great, Bob!
@Tranquil Hollow RR posted:Nice, that works.
Thanks Gents! I got a coat of brown paint on the plaster cloth this afternoon. Slow but steady progress.
@rscott521 posted:
Now fill it up! ![]()
Construction of my kit- bashed Union Station has begun ! I am about a day into it. Plans changed due to the parts available as I had purshased what was described as 2 stations already cut up, but project never finished. That's OK after viewing a lot of photos of real and modeled stations, I decided to make a very large arch for the main entrance, rather than use the small factory sized round top windows and doors that come with the MTH kits. Not having enough doors/windows & columns made that decision easy ! At least the plan is coming together as I "wing it" and I am about 8 hours in so far.
Attachments
Chris,
Literally a "Union" of many stations. It looks very promising.
John Rowlen
Chris - I like your vision. Will the final version be like the left side (2nd photo)? Looking forward to your progress.
You are off to a good start Chris. That is going to be an impressive structure when it's done.
Bob
@chris a posted:Construction of my kit- bashed Union Station has begun ! I am about a day into it. Plans changed due to the parts available as I had purshased what was described as 2 stations already cut up, but project never finished. That's OK after viewing a lot of photos of real and modeled stations, I decided to make a very large arch for the main entrance, rather than use the small factory sized round top windows and doors that come with the MTH kits. Not having enough doors/windows & columns made that decision easy ! At least the plan is coming together as I "wing it" and I am about 8 hours in so far.
Really nice work, Chris! I'm doing a similar project with MTH banks, although my design is much simpler. I wish i had someone's already cut banks like you. It might have made it a little easier for me. Something about cutting up these beautiful buildings just kept me from starting.
Good morning everyone! This past weekend I was able to get my hands on a couple of new VL GS-2 locomotives, so I decided to take them for a spin around the layout! Hope you enjoy this video and happy railroading!
Thanks for the positive feedback. Matt, based on the amount of cutting and fabricating I am having to do on the center, Main Entrance Hall Section, I am pretty much thinking I will leave the left and right wings alone. One benefit I am seeing at this point, is I have the option, if I need or want to, of decreasing the total width of the station by sliding the left and right wings toward the center. Whether each wing has 3 Palladium windows or 4 Palladium ( round top ) windows isn't going to change the stations overall appearance that much. Once the center hall is near done, then I will determine how wide I will make entire structure.
This station will be sitting on an elevated platform over the passenger yard tracks, so there's still many decisions to make about the elevated platform size, roadway, parking facilities up on the deck, etc. The track spacing below is not wide enough to get into an elaborate platform scene below... having 5 total stub tracks below ( one of which is an "interchange track" ). Having the 5th stub siding, was a higher priority than losing one siding and having platforms between tracks.
StrapHanger: I am not one for "looking back", I should have opened the carton of the cut up parts I purchased, but I didn't. Having the walls cut apart, was somewhat of a benefit, the downside is that I didn't actually get all the sides/parts for (2) complete MTH Bank Buildings. Anyway, had I received the second front wall with the columns, entrance doorway etc, I probably would have ended up with a more traditional kit-bash. I do prefer the modified center section with the large arch, I am contemplating different methods for fabricating my own scratchbuilt tall window/entry door assembly out of plastruct parts and either real glass or plexi-glass window.
Here's some photos of the passenger yard tracks.
Attachments
@chris a posted:Here's some photos of the passenger yard tracks.
Is the station going to be above the tracks?
Good morning Bob, Yes the platform will be roughly 24 deep x 40 long (wide) and will sit above the yard tracks. In the first photo, the 2 tracks to the left and above the yard tracks is the main line, so the plan has been to put the station above the yard and roughly at the height of the main line. I had my chicken and egg debate, do I build the station first, or the platform and decided the station needed to be built first then I could fabricated the platform to serve the station....
The yard tracks are on 4 inch centers, so 5 of them consume about 20 + inches of depth with clearance... The long axis of the station roughly 36 inches as it sits now, will be parallel to the main and yard tracks. The depth of the station which is around 14 inches, leaves me another 10 inches + for roadway so that the 24 - 26 inch platform dimension clears the 20+ wide yard below.
Sorry for the "wordy" explanation....
StrapHanger: One other thought I will share from my experience cutting these parts up. I do as many "straight cuts" as possible on my table saw with a fine tooth blade. I thought I could tilt the blade to 45 degrees and cut through the corners and then have a good seam that I could re-attach. NOT REALLY !!...
After one cut that took a long time to set up, I ended up deciding that I was better off cutting the walls away from the corner, like a 1/2 to 3/4 inch away, and re-bond the new pieces together with super glue. I tried Testors Styrene solvent, but the MTH kits must be made out of ABS. I am told the solvent for ABS is Acetone, but my can of Acetone was empty yesterday so I used CA Gel Glue by Loctite yesterday with good results.
@RSJB18 - Thanks for the inspiration and the link to textures.com!
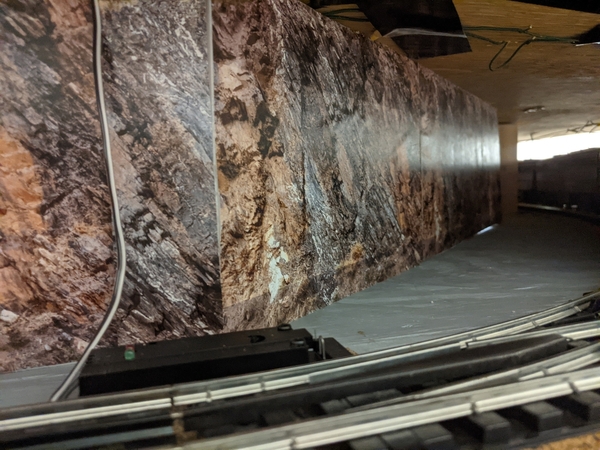
I decided to add some rock walls inside my tunnel. They will only be visible to the Lionel Caboose Cam that my wife got me for Christmas, so I didn't go crazy with trying to be too precise. That said, this was a very easy and quick way to start doing something I never thought I'd have to do when I started this layout in 2002-03 (i.e. scenic INSIDE tunnels)! LOL
On the work bench:
In the tunnel:
Attachments
@chris a posted:Thanks for the positive feedback. Matt, based on the amount of cutting and fabricating I am having to do on the center, Main Entrance Hall Section, I am pretty much thinking I will leave the left and right wings alone. One benefit I am seeing at this point, is I have the option, if I need or want to, of decreasing the total width of the station by sliding the left and right wings toward the center. Whether each wing has 3 Palladium windows or 4 Palladium ( round top ) windows isn't going to change the stations overall appearance that much. Once the center hall is near done, then I will determine how wide I will make entire structure.
This station will be sitting on an elevated platform over the passenger yard tracks, so there's still many decisions to make about the elevated platform size, roadway, parking facilities up on the deck, etc. The track spacing below is not wide enough to get into an elaborate platform scene below... having 5 total stub tracks below ( one of which is an "interchange track" ). Having the 5th stub siding, was a higher priority than losing one siding and having platforms between tracks.
StrapHanger: I am not one for "looking back", I should have opened the carton of the cut up parts I purchased, but I didn't. Having the walls cut apart, was somewhat of a benefit, the downside is that I didn't actually get all the sides/parts for (2) complete MTH Bank Buildings. Anyway, had I received the second front wall with the columns, entrance doorway etc, I probably would have ended up with a more traditional kit-bash. I do prefer the modified center section with the large arch, I am contemplating different methods for fabricating my own scratchbuilt tall window/entry door assembly out of plastruct parts and either real glass or plexi-glass window.
Here's some photos of the passenger yard tracks.
Chris:
Please continue posting progress updates on your passenger terminal project. Urban passenger station scenes are among my favorite model railroad likes. I am eager to see the final product when the time arrives.
@chris a posted:Construction of my kit- bashed Union Station has begun ! I am about a day into it. Plans changed due to the parts available as I had purshased what was described as 2 stations already cut up, but project never finished. That's OK after viewing a lot of photos of real and modeled stations, I decided to make a very large arch for the main entrance, rather than use the small factory sized round top windows and doors that come with the MTH kits. Not having enough doors/windows & columns made that decision easy ! At least the plan is coming together as I "wing it" and I am about 8 hours in so far.
Chris:
Superb work! Bravo!!!!!!
So, Today I finished the Traditional size 681 Turbine, gave er a buff n fluff, repaired the smoke and she wanted to make delivers this morning. I was happy to oblige, Blowing smoke rings, she arrived at the Prairie town of Hope 4Layout Valley and crossed the rickety old wooden bridge once again. She pulls smooth and strong. Happy day
Attachments
@Miggy posted:So, Today I finished the Traditional size 681 Turbine, gave er a buff n fluff, repaired the smoke and she wanted to make delivers this morning. I was happy to oblige, Blowing smoke rings, she arrived at the Prairie town of Hope 4Layout Valley and crossed the rickety old wooden bridge once again. She pulls smooth and strong. Happy day
Why tape over the gi-raffe car? Doesn't the bottom latch work?
Mitch
Forget the tape better watch the lights on the gondola as they bang the bridge hard enough to tilt the car.
Always something to do on the carpet layout. Good points all... lol, Fortescue was shaking his head when he saw the tape. it was handy and, well, without my glasses, tape. The Flashing lights was a temporary thing turned permanent, so, When I find 1/32 cotter pins, ill bracket the lights for the sheep gondola, which also need gorilla glur to the car behind it. That copler is a worst offender of letting loose. It is heavy, but won't pull 5 cars, I mean "A Car".. So the giraffe kept biting the sheep, and he was easier to tape shut.
.....did anyone notice the SMOKE? roflmao, I thought that was cool
Cleaned up a plumbing leak from kitchen - lol
@Miggy posted:That copler is a worst offender of letting loose. It is heavy, but won't pull 5 cars, I mean "A Car"..
https://ogrforum.ogaugerr.com/...hood-keep-em-coupled
So the giraffe kept biting the sheep, and he was easier to tape shut.
(shakes head goodnaturedly)
@Miggy posted:.....did anyone notice the SMOKE? roflmao, I thought that was cool
Smoke rings are common for, and one of the best things, about PostWar steamers..
The other things I love about PostWar engines are Magne-Traction, E-unit buzz, air whistle tenders, bicycle horn diesels, the smell of ozone, ease to repair, reliability, robustness and the nostalgia factor
@Lionelski posted:Smoke rings are common for, and one of the best things, about PostWar steamers..
The other things I love about PostWar engines are Magne-Traction, E-unit buzz, air whistle tenders, bicycle horn diesels, the smell of ozone, ease to repair, reliability, robustness and the nostalgia factor
John, I haven't met you and I already like ya! <salute> Love the drawing on your site of Lionelski!! get lots of hugs, they grow up fast
@geedubcpa posted:Cleaned up a plumbing leak from kitchen - lol
Ruh roh.....🤯
@Miggy posted:John, I haven't met you and I already like ya! <salute> Love the drawing on your site of Lionelski!! get lots of hugs, they grow up fast
Thanks Miggy. Hard to believe that the last PostWar Lionel was made 52 years ago
As to them growing up fast, that 5 year old artist will be 16 this year!
Great work everyone!
Bob the corner project turned out perfect!
Chris A. Your union station is a huge project to undertake. I like where its going and will be doing the best I can to keep up to date on your build.
As for me I did nothing in the train room for that last couple of days and I don't see it happening today. But I hope to get out there tomorrow. I have some wiring to do and have to dig out a couple buildings to kit bash into a row of flats for along behind my service yard along the upper tracks.
I hope everyone stays safe and finds time to have fun with there layout and trains!
Thanks Mike- like you I wish I had more time available to work on it.
Bob
@chris a posted:Construction of my kit- bashed Union Station has begun ! I am about a day into it. Plans changed due to the parts available as I had purshased what was described as 2 stations already cut up, but project never finished. That's OK after viewing a lot of photos of real and modeled stations, I decided to make a very large arch for the main entrance, rather than use the small factory sized round top windows and doors that come with the MTH kits. Not having enough doors/windows & columns made that decision easy ! At least the plan is coming together as I "wing it" and I am about 8 hours in so far.
Chris, great idea coming up with a super-sized realistic bank...big enough to be the "FED!" Look forward to seeing the finished product![]()
Just about finished cutting and mitering sections of block walls to finish the veneer on the main entrance arch. Found some thin scrap ABS plastic and used it to line the inside of the arch. Laminated two thin strips together so they would make a rigid surface to glue the individual blocks up into the arch.
Also did the coping cuts to make the bump out fit snug up against the side wall on the right side wing. It would have been easier to modify the side wall of the bank building with the 4 windows but then I wouldn't be able to slide the wing to different lengths. I am thinking about shortening the wings to 3 arch top windows which will make the station about 35 inches across and leave room for the deck to have sidewalks and road surface on both sides. We'll see, not a tonight problem.
Yes, way too much cutting/filing/sanding. But hopefully 90% of that tedious work will all be done on the center section.
Thanks for all the positive comments and likes. Any and all suggestions are welcome as I work through this.
Attachments
My presentation to a NMRA affiliated group on Friday was edited down to this in case you might be interested:
Good morning Chris - thanks for continued posting on the station. Nice work on the central arch. I like the appearance of the left side of the building. Don’t care for the pillars on the right. I’m sure whatever you decide will look great.
@p51 posted:My presentation to a NMRA affiliated group on Friday was edited down to this in case you might be interested:
Great presentation Lee. I skimmed through it but will go back and watch the whole thing over coffee on the weekend.
Bob
I got some ground cover and gravel down last night after dinner. ![]()
Still work to do but I'm happy with the results so far.
I also fired up my new RS-1. MTH did a great job with the sound on this ALCO.
Attachments
Excellent work, Bob. I love how the gravel road flows seamlessly into the tunnel photo. Very realistic looking.


