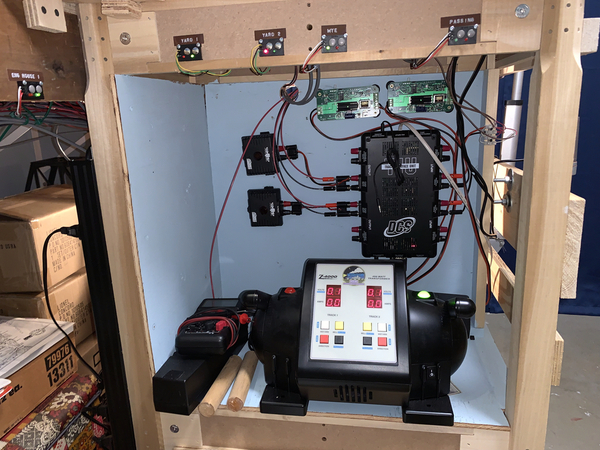
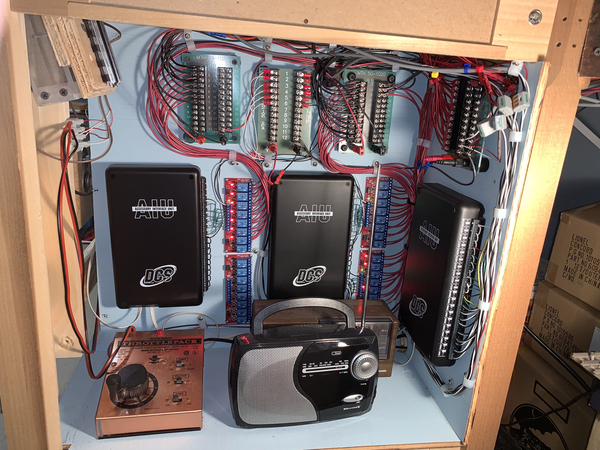
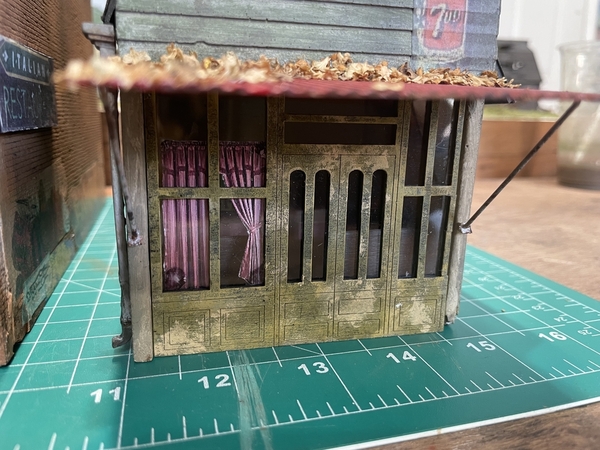
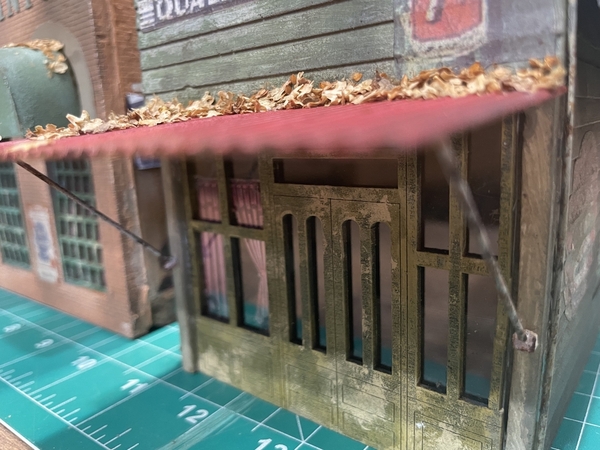
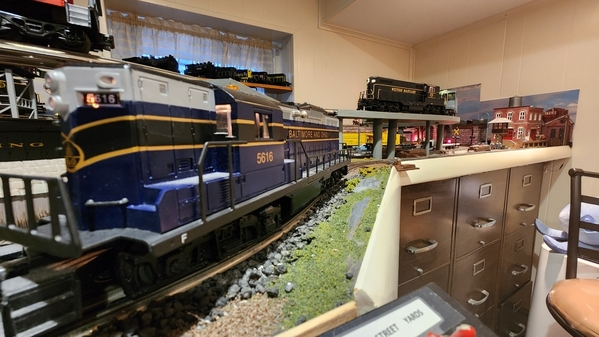
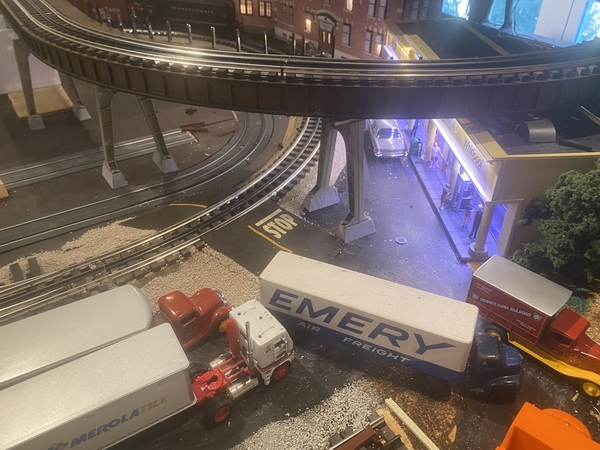
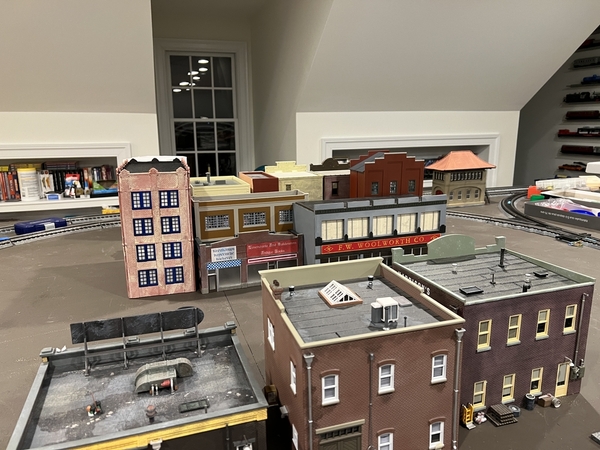
@Bob Golfs that is a really slick way to get to the tough part of the layout and camouflage the support for where the platform will rest.

@leapinlarry the turntable already looks great, but I'm sure the parts from Al will make it better.  Impressive motive power as well.

@Steve Tyler your tunnel lighting method sounds great!  Also the idea for the grandchildren to view trains sounds like a lot of fun.

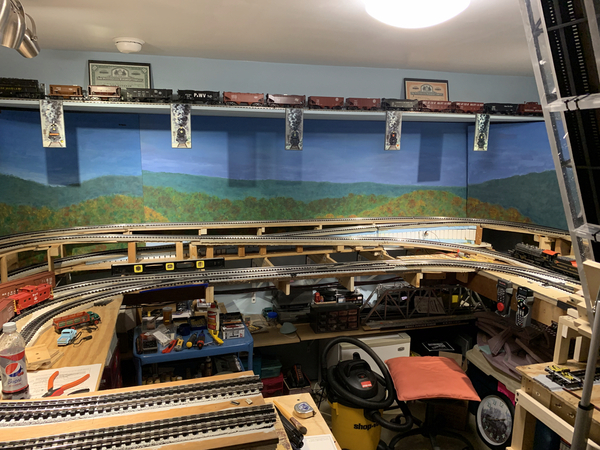
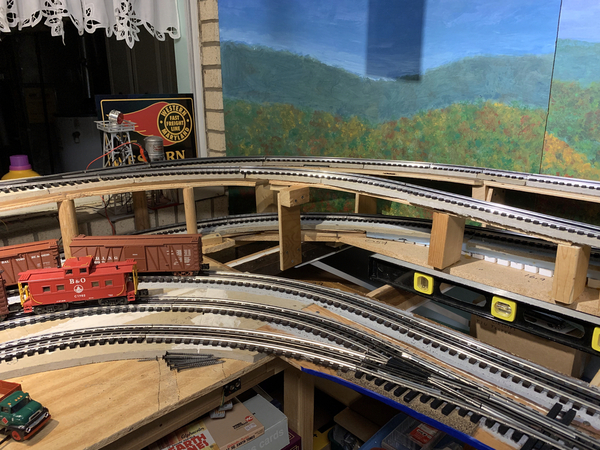
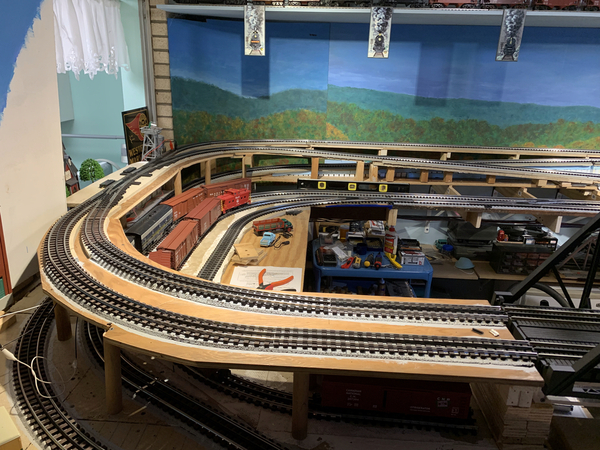
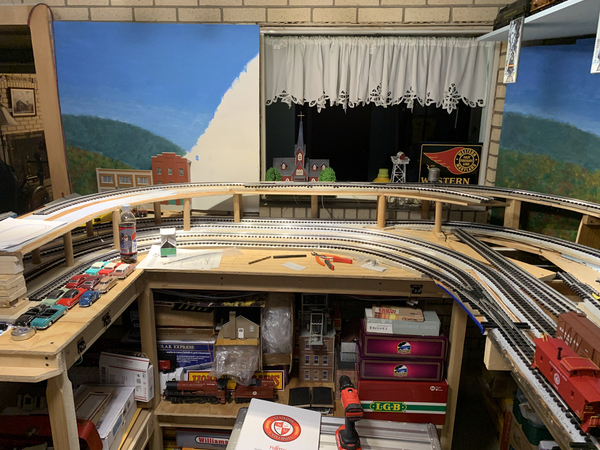
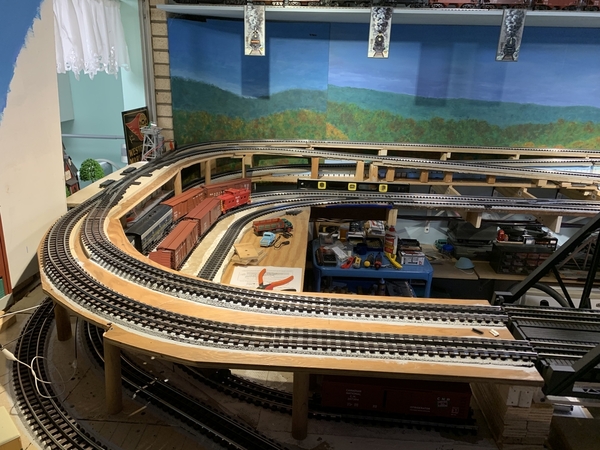
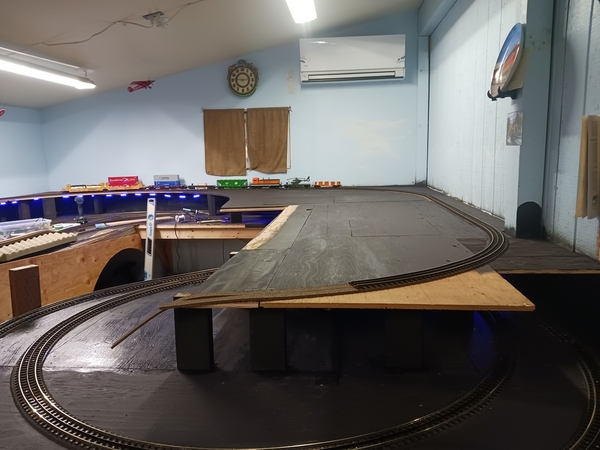
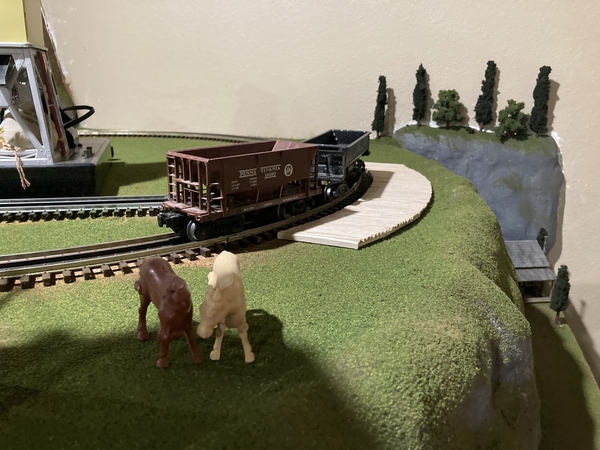
I was able to complete the roadbed and track for converting my layout from an over and under twice around mainline to separate high and low level mainlines with two grades connecting the two loops so trains can move up or down as desired.  Also, I incorporated two yard tracks and a run around track to make up some trains.  Now I have to wire in the new power blocks so I can get rid of a menagerie for jumper wires laying about the layout.

20230315_000938595_iOS20230315_001003713_iOS20230315_220303156_iOS20230206_002318612_iOS20230221_004520823_iOS20230221_004550505_iOS

Attachments

Images (6)
  • 20230315_000938595_iOS
  • 20230315_001003713_iOS
  • 20230315_220303156_iOS
  • 20230206_002318612_iOS
  • 20230221_004520823_iOS
  • 20230221_004550505_iOS
Last edited by Mark Boyce

Looks like a myriad of things happening on this page alone. From the creative to the technical, to just having fun. It's all wonderful.

Mark, things are looking good and it looks like once this project is completed you may be able to move to scenery. From your explanation, your new design creates a great use of the space that you have and you have maximized the operational possibilities. Also, thanks to you I learned a new word..."menagerie".

Dave

Last edited by luvindemtrains

Thank you, Dave, Bill, Jay, Gene, Bob!  Given a lot of space for a layout, I think I would prefer the concept of two mainlines stretching through the countryside from town to town, as often happened in real life.  However, I wouldn’t be able to pay for all the materials to fill the space, so this is a compromise.  😄  Many of you and others have followed my progress on my thread that is linked in the signature line, so you know the retrofit has had its challenges.  Bob, thank you for the compliment.  You are right; the layout shows I was a utilities engineer and not a carpenter.  😆  However, everything is solid so it provides a good base for scenery, which is my favorite part of the hobby besides running trains.

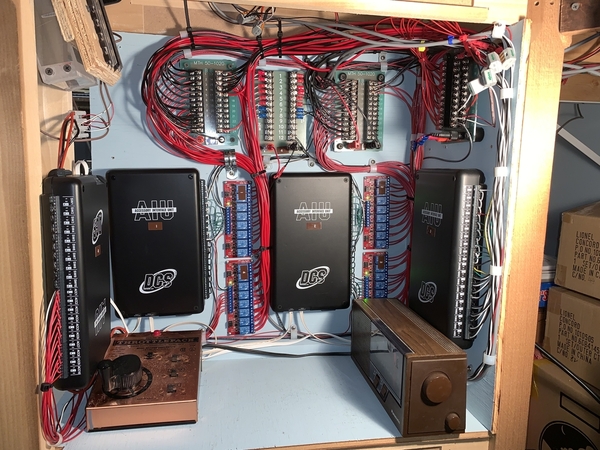
Last evening I took inventory of available AIU ports and solid state relays to connect to power connections.  I have enough relays on the board, but will have to add the spare AIU to the mix.  Bill, you knew I would be adding.  As can be seen, I should have used a larger space for AIUs, but this is my first go at that technology.  I figured out how I will do it.

Dave, our youngest daughter, coming up on her 30th birthday, would use the word plethora instead of menagerie.  🤔

Thank you for all the encouragement!!

WOW- 2 days without a post on this thread.......

So let me do something about that!

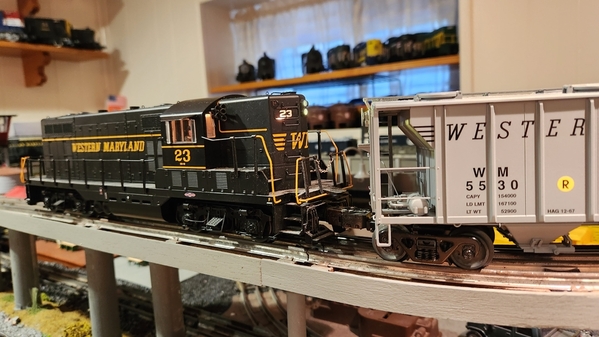
I'm switching out power and rolling stock on my layout. Giving some other engines some run time. I added a Cab 1L since these were last run so I had to program both into the remote last night and give them a run. They both ran OK but do need to get serviced and lubed. I also noticed a problem with the marker lights on the front of the WM Geep that I will need to check.

2023-03-23 08.00.342023-03-23 08.01.122023-03-23 08.01.34

Bob

Attachments

Images (3)
  • 2023-03-23 08.00.34
  • 2023-03-23 08.01.12
  • 2023-03-23 08.01.34
@RSJB18 posted:

WOW- 2 days without a post on this thread.......

So let me do something about that!

I'm switching out power and rolling stock on my layout. Giving some other engines some run time. I added a Cab 1L since these were last run so I had to program both into the remote last night and give them a run.

Bob

So Bob, I’m wondering do you keep a record of when you run your engines? You jogged my memory back about 40 years. There was an article in MR about creating a report sheet. It contained columns for date, engine #, lube, runtime, any problems, remarks. I made one up and my son and I used it for awhile. Don’t know why we stopped.

@pennsyfan posted:

So Bob, I’m wondering do you keep a record of when you run your engines? You jogged my memory back about 40 years. There was an article in MR about creating a report sheet. It contained columns for date, engine #, lube, runtime, any problems, remarks. I made one up and my son and I used it for awhile. Don’t know why we stopped.

I'm a horrible record keeper. My wife was an executive secretary and is the total opposite.....

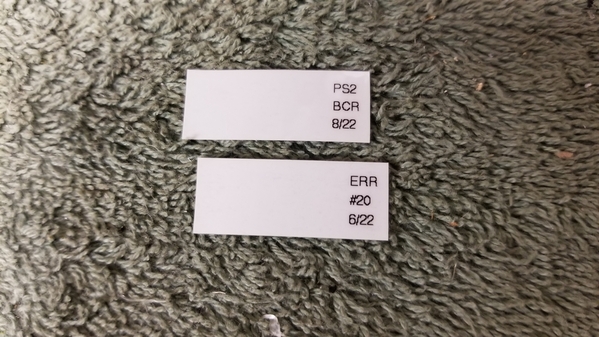
I started an inventory in excel several years go but haven't kept up with it. I used to have a computer on my desk right next to the layout so it was easy to make changes to the file but since my son commandeered the space for gaming, I lost the ready access to the PC. I have started putting small labels on the bottom of my command engines with engine number, battery or BCR, and system type at least. I don't have a full DCS set so no ID #'s on the MTH engines yet.

2022-08-19 17.03.00

Bob

Attachments

Images (1)
  • 2022-08-19 17.03.00
Files (1)
@RSJB18 posted:

I'm a horrible record keeper. My wife was an executive secretary and is the total opposite.....

I started an inventory in excel several years go but haven't kept up with it. I used to have a computer on my desk right next to the layout so it was easy to make changes to the file but since my son commandeered the space for gaming, I lost the ready access to the PC. I have started putting small labels on the bottom of my command engines with engine number, battery or BCR, and system type at least. I don't have a full DCS set so no ID #'s on the MTH engines yet.

2022-08-19 17.03.00

Bob

I should do that. I have at least labeled engines with a BCR. However I have on occasion tried to access an engine with the wrong system. 😱

With yesterdays arrival of #2 anthracite coal from Brennan Model RR Products, I was able to completed the coal loads for my Lionel 25000 LV hoppers. They are currently curing.  Tomorrow I plan to give them a ride around the layout before putting them back on the display shelf.   I used about 1/2 bag of the coal to finish eleven loads.    

IMG_8278IMG_8282IMG_8279IMG_8280IMG_8281IMG_8284

Cheers, Dave

Attachments

Images (6)
  • IMG_8278
  • IMG_8282
  • IMG_8279
  • IMG_8280
  • IMG_8281
  • IMG_8284
Last edited by darlander

thanks bob im trying lol sometimes frustrating but watching all the layouts on YouTube is very inspiring to keep going.they are very big so you work with what you've got and that's satisfying.

Check out the layouts on here. You’ll see many posts and videos of 4x8 layouts. They are excellent and innovative. My own layout is 8x16 with a 1’ river on a piano hinge. When I was laying the track I discarded my plans that included yards so I could have a town. Sometimes I rue the day that I took the bait of MTH scale engines. They are great for a large layout. But for a layout like mine they take up too much room with minimum 072 curves. As you said “work with what you've got and that's satisfying.”

Have fun, enjoy!

@darlander posted:

With yesterdays arrival of #2 anthracite coal from Brennan Model RR Products, I was able to completed the coal loads for my Lionel 25000 LV hoppers. They are currently curing.  Tomorrow I plan to give them a ride around the layout before putting them back on the display shelf.   I used about 1/2 bag of the coal to finish eleven loads.    

IMG_8284

Cheers, Dave

Nice work Dave! You probably have explained this before but prior to adding the coal, do you do anything to the original bases to create different contours for the coal?

Dave

Hi Guys, it's been 5 days since my last visit and there sure has been a nice group of projects for a group of nice people!!

I would like to comment on everything, but I am limited on time as the CEO has other plans for me, just as she has for the last 4 days! LOL

Here are a few shout outs!

@Mark Boyce Mark, congratulations on your layout accomplishment! It really looks great!

@luvindemtrains Dave the detail you do on your buildings is so realistic! I keep watching on your other thread just to see your amazing work and get my free lessons!

@scottyhubcaps Scott wonderful looking start! I like you get frustrated sometimes and remember what a really old timer told me when I first started. He said remember its about having FUN! If your not having fun, just take a break and come back when you're ready to have fun again!

@darlander Dave, outstanding job on the coal loads! Don't forget to post some photos or even better yet a video of the Coal Train!

I am sorry guys but I have nothing to share, believe me I wish I did! Heck some of you might have noticed I have been on the forum a good amount of the day so far. Some of it commenting on other threads, but most of the time helping the CEO! Last summer we bought a used travel trailer for really cheap but needed a lot of work, and now that the snow is gone this is the perfect time to start working on it. 

Lucky me they say it is going rain starting tomorrow, all I can do then is paint some floor trim in the garage and get my rear into the train room and try and get something done in there!

I hope you all have a great weekend and find time to have fun with your layouts and trains!

Placed the coal loads in the hoppers and put them to work on the layout for a few laps. Filled the room with smoke as anthracite coal and Missabe ore made the rounds.    As Mike G requested, here's some of todays action!

The Lionel hoppers are back resting on the display wall behind appropriate power, a five stripe GG1.   IMG_8298

Cheers, Dave

Attachments

Images (1)
  • IMG_8298
Videos (2)
IMG_8295
IMG_8293

@darlander Dave now that is a great looking Coal train! Outstanding work!

@scottyhubcaps Scott you are so correct! There is so much to learn for such great folks that are here and willing to share!

I have learned so much from the folks here, not only from a model train hobby, but if one takes the time to listen and read what is being said you can also get a bunch of life lessons here!

@darlander posted:

Placed the coal loads in the hoppers and put them to work on the layout for a few laps. Filled the room with smoke as anthracite coal and Missabe ore made the rounds.    As Mike G requested, here's some of todays action!

The Lionel hoppers are back resting on the display wall behind appropriate power, a five stripe GG1.   IMG_8298

Cheers, Dave

Now that’s my idea of a smoke filled room Dave. Everything looks very impressive.

Jay

@darlander posted:

Placed the coal loads in the hoppers and put them to work on the layout for a few laps. Filled the room with smoke as anthracite coal and Missabe ore made the rounds.    As Mike G requested, here's some of todays action!


The Lionel hoppers are back resting on the display wall behind appropriate power, a five stripe GG1.   IMG_8298

Cheers, Dave

Great job on the hopper loads Dave. Reminds me that I have more car loads to do.......

so many projects, so little time.....

Bob

Well in all honesty all I did was fetch tools. My train buddy Jimmy G. from Brooklyn stopped by after we were at the METCA show in East Rutherford yesterday. I was telling Jimmy how frustrated I was; waiting for the trestle builder to come back and measure for the girder supports. Jimmy said that he could use lionel trestle supports. He attached a thin piece of movable plywood on the top of each trestle so that the trestle didn’t have to be on the same plane as the support. He raised the supports with blocks of wood that were cut to appear as concrete supports. I will be painting these. I ran my largest engines and longest passenger cars to check clearances.
1A12DE8D-1460-41E3-8039-62FF1EEEE2B822965914-628E-468A-903D-3CA5D5D29B2E

Follow the link for a video https://ogrforum.ogaugerr.com/...4#172752760421072774

Attachments

Images (2)
  • 1A12DE8D-1460-41E3-8039-62FF1EEEE2B8
  • 22965914-628E-468A-903D-3CA5D5D29B2E
Last edited by pennsyfan

Since yesterday it rained all day,  I spent several enjoyable hours working on my layout.  With the change to Spring this past week, it was time to change the Westend neighborhood from winter weather to warmer weather and do a little urban renewal.

I relocated the Mary Merry Christmas Shoppe ( MMCS ) to the back of the Westend neighborhood.  Since Christmas shops seem to be open year round in some towns,  I wanted to give the Mary Merry Christmas shop year round exposure, especially since the shop is named after my mother whose name was Mary.  Relocating it from foreground to background seemed to be the perfect solution.  This coming Christmas the MMCS will be front and center once again.

In place of the MMCS I brought out my TUCKER, STUDEBAKER, VOLKSWAGEN dealership again.  I just have a thing for Tuckers primarily.   To enhance the dealership, I replaced the car lot's surface.  First I added additional bracing so I could expand and raise the surface of  the lot to be even with the existing platform.  I then added a retaining wall below the extended lot.  The retaining wall is from Scenic Express.  It fit nicely (  see bottom photo lower right corner ).  I used black foam board for the surface of the lot.  I used some silver push pins, which I purchased a few years ago at an art supply store, as edge of lot barrier ... don't want those new cars to roll off the edge of the lot!  The push pins seem to work well for this purpose ( see bottom photo ).  

Whenever I change a scene or create a new one, I leave the newly created scene in place for a week or so.  This gives me time to view the scene daily.  This length of time usually allows me to see if I like the scene and, if so,  tweak the scene a bit.  

Here are before and after photos.   IMG_0597IMG_1682

The car lot floodlight pole is from Lemax.  To hide the on/off switch I plan to plant some flowers around the base.  We shall see how that works .. lol! IMG_1679

Attachments

Images (3)
  • IMG_0597
  • IMG_1682
  • IMG_1679

Moving buildings around (again!) to see where they might work........and, get an idea of how many more I might need.

A119E72A-85D6-48B9-90CE-CA82624FC94A

This has some hard to reach areas (easy to reach with a step stool). Consequently, this will all be an area of buildings and static scenery.

Peter

Peter, really like the "W. F. Woolworth Co." building.  Takes me back to my home town with a building fit into the rest of Woolworth's.  Also had one in the Mahoning Plaza .  I/we frequented both often.

Ron

Working on a new layout. I have some longer cars coming to me so making some room for them to move around the track. Let some of the kids out to play tonight to test my wiring.

0-96 on the outer ring

0-72 mid ring.

0-48 & 0-36 on the inner ring.

the far end will have a sheet of plywood on top of it as a tunnel/mountain.

Attachments

Videos (1)
trim.7988A562-ACEB-4E70-A9B3-4C6651AE9012

Morning guys I hope your all doing well and made it threw the weekend ok!

Well I see some nice work being done, way to keep this page going guys!

Bob, it sure looks like your friend had to deal with this issue before. Looks great!

Patrick, it is so cool how you change the seasons! I love the new spring/summer look. But one has to ask what did you do with the snow?

Lee I love the B&W photo! Really makes you think your looking back in time!,

Peter, now that is a problem to have! I have the same problem, just need to get the rest of the track down so I have places to put stuff! LOL

Pault, nice little layout, should be fun to run. I am sure you checked the clearance going both directions?

As for me guy not a lot, I snuck into the train room yesterday and got some cork down, Today I hope to get some track put down, then I have to go threw things to see what I can sell for more cork! LOL If it isnt one thing its another. The good thing is I have stuff to get rid of. I just need to make the time to take photos and post them.

But first thing today I have to take the snow tires off the CEO's car, then the rest of the day is train room. I also need to do some bench top painting before the upper layer is put on.

I hope you all have a great week and find time for some fun with your layout and trains!

@Mike g.

I really enjoy learning what’s new with the guys in this thread ,   You summarize on posts that I have missed and I like this. I looked yesterday, page 1189.  

The more different train guys who add to this the more we all learn.  In fact I encourage more participation. I have decided this month to let my subscription lapse on the other popular train magazine I have belonged for many years.  I spend so much time here with this OGR Forum. An besides, when we have the experience and knowledge of those like The gunrunner what else do we need… lol.

How many different times have we seen cork applied below the different rails and they all get the job done.  (You’ve seen this before on OGR, three rails better than none)

I also like learning what the experiences are with weather, the climate, and what effect the changes in MTH had on everyone, even in Oregon an Washington in the late hour.
if I’m up really late here you guys on the west side of our wonderful country are still chiming in with us on OGR.

One last thought with you in mind Mike, I worked with a gentleman at the bank who was a proud US Marine.  He displayed the Marine shield on his desk in his office.  I am so very proud to have been his coworker, I miss him daily.  So each time I see your name and see your train room I a reminded of David.

a good day to you changing the tires…

Seth

I have to also admit I can’t keep up with commenting on others’ work like Mike!  Everyone is doing great work.  I also agree, this is the place to spend time.

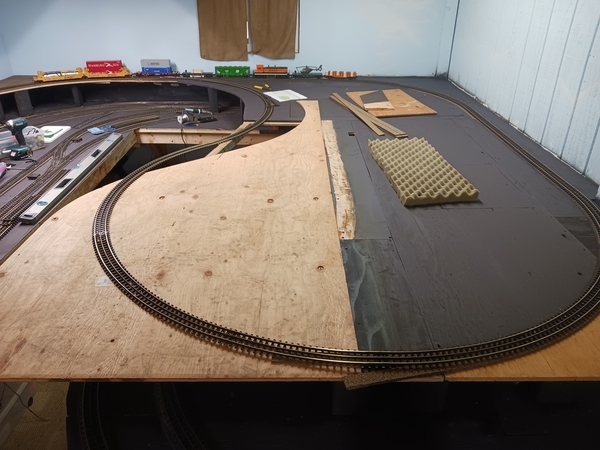
I finished laying new track so now I have an upper and lower levels connected by two grades, though in a small space they are steep.  I am only having trouble with one engine on the grade.  It needs inspection for the problem.  I have been wiring until I ran out of wire.  

EAE6ADBD-8FEA-4069-92E8-EA83E14977FE92C45499-3D24-46F7-8F39-AB913AD8F606

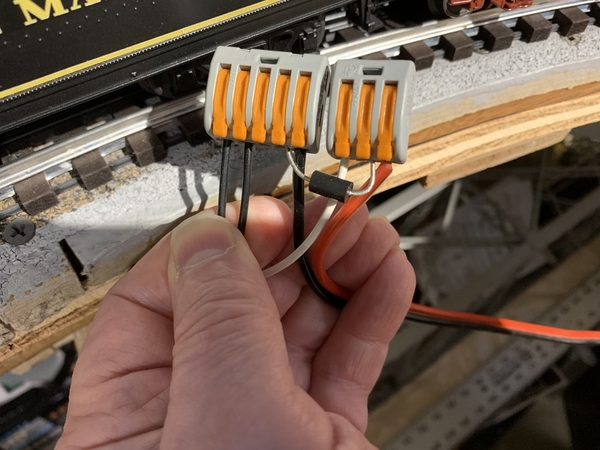
Here are the connections at the track.  #14 red and black wires go to the terminal blocks by the AIU, white and black #18 go to the track, TVS to protect engine electronics from surges.  Notice I can stand up and do most of these connections .  

A85E03A8-9AF1-438D-B548-C623D681C63A

I am using up the gray WAGO connectors and have two boxes of the clear connectors to use next.  I’ll post a photograph of the terminal blocks and AIUs when I get all the wires in.

Attachments

Images (3)
  • EAE6ADBD-8FEA-4069-92E8-EA83E14977FE
  • 92C45499-3D24-46F7-8F39-AB913AD8F606
  • A85E03A8-9AF1-438D-B548-C623D681C63A

Thank you, Gene, Jeff!

I am pleased with the progress considering I have spent the last 4+ weeks in PT with more lower back problems, hence my photograph showing how I’m doing a lot of my work standing.  I love it when a plan comes together!  👍🏻👍🏻 It looks like we have a handle on the orthopedic issues now.  

Yes, I am looking forward to a first run also!  I don’t know how to do live stream either, but it can’t be too hard.  A live stream may be too tempting for Murphy to resist, however!!  😄

Hi guys, I hope you all have had a wonderful Tuesday! LOL I know its not as good as Hump day or Friday! LOL

Any how I did get to the train room today and got some things done, but not everything I wanted.

@Seth Thomas Seth I agree with everything you said about OGR and all the help one can get here! Thank you for your comment about me being able to remind you of your coworker from the bank! He also must have been a really good friend! SEMPER FI!

@Mark Boyce Mark, you are doing a great job and if you weren't so far away I would have you help me wire my layout! LOL I am sure you will figure out what is going on with that one engine! I think a live stream would be great, but sometimes I am still having a hard time inserting videos from YouTube! LOL

Well guy I ended up getting some track laid, but still need to put in a power drop. Then I started working on the rest of the top using old plywood from old layouts and cut ends left over. It really doesn't look like much and to be honest it looks like crap! But it is funny how a coat of paint makes things look a lot better sometimes! LOL

Here are a couple photos, enjoy and if you can have a laugh! Remember that is what this is all about, having FUN!

20230328_13412720230328_13413920230328_151151

Have a great night everyone and Seth get some sleep! LOL

Attachments

Images (3)
  • 20230328_134127
  • 20230328_134139
  • 20230328_151151

@mike g. I think your upper level looks great!  You should see my menagerie of wood sections and types on my layout in person!  I agree, I wish I was a lot closer too!!  As close as I can see on Google Maps, we are 2584 miles apart!!  😆

I programmed and tested all the new track blocks I wired.  My wire is scheduled to arrive tomorrow.  If it doesn’t, I hope to get back at it after PT!!  That is if the boys at PT don’t beat me up too much!  😄

Mark-There goes that word again, "menagerie". Glad to see the progress you are making with the wiring. I know it's the most exciting part of the hobby, lol. I hope that it's a minor issue with the one locomotive.

Mike-It doesn't look bad at all. You, like Mark, seemed to have mastered the art of recycling wood. Thank you both for helping with the planet. The magic is what you can create on top of the recycled wood. I bet you no one would know the difference. I could kind of see a trestle on those curves, in the forefront, on your lower level. Of course there would have to be some adjustments to the track. I know you wouldn't mind more of that right? I'm sure whatever you decide will be  nice.

Dave

@Mark Boyce posted:

@mike g. I think your upper level looks great!  You should see my menagerie of wood sections and types on my layout in person!  I agree, I wish I was a lot closer too!!  As close as I can see on Google Maps, we are 2584 miles apart!!  😆

I programmed and tested all the new track blocks I wired.  My wire is scheduled to arrive tomorrow.  If it doesn’t, I hope to get back at it after PT!!  That is if the boys at PT don’t beat me up too much!  😄

Good luck Mark.

@Dallas Joseph Dallas, I really like your new profile photograph!  My Kim doesn’t like her photograph taken, so you are left with just me!  😄

Thank you!  As for the PT clinic, the sharp pain is leaving, now I gave to “retrain” the nerves to make my legs work right.  Who knew such a thing??  😆  Most of that will happen with home exercises in the coming weeks, and not at the PT clinic on Medicare’s dollar!  🙄

Last edited by Mark Boyce

Jay, thank you.  I have good new shoes, and threw out the old ones.  The foot doctor fitted me with orthotics as well.  Sorry to go off topic.

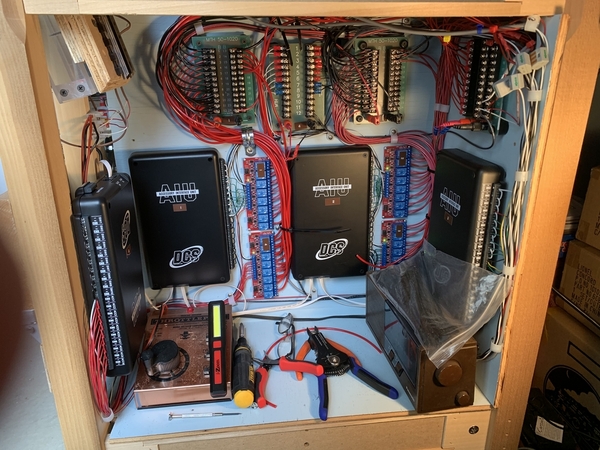
Here is the AIU panel.  I should have more room between the left relay column and AIU #2.  I have 4 more pairs of red and black then I can tidy up with a couple more cable ties.  The electrons don’t care anyway.  😉

20895EE3-731C-4EFB-94F3-228E51235C2D391E78D3-A65F-475E-88F5-EAC38BB7F3BD

Attachments

Images (2)
  • 20895EE3-731C-4EFB-94F3-228E51235C2D
  • 391E78D3-A65F-475E-88F5-EAC38BB7F3BD
@Mark Boyce posted:

Jay, thank you.  I have good new shoes, and threw out the old ones.  The foot doctor fitted me with orthotics as well.  Sorry to go off topic.

Here is the AIU panel.  I should have more room between the left relay column and AIU #2.  I have 4 more pairs of red and black then I can tidy up with a couple more cable ties.  The electrons don’t care anyway.  😉

20895EE3-731C-4EFB-94F3-228E51235C2D

Old electrician's joke......sending the helper out to the truck to get a bucket to catch the voltage drop.......

The wiring looks good Mark. It's always hard to plan ahead and leave enough room for everything. Especially when track plans change....

Bob

@RSJB18 posted:

Old electrician's joke......sending the helper out to the truck to get a bucket to catch the voltage drop.......

The wiring looks good Mark. It's always hard to plan ahead and leave enough room for everything. Especially when track plans change....

Bob

Bob, I’ve heard that one before!  😄  Once I moved to engineering for the last 10 years I worked, I learned the term “Scope creep”!  Yes, this this layout project is a very good example of that term!  😆

Last edited by Mark Boyce

Evening guys I hope you all had a great day! I spent most of it with the CEO which seamed like we were just driving around! LOL any how I did get to the train room again today and got a little more done. I took a photo for proof and so you guys can see how big the upper loop is! I might change my mind and put the town up there and use the lower area behind the lift bridge for my industrial area.

Here is what I have so far, as you can see I have a hole to fill in! LOL

20230329_142728

As with everything else I am open to ideas.

@Mark Boyce Mark I am just amazed at your wiring! I must be missing something as I didn't know you had to program track power! LOL

@luvindemtrains Dave I like the idea and the thought of the look for a trestle! But hate the idea of moving the track again! LOL

I hope you all have a great night and find time tomorrow to have fun with your layouts and trains!

Attachments

Images (1)
  • 20230329_142728

Good evening everyone!

A few days ago I came to the conclusion the I need to add a freight platform at the mine. Because of space constraints the mine has an O36 curve with a 2 car siding. As a result, I cannot have trains longer than 3 cars be moved to the mine. This is because of the small siding only being able to fit 2 cars. To remedy this I decided to add a platform to the side of the curve.

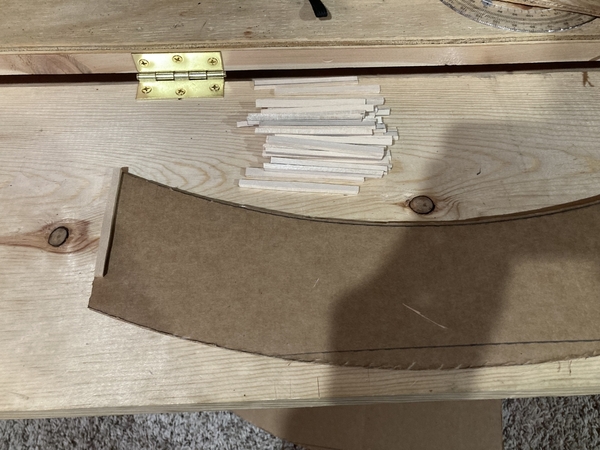
Construction began with cutting up a bunch of balsa beams. I wanted the platform to look last minute and well aged. So the beams did not have to be perfect. Once I got enough beams I started to temporarily glue them to a cardboard template.
49D7396E-07FA-432E-9442-6C15F3FFCC62C8B6BC8F-3E5C-4093-9D71-6B09ED4F4219
After a few hours of gluing and making more beams, I was able to finish the platform. I added under framing to the floor and pealed off the template. It looks good on the layout but it still needs some final touches. I will stain it and add figures soon to make it look used.
CDF7B656-0977-4FEB-B86A-28AABBD09036CB40EBA3-9388-4AF6-A03D-26315207EF58C3E95B46-CC95-4663-822D-C737670889FF
Thanks for reading and good night!

Attachments

Images (5)
  • 49D7396E-07FA-432E-9442-6C15F3FFCC62
  • C8B6BC8F-3E5C-4093-9D71-6B09ED4F4219
  • CDF7B656-0977-4FEB-B86A-28AABBD09036
  • CB40EBA3-9388-4AF6-A03D-26315207EF58
  • C3E95B46-CC95-4663-822D-C737670889FF
Last edited by Trainmaster04
@mike g. posted:

Evening guys I hope you all had a great day! I spent most of it with the CEO which seamed like we were just driving around! LOL any how I did get to the train room again today and got a little more done. I took a photo for proof and so you guys can see how big the upper loop is! I might change my mind and put the town up there and use the lower area behind the lift bridge for my industrial area.

Here is what I have so far, as you can see I have a hole to fill in! LOL

As with everything else I am open to ideas.

@Mark Boyce Mark I am just amazed at your wiring! I must be missing something as I didn't know you had to program track power! LOL

@luvindemtrains Dave I like the idea and the thought of the look for a trestle! But hate the idea of moving the track again! LOL

I hope you all have a great night and find time tomorrow to have fun with your layouts and trains!

Mike, Good use of extra wood!  I was programming the name of each track block into the DCS remote so I can turn the power to the track on and off with the remote.  You can use the accessory ports on the AIU to switch power on and off, but it is a good idea to have the 4amp AIU port pick up a 10 amp relay in case the load gets over 4 amps.  The relay Bill and I used come 8 on a circuit board.  Programming is easy and it is quite handy.

@Bob Golfs posted:

Hey Mark!  I’m sure with you’re familiar with the term “as built” in deference to “as designed!”  A very common term in the industry as well as my layout!

Bob

I am certainly familiar with “as built”.  I have a PHD in red and green colored pencils.

Last edited by Mark Boyce

Hi guys I hope you all had a wonderful Thursday!

@Trainmaster04 Your freight platform looks great!

@luvindemtrains Dave, I am sure if you want to you can fix that! Not very far away from here that would be caused by a car or truck trying to break into a store or something! LOL

@Mark Boyce Mark, very cool I will be talking with you alot when I get to that point!

Well guys I was able to get the upper deck finished enough to install track. Then the gremlins came out! LOL I tried running different engines and they would stop in different places on the upper track system. Even right at a power drop.

I gave up for today but here is a photo of it!

I hope everyone has a great night and a wonderful Friday! Don't forget to have fun with your layout and trains!20230330_151929

Attachments

Images (1)
  • 20230330_151929
@Mark Boyce posted:

I received the roll of wire yesterday.  The remaining 4 runs of wire have been terminated, the AIU has been setup, and all blocks tested.  Here is a photograph of the AIU panel.  Mike, I’ll take photographs of individual items and their wiring another day.

74F5971D-6D78-441A-BB76-656FF60EB0C1

Looks so good Mark! I hope to redo my wiring nice and neat like that! I plan on PM you!

Mike-The bench work looks great. You made lemonade out of lemons man! There's definitely skill there. I also really like your track work and how it traces your bench work. Very visually pleasing. I'm sorry about those darn gremlins. They do not want things to go smoothly even after all the effort put in to get to this point. Shame on them. I won't try to diagnose the problem but hopefully the next time you return to the train room you'll have that aha moment and the gremlins will have disappeared.

Mark-Your wiring is top notch. That's got to be one sign of a good running layout.

Dave

Last edited by luvindemtrains

Mike-The bench work looks great. You made lemonade out of lemons man! There's definitely skill there. I also really like your track work and how it traces your bench work. Very visually pleasing. I'm sorry about those darn gremlins. They do not want things to go smoothly even after all the effort put in to get to this point. Shame on them. I won't try to diagnose the problem but hopefully the next time you return to the train room you'll have that aha moment and the gremlins will have disappeared.

Mark-Your wiring is top notch. That's got to be one sign of a good running layout.

Dave

Dave, Thank you!!!

Neatness and documentation came in handy troubleshooting last evening before I made the last post.  The very last track section wouldn't power up.  I knew I had connected it to the lowest and last two terminals on the relay board in the lower right corner of the larger main plywood board.  It had been a bear to get the wire in the terminal because the relay board had been mounted and, all but one relay had been used, before I installed the third of four AIUs, the one on the right hand side wall.  Sure enough one of the two wires in question wasn't in the slot.  I finally fixed that, so I couldn't pull either out with needle nose pliers, (Something I didn't do on the very hardest connection I had to make)  Duh!!!  Then it still didn't work.  Finally, I noticed the wire to the AIU was missing on the other side of the board.  I had forgotten it, because it was the only wire I needed to add from the AIU to that relay board.  That was fixed, and all worked well.  The point is, I had documented all the connections on the first iteration, and was completing documentation of the new connections as I went through checking each.  I did this rather than tagging wires because I knew from experience at work, I would never be able to sort through all the tags on this crammed space.  Yes, my documentation sheet is a mess right now, but I will type and save it on a spreadsheet and print a copy to keep handy.

My track work has some spots where it was hard to get good tight connections without the GarGraves/Ross track pins showing.  I can get them tight as I connect one track section to another.  The problem is getting the last connection made on a loop for instance or any other place where I am mating up to existing track.  I trim track a bit long, then shorten the sections up to fit good, but I have two places where the wheels dip a bit and ride on the pins until the next section.  Car wheels may touch the pins, but I don't see that engine wheels do.  Everything has run fine over them, so I left them as is.  At least I know what to lift up and try to fit in a slightly longer section.  Quite frankly, I like the track connections are used on HO track that Atlas O uses better than the pins GarGraves and Ross use.  On the other hand, either method is no big deal.

Continued to write up my York shopping list while running trains this morning.  Shopping list includes Miller Engineering products, some passenger car diaphragms  which can be retrofitted onto Williams scale passenger cars, and a Lionel freight sounds car.  

Also did some visual imagineering as I continue to redo the west end of my layout.   The Westend neighborhood, which sits on an elevated shelf extending the layout's length by one ft., is giving me satisfaction as I've got buildings arranged where I want them.  Next step is to hook up 3 buildings for illumination.  

Last edited by trumpettrain

I started to assemble the tmcc infrastructure on a O72 oval (because the only engine I have that's currently TMCC-ready is my zephyr that needs o72 curves).  Still ironing out issues like polarity and track stability.  I think I need to put some foam under the tracks so the vibrations of a relatively heavy consist doesn't cause the tracks to slip apart.  I also think that without one of the heavy duty power-master units the lock-on may be overkill for now.  What I do know is the cab1 unit was sporadic in its ability to communicate with the zephyr engine.  I readdressed it five or six times, and it only responded here and there.

Attachments

Images (2)
  • lionel_layout-2
  • lionel_layout-1

Since yesterday it rained all day,  I spent several enjoyable hours working on my layout.  With the change to Spring this past week, it was time to change the Westend neighborhood from winter weather to warmer weather and do a little urban renewal.

I relocated the Mary Merry Christmas Shoppe ( MMCS ) to the back of the Westend neighborhood.  Since Christmas shops seem to be open year round in some towns,  I wanted to give the Mary Merry Christmas shop year round exposure, especially since the shop is named after my mother whose name was Mary.  Relocating it from foreground to background seemed to be the perfect solution.  This coming Christmas the MMCS will be front and center once again.

In place of the MMCS I brought out my TUCKER, STUDEBAKER, VOLKSWAGEN dealership again.  I just have a thing for Tuckers primarily.   To enhance the dealership, I replaced the car lot's surface.  First I added additional bracing so I could expand and raise the surface of  the lot to be even with the existing platform.  I then added a retaining wall below the extended lot.  The retaining wall is from Scenic Express.  It fit nicely (  see bottom photo lower right corner ).  I used black foam board for the surface of the lot.  I used some silver push pins, which I purchased a few years ago at an art supply store, as edge of lot barrier ... don't want those new cars to roll off the edge of the lot!  The push pins seem to work well for this purpose ( see bottom photo ).  

Whenever I change a scene or create a new one, I leave the newly created scene in place for a week or so.  This gives me time to view the scene daily.  This length of time usually allows me to see if I like the scene and, if so,  tweak the scene a bit.  

Here are before and after photos.   IMG_0597IMG_1682

The car lot floodlight pole is from Lemax.  To hide the on/off switch I plan to plant some flowers around the base.  We shall see how that works .. lol! IMG_1679

Patrick, I really like your Hudson dealership! The Smith Bros must be really diverse, they have the Hudson dealership in Patsburg on the east coast, and a Television & Appliances dealership in Paradise on the west coast. LoL Thanks for posting your layout update!

By the way, that is a really cool way to use pushpins!

Attachments

Images (1)
  • mceclip0

This may not be a pure layout post, but the engine will run on my layout when finished. Besides, this is one of my favorite OGR threads.

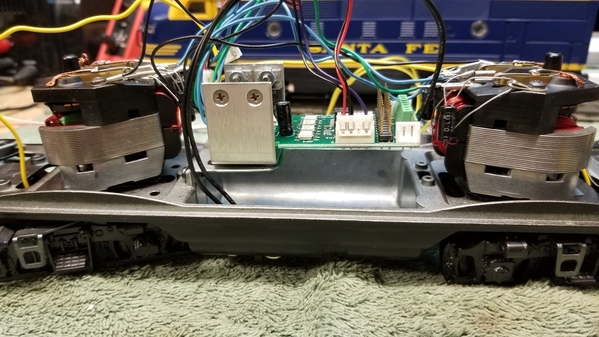
I bought a used Lionel Santa Fe F3 ABA set from 2005 catalog about 3 years ago. It was delivered DOA, so I stashed it away with the thought I'd repair it one day. When I started to troubleshoot it I found the 5 volt rectifier for the smoke unit was miss wired to the plus side of the motor wires!!! It fried the DCDS, which is custom for this model and the 2004 F3 model. No wonder is was DOA!

Being a 2005 model Lionel replacement parts are a problem. I decided to replace all the Lionel stuff with ERR Commander, ERR F3/F7 RS board and then get creative for the lights. Also, I never use smoke so I'm going to omit the smoke unit.

Here's some photos of the beginning of the project, updates will follow if anybody is interested.

The original mess!

I had to drill a couple of holes to mount the ERR Commander and RS. Here's a photo of the PCA's installed. I had to remove the rear motor assembly to access one of the holes for the RS PCA.

I always wondered why the powered A unit weighed so much, I found this black hot poured metal ballast, on the left in the photo, in the fuel tank. It has to weigh at least a 1 lbs!

The adventure continues, waiting for LED's to arrive for the lighting.

Attachments

Images (3)
  • mceclip0
  • mceclip1
  • mceclip2

This may not be a pure layout post, but the engine will run on my layout when finished. Besides, this is one of my favorite OGR threads.

I bought a used Lionel Santa Fe F3 ABA set from 2005 catalog about 3 years ago. It was delivered DOA, so I stashed it away with the thought I'd repair it one day. When I started to troubleshoot it I found the 5 volt rectifier for the smoke unit was miss wired to the plus side of the motor wires!!! It fried the DCDS, which is custom for this model and the 2004 F3 model. No wonder is was DOA!

Being a 2005 model Lionel replacement parts are a problem. I decided to replace all the Lionel stuff with ERR Commander, ERR F3/F7 RS board and then get creative for the lights. Also, I never use smoke so I'm going to omit the smoke unit.

Here's some photos of the beginning of the project, updates will follow if anybody is interested.

The original mess!


I had to drill a couple of holes to mount the ERR Commander and RS. Here's a photo of the PCA's installed. I had to remove the rear motor assembly to access one of the holes for the RS PCA.


I always wondered why the powered A unit weighed so much, I found this black hot poured metal ballast, on the left in the photo, in the fuel tank. It has to weigh at least a 1 lbs!


The adventure continues, waiting for LED's to arrive for the lighting.

Scott- I did a older F3 with an AC Commander last year. I was able to put the speaker in the fuel tank well with the boards stacked above (with GRJ's help).

2022-03-13 21.10.00

Looking forward to your progress.

Bob

Attachments

Images (1)
  • 2022-03-13 21.10.00
@RSJB18 posted:

Scott- I did a older F3 with an AC Commander last year. I was able to put the speaker in the fuel tank well with the boards stacked above (with GRJ's help).

2022-03-13 21.10.00

Looking forward to your progress.

Bob

Hey Bob, I thought about you when I started this project, because I remember you're F3 project posts that you mention above. I followed the the whole thread. Anyway, appreciate your reply, but here's another photo of the fuel tank with the speaker in it and the ballast weight. The ballast was actually cast to fit the speaker. Lionel must of had a good reason for the weight, like traction maybe? I just thought the weight was weird! LoL

I plan to use the Lionel speaker already in the fuel tank and it should sound just fine. Impedance is acceptable for the ERR RS.

Attachments

Images (1)
  • mceclip0

Hi guys I hope everyone is doing well and ready for a fun weekend!

@WesternPacific2217 Scott that is quite the undertaking! Good look and I will be waiting for your updates!

Well guys and gals, I was able to repair my stalling issue on the upper loop just by adding another power drop! Lucky me!

Bad news it showed another stalling location, I replaced 2 switches, 3 sections of 054 curve with a 30" section of flex track and another power drop. Nothing, no change! At my wits end I decided to use fine sand paper and clean the top of the center rail on the flex track, next was to re clean the track again.

I could not believe that the black coating on the top was stopping both a conventional and DCS engine!

Here is a video of the first full upper loop run!

I hope you all have a great weekend and find time to have fun with your layouts and trains!

Well, while technically not ON the layout, my latest project will eventually be featured there, so I guess this qualifies!

In its current form, this project is really the latest iteration of several on-going projects and guiding development principles, including my on-going "button" project (coming up with button-activated features to amuse the grandkids), my continuing efforts to recycle and repurpose old materials and electronics, and my frequent efforts to utilize non-train-related items on the layout.

So, what is the project? After a lot of contemplation and false starts, it has evolved into a set of renewable-energy-themed features, including an operating windmill, two working solar panels, and a solar and wind powered billboard.

Specifically, I came across an inexpensive solar-powered model windmill on line a month or two ago, and ordered one after discovering it was close enough to O scale (at least by the loose "Big L" standards!) to be considered for incorporation into the layout. It worked as advertised, but needed direct sunlight or very bright artificial light (both in short supply near my basement layout!) directly on the solar cell in the base to operate. I found the windmill's motor would instead run on other sources as long as they provided as little as a volt and a half, and no more than 3 or 4 volts (not coincidentally roughly the output of the OEM solar cell) before it spun too fast. So, I needed an alternate power source.

By chance, I had recently replaced a pair of solar spotlights, which I had deconstructed earlier with the intention of salvaging the LED spots and adding them to the Arduino based "thunderstorm simulation" I had put together and installed on the layout. Among the remnants left over were a pair of solar cells and two rechargeable batteries. The solar cells were each nicely mounted in a rectangular plastic case, which when opened left the cell in a flat rectangular surround resembling a solar array. Bingo! A bit of fiddling, and I was able to confirm the cells still produced usable power (enough to spin the windmill), and came up with a plan to mount each of them on a stalk, like some prototype solar arrays.

For kid-friendly light sources that could be directed toward  the solar cells on the layout, I decided to use some LED flashlights I had on hand, but they were not quite bright enough to reliably spin the windmill. So, I tried to come up with some alternate or supplemental power source. As it happened, both the rechargeable batteries and a standard alkaline AA battery had enough juice to spin the windmill, so I decided to add a button under the edge of the layout (like the one in this video) to send extra battery juice to the windmill.

While all this was in progress, my thoughts turned to alternate ways to use and display the energy I'd be generating and/or supplementing. Recently, I was sent a 100-pack of the wrong type of LEDs, so I checked to see if they could be powered by my devices. Bingo again! A little more thought, and I came up with a foam board construction surrounding sixteen color-changing and flashing LEDs chained together to provide a backlight for a renewable-themed billboard, which will light up whenever the solar cells are generating or the supplemental power button is pressed. I finished the LED string fabrication last night (some of the most fiddly soldering I've ever had to do BTW!) and everything worked! Now I'm waiting for the glue to dry, so I can close it all up. Here's a video of the LEDs in operation, behind the gloss finish laser printed renewable energy graphic I plan to use as the billboard pic:

Meanwhile, I discovered that a single alkaline cell was not powerful enough to light the new sign, so I settled on the nominal 3.2 volt rechargeable cell instead. The only problem: they must be recharged eventually, there's no recharger, and the push button's LED would create a small but continuous drain, resulting in eventual discharge of the battery!

A bit of research, and I found the retired solar spotlight's 3.2 volt Lithium Iron Phosphate cell needed a recharge voltage of between 3.5 and 3.65 volts. Easy-peasy -- I cut the molded battery holder free from the old enclosure, connected it to an AC to DC voltage converter (which I set to 3.58 volts), and voila!, the rechargeable battery recharged (from less than three volts to 3.26 volts) in a matter of minutes. There's also a slide switch from the remnants I may be able to use to easily disconnect the battery when not in use.

So, as currently planned, I will end up with a roughly scale windmill, two pedestal-mounted solar panels, and a "solar powered" and renewable-energy-themed billboard, which can be activated (windmill turns, billboard lights up) when either beams of light are focused on the solar panels, or the under-layout button is pushed. Stay tuned . . .

I finally got all four trains running at the same time!  Thanks to Mike G for the phone call today!  You inspired me to get out of my hole and get in the train room to attempt running them all at the same time!  All four are run on different controllers, one Bluetooth, one legacy and two separate TMCC controllers. I’m glad I did it slow at first to make sure there were no Addams family type collisions!  I couldn’t afford it. Apologize for the mess on the layout, but they are all running as planned!

That definitely is deserving of my favorite beverage!

image

Next is cleanup and then start scenery!  I’m moving forward for what seems like an eternity to get to this point.

Attachments

Images (1)
  • image
Videos (1)
trim.0A8A8B1E-CDD9-4E61-9241-923EFC671DDA

Add Reply

Post

OGR Publishing, Inc., 1310 Eastside Centre Ct, Suite 6, Mountain Home, AR 72653
800-980-OGRR (6477)
www.ogaugerr.com

×
×
×
×
Link copied to your clipboard.
×
×