


Looks good Chris! I picked up the sky blue paint yesterday and hope to get the one wall painted in the train room that I don't have to wait for sheetrock!![]()
Nice layout !! I would like to see more.
Another day and half of work resulting in 12 more feet to the length and 1 row of the ceiling installed. Platform now gets the length of the room 40 feet next finish drywalling in the HVAC Duct work finish the ceiling before I can start building the return back to the end of the room completing the "U" shape around the room.


Attachments
Images (4)


Attachments
Images (3)


Not only a great video, BUT awesome sound - stereophonic on my IMac.
Lee, enjoyed the video of a trip around the layout. Especially done in black and white. ..........Paul
Lee, I like your video cause the detail it shows in a somewhat finished layout! Kinda reminds me of watching an old war movie!
Thanks, guys! I decided to make it B/W on my computer as the lighting in the room isn't all that great. As for the sound, I had the camera mounted on a HO flatcar which was coupled to the tender of one of my 4-6-0s. The loco was facing the opposite direction as the speaker would be closest to the camera that way.
I'll never get the quality of video that Trackside Model Railroading magazine got when they came out to shoot video on the layout in January, though...

Attachments
Images (1)

chris a posted:Mike, thanks. Glad to hear you are making major progress on the train room.
My son came home last night, we ran some trains, and he took a bunch of photos for me. His camera and skills are light year's ahead of what I am capable of !!!
")
")
")


")
Chris, your son did a great job taking the photographs to show off your layout!
p51 posted:I bought a Go Pro camera in Europe last month, so I mounted it in a HO flat car today, and took this video:
Lee, your video was outstanding, as is your layout. I just recently got a Go Pro camera and may try the same on my layout.
p51 posted:I bought a Go Pro camera in Europe last month, so I mounted it in a HO flat car today, and took this video:
Lee, very nice video of your layout! IT sure does look like it could have been filmed in 1943!
Hey Mark, Thanks, I will pass your compliment along to my son.... He is as patient and methodical, as I am when I'm working on the layout, dealing with all the variable camera settings to get the best result....I was pretty amazed at the level of detail that I could zoom in on, especially in areas I can't get that close to anymore. My first thought was now I really understand why so many model railroaders get into high end photography..... It is a really good way to see if there are any areas that need improvement, or touch up, or hopefully not !
Heck some of the photos end up looking better than standing in front of the whole layout gazing out.... Very different perspective when your sitting at a back-lit hi resolution monitor.... I really want to load his photos on a high capacity USB drive that I bought to load family videos through my Blue Ray player so I can watch them on the big flat screen in 1080 resolution, that should be interesting.
Chris, I am a total novice with digital photography, using my smart phone only. One of my sons-in-law is a videographer. Once I get something built on my layout, I'm sure he would take some photographs and videos. I just need to give him something to shoot.
Yes, there is something to it that photography helps you become a better modeler. Also, the different vantage points is interesting too.
Got the majority of the buildings done. Only have two left to clean out the flashing. Saved the worse two for that tomorrow. This afternoon and early evening I got the flats painted. Also had some black foam board and I used that as a template for the angular building. Pics..............Paul


Attachments
Images (3)
Chris, I agree with Mark! You son did a great job with the pictures! Guess I will have to start working on my picture taking for the future!![]()
Paul, the flats are looking good! Cant wait to see them on your layout! I be they are going to be wonderful! Are you also making signs for the buildings?![]()
Passenger siding for main.
Mount of all these buildings & lamps now's all I have to do is wire to terminal strip and powered up.
Attachments
Images (1)
Paul, the building flats are looking good.... You're going to need a "small factory" to assemble/weather and complete that factory ! That's a lot of square feet.... I remember how long it took me to do four panels.


Attachments
Images (2)


Former Member
those of you interested in helping mitch please check his profile
M. MItchell Marmel
This morning I painted all the windows for the second batch of building flats this morning. Having lunch today with a bunch of train guys but hope when I get home I can clean the flashing out on the last two flats and get them painted. Pics.............Paul


Attachments
Images (2)


Attachments
Images (2)


Got a section of the ceiling done it is 4 ft wide and 24 ft long. I used 1 in drywall screws and what we call in aviation Outside Diameter Counter sunk finish washers and used white duct tape on the seam. My advice to any that want to use this system cut the piece to apex length and lay it out working from one end to the other matching the edges 2 joists at a time before installing along the entire joist. I ran mine across the floor joist so I was picking one up every 16 inches.


Attachments
Images (3)
M. Mitchell Marmel posted:Proving Marx's well-nigh unkillability once again, here's a B&O powered A unit a buddy sent me today. Straightened out the front truck frames and axles, resoldered the headlight lead, new bulb and a few drops of oil later...
Mitch

Having retrieved the dummy A unit from the J. Reilly McCarren Transportation Museum, here's the A-A Marx consist pulling some Lionel pre/postwar varnish (using a Scout tender as an adapter)...

Mitch
Attachments
Images (2)

Videos (1)


Attachments
Images (1)


Attachments
Images (3)


Had some extra lumber so I built more shelves which allowed me to get a bunch of tenders & cabooses off my layout. Looks neater now. Maybe room for another building if I can find the right one. Looking for more smaller items for the layout now such as signals, lamp post, people, vehicles and such.
Ballasting continues. According to my calculations, I'm about 44% done with the entire layout. I'm refining the process as I go, and have employed some time saving devices to the gluing process.
This first photo was taken back in 2005. That large red object on the upper deck is an old Tide detergent jug. I saved it because I liked the dispensing spout. My son, who was 12 at the time, decorated it and named it Freddy. I had kind of forgotten about Freddy, as he had been moved around numerous times over the years. Yesterday, I remembered and found him again, then rinsed the old detergent out. That took a number of tries to get him clean enough. I told my son back then, that I planned to use it for ballast glue, and he actually painted that on the side. Freddy is great, because he holds two gallons of mix. As it turns out, my son is coming over today for a few hours, before I take him to the airport, so he'll get to see Freddy in action after all these years.

I also found this Downy jug. It was much easier to rinse, so I started with it. Same spout on both, but only about half the capacity. Bit of a learning curve with this, because the neck of the bottle being filled is only slightly larger than the spout. It's important to make sure that the spout is not blocking the air flow through the neck of the bottle. Do that, and the glue goes all over the floor, which totally defeats the purpose. Oops!![]()
![]()
![]()

I use those strips of Masonite to mark the section that I'm currently gluing. When it is properly saturated, it looks like wet cereal. To the left, it's done. To the right, it's still dry.

The spray bottle contains straight water, to wet the area prior to gluing.

You can see the difference between the glued and unglued here.

Now that 35th Ave is mostly done, I moved a bunch of cars up from Pig's Eye to get them out of the way while I glued over at Shoreham.


I grabbed some old Korber buildings from enterTRAINment, and put them over at University Jct, just to see how they looked.

Part of the point is to conceal the openings in the backdrop. Still needs work, but I've got a better idea of what it needs.

I'm getting close to having the ballast meet up from the two ends. I need to bring down another bucket from the garage.

I've got about six feet left to connect up.

Toe update: Went to the doctor yesterday, good news, and maybe a little bad. Jury is still out on the bad. The good news is, the wound is shrinking. The potentially bad news is, the toe was a kind of angry red. He changed up a few treatment items, including a different antibiotic. Did some blood tests, and ordered an ultrasound to check the circulation. The redness may have simply been a result of having it wrapped too tight. I see him again tomorrow.
If my posting time seems a little odd today, it's because I went to dialysis early, so I could be with my son this afternoon before he leaves for Boston. He might be at the house already, if he couldn't sleep and drove down early. I have that problem the night before travel. It appears to be hereditary.![]()
Attachments
Images (11)
Elliot, Thank you for the tips about Freddy and Downy!! 44% of that layout is a lot of ballasting for sure. Every way to make it easier is a welcome relief!!
Yes, I understand the possibilities of the red tow. I'm still praying it gets well!
Thanks Mark, I don't know if Tide even makes a jug that large anymore. Most people have gone to pods or the H E liquid. It may be a collectors item. BTW, I hear the pods are delicious.![]()
![]()
Elliot, the layout is looking GREAT !! hope toe tests go well, good luck !
Big_Boy_4005 posted:Thanks Mark, I don't know if Tide even makes a jug that large anymore. Most people have gone to pods or the H E liquid. It may be a collectors item. BTW, I hear the pods are delicious.
How do people think up things like that to do?! ![]()
Chris, The sidewalk's and Roads look great! Thanks for the information!![]()
Paul, your windows are looking good, cant wait to see them in the flats!![]()
Brian, great pictures! With the size of your train room/house I know there will be plenty more to come!![]()
RJT, Its looking good, but one question, why didn't you just sheetrock it?![]()
Elliot, Freddy is a great idea! We get that size of jug all the time, now I am going to have to save one when it gets empty! Your ballast work is looking GREAT! Enjoy the time with your son! We will be praying for you and your toe!![]()
Elliot- funny story about the Tide jug- even more amazing that you found that photo among the 1,000's you have taken and shared with us over the years.
Those pods are no laughing matter. I've seen many stories over the years of young children being poisoned (some fatally) from ingesting them. They look like candy to them with the bright colors. The Mfr's are finally putting them in child-proof packaging.
Hope the toe keeps healing up. BALLAST ON!
Bob


Attachments
Images (6)


RSJB18 posted:Elliot- funny story about the Tide jug- even more amazing that you found that photo among the 1,000's you have taken and shared with us over the years.
Those pods are no laughing matter. I've sen many stories over the years of young children being poisoned (some fatally) from ingesting them. They look like candy to them with the bright colors. The Mfr's are finally putting them in child-proof packaging.
Hope the toe keeps healing up. BALLAST ON!Bob
You are right about all of that, Bob! New items need to sometimes revise the packaging and state the threat more completely. I was thinking about locally a high school kid was hospitalized for eating them, and I thought why would you do such a thing?
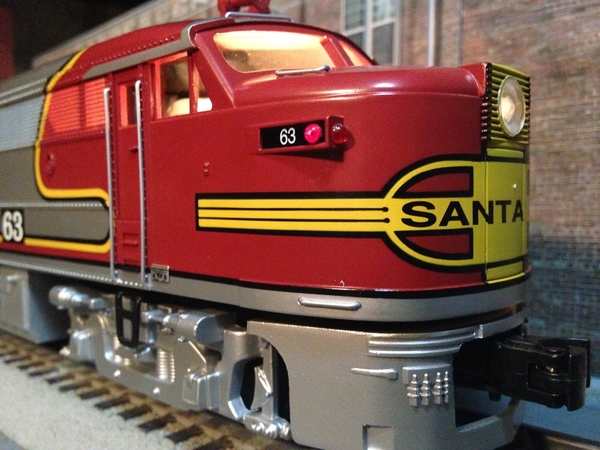
Brian, I see it is Santa Fe all the way day!! Looking good!!!!

thanks Mark...
Attachments
Images (1)

Elliot, as always great job. Interesting how you came up with better ideas for holding larger amounts of glue. Today I got the last of the flats cleaned of flashing. Thought I had two to go but it was only one. I got it done quickly this time. I use a drill to drill numerous holes. Enough to punch out the plastic center and finish with a file. While outside working in the yard I got it painted. Now I have all the flats painted. I can now start the tedious task of applying the concrete paint to all of them now. When I finally get that done it will be time to start piecing them together to form the brewery. Probably won't get started on it till next week. Taking the weekend off to visit the kids. Pics......Paul


Attachments
Images (2)
Paul, the flats are looking great!![]()
Brian, great pictures, just one question. Is there a road name you don't have? LOL![]()
mike g. posted:Brian, great pictures, just one question. Is there a road name you don't have? LOL
there is still a good few I don't have, but I'll try get to them sooner or later... ![]()


Attachments
Images (3)


Attachments
Images (2)


Add Reply
Sign In To Reply
