Did more work on the town scene.
Dave


|
|
Did more work on the town scene.
Dave
 Completed")
")
")
")
")
LUVINDEMTRAINS, Very effective configuring and good looking buildings combined very nicely. I like where you are taking that cityscape a whole lot.
FrankM


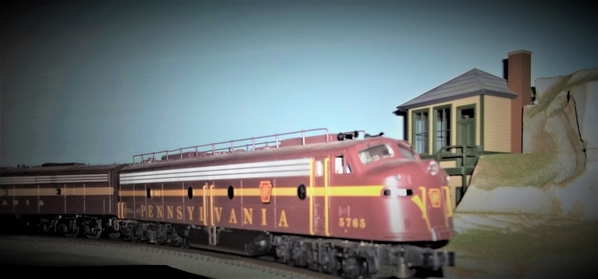
a little more Santa Fe... very nice day out... ![]()


Moonson posted:LUVINDEMTRAINS, Very effective configuring and good looking buildings combined very nicely. I like where you are taking that cityscape a whole lot.
FrankM
Frank,
I appreciate positive feedback from wherever it comes but coming from you, my friend, solidifies that I am on the right track(pun intended). Thanks!
Dave
Mark Boyce posted:RSJB18 posted:Elliot- funny story about the Tide jug- even more amazing that you found that photo among the 1,000's you have taken and shared with us over the years.
Those pods are no laughing matter. I've sen many stories over the years of young children being poisoned (some fatally) from ingesting them. They look like candy to them with the bright colors. The Mfr's are finally putting them in child-proof packaging.
Hope the toe keeps healing up. BALLAST ON!Bob
You are right about all of that, Bob! New items need to sometimes revise the packaging and state the threat more completely. I was thinking about locally a high school kid was hospitalized for eating them, and I thought why would you do such a thing?
You would do such a thing because you thought you’d get high.........
It’s a shame people feel the need to alter their mind and escape reality by using drugs/chemicals.
All we need is our trains.
Mike
Guitarmike posted:Mark Boyce posted:You are right about all of that, Bob! New items need to sometimes revise the packaging and state the threat more completely. I was thinking about locally a high school kid was hospitalized for eating them, and I thought why would you do such a thing?
You would do such a thing because you thought you’d get high.........
Mike
As I know it, the Tide Pod thing was one of those YouTube challenges. Bite it open and try not to swallow-- while filming yourself. The internet is full of stupid ideas like that.
I'm lucky cameras weren't as accessible when I was young and dumb. Plus the challenges weren't as bad. I tried the Saltine Challenge and almost tried the Gallon of Milk challenge back in the 90s. The "fold a paper in half 10 times" challenge made me angry. I tried so hard to win that one.
Luvindemtrains: I totally agree with FrankM's comments above on your city scene... Excellent layout of the buildings and roads... Provides some very interesting views under the deck and through truss bridge..... Keep posting photos.... I have one of those Davenport Dept. stores, but it's never been out of the box, as I haven't built that part of the layout yet... Great job !
chris a posted:Luvindemtrains: I totally agree with FrankM's comments above on your city scene... Excellent layout of the buildings and roads... Provides some very interesting views under the deck and through truss bridge..... Keep posting photos.... I have one of those Davenport Dept. stores, but it's never been out of the box, as I haven't built that part of the layout yet... Great job !
Thank you kindly Chris!
briansilvermustang posted:
Alco PA's in Santa Fe livery - can't get any better! Thanks Brian!
Dave
There has been time at the workbench lately for finishing some projects left hanging,
First off, this presumed Walthers express reefer kit from the doorstop era. It had been previously assembled and came with high speed trucks fashioned from wood. After stripping the original brush job I primed it and re-glued the door hardware. All the extra brass details were scratchbuilt and a set of appropriate style MTH trucks mounted. After some test time on the layout it returns to the shelf for some future paint work and decoration.
Next up was a return to a totally scratchbuilt N6b cabin car. Had a little accident to fix before progress could be made. The claw does look way out of place but is needed for my operation...easily swapped out for Kadees. End railings were a real PITA.
Will probably continue to finish this project now that I'm reinvigorated. Stay tuned.
Bruce
brwebster posted:There has been time at the workbench lately for finishing some projects left hanging,
First off, this presumed Walthers express reefer kit from the doorstop era. It had been previously assembled and came with high speed trucks fashioned from wood. After stripping the original brush job I primed it and re-glued the door hardware. All the extra brass details were scratchbuilt and a set of appropriate style MTH trucks mounted. After some test time on the layout it returns to the shelf for some future paint work and decoration.
Next up was a return to a totally scratchbuilt N6b cabin car. Had a little accident to fix before progress could be made. The claw does look way out of place but is needed for my operation...easily swapped out for Kadees. End railings were a real PITA.
Will probably continue to finish this project now that I'm reinvigorated. Stay tuned.
Bruce
Bruce, Great post!! Thanks for sharing your wonderful project.
Dave
I have to take my layout down, we are moving. ![]()
John Pignatelli JR. posted:I have to take my layout down, we are moving.
John,
I'm sorry to hear this. I dread the day I have to do that, even if my new space will accommodate another layout. Will you be building another layout in your new move?
Dave
Dave, The city streets going uphill to different levels makes for an interesting realistic scene. It reminds me of an N scale town I built before either of our girls were born. Now they are out of college, married, and long out of the house. Since nothing is flat around here, I will have to follow suit once again on my new layout!
Brian, The Santa Fes look great!!
Bruce, I can't even come up with the words to express what a wonderful job I think you did on that caboose!!! I will have to let Frank M write it for me!!! ![]()
John, I am sorry to read you have to take your layout down. I know how discouraged I felt when it happened to me. Sometimes am discouraged about how long it has taken me to get to the place where I can start building something that is remotely comparable to what I had over 25 years ago. I don't think you or I have that many years left in us again, so I hope you can join me in getting a new layout planned and start construction of an even better layout! ![]()
John Pignatelli JR. posted:I have to take my layout down, we are moving.
Argh... I can relate, we are moving too. My wife says "why are you spending time in the train room, it's just gonna have to come down", but I she doesn't realize new engines have to be tested, those telephone pole kits I've had for 20 yrs need assembled, etc. Anyway I'm not taking it down until we list the house, and that happens after her business is sold, so in the meantime...... But good luck in your move John, heading south ?
Dave, your town is looking good. The mix works well. And the different angles you took the pics at make for some good scenes. Tonight I had a small window while doing laundry so I started painting the concrete on some of the flats. But that is it till I get back from visiting the kids and grand kids. Pics.............Paul


The flats look great Paul!


Lovindemtrains, Great looking town! The different buildings and placements make it a joy to look back in time! Keep up the great work!![]()
Brian, Nice Santa Fa collection! You sure keep the bar high with all the engines and rolling stock!![]()
Brwebstr, Great looking cars and what detail you put into them! Wonderful work!![]()
John, I am sorry to here you have to take it down. I sure hope your new place has room for a future layout!![]()
Paul, the flats are coming along nicely! I hope you have fun with the kids and grandkids! Enjoy the time with them you can!![]()
Some nice modeling on display -thanks, I enjoy seeing it. I have moved twice in one year and, at least, I anticipated the first one and my layout was on modules to take apart but there were damages and losses plus I sold a bunch of "extra" items to lighten the load. At least I am in Pa. with a lot of train stuff around. Yesterday I dug out my lighted signals and plan to set them up. Some are home made and, sort of crude, but I enjoy the colored lights. I used a string of Xmas mini-lights, red & green, two to a pole with a large washer painted black. The pole is 1/4" iron pipe painted black with a 1/4" to 3/8" reducer on the bottom as a base. Crude but very cost effective. Also swapped out a ZW for a better one.
I gave this old Williams 18" Amtrak baggage car a make over.
1) replaced interior "bayonet bulb" lighting with LED
2) This unit was always a poor tracker. Turns out, it needed a bunch of weight. It was too light. Weight added. Problem solved.
3) The trucks were originally shiny/silver but I painted them black to match all my other Amtrak equipment. If I get tired of black I can always paint them silver again. ![]()
4) Added red "tail lights" with an underside on/off switch. These look cool when this is the last car of the train. If it isn't, I can turn them off.


Ralph, the car looks great! Mind if I ask what size LED's you used for the back of the car?![]()
mike g. posted:Ralph, the car looks great! Mind if I ask what size LED's you used for the back of the car?
2 mm
Managed to salvage my mine run road made of rigid pink styrene insulation... It was way too fragile after spray painting it with Camouflage "Sand" color..... Brush painted it with the same California AllFlor flooring paint I used on my train room concrete floor, then after it dried, weathered it with India Ink/Alcohol wash, then took the air brush out to blend and smooth the transitions....
Been adding trees and vegetation to the hillside, not done yet, but I find it's better if I put things in place and come back the next day to finalize what trees belong where. Then moved on to the rural gas station scene at the bottom of the mine run hill....

")
")
")

")
")
")
so today I finally obtained that last left hand 022 to complete the classic shape figure 8 inside the oval with a return track for continuous running. Tomorrow I will run wire to power up the eleven 022's. and Sunday I will power up run a train between all three tables. It will be a special Father's Day. My daughter and granddaughter will run their trains too, one loco at a time. I will have to figure out how to do two train operation as a challenge.
What's In the next few weeks is running feeders, figuring out a couple of blocks, and where to place specialty tracks.
Then placing a couple of accessories and plasticville etc.
I am excited about it!


Btw, sorry for the poor picture quality.
Will send better progress photo updates.
Fun looking layout great job keep it up
Ralph, thanks for the information!![]()
Chris you layout is so great looking that I could see myself living there! It would be a nice little step back in time! Keep up the great work!![]()
Leroof, looing good! I hope you have a wonderful time with your daughter and granddaughter on Fathers Day!![]()


Great Pictures Brian! I really love the first 3 of the wooden bridge!![]()
thanks Mike !!!


chris a posted:Managed to salvage my mine run road made of rigid pink styrene insulation... It was way too fragile after spray painting it with Camouflage "Sand" color..... Brush painted it with the same California AllFlor flooring paint I used on my train room concrete floor, then after it dried, weathered it with India Ink/Alcohol wash, then took the air brush out to blend and smooth the transitions....
Been adding trees and vegetation to the hillside, not done yet, but I find it's better if I put things in place and come back the next day to finalize what trees belong where. Then moved on to the rural gas station scene at the bottom of the mine run hill....
terrific work, (and photos)!
briansilvermustang posted:thanks Mike !!!
![]()
chris a posted:Managed to salvage my mine run road made of rigid pink styrene insulation... It was way too fragile after spray painting it with Camouflage "Sand" color..... Brush painted it with the same California AllFlor flooring paint I used on my train room concrete floor, then after it dried, weathered it with India Ink/Alcohol wash, then took the air brush out to blend and smooth the transitions....
Been adding trees and vegetation to the hillside, not done yet, but I find it's better if I put things in place and come back the next day to finalize what trees belong where. Then moved on to the rural gas station scene at the bottom of the mine run hill....
Masterful results Chris!
Hooked up some Just Plug lights, added a hub to light up heliport.  put some more at lumber mill and sanding tower, also maintenance shed
 This system is great.


Congratulations, Leroof!!!
Question about using Lionel 1033.
how can I use this transformer to run one train and use other posts(?) to power the 022's ?
thanks.
leroof
great thanks to all for sharing your layout progress. It was so motivating that I rebuilt (simplified) my former PW Lionel layout. To all every, thanks for so many amazing shared moments of creativity.
Have a great Father's day, if possible, run trains!
Access to this requires an OGR Forum Supporting Membership


