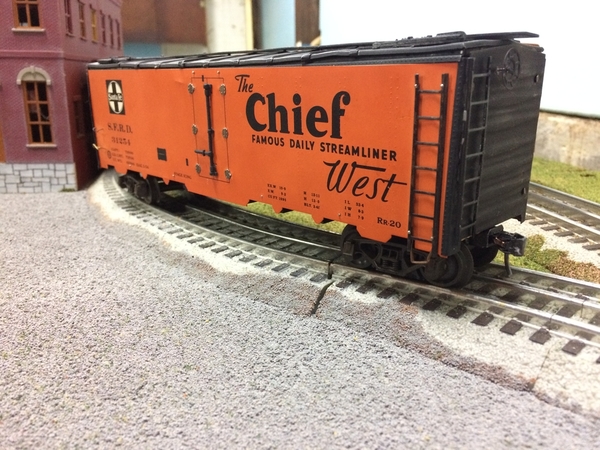
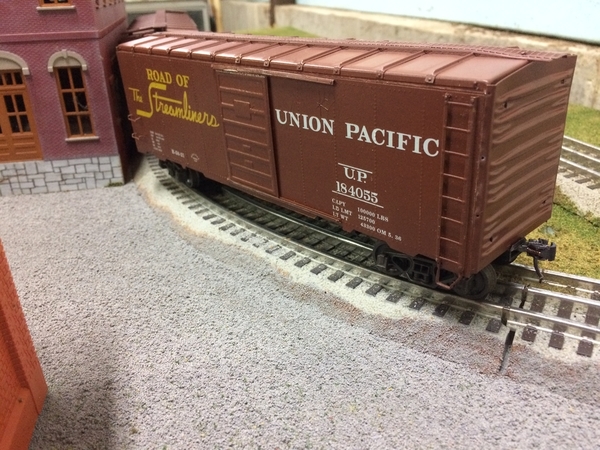
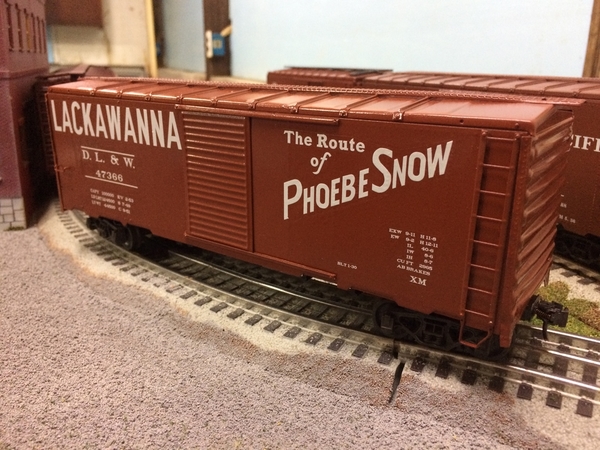
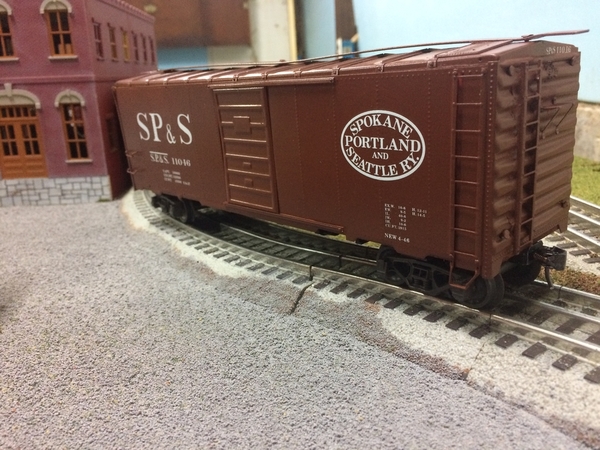
More trains for Brian!
mike g. posted:Chris, you are the goto Man for information! Your layout is looking great with the wide sweeping curves along with everything else! Just keep what your doing!
Joe, nice looking engines and very smooth! Your layout looks like its going to be a fun one when completed!
Paul2, She sure has done a great job on the painting for you! I bet your getting excited to get them back on the track!
Lee, Looks great! I am just wondering how many more do you have left to do?
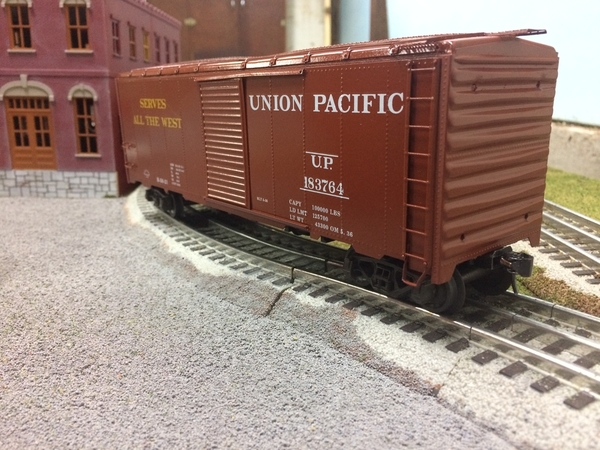
I think I’m might do 5 more I had 14 total
More trains for Brian is right!!
Lee, you are getting to be a whiz at these cars! Five more will be done in no time!
Dropped the lift out section in place after I positioned a couple of terminal blocks. Then I started drilling out an opening for the one half of the plug. I made the hole on the snug side. I then ran a bead of glue around the backside of the plug before pushing it into place. I'll let the glue set up for a while. The other half of the plug is going to hang out the hole I drilled for it. I would of been further along but for some reason I am having trouble finding the tools I need. Too many senior moments I guess. After dinner I'll start running wires from the tracks to the terminal blocks. Pics..................Paul
Attachments
Paul, We have been in this house for over 7 years, and I still have trouble remembering where I put things. I can remember where it was in the old house, but not this one. Your plugs look good!!
Wishing a Happy Birthday to @CBS072! ![]()
Mitch
Attachments
briansilvermustang posted:
adding a new ramp to go to some staging tracks...
and putting in some more shelves down underneath too...
Brian, I would love to see a video of one of your trains tunneling through the walls and running through all of the rooms in your house.
I'll second Arnold's request. My guess is, we will be transitioning all over the house and get lost in video land!!
Attachments
The truck looks great
Mark Boyce posted:The truck looks great
Thanks Mark
I spent time running a new Santa Fe "Cat Whiskers" #200L and 200A AB powered set that just arrived. It is another good Ebay purchase from the seller who sold me an Santa Fe #200LABC ABBA set a month ago. I still have to test a second powered #200A unit that also arrived with these engines. The seller had two complete sets in three shipping containers of personal trains he is selling. I ran the Big Boy #4014 with 30 cars behind it, and a new Niagara #6013 pulling ten Broadway Limited 21" passengers that I detailed. It was a good night running trains on the mainline of the "Valley of Bridges" layout.
Tomorrow I will inspect the new Atlas O H21a Pennsylvania "Coal Goes to War" and Norfolk & Western coal cars that arrived today. I oil axles with a drop of LaBelle 107 and roll the wheels before I store the cars.
Sincerely, John Rowlen
John Rowlen posted:It was a good night running trains on the mainline of the "Valley of Bridges" layout.
Sincerely, John Rowlen
John, so good to hear you had a fun night running some of your new trains. Seems you’ve suffered a run of bad luck lately, so I’m glad you are back “on the right track”. ![]() Would love to see some video of that Niagara consist!
Would love to see some video of that Niagara consist!
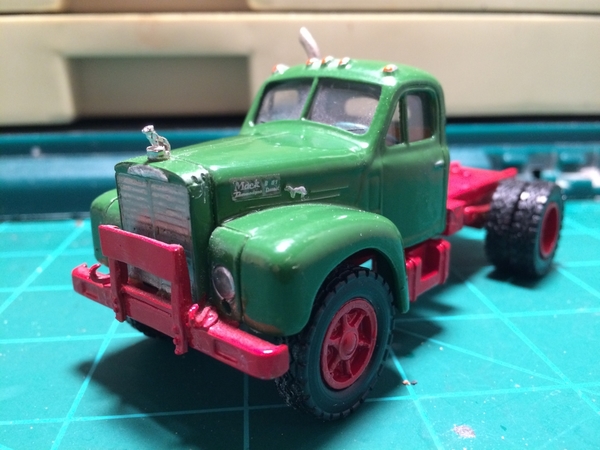
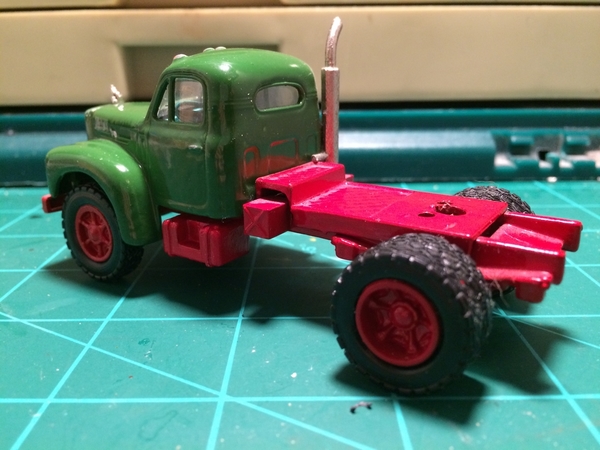
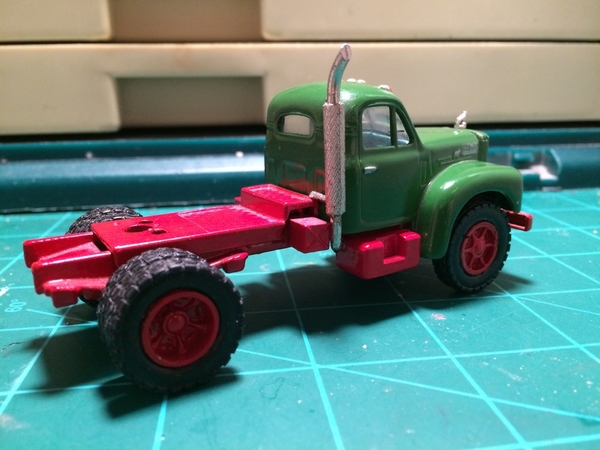
Lee, I cant wait to see all 14 on the track at the same time! By the way the Mack truck is looking great! Nice work!![]()
Paul2, the plug system is looking very nice, will make an easy connection when you drop the lift out section in place! Nice idea!![]()
John, anytime running trains is a good day! I cant wait to get to that point! Someday!![]()
Brian, how is that video coming along of your trains running in the house? LOL![]()
Thanks Mike
Don’t know if I will get all 14 done but there will be a good manifest of them
Lee, great looking bunch of cars. Like Mike said can't wait for a video of them coming down the tracks and where do you find the kits and where did you find the Mack truck........Paul
I bought them at a hobby shop in St. Louis there was a box of them beat up and painted I’ll post some in the rough stage and the video will be soon also of them
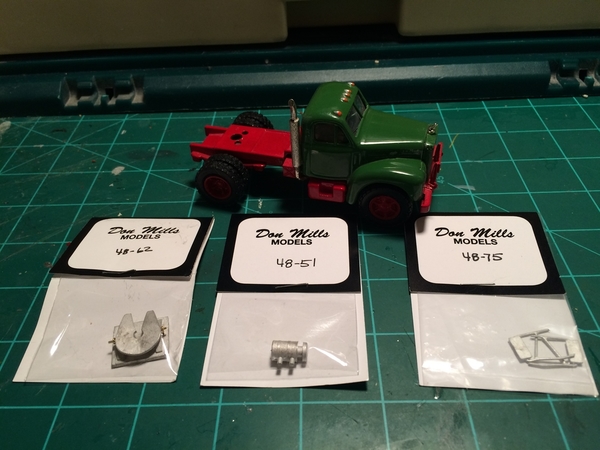
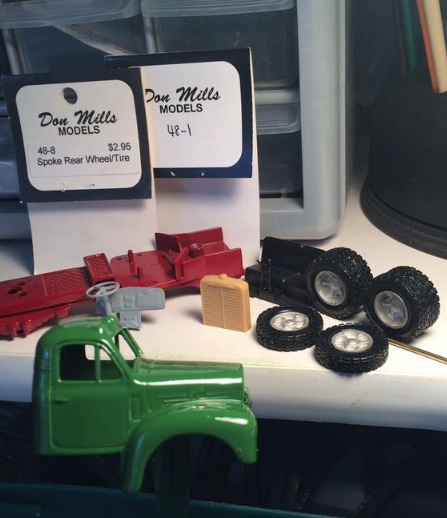
The Mack is a corgi I added a B73 radiator I got from Don Mills and added his parts to upgrade it
Attachments
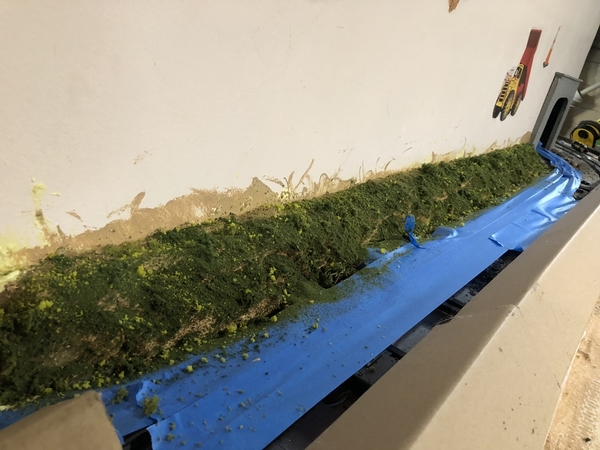
It feels good to work on the layout once again. I have been in awe of the work that everyone else has been doing. Today I tried Chris A's method with using spray foam and low loft batting on the shelf portion of the layout. I have been stooped on how to finish this area and finally came to the idea of putting a small grass knoll with a wall on top of it. Most of it didn't quite go as planned, but I am fairly happy with it and learned quite a bit. Found some old paint and used that as the base coat, but go buy some new spray foam (what I had was really old and wouldn't come out) and some more tape because my kids used it all. Not too bad for a rookie!
Attachments
Looks great Thaddeus! Keep up the good work.
Bob
Looks good Thaddeus! If you get to doing it in a way that suits you better, you can always come back and change this.
THADDEUS, came out good for a first time trying something new and it is a good feeling you get when you start to work on the layout again. This afternoon I got a bit done. Got all the wires in and soldered to the tracks where needed. And I soldered wires to the other half of the plug. I will be using only five of the six wires so I am not sure whether I'll go see if I can get some yellow 14 gauge wire just in case I need another line for something. So that's a wrap for a day or two. Tonight we have to go out and tomorrow I will be helping set up for the local TCA show in Parma plus I will be selling some stuff on Saturday there. Sunday will be out for part of the day to go pick up my passenger cars. I am anxious to see them in person, get them home, wire in the LED lighting kits and get them on the track. Pics........................Paul
Attachments
The little Christmas layout I am making for a friend's daughter is taking shape. It is my first attempt at a layout and its objective is to be more fun than gorgeous.
So many little things that I thought were done have had to be touched up. For example, I took an old tank car, separated the tank from the bed, painted the bed a glossy green. Painted the tank glossy white. Then I copied an image of candy cane stripes from online; saved it as a jpeg; and printed it on my color laserjet on water-slide decal paper. Then I cut the decals into strips with some cut outs for the manholes. The application of the decals was delicate with all the features of the tank, but with care it turned out looking like a big candy cane on wheels. Once I applied a clear coat to seal the decals, however, the red ink bled a bit, so I had t touch up with a very fine brush and Testors glossy enamel.That was just one little repair.
I bought some 23/32 plywood and cut it to yield 2 panels of 48" x 66"; then hinged the 2 panels; painted them flat white; and applied Woodland Scenics snow flakes to the wet paint. It is dry now, and the snow looks great, ready for me to secure the tracks with an inner and outer oval. The idea was to have a 4' x 5.5' layout that could be folded up and put away after Christmas, and easily deployed the following December.
There is a lot more but that's enough for now.
Arnold D. Cribari posted:briansilvermustang posted:
adding a new ramp to go to some staging tracks...
and putting in some more shelves down underneath too...
Brian, I would love to see a video of one of your trains tunneling through the walls and running through all of the rooms in your house.
it will be a while, tearing things down and redoing... ![]()

camouflaging microwave... ![]()
Attachments
Paul, Looks like you are on your way with the wiring. The track, ballast, and electrical connections look good! Have a good weekend at Parma.
Pete, Sounds like the Christmas layout will be really nice! Your friend's daughter should be very pleased!
Brian, Just don't camafoge the freezer! You wouldn't want to not be able to find the ice cream! Izzy would be mighty sore at you!!
Here’s a video of the All Nations cars I restored. enjoy
Attachments
They look good rolling along, Lee!
Thaddeus, Looks wonderful! I hope my first time turns out as nice!![]()
Paul2, your work is so clean and professional, Looks Great! My I ask what you use to do the soldering? P.S. Thanks for the surprise!![]()
![]()
Pete, sure sounds like a great little layout! I sure hope you post pictures!![]()
Brian, Don't tear to much down! You still have the new layout in the shop to do!![]()
Lee, The cars look great, rolling nice and smooth also! Wonderful job!![]()
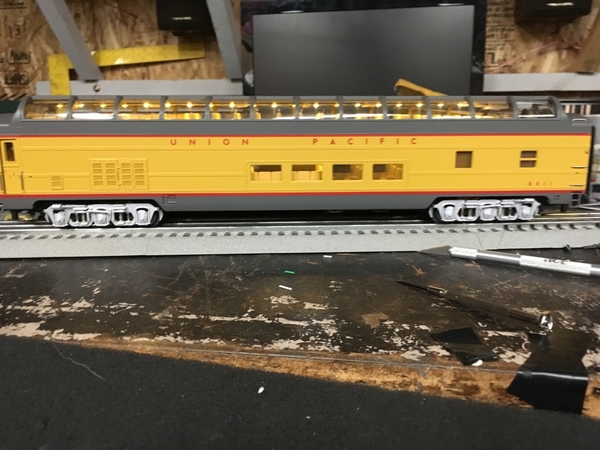
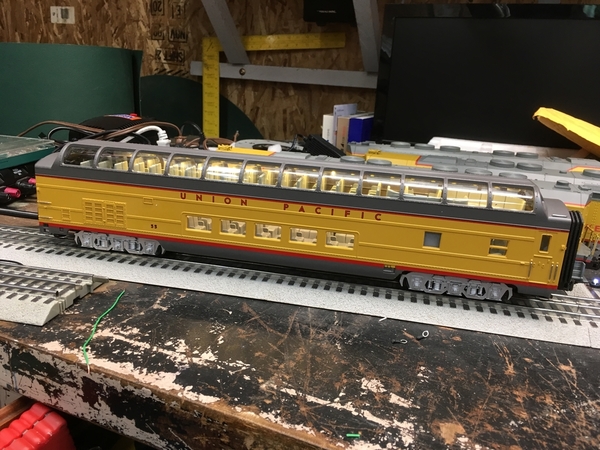
Here are a couple of shots of the two full dome cars that I have installed LED lighting. The second one took a lot less time to do. I did three more cars this afternoon. I think I have 12 left to do.
Attachments
Apples55 posted:I’m sorry, my friend, but that is in incredibly poor taste. Please consider deleting it.
Done and done. My apologies to anyone who was offended.
I opened a couple of newly arrived Atlas O N&W and Pennsylvania H21a Hoppers. I installed the interior bracing that comes with the car. The bracing pops into the car. Do not use glue. I start each piece from the middle of the car as I place them in the holes in the side of the interior.
I tested these cars behind my Big Boy #4014 for an hour of run time, fun time. The Atlas H21a hoppers are well weighted and have the new hidden coupler plates on the Andrews Trucks. These are Atlas Master Line cars and worth the money.
Sincerely, John Rowlen
Attachments
Mitch - I know you were trying to be funny but you were skating on thin ice !! Be careful. It is a crazy world out there.
John Rowlen posted:I opened a couple of newly arrived Atlas O N&W and Pennsylvania H21a Hoppers. I installed the interior bracing that comes with the car. The bracing pops into the car. Do not use glue. I start each piece from the middle of the car as I place them in the holes in the side of the interior.
I tested these cars behind my Big Boy #4014 for an hour of run time, fun time. The Atlas H21a hoppers are well weighted and have the new hidden coupler plates on the Andrews Trucks. These are Atlas Master Line cars and worth the money.
Yanno, I've been playing with trains for half a century, and this is the first time I ever considered the possibility that hopper cars might have interior bracing. The intarwebs IS edumacashunal! ![]()
Mitch
You never stood on a bridge and looked down in to a real, empty coal hopper car ?? You should try it some day. Check out gondolas, too.

Attachments
PSAP2010, The LED lighting makes those cars look great! I have everything I need to do mine, I just have to do it sometime.
John, The hoppers look great! I have a couple that have a brace to be added that angles from the floor to the side of the hopper. I found them difficult to put in straight, but it could be my dexterity isn't what it once was.
Brian, Another great viewing angle for a real railroady impression!
briansilvermustang posted:Arnold D. Cribari posted:briansilvermustang posted:
adding a new ramp to go to some staging tracks...
and putting in some more shelves down underneath too...
Brian, I would love to see a video of one of your trains tunneling through the walls and running through all of the rooms in your house.
it will be a while, tearing things down and redoing...
camouflaging microwave...
Normally people tear out the kitchen and replace it. Brian tears out the TRAINS IN THE KITCHEN and replaces them. ![]()
chris a posted:Dave, thanks for the kind words. Still recovering from major shoulder surgery, (week 14), so I need to keep busy, and keep moving. I won't be able to go back to restoring old windows till early 19, so I have a window of opportunity here to try and get this to the point where trains can run all the way around the main line. I don't know about achieving excellence, but I am trying to continuously improve, and always striving for excellence. The results are pleasing and I can see definite improvements since I started this a couple of years ago.
When I can finally run a train on the entire 220 foot mainline that's when the "enjoyment" and sense of achievement will really hit me.
Definitely learning new things everyday. Most of the techniques I am employing now, I have read about over the years, but never put into practice - like use the widest radius curves space will allow, don't lay too many tracks, roads or scenery in straight parallel lines, even small elevation changes and grades, and wide sweeping curves, add to the realism. Of course all these things make the build process longer, but in my case, this whole layout is designed and built in modules that can be taken down, moved and set up again.
So, I keep telling myself, the extra time spent now building in modules, won't be wasted as it won't have to be demolished to be moved, inherited, or sold off.
I had bought a bunch of wide radius ross curved track, 096 up to 0128, but now I am realizing I really get better smoother turns with transition "easements", by bending gargraves flex track. I might end up with quite a bit of Ross leftover,as I am starting to enjoy, and getting more proficient, bending the gargraves.
I will concur with the idea of learning a lot of techniques but not using them. I have, in the last 2 years or so, become "brave" enough to take chances. For the most part I have been relatively successful and pleased with results. Even with those things that I wasn't so successful with I don't believe I was too far off the mark. I am learning that sometimes "mistakes" actually yield good results and this has motivated me to keep moving, trying, and experimenting.
When it is all said and done, I don't have unlimited funds to hire someone to do things for me and when I have, I have insisted on working along side them to learn. Most importantly doing things on your own is one of the best parts of this hobby (IMHO). This is not to say having a couple of buddies over to do some landscaping, etc. doesn't have its place but, for me, should be done for comradery not necessarily out of need.
Seeing guys on the forum, like yourself, accomplish such great results is great. Especially when you give details on your work.
Dave
Hey guys thanks for all likes.
I also had to do some repair work on the second full dome car. It apparently had been dropped at one time before I bought it. I had previously repaired the frame at one of the truck mounts using some epoxy to replace a piece of the frame around the hole. When I had the car apart to install the LEDs I noticed that the frame was cracked around the other truck mount. I used Gorilla Glue cazy glue equivalent on the cracks. Should hold as long as I don’t abuse it.
Larry
jim pastorius posted:You neverstood on a bridge and looked down in to a real, empty coal hopper car ?? You should try it some day. Check out gondolas, too.
Under this bridge in Pennsylvania....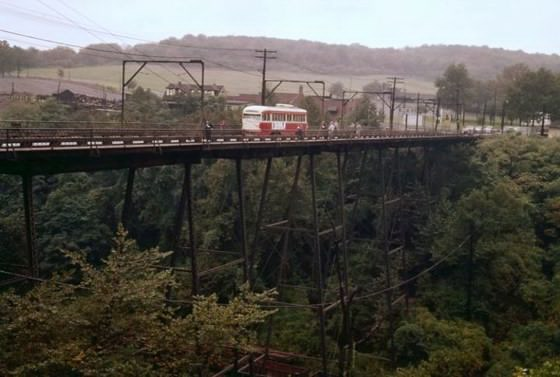 .. there has stood a railyard for parked freight cars, ever since I was a curious boy, living nearby. As ever-adventurous adolescents, a couple friends and I used to climb down there and climb up and into the empty hoppers. We'd slide down the insides to the hatches at the bottoms, and either scramble back up the very slippery sides (not wet, but very dusty, rusty, and bruised metal) back to the top edges, or we'd try to slip out the open bottom doors.
On one occasion, as one of those friends and I were about to go thru one of those doors, an engine must have rammed into the long line of those hoppers, far down the tracks, giving the hopper we were partly in and partly out, a heavy jolt and BANG!
I was able to scurry back up one of the ends, inside, but my friend wanted to see if he could get out one of the slightly-opened chutes in time. We screamed at him to abandon that idea and hurry back up an inside-end to us to make our getaway. Bending inward at our waists, we had to reach far into the car for his up-reaching hands, as he was having a terrible time getting traction for his feet.
We finally did get hold of him and dismounted the hopper. Then, we ran like the crazy devils we were out of the yard and back up the hillside, to a local Dairy Queen near the bridge for the comfort of ice-cream and catching our breaths.
That was the last time we ever tried that stunt.
We told nobody about it.
The things we did as kids!
FrankM


