Roof paint is drying. I hope to get vent and smoke stacks mounted to the engine house roof tomorrow. Then the plan is to get it on the layout over the weekend.


|
|
sidehack posted:Installing Legacy (which I've had sitting in the box since 2015) in combination with TMCC
while printing new couplers for B&M F Units
Your on my timeline Ray. I like your couplers can you show installed photos please.


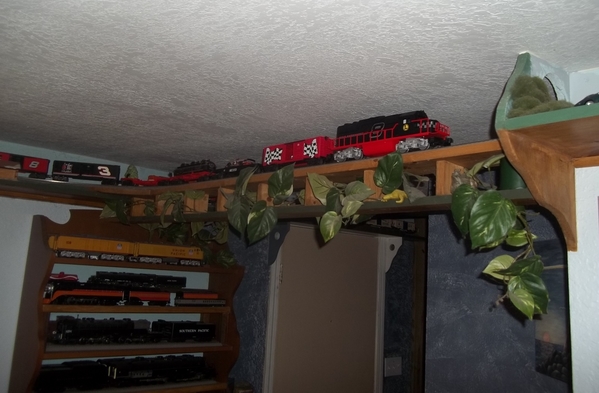
put more shelves up on the shelves to get more storage room ...


Brian, I really like the MoPac diesels especially the weathered one. Nice photos as always.
Arnold D. Cribari posted:The last couple of days I have kitbashed pieces of an engine house I got about 20 years ago, to make a Yankee Stadium entrance.
About 1 month ago, Leroof visited me and taught me the basics for using a Dremel tool my son gave me for Christmas 2 years ago. I got a lot of practice using that Dremel tool to make this Yankee Stadium entrance:
I used the Dremel tool to shape plastic parts from the kitbashed engine house and cardboard, painted them, and glued them together.
This is a work in progress. I believe my Yankee Stadium entrance will improve over time. Such projects require patience and careful attention to details.
After several hours using the Dremel tool, I am a lot more confident working with it. IMO, it very helpful in making model railroad structures. Arnold
Super work Arnold, thanks for sharing the pica.
As to use of a Dremel tool, I don't know what I'd do without mine. Trimming, track cutting, scenery work, wheel cleaning, part polishing, rust cleaning, etc, etc.
This tool and my Hot Glue gun (wireless Ryobi) are the most used on Warrenville, next to screwdrivers and paint brushes
Brian, I thought you would have run out of walls to hang shelves by now. ![]()
Andy, the cars and their contents look great!

Mark Boyce posted:Brian, I thought you would have run out of walls to hang shelves by now.
if that were to happen...
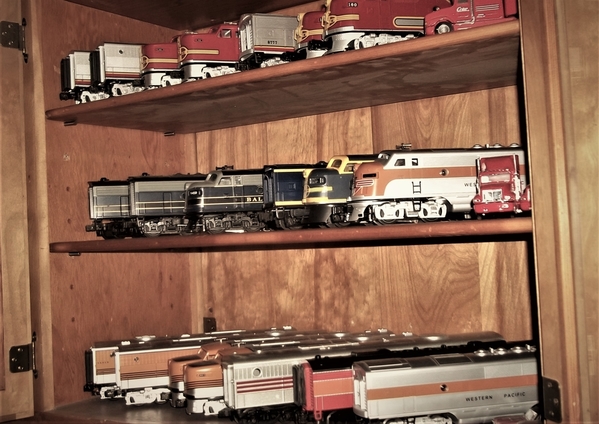
no worries, still have the kitchen cabinets and drawers to use... ![]()

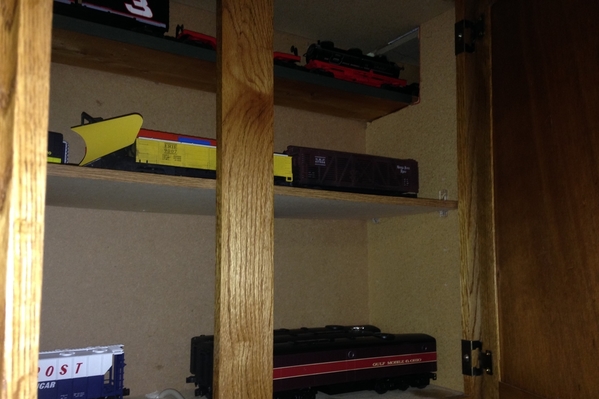
top level is part of the ceiling layout, going thru all the cabinets ...
still room for another shelf in there... ![]()


briansilvermustang posted:Mark Boyce posted:Brian, I thought you would have run out of walls to hang shelves by now.
if that were to happen...
no worries, still have the kitchen cabinets and drawers to use...
Brian,
My guess is that you are not married (LOL). If I'm correct, it would be cool to replace the cabinet doors with glass or plexiglass.
A single friend of mine has trains all over the house, so much so that the entire dining room table is covered except for a place for a single place setting.
Ski, Your friend may have a lot of trains, but it would be hard to beat what Brian has displayed! ![]()
I had mentioned missing my old 253 consist earlier, when I got an extraordinary email on Monday: "Santa", who lives in New Hampshire, offered me a set of prewar cars in need of some TLC...
The cars arrived today. One was missing a coupler, another had no light or power pickup.
I set to work, and here are the results!

The front car now sports an MPC era dummy knuckle coupler (since I no longer have any locos with latch couplers) and a third rail pickup modified from a box-coupler truck pickup...

The lamp bracket, barely visible here, consists of a screw-type base soldered to a bracket fabricated from an old Fastrack grounding strap and held down by a screw salvaged from a junked MTH bump and go trolley shell...

All three cars light up fine!

My New Haven EF-4 has been sitting in the corner of my layout gathering dust for a couple of years, now, so I figured it was past due to be dusted off and given some exercise...

Thanks to "Santa", this Christmas will be even merrier than ever!
To quote Tiny Tim, "God bless us every one!" ![]()
Mitch
Lionelski posted:briansilvermustang posted:
A single friend of mine has trains all over the house, so much so that the entire dining room table is covered except for a place for a single place setting.
That man has room for improvement!
Yes, room for improvement!
Ski, Brian shared what could be a photo album of all his trains a while back. When you thought there couldn’t be more, there were more!!
will update soon... ![]()


Designed and 3D printed couplers for the Atlas B&M F Units and dummy. All 6 of the dummy couplers dissolved like sugar cubes. Sent in a request to Atlas but haven't got a response yet so decided to make my own. Did find a factory design flaw on the adapter so added reinforcement walls each side. Seems to work fine. Now just paint and powder coat..haha
 As designed on CAD with reinforced adapter plate
 Test fit 3D printed couplers
 Long test run with heavy consist, no problems

sidehack posted:Designed and 3D printed couplers for the Atlas B&M F Units and dummy.
Test fit 3D printed couplers
very cool Ray, they look great ! I am doing the similar thing to replace couplers that I do not want to
worry about coming open on me while running trains... like long heavy passenger trains, sets of engines
that I will always keep together, & long unit trains that I will not be breaking up, switching out single cars...
I am going to make mine out of aluminum, cutting out rows of blanks in a " wire EDM ", machining, then
anodizing the couplers when done. You're couplers turned out great, very nice !!
M. Mitchell Marmel posted:I had mentioned missing my old 253 consist earlier, when I got an extraordinary email on Monday: "Santa", who lives in New Hampshire, offered me a set of prewar cars in need of some TLC...
The cars arrived today. One was missing a coupler, another had no light or power pickup.
I set to work, and here are the results!
The front car now sports an MPC era dummy knuckle coupler (since I no longer have any locos with latch couplers) and a third rail pickup modified from a box-coupler truck pickup...
The lamp bracket, barely visible here, consists of a screw-type base soldered to a bracket fabricated from an old Fastrack grounding strap and held down by a screw salvaged from a junked MTH bump and go trolley shell...
All three cars light up fine!
My New Haven EF-4 has been sitting in the corner of my layout gathering dust for a couple of years, now, so I figured it was past due to be dusted off and given some exercise...
Thanks to "Santa", this Christmas will be even merrier than ever!
To quote Tiny Tim, "God bless us every one!"
Mitch
Mitch you did a great job. I’m glad you chose an NH engine to pull them. At least for Christmas, let that stand for New Hampshire instead of New Haven. LOL
MERRY CHRISTMAS TO ALL & TO ALL A GOOD WEEKEND!


briansilvermustang posted:sidehack posted:Designed and 3D printed couplers for the Atlas B&M F Units and dummy.
Test fit 3D printed couplers
very cool Ray, they look great ! I am doing the similar thing to replace couplers that I do not want to
worry about coming open on me while running trains... like long heavy passenger trains, sets of engines
that I will always keep together, & long unit trains that I will not be breaking up, switching out single cars...
I am going to make mine out of aluminum, cutting out rows of blanks in a " wire EDM ", machining, then
anodizing the couplers when done. You're couplers turned out great, very nice !!
Brian
That sounds like a great idea, we used to have forging trimmers made from Wire EDM at one time, does a nice job
I'd like to have one of those printers that deposits metal in layers, would make life easier although a little poorer I suppose.
Ray
Brian, you have a dirty engine? That is a surprise ![]() .
.
So far this morning;
I put together my impending third level on the living room floor to calculate the custom cuts to be made. I also made a pattern for the new roadbed. I straightened and installed my new-to-me 24" MARX bridge. Then I bought Christmas presents for me! Lots of goodies are on the way to my mountain. Forty nine pieces of O gauge track. Four more O22 switches. And two professional grade Foos balls. Now I'm off to play with a scroll saw.
I'll be back
I completed two more brass dumpsters for the scrapyard and color coded them for easy sorting. Also made a scrap rod/pipe rack. The trailer is now officially designated as the Yard Office so no more would-be renters are welcome!
Wish I could find some inexpensive 1:48 plastic automobiles that I could heat up and flatten. Anyone aware of a source?
Cheers, Dave


Dave, Very nice work in the scrapyard.
Well y'all, it's been eight hours since my last update. I did this.... Five inches too long.
I then raked, piled, and burned three big 'ol piles of leaves. I returned to the train building to rethink my third level. I ran my tallest engine to determine the height and spacing of risers. I'll cut some posts tomorrow. One more very important item. My bride is in Texas for a week.
Bill

darlander posted:I completed two more brass dumpsters for the scrapyard and color coded them for easy of sorting. Also made a scrap rod/pipe rack. The trailer is now officially designated as the Yard Office so no more would-be renters are welcome!
Wish I could find some inexpensive 1:48 plastic automobiles that I could heat up and flatten. Anyone aware of a source?
Cheers, Dave
Looks nice Dave! I love the dumpsters.
Odenville Bill posted:Dave, Very nice work in the scrapyard.
Well y'all, it's been eight hours since my last update. I did this....
Five inches too long.
I then raked, piled, and burned three big 'ol piles of leaves. I returned to the train building to rethink my third level. I ran my tallest engine to determine the height and spacing of risers. I'll cut some posts tomorrow. One more very important item. My bride is in Texas for a week.
Bill
Bill, Looks like you need to do some fabrication. My leaves we didn’t get to are covered with snow now. Out of sight, out of mind.
I was able to bring in some ceramic buildings from the garage the last couple days. I still have to finish arranging and then I’ll post a photograph or two. I didn’t think of getting the Polar Express out before my surgery, so it will Take some doing to get it out and on the track, but not impossible
Playing around with coloring the supports for the roof. Once they dry I can see how they look. Pic............Paul 2

Finally went live with the power las night! It's officially operational!


checking and getting all my locos programmed again for when I add Legacy to the TMCC controls next week and that includes the crane. The have sat for several years but are still in great shape.


Jon1443 posted:
Finished wiring everything up to the new control board and then started on the elevated section
Nice ! What are your plans for the near and far ends ? Are the two ends of the straight section on the right to be connected to the curves at either end ?
I got the engine house on the layout and sceniced around it. I copied another forum member's idea and covered the engine house with Glad Press 'N' Seal so I could glue everything down around it and still be able to remove the engine house from the layout. It'll look sunk into the scene that way. Once everything dries in a day or two I'll wire the lights in, paint the rails leading into the engine house rail brown, and it'll be done, except for details.

Lou, the engine house and environs are looking mighty fine!
Paul, while the first flats look great, I think you have improved. This looks fantastic!
What'd I do today? It has been bothering me that there is no indication of the electromagnet being energized on my Lionel 282 Gantry Crane so I set out to rectify the problem. I wired an LED across the electromagnet feed wires inside the crane cab:

Because the LED I used is a non-polarized red/green version and the electromagnet is energized with 14VAC I had to wire a diode such that only current for the red direction is allowed to pass through the LED. There is a resistor built-in to these diodes so not needed.

Aaaand....up the chimney the LED diode rose! A dab of hot glue and all done.

Now I cannot forget to de-energize the electromagnet and cook it.

I started out doing this for purely practical/safety reasons but serendipitously it adds a dimension to operation. Lights, after all, are a form of animation and seeing it come on with the magnet and go off when the steel drops is entertaining/satisfying.
geysergazer posted:What'd I do today? It has been bothering me that there is no indication of the electromagnet being energized on my Lionel 282 Gantry Crane so I set out to rectify the problem. I wired an LED across the electromagnet feed wires inside the crane cab:
Because the LED I used is a non-polarized red/green version and the electromagnet is energized with 14VAC I had to wire a diode such that only current for the red direction is allowed to pass through the LED. There is a resistor built-in to these diodes so not needed.
Aaaand....up the chimney the LED diode rose! A dab of hot glue and all done.
Now I cannot forget to de-energize the electromagnet and cook it.
I started out doing this for purely practical/safety reasons but serendipitously it adds a dimension to operation. Lights, after all, are a form of animation and seeing it come on with the magnet and go off when the steel drops is entertaining/satisfying.
Nice job!! What type/size diode/resistor did you use??
I bought these on eBay, about a buck a piece, 10 in a package. They are 5mm diameter so lots of light for old eyes ![]() :
:
5mm Bi-Color Nonpolar Red/Green Pre Wired 12v Diffused 2-Pin Leds USA

Because they are rated 12V they have a resistor already in one lead. If you supply DC in one direction it lights green while reversing the DC polarity cause it to light red. So inserting any 1N diode in the line means you can feed it with AC and depending on which way the diode is polarized the LED will light either red or green. I'm feeding 14VAC rectified to half-wave DC so well below 12V to the LED.
Marty, what a fun project!
Marty R posted:Well..... technically it took about 4 days
Wowsers!
Love it Marty
Lou, engine house came out looking very good.
Lew, that was a nifty idea to add the light to show when the magnet was on.
Paint dried on the supports but I decided to darken them some more. Then while I was moving the building the loading dock popped off. That's what I get for being stingy with the glue. After that dried I added the roof above the loading dock. The kit doesn't come with stairs so I made up a set to go on the one side along with railings. Maybe after dinner I'll glue the stairs and railings together........Pics...........Paul 2


Access to this requires an OGR Forum Supporting Membership


