
RSJB18 posted:

Cleaned the track this afternoon.

Open question: I have 5121, 5122 switches, powered on track power. Obviously that means the solenoids buzz when a car is sitting on the anti-derail rails. I was playing with one of the worst offenders this afternoon and its a simple fix- just stop the plunger from from vibrating when energized. However- the simple fix renders the switch useless. What I'm looking for is a way to briefly cut the power to the solenoid to limit the length of time it can buzz. I know that these can be re-wired from aux power but that doesn't eliminate the buzzing.

Thoughts?

If you use aux power supplied by a capacitor setup that'll stop the buzz. The Cap has enough energy stored to pull the solenoid plunger and then it runs out of juice until the actuating button is released or the car moves off the  derail-rail. Then the capacitor re-charges and is ready to fire again.

geysergazer posted:
RSJB18 posted:

Cleaned the track this afternoon.

Open question: I have 5121, 5122 switches, powered on track power. Obviously that means the solenoids buzz when a car is sitting on the anti-derail rails. I was playing with one of the worst offenders this afternoon and its a simple fix- just stop the plunger from from vibrating when energized. However- the simple fix renders the switch useless. What I'm looking for is a way to briefly cut the power to the solenoid to limit the length of time it can buzz. I know that these can be re-wired from aux power but that doesn't eliminate the buzzing.

Thoughts?

If you use aux power supplied by a capacitor setup that'll stop the buzz. The Cap has enough energy stored to pull the solenoid plunger and then it runs out of juice until the actuating button is released or the car moves off the  derail-rail. Then the capacitor re-charges and is ready to fire again.

Capacitors had crossed my mind Lew. Hadn't looked at it from that angle though. Any idea what size? I've been focused on shutting down current flow not using a different source.

Bob

Great info Lew. Did a search of Atlas switch machine and found this from Circuitron. I have one of their flasher relays on my crossing signals. Now- the concept is simple, how I could wire these into installed switches may be hard. I think I would have to get at the underside to connect to the two activating rails on the non-derail circuit. I would at least have to re-wire all of the switches to aux power and let this be the source. I have one spare switch that I re-wired for aux power that I could play with. The good thing is one board will handle several solenoids. Now I'm regretting not re-wiring all of the switches before I built the layout......

Just what I need- another project

https://cdn11.bigcommerce.com/s-upyoiba7k3/images/stencil/1280x1280/products/567830/300875/CIR-800-5303-2__19637.1504129633.jpg?c=2&imbypass=on

RSJB18 posted:

Great info Lew. Did a search of Atlas switch machine and found this from Circuitron. I have one of their flasher relays on my crossing signals. Now- the concept is simple, how I could wire these into installed switches may be hard. I think I would have to get at the underside to connect to the two activating rails on the non-derail circuit. I would at least have to re-wire all of the switches to aux power and let this be the source. I have one spare switch that I re-wired for aux power that I could play with. The good thing is one board will handle several solenoids. Now I'm regretting not re-wiring all of the switches before I built the layout......

Just what I need- another project


If you want to build your own circuit I just watched this video a few days ago on how to wire 1122 for constant voltage.  Info on the capacitor circuit starts about 26 minutes in.  https://www.youtube.com/watch?v=hGNLN2MA7x0

don

RSJB18 posted:

Great info Lew. Did a search of Atlas switch machine and found this from Circuitron. I have one of their flasher relays on my crossing signals. Now- the concept is simple, how I could wire these into installed switches may be hard. I think I would have to get at the underside to connect to the two activating rails on the non-derail circuit. I would at least have to re-wire all of the switches to aux power and let this be the source. I have one spare switch that I re-wired for aux power that I could play with. The good thing is one board will handle several solenoids. Now I'm regretting not re-wiring all of the switches before I built the layout......

Just what I need- another project


Bob, projects are what keep you young!

Don- thanks for sharing that video. Exactly what I want to do. As shown though, getting at the solenoid wire on an installed switch will be tough. The spare unit I have I was able to do from the top by clipping the wire to the solenoid and pulling it out.

Mike- believe me, I've got enough projects to keep me young for a lonnnnnnnngggggg time

Bob

Just completed the track to represent (our own representation) of  the Cass Railroad in West Virginia. We will have three Shay Engines on sidings in the 3 way switch as seen in the video. Each Shay will take its turn going up the spiral and eventually working its way through the switch backs as seen at the top of the video. Each Shay will then return to its siding and the next Shay will begin its journey up the spiral. The spiral will eventually be an enclosed mountain. We are controlling these Shays and all of the associated switches with the Arduino development micro controllers.


Thanks;

idea-thinker  

Attachments

Videos (1)
M2U02177

First project to replace working strobe light to detailed strobe light on powered unit. Removed the shell, drilled out old one with 4mm drill bit, removed plastic base off the top of the cab, drilled 2mm bit on bronze base then 3mm, installed 3mm white LED in bronze base, applied very little hot glue on it, glued it on top of the cab, assembled wires back on, shell on chassis, glued orange top part on base. Tested it, everything worked great. I have about 20 powered units to go! 😳


07D2087F-8BE8-4222-9BBA-85DFDB3C63EE5CA6F19F-545E-4B5E-8261-876ECA865C1EEE2E95B3-5083-4673-AFD4-A3FC611D872DF33073B5-AE48-491E-BC40-02895545473AFE286180-C4FE-4EE6-A04C-7EF4C75AD5CBFE0F8841-51B8-4203-A003-A719436F3E60117C272E-4F75-48D9-9829-C90499A14A19687088B2-5F76-4BD0-AAEF-2DB85F409075

Attachments

Images (8)
  • 07D2087F-8BE8-4222-9BBA-85DFDB3C63EE
  • 5CA6F19F-545E-4B5E-8261-876ECA865C1E
  • EE2E95B3-5083-4673-AFD4-A3FC611D872D
  • F33073B5-AE48-491E-BC40-02895545473A
  • FE286180-C4FE-4EE6-A04C-7EF4C75AD5CB
  • FE0F8841-51B8-4203-A003-A719436F3E60
  • 117C272E-4F75-48D9-9829-C90499A14A19
  • 687088B2-5F76-4BD0-AAEF-2DB85F409075
Videos (1)
trim.C5E3A9EE-C6EB-4AF8-8070-48D380D3B2E0

As if I don't have enough irons in the fire with projects to work on and complete I added another one. I dug through cobwebs to pull out a Downtown Deco kit I have had for years. Kozaks Machine shop. What made me get it out was I was looking at the scene I did with the Walther's oil depot and thought the machine shop would fit in there better. Opened the box and carefully took out the plaster pieces. Had one broken wall which I have glued and waiting for it to dry. Maybe later tonight I can work on it a bit. Pics..............Paul 2

DSCN0018DSCN0019DSCN0020DSCN0021DSCN0022DSCN0023

Attachments

Images (6)
  • DSCN0018
  • DSCN0019
  • DSCN0020
  • DSCN0021
  • DSCN0022
  • DSCN0023

Brian, as norm, wonderful Photos!

Lee D, Nice job on weathering the PIG! Also sweet job on the All Nations car! Nice to see your back and busy!

Idea, Nice project! Just wondering are they always going to back up the mountain?

CGWForever, Wonderful job on the new strobe! Now that you have it down it wont take very long to get them all done at 5 per day! LOL

B&O, great little trolley, even better is how wonderful your layout looks!

Paul, Same story I gave Bob, Its all those projects that keep you young! Plus we all know you can do anything!

Sorry nothing new here from me, who knows maybe tomorrow as my team isn't playing! LOL

I hope you all have had a great day and an even better tomorrow!

Bruce Jacobsen posted:

Big day, finished layering track and installing all the roadbed on the upper level. Can now get off the table and get under the table and start wiring the second level.Table1Table2Table3

Bruce, sorry I didn't mean to forget you, you were posting while I was typing my last response. What a great step to what looks like is going to be a wonderful layout! I see its in your garage, but I sure hope that doesn't mean you park your vet outside!

I hope you have a nice creeper for under the layout so you don't get a kink in your neck!

Lots of great projects everyone!!  If lots of projects keep you young, I am with Bob and Paul and will stay young a long time!!  I confess I overdid it Thursday after a good followup appointment at the orthopedic surgeon, and have just been plodding along since.  Visiting both my parents' personal care home and my aunt's nursing home yesterday didn't help.  It is soooo far into the homes from the parking lot and then back to their rooms!!!!  I remember walking back there like it was nothing some time ago!!  No worries, Monday the boys will whip me into shape at PT!  

Idea-thinker, having been to Cass and owning an MTH Western Maryland #6 Shay, I am really interested in your project!  Your concept is something different from what I have seen in over 50 years with trains!  I know I am going to like it as it progresses!

Bruce, That is a great looking layout you are building.  How do you get in and back out of the Vett after working on the layout??

My other project from my main train layout is to build the Lionel D-225 Dealer Display Layout that will reside in our Train Display room. Attached is the start of the display layout. We are planning on replicating the D-225 as close to the original as possible including using Super-O track and Switches.

D-225 Lionel Dealer Display Layout


Thanks;

idea-thinker

Attachments

Images (1)
  • D-225 Lionel Dealer Display Layout

I recently purchased a Lionel bump-n-go trolley. I had a similar trolley in HO when I was a kid (no bump-n-go though), don't know why it took me this long to buy one. Fun little critters to let loose on the layout.

This one is nice and clean but the motor was gunked up with old grease. Took it all apart and cleaned everything, worm gear, commutator, gear box, wheels, etc.

It runs great now.

2020-02-01 19.23.402020-02-01 19.23.48

Everyone have a great Sunday.

GO CHIEFS!

Attachments

Images (2)
  • 2020-02-01 19.23.40
  • 2020-02-01 19.23.48
Last edited by RSJB18
RSJB18 posted:

I recently purchased a Lionel bump-n-go trolley. I had a similar trolley in HO when I was a kid (no bump-n-go thought), don't know why it took me this long to buy one. Fun little critters to let loose on the layout.

This one is nice and clean but the motor was gunked up with old grease. Took it all apart and cleaned everything, worm gear, commutator, gear box, wheels, etc.

It runs great now.

2020-02-01 19.23.40

Everyone have a great Sunday.

GO CHIEFS!

Bob, looks like a really nice trolley! I am glad you were able to get it running smoothly! I hope you have a great Sunday also!

GO SEAHAWKS! Oh wait there not at the show this year. GO TRAINS!

idea-thinker posted:

Just completed the track to represent (our own representation) of  the Cass Railroad in West Virginia. We will have three Shay Engines on sidings in the 3 way switch as seen in the video. Each Shay will take its turn going up the spiral and eventually working its way through the switch backs as seen at the top of the video. Each Shay will then return to its siding and the next Shay will begin its journey up the spiral. The spiral will eventually be an enclosed mountain. We are controlling these Shays and all of the associated switches with the Arduino development micro controllers.


Thanks;

idea-thinker  

I absolutely love it, unique!

As it is WV, perhaps a mountain for the spiral to wrap around?

mike g. posted:
RSJB18 posted:

GO CHIEFS!

Bob, looks like a really nice trolley! I am glad you were able to get it running smoothly! I hope you have a great Sunday also!

GO SEAHAWKS! Oh wait there not at the show this year. GO TRAINS!

Mike, you must be thinking Patriots. They were in the last 3, winning 2. 
NASCAR is coming soon!  Let’s go racing boys!

PS TRAING the new conductor, Lucy, is a full time job.

456A2FC4-CF00-42D8-A4CE-B83792B23BC3

12EE1F72-A68B-455A-8DB9-CA96A0018484

Attachments

Images (2)
  • 456A2FC4-CF00-42D8-A4CE-B83792B23BC3
  • 12EE1F72-A68B-455A-8DB9-CA96A0018484
Last edited by decoynh
briansilvermustang posted:


          Matt " NASCAR is coming soon!  Let’s go racing boys! "

          Mike  " Matt, I am with you, lets go racing! Bogady, bogady,bogady ! "


                 sounds good to me          have a great day !!


hi izzy!  I'm keeping my Daddy on his toes. No time 4 trains - just ME!

So much good work has been posted in the last two days.  It is nice to see the layout construction and car building.

It's Super Bowl Sunday, and I just finished the interior of my last passenger car while Mom slept.  Now that she is up, I can start grinding the Preiser 65602 Seated People and put them in the 1927050 UP Excursion Dome Coach and the Coach, Texas Eagle.  There are no more 21" passenger cars waiting for painting.  Am I done?  I would not wager on it.

Update: I finished placing Preiser Seated People in the Dome of the Dome Coach.  I inspected what figures I have left and will need to paint a couple specific figures to complete the lower level of the Dome Coach and the Texas Eagle Coach.

Have a good Super Bowl Sunday.

Sincerely, John Rowlen

Attachments

Images (7)
  • IMG_1444
  • IMG_1443
  • IMG_1437
  • IMG_1434
  • IMG_1446
  • IMG_1447
  • IMG_1445
Last edited by John Rowlen

LOL Brian, Just wonderful!

Johan, I just love the new box cars and the scenery you use to show them off!

John, I can see the light at the end of the tunnel for you! Nice work!

So today I got some train room time and went out swapped out a right hand switch for a left hand by a suggestion from Lew! Worked out great! Then I extended the siding that the crane is on to meet up with the other crane. That took a little doing! Here are a couple pictures.

I hope everyone is having a great Super Bowl Sunday!IMG_20200202_140524002IMG_20200202_140532613IMG_20200202_140540198IMG_20200202_140546800

Attachments

Images (4)
  • IMG_20200202_140524002
  • IMG_20200202_140532613
  • IMG_20200202_140540198
  • IMG_20200202_140546800

Hi everyone,

Great to see work progressing on your guys' trains and layouts. In case you don't know already, I'm in the process of expanding my current layout from a 4x8 table to an 8x11 table. The layout will be roughly modeled after the 1940s-1950s era of railroading, taking a lot of inspiration from the Pennsylvania Railroad, including a rough rendition of their world-famous Horseshoe Curve.

Here is an illustration I made in SCARM with other details drawn in with Photoshop.

layout

Allow me to expand upon this drawing by providing some more insight.

The layout will be made using Lionel's Fastrack, and expands upon an existing loop of track that was once part of a starter set. The smaller loop at the upper part of the photo has been in place since about 2011, and has all O-36 curves. The larger loop is being added on and will have a maximum radius of O-48. In the engine maintenance facility, there will be O-72 curves, as that is literally the only place on the layout that I have room to accommodate them.

Now, let's talk about scenery. Starting within the smaller loop will be a downtown section, using all MTH Buildings to maintain a common look and curb height. The road through this section of the layout will likely be elevated to hide the actual height of the curbs, which is unrealistically high. Behind a few of the buildings will be a city park, complete with all amenities that anyone could need; benches, playsets, fountains, and the beauty of the outdoors. Additionally, a relic of railroading's past will be sitting on a long unused siding: a former PRR caboose.

To the left of the park will be the mighty Allegheny Mountains, and resting within them the PRR Horseshoe Curve. Rather than modelling the current park that is at the curve, my version will be sceniced as the curve was when steam was still king. Beyond the curve, the hillside slopes down to the reservoirs that supply water to the city of Altoona. While I'm not able to recreate the sloping hill down to the lakes, I can recreate the lakes themselves. And additionally, I'll be using a bit of my own imagination and make it a recreational lake, complete with people fishing, canoeing, and doing other activities to add more interest to the layout.

The scene with the lake will be a transition point from the more wooded areas to a rural scene. It will feature an old style gas station and service center, a farmhouse and barn, and crop fields as far as the eye can see. Behind the barn, I want to put some farm animals grazing, and I also want the entire area fenced in. The property owner doesn't like to see railfans on his property. 

Finally, we come to the engine maintenance facility. I'll be using MTH's two-stall engine shed (which yes, it accomodates Fastrack). I'd like to populate the yard with as many railroad workers as I see fit to make it as realistic as possible. It's likely that I will weather all the buildings. The area behind the buildings in the right-hand side of the photo is still undecided, so I'm open to suggestions on that.

Once I have more progress to make a good post, I'll make sure to share it here. Have a good Groundhog Day and Super Bowl Sunday everyone!

Attachments

Images (1)
  • layout

Mike, The change of switch looks good!  Your crane will have a great place to operate!  

Nick, Your plan looks good as does your description of what you plan to do.  I'll look forward to seeing your progress.

I finally sat down and did some painting on the AmeriTown Marvin's Drug Store kit I had planned on building when recuperating from knee replacement.  Well here we are 3 days short of 3 months and I finally got at it.  I had already washed the parts to get any ols off then a couple weeks ago. I sanded the edges smooth and used the method of painting mortar and wiping most of the color off to expose the bricks.  It isn't as even as I had hoped since it has been a few years since I had done it before. I painted the woodwork a burgundy color and will add other colors for the details another day.

2020-02-02 18.36.43

Attachments

Images (1)
  • 2020-02-02 18.36.43
Last edited by Mark Boyce
mike g. posted:

LOL Brian, Just wonderful!

Johan, I just love the new box cars and the scenery you use to show them off!

John, I can see the light at the end of the tunnel for you! Nice work!

So today I got some train room time and went out swapped out a right hand switch for a left hand by a suggestion from Lew! Worked out great! Then I extended the siding that the crane is on to meet up with the other crane. That took a little doing! Here are a couple pictures.

I hope everyone is having a great Super Bowl Sunday!IMG_20200202_140524002IMG_20200202_140532613IMG_20200202_140540198IMG_20200202_140546800

Mike, that worked out great!

What would it be like to extend the crane siding to the right off the tilt-up onto that deck. The grain elevator might fit there and then you'd have three car-spots on one siding. Lots of prototype-like switching operation right there.

mike g. posted:

LOL Brian, Just wonderful!

Johan, I just love the new box cars and the scenery you use to show them off!

John, I can see the light at the end of the tunnel for you! Nice work!

So today I got some train room time and went out swapped out a right hand switch for a left hand by a suggestion from Lew! Worked out great! Then I extended the siding that the crane is on to meet up with the other crane. That took a little doing! Here are a couple pictures.

I hope everyone is having a great Super Bowl Sunday!IMG_20200202_140524002IMG_20200202_140532613IMG_20200202_140540198IMG_20200202_140546800

Mike. Thank you Sir. 🤝

Johan

Hello all. I think I have time for a quick post, but likely no replies soon.

This is what I've had going the last few days. 

A loose e-unit mounting screw came loose. Said screw also supplied the only chassis ground(2 position) and I had been pulling a good load about 20min before this meltdown was noticed. After these photos I pressed lightly along the oblong burn hole and it's edges shattered. The hole ended up being about 1½" long.IMG_20200125_043350~2IMG_20200125_043451~2

633 is one shot/one year shell; and a zebra which I like, AND I had already repaired /bashed the grill with a metal frame/screen; so I reached for an Exacto saw..."extending it's life by shortening it"...(insert loose screw joke here)

This is after an attempt at bumpshop work with a micro torch and hardwood. I might have tried boiling water / baking ,but it would never fix the fine lines. The torch told me enough to decide to simply cut it up to "save the cab".

IMG_20200128_031727~2IMG_20200128_031237~3IMG_20200128_031102~2

I"m thinking this good shell side might be used against a factory wall as a generator or AC unit, pump house, etc. (cover for Gantry's drive?)

IMG_20200128_023638~2IMG_20200128_023605~3IMG_20200131_011558~2

The pilotweight is from an old plastic PW Lionel steam engine and is needed for traction and counterbalance. (it could use a few more oz really). GG-1 roller mounted on a Z-cut Jenga block. Positioning it to both clear the gears and go over the free axle, and still sit deep enough was tight.

It already pulls 5 cast PW blunt axles no problem (heavys-6 wheel crane, work caboose etc) or half a dozen baby Madisons, etc.  I have to mount better lights, make better mounts (1/2 done now) and reverse the shell( to center the engine bay more over truck; cab "hanging" and make an e-unit bracket.  

....with 2 mounting screws this time 🙄

The e-unit shows no sign of the overheat and works fine. But I have a smoke unit whispering to me too. I don't think I can fit both in my "Pygmy Zebra"😔


Attachments

Images (8)
  • IMG_20200125_043350~2
  • IMG_20200128_023638~2
  • IMG_20200128_031727~2
  • IMG_20200128_031237~3
  • IMG_20200128_031102~2
  • IMG_20200131_011558~2
  • IMG_20200125_043451~2
  • IMG_20200128_023605~3
Mark Boyce posted:

Mike, The change of switch looks good!  Your crane will have a great place to operate!  

Nick, Your plan looks good as does your description of what you plan to do.  I'll look forward to seeing your progress.

I finally sat down and did some painting on the AmeriTown Marvin's Drug Store kit I had planned on building when recuperating from knee replacement.  Well here we are 3 days short of 3 months and I finally got at it.  I had already washed the parts to get any ols off then a couple weeks ago. I sanded the edges smooth and used the method of painting mortar and wiping most of the color off to expose the bricks.  It isn't as even as I had hoped since it has been a few years since I had done it before. I painted the woodwork a burgundy color and will add other colors for the details another day.

2020-02-02 18.36.43

Looks good Mark.

This was sitting on my desk when I got back to the office this morning so we can trade tips and tricks as we build.

2020-02-03 08.20.28

Attachments

Images (1)
  • 2020-02-03 08.20.28
Mark Boyce posted:

Mike, The change of switch looks good!  Your crane will have a great place to operate!  

Nick, Your plan looks good as does your description of what you plan to do.  I'll look forward to seeing your progress.

I finally sat down and did some painting on the AmeriTown Marvin's Drug Store kit I had planned on building when recuperating from knee replacement.  Well here we are 3 days short of 3 months and I finally got at it.  I had already washed the parts to get any ols off then a couple weeks ago. I sanded the edges smooth and used the method of painting mortar and wiping most of the color off to expose the bricks.  It isn't as even as I had hoped since it has been a few years since I had done it before. I painted the woodwork a burgundy color and will add other colors for the details another day.

2020-02-02 18.36.43

Mark:

The building is shaping up real well. The latest issue of OGR has a GREAT article on painting bricks. The author had several techniques of which I did not know. The technique that you are using is similar to that which I was taught by a guy that works in the Custom Model Railroad shop in Baltimore, Maryland with one exception. Since you appear to be using acrylic paint, before painting the bricks with white, thin some white paint with water and then paint and wipe the surface. It will take a bit longer to dry but there will be less stains from the wipe on the face of the brick, Some thin mortar smudges are OK, so, don't obsess with getting the face of the bricks perfectly clean. Again, great work.

Nick, Your plan sure looks good and you have a great idea of what you want to do. Thanks for sharing it with the rest of us and I will be fallowing for sure!

Mark, Thank you, as I stated it was Lew's idea, 1) to get rid of the s curve between the switches and 2) to give me a longer siding. Both worked great! See Mark, your just like Bob and Paul, more projects. You should stay young for a very long time! Now all you have to do is get the body on the same page! I hope you will post photos when your done!

Lew, Thanks as it was your idea! I could take the track to the other side, but as for now I am out of track, Plus I might want to put a building over there. Time will tell!

Butch I am sorry about your meltdown! But you sure have taken a bad deal and turned it positive! Nice work!

Bob, Nice looking building. I hope you post photos as you g along!

Ray, Looks Amazing! I could spend days on CAD trying to get there and never make it! I tried CAD for home building and was just faster for me to hand draw it out and turn it in the building dept! LOL

Well I don't know if I will make it out to the train room today, but if I do as you all can tell by the photos from my last post I have some track to paint and a switch machine to move to the new switch location.

You all did a great amount of work over the weekend and sounds like most had fun!

Have a great Monday and maybe you will get time for train and layout fun today also!

Bob, Thank you, That looks like a nice one to build!

Randy, Thank you, I forgot to mention that I did thin the acrylic, but I don't think I thinned it enough.  I did see the article in OGR.  It is very good, and I saw some things that were new to me also.  

Mike, Yes, I must have gotten the gumption to start painting from Bob and Paul's posts!    Actually, when I was feeling up to doing something, it was always trying to do something around the house to help my wife, go through all the stuff we brought back from my parents' and aunts', or just keeping up with our bills and my aunt's finances since I am power of attorney.  After those things, I was beat!  

Ray, the 3D printed building front and elevated girders and supports look great!

Last night I was working on a cardstock bridge for my lay-out, when my neighbor came over with his two grandchildren. The four-year-old girl is a "Young Sheldon"--a child genius. She loved everything, ran the trains successfully, mooched cookies off me, operated a powered pirate ship from my lay-out, and got into stuff.

Her grandfather told me that at school she often attends classes for higher grades, and since she behaves, they let her do it.

Randy Harrison posted:

Bravo, Ray! This is a superb structure. What CAD software do you use for the design?

Thanks Randy, I am using Autodesk Powershape Premium 2020 which I purchased almost 15 years ago before they were bought out by Autodesk. It is way more than is needed but I used it for designing parts and forgings before retiring.  I hear there are a lot of inexpensive software out there that can do the job like Autodesk Fusion 360 which my son uses and likes very much.

Mark Boyce posted:

Mike, The change of switch looks good!  Your crane will have a great place to operate!  

Nick, Your plan looks good as does your description of what you plan to do.  I'll look forward to seeing your progress.

I finally sat down and did some painting on the AmeriTown Marvin's Drug Store kit I had planned on building when recuperating from knee replacement.  Well here we are 3 days short of 3 months and I finally got at it.  I had already washed the parts to get any ols off then a couple weeks ago. I sanded the edges smooth and used the method of painting mortar and wiping most of the color off to expose the bricks.  It isn't as even as I had hoped since it has been a few years since I had done it before. I painted the woodwork a burgundy color and will add other colors for the details another day.

2020-02-02 18.36.43

Mark

Glad to see you are getting into it again. 

Like Randy said I found what works good is to thin the white or light gray to the consistency of milk, then apply in an area and angle the surface back and forth to let the paint flow through the mortar lines, when it starts to stick somewhat then start wiping with a damp cloth which is a learned art in itself. Depends on how much white you want on the brick faces.

This is one of the last ones I finished:

Brick_8286

Attachments

Images (1)
  • Brick_8286

Expanded the upper loop on my temporary 4' x 8' test layout only to discover I'm four A trestles short, hence a WTB listing--the project engineer has been duly chastised for inadequate planning.

I'm using a mix of GG flex track for the straights, and GG sectional for the 031 curves.  To attach feeder wires, I heavily tinned the ends of 18 awg stranded wire and stuffed it into the ends of the GG track in the space below the track pins for the center rail and an outside rail.  Doing so avoided soldering to the rail, and has worked well on around the tree Christmas set-ups.

Photos to follow.

Last edited by Pingman

After seeing Bill Bramlage utilize these New London Industries stencils for clouds I gave it a shot but in practicing I didn’t like that I was creating too many straight lines through oversprays. I tried to ensure better success by purchasing foam boards from Walmart and making templates for the stencils to create depth with a soft backing on the backdrop. I am pleased with the results but would like feedback from you guys before I call this project complete. 

Attachments

Images (4)
  • 8C52A883-2B6B-4851-8ED6-0A7C5A173033
  • AA8C3BBF-EC3B-4C45-944E-5B780899DADB
  • 6F7D7DCC-ECCD-4BB5-854F-469E8AB8F7F4
  • F4EC0467-EEB1-4777-A3B3-2AFA3BE0B062

Last night surfing the net I found some building flats I want to try from Trackside scenery to fill in the last area. So today I ordered them and I hope they will be here in a few days. Then I decided with the beautiful weather I would cut my PVC pipe and recut the ones I made too long. The smaller ones I am going to use as storage tanks. And with the really short ones left I am going to make some flatcar loads. Plus I washed the wife's car. That should get me a few extra brownie points LOL. Pics..............Paul 2

DSCN0024DSCN0025DSCN0026

Attachments

Images (3)
  • DSCN0024
  • DSCN0025
  • DSCN0026
Fireball RR posted:

After seeing Bill Bramlage utilize these New London Industries stencils for clouds I gave it a shot but in practicing I didn’t like that I was creating too many straight lines through oversprays. I tried to ensure better success by purchasing foam boards from Walmart and making templates for the stencils to create depth with a soft backing on the backdrop. I am pleased with the results but would like feedback from you guys before I call this project complete. 

I think they look very nice, the size looks good and the thing with clouds is like snowflakes no two the same. I'd have to see it on the layout to be sure however.

sidehack posted:
Randy Harrison posted:

Bravo, Ray! This is a superb structure. What CAD software do you use for the design?

Thanks Randy, I am using Autodesk Powershape Premium 2020 which I purchased almost 15 years ago before they were bought out by Autodesk. It is way more than is needed but I used it for designing parts and forgings before retiring.  I hear there are a lot of inexpensive software out there that can do the job like Autodesk Fusion 360 which my son uses and likes very much.

Ray:

Thanks for the information. Is Autodesk Fusion 360 More affordable? also, is it somewhat intuitive to use? I have never used a CAD program to pass on a drawing to either a laser cutter or a 3D printer.

Nice work everyone.

I finished the Lionel 1927050 Union Pacific "Excursion" Dome Coach "Columbine" tonight.  Used 1/3 of a box of Kleenex blowing my nose, so I am quitting for the night.  The dust from grinding must be irritating.

I can't tell if the pictures are clear.  My eyesight may be dictating that these are the last cars I detail, or my sinus condition is messing with my eyesight.

Have a good night.

Sincerely, John Rowlen

Attachments

Images (9)
  • IMG_1448
  • IMG_1449
  • IMG_1450
  • IMG_1451
  • IMG_1452
  • IMG_1453
  • IMG_1454
  • IMG_1455
  • IMG_1456

Mark,  I moved back to O-gauge six years ago after detailing 180 Walthers HO Passenger Cars.  My eyesight was much better back then.  It is relaxing painting late at night while I wait to help Mom in the middle of the night.  After she left the hospital two years ago, I stayed up painting and detailing people and passenger cars so I would be there to help if she needed me. She is much better now and more able to move through the house.

The habit of painting late into the night is hard to break. I have a dozen more boxes of Preiser 65602 Seated People I may paint while I can, before eye surgery this summer.  I might just want to detail another set of O-gauge passenger cars.

Sincerely, John Rowlen

Last edited by John Rowlen

Morning guys, Im up early as usual do to my buddy Tank! Now he is sleeping again! LOL

Lee D, Nice job on the pigs!

John, wonderful work on the UP Dome car! I am glad your done and can move on to something else relaxing! I hope your sinus problem goes away and your eye sight improves!

Mark I am sure your building is looking wonderful even without photos for Lew!

Well its early so I cant work on the house, but I think I can get out to the train room and paint the track I laid the other day!

I hope everyone has a great Tuesday and have time for there trains and layouts!

Randy Harrison posted:
sidehack posted:
Randy Harrison posted:

Bravo, Ray! This is a superb structure. What CAD software do you use for the design?

Thanks Randy, I am using Autodesk Powershape Premium 2020 which I purchased almost 15 years ago before they were bought out by Autodesk. It is way more than is needed but I used it for designing parts and forgings before retiring.  I hear there are a lot of inexpensive software out there that can do the job like Autodesk Fusion 360 which my son uses and likes very much.

Ray:

Thanks for the information. Is Autodesk Fusion 360 More affordable? also, is it somewhat intuitive to use? I have never used a CAD program to pass on a drawing to either a laser cutter or a 3D printer.

Randy it looks like you may be entitled to try the Fusion 360 CAD software for 1 year FREE because of our hobby

https://www.autodesk.com/campa...on-360-for-hobbyists

it sounds like a good way to test it out and at least get a taste of how these systems work before you purchase anything

mike g. posted:

Morning guys, Im up early as usual do to my buddy Tank! Now he is sleeping again! LOL

Lee D, Nice job on the pigs!

John, wonderful work on the UP Dome car! I am glad your done and can move on to something else relaxing! I hope your sinus problem goes away and your eye sight improves!

Mark I am sure your building is looking wonderful even without photos for Lew!

Well its early so I cant work on the house, but I think I can get out to the train room and paint the track I laid the other day!

I hope everyone has a great Tuesday and have time for there trains and layouts!

Mike, Thank you!!  One thing this building will be put in the middle of a small town block where you will really only see the front anyway.  I have always preferred a kit or scratchbuild where you can paint all the components separately, then assemble it instead of the molded wall with everything on it.  However, it is a good, low cost  building to get used to O gauge.  I even did scratchbuilding in N scale 25+ years ago, but I have to find out what different methods and materials work for me now and in a much larger scale.

I love Lew's comments.  Keep 'em comin' Lew!!

Now that the Super Bowl is history, and the holidays are mostly past, Valentines Day is near, we can better concentrate on what’s important, our model railroads.

Mike G., Yes,  your switch replacement and ladder track looks really great and so does your train room, with beautiful airplanes hovering over the layout, now I have a question, near the white mountain is a BNSF, what brand and is it command? It’s a neat engine. The crane track and your buildings really make your layout come alive. Wow.

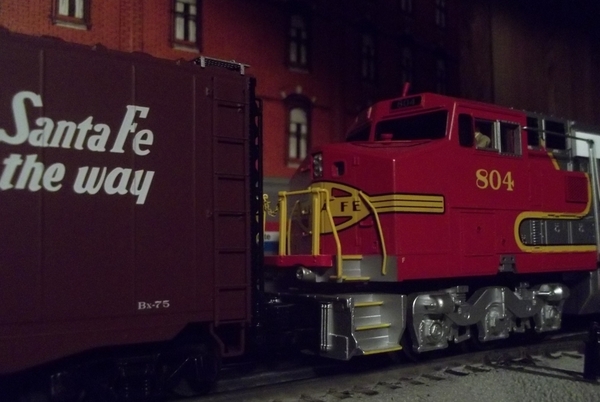
SANTIAGOP23, Your video of the beautiful Sante Fe is Fantastic. The detailing is meticulous, the colors so strikingly sharp, Congratulations. Keep the pictures coming.

RSJB18, Bob, of course, your cheeseburger and fries are ready, however the police are out in front do to a visit from some country music singers from Nashville. Also, I hope you can quiet down your buzzing issue, however, your layout is responding nice, the man standing on the porch of the shack, the light, Wow, and I love your pennsy switcher. Have fun in the train room. Oh, you can pay for your order with your Lionel Credit Card.   Just kidding....

Randy Harrison, it’s time to bring the Ringling And Barnum and Bailey Circus to town, beautiful work on the Caboose, and a beautiful circus train. Awesome work and I’m sure your having fun. I remember when going to the circus as a young boy was so Exciting. Thank you for bringing back the memories.

Don Mcerlean, oh what a beautiful Steam driven passenger train. There’s just something special about those post war heavy 224 Lionel Steamers, and those shiny greenTinPlate passenger cars. Awesome layout, you might consider a nice dark green curtain to hide your other goodies, that’s a little humor.... I like your pike. 

TRAINMAN1225: I like your new track plan, wondering if your going to use Command Control or Conventional? Keep us posted, updated with pictures. Good luck in your adventure.

Sidehack, Ray, your layout is stunning, I love the Pennsy Switcher, and your abilit to build parts, your under the bridge scenes are so cool, very realistic, fun to view. Keep the pictures coming and I commend you on your engineering skills. Wow.

idea-Thinker, your recent video of the Shay going up the mountain is Amazing, your floor layout with walkways covered with Lexan is so creatively cool. I will post a few other pictures to help members of the forum to see your great ideas. Your D225 recreation of the Lionel Display layout will be so neat, very good, you are one that is an Idea-Thinker. Post more pictures.

Bruce Jscobsen, Wow, what a really great beginning of a fabulous layout. Very nice trackwork, nice table, nice track plan. Question, do you plan to use command control, or go conventional? All in all, it’s going to be fun to watch as you progressively move forward on this great Adventure. Wow.

CBWFOREVER, Patrick, Neat Video on adding realism to the strobe light on your beautiful C&NW diesels, which is a very beautiful paint scheme. Your layouts nice, and I love this colorful trains. 

COASTLINEKEVIN, Oh what a beautiful attic floor layout. The lights, the colorful trains, great plan, looks like lots of fun to run. You’ve built a really nice layout, and I bet your attic man cave is a great place to relax and forget the problems of the day. Thanks fir your fun to see video.

Mark Boyce, Yes, there’s a real police presence outside the Starlight Diner, however, McDonalds is having a sale, 15 cent hamburgers with cokes fir a dime, it’s a real competitive area on my layout. Thanks for the comments, it’s simply a fun day in the Neighborhood....

John Rowlen, with all the meticulous painting of figures, my eyes would be going crazy, but you have persevered and made your people and the passenger cars look fantastic. Thank you for all the work and the pictures, and now, let’s see them running on your layout, Action, your work is awesome.  Thank you for your input to our great hobby. Wow.

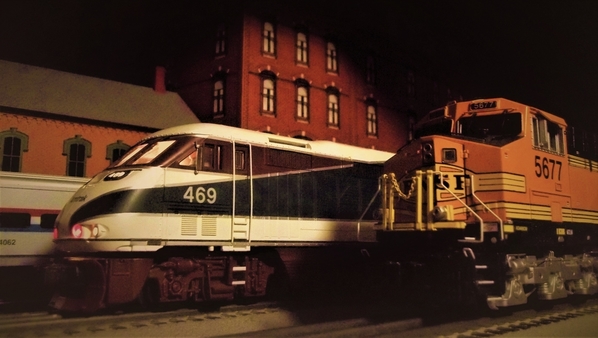
LIRR, I love those beautiful Passenger trains, Pennsylvania and the California Zephyr, so nice.  Thank you for the pictures. Keepem coming.

Paul Romano, Wow, your pictures of real trains, real engines, and the ones on the fabulous New Jersey’s Hi Railers layout are beautiful. You are Blessed to have such a great layout to run trains and share fun with so many talented folks that have built the largest layout in the USA, simply amazing. Thanks fir your pictures. I have been there and it’s just Eye Popping Huge. We will return to Patterson in the future.

Briansilvermustang, what can I say, you have the Trains, a beautiful dog, a house full of fun. Keep the pictures coming, your the man. Wow.

Now, I’ve been doing lots of wiring, lighting up buildings, street lights, accessories, and tracks. It’s really time consuming. You’ll see Idea-Thinkers floor layout, and you’ll see mine with the scenery. I wish everyone a Happy Tuesday...004DC311-F074-4FC1-870F-5168317B66E1B2DD57DA-63DA-45E0-87C0-681234B607F154E8E194-2FAB-401F-8302-8CF368324BF81484C597-3680-4061-A97D-ED085238824D323B736D-320F-4863-8BCD-32227634383242393621-C63A-4197-9483-1C1A6446D1CD74D9BB76-07E2-47EE-9EA1-0C138F6738D40E2E54DF-C75F-435E-A9BF-32B110E9B15F928F861C-AE12-425D-9265-DA2E11C2C9718FB068E4-0DB9-48E3-842E-1FF8BA40725D4468AB54-203B-470B-AB37-AFF883BC7980EE6BA398-A753-4093-ABFE-942692F89248

Attachments

Images (12)
  • 004DC311-F074-4FC1-870F-5168317B66E1
  • B2DD57DA-63DA-45E0-87C0-681234B607F1
  • 54E8E194-2FAB-401F-8302-8CF368324BF8
  • 1484C597-3680-4061-A97D-ED085238824D
  • 323B736D-320F-4863-8BCD-322276343832
  • 42393621-C63A-4197-9483-1C1A6446D1CD
  • 74D9BB76-07E2-47EE-9EA1-0C138F6738D4
  • 0E2E54DF-C75F-435E-A9BF-32B110E9B15F
  • 928F861C-AE12-425D-9265-DA2E11C2C971
  • 8FB068E4-0DB9-48E3-842E-1FF8BA40725D
  • 4468AB54-203B-470B-AB37-AFF883BC7980
  • EE6BA398-A753-4093-ABFE-942692F89248

Did some sceneary work this morning for a couple of hours. Working with the Styrofoam, , set up structural forms for a tunnel entrance on the higher main line track coming of the bridges on the left side of the layout.. These were all fitted and glued in place. Also cut some foam sections for the ground terrain sloping down to the water level on the left side. A little more sahping and they will get glued. and all of todays and tomorrows' structural work will get the Woodland scenic cloth work. Staring to look good. 


Probably helps with a few photos so here we goIMG_4985IMG_4986IMG_4987IMG_4988IMG_4989

Attachments

Images (5)
  • IMG_4985
  • IMG_4986
  • IMG_4987
  • IMG_4988
  • IMG_4989
Last edited by LIRR Steamer

John Rowlen, always a treat to see your latest painted passenger car.  I've looked at so many of your fine custom painted Preiser figures over the last couple of months or so that I've begun to recognize the "regulars" on your various domes, diners, and coaches and their wardrobes--they sure like train travel though they aren't much on reading.  

Layout-wise, I've been securing the trestles for my upper level test track loop to the tabletop and making it more symmetrical with the at grade outer loop.  Fortunately, a generous techno-peasant has shipped me additional trestles to adequately support the expanded elevated loop.

Keep 'em coming, fellas.

Last edited by Pingman

What'd I do? I use a DCS Remote Commander to control the locomotive on the PER. For me the only disadvantage of this inexpensive DCS "throttle" is that you must more-or-less point the remote at the receiver (because it works on line-of-sight IP, like a TV remote). Today the Postman brought me a little box so I set out to fix the problem. In the box was an IR repeater system. There is a receiver (picks up the signal when you push a button on the remote), an emitter (produces a signal for the DCS Remote Commander receiver to pick up) and little box of electronics to make it all work.

I attached the IR receiver to the Remote with the included 3M double-sided stickum:

        IMG_0271

That clear bump is the remote's IR emitter. The receiver (now stuck to the bottom of the remote) picks up the signal nicely even though it is actually mounted upside-down. It works because the whole plastic housing is transparent (to IR wavelength). I first removed the stickum from the protruding end so as to not block the IR signal:

        IMG_0269

Then I attached the IR emitter (actually two because that's what was supplied) to the "window" on the Remote Commander receiver:

         IMG_0272

Everything is out in the open right now so I can watch the pretty flashing lights until I'm satisfied all is copacetic.

                      IMG_0274

I now have a tethered walk-around throttle that works beautifully! It doesn't matter what position I hold it in and response is 100% (having to aim the original setup meant that sometimes the signal wasn't read by the receiver and I was always unconsciously watching for that).

The tether (that came with the IR extension system) is standard headphone wire with 3.5mm connecting jacks:

         IMG_0276

Attachments

Images (5)
  • IMG_0271
  • IMG_0269
  • IMG_0272
  • IMG_0274
  • IMG_0276

Carl,  I always wanted to travel the Canadian Rockies by train.  I can't imagine traveling by train and reading a book.  For me, the view is out the window and the people I meet. 

I did a new figure combination on this last car that is not used in the 152 21" O-gauge passenger cars I detailed.  There are 41 figures available to me, but some are too large and separated in the bathrooms, away from smaller 1/45 scale figures.

The Texas Eagle Coach from the 1927050 2-pack is finished.  I had to paint four figures to finish the car.  I may paint more figures to fill my late evenings when Mom is sleeping. 

I posted some pictures of the Texas Eagle Coach.  I have the Santa Fe scratch built Kitchen to paint and glue into place.  Pictures will be posted when done.

Update: Four pictures of Santa Fe Dining Car Kitchen and three cooks yet to be placed in the kitchen.

Have a good evening.

John Rowlen

Attachments

Images (16)
  • IMG_1459
  • IMG_1460
  • IMG_1461
  • IMG_1462
  • IMG_1463
  • IMG_1464
  • IMG_1465
  • IMG_1466
  • IMG_1467
  • IMG_1468
  • IMG_1469
  • IMG_1470
  • IMG_1472: Scratch built kitchen for Lionel Santa Fe Dining Car.
  • IMG_1473
  • IMG_1474
  • IMG_1471: Three cooks from modified Preiser figures.
Last edited by John Rowlen

Well,  I am many pages behind, with little time to go back and read/comment on all the great posts here.   In between preparing tax documents for the accountant,  I have been able to make decent progress on the "whole layout" signalling project.   Got the 22 relays all wired and the power supply installed with 3 DC/DC buck converters acting as voltage regulators, re-soldered a bunch of new resistors in line with the LED's, and completed a successful bench test of the entire system.  So far only one "gremlin" which took along time to locate, but turned out to be a intermittently failing wire ???   

Managed to design/layout all my relay board labels,  end of cable junction labels, and wire labels, laid out in Excel and ready to print....   So.... I should have the 1st 30 conductor cable controlling the first 4 signal heads done tonight....  Here are some photos.

DSC06889DSC06886 [2)DSC06890DSC06888

Attachments

Images (4)
  • DSC06889
  • DSC06886 (2)
  • DSC06890
  • DSC06888

Bar GP7 #63,  Another excellent car.

Chris, That's a lot of wires. I recommend some screen covering keeping critters or accidental bumping out of the wiring.  Snagging a wire could be maddening.

The Santa Fe Dining Car is progressing.  I modified three Preiser figures into cooks to go with the waiter.  The scratch-built kitchen is completed, and the empty space is filled.  The cooks need two more coats of white, and then I will place them in the kitchen.

Have a great day.

Sincerely, John Rowlen

Attachments

Images (4)
  • IMG_1471
  • IMG_1472
  • IMG_1473
  • IMG_1474
Last edited by John Rowlen
chris a posted:

Well,  I am many pages behind, with little time to go back and read/comment on all the great posts here.   In between preparing tax documents for the accountant,  I have been able to make decent progress on the "whole layout" signalling project.   Got the 22 relays all wired and the power supply installed with 3 DC/DC buck converters acting as voltage regulators, re-soldered a bunch of new resistors in line with the LED's, and completed a successful bench test of the entire system.  So far only one "gremlin" which took along time to locate, but turned out to be a intermittently failing wire ???   

Managed to design/layout all my relay board labels,  end of cable junction labels, and wire labels, laid out in Excel and ready to print....   So.... I should have the 1st 30 conductor cable controlling the first 4 signal heads done tonight....  Here are some photos.

DSC06889

Chris,

Can you explain the use of the capacitors in more detail. I have a crossing signal controlled with an ice-cube relay that chatters when a light car is on the insulated rail. I want to add a cap to hold the relay in until after the last car clears the block.

2017-04-21 20.06.49

Bob

Attachments

Images (1)
  • 2017-04-21 20.06.49

John, Another successful 'Dr. Frankenstein' job!  The populated kitchen will look great!

Chris, I see signals changing with each photograph!  An intermittent wire!  Stranger things have happened.  It looks great!

Johan, The Gulf car looks superb as usual!

Lou, The whole scene is looking great!  The 4-lane highway overpass looks neat.  I don't recall if you mentioned how you built it; and I would never find it in almost 900 pages on this topic!  

Mark Boyce posted:

Lou, The whole scene is looking great!  The 4-lane highway overpass looks neat.  I don't recall if you mentioned how you built it; and I would never find it in almost 900 pages on this topic!  

Thanks. I built that highway/downtown area about 2 years ago. It's all wood. Mostly cut up 1X6 pine with a 1/4" plywood top. Wasn't that hard to make. The hardest part was putting the lines in the street. 

Lou1985 posted:
Mark Boyce posted:

Lou, The whole scene is looking great!  The 4-lane highway overpass looks neat.  I don't recall if you mentioned how you built it; and I would never find it in almost 900 pages on this topic!  

Thanks. I built that highway/downtown area about 2 years ago. It's all wood. Mostly cut up 1X6 pine with a 1/4" plywood top. Wasn't that hard to make. The hardest part was putting the lines in the street. 

Thank you!  The lines on the street!  Yes, I can see that would be hard for me too!  

Mark Boyce posted:
Lou1985 posted:
Mark Boyce posted:

Lou, The whole scene is looking great!  The 4-lane highway overpass looks neat.  I don't recall if you mentioned how you built it; and I would never find it in almost 900 pages on this topic!  

Thanks. I built that highway/downtown area about 2 years ago. It's all wood. Mostly cut up 1X6 pine with a 1/4" plywood top. Wasn't that hard to make. The hardest part was putting the lines in the street. 

Thank you!  The lines on the street!  Yes, I can see that would be hard for me too!  

It's not a hard process. All the lines are white 1/8" automotive pinstripe tape. It's just a very tedious process to cut and apply the tape. The road is about 12 feet long. It think it took me about 6 hours or so to apply all the striping. It's the short lines between lanes that eat up time. 

Mark,  the different light aspects were intentional... what you can't see in the photos is me moving the "insulated rail common trigger to different relay coils checking to see if all the different aspect outputs were working....  

Bob,  the capacitor is for "smoothing" the voltage across the relay coil, which should prevent relay chattering.     As wheels and track get's dirty, intermittent contact will cause relay chatter..  The capacitor basically stores the 12 volt charge and applies to the contacts when the signal from the insulated rail, gets weak or disappears intermittently. 

I am using a 470 uF capacitor as that seems to be used regularly in this application (ie: 12 Volt DC relay coil)....  The capacitors are "polarized" there is a "gray/silver" stripe on one side that side connects to the negative DC lead going to the coil.... The positive lead is hooked up directly to the 12 VDC + coil contact. 

Hooking it up backwards, will likely cause it to pop... small explosion.    Also, you need at least twice the coil voltage on the cap rating....  35 VDC and 50VDC are pretty common.   I did a Google search as I hadn't hooked any up in over a year, and needed an installation refresher... 

You have to be using  DC relay coils to use the capacitor... there aren't many AC relays in use at this voltage, but my understanding is the Cap won't work in an alternating current environment which make sense.  

I am not an electronics expert, but I think I read somewhere that much higher value capacitors may be used to create a "delay".... I assume it does it because it is effectively a storage device and has to "discharge" after the circuit opens, so the more watts you store, the longer it takes to discharge and release the coil....  So if you are trying to delay the closing of the gates, my guess is that you will want a capacitor with at least 2000 uF rating, maybe even higher.    

I'd attach the page but I closed it a week ago, and I doubt I'll find it again...  I also hooked up a 22 ohm resistor in the line from the insulated rail the theory is that it slows down current surges...   


Afternoon guys, I don't have a lot of time so I will make it quick!~

Larry, What a great layout you have! The BNSF is from MTH and its a PS2 I run from my DCS system. I really love the engine! Thanks for your kind words!

Johan, great job on #59 and the tank car! They both look wonderful!

Brian, wonderful Santa Fe engines!

Lirr, your going to be a pro by the time you get done!

Lew, Now arnt you the smart one! What a great idea!

John, Your work on your passenger cars ar just amazing!

Lou, Looks great! I really like the Highway!

Chris, Looking good! I am glad things are working well for you! But it still makes my head hurt! LOL

So yesterday I was going to paint my new track for my siding, but then started thinking about what Lew said about extending it for more car parking. Well I didn't do that, but I did extend the other siding and then this morning I went out and painted both tracks! Here are a couple of photos !

Everyone have a great night!IMG_20200204_070532496IMG_20200204_070557883IMG_20200205_042337832IMG_20200205_042401730

Attachments

Images (4)
  • IMG_20200204_070532496
  • IMG_20200204_070557883
  • IMG_20200205_042337832
  • IMG_20200205_042401730

Mark, That's a very nice building.

Mike,  The layout looks very good.  You have passed me by.  I need to get to work.

Chris,  As always, your skills inspire and amaze me.  It is a very nice layout.

Johan, Beautiful cars.

Leapin' Larry,  I am a long ways away from showing off my layout.  Your work is excellent.

I MIGHT BE DONE, probably not.  The Santa Fe Dining Car in the Lionel 1927020 2-pack has no sound system.  It meant that the kitchen interior was totally empty.

Have Space, Will Build.  Since the four windows in the kitchen area are clear, I decided to build a kitchen inside the empty space.  Using Plastruct .040 white sheets and .020 Grey sheets, I fashioned the kitchen shown in these final pictures.  The cooks are modified Preiser 1/48 figures,  Arms were cut off and re-positioned.  The sink faucets are household staples, drilled into position with a hand pin drill.  The paint color is Testor's Acryl Flat Aluminum.

I decided not to add pots, fire extinguishers and dishes because the interior is only seen through four small windows.  Maybe some lonely night, I will pull out the car and add to it.

Have a good evening.

Sincerely, John Rowlen

IMG_1475


Attachments

Images (10)
  • IMG_1475
  • IMG_1476
  • IMG_1477
  • IMG_1478
  • IMG_1479
  • IMG_1480
  • IMG_1481
  • IMG_1483
  • IMG_1484
  • IMG_1475

Hi guys. I have been away from home since Monday trying to make a living and realized not near as much fun as working on the layout. Mark great building really good job ! Lou1985. I really liked the highway on the edge of your layout and that it’s the top of a long underpass for the tracks. I have a long ( uninteresting) straight on one side of my layout might try that. JohnRowan your imagination in putting folks in the passenger cars is unmatched. Love it. Leapinlarry Thanks for the compliment on my 224 and tinplate pass cars . I appreciate it I just spent part of last weekend watching them go round

Regards guys. Don McErlean 

Mark,  Great job on the Ameritowne Building, I really like the details/signage in the store front windows as well as the trim color choices....  My only other thought is I'd think about a very diluted black/gray wash for the concrete/stone window sills so they don't look so bright... 

Mike G:  The trackwork and weathering looks good.   Yes I am moving at a "snail's pace" on the signal wiring... Just finished putting down the printed labels on the relay board, as well as the first 4 sets of terminal junctions at the signal location....   I really don't want to start having signal control issues once I install this under the table, so I figure labeling everything really well and double checking it will pay off.   I have a nice home made creeper but I don't want to camp out under the table trying to trouble shoot this after it's mounted...    

John,  love your work on the passenger cars....  I have more than a few that need populating, but not yet.   I saw your comment above about protecting the wiring... I have a bunch of cable clamps multiple sizes that I plan to pin everything down in logical groupings once I get the 7 I/O cables completed. 


Last edited by chris a

Lee,  I am finally finished for a while. Your flat cars look great and  I will always remember your tow truck driver you painted.  The dirty overalls made the figure very realistic.

Lew,  The layout is looking nice with the crane siding.  It has been fun watching the building of the layout.

Lou1985,  I may use your idea of adding to the side of the layout for two Tugboats I need to dock along my river.

Carl,  Look forward to seeing pictures of your upper level layout work.

I often don't comment.  I appreciate all the sharing of ideas on this Forum.  I will be incorporating some ideas in my layout.  Thank you.

Sincerely, John Rowlen

First, I thought I had fried a board on my VisionLine Niagara.  It was doing fine until there was an issue with an engine nearby that shorted out the rails for a short period. When I went back to the Niagara..... no crew talk whatsoever. Everything else was fine. When I read that you cannot independently control volume on an engine, thoughts of sending the engine in for a lengthy repair entered my head.   BUT my LHS owner suggested that I try resetting via Bluetooth. I got the app, found the volume button on it, and there it was..... independent controls of the different sounds!  .....set it back to full and all was well, the sun shined once more, all was right with the world.    .....i dont remember seeing any way to control these settings via the Legacy remote. Did I miss something?

On the layout,  I added  self-made sound circuits.  My Lionel Lift Bridge now is on a schedule to let boats pass under it.  First a warning siren is sounded... then  couple seconds later a second blast happens and shortly thereafter, the bridge raises, with some creaking/squealing/groaning sounds.  Background noise of some birds, train far distant, and some guys shouting while it sits open for a bit, then another warning siren before it comes back down.    

Last week I successfully automated my oil drum/barrel loader (the one that picks up barrels with a forklift and transports them to a gondola at the siding. Now, when a car pulls up, the sound will activate and a light I added to the work house will also light up. The sound is of freight dock general background noise. If the car does not remain for 30 secs, the sound stops and no loading takes place. If the car remains, the sound track continues with guys joking about not damaging the paint on the train with the forklift and then you get the beeps and motor sounds of the forklift as it goes back and forth delivering the oil drums to the gondola... after 6 drums are loaded, the animation switches off and the foreman says "that's enough. we're good to go! " followed by "let's load up some more drums for our next job".  The cycle will only repeat after the dock has been cleared for 4 seconds (the loaded car leaves).

IMG_7941IMG_7942

The attached pix are of the redecorated oil drum loader...my attempt at a night shot to capture lighting.  ...still very much a work in progress.

Attachments

Images (2)
  • IMG_7941
  • IMG_7942
Last edited by ScottV

Lee,  I am glad to see your driver has a good job.  The excitement of painting figures is the ability to learn by trying new methods.

Mark,  I used Testor's Acryl Flat Sand for many stone window sills. Put a drop of Red Earth in it if you want it darker.  A thin wash might help darken the sills.  I thought the building looked excellent as is.

Scotty,  Nice nighttime pictures.  Nighttime is when the layout magic happens: road signals, street lights, warm interior lights, and the passing engine headlight and passenger cars.

I just learned my offer for a Lionel 1927610 Canadian Pacific four-car set was accepted.  I will be painting more Preiser 65602 Seated People this week after I get AAA batteries for my head light I use when painting.  I do like working in the quiet of late night.

Sincerely, John Rowlen

Last edited by John Rowlen

Gang, when you spent $1 on an 18" long suspension bridge, you know you're getting a poorly-made piece of junk. Two hours of cutting, tearing, repairing, taping, eliminating pieces (there were no directions), and I am amazed to report that this card stock bridge is so stable that I was able to move it to my  unfinished "Knights of Atlantis" train lay-out.

Now I have to make supports to put it somewhere over the tracks.


SUNP0005SUNP0010

Attachments

Images (4)
  • SUNP0005
  • SUNP0007
  • SUNP0008
  • SUNP0010
chris a posted:

Mark,  the different light aspects were intentional... what you can't see in the photos is me moving the "insulated rail common trigger to different relay coils checking to see if all the different aspect outputs were working....  

Bob,  the capacitor is for "smoothing" the voltage across the relay coil, which should prevent relay chattering.     As wheels and track get's dirty, intermittent contact will cause relay chatter..  The capacitor basically stores the 12 volt charge and applies to the contacts when the signal from the insulated rail, gets weak or disappears intermittently. 

I am using a 470 uF capacitor as that seems to be used regularly in this application (ie: 12 Volt DC relay coil)....  The capacitors are "polarized" there is a "gray/silver" stripe on one side that side connects to the negative DC lead going to the coil.... The positive lead is hooked up directly to the 12 VDC + coil contact. 

Hooking it up backwards, will likely cause it to pop... small explosion.    Also, you need at least twice the coil voltage on the cap rating....  35 VDC and 50VDC are pretty common.   I did a Google search as I hadn't hooked any up in over a year, and needed an installation refresher... 

You have to be using  DC relay coils to use the capacitor... there aren't many AC relays in use at this voltage, but my understanding is the Cap won't work in an alternating current environment which make sense.  

I am not an electronics expert, but I think I read somewhere that much higher value capacitors may be used to create a "delay".... I assume it does it because it is effectively a storage device and has to "discharge" after the circuit opens, so the more watts you store, the longer it takes to discharge and release the coil....  So if you are trying to delay the closing of the gates, my guess is that you will want a capacitor with at least 2000 uF rating, maybe even higher.    

I'd attach the page but I closed it a week ago, and I doubt I'll find it again...  I also hooked up a 22 ohm resistor in the line from the insulated rail the theory is that it slows down current surges...   


Close...

discharge "speed"is  based on the amp draw. A small bulb eats more in one second than say a motor so a heavy draw can drop the charge "immediately" and a light draw l.e.d. on the same cap will last many minutes/hours.

The voltage output peak is based on the charge's peak, etc. (use a cap voltage rated well over expected max volts, 35v- 50v mostly)  More uf rating is like having a "bigger battery"; voltage remains the same but more amps are available. More uf can take longer to charge. You don't need high charging amperages going into one to eventually get a high amp delivery out of one either.

Over voltage and reversed polarities makes them pop like firecrackers. From puffs of smoke and a soft puft sound to M-80/¼ stick explosion depending on size and voltages. (careful

Bi-polar caps are for ac they say bi polar or have the ac wave (~) or dot dash instead of a + or - (lable to legs vary)

Delays can be created in the charging speed of caps used in say our relay triggering by using resistors and other regulating circuits. (say chattering is from many car wheels over a small isolated rail section..... off,on off on off on...etc; then slowing the cap charge to avoid it throwing the turnout repeatedly with one train pass works out. While charging , the coil simply won't fire with any ompf again.

This means you are also vulnerable to being unable to quick change in decisions (oops recovery) in a "split second"...but by adjusting resistance you can also find a happy balance between charge time silence and a really slow chatter  (maybe one click every 1.5 sec or maybe 5 sec. sound ok?)

Chattering ac relays can often be helped with just a diode, giving the coil half wave (pulsed dc)   (for independent power turnout coils; not for track powered.)

A timed,  or latching relay is another way to keep chatter down by locking out continuous power temporarily... 

Relays seem like a pita but can help some longt track(circuit) wear too. Those sparks at isolated rails are "large sparks" from a large "linear motor". A smaller coil(relay) makes smaller sparks.  Every spark lifts and burns a tiny bit of metal, big bit from big sparks or small ones...it adds up

Leapin' Larry,  Here is a video of the cars I recently detailed on my far from finished layout, Valley of Bridges.  All of my family has moved to Florida, and the odds are against my finishing the layout here in Cleveland.  Detailing the passenger cars is a productive use of time when continuing to build the layout is no longer realistic.  At age 69, a simpler plan seems wise.

Sincerely, John Rowlen

Attachments

Videos (1)
Santa Fe -1 MVI_1502_Trim

Today I made further progress on my scratch-built Union Station. I stained and assembled som of the interior details.

The Information Counter/Dispatch Board.

0205202307

The ticket Office.

0205202307a

For more details on today's progress including where I got my materials and how the make the dispatch board, see, like and follow my posts in the OGR Scenery and Structures forum at https://ogrforum.ogaugerr.com/...ess-update-1-29-2020

Attachments

Images (2)
  • 0205202307
  • 0205202307a
Mark Boyce posted:

John, Another successful 'Dr. Frankenstein' job!  The populated kitchen will look great!

Chris, I see signals changing with each photograph!  An intermittent wire!  Stranger things have happened.  It looks great!

Johan, The Gulf car looks superb as usual!

Lou, The whole scene is looking great!  The 4-lane highway overpass looks neat.  I don't recall if you mentioned how you built it; and I would never find it in almost 900 pages on this topic!  

Mark. Thank you very much.🤝

Johan

mike g. posted:

Afternoon guys, I don't have a lot of time so I will make it quick!~

Larry, What a great layout you have! The BNSF is from MTH and its a PS2 I run from my DCS system. I really love the engine! Thanks for your kind words!

Johan, great job on #59 and the tank car! They both look wonderful!

Brian, wonderful Santa Fe engines!

Lirr, your going to be a pro by the time you get done!

Lew, Now arnt you the smart one! What a great idea!

John, Your work on your passenger cars ar just amazing!

Lou, Looks great! I really like the Highway!

Chris, Looking good! I am glad things are working well for you! But it still makes my head hurt! LOL

So yesterday I was going to paint my new track for my siding, but then started thinking about what Lew said about extending it for more car parking. Well I didn't do that, but I did extend the other siding and then this morning I went out and painted both tracks! Here are a couple of photos !

Everyone have a great night!IMG_20200204_070532496IMG_20200204_070557883IMG_20200205_042337832IMG_20200205_042401730

Mike. Thank you very much. 🤝

Johan

Another busy evening on the RR's.

Chris A- thanks for the info. I'm using a 12 VAC relay so your method won't work but @Adriatic Butch, followed up with some good info. Thanks to you both.
Mike- the sidings look good.
Mark- great job on the building. I hope to get started on mine this weekend.
John- the trains look great. The sounds are excellent too.
ScottV- love to see/ hear a video of the loader in action.
Randy- very nice
LeeD- nice work on the flats and your driver.
Johan- another great car.
Vincent- cool little bridge.

Me? ran trains for a bit last night. I'm having fun shifting cars around onto the new sidings.

I put my MTH H-10-44 away until I can replace the speaker, don't want to risk shorting the board if the speaker blows. My Williams NW-2 is a very able replacement for early diesel power. Shot a video but it's too big to upload. Some pix will do....

2020-02-06 07.06.492020-02-06 07.07.182020-02-06 07.07.43

Attachments

Images (3)
  • 2020-02-06 07.06.49
  • 2020-02-06 07.07.18
  • 2020-02-06 07.07.43
Last edited by RSJB18

Chris a, wiring panel looks good....neat and precise.

Mike g, The siding for the crane looks better with the extension to the other crane.

Johan, I like the hopper car. Nice weathering on the tank car. Your list of cars keeps growing.

Mark, good job on your building so far. Glad to see you are getting  chance to work on some projects for the layout.

Lee, like the new truck addition with figure and the flat cars came out great.

Bob, nice pics of the layout. The siding came out great.

So late yesterday faternoon I got my package from Tracksidescenery. I like the way the buildings look. I placed a car on them to show the perspective of their size. They are O scale. Nopw I am going to cut them out and mount them on foam board. Hoping they will finish off the last section of backdrop.........Pics............Paul 2

DSCN0027DSCN0028DSCN0029

Attachments

Images (3)
  • DSCN0027
  • DSCN0028
  • DSCN0029
paul 2 posted:

Chris a, wiring panel looks good....neat and precise.

Mike g, The siding for the crane looks better with the extension to the other crane.

Johan, I like the hopper car. Nice weathering on the tank car. Your list of cars keeps growing.

Mark, good job on your building so far. Glad to see you are getting  chance to work on some projects for the layout.

Lee, like the new truck addition with figure and the flat cars came out great.

Bob, nice pics of the layout. The siding came out great.

So late yesterday faternoon I got my package from Tracksidescenery. I like the way the buildings look. I placed a car on them to show the perspective of their size. They are O scale. Nopw I am going to cut them out and mount them on foam board. Hoping they will finish off the last section of backdrop.........Pics............Paul 2

DSCN0027DSCN0028DSCN0029

Thanks Paul I like the Valley Suppy Co can’t wait to see it done 

geysergazer posted:

Lee, with all those cars you've been building/modifying/painting you're gonna' need a bigger layout.   

Lew 

You are right I have the frame work done for the second half of the layout it’s been to cold these past evening’s to work out in the garage but I’ll get you guys some shots of it one day 

Mark, Thank you! The AmeriTown building is really looking sharp!

John, Thank you Sir! Your dining car looks great! You did a wonderful job on the kitchen! Nice video!

Lee D, Thank you! The truck and driver look perfect! And your piggyback trailers are just wonderful! Nice video, but I think you lost something from your last photo! LOL

Chris Thank you! I know your taking your time, but its better to do it right and test it before you end up going under the layout!

Scott V, Sounds like quite a project! I wish you would have posted a video! I am with John, your night photos are great!

Vincent, You took a $1 project and made it look great! Nice work!

Randy, Outstanding work on your Union Station project! Things are really coming along nicely!

Bob, Looks like you are having way to much fun! LOL I think you need to get back to work!

Paul 2, Nice selection of buildings! They should look really nice on your layout! I hope you will post photos down the road!

Well today I spent a good amount of time with the wife as its her birthday, but then she gave me the green light to visit the train room. I have a couple switch machines that have to stiff of wire so I spent a good amount of time under the table looking for replacement wire. Never did find it but did find stuff I forget I even had. I found 2 crane cars with crane tenders and some what look like American flyer size cars that I will never use and put up for sale! Here are a couple photos!IMG_20200206_152536609IMG_20200206_152544588IMG_20200206_152716145IMG_20200206_152723393IMG_20200206_152733832

I hope everyone had a great day and fun with there trains! Remember to have fun and don't work to hard! LOL 

Except you BOB you been playing to much! LOL

Attachments

Images (5)
  • IMG_20200206_152536609
  • IMG_20200206_152544588
  • IMG_20200206_152716145
  • IMG_20200206_152723393
  • IMG_20200206_152733832

Paul and Mike, thank you for the comment on train time and the building.

Paul, I like those building prints a lot!

Mike G, Yesterday I was able to pull out a big tote box my wife buried in the garage right after surgery.  I was looking for one thing and found others I forgot I had too.

Mike23, the layout looks very nice including the backdrop and shelves.

Lee, the piggyback flat cars look great!

I didn't do anything in the train room today.  I didn't follow Mike's advice and worked too hard going through old papers and shedding stuff I totally forgot about also.

Lee D, Thank you! The truck and driver look perfect! And your piggyback trailers are just wonderful! Nice video, but I think you lost something from your last photo! LOL

Mike 

I think I know what your thinking I removed that hitch for a 40’ trailer setup and moved the front one back a little I will probably do another one this way. Thanks for the complement I appreciate it 

Mark Boyce posted:

Paul and Mike, thank you for the comment on train time and the building.

Paul, I like those building prints a lot!

Mike G, Yesterday I was able to pull out a big tote box my wife buried in the garage right after surgery.  I was looking for one thing and found others I forgot I had too.

Mike23, the layout looks very nice including the backdrop and shelves.

Lee, the piggyback flat cars look great!

I didn't do anything in the train room today.  I didn't follow Mike's advice and worked too hard going through old papers and shedding stuff I totally forgot about also.

Thanks Mark for the complement I appreciate it they were a fun project 

53F39607-69B1-41C2-AAAA-F9463A7854271A2D34C2-E07F-433B-8F29-2A7093D0F8248BFFC08A-44F8-4E01-8A25-2FACF857B5B6DAE5E868-4067-48CA-8A83-3080501405B5Well I’m back in Reefer mood ok not that Reefer mood either I know some of you guys where teens in the sixties like my brothers. Anyway back to what’s going on the layout next. A very nice OGR. Member sent me this very old Wood Reefer and I mean made out of real wood and yes it has two different sides. Thought I would try to get this thing up and going again. 

Attachments

Images (4)
  • 53F39607-69B1-41C2-AAAA-F9463A785427
  • 1A2D34C2-E07F-433B-8F29-2A7093D0F824
  • 8BFFC08A-44F8-4E01-8A25-2FACF857B5B6
  • DAE5E868-4067-48CA-8A83-3080501405B5
Last edited by lee drennen

To finish my last fourteen Lionel 21" passenger cars, I had to paint a few specific figures from several Preiser 65602 36 Seated People packs.  I am now finishing the remaining figures before starting on new sets of 36 people for the Canadian Pacific 21" passenger cars that are in transit.

It is a good time to start painting because an ice storm with snow later is expect here in Cleveland.  I bought extra batteries for my LED work light I wear on my head while painting.  The mix of figures will help me sharpen my painting skills before opening the twelve new boxes of people.

Don't need a snow day.  I'm retired.  Very tired.

Sincerely, John Rowlen

Attachments

Images (3)
  • IMG_1503
  • IMG_1504
  • IMG_1505
John Rowlen posted:

To finish my last fourteen Lionel 21" passenger cars, I had to paint a few specific figures from several Preiser 65602 36 Seated People packs.  I am now finishing the remaining figures before starting on new sets of 36 people for the Canadian Pacific 21" passenger cars that are in transit.

It is a good time to start painting because an ice storm with snow later is expect here in Cleveland.  I bought extra batteries for my LED work light I wear on my head while painting.  The mix of figures will help me sharpen my painting skills before opening the twelve new boxes of people.

Don't need a snow day.  I'm retired.  Very tired.

Sincerely, John Rowlen

John,  what’s the population of Rowlenworld?

Happy Friday! Another busy evening......Everyone is doing some great work.

Like Paul, I also got some building prints. I plan to use them on the wall behind the new siding. These are from the same source where I got the block wall images from. I have a nice color printer at work that handles up to 11X17 paper so I'm able to print at a decent size. I'm going to print a couple different sizes out today now that I see what the full size images look like. Not sure about scale yet, I have to measure them but I stuck them on the wall last night to see how they look. I 'm planning on building a stockade fence behind the new building so the bottom will be covered. I need to cut these out and mount them on foam board and then I'll see how I want to arrange them.

I'm also planning to add a backdrop with a road to connect to the road at the bottom of the retaining wall.

Bob

2020-02-06 19.49.352020-02-06 19.51.172020-02-06 19.51.372020-02-06 19.52.12

2020-01-27 13.16.29

Attachments

Images (5)
  • 2020-02-06 19.49.35
  • 2020-02-06 19.51.17
  • 2020-02-06 19.51.37
  • 2020-02-06 19.52.12
  • 2020-01-27 13.16.29

I tidied up. A recent project was using an IR remote extender/repeater to convert my MTH DCS Remote Commander into a 100% responsive all-position tethered walk-around throttle.

Beta version:

                    IMG_0274

Remote Commander receiver with IR emitters applied to the IR window, IR extender electronics and it's power supply.

Beta-testing complete, I am happy with the performance so set out to hide the hardware. 

The DSC receiver now hidden in the benchwork:

        IMG_0287

A cover installed to prevent stray IR produced by the Remote from hitting the DCS receiver and causing conflicting-signal jamming:

        IMG_0289

The extender/repeater electronics hidden from view:

       IMG_0288

Beta-testing revealed an interesting problem. Strong sunlight was interfering with IR signal propagation through the plastic IR receiver housing so I remounted the receiver such that the receiver window is now aimed directly at the remote emitter. This required flipping the receiver over which I avoided originally because not quite tidy. Too bad, so sad, performance wins out over tidiness:

                     IMG_0291

                     IMG_0292

All tidied up and working beautifully:

        IMG_0290

Oh, and for anyone else interested in this setup this is a true 'walk-around throttle' which can have the tether unplugged (the tether-wire is standard headphone cable with 3.5mm jacks/plugs) and moved to a new outlet while the train is in motion. This works because the actual 'throttle' is the DCS Remote Commander Receiver and the only time the hand-held remote is active is when a command (change direction, faster/slower, sound whistle/horn) is sent. Thus the tether actually only needs plugged in when the operator wants to send a command to the DCS Receiver.

So spending $60 for a DCS Remote Commander plus $17 for an IR extender/repeater produces a very inexpensive basic-functions walk-around-throttle DCS system (for one locomotive).

Attachments

Images (7)
  • IMG_0274
  • IMG_0287
  • IMG_0289
  • IMG_0288
  • IMG_0291
  • IMG_0292
  • IMG_0290

Mark, I hope your doing well after over doing it! Remember your spose to take it easy unless its train related! Everything else can wait till your daughters and Son-in-laws come over to visit!

Lee D, I was joking, In your video I didn't see any trailers on the pigs like in the other photo. Looks like you have a wonderful start on the wood reefer!

John, I thought you were almost done with passenger cars! Now you say you have another set on the way. WOW I sure hope you have room for all these passenger cars! When you get done I hope you can take a picture of all the cars you have done! Must be over 60 or so!

Bob, The buildings look good! I wish I had a good printer, I just bought a Canon a couple months ago and I would have to say I am not impressed with the photos it prints.

Lew, I am glad your DCS/IR system is working well for you! You are right that $77 total is a great price for a walk around system!

I am not sure if its a train room day, but you never know! If it is I will let you all know what I got done if anything!

I hope you all have a great Friday and an up coming weekend! If you feel bogged down just take some time sit back and run some trains! LOL

lee drennen posted:

53F39607-69B1-41C2-AAAA-F9463A7854271A2D34C2-E07F-433B-8F29-2A7093D0F824Well I’m back in Reefer mood ok not that Reefer mood either I know some of you guys where teens in the sixties like my brothers. Anyway back to what’s going on the layout next. A very nice OGR. Member sent me this very old Wood Reefer and I mean made out of real wood and yes it has two different sides. Thought I would try to get this thing up and going again. 

        I was hoping that you would be able to use these cars Lee.  Thought they were pretty cool cars when I saw them, and thought of you, being the guy that would bring them back to life. They are going  to look great when you get them done.  Have fun building them !    wonder how old these cars are...


Last Saturday I rebuilt my control box (going from the ZW back down to an RW or 2) and was planning on repainting it Sunday. Then my wife (after recently giving birth) had a bad gallbladder attack and we had to make a trip to the ER. After another trip Tuesday and surgery yesterday, I haven't touched the layout all week. Maybe tonight.......

Mike. Thanks and that’s ok it was a long day yesterday and thanks for the complement on the Reefer

Brian. Thank you so much for thinking of me when you seen them I’m going to do my level best to do this one justice. I know they are very old probably in the sixties one of them is stamped on the bottom where it was made back East. Thanks again for your kindness 

mike g. posted:

Jon, take care of the family first! Wife and newborn come first! The layout will be there!

Lee D, Must still be snowing there as I see your probably home again today! Hope you get time to work on your reefer car today!

Mike

it stopped snowing  roads are clear I’m waiting at a customer to load my sea container I have lots of time now before it’s loaded 

John Rowlen posted:

To finish my last fourteen Lionel 21" passenger cars, I had to paint a few specific figures from several Preiser 65602 36 Seated People packs.  I am now finishing the remaining figures before starting on new sets of 36 people for the Canadian Pacific 21" passenger cars that are in transit.

It is a good time to start painting because an ice storm with snow later is expect here in Cleveland.  I bought extra batteries for my LED work light I wear on my head while painting.  The mix of figures will help me sharpen my painting skills before opening the twelve new boxes of people.

Don't need a snow day.  I'm retired.  Very tired.

Sincerely, John Rowlen

John, I'm in the Cleveland area also, (Brook Park), we'll have to hook up!20181015_172624

Attachments

Images (1)
  • 20181015_172624

Trimmed the excess paper off the building flats. Went down to the basement and found my blackfoam board and glued the flats to them. Letting them dry a bit longer before I cut them out of the foam board. In the meantime I have to go through my acrylic colors to see what I can use as to a brick color and apply it to the Kozak building sides. ........Pics ..........Paul 2

DSCN0030DSCN0031

Attachments

Images (2)
  • DSCN0030
  • DSCN0031

Still slogging along on Signal Central...   got 2 cables cut and terminated at the panel, figured out how to label the junction at the signals under the table as for 4 of the cables there are 17 wires/terminals supporting 4 signals, 2 eastbound, 2 westbound....

Started cutting brass tubing and making the signal heads for the kitbashed Plasticville Signal Bridge...  Once I got the design, spacing and mounting figured out it's moving along.   Sill have to solder on the white marker lights above and below the color position light targets, but one step at a time!

After alot of thought I came up with what I think is a pretty cool way to attach the brass posts (1/8 inch Dia,) to the plastic girder web...  I wrapped the post 180 degrees with 1/32" brass wire, then I am going to drill 1/32 holes in the plastic and slide the 2 wire pins through, a slight bend on the back side and they won't rotate, or twist, and if I should ever have to remove one, it wont be super-glued forever...     

Paul:  The backdrop buildings look great.  Was that a "custom order" getting just the individual buildings ?

Lee:  You're bringing that reefer back to life.... Question, do you know anything about those wheel trucks.... I bought some of those years ago in a 2 rail odd lot... I weathered them and all the 2 rail axles, but I was thinking about installing a pair on wood kit gondola that I bought.. Who made them ? 

Johan,  Great photo of the BAR Boxcars !  Really well done weathering, and the scene just draws you in ! 

DSC06895DSC06897DSC06898DSC06899 [2)DSC06900DSC06901 [2)

Attachments

Images (8)
  • DSC06895
  • DSC06897
  • DSC06898
  • DSC06899 (2)
  • DSC06900
  • DSC06901 (2)
  • DSC06892
  • DSC06894

Lots of neat projects!

Paul, the flats will look great!

Chris, that is some operation you have figured out!  Thank you for all the photographs.

I had planned to go to Michaels to get a coue other color paints to finish up the AmeriTown kit, but decided not to because of the snow.  I did open the bag on the Atlas O signal tower kit just to take a look at the parts and instructions.  There are lots more parts than the HO version I built back around 1970.

imageimage

Attachments

Images (2)
  • image
  • image
Last edited by Mark Boyce
chris a posted:

Still slogging along on Signal Central...   got 2 cables cut and terminated at the panel, figured out how to label the junction at the signals under the table as for 4 of the cables there are 17 wires/terminals supporting 4 signals, 2 eastbound, 2 westbound....

Started cutting brass tubing and making the signal heads for the kitbashed Plasticville Signal Bridge...  Once I got the design, spacing and mounting figured out it's moving along.   Sill have to solder on the white marker lights above and below the color position light targets, but one step at a time!

After alot of thought I came up with what I think is a pretty cool way to attach the brass posts (1/8 inch Dia,) to the plastic girder web...  I wrapped the post 180 degrees with 1/32" brass wire, then I am going to drill 1/32 holes in the plastic and slide the 2 wire pins through, a slight bend on the back side and they won't rotate, or twist, and if I should ever have to remove one, it wont be super-glued forever...     

Paul:  The backdrop buildings look great.  Was that a "custom order" getting just the individual buildings ?

Lee:  You're bringing that reefer back to life.... Question, do you know anything about those wheel trucks.... I bought some of those years ago in a 2 rail odd lot... I weathered them and all the 2 rail axles, but I was thinking about installing a pair on wood kit gondola that I bought.. Who made them ? 

Johan,  Great photo of the BAR Boxcars !  Really well done weathering, and the scene just draws you in ! 

DSC06895DSC06897DSC06898DSC06899 [2)DSC06900DSC06901 [2)

Chris

Thanks they are vintage Atlas O I have lots of these on cars and they run very well on Fastrack. They are very detailed too hope this helps Chris 

Lee,  thanks for the info on the trucks, it definitely helps.  Yes when I was done with my 3 step weathering process I was really amazed at the quality of the detail in the truck castings....  

Samparfitt:  Wow,  I have never opened the Great Northern Railway thread....  Now I have a lot of reading to catch up on.... great layout, wonderful videos.   

chris a posted:

Lee,  thanks for the info on the trucks, it definitely helps.  Yes when I was done with my 3 step weathering process I was really amazed at the quality of the detail in the truck castings....  

Samparfitt:  Wow,  I have never opened the Great Northern Railway thread....  Now I have a lot of reading to catch up on.... great layout, wonderful videos.   

Chris, it isn't just the reading, the multitude of great photographs and videos could take you months to see it all!  Sam has really done a great job not only showing his trains and great scenery, but spent a tremendous amount of effort describing how he fixes and fine tunes!!  

Johan, Great job on the Bar Box cars! Way to show them off in your scenery!

Vincent, its white and cold! and as Lee said its not a snow cone! LOL

Paul 2, Buildings are looking wonderful! Just wondering are they spendy?

Chris, Nice work! Great idea for attaching the mast to the plastic bridge! Things sure are looking sharp!

Sam, Great photos and video's! But wondering where is that siding you keep talking about that goes around the water from Seattle to my side of the water!

Mark, Don't worry you can do it! Just don't over do it! LOL

Well today I got the motor for the crane back and everything works, but its still loud. I will post a video here and some photos of my first time trying airbrushing. I had to wait till I got the right paint color for my fixed pilot project for my dummy ES44. I also did some work on some switch machines under the layout, but no photos for Lew! You wouldn't be able to tell that I did anything anyways! LOL

I think I am going to brain storm on making the crane run better and a lot less noisy !

IMG_20200207_150041652_TOPIMG_20200207_150044998IMG_20200207_150048995

Attachments

Images (3)
  • IMG_20200207_150041652_TOP
  • IMG_20200207_150044998
  • IMG_20200207_150048995
Videos (1)
VID_20200207_152734508

Mike, I'll get by on the Atlas kit.  Actually, I think I have done not bad.  I only overdid it a bit 3 times, and it will be 3 months tomorrow since I got out of the hospital.  

Today, I only pushed a smidgen of snow away from my wife's car doors since the evergreens keep the bulk of the snow away from there.  My car is still covered, and I didn't do any shoveling.  I stayed a shut in!  

The painting looks good from here.  I think all the postwar motorized accessories are pretty loud.  Yours sounds about average to me.

Last edited by Mark Boyce
Mark Boyce posted:
lee drennen posted:
Mark Boyce posted:

Lee, I have one of those cranes in the original box that I have no plans of using.  It can be the first item on your traditional layout!  

Watch out where the huskies go. 

Mark that’s a great idea let me think on it first. And I really like that tower I need a tower first 

Lee, you definitely need a tower first!!

How much? 

chris a posted:

Still slogging along on Signal Central...   got 2 cables cut and terminated at the panel, figured out how to label the junction at the signals under the table as for 4 of the cables there are 17 wires/terminals supporting 4 signals, 2 eastbound, 2 westbound....

Started cutting brass tubing and making the signal heads for the kitbashed Plasticville Signal Bridge...  Once I got the design, spacing and mounting figured out it's moving along.   Sill have to solder on the white marker lights above and below the color position light targets, but one step at a time!

After alot of thought I came up with what I think is a pretty cool way to attach the brass posts (1/8 inch Dia,) to the plastic girder web...  I wrapped the post 180 degrees with 1/32" brass wire, then I am going to drill 1/32 holes in the plastic and slide the 2 wire pins through, a slight bend on the back side and they won't rotate, or twist, and if I should ever have to remove one, it wont be super-glued forever...     

Paul:  The backdrop buildings look great.  Was that a "custom order" getting just the individual buildings ?

Lee:  You're bringing that reefer back to life.... Question, do you know anything about those wheel trucks.... I bought some of those years ago in a 2 rail odd lot... I weathered them and all the 2 rail axles, but I was thinking about installing a pair on wood kit gondola that I bought.. Who made them ? 

Johan,  Great photo of the BAR Boxcars !  Really well done weathering, and the scene just draws you in ! 

DSC06895DSC06897DSC06898DSC06899 [2)DSC06900DSC06901 [2)

Chris. Thank you. Nice to hear from you. Your work is always just amazing.

Johan

mike g. posted:

Johan, Great job on the Bar Box cars! Way to show them off in your scenery!

Vincent, its white and cold! and as Lee said its not a snow cone! LOL

Paul 2, Buildings are looking wonderful! Just wondering are they spendy?

Chris, Nice work! Great idea for attaching the mast to the plastic bridge! Things sure are looking sharp!

Sam, Great photos and video's! But wondering where is that siding you keep talking about that goes around the water from Seattle to my side of the water!

Mark, Don't worry you can do it! Just don't over do it! LOL

Well today I got the motor for the crane back and everything works, but its still loud. I will post a video here and some photos of my first time trying airbrushing. I had to wait till I got the right paint color for my fixed pilot project for my dummy ES44. I also did some work on some switch machines under the layout, but no photos for Lew! You wouldn't be able to tell that I did anything anyways! LOL

I think I am going to brain storm on making the crane run better and a lot less noisy !

IMG_20200207_150041652_TOPIMG_20200207_150044998IMG_20200207_150048995

Mike. Thank you. It's a nice made some own things because BAR cars are really hard to find. Later i am gonna try it made some BAR & MEC engines too.🤝

Johan

Mark, Thank you! I am glad your not out trying to shovel snow! Here is an idea either wait till one of the Son-in-law's come over or till it melts! LOL

Ray, wonderful job on the switching tower!

Lee D, Thank you, but I still think its a little loud. I am going to so some adjustments and see if that helps. I also have a plan rolling around in my head of how to fix it, but I have to do some experimenting!

Not sure what if anything I will get done in the train room today as I have a HOA meeting to go to and the HVAC guy coming over to fix our brand new furnace and heat pump! It sucks when you put out a couple grand and things do work right!

Anyway I hope everyone has a great Saturday and finds time for there layout and trains! 

Mike, agreed that the 182 Crane is too loud. Looks like it is running smoothly now but still too loud. The 282 provides adjustment of the worm gear engagement by sliding the motor. Those clever engineers at Lionel designed the motor base with a slight taper so moving the motor in it's track raises/lowers it with respect to the base it rests on and thus also wrt the pinion gear the motor worm mates with. I wonder if the 182 has a similar provision for adjustment?

Mike, I'll let it melt. 

Mike, Lew, Lee, I got out my gantry crane and have to apologize.  It is not the postwar, but is Lionel 6-12700 from 1987.  I'm going to set it up on the workbench, because I think there was one function I had trouble with.

Ray, the real parts mockup looks great!!  It is just like we were discussing at of all places my Thursday morning breakfast-Bible study.  We get on a variety of topics while waiting for the food and when we start eating.  One was about one of the guys mentioning being in New York, and driving a steer and the elevated line seemed to go on forever.  I have never been to NYC or Chicago, but I have been to Philly once back in the '80s and saw theirs.  Anyway, the remark was made about the residents and hotel guests having to listen to the trains right outside their windows.  Your mockup is like what they were talking about.

Mark, your Crane is the new one (1987 compared with 1955 ) with two DC motors/gearboxes. The only problem I've read here that people have is the two rubber drive-belts in the gearboxes can age-out and break. There is some standard autoparts/hardware store "O"-ring that works as a replacement.

I remember riding the Chicago EL a couple times as a kid and it was LOUD. It's like all that steel bridgework transmits and amplifies the sound.

Add Reply

Post

OGR Publishing, Inc., 1310 Eastside Centre Ct, Suite 6, Mountain Home, AR 72653
800-980-OGRR (6477)
www.ogaugerr.com

×
×
×
×
Link copied to your clipboard.
×
×