@RSJB18 posted:

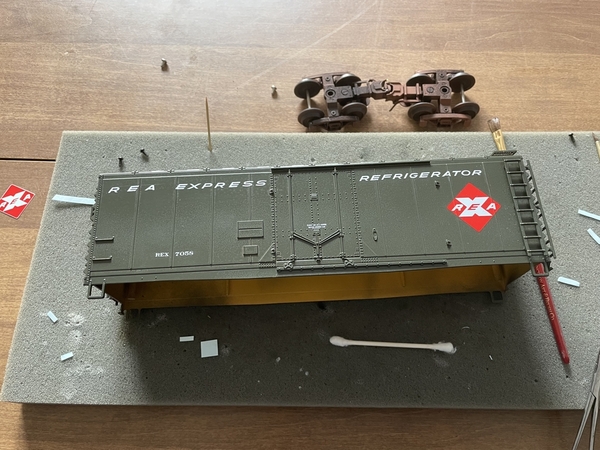
I have a couple of Menards lighted vehicles that I want to put on the layout. Now that the sign and vacuum are off my bench, I can get back to important stuff.
I started by testing the lights on both on the bench. The REA truck was fine but the '48 Ford was a different story. I didn't know Menards put smoke units in their cars......

2023-01-21 16.00.31

To be continued....

Bob

Nice vehicles Bob .

Are you sure that wasn't exhaust smoke at the back of the 48 Ford Bob ?

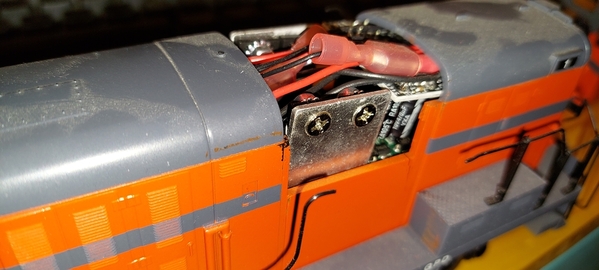
Been wanting to add command and sound to my Weaver RS-3. I could never find a way to squeeze command and sound in, it was always one or the other. Here's what it looks like with ERR cruise commander, it is a tight fit to say the least.

20230111_134035


Although it ran well, I was always disappointed with the lack of sounds. Since I discovered that DCC can work in O gauge 3 rail locomotives I decided to install a Soundtrax Tsunami2 TSU-4400 into my RS-3.

20230111_210735

As you can see the decoder and speaker fit with lots of spare room!


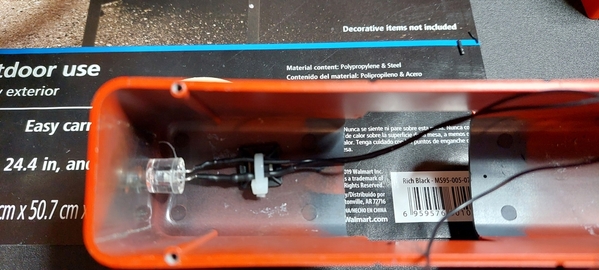
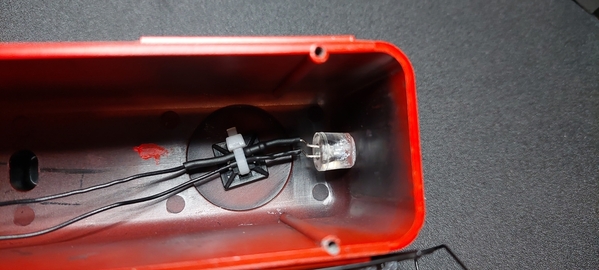
I also upgraded to LED lights.

20230111_210741

20230111_210746


The test run went great! It runs and sounds fantastic, I couldn't be more pleased with how it turned out!

Attachments

Images (4)
  • 20230111_134035
  • 20230111_210735
  • 20230111_210741
  • 20230111_210746

I bought one of these https://www.menards.com/main/g...70157374-c-13318.htm

Within 10 minutes of opening the package, the coupler fell apart.
Also, two of the little plastic things that are supposed to hold the rope tight are missing.

I'm not happy at all.

But...

Any tips on holding the spring (inside the coupler) back far enough so that I can jimmy the coupler together?  Or do I just buy another $30 $14-3/4" flatcar to get another coupler?

Attachments

Images (1)
  • mceclip0

Well, my dad and I were able, via a LOT of trial and error, to compress the spring enough to put the coupler back together.  The rivets holding the top of the drawbar into the coupler had failed, so the drawbar had bent downwards and popped out.  The drop of glue judiciously applied to each rivet will, hopefully, keep it together.

The 1948 M&Ms van will probably go into the bin or for sale; replaced by a 1947 Menards or 1948 (lighted) Pepsi van.

Last edited by Micro

Added to my bench today is a pair of Lionel 6672’s, complete with some rust on the trucks and wheels, and some missing parts, which are replaceable. The problem is the “white” body shell. In addition to the bottom being sloppily painted flat black and chipping, it has a strong yellowing tint to it. Was it really white originally? Is the yellowness a problem of too much sunshine? I even thought of tobacco smoke, but warm water and Dove hasn’t been a lot of help. Any thoughts?

rich

Hi well I would have guessed age of the paint and also possibly discoloration due to Sun making color fad to the color you're seeing.

There is a car on Ebay so you can see the color looks white to me!

p.s. if you think it's due to smoke damage cigarettes you can wash the cars with Windex which has ammonia in it and will clean the smoke off completely, but you might have to clean more than ounce, I recommend using paper towels they will turn dark brown if it was smoke was as I had said! good luck and please shoe us pictures after the cleaning!

EBAY LINK REMOVED per TOS

Alan

Last edited by OGR CEO-PUBLISHER
@Rich posted:

... has a strong yellowing tint to it. Was it really white originally? Is the yellowness a problem of too much sunshine? I even thought of tobacco smoke, ...

I offer this as 'related' experience. I have seven Lionel 9802 Miller (white) boxcars. They are cast white plastic with red lettering. One of them never came out of the box until a week ago, another couple of them were stored in a newspaper & cardboard boxes under the train table, and the others ran on my grandfathers basement table (no sun) for years and they also sat collecting dust on the table for 5~10 years after his passing. Only the 'still in the box' boxcar is clean and probably still shows the 'original white', but even that one has roughly one (only one) shade of age/yellow/tobacco/fade to it. The others all have a slightly irregular/non-uniform color/cast/fade to them that shows plainly to the naked eye but my phone camera doesn't pick up. I have gently cleaned a few of them to look a bit better, but they have not returned to the "boxed white". One of them had dirt/grease fingerprints (likely they are mine from decades ago ) that I scrubbed and 409'd and hot water/dawn/brushed vigorously - but it still has a faded yellow-ish tint to it, and one of my prints is still noticeable.

@Rich posted:

... I was reluctant to try Windex because I don’t have any previous experience with it on Lionel paint...

Even tough my boxcar is only worth a dozen dollars, I was hesitant to be too rough with it for fear of spoiling the lettering. The first time I used windex I diluted it 50/50 with water. It got some grunge off, but not all of it. Then I went full strength, but only briefly. Again, it removed another 'measure', but not all of it. Then it was full strength till I was satisfied. Just take it in baby steps.

I'm cleaning and rebuilding dozens of engines, operating cars/accessories, and rolling freight after decades of cardboard and newsprint storage to get them back to "good-as-they-can-be" running condition, because good as new isn't possible . None of my kit is minty or 'excellent' condition, but I still want to be gentle with them


EDIT: in fact if you search "lionel 9802" on the e-b@y, you'll see some of the different 'whites' of the same car.

Last edited by woodsyT

@woodsyT,

I went through the same thing as you about 6 months ago restoring my stored collection.  I ended up using Dawn diluted with distilled water, cleaning with a softish tooth brush, and then a distilled water rinse followed by a very soft cloth (I used tea towels I steal from my wife's stash).  I don't remember if Dawn comes in different strengths, but if it does choose the mildest.  I was able to clean the grunge off really well.  I did go more gently around the decals, and luckily never did any damage.

@texgeekboy posted:

@woodsyT,

... followed by a very soft cloth (I used tea towels I steal from my wife's stash). ...

What is it with our dear wives and their tea towels/dish cloths? I love my wife through and through, but my "bull in the china shop" still doesn't understand why the dish towels must remain clean and neatly displayed on the oven handle. She loves me enough that she retired a few older faded beach towels and cotton t-shirts and even made a space in a cabinet for "His Towels" so long as I understood that I was forbidden opening "Her" drawer of kitchen towels.

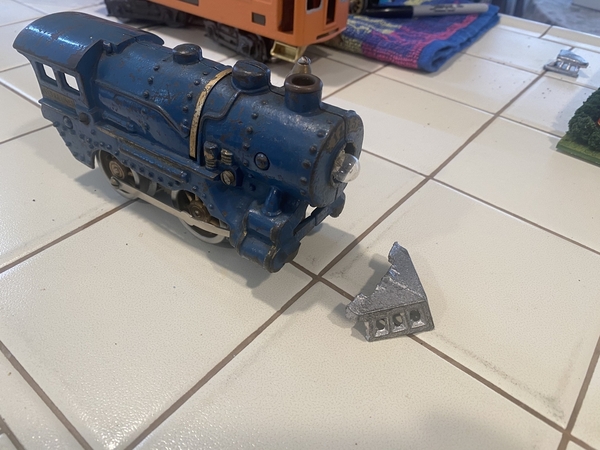
The K-Line MP-15 really runs fast and a slower speed would seem better however this one did not have the "serial/parallel switch. There was a lot of discussion about rewiring and the sharing or lack thereof of the load on the traction motors so I did not want to make the choice permanent. There was a little bit of room between the fuel tank and the e-unit cut out switch and a mini toggle just fits. (it would have been better to more accurately check the room inside!). I drilled a 1/4" hole in the chassis and then slotted the hole for the final position. Soldering to the tiny lugs was a pain. My old Weller gun was too large and the pencil iron was too weak so the soldering appearance was a little messy but it works. (For some reason that picture did not take) Now either serial or parallel operation is possible. Pulling three heavy cars up a steep grade in parallel mode seems OK and the lights are brighter now.First drilled holeBottom View shifted holeFinished switchSwitch installedFinished installation
Attachments

Images (5)
  • First drilled hole
  • Bottom View shifted hole
  • Finished switch
  • Switch installed
  • Finished installation

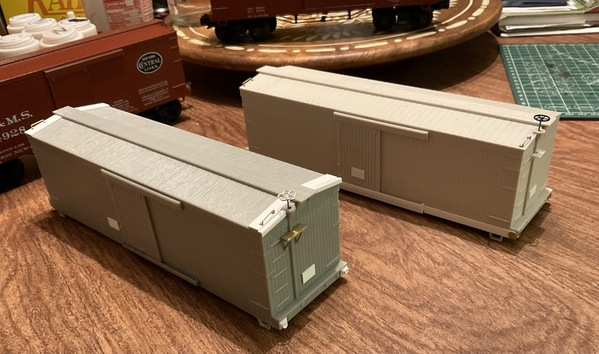
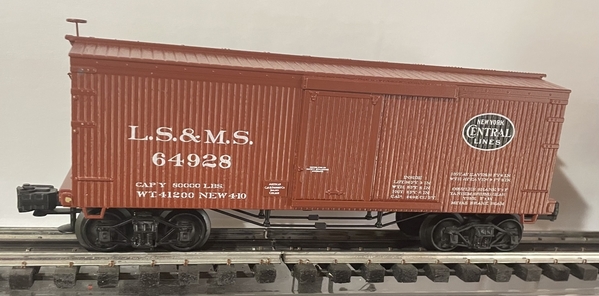
Continuing with some customization of my MTH 3R 19th century cars. Just adding some details to their standard boxcars, like tack boards, brake wheels and turnbuckles on the truss rods.

I also add some strip styrene to alter the look of the car slightly, to eliminate the cookie cutter appearance. A few grab irons and some poling pockets (brass and styrene) round out the enhancements.

47BB886B-1E62-4A28-B128-20E32ECF2697

The LS&MS car reflects some of the improvements in a finished state. This car is also riding on a pair of Wiseman archbar trucks assembled with MTH 3R wheel sets and Weaver couplers. I am still working on refining the coupler set up as the stock Weaver coupler shanks are just a bit too long.

381B6E50-2C4C-4CAA-B4B3-DEF70C369BAF

Tom

Attachments

Images (2)
  • 47BB886B-1E62-4A28-B128-20E32ECF2697
  • 381B6E50-2C4C-4CAA-B4B3-DEF70C369BAF
@Krieglok posted:

Continuing with some customization of my MTH 3R 19th century cars...

DANG! those look great!


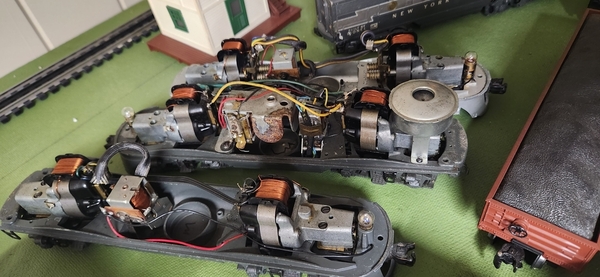
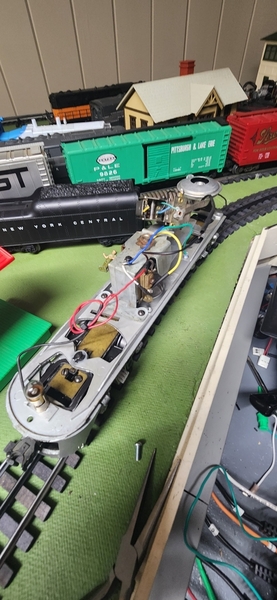
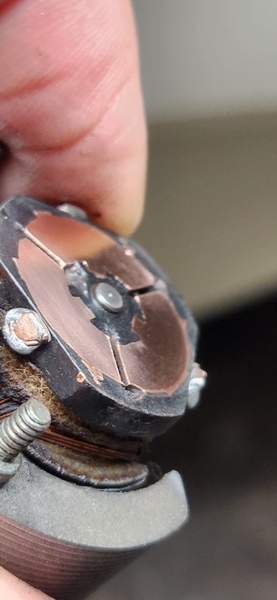
ALSO on the workbench - Pullmor motor tune-ups. I am in the midst of bringing dozens of postwar engines back to life. I wish I had taken some before pics of this one, but some of the armatures were in a really lousy way - filthy, rusty, dust/dry greasy resin/goo packed. I don't know how they operated all they did was grunt for me until I rebuilt them.

A little mineral spirit bath, some compressed air to blow out the gunky schmutz and expedite the evaporation of the mineral spirits, several seconds with a brass brush in the dremel tool and then polish the commutator plate with a fiberglass pencil has them looking like, well... not new, but pretty darn good. And with a fresh pair of brushes they purr as smooth as a pullmor can purr

20230131_08341620230131_083407

Brass Wire Brush Wheel

Fiberglass Cleaning Brush Pencil


EDIT: also used the fiberglass pencil  on the e-units. MUCH easier than a e-unit rebuild (as long as the contact fingers are still good)

20230131_085902

20230131_085637

Attachments

Images (4)
  • Pullmor Armature / Field: Pullmor Armature / Field
  • Pullmor Armature: Pullmor Armature
  • e-unit after: e-unit after
  • e-unit before: e-unit before
Last edited by woodsyT

A few years ago I purchased a K-line caboose 611-1751 NYC with the intent of repainting for the home RR.  After the repaint, the caboose sat until actual trains could be run. This caboose is lighted with a single pickup roller and works as well as can be expected in regard to lighting and not derailing. However there was a annoying tendency for the pickup roller to short circuit when passing over the 3424 track clips for the automated brakeman car. The short was sufficient to halt the locomotives. The problem with the original caboose roller is that it's a very small diameter and just long enough to simultaneously contact the center rail and the track clip (which is grounded). Chamfering the roller was not an option since the roller support bracket ends would still contact the track clip.

I was able to remedy this situation by changing out the original roller for one with a larger diameter but chamfered ends. That way the ends of the roller and the support bracket ends avoid contact with the track clip and no short circuits occur.  The original roller pin was reinstalled. K-Line 6111751 NYC CabooseCaboose CompleteOriginal pickup rollerNew Roller Installed

Attachments

Images (4)
  • K-Line 6111751 NYC Caboose
  • Caboose Complete
  • Original pickup roller
  • New Roller Installed: new roller installed

The K-Line MP-15 really runs fast and a slower speed would seem better however this one did not have the "serial/parallel switch....

I have a K-Line MP-15 with the series/parallel switch, and in parallel it still wont run as slow as my postwar F-3 or 2065 loco. I wish there was a way to slow it down a little more. It pulls almost as much as the magnetraction F-3, it just wants to race

A few years ago I purchased a K-line caboose 611-1751 NYC with the intent of repainting for the home RR.  After the repaint, the caboose sat until actual trains could be run. This caboose is lighted with a single pickup roller and works as well as can be expected in regard to lighting and not derailing. However there was a annoying tendency for the pickup roller to short circuit when passing over the 3424 track clips for the automated brakeman car. The short was sufficient to halt the locomotives. The problem with the original caboose roller is that it's a very small diameter and just long enough to simultaneously contact the center rail and the track clip (which is grounded). Chamfering the roller was not an option since the roller support bracket ends would still contact the track clip.

I was able to remedy this situation by changing out the original roller for one with a larger diameter but chamfered ends. That way the ends of the roller and the support bracket ends avoid contact with the track clip and no short circuits occur.  The original roller pin was reinstalled. K-Line 6111751 NYC CabooseCaboose CompleteOriginal pickup rollerNew Roller Installed

@Victor Bertolina.....

Really nice job . Did you have the replacement roller on hand or did you purchase it from some where?

@woodsyT posted:

I have a K-Line MP-15 with the series/parallel switch, and in parallel it still wont run as slow as my postwar F-3 or 2065 loco. I wish there was a way to slow it down a little more. It pulls almost as much as the magnetraction F-3, it just wants to race

It will run slower in series. Parallel sends full voltage to both motors. Series sends it through one motor and then the second.

All of my K-lines are series wired and they are more manageable. Certainly not Legacy worthy.....

Bob

Add Reply

Post

OGR Publishing, Inc., 1310 Eastside Centre Ct, Suite 6, Mountain Home, AR 72653
800-980-OGRR (6477)
www.ogaugerr.com

×
×
×
×
Link copied to your clipboard.
×
×