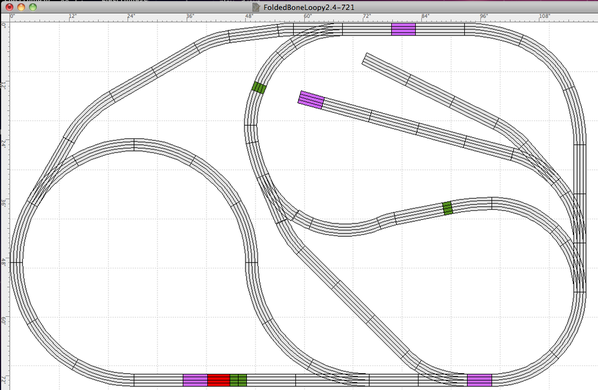
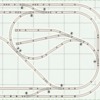
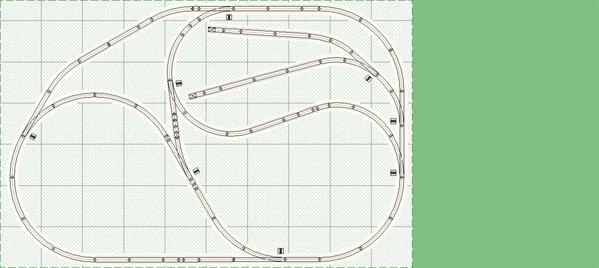
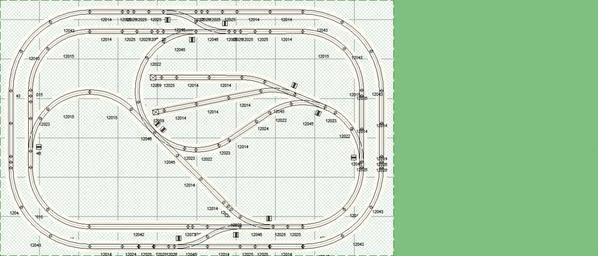
It's tough fitting a decent layout into smaller spaces, something's gotta give.  Most of the designs I've tried have ended up too busy and somewhat artificial looking, but this one seems to show some promise.  I've got reversing loops on both ends and several different routes I can take through the layout.  There also seems to be ample room for some buildings/scenery and an open corner to house the controls and a little working room.


Let me know what you think, any potential problems, suggestions, etc...  Significant redesigns welcome if you want to


One idea I had was to try to combine the two lower-middle lines into a single line.  However, this seems like it would reduce the ability to run two trains significantly.  The advantages would be reducing track/cost and opening up the lower left loop a good bit bigger in case I eventually wanted to put something in there.


What's currently missing I'd say is two entirely separate loops to be able to run two trains continuously in an unmonitored fashion, but I can live with that.  Like I said, in this small a layout, something's gotta give.


I don't know yet if this will be the design I go with, but it seemed to offer enough to be worth showing and maybe of some use to others who need to keep small.


btw - the colors are just for my reference to make it easier to tell 5" from 4.5" straights and 1 3/4" from 1 3/8".

Attachments

Images (1)
  • FoldedBoneLoopy2.3
Original Post

Replies sorted oldest to newest

Originally Posted by Greg Houser:

I'd lose the S-curve at the top but other than that it looks real good!


--Greg

The only reason that's there is because it's how I managed to get the ends of the rail to meet up properly.  One of the biggest problems w/ sectional layouts it seems is trying to get the tracks to match up right after you go beyond simple ovals.  I can fiddle around with it and look for other possible connections though.

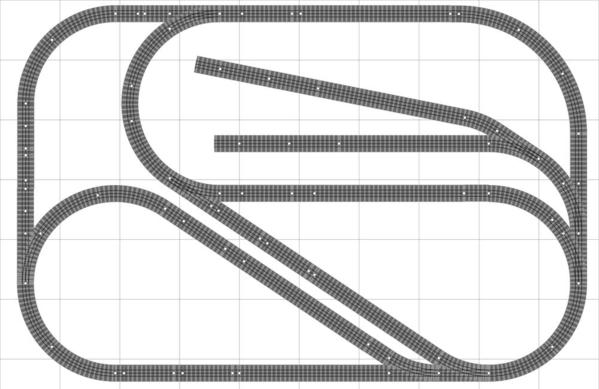
That looks like a good alternative (and certainly simpler!) design.  I've got an experimental version here where the two lower middle lines are merged into one and the shape of the loops looks more similar to that - a very elongated teardrop.


On the other hand, it trades out a bunch of the O-48 track for O-36.  I like to use the wider curves where I can, and it looks a little more artificial to me.  I can probably remove the slight 'S' in the lower right loop with a little more work, I think extending the line NW a little more at the point where it leaves the outside loop will do the trick - it just needs some work to get it to line up right.

Is an elevated line out of the question?


You fit a simple, unconnected design weaving in and out of a tunnel or two above what you have...or


Schleicher's 5x9 ping pong layout inside a lower loop (see pg 67)


http://books.google.com/books?id=uDbTKiW5SC8C&lpg=PA65&ots=zLkwYyA6Tx&dq=Robert%20Schleicher's%205x9%20Ping%20Pong%20Table%20Layout&pg=PA67#v=onepage&q&f=false could have


Or maybes Dans layout here inside a lower loop.


https://ogrforum.ogaugerr.com/d...914#5512461176840914

No, I'd be totally OK with an elevated line.  I just haven't put in the time to learn how to do them in my software yet


In the back of my mind I was thinking of maybe doing a simple upper loop later on as an add-on.  I'm going to be building the layout in phases anyway so as not to spend too much at a time, so the upper loop was basically in my head as an assumed later phase.


Something like this:

Phase 1:  Basic dogbone shape w/ connecting bit

Phase 2:  Add the medium sized right loop and a couple more switches

Phase 3:  Add the yard (there's room for a 3rd "finger" as needed)

Phase 4:  Build a mountain/tunnel and upper loop


Scenery would likely also happen in phases over time too.  As for what size/shape/location the upper loop would be in I don't know yet.  On the left side for sure, but I don't yet know any more precisely than that.


On the other hand, once I learn how to do elevation in RailModeler I may decide to do more of a 3D design where trains move up and down between an upper and lower level.  I should have some time this weekend to experiment with the elevation features I think.


My wife also suggested maybe adding a point-to-point trolley line eventually, that could go either on the upper or lower level and would probably be a Phase 5 in the list above.


Oh, and probably another phase somewhere to buy an additional train to populate the yard with.  Can't forget that!

I'm too new to figure out pricing, but you're talking 4 switches and quite a bit of track, so it's probably a tidy sum in excess if $400. However, IMHO it adds a lot more in interest. I'm a big fan of being able to have trains pass each other going in opposite directions, etc. It lets you run two trains unattended for guests/kids or lets you have one train running pretty much unattended on the outer oval while controlling another on the inside tracks.

I don't know if Mike's versions are FasTrack or not, but I'm having some trouble reproducing them in RailModeller without the tracks being labeled.  So, I'd like to get a labelled version of both designs as well.


The outer loop version I think is the best, although I think I might move the yard entry back to the right side track instead of off the lower right loop.


What you could do temporarily to save money is have the outer track unconnected to the inner track - then add the switches later as budget permits.  The outer train would be purely on a loop and the focus would be on operating the inner train.

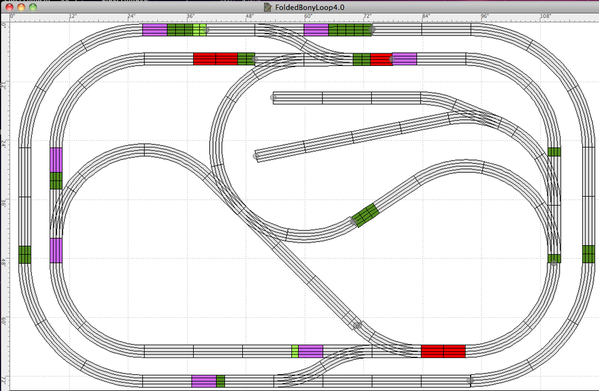
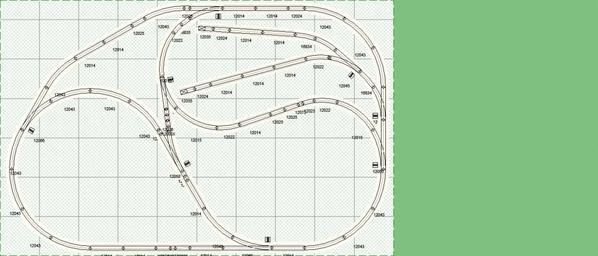
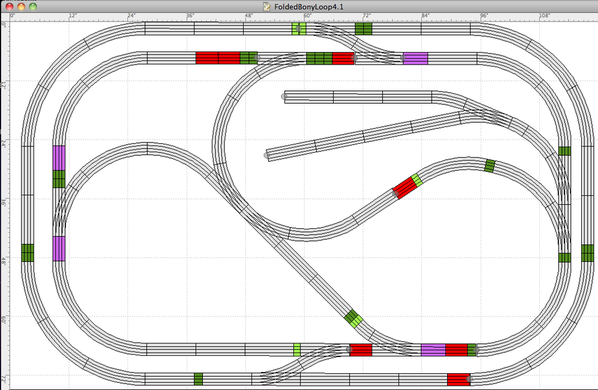
OK, I think I've managed to reproduce that track design in RailModeller.  The key point I was stumbling over was that I was trying to get all the track pieces to connect to each other.  If you accept small gaps, it becomes a lot easier.  I suspect that RR-track is more lenient in what it considers "connected" than RailModeller is.  So to me, every time I tried to put the design together it felt like things didn't quite fit right and there were gaps.  Anyway, I've massaged some things and tried to gradually bring the gaps down as much as possible.  I've also moved the yard as mentioned earlier to allow somewhat longer spurs.  I'd like to reduce the number of small "fitter" straights if possible, but it more or less works.


Rough estimate is that this would add about $482 to the cost of the layout due to four additional switches and quite a few extra track pieces.


Same colors as usual:

Purple = 5"  Red = 4.5"  Dark Green = 1.75"  Light Green = 1.375"

All outer curves are O-48, all inner curves are O-36


FoldedBonyLoop4.0

Attachments

Images (1)
  • FoldedBonyLoop4.0
I would be tempted to try removing the short straight track after the switch into the yard and then reconfigure the spurs so they are parallel to each other. I think that will give you a tad more length on the spurs and provide a little extra space for buildings. I don't have the software to try it myself.. I do have software for RealTrax and might redo some of my layout. My lower level is already pretty close to this and I like the crossover for the loops.
Last edited by DoubleDAZ

I'm still tinkering with it a bit, I've managed to reduce some more gaps and with a little rearranging reduce the number of small fitter straights so the layout has a few less pieces of track now and is slightly cheaper.  Still, I don't know if it'll be practical.


I think my next move is to try to recreate the other layout to have it for reference and then see what alterations I might be able to do to simplify it a bit.  I like the design with the outer loop, but it's just too many switches I think resulting in too high a price for the whole layout.

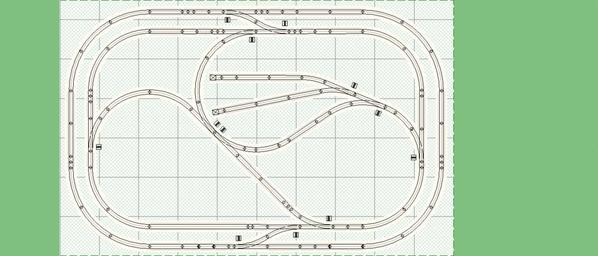
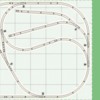
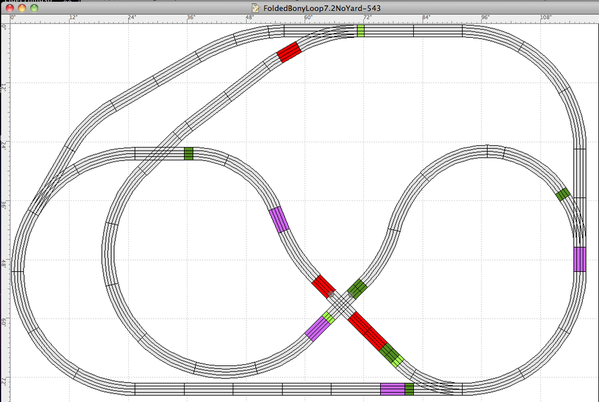
Here's another new variant, replacing two switches with some crossovers and pushing the upper right loop a LOT bigger to make something that looks like a figure-8 but isn't.  Not sure whether it's an improvement over the older one (it's a little less "free roaming"), but fewer switches does help keep the cost down...  Haven't put the yard back in yet but it'd still be in the upper right loop somewhere.  The downside is that two minor S-curves are back in...  I've been massaging them for a while but haven't been able to get rid of them yet.


FoldedBoneLoop7.2

Attachments

Images (1)
  • FoldedBoneLoop7.2

Dboren,

   Would you mind posting the latest version of this track plan that you mentioned below with your tweaks reduce the fitter sections? Thanks.

Originally Posted by dboeren:

I'm still tinkering with it a bit, I've managed to reduce some more gaps and with a little rearranging reduce the number of small fitter straights so the layout has a few less pieces of track now and is slightly cheaper.  Still, I don't know if it'll be practical.


I think my next move is to try to recreate the other layout to have it for reference and then see what alterations I might be able to do to simplify it a bit.  I like the design with the outer loop, but it's just too many switches I think resulting in too high a price for the whole layout.

Post
The Track Planning and Layout Design Forum is sponsored by

AN OGR FORUM CHARTER SPONSOR

OGR Publishing, Inc., 1310 Eastside Centre Ct, Suite 6, Mountain Home, AR 72653
800-980-OGRR (6477)
www.ogaugerr.com

×
×
×
×
Link copied to your clipboard.
×
×