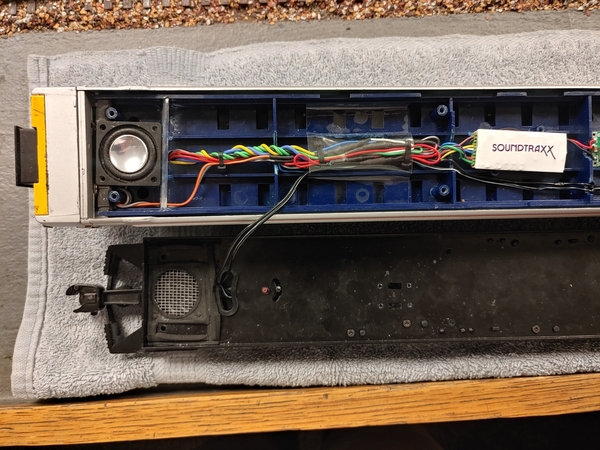
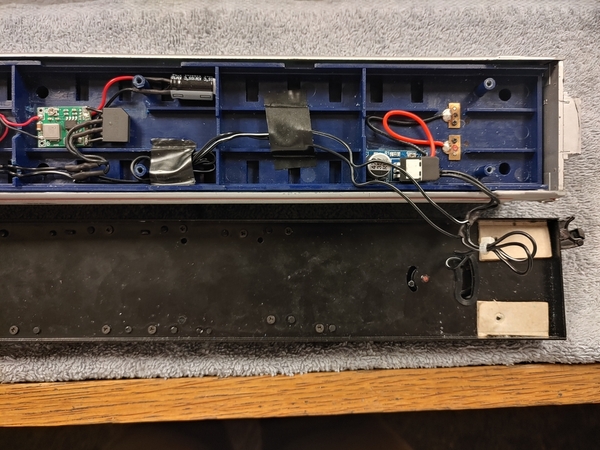
Something I have always wanted to do is set up a control and sound system in my Lionel Amfleet cab car, but nothing was able to allow for this without having exposed electronics. Now that Blunami is on the market I can finally have my childhood fantasy come to life. I will show you how I did the install here.

For my install I used a Blunami 2200 and a 28mm Soundtraxx Mega Bass speaker. The install uses all 6 of the lighting functions of the 2200. I simply mounted the speaker to the underside of the interior piece with some double stick tape as there was not much in the way of room for screws and the speaker is very slightly shorter than the space between the frame and the bottom of the interior part with those ribs removed and sanded completely flat. I also glued in a plexiglass piece to create a bass chamber, and it sounds really good.
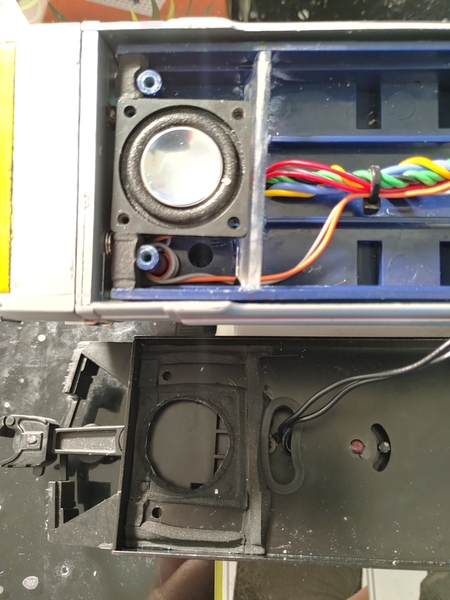
20240520_163203_HDR

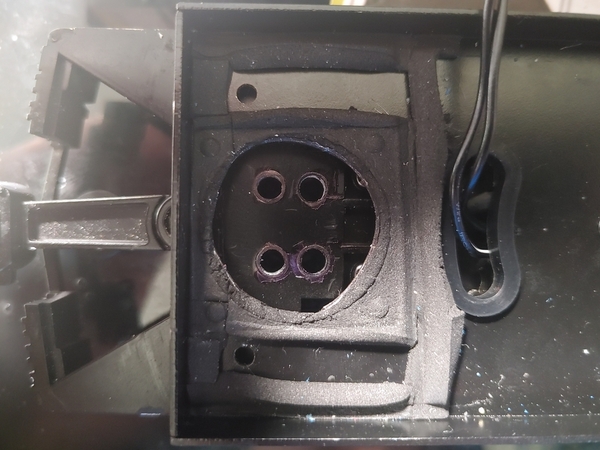
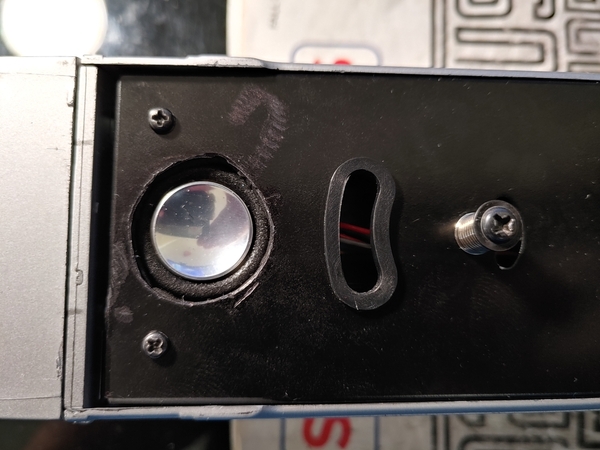
There is also a strip of foam between the top of the speaker frame and the lip of the interior. The sound is incredible from this small speaker, very loud and very clear. Here's a picture showing the speaker with the frame on. The hole is not perfect but gets the job done.20240520_162857_HDR
Only modifications I needed to do was to rewire the strobe lights to be ground switched, as the original board switched them on the hot side. Wasn't too difficult, just remove the SMD LEDs and rotate them around 180 degrees. Although, removing that PCB was not easy.

Here's a video showcasing it in action, with the volume set to maximum (as well as the horn sound set to maximum too). I am running it with a 9V battery for the time being, just for testing and programming.

Horn is set as K5LA (3). Bell as EMD slow (3). Strobe lights are set to activate when the bell is turned on and they flash the same as the real thing.

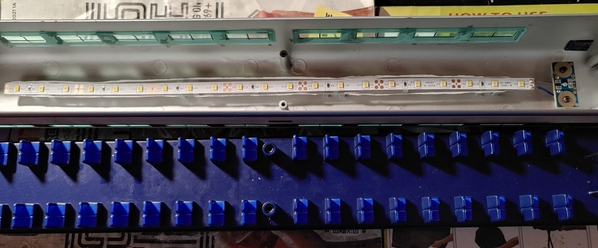
The final blueberry on top of the cake, I bought GunrunnerJohns constant current boards and installed LED lights for the interior.
20240521_215233_HDR~2
I reused the spring contacts system for the lights so the shell is easier to take off in the future.

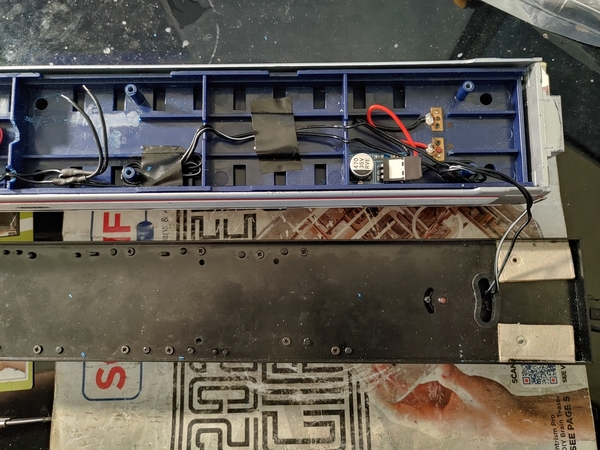
And here's an overview of the installation so far. The space and those bare power wires, after the 2200, is reserved for the AC to DC board.
20240522_155401_HDR20240522_155451_HDR
I will post pictures of the finished installation in a reply and also some videos of it in action too.

Attachments

Images (5)
  • 20240520_163203_HDR
  • 20240520_162857_HDR
  • 20240521_215233_HDR~2
  • 20240522_155401_HDR
  • 20240522_155451_HDR
Last edited by MichaelB
Original Post

Replies sorted oldest to newest

You will want to add a screen over the speaker hole (just a small square of nylon window screen is fine). The speaker magnet is powerful and it will pick up any magnetic debris on the track as it runs over it.  

I think it might be okay that way, since the plastic pilot covers up the speaker hole most of the time and the speaker is around an inch off the track.

Last edited by MichaelB

Small update, added 4 holes to the pilot to allow more sound through when the car is on completely straight track. I'd drill more holes or make the holes bigger, but I am worried about that area becoming extremely weak as a result. The pilot is just made out of plastic and I still want to couple something to the front of the car on occasion.
20240523_153438

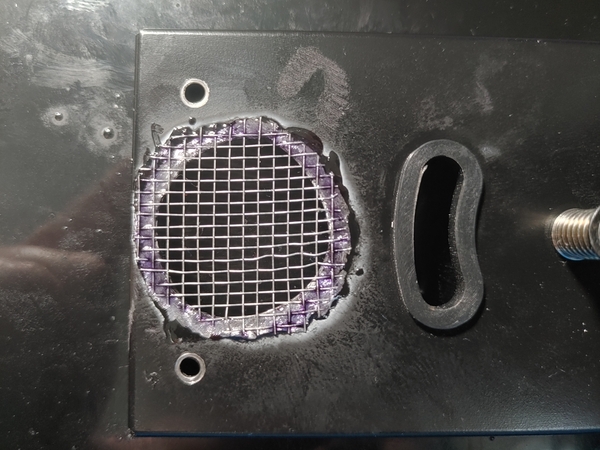
I also decided to add a screen over the speaker hole, just so it's there. Also adds some protection while I am putting the 2 screws into the frame.
20240523_161532_HDR
Used some chicken wire, as I wasn't able to find any window screen material. Should be better than the window screen material anyway.

Attachments

Images (2)
  • 20240523_153438
  • 20240523_161532_HDR
Last edited by MichaelB

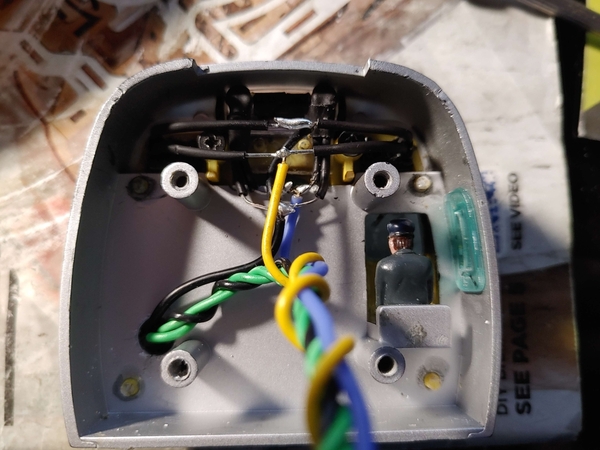
Also for reference, this is what the wiring looks like in the cab part of the car.
20240517_202550

There's 2 LED headlights wired in parallel, 2 red LED marker lights wired in parallel, and 2 Ditch light LEDs with separate grounds. The black wire is actually the common power wire. I did this many years ago when I fixed the wiring for the PCB, because I didn't have access to blue wire at the time. Each colored wire represents each of the 4 lighting functions. Yellow for marker lights, blue for headlights, and green for the ditch lights.

You might be able to see that the original PCB with the lights is omitted here. I decided to put LEDs in place of the old lenses to have brighter light and have less light bleed. The marker light LEDs have heat shrink around them to make sure the light doesn't shine in the yellow plastic of the front. The lenses on that plastic headlight piece were cut off and replaced with 3mm LEDs and that plastic headlight guide was painted black to look more like the real thing.

Attachments

Images (1)
  • 20240517_202550
Last edited by MichaelB

Here's the final pictures of the install. Buck converter and rectifier are both from Amazon.
20240526_095621_HDR
20240526_095626_HDR

And also a quick video of it in action, I will have a full video up showcasing everything

The car sounds are quieter than I expected at the museum, but it's not terrible. It's pretty clearly audible at around 5 feet away. I did change the horn sound to K5LA (1), as it's closer to the sound of the real Metroliner cab cars.

Attachments

Images (2)
  • 20240526_095621_HDR
  • 20240526_095626_HDR
Videos (1)
20240526_160725
Last edited by MichaelB
@C.Vigs posted:

Really great job, and a creative use of Blunami.

Does the Genesis also have Blunami? It would be interesting to see what could be done with having Blunami equipped engines consisted with cab cars or other equipped rolling stock.

~Chris

No that has PS3. A club member is planning to convert his K-Line Surfliner cab car to have a Blunami too, along with his dead F59PHI

Last edited by MichaelB

Seeing as I found the sounds of the cab car to be too quiet with the usual background noise of the museum, I will be working on building an audio amplifier/booster for the speaker. The volume is already maxed out on the decoder (horn and master volume), so I am looking for around a 1-1.5 watt boost in power to the speaker (the peak power is 4 watts for the speaker). The decoder has a max power output of 2 watts for the speaker. Anyone have any suggestions for an amplifier circuit for this application?

So quick update. On Friday I decided to redo the speaker mounting method to have it screwed onto the metal frame. Before I had it held down on with double stick tape on the top of the magnet onto the underside of the interior part. It seems to have improved the sound and made it louder than before.

I don't have a picture of its new setup right now, but here is a quick video showing it in action at my local club. So you can hear what it sounds like with the new speaker mouting method

Attachments

Videos (1)
MVI_0018
Last edited by MichaelB

Here's a final picture of the final configuration of the Blunami install in the car. I was adding figures to the interior so this was a perfect time to show this.
20240610_222834_HDR~2

I added 8 capacitors in parallel to act as a keep alive (on the DC output connection of the buck converter). That gives me around 1 to 2 seconds of run time if I cut the power, but will ensure it will not instantly loose power if it goes over back to back switches.

Attachments

Images (1)
  • 20240610_222834_HDR~2

Add Reply

Post

OGR Publishing, Inc., 1310 Eastside Centre Ct, Suite 6, Mountain Home, AR 72653
800-980-OGRR (6477)
www.ogaugerr.com

×
×
×
×
Link copied to your clipboard.
×
×