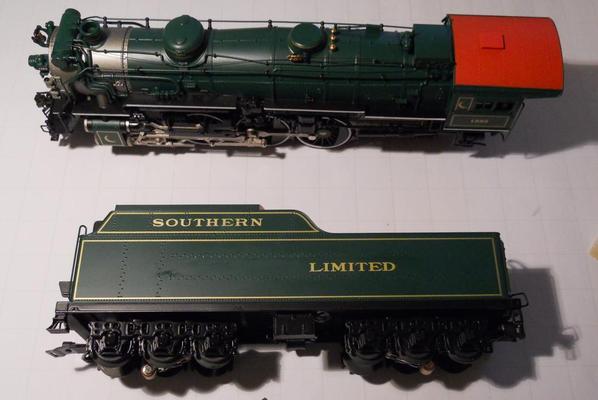
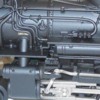
As I mentioned in a couple of the Southern Crescent threads, I bought mine because I loved the piping and machinery attached (particularly on the front end), but I don't do Southern on my layout, and while many love the beautify of the paint scheme, it was too garrish for me.


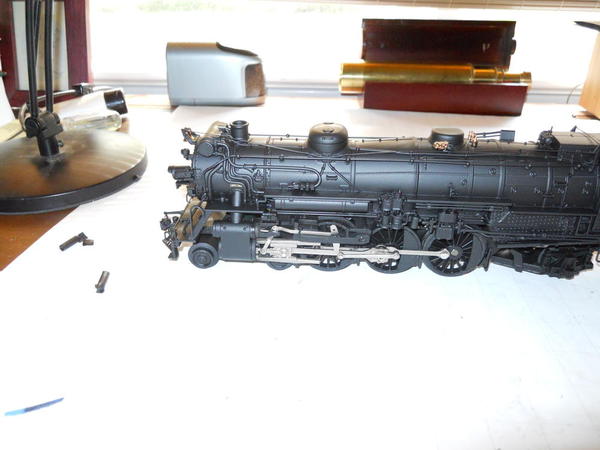
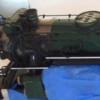
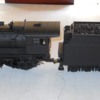
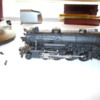
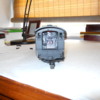
I bought this intending to repaint it flat black, and I have . . .  without removing the body or priming.   Here are the pictures.


Step 1 was to test the paint with a small trial spray onderneath the tender and let it dry overnight - to make sure ti does not react with the paint, etc.


Next is to sand off the printing, etc. with # 600 sandpaper: it has enough dimension that you can see it through paint so it must be removed. This took only 15 minutes.


Number 600 sandpaper takes off the letters but not the paint


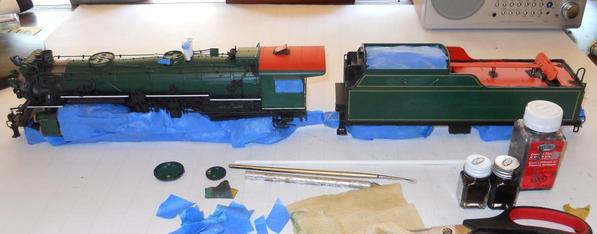
TWO HOURS I then spend on masking the loco EVERYWHERE I don't want even a spray of paint to go.

I mask and trim the number plates, and even the manufacturer's plates, etc.  The bell is a challenge

to mask, but I got it done.  IF YOU DO THIS: remember, mask the IR link REALLY well - any paint on that 

could ruin your whole day. 


Masking takes well over an hour


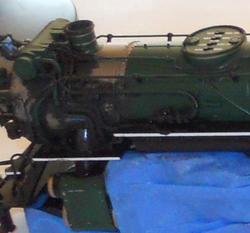
Next, I use a fine brush to paint everywhere I think "spray shadows" might

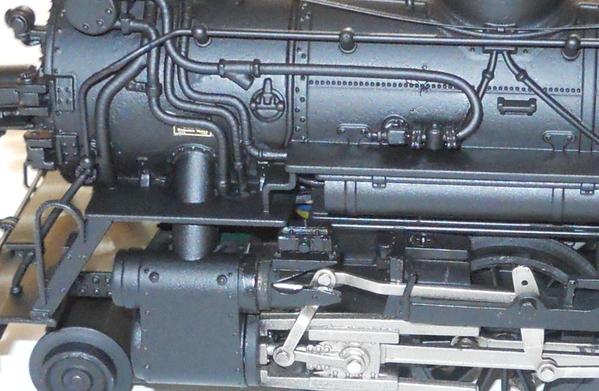
occur - under pipes, backside of pipes and equipment.  This took an hour.  Below shows

some details, above you can see I've done it everywhere.  


Hand paint where spray shadows are likely to be, etc.


Immediately after finished the manual painting, I spray it.  Two coats 20 minutes apart: the first is semi-gloss, the second flat, black.  I do not use an airbrush - can't move enough paint in a short time.  I use Rustoleum Painter's Touch Ultra Cover spray paint cans bought at Ace Hardware.  


Four hours later the paint is nicely dried, if not yet absolutely hardened. I remove the masking, spend thirty minutes hand painting the wheels rims flat black, etc. 


Here it is - really looks nice!


Done!


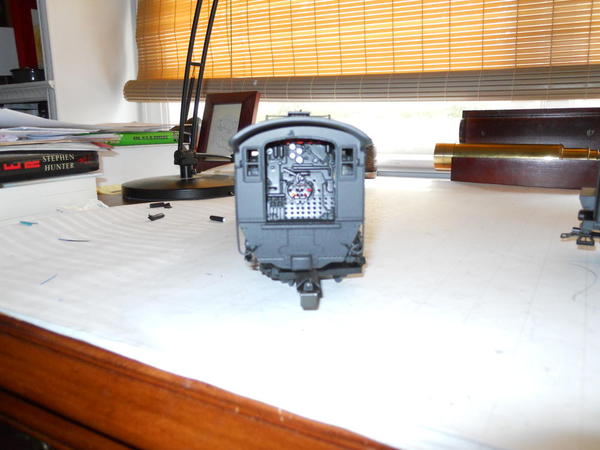
Note that spending half an hour masking the inside of the windows, too, and the cab with a 

tape curtain paint off with a perfect interior - no spray.

masked the cab well . . .


And this is what I wanted when I bought the loco: all that piping and machinery, on an hard-working industrial loco.  Grand!


This is what I wanted . . .


AND THE ONLY THING THING THAT WENT WRONG?  It surprised me.  I masked all three of the tiny brass "manufacturer's plates" -- cover them with masking tape, trim it with a #11 Xacto blade.  Five or six hours later, when I carefully removed the tape, two or the tiny brass plates came with it.  No big deal.  I glued them back on.   Below is the one that stayed on, but the other two look just as good now they are reattached.

Number plate is perfect . . .

Attachments

Images (7)
  • Number 600 sandpaper takes off the letters but not the paint
  • Masking takes well over an hour
  • Hand paint where spray shadows are likely to be, etc.
  • Done!
  • This is what I wanted . . .
  • masked the cab well . . .
  • Number plate is perfect . . .
Last edited by Lee Willis
Original Post

Replies sorted oldest to newest

Year, I do Southern some; I'm on the Gulf Coast and the Crescent Limited came through

Mobile back in the day (though not behind these Ps-4's) before my adulthood (adultry?),

but I like the looks of it black, too. And, Lionel painted the roof red, which SOU steamers

did not have (I painted the roof black on my MTH green Ps-4 and my Lionel T-class

Mountain). Why do they insist on this odd red roof?


The first Ps-4's were indeed black; it was a few years later that the Green Decision was

made (as everyone knows, the Southern Rwy - Britain - had green locos; but they were

a very different green...).


I have some SOU green steam because it is striking, and it's my part of the country, but,

esthetically, my fave is a NYC J3a Hudson. Plain or fancy.


Your loco looks very nice.


Originally Posted by Dewey Trogdon:


Good job on the painting!

You are gonna put "Southern" or at least Southeastern Railway lettering back on that black workhorse aren't you Lee?? It won't run right on "foreign" rails.

No, everything on my layout, except my Vision Hudson, is Santa Fe or Union Pacific.  I think it will feel at home in the western US.

Originally Posted by Zett:

Wow what a project. I would have freaked out starting this. I am assuming 2 coats of the spray was enough? Thanks for taking pictures of the process and posting.

I agree...thanks for posting.  As for the Zett's two coats of paint question, maybe it's just the lighting in the photos (or it could just be my eyesight), but does anyone else see green still showing through the black paint?

Originally Posted by Jumijo:

Why semi-gloss followed by flat black? Why not all flat black? I don't understand the use of 2 different paints.

Well, first, a thin flat coat over a thick semi gloss leaves just a trace of sheen, which I want - just a tiny bit.  


Second, and this is dangerous if you have not practiced: I've done a lot of practice.  I spray the semi-gloss very heavy and wet, and let it dry a short time - just 20 minutes exactly today.  Then, I spray a thin, "dry" coat of flat ( dry means from farther away - about 18-20 inches as opposed to a foot) over everything.  The new paint dries flat, which is what I want, with just that trace - a trace is all, of sheen.  


AND, THIS TOO: it causes a minute crazing- tiny cracking of the surface of the paint - the semi-gloss underneath is wet but the surface dried, the new wet spray - not too wet but good, leaves a type of patina I love - hundreds of tiny cracks per square inch that you can only see when you are an inch or two from the loco - looking from any further way very rough and scale "cast iron" and industrial.  


I'd suggest anyone who does this to practice first.  The potential to ruin a perfectly good loco is very high here if you wait too long - another ten minutes and the crazing would be rumpled, ruined paint, but when you get it right the look is just extraordinary - at least what I like.  I can't possibly put this in a photo but it is great.

Thanks.  I was pretty confident it would work out because I've experimented and tested a lot.  But I was also motivated by really wanting this loco as it is now . . . this one "modification" - repainting it as I did -- changing it from something that would be sure to sit on the shelf all but maybe an hour a year to a loco that will be on the layout all the time and run nearly every day. That was worth some risk. 


I was longfully staring at my Vision Hudson last night (the loco I run most of all) and wishing it had this look, too.  As to confidence - I'm going to have to think a bit more before I do this to a loco costing nearly twice as much as the Southern Crescent, but eventually, I probably will.

The crazing effect is from the heavy wet coat having a surface skin that's dry and the top coat's solvent softening it.  That's a really tricky technique and I'n not sure I want to know how long it took to perfect it. 


To much top coat (too heavy or too close) and you get a "crackle" finish and too little/to far it just looks like the top coat.

Comments to Casey LV and to Chuck.


Casey LV: The paint is the same brand and type for both coats: Rustoleum Ultra Cover 2x - a heavy coat of semi- and 20 minutes to dry and a thinner flat over it.  This causes a very slight crazing and pucker ing of the surface.  

---->There may be better paints, or not, but I have experimented and tested with this brand and type and I would not try this "trick" with any other paint unless I had experimented with both the spraying and timing. I did this the first time, for real, on a Williams ten-wheeler I modified about two months ago.  And then only after I had tested on plastic and metal sheets, and bought four or five old cast iron locos of various vintages - nothing special, and practiced on them.   I have only done this on this one Lionel and two Williams - never determined if MTH paint would be different.  


Below is the bottom picture in my original post.  At the very center you can see a tiny bit of blue and green - wires inside the loco.  Move up at about 1:30 as on a clock face to the inside of that pipe that comes from the left towoard the right and makes a U down and back toward the front to enter a valve or something attached to the boiler.  The light is just right inside the surface of the boiler there to show the patina and texture i wanted - very much like cast iron.  

 Number plate is perfect . . .


Chuck, you are correct that this is a very tricky timing, and spraying: the thickness of the coats, as you observed is a key factor in if and how they craze, not just the timing: in particular the bottom coat has to be nearly uniform in thickness, and wet, everywhere, for this to look good.  I had training forty years ago and did some auto body paint and all at a very upscale shop, so I felt I could do it.


Still, I expect some day this is going to backfire on me.  That would either ruin a loco or require that I take the body off and remove all the paint, etc. - monstrous work if I could do it well (I know I could do the paint work even if a hassle, but could I disassemble and re-assemble a Vision loco?.  The main reason I have not tackled doing this to my Vision Hudson: there is confidence, and then there is confidence . . . 

Attachments

Images (1)
  • Number plate is perfect . . .

Lee you might try a automotive Satin Black . It's not gloss but it's not flat either it's got just a little sheen to it. You see it a lot on hot rods. You can get it from Eastwood in a rattle can and it's a very high quality paint and very fast drying. That way you only have a 1 part paint process instead of the 2 part.

To much paint and you start to cover up tiny details and down the road as the paint gasses out you can easily get cracking not to mention dealing with the runs.

Try Eastwood .com they've got alot of nice stuff these days they didn't have 40 years ago. I still remember shooting Imron ..... I'd rather just shoot myself and get it over with.
Nice Job

David

Originally Posted by Lee Willis:
  I masked all three of the tiny brass "manufacturer's plates" -- cover them with masking tape, trim it with a #11 Xacto blade.  Five or six hours later, when I carefully removed the tape, two or the tiny brass plates came with it.  No big deal.  I glued them back on.
Lee, nice job.  For small details like those plates and number boards/logos/printing/etc I've often used vaseline as a mask.  Apply carefully with a toothpick and after the paint dries just wipe it off.
Originally Posted by Gary:
Originally Posted by Lee Willis:
  I masked all three of the tiny brass "manufacturer's plates" -- cover them with masking tape, trim it with a #11 Xacto blade.  Five or six hours later, when I carefully removed the tape, two or the tiny brass plates came with it.  No big deal.  I glued them back on.
Lee, nice job.  For small details like those plates and number boards/logos/printing/etc I've often used vaseline as a mask.  Apply carefully with a toothpick and after the paint dries just wipe it off.

Worked for Earl Scheib for years LOL Your $29.95 paint job included Vaseline instead of masking tape.

David

Beautiful job Lee!

Can you post some more photos of the locomotive on the layout or with some scenery - 'in action'?


Re your Hudson,  have you considered a very light coat of satin clear for starters?


PS  Congratulations on your article in OGRR! Wanted to write but lost your email (not in your profile)

As you state that your layout is a Western-centered one, but I feel that the Ps-4 does not look at all Far Western (UP, ATSF, even SP - nope, no way); I might point out that it does

indeed have, in black, a very pronounced Missouri Pacific look, which is a railroad

that had some of the most handsome steamers in the US. It is also very seldom

modeled, which I don't get. It was a "Western" road, pretty much.


Someone has described MoPac steam as having a NYC look, but on a larger scale

(no tight clearances). They do favor, with differences, of course.


Your loco would look great with an oil tender (easy change; styrene, wire and there

you go) and "Missouri Pacific Lines" on the bunker. 

Post

OGR Publishing, Inc., 1310 Eastside Centre Ct, Suite 6, Mountain Home, AR 72653
800-980-OGRR (6477)
www.ogaugerr.com

×
×
×
×
Link copied to your clipboard.
×
×