I'll start this off with a little scene that needs a lot more work but hopefully you will enjoy as it is for now....
Thanks,
Alan


|
|
I'll start this off with a little scene that needs a lot more work but hopefully you will enjoy as it is for now....
Thanks,
Alan
Replies sorted oldest to newest
Great photo Alan.
You guys have seen this before I'm working on the Sinclair service station, and the 4 mth banks kit bashed into a train station.
Thanks, Alex


Man you guys get up early to start huh.![]() Have a train show today so i figured id post super early before i left for the day.
Have a train show today so i figured id post super early before i left for the day.
I been working on the linolium factory. Hadnt a clue what to do with the inside,
After alot of research this is what i came up with so far.
They had long tables inside. 3 floors stacked vertically that all fed into a huge oven or drying tower. Each floor would pull a piece of sail cloth(the same cloth they used to make sails on boats) across the table and apply a coat of linseed oil to the cloth then put it on a hanger which swung back in to oven then up and down and around a guided sytem to the next floor repeating the process until many coats where applied and dried.
The picture below represents the first floor where the roll of sail cloth is getting its first coat before being cut and sent into the drying racks.
I also learned that way before carpet people used sailcloth on their floors to keep it warm.


Every building in this photo is Card Stock constructed.


A couple of scenes I found scenery inspiration from at the Amherst Train show in Narrow O gauge. Enjoy!


Patrick,
That is really sharp.
Here is a model on an LNG tanker I completed. The hull is made of 1-inch thick Masonite. The hull was made by one of my customers carpenters. I glued styrene sheets to the top of the deck and added the structure.
Alan Graziano


Boy, the standards get higher every week! Amazing, guys. I've had nothing to share for quite a while now--been doing boring table and track work on Phase 2 of my layout. But, I am getting back in the saddle now, so hopefully I'll have stuff worth sharing again once in a while. Starting small this week:
One of the goals of my layout is to include every accessory that appeared in the 1957 Lionel catalog--looking as good as possible. That means I needed to find a place for a 920-2 tunnel portal. However, the only place I had room will have three tracks entering the mountain, so I need to somehow add a double-portal that is visually compatible with the 920. So, I decided to see how close I could come to the Lionel look using good old pink foam.
Rough cut:

Score the blocks and add some headers and footers:

Prime:

Finish texture and color:

Close enough for government work!
I love pink foam.


Hi Avanti (Pete)
Your tunnel portal came out great. I'm in the process of making a huge mountain of foam and I will be making several portals similar to what you have done.
What did you use to score the foam to create the stone blocks?
Thanks for showing what can be done!
Fred
Hi Avanti (Pete)
Your tunnel portal came out great. I'm in the process of making a huge mountain of foam and I will be making several portals similar to what you have done.
What did you use to score the foam to create the stone blocks?
Thanks for showing what can be done!
Fred
Thanks, Fred. I scribe with the tools from an old manicure set.

Fred....Pete's portals look wonderful!.....you can also use a good old dull pencil to scribe the foam with producing very good results.
Alan
WOW WOW WOW, Sunday scenic showcase is really getting better and better every week. This is one of my favorite sections of this forum. I must say to all of you guys just an awesome display of craftsmanship![]()
Thanks, Alex
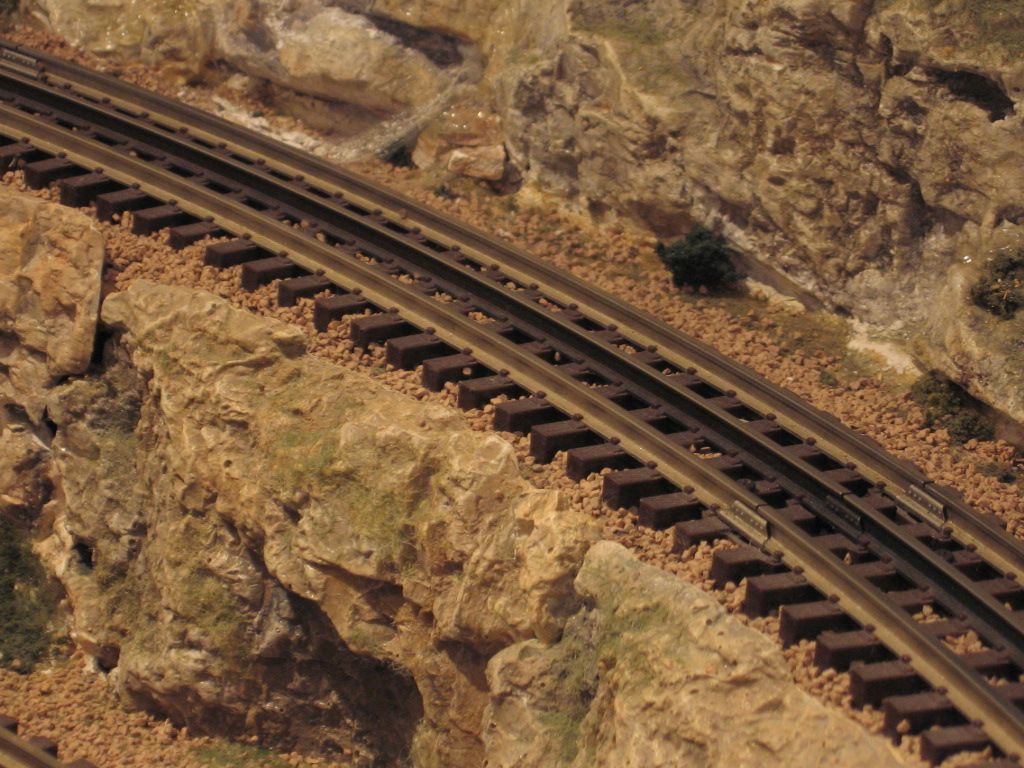
 This is the start of a cut through a hill coming out of the stageing yard on my layout.

Got some rocks up.

A few trees and a road with log truck and scratch built bridge.

A GE 44 Ton pulls a short train through the cut.


Awesome stuff!
I just finished laying this turnout and adding the ground throws.
"An ex-CR Boxcar Passes an abandoned tower just north of Columbus, OH:"

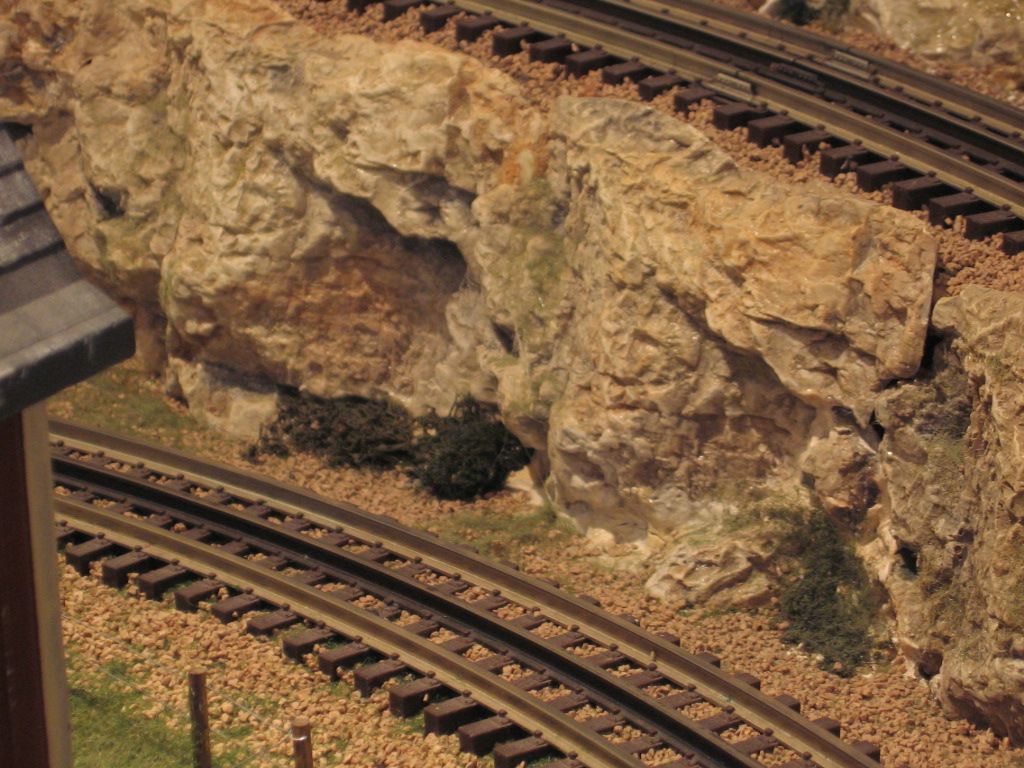
Very nice work this week everyone ![]() . Another rock job. Rock molds from Woodlands Scenics.
. Another rock job. Rock molds from Woodlands Scenics. 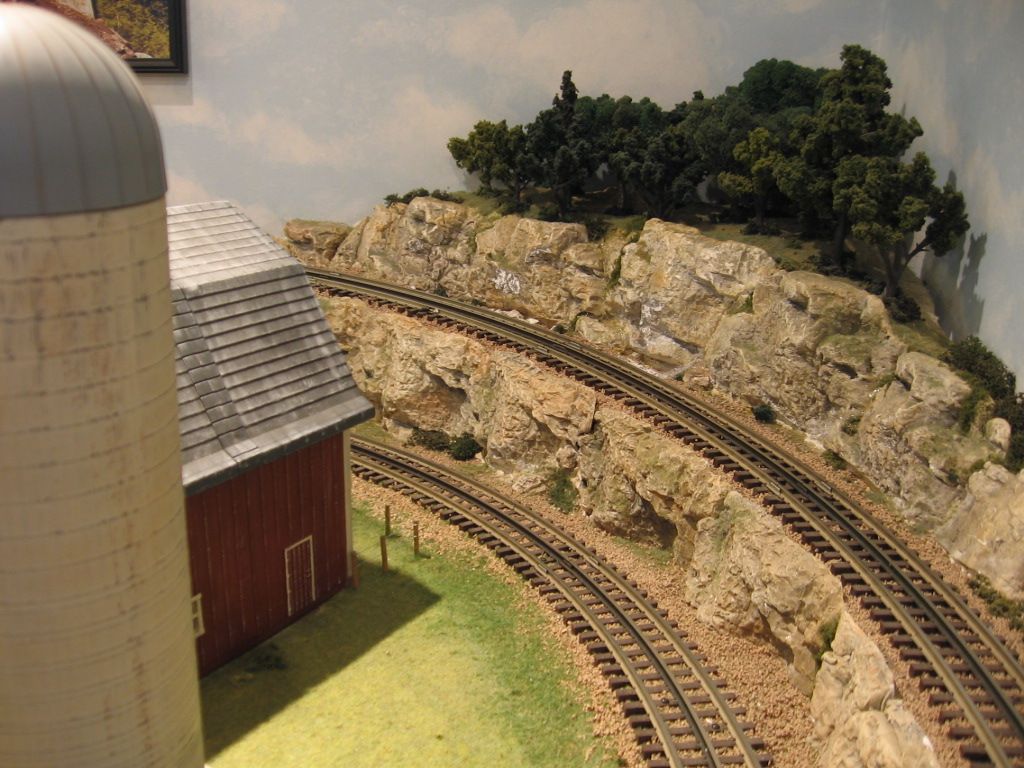

Alex....I agree. WOW!!!....This forum is getting better and better. I am just thankful that you guys let me be here.... Only problem...my neck is getting sore from looking up to the rest of you!!
Alan
Awesome stuff!
I just finished laying this turnout and adding the ground throws.
"An ex-CR Boxcar Passes an abandoned tower just north of Columbus, OH:"
Thanks Jerrman! Still some work to do on it (vines, graffiti, etc.)

Weathering all my diesels and experimenting with the Sony NEX C3…


I look forward to this topic every week, although I haven't posted to it before now.
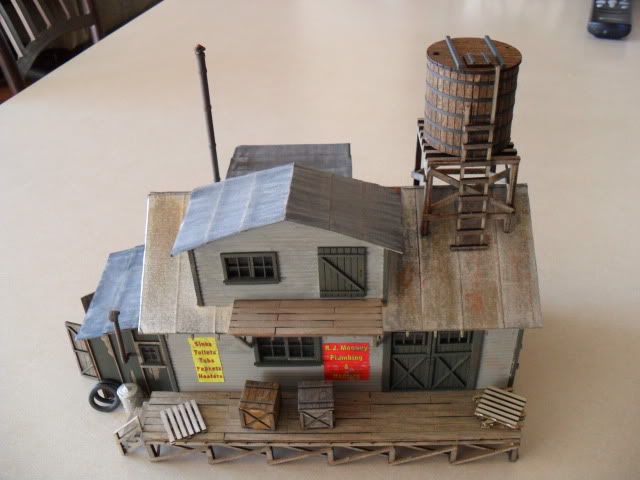
Bar-Mills Mooney Plumbing kit:

Alex....I agree. WOW!!!....This forum is getting better and better. I am just thankful that you guys let me be here.... Only problem...my neck is getting sore from looking up to the rest of you!!
Alan
Alan,
You have accomplished such beautiful scenes on your layout, I consider it a work of art and I'm quite sure the rest of the gang will agree. We all show different talents here every week and each one of us have our own special one just like you. So the bottom line here is I love that you start us off every week, and you most definitely belong here and I'm glad you are. The great thing here is this thread is getting better every week, so I thank you for getting us going each Sunday.
Thanks, Alex![]()
I agree this is one of the weekly topic I look forward to. The work by everyone is fantastic.
Here is from the other end. The Flat with the loading doc is one I bought from Patrick H. I just put the lights on it last night.


Holy schnike!!!! Great work this week, all of you make this hobby fun.
Wow Guys, some outstanding work here this week, simply stunning.
here are some shots taken by Bob Bartizek around my layout, we had a group open house yesterday with some of the hi railers in Cincinnati.


Alan,
I agree with Alex. Your layout is awesome. I love all the scenes that you post. You have also done a good job as a steward of Sunday Scenic show case.
Alan Graziano
Thanks so much Alex, TMack, and Alan....I am learning so much from all of you guys that post here. I am just now beginning the scenery process on the layout as I wasn't sure where I would be placing trees, rocks, grass, weeds, etc. with all of this darned concrete!! I am still trying to decide whether or not I am going to keep the monorail up. I was fascinated with it in the beginning but it seems a detractor now. I may leave it up for a while but it is not going to be a permanent fixture.
This has got to be the best showcase in a long while....WOW guys, you have hit it completely out of the ball park this week!!
Alan
Alan. Please.... keep the monorail. It is part of the character of your layout. imo.
Jack
Patrick,
That is really sharp.
Here is a model on an LNG tanker I completed. The hull is made of 1-inch thick Masonite. The hull was made by one of my customers carpenters. I glued styrene sheets to the top of the deck and added the structure.
Alan Graziano
Holy Moly Graz, what is the length of that monster. And how a bout a hint of the half egg carton domes down the middle, how they where formed or bought
Patrick.
How did you know my nickname was Graz ?
The ship is 48 inches long. The hemispherical heads are from Plastruct. They are 6 inches in diameter. After completing the model, my customer asked me to install lights on it. I did not think I could install the lights with the model completed, but I bought some 12-inch long drill bits and went to work and installed about 25 lights.
Alan
Alan,
Thank you for a wonderful compliment, but I am no way in the league of these guys. I am mastering the art of budget scenery. Its going to be a while before I can paint and detail like these guys. All I know is I am having fun trying out all kinds of new stuff and I really enjoy OGR and all the people here and the idea they share.
-Ted
Patrick.
How did you know my nickname was Graz ?
The ship is 48 inches long. The hemispherical heads are from Plastruct. They are 6 inches in diameter. After completing the model, my customer asked me to install lights on it. I did not think I could install the lights with the model completed, but I bought some 12-inch long drill bits and went to work and installed about 25 lights.
Alan
Just incredible!
We had a family in the neighborhood where i grew up,the Grazianos. We always called them Graz at school or when referring to them. Its Calabrese i beleive.
Man you guys get up early to start huh.![]() Have a train show today so i figured id post super early before i left for the day.
Have a train show today so i figured id post super early before i left for the day.
I been working on the linolium factory. Hadnt a clue what to do with the inside,
After alot of research this is what i came up with so far.
They had long tables inside. 3 floors stacked vertically that all fed into a huge oven or drying tower. Each floor would pull a piece of sail cloth(the same cloth they used to make sails on boats) across the table and apply a coat of linseed oil to the cloth then put it on a hanger which swung back in to oven then up and down and around a guided sytem to the next floor repeating the process until many coats where applied and dried.
The picture below represents the first floor where the roll of sail cloth is getting its first coat before being cut and sent into the drying racks.
I also learned that way before carpet people used sailcloth on their floors to keep it warm.
Did you make these figures yourself, I would appreciate some help on creating my own figures (people) but I have had trouble finding any possible links here on the forum if they exist. Thanks for the help.
Every building in this photo is Card Stock constructed.
I have betowed the privildge upon Ted to school me on the basics of card stock building construction. We have been exchanging emails all weekend with me asking questions and he replying with answers and explanations. In the back of the right side of his picture above is his Clever Models Steel Pipe factory which is the building that hooked me. I have now purchased the "kit" plus another that will fit the area and waiting for some tools to arrive.
Here is the area that I will use the buildings a s a backround for:

I offered to hire him to build it and he told me he didn't think he had time. Sounds like my Dad when he used to say "do it yourself, you ARE capable". Guess we are going to find out! Good thing is I can print these out as many times as I want!
Stay tuned!

Sunday Scenic Showcase - 2 Pages! Yeah baby....Lets keep it going this time! Where is Jim P? He is always building/changing something.![]()
Access to this requires an OGR Forum Supporting Membership


