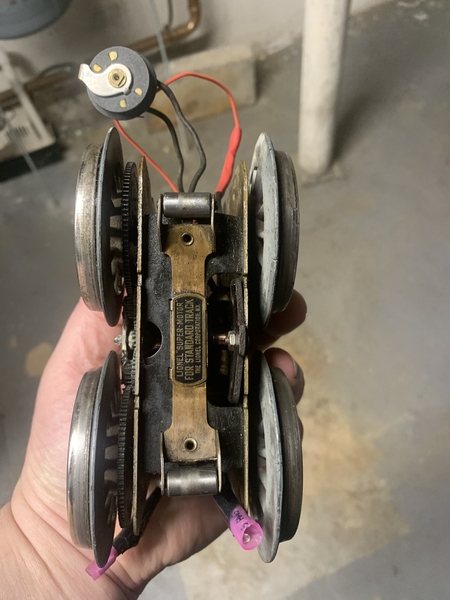
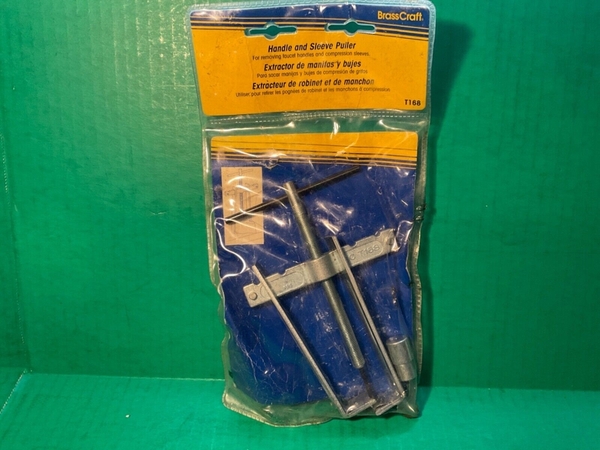
I got a puller (i read that a brasscraft faucet puller would work) and got the two geared wheels off. I did not take off the plain wheels on the other side. The wheels started to crumble at the slightest pressure so I had to resort to pulling from the gears underneath but they came off easy and are unharmed. The two round tabs of the wheels were pretty tightly connected in the two mating holes of the gear. Is there a preferred process to press the new wheels onto the gears? By the way, the wheel spokes basically crumbled. Are the new wheels made of similar brittle material or are they made more malleable?
I have only replaced gear wheels on six standard gauge wheelsets, but my experience was the same on most of them. Two problems were found; 1) the gear alignment nubs on the wheel were not accurately cast, and so they did not perfectly align with the holes on the gear, and 2) the central hub was not cleanly cast to form a perfect right angle with the backside of the wheel. That problem appeared on half of the brand new wheels I used.
First, the gear alignment nubs: Rule #1, you must not change the relationship of the center hole of the gear wheel with the central Hub (where the axle goes) on the back of the wheel by filing, squishing or any other means you can think of. So you must adjust the nubs only in order to make things fit.
I saw one wheel where somebody had a more powerful arbor press than mine, and they just smashed the whole thing together. The result was that both of the alignment nubs had tiny bits of their edges smashed flat against the wheel. The excess smashed metal squished outward and prevented the gear from sitting flush with the back of the wheel, as it must. In this instance, the result was a slight wobble in the gear, moving in and out in relation to the motor side plate and the back of the wheel. So my approach was to carefully, slowly, painfully file away the just enough metal on each of the alignment nubs to allow a perfect fit. The major precaution that must be taken here is to do it slowly and do a lot of test fitting. Small files were used, even some needle files, but a problem is that when you place the files flat against the nub and file your way around, the files will eventually hit the central hub. In my case, I used a Dremel to clean up the nubs in those areas. By now, I'm sure those of you with real machinist skills are gripping the edges of your chairs! You do what you can with what you have available, and that includes knowledge, tools and skills!!
Spend some time during the filing process and use a fine point market to show where you need to file, and to help mark your progress. It's not a process I like at all, but I didn't see an alternative. I'm hoping others may chime in with their experiences.
Next, the central hub: When I had filed enough metal off the nubs to make things fit, I noticed the gear was still "rocking" against the back of the wheel instead of laying perfectly flat. The cause was that the central hub was not perfectly formed where it meets the back of the wheel - think of it as an area where the transition from the hub to the back of the wheel was rounded instead of a perpendicular junction. I had to file both the central hub and the backside of the wheel where they meet, in order to get the gear to lay perfectly flat against the wheel. Happily, that was a pretty easy cleanup and my new gear was now ready to be secured to the wheel.
Securing the gear: A lot of Youtubers, when securing the gear to the back of the wheel, seem to just smash the edges of the nubs once they were seated - the tool of choice seemed to be a flat, screwdriver-shaped cold chisel, or a round tipped, flat ended punch. I spoke with a few knowledgeable folks who advised against that (I do not know why), and said that I should do the swaging at the center hub using a special tool. So I bought the round faced tool for my press. The surface of that tool has the circular crimping edge at the outer reaches of the center hub, such that the hub's metal was compressed tightly against the inner diameter of the gear. That was a bear! It took everything my press had to create that crimp - I thought I was going to break the handle on my press (a modified Harbor Freight, so that might explain the concern), and even had one kind soul offer a suggestion to smack my press handle with a large hammer to provide an "impulse" blow to the crimp - I didn't do that, thinking "what could possibly go wrong with that?" It seemed to me that all of this pressing needed to be done with the axle in place in order to prevent squishing the axle hole in the central hub. It took a while to figure out how to do that on my press, but I got it done.
Plan B: If you don't have a press, then I would say a cold chisel and a hammer used at the nubs would probably work, but could potentially result in uneven seating if things went wrong.
Plan C: Which is why I chose to ignore swaging of the gear/wheel altogether on my first attempt (before I bought the press tool) and simply go with JB Weld. Worked perfect, nicely aligned and flat with no wobble and VERY well secured!! Let's just say when and if that wheel crumbles, I won't be around to deal with it!
Looking forward to hearing other peeps experiences as well.
George