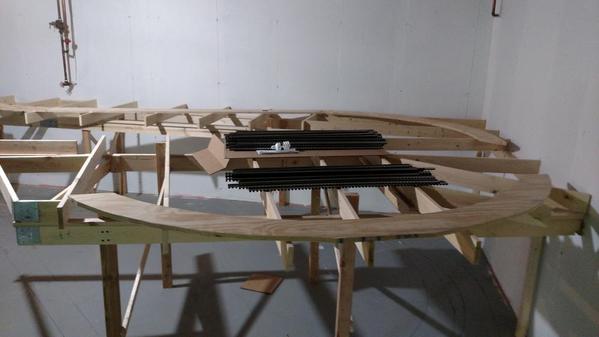
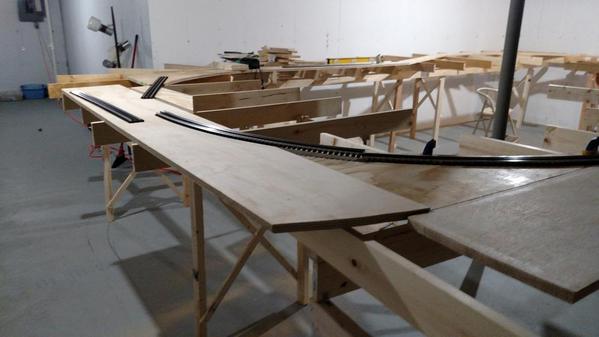
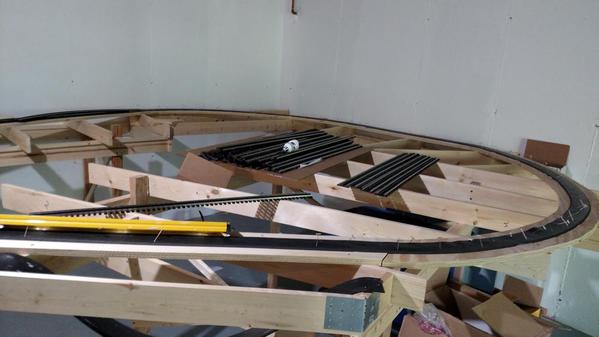
The more I learn, the more tweaks I'm making.  I expect that's pretty common.   Thanks to everyone for all the help.  


Moving from Conventional to DCS has really opened up my thinking about the track plan.  No requirement for double mains allows a bit more layout flow.  In the original plan - each main climbed and descended across the whole length of the room.  


My thinking -  Instead of having the two mains, I keep the two lines along the west and north wall - but have them tie into each other with an elevated loop on the East end - rather than messing with ascending - descending track in two different places.  It eliminates any clearance issues with the descents occurring too soon, etc. - and should help for a more consistent look when I model it out. 

I can pull the reversing loop out of the East end - eliminating smaller diameter track - keeping everything 96 and above. 


The lower level loop on the east end could be tied together with two switches at the alcove.  The key would be to install so that the train could reverse direction.  One Idea I've had is to break up the double mains at the alcove.   The outer line could turn and run flat below the elevated lines all the way around the room.  The inner line could maintain it's current position in the alcove.  A RT switch could be installed coming out of the alcove and tie into a second RT from the duck-under bridge - allowing full reverse of direction. 


This plan would cut the lift bridge down to a 1 track bridge - as would be the wrap around the stairs.  Once around, a turnout could be added to increase to two tracks and tie into the descending elevated track - unchanged from the previous design.  


The newly created lower level track would wrap around the North and West walls entering into a yard along the 18ft West wall -  I can fit in an engine house and some short sidings here - and then continue the track to tie into the inner loop.   I'll draw it up and see what it looks like. 


Last edited by Jacobpaul81

Hopefully this is the final iteration - Blue is elevated, green will be level plain.  I've cut it to two switches to jkeep things simple.  Plan is to build in parts - green level first -  then some scenery - adding the blue level once I feel good about arrangement.  If that works, I'd like to fit an e ngine house inside the east loop using a 4 or 6 track yard switch from Ross.   Take a look and let me know what you think -  I believe this controls direction and allows for maximization of travel.

photo

Attachments

Images (1)
  • photo

5-26-2015. Progress:  started laying subroadbed.  Started with alcove and working outward from there.  Trying to decide how I want to handle duck under bridges.  The gap is roughly 40".  I've looked at custom offerings from Stainless Unlimited (which is local  to me) but out of my budget.  I'll probably just use plywood and attempt to model them.   Subroadbed is 3/4 cabinet grade plywood - cut to 6" width per track.  Tacked down with 375PL adhesive and screws from above. Its crazy sturdy - I'm 185 and was walking on it without any movement.  


Attachments

Images (3)
  • IMG_20150525_205655142
  • IMG_20150525_205705295
  • IMG_20150525_205640548
Last edited by Jacobpaul81

Very cool! It's nice to see roadbed and track. I suppose that one has to walk on it to confirm the structural integrity.  Many still want to build huge frames and decks, when this works.


I had the Atlas double track truss bridge in mind when I tried to make the gap 38"-40".  You can always address that later after you recover from the build outlay.


The extra planning time was well worth it. It looks to be a nice runner now that it's being built.


Thanks for update. I hope all is well with you and your family.

Originally Posted by Jacobpaul81:

5-26-2015. Progress:  started laying subroadbed.  Started with alcove and working outward from there.  Trying to decide how I want to handle duck under bridges.  The gap is roughly 40".  I've looked at custom offerings from Stainless Unlimited (which is loop oval to me) but out of my budget.  I'll probably just use plywood and attempt to model them.   Subroadbed is 3/4 cabinet grade plywood - cut to 6" width per track.  Tacked down with 375PL adhesive and screws from above. Its crazy sturdy - I'm 185 and was walking on it without any movement.  


Just a thought there is Jim who owns Bridge Boss, he makes different custom bridges that are all very reasonably priced. Here is the link: Bridge Boss Link

Thanks everyone!  Work is progressing smoothly thanks to all the advice ive received here.  Definitely a credit to the forum community.

I was suspect to start, but I'm now 100% supporter of the l girder technique.  From a time standpoint, assembly is way faster - you can use pre-cut lumber for girders and joists and legs are quick to make when cuts have wiggle room. It took me about 8 hours to build the tables - about 4 to add joists. The subroadbed is the most time consuming part of this technique - ive got about 3 hours in it.

I've made several changes to the layout simply by pulling joists and adding new or adjusting girder height due to odd floor slopes - had I built tables using a more traditional grid, none of this would have been possible.   I've read about cost and stability as debatable topics -  I'm around $300 into the bench work to date with another $100 in wood expense expected (for upper level) and the tables are rock solid.   I'm very happy with the results I'm seeing.

I'll check out everyone's bridge recommendations and see if something will work.


Progress is slow-going -   Started on my custom plate girder bridge last night to connect the east loop.  


IMG_20150628_221840828

IMG_20150628_221859302

IMG_20150628_221914446


Using 3 1x's to structurally support the weight. 2 of the 1 by's are standing up, with one laid down in-between.  Metal mounting brackets will attach to this structure from underneath.

The girders are made with 3" x 1/4" poplar sheets - The overhanging top-cap is made with 1x2" pine strips. The girders are formed with 1/4" pine strips.   Headed to Menards after work to get some thin birch for the mounts and some smaller strips (like 1/8") for the Flanges and the Web underneath.  


The East Loop Sub-road bed and Roadbed are all installed.  


IMG_20150626_150037057


I'm changing plans - again.  Decided I didn't like the all elevated second loop - The new plan calls for only one elevated track - that track will connect on the straightaway pictured above on the south end of the return loop.   The new plan eliminates the second duck-under bridge.  I'm still finalizing the operation of the newest revision - I'll share when I get there.  

Attachments

Images (6)
  • IMG_20150626_150026293
  • IMG_20150626_150037057
  • IMG_20150628_221840828
  • IMG_20150628_221859302
  • IMG_20150628_221914446
  • IMG_20150626_150037057

Hi,

Well, it is summer. Nice to see that your still nibbling away at it.


So, this bridge is crossing in the west from the loop behind the stairs?


You will eliminate the bridge crossing in front of the stairs to the alcove?


I can see how that would work. The space next to the stairs could be a siding for an industry or diesel service area.

You'll forgive my directions - I keep getting the East - West side mixed up on the diagrams.  Our house actually faces East, so when you come down the stairs, that's the direction you are facing - throws me off when writing on here.  Technically the side to the right as you come down the stairs is south and in front of you is east. I'll go with that to save confusion:


The bridge I'm working on will be going in the circled area on the South end of the basement: 


photo


Rather than two bridges here, I've made some tweaks, so that the elevated loop (Blue) will cross the lower loop (green) about two feet after the water main.  That will give it more than enough room to descend around the curve - roughly a 1.75% grade. 


In this next image you can see where I've pushed the lower level track back (green in above diagram) so it can cross under the elevated track.  You'll notice this adds several feet of straight along the South wall. 


IMG_20150626_150037057


I will be installing a left hand turnout on the lower left of this image (where my level is) to connect the lower main to the elevated line.  


Once the track crosses the bridge, there will be a left hand turnout on the other side - as it appears in the original diagram. I am backing it up closer to the bridge. That will allow me to add two more turnouts before entering the alcove.  These two turnouts will allow the directional change from the lower inner to the lower outer - this is key, as the layout doesn't work without them - they will go here:


photo

It's tight but it should all fit - check - it has to fit. 


The new plan cuts out the double crossovers and reduces it to a single crossover (east wall in front of stairs). The bridge here remains but is reduced to one track.  This will make it easier to lift out. 


Two lines still go through the alcove.  The inner runs through the crossover and crosses over the bridge.  The outer will make the turn out of the alcove (it can be done at O-102) and connects with the previously planned elevated track (blue above).


The elevated line will merge with the middle line (rather than middle with inside) at west end of layout. These will then merge with interior line at some point - TBD.  I'm debating how to re-work under the stairs - I really would like an industry located here - and an Engine house on the back corner. 


photo

Attachments

Images (4)
  • photo
  • IMG_20150626_150037057
  • photo
  • photo
Originally Posted by Putnam Division:

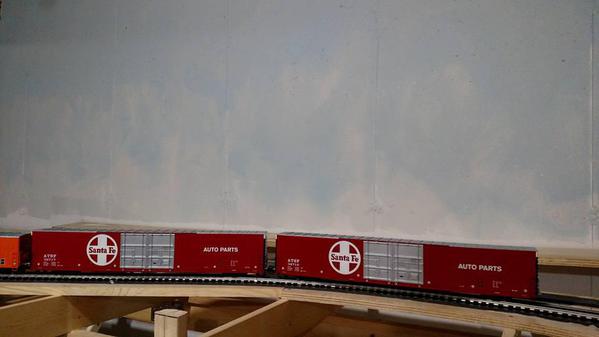
Love this engine livery......


I may be one of the few people who prefers this Santa Fe livery over the War Bonnet!


The layout is coming along....I look forward on seeing video of consists going around those sweeping curves.....wish I had the space!  Great job!


Peter


Hi Peter, you and me both. I had to have that F7.  I know a lot of folks find the blue and yellow boring - but that's the train I grew up with.  I spent my childhood in Topeka watching my father run mostly Yellow-bonnets in the yard - the F7 cigar band was the first engine he ever ran. 

Speaking of, those orange Weaver '57 Mechanical Reefers are my favorite rolling stock - I really must obtain all 8 road numbers.  I lucked into that one.  


I'm excited to get everything up and running - but it's going to take me a bit longer as I incorporate all the changes - I'm also delaying for other reasons:  I was just contacted by Bluerail trains - their HO release has been successful and they are shifting gears towards getting an O gauge smart board on the market.  Hoping I'll be able to run straight track power and convert some older Weaver and MTH models to bluetooth - and skip the DCS / TMCC control options. 

Now it makes sense...I forgot about the bridge to allow access to the South walkway.


I like your changes on the fly.


Curved switches will permit access behind the stairs West for the engine house and an industry. Ross has a 120 to 96 and a 96 to 72. Then a small cut straight or piece of flex to get the angle that you need off of the turn-out.

Originally Posted by Moonman:

Now it makes sense...I forgot about the bridge to allow access to the South walkway.


I like your changes on the fly.


Curved switches will permit access behind the stairs West for the engine house and an industry. Ross has a 120 to 96 and a 96 to 72. Then a small cut straight or piece of flex to get the angle that you need off of the turn-out.


I think the space just isn't sufficient beneath the stairs - but I'll keep playing with it. I'm adapting many things as I go and learn.  I picked up one of these kits the other day and am building it for the West wall of the layout.  Hope to find 4-5 more to model a San Francisco inspired theme for my wife - she grew up in the bay area.

As I'm learning more about the scale size of things - I realize how MUCH space I have for buildings. With so few 0-102 layouts out there, I guess I just didn't have a good perspective of it. I picked up a 3-story MTH building to sell - but placed it on the layout and it looked tiny absolutely tiny!  The area under the stairs is plenty of space for my urban town.


Since I can shift my town under the stairs,  I can now use the North side as a yard and install an engine shed (looking at the IHC/Atlas or Korber kit - both could be made to have a Topeka feel).  I've got 4 feet of table top over there - which is plenty of space for some warehouses / factories / brewery along the wall with the outside loop tucked behind / underneath - and room to build a yard in-between the two lower lines.


photo

Attachments

Images (1)
  • photo

You also want to keep in mind the spacing between the elements is part of the overall look and feel. There is a lot of track between cities in the western US, not like the eastern.


Having geographic elements between those activity\town\city elements completes the picture.


You'll find the balance that pleases you.


Re-working the current subroadbed to fit with the newly revised plan.  Dumped the cookie-cutter underneath the stairs and the plan for foam decking for full 3/4" plywood - everything was already cut up so I pieced it together - but it's all solid and will make a great base.  Got one small shortage there that I'll have to cut to fit.

 IMG_20150803_174447356


Added sheets of plywood to the North side for the recently planned engine facility...


IMG_20150803_174454048


IMG_20150803_174500937


Here's another view of the yard - as you can see, I still need to cut the entry plywood out. -  The 2' x 8' plywood against the wall is there for a visual.  Planning some scratch-built warehouses - between 17"-19" high to back up to the outer track - so it's a little high visually (5"-7") but allowing me to get a feel for what a 6-7 story building would look like there.  I'll be continuing the woodland scenics roadbed around for the outer loop this week - and hopefully start adding sheetrock behind the furnace and underneath the stairs. 

Attachments

Images (3)
  • IMG_20150803_174447356
  • IMG_20150803_174454048
  • IMG_20150803_174500937

11888069_10156065911880613_6704516438466072353_n

11889449_10156065911750613_2264013763946248703_n

11891052_10156065911940613_1346015629599498275_n

11949418_10156065911815613_7897247496876332406_n


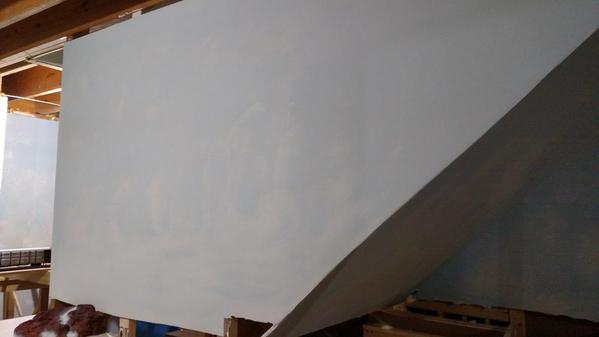
I need to upgrade the lighting to better illustrate but I painted backdrops this weekend.  Colors are Olympic Faint Flicker as a base, Valspar Carolina Skies as an overlay.  Everything was painted with Faint Flicker, then working from the top, I applied the blue - solid at the ceiling -  with a second brush (a texture brush) , I dry-brushed the blue over the gray in a cross pattern to blend the blue in.  


Also got all the sheet rock in place under the stairs and behind the house systems.   


IMG_20150828_223353945

IMG_20150828_223431907


I've got all the sub-roadbed cut for the climb along the north wall - going to install that tomorrow - then on to building bridges around the stairs - and from the alcove around the South loop.  Need to purchase some switches and crossovers - then I can finally get the track down. 

Attachments

Images (6)
  • 11888069_10156065911880613_6704516438466072353_n
  • 11889449_10156065911750613_2264013763946248703_n
  • 11891052_10156065911940613_1346015629599498275_n
  • 11949418_10156065911815613_7897247496876332406_n
  • IMG_20150828_223353945
  • IMG_20150828_223431907
Last edited by Jacobpaul81

That was a great step complete. It brings the layout to life.


I took the same approach. I used the lightest color blue to represent what the sky looks like at low altitude. When the light in the room changes, the sky is more or less apparent.


The cloud color first technique provides good results. I was in too much of hurry and have a cloudless sky.


Closing in the stairs really changed the appearance of that side.


Thanks again for taking the time to post your progress.


Oh, on the honey-do side...did you get the back yard squared away this summer?

Yea, really like the cloud first technique. It looks very natural - even on the rough concrete walls.  Hides lines and imperfections well.

I'm always working on something - been doing landscaping - I'll be tiling the screened porch floor if I ever have a good weekend for it.  It seems like its rained in St. Louis practically every day since April.
IMG_20150909_150419699IMG_20150909_150400453IMG_20150909_150406001IMG_20150909_150409236IMG_20150909_150413731

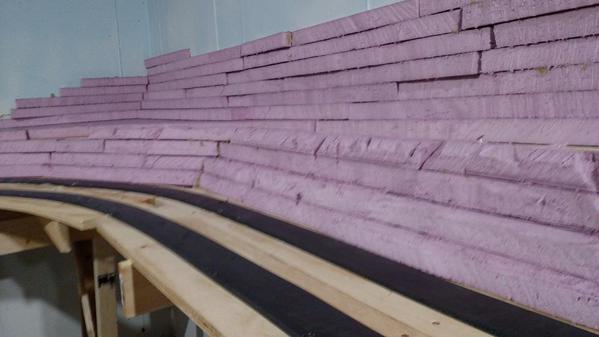
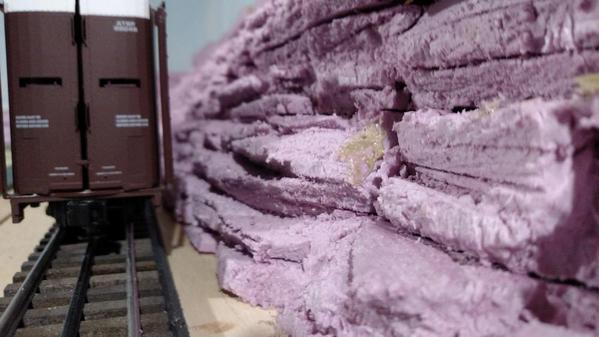
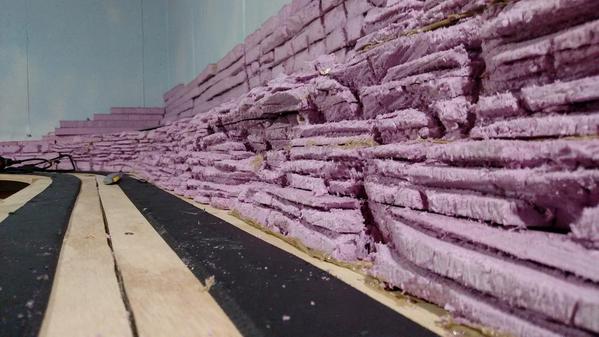
I've been sick as could be since start of the labor day weekend - but i can't just lay around - not when there's fun to be had - so ive had a stool setup with a shop vac at the ready - using the hacksaw and duct tape method - makes a great $1.50 sculpting tool. 

Feeling pretty good about this so far - main key is to remember that you're cutting negative space - I messed up a time or two and cut layers too close.

Attachments

Images (5)
  • IMG_20150909_150419699
  • IMG_20150909_150400453
  • IMG_20150909_150406001
  • IMG_20150909_150409236
  • IMG_20150909_150413731
Originally Posted by Moonman:

western scenery? I suppose I focus to much on the jagged look of Alaska when I think mountains.


It looks good.


Still, grab the grinder with the cutting wheel and see how fast you could rough that in

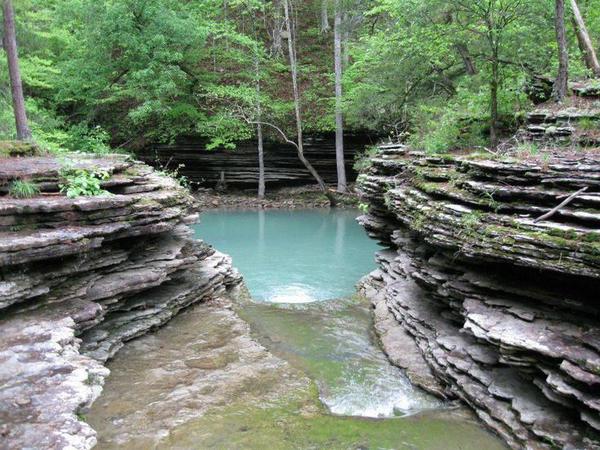
Depends on your definition of "west".  The plan is for it to be Missouri river cliffs -  rock here is predominantly limestone, shale, and sandstone - formations are very old, rough and weathered with stacked layers as opposed to the rocky mountains  which are smoother surfaces and vertical.


I'll still be cutting off quite a bit more to get the look right


473f351eeb1a1befd314d093a386c568

Attachments

Images (1)
  • 473f351eeb1a1befd314d093a386c568

That is quite lovely - and a very common sight in Missouri.  Most of the rivers here look pretty much like this spot.  


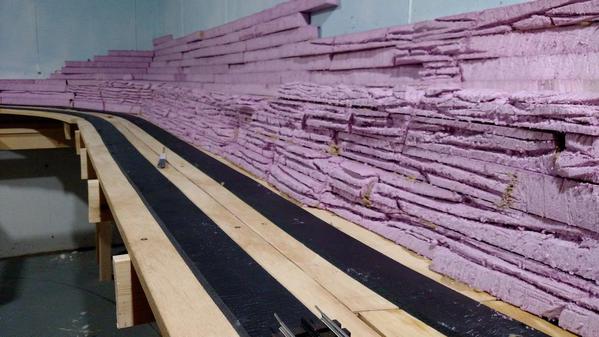
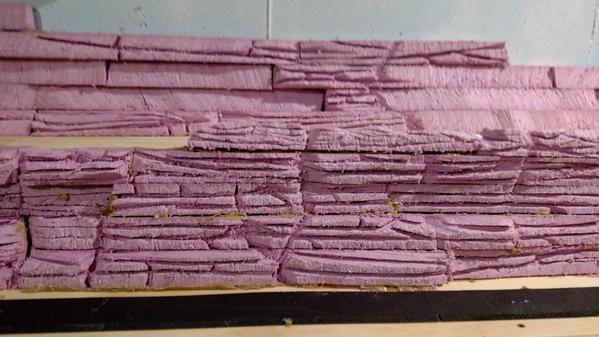
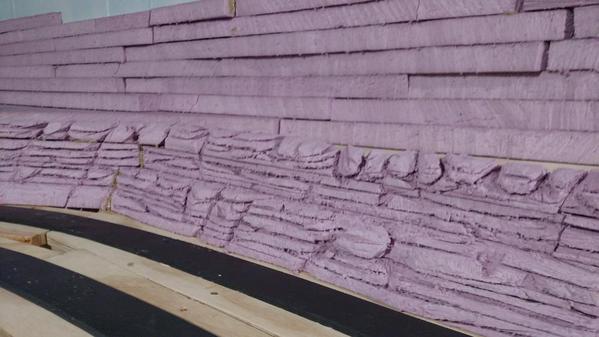
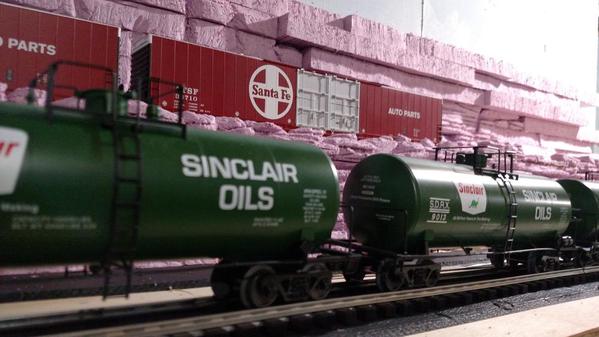
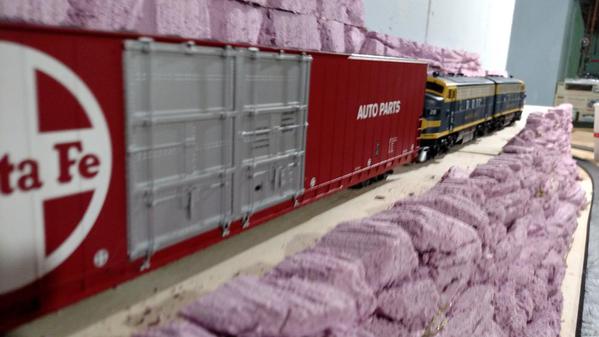
Work continues!  Had a few hours before work this morning.  I realized I wasn't carving into things enough and obtaining enough definition - it was looking to smooth.  I figured I was making a mistake I imagine many make and not shaping the rear of the rocks - thereby losing that dimension of separation between rock and dirt - so I removed some layers (though there's plenty more to do) and started digging-in and adding additional dimension.  Took some shots with a car to show scale of everything.  


IMG_20150910_112951881

IMG_20150910_113108407

IMG_20150910_113134713

Attachments

Images (3)
  • IMG_20150910_112951881
  • IMG_20150910_113108407
  • IMG_20150910_113134713
Very nice work, minus the mess, I really like to work with the pink foam. One thing to remember is when the time comes to paint it the deep crevices can be a nightmare.  One thing that helps is a bottle sprayer and mix your latex paint with water. It works better then a brush. 
You have made some good progress,  keep posting updates.  Nick
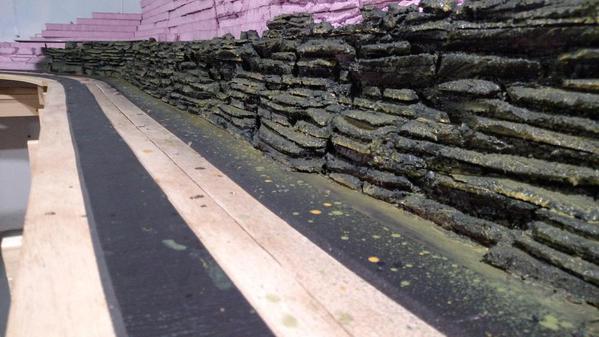
Already on it.  Wanted to make sure I have it down before doing 3 times the work.  Sprayed on black - then clover, and now yellow ochre.

Originally Posted by t8afao:

       
Very nice work, minus the mess, I really like to work with the pink foam. One thing to remember is when the time comes to paint it the deep crevices can be a nightmare.  One thing that helps is a bottle sprayer and mix your latex paint with water. It works better then a brush. 
You have made some good progress,  keep posting updates.  Nick


IMG_20150911_210748453IMG_20150911_210756549IMG_20150911_210801120

Attachments

Images (3)
  • IMG_20150911_210748453
  • IMG_20150911_210756549
  • IMG_20150911_210801120

Add Reply

Post
The Track Planning and Layout Design Forum is sponsored by

AN OGR FORUM CHARTER SPONSOR

OGR Publishing, Inc., 1310 Eastside Centre Ct, Suite 6, Mountain Home, AR 72653
800-980-OGRR (6477)
www.ogaugerr.com

×
×
×
×
Link copied to your clipboard.
×
×