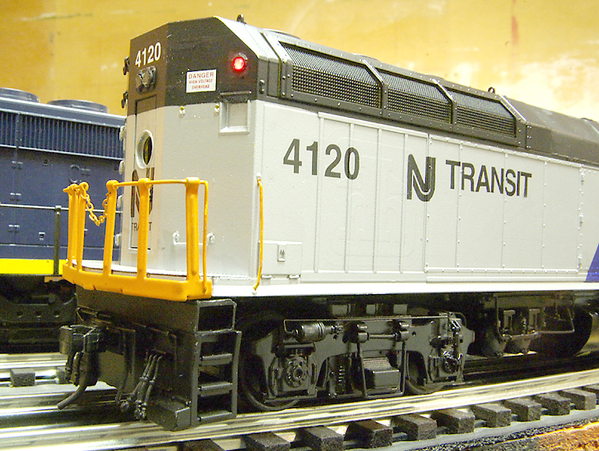
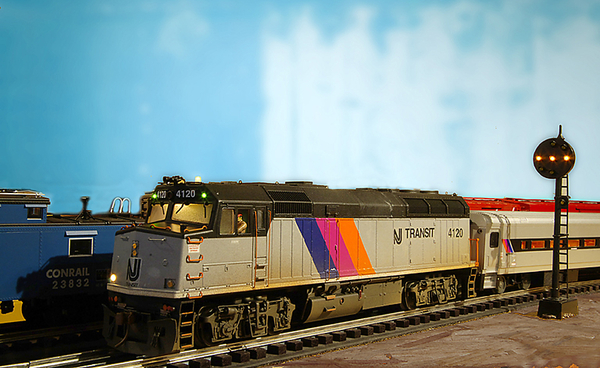
I have been bitten by the 3 Rail Scale bug and I'm now wondering How to install fixed pilots. 3rd Rail has recently offered fixed pilots for their 3 rail diesels, but they cost an arm & a leg nowadays. Norm Charbonneau used his 3D printer to make fixed pilots, but I don't have one, let alone the skill to design a pilot. Is there an easier way to make fixed pilots? (Also my layout is O54/O42 Radius only, so will fixed pilots and Kadee Couplers be a problem?)

Kyle - A Fellow "Rail-Nerd"

Last edited by The-576-Guy
Original Post

Replies sorted oldest to newest

Before you start converting diesels to Kadee’s. Start with a couple of boxcars and see how they perform. If they pass the test. Small diesels should be fine. I just can’t see passenger cars working.

For fixed pilots. Go to Shapeways and search O scale pilot spacer. A few should pop up and may be what your looking for.

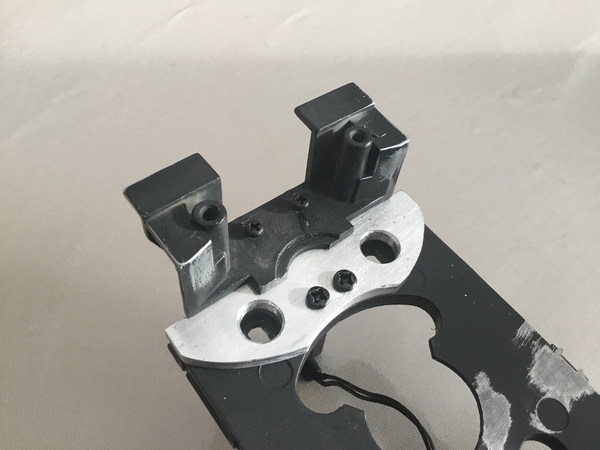
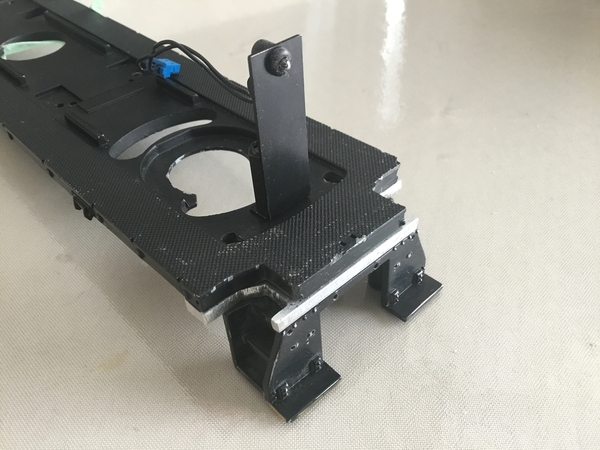
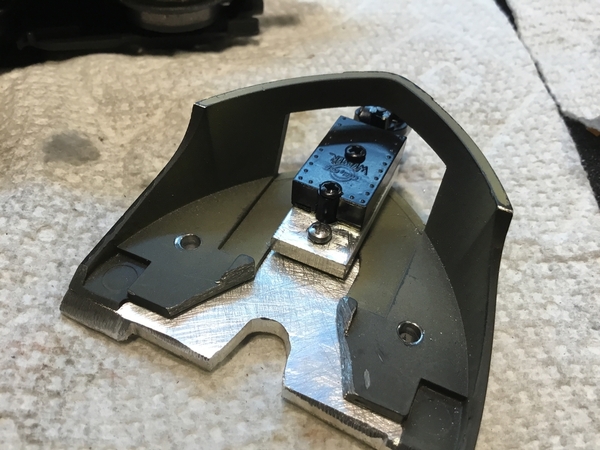
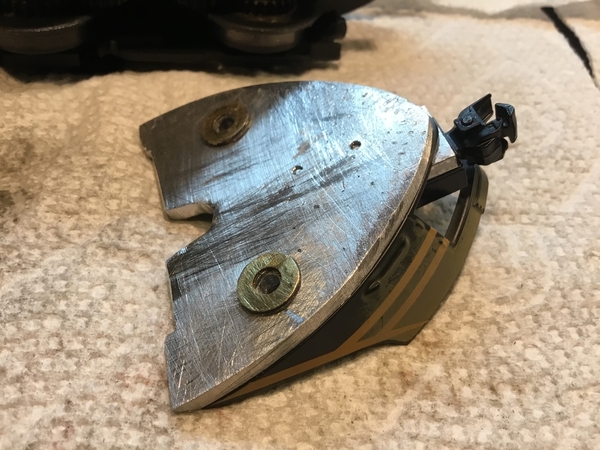
I only have done one model. An MTH RS1. I made the spacer out of aluminum from the big box store. Cutting, drilling, shaping and tapping is involved. Not hard and can be done with basic tools. I had 3 to do. I ended up buying a junker on eBay just to use the chassis for mock up. If you don’t like it and want to revert back. You may have already ruined some factory parts.

AC4B60B0-1D5C-463C-8BC7-26B0A54645FC08F644BE-EDF4-4803-BF6E-E12BF53B981050D685F8-A0E6-47C9-9C26-A0925F3AE3D9

Attachments

Images (3)
  • AC4B60B0-1D5C-463C-8BC7-26B0A54645FC
  • 08F644BE-EDF4-4803-BF6E-E12BF53B9810
  • 50D685F8-A0E6-47C9-9C26-A0925F3AE3D9

A few conversions I did going back at least 15 years now before I decided to migrate my PRR and CNJ models to 2 rail and stick with lobster claws on my 3 rail trains.  I made spacers for both of these units and removed the electro couplers off the trucks.  It worked out much better on the F40PH than the C30-7 as the balance of the truck got thrown off on the 6 wheel trucks and it never ran right after, but with time I probably could go back and fix that.

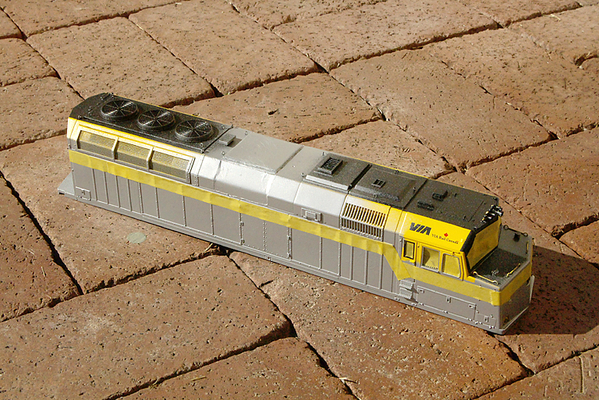
F40PH to start.  The donor was an MTH VIA Home Hardware unit.  First I removed the dynamic brakes as NJT units were not delivered with them.

_IGP9459

Masking of the model for new paint.

_IGP9461_IGP9463

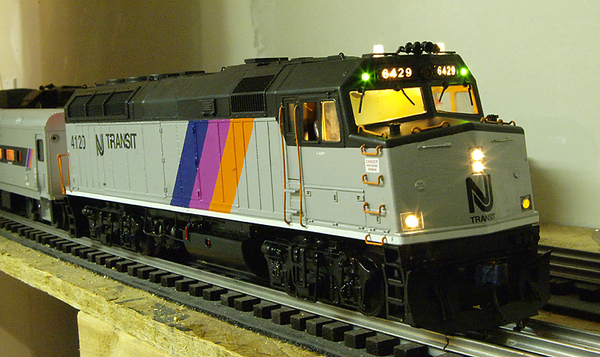
Spacer added to the front and rear pilot, brass rods used for HEP connections, addition of the Kadee coupler box, and infilling the hole left from the removal of the claw.

_IGP9465

Fresh out of the pain shop.

_IGP9466_IGP9467_IGP9477_light

added decals, painted coupler and painted MU and HEP connectors.
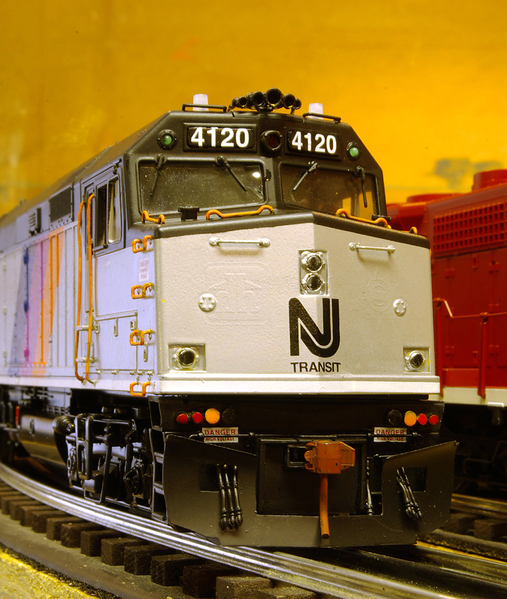
_IGP9491

Some gentle weathering added.

_IGP9517

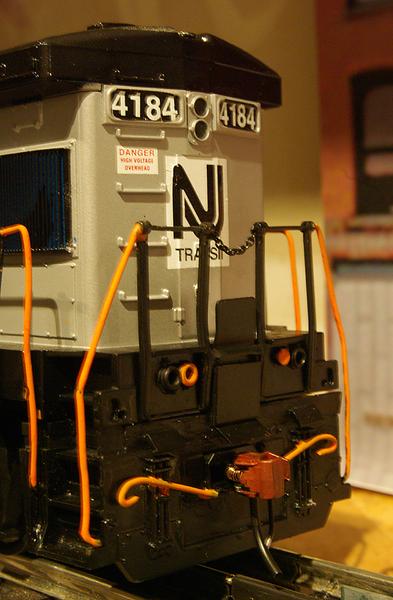
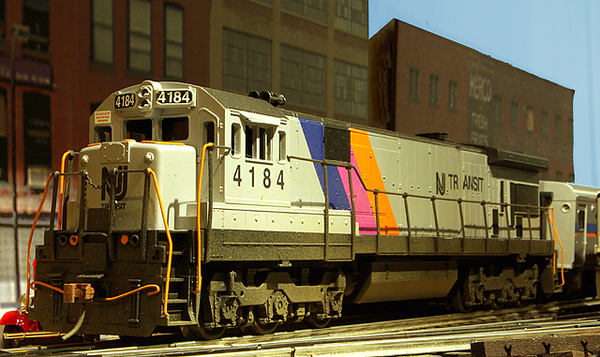
My C30-7 meant to replicate the U34CH:

Rear and Front views fresh out of the paint shop.  I did this spacer out of two layers of plastic and made a template to cut them out more accurately than the crude attempt on the F40.  I like the results much better.  Also added was a hand made cut lever for the couplers, the covers over the air lines, and the HEP / MU connectors.
IMGP3473IMGP3483

"In service" look with some fairly heavy weathering to reflect this unit at the end of life.
IMGP3514

One cautionary tale.  After these truly enjoyable exercises, I just made the choice that for my primary and hopefully future layout, I didn't like the 3rd Rail anymore either!

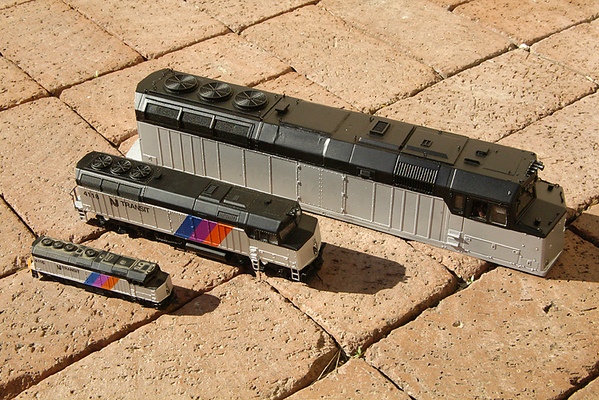
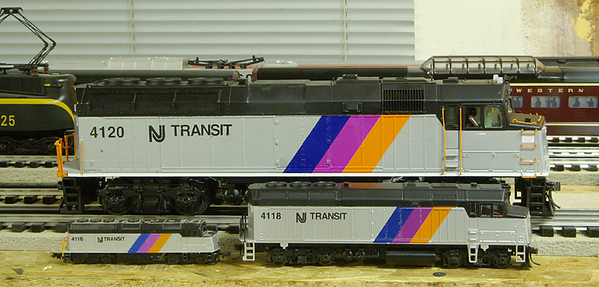
As 3RS for operations, I was able to run 4 axle locomotives and 40 freight cars with Kadee couplers on my modular 3 rail layout on the 054 loop without issue.  80' passenger cars ran on the 072 loop but depending on how closely the couplers were spaced, I sometimes had challenges running them that tight and recommend at least 080 curves.  Of course the larger the curve you can fit the better in any situation.

Athearn O 2 rail car that I've swapped the wheelsets out for 3 rail and 2 rail at least twice!

_IGP9255

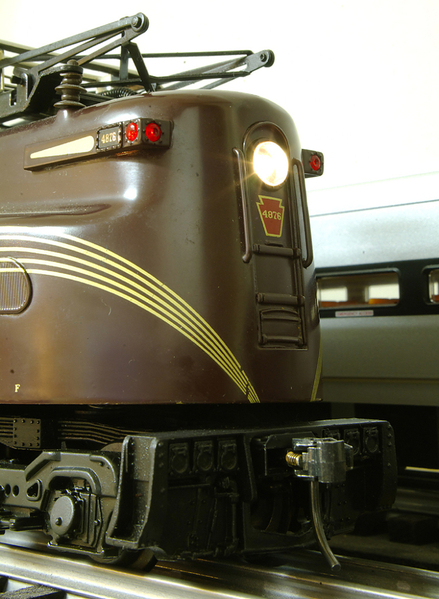
Weaver 3 Rail GG1 was a breeze.  Just swapped out the coupler with a #805 coupler and pocket.
_IGP9436

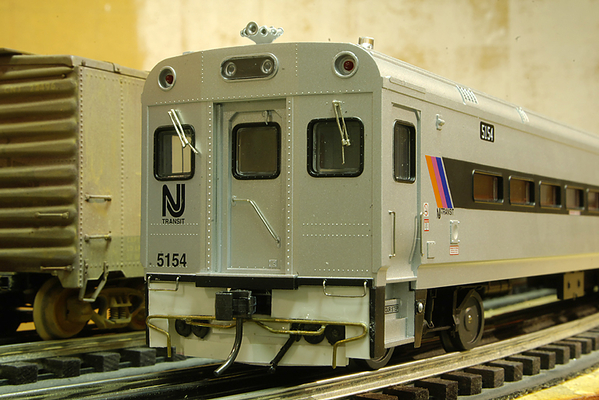
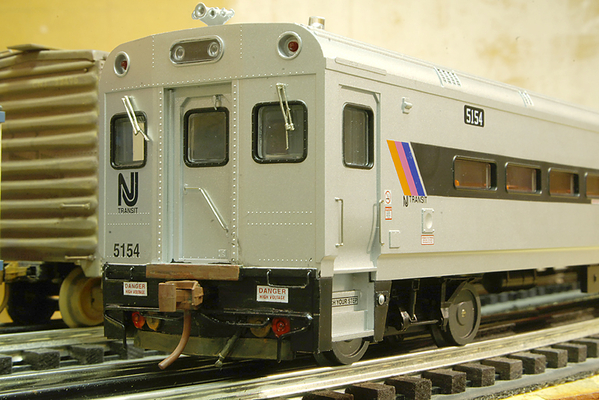
Atlas 3 Rail Comet Cars.  Not being the easiest cars to disassemble, I cut the 3 rail coupler off with tin snips and threw them away. This left a great opportunity to fill in the end of the cab car with the missing details.
_IGP9592_IGP9593

My 2nd partially completed O scale layout circa 2010 with various cars converted to Kadee couplers.

IMG00046-20110215-1807

The fun part of running trains with Kadee couplers was the sound they made when the slack action was pulled out of the train when I started one.  You could hear all the couplers clicking together which is very prototypical.  Fun times!

Attachments

Images (27)
  • _IGP9459
  • _IGP9461
  • _IGP9463
  • _IGP9465
  • _IGP9466
  • _IGP9467
  • _IGP9477_light
  • _IGP9491
  • IMGP3473
  • IMGP3483
  • IMGP3514
  • _IGP9517
  • _IGP9255
  • _IGP9436
  • _IGP9592
  • _IGP9593
  • IMG00046-20110215-1807
  • _IGP9517
  • IMGP3473
  • IMGP3483
  • IMGP3514
  • _IGP9255
  • _IGP9436
  • _IGP9435
  • _IGP9592
  • _IGP9593
  • IMG00046-20110215-1807
Last edited by GG1 4877

Kyle,

In addition to what Dave C. has said, you can also use styrene, as I have, to create shims for the pilot. This is what has been used on all of my conversions. In the age of 3D printing this task has been made even more precise as you mentioned with Norm C. and companies like Shapeways.

Also, I have one corner of 054 curves and my four axle diesels negotiate them fine. However, if you intend to run 6-axle diesels you may run into a problem. At the very least you will probably have to use a longer shank Kadee coupler.

Do a search on here for 3-rail scale, fixing pilots, etc. There are great examples from other forumites who have done great work in this area. That's how I started this brave venture.

Dave

Last edited by luvindemtrains

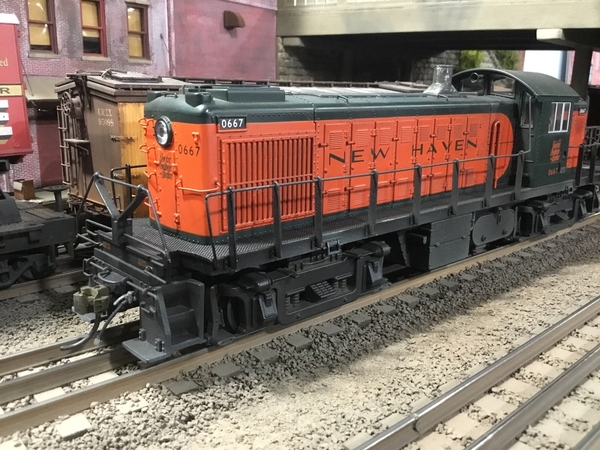
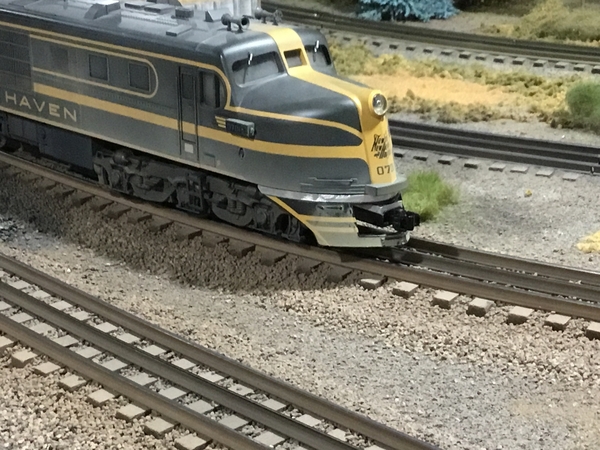
Just finished the test run and it passed after a few tries. I only own a few diesels. I’ve had this NH DL-109 for over 20 years. Proto 2 before DCS was available. I ordered a pilot from MTH before I started hacking away. Just in case it didn’t work out and I had to revert back. This is a fairly long engine. I had no doubt I could mount a Kadee. It was more about getting the pilot to sit right and still have the truck pivot fully. As well as to be able to actually pull something without derailing it.
I was looking to find some thick styrene for the spacer but opted for my favorite material for doing these things. Aluminum. 4 cuts with a hacksaw on some 2” , 1/8 thick got me a piece to work with. I traced out the factory pilot and used my disc sander to round into shape. I made a seperate piece for the coupler and no further shims were needed. 2 holes were drilled and tapped for 3mm screws in the chassis.
I did have to trim the stock pilot a whisker to let the truck swivel. I also knocked down the trucks side frames in the upper front corner. On other models you may get away with just trimming the factory pilot. The NH has a yellow stripe I wanted to keep intact. So I attacked the side frames. Normal layout viewing it’s not really noticeable. Because of the rake of the nose. I had to trim off the trip pin for clearance seeing I wanted the coupler set back. I used a Weaver coupler someone gave me as the box is a little nicer than a Kadee.

4BAD4BF6-64C4-46E4-8435-11F0A8EC258A7BB12546-82A0-49D7-A78F-BA94BE14462F54C7AB74-DD3A-418E-971A-E45AC8E7D85229C8A221-23BC-48ED-8B56-7B114890F3E0

I’m not sure with the length  of this engine I can pull freight with it. It did fine with a GGD coach on 072’s. . They mostly ran as AA’s so I still have another one to do. I found a close match color wise for the spacer. It’s a Vallejo green. I still want to address at least the rear ladders so the are not attached to the trucks.

Attachments

Images (4)
  • 4BAD4BF6-64C4-46E4-8435-11F0A8EC258A
  • 7BB12546-82A0-49D7-A78F-BA94BE14462F
  • 54C7AB74-DD3A-418E-971A-E45AC8E7D852
  • 29C8A221-23BC-48ED-8B56-7B114890F3E0
Last edited by Dave_C

I also want to fill the gap on my Santa Fe DL-109. Right now I want to keep the swinging pilot, but the gap has to go! Later, I will modify the pilot to be fixed later when I have more room for large curves. Part of the beauty of doing these types of conversions is that they can be done in stages…

Jeff C

Many years ago, Weaver brought in the PRR Passenger Sharks.  The 2 rail versions were to have fixed pilots but that did not happen.

I immobilized the pilot on both A units by simply drilling a hole in the middle of the top sheet of the pilot and a sloppy hole in the frame of the body right over the first hole.  The sloppiness was to allow some movement in alignment before bolting the two pieces together permanently.  I used a 2-56 nut and bolt with washers and after alignment, painted the bolt and nut and area around it with ACC.  So far, no problems.  Simple but effective.

Ed


E

On my Santa Fe DL AB pair I’m concentrating mostly on the nose of the A unit first, not only by adding a shim to fill the gap, but also adding the door details for the doors that cover the coupler. Other than that it will stay a swinger for now. It will look light years better sitting on straight track without that huge gap over the pilot.


Jeff C

Add Reply

Post

OGR Publishing, Inc., 1310 Eastside Centre Ct, Suite 6, Mountain Home, AR 72653
800-980-OGRR (6477)
www.ogaugerr.com

×
×
×
×
Link copied to your clipboard.
×
×