
Dylan the Train Man here, back with a quick update to my new and improved layout: the Sunrise Mountain and Western Railroad (SM&W RR)  Version 2.0. For those who haven't seen my previous train shed update posts, check those out to see all the progress from start to end of my layout room.

Now, before I get to the update, I have some facts and figures to mention about my layout room and layout in general:

-The layout is in a 12' X 16' shed in my backyard.

-The layout itself measures 11' 4" X 15' 4.5".

-I'm using Mianne Benchwork with 5/8" plywood on top.

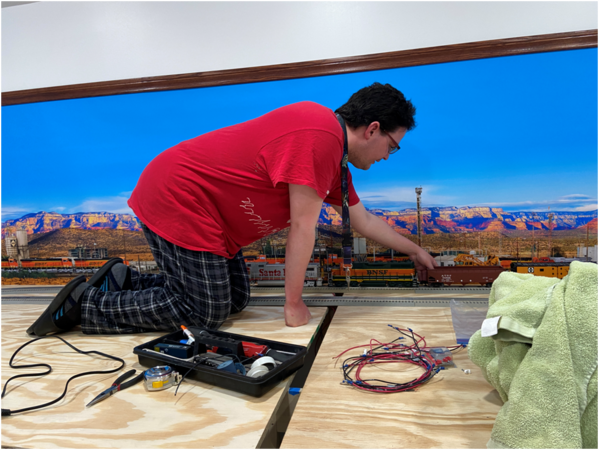
-The track is Lionel's Fastrack, with all command-controlled switches.

-The layout is a two-loop layout with O84 curves on the outside loop and O72s on the inside loop.

-Min. Curve on whole layout: O72

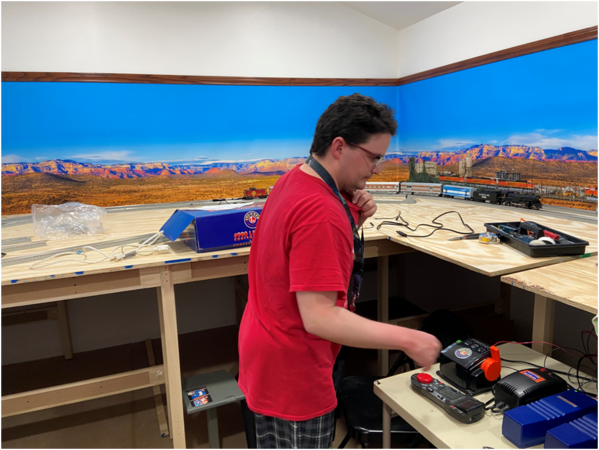
-The backdrop is the Arizona Desert backdrop from Trainjunkies, with a small BNSF yard added on the west wall.

Now for the actual short update:

I now have trains running on the layout. When I got home from work this evening, I did a bit of cleaning of my three current locos and then ran them around the layout. Everything ran great! The switches also operated well. I'm pretty happy.

The next steps will be to screw down the tabletop boards, build a hinged bridge, lay the track permanently, wire everything up, and add more trains. Also, Lionel's Base 3 is coming this summer!

Attachments

Images (3)
  • mceclip0: Me running trains
  • mceclip1: Me up on the layout
  • mceclip2: Excursion Train Running
Last edited by Dylan the Train Man
Original Post

Replies sorted oldest to newest

Just picked up a new Powerhouse and Powermaster for my layout from The Train Engineer Train Store here in Vegas. I hooked those up this morning and everything works great! I now have two trains running: a conventional steam loco (which pulls my excursion passenger train; see photos above) and my two Legacy diesels (an ATSF B40-8W and a BNSF GP35) with a long freight. Everything runs flawlessly.

This is a small update. First, my dad and I made a quick stop at my grandpa's woodshop at his house. We cut the hinged bridge section. Then we stopped by the local Home Depot and purchased some hardware to get the bridge installed. We also bought a soldering iron. All I need now is some wire and a few MTH 12-Port Terminal Blocks, and we can get started on wiring the track. I'm also planning to order some of the Woodland Scenics Desert Grass Mats. Those will give me some basic scenery and, of course, sound-deadening for the Fastrack. Things are coming along nicely.

Another quick update. I ordered everything else on my list this afternoon, so now I just need to wait a week or two and I can get started on installation of the hinged bridge, putting down some basic scenery, and wiring the track. Then I just need to find a shelf for a control panel and get that installed.

Finally, Lionel just announced their new Legacy ET44 Tier 4 locomotives. I just pre-ordered one of the BNSF ET44C4s. I'm pretty darn excited about that.

I'm back with another quick update. I now have a functional hinged bridge, but I still have some work left to do on it. I originally wanted to build the bridge to hinge upward, but it was proving difficult to construct, so my dad and I decided to build a drop-down bridge. The bridge has 3 hinges on one end, and a slide latch that holds it up on the other. Now I can get in and out of my train room without ducking under the benchwork (which is good for me and also for visitors to the layout).

The next steps:

-Install the bridge girders (I ordered custom 38" long girders from Nick (PGHTrainFanatic on Youtube); he makes laser cut building flats and bridge girders.)

-Paint the bridge (haven't decided what color yet; probably black or dark gray)

-Lay down the Woodland Scenics Grass Mats

-Lay the track permanently and wire everything

-Figure out how to get the track power to be turned off when I drop the bridge down. Anyone have any suggestions for that?

-Also, I plan to have crossing gates and signals, so I will plan for those when I do the track wiring.

One more thing: I also hung a clock in the train room, which will help a lot. The clock is black with a yellow RR Crossing logo.

@BillYo414 posted:

Great progress!

Are you trying to turn off all track power when the bridge is down? Or just the track within a few feet of the bridge?

Just within a few feet of the bridge on both tracks and in both directions. Don't want trains to plunge to the floor like in the I Love Toy Trains TM Books and Video Series (especially my expensive command-controlled equipment).

Last edited by Dylan the Train Man

It's been a while since I did a layout update. Almost 2 months, actually. Well, I finally have something to talk about.

I spent this morning with my dad at my grandpa's wood shop attaching the bridge girders to the side of my drop bridge. I cut a groove on two thin sections of wood and used glue and a nail gun to attach the girders. Then I attached the whole side pieces to each side of the bridge plank the same way. The bridge turned out great! The girders are custom laser-cut MDF bridge sides that I purchased from Nick (PGH Train Fanatic on Youtube). Thanks a lot for making the girders for me, Nick!

The second thing I did today was finally finishing laying down the Woodland Scenics desert sand grass mats. Now my layout has basic scenery on the top. Now that the bridge is built and the mats are glued down, now I can move on to the next steps of my layout build.

First, I need to get the bridge painted black and reinstalled.

Then I can start laying track and wiring.

I haven't run trains in quite a while, so I really want to get the track laying and wiring done.

Then this summer, the Base-3 should be arriving. That will be a great addition to my layout.

After that, I have a few other things I want to do on my layout (hopefully before the end of the year):

-Purchase more track and a 180W PH/LPM Combo and get the freight yard installed, wired, and functional

-Add an Atlas O turntable and loco servicing facility

-Add MTH's DCS WTIU (w/ MTH Z1000 Brick for aux. power) to the layout, along with an MTH or Atlas O Premiere locomotive

-Add some new rolling stock from Atlas, MTH, and Lionel

-Maybe preorder some stuff from the next Lionel and/or Atlas catalogs

Last edited by Dylan the Train Man

Minor update: Hinged bridge is now painted and awaiting final installation! Then I can begin wiring the track and testing. I guess I need to add photos. Here they are!

I will be adding lettering for my layout, the Sunrise Mountain and Western RR (SM&W RR) on either side of the bridge. This weekend, my dad and I will install the bridge on the layout, wire the 2 tracks through the hinges, and begin wiring the rest of the layout.

Attachments

Images (2)
  • mceclip2: Finished bridge at woodshop
  • mceclip3: Painted bridge

Add Reply

Post
The Track Planning and Layout Design Forum is sponsored by

AN OGR FORUM CHARTER SPONSOR

OGR Publishing, Inc., 1310 Eastside Centre Ct, Suite 6, Mountain Home, AR 72653
800-980-OGRR (6477)
www.ogaugerr.com

×
×
×
×
Link copied to your clipboard.
×
×