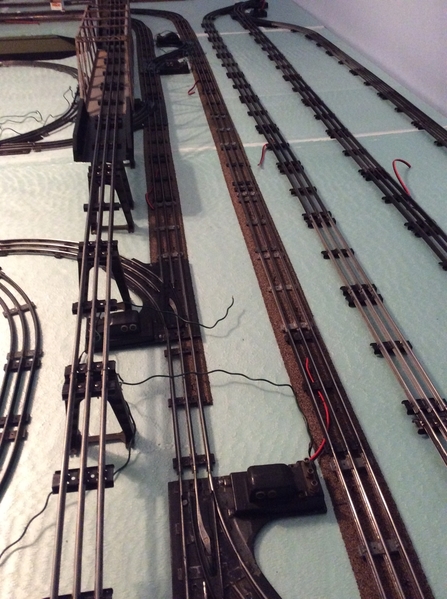
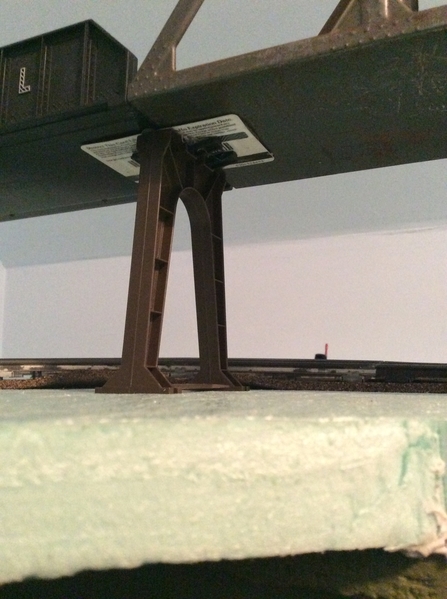
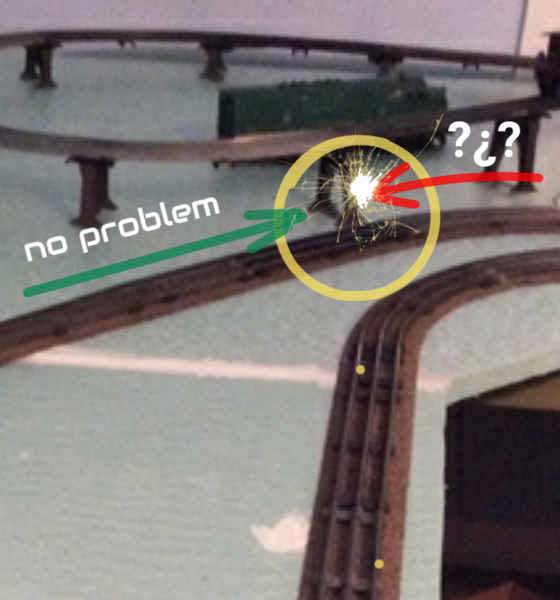
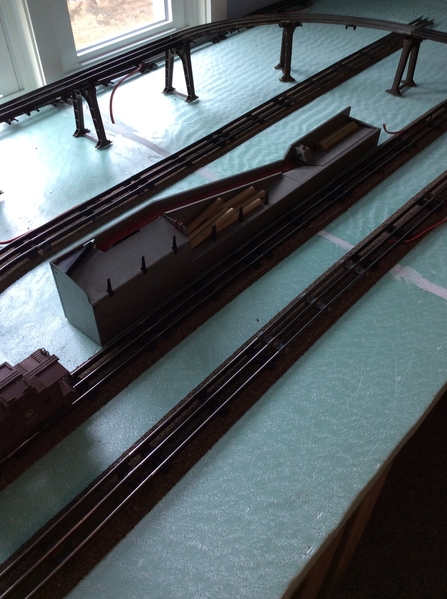
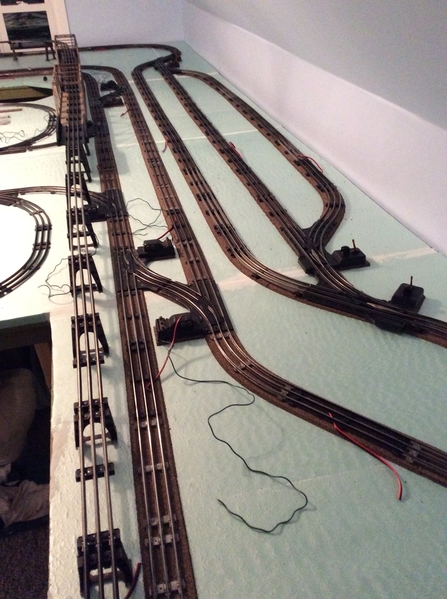
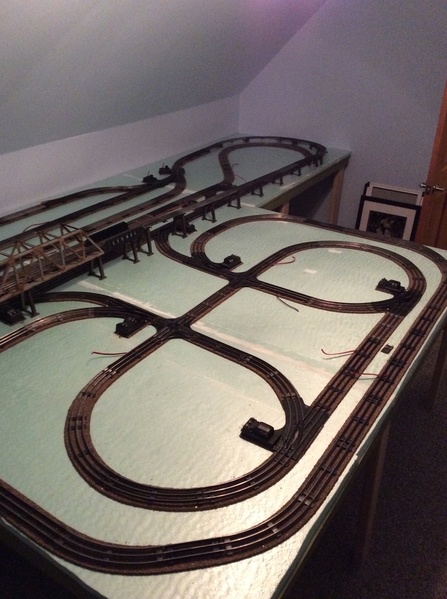
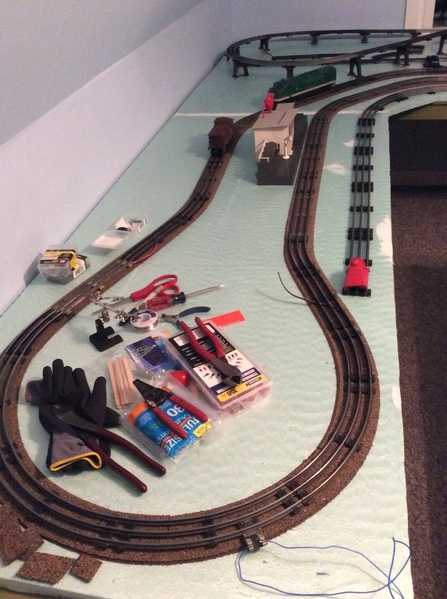
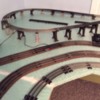
Where you have the silver UP, run a long tall car thru. You may hit that upright with inside/stringline overhang.  Test pulling your longest, widest, tallest cars is also needed. (rocket launcher rocket fin, Evans Autoloader car roofs, passenger cars luggage boxes, tanks etc and full O boxcars roofs.

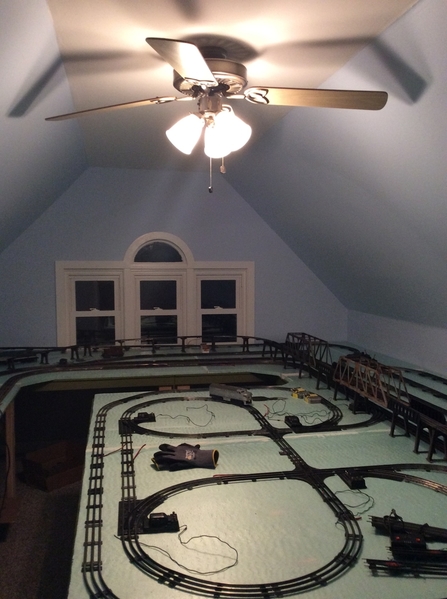
I think you are too close to the window and wall. If you cant slide a 2x4 rough cut (thicker than finished; finished 2x4 needs a scrap of paneling on it to be closer to 2") between wall and TIES; you are too close and you will bump the wall about an inch &1/2 after/ before each curve.  I.e. the sweep of overhang extends beyond the curve and into the beginning on each straight.


Will definitely check all the clearances during testing. Planning on finishing the track laying tonight. Will post some pics when done. 

Assuming testing goes well, what is my next step? 

Do I start placing accessories so I know where to install insulated track and ucs sections? 

I have some cork roadbed to put down, then I can start fastening things down, and running wire.

Asymair95 posted:

Will definitely check all the clearances during testing. Planning on finishing the track laying tonight. Will post some pics when done. 

Assuming testing goes well, what is my next step? 

Do I start placing accessories so I know where to install insulated track and ucs sections? 

I have some cork roadbed to put down, then I can start fastening things down, and running wire.

Yes, place Accessories and buildings and such to get an idea of how it will look and special track and wiring needs..

What are you thinking for ground cover or detail?  You can just paint the foam with inexpensive latex paint. It will look good just painted. Get a few colors and apply it in a mottled look, like camouflage. Do it while it all relativity wet, to blend the edges of the color changes. 

It will give the layout a finished look without a lot a scenic effort. If you decide to add scenic material later, the earth tone base will be there.

Watch this video of forum member Roger Peterson building their Christmas layout. When they get to the table painting part, watch how easy it is. They used paint that they found laying around at the historical society. here's the same layout this year. Check out the long photos and look at the table. The base colors are the same.

I was thinking about some threads on how to pin stuff down on foam. It may cause you a problem. You may want to experiment with methods to fasten things.

Last edited by Moonman

Started adding cork track ballast. I staggered the joints as suggested, and also installed the insidenradius of turns first, which seemed to help. It is still a bear getting this stuff to conform to o27 turns though, very challenging. 

67939843-9908-4472-AC5A-EBCB9DFCC7F4

7A9DEBAD-66C7-42EB-8F37-25531E1B7B7D

I also got all the bents screwed to the track. For the bridges I used hot glue. I first glued an old gift card to the top of the bent, then glued it to the bridge. It holds real well, and is still removable with some effort.

4579C2C0-5C23-45AD-936A-9C085D109861

Need to get some more 1” finishing nails to secure the cork to the foam board. 

Attachments

Images (3)
  • 67939843-9908-4472-AC5A-EBCB9DFCC7F4
  • 7A9DEBAD-66C7-42EB-8F37-25531E1B7B7D
  • 4579C2C0-5C23-45AD-936A-9C085D109861

Good idea for the bridge support!

You need some slits for the O27 curves. Will the cork split in half at the center? If is does, you can make some slits away from the beveled with a utility knife that will permit easier bending for the O27 curves.

Some use T-nails or pins to attach to foam. Like a trim nail with a folded head. A craft store would have them. A least the nail head will hide.

If you have a small  hammer type hole punch, or metal tube to make one from (grind a taper like sharpening a popsicle stick it will cut like a chisel. Or maybe even a loose leaf paper hole punch, but make a circle at the end of each pie slit. It should relieve some push/pull stresses created by closing the slice(overlapping) allowing a flat lay. (if you can, hide the hole and slit under the track ties, under ground cover, etc., using screws/pins to hold each slit in overlap where you can too). 

Tried some different ways securing the cork last night. Found 1” brown paneling nails work perfect. They blend in with the cork and are barely visible, and are ribbed so resist pulling out.

AE544687-2E21-4D61-95E5-C2859EDB796F

I would also like to change the lighting in this room to something more suitable for running trains. I currently have a ceiling fan with a light that is almost useless. Was thinking some kind of track lighting, but not sure.

51E6749A-F465-4899-B689-0C5CE64B1E04

Was looking through my track and realized I only have a few sections of ucs track. I don’t have many operating accessories so maybe I don’t need much. I think currently I have a milk car and platform, lumber mill, and log loader. All my other accessories can be run from insulated track.

7817F8E8-3CE3-4975-A2B0-FDAC362B5DF1

Attachments

Images (3)
  • AE544687-2E21-4D61-95E5-C2859EDB796F
  • 51E6749A-F465-4899-B689-0C5CE64B1E04
  • 7817F8E8-3CE3-4975-A2B0-FDAC362B5DF1

Do you have any flood light bulbs to test the fan lighting? They look aimed adequately - I was thinking you could use some LED flood bulbs - I use 5000K dimmable -it's a daylight wavelength - something in 4000K would be less harsh

If you have an incandescent one somewhere to test the aim and coverage, it just may work and save bucks and a lot of work. 

The track would work, for sure. Use the angle to aim across and fixtures that can be aimed. I think you may want to keep the fan to assist with circulation. 

Good idea for grabbing the foam. Drywall screw pushed in could do the same. 

Some push a wire tie through from the top with the head topside. The, attach a second on the bottom of the foam and snug it. That would hold everything down.

Does your loader unload, too? Need to be in between 2 tracks? I have a modern one on the grandkids table. It is our favorite. Looks like you have what you need. Doorbell buttons work good as activators. Just keep any kids from holding it down.

Happy New Year to you! Thanks for sharing the build. Fun stuff now for 2019!

Will give the floodlight bulbs a shot, I think I have some already. Whatever I use I want to be able to dim it to replicate dusk or dawn lighting.

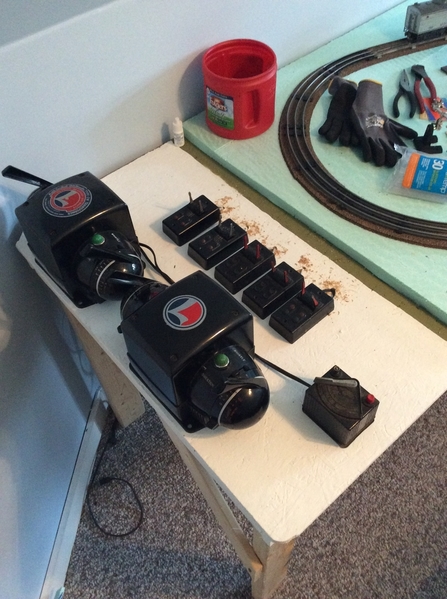
I started placing transformers and switches last night. Will use a small 45 watt and 60 watt transformer for lighting or accessory power.

81B963D6-28C8-44A4-B9F9-43C06F6A88F7

I picked up two 6019 tracks last night on eBay. Will get those cleaned up and wired when the come in. Will be using them to operate a log dump car for my lumber accessories.

7C7B23D3-9CD5-4F87-9B51-717FFEEC1B67

9E9414C9-9751-43AA-BC99-ED0559D45DB3

I was thinking I could put them on opposite sides of the track, but you would be looking at the back of one, which would bug me.

The log loader was my Uncle’s who passed away at 29 from Hodgkin lymphoma. It sat in its original box in our basement for years, along with all the other “Train boxes” that my Brother and I were not allowed to touch when we were kids. Was probably a good decision as I’m sure we would have destroyed everything.

Fast forward to last Winter. I cleaned and adjusted the log loader, replaced the ribbon, cleaned motor, and replaced some broken parts. It works like a champ now. I showed my Dad how well it worked, he became visibly emotional. He hadn’t seen it run in 60 years, and I’m sure it was reminding him of his Brother, and his childhood. A very touching moment for me. I can only imagine what he is going to think when he sees the completed layout. This is why I’m pressing so hard to get things done in a timely manner. My Dad is up there in years, and we are not sure how much time we have left with him.

Attachments

Images (3)
  • 7C7B23D3-9CD5-4F87-9B51-717FFEEC1B67
  • 9E9414C9-9751-43AA-BC99-ED0559D45DB3
  • 81B963D6-28C8-44A4-B9F9-43C06F6A88F7

Tried different styles of light bulbs today, and ended up liking the originals the best. Guess I’ll stick with those.

Finished the roadbed on the two main lines.

BEF5B72C-6968-4082-84A9-F8E506BC6ED1

All that is left now is the center table section. Hoping to finish the roadbed tomorrow night, but I might run out of cork again, gonna be close.

2F18DB5F-1BAD-44CB-AA44-E2A1AA1B6254

Also phased three of the transformers.

88B11441-9712-48E3-8E5B-32391A171020

Once the roadbed is finished, I will start placing accessories and see where insulated track sections are needed, and also ucs/rcs track sections are needed.

Back to Lowe’s tomorrow for more paneling nails for the roadbed, and thermostat wire for the switches.

Attachments

Images (3)
  • BEF5B72C-6968-4082-84A9-F8E506BC6ED1
  • 2F18DB5F-1BAD-44CB-AA44-E2A1AA1B6254
  • 88B11441-9712-48E3-8E5B-32391A171020

 You know that GG-1 might be having trouble on 0-27 period. Some manage well enough, but the truck's guide slots on mine needed 1/32" taken off each end to swing well and  because of the fixed pilot's now increased overhang from the center rail on 0-27, most fixed couplers of freight cars actually coupler bind, and that nearly (or fully) pulls either the car or the pilot truck off the rails.

  It is considered a full O engine; likely because of the coupling issue, because some seem to take 0-27 fine "right out-da box". 

  Articulated coupler shanks like you see on some passenger cars achieve better angles that can overcome the issue. Add one to a mailcar, milkcar, or caboose(s) for a dedicated transition car if you need to. 

Also note coupler sizes vary slightly. The GG-1's is kinda small and will have better angles with a similar small couplers like metal ones of the era than a later larger and especially plastic ones...if the later will even ever fit up to it. Mine never did.

Asymair95 posted:

Tried different styles of light bulbs today, and ended up liking the originals the best. Guess I’ll stick with those.

Finished the roadbed on the two main lines.

BEF5B72C-6968-4082-84A9-F8E506BC6ED1

All that is left now is the center table section. Hoping to finish the roadbed tomorrow night, but I might run out of cork again, gonna be close.

2F18DB5F-1BAD-44CB-AA44-E2A1AA1B6254

Also phased three of the transformers.

88B11441-9712-48E3-8E5B-32391A171020

Once the roadbed is finished, I will start placing accessories and see where insulated track sections are needed, and also ucs/rcs track sections are needed.

Back to Lowe’s tomorrow for more paneling nails for the roadbed, and thermostat wire for the switches.

I like how your layout is looking.

Thank you. Been getting the roadbed down on the o27 track in the center section of the layout. Almost done, might need one or two more pieces of cork, it’s gonna be close.

I wasn’t planning on running the GG1 on the o27 sections, it will stay on the o31 section, as well as the F3. It’s just way too tight for those big monsters.

99% finished with the roadbed, whew. It was lots of work, but the difference is amazing.

1EE0263B-2045-4042-B133-0096B29CCDB6

36CA10E8-460D-4FDF-99C6-983E8D98D107

Looks great and really helps with the noise. 

I still have one o27 siding area to do under the window, but I’m waiting on another switch in the mail. This will give me two o27 sidings, and two o31 sidings. 

I’m thinking of putting a raised trolly figure eight track above this center section. Or, maybe a double bumper stop trolly line under the window area running between the industrial area, and the town area in the middle here.

I also sank all the accessory power wires for the switches. 

Tomorrow I will start placing accessories.

Attachments

Images (2)
  • 1EE0263B-2045-4042-B133-0096B29CCDB6
  • 36CA10E8-460D-4FDF-99C6-983E8D98D107

The roadbed makes it look really nice.

This layout shouldn't be noisy - I think that you have discovered a drawback of using the foam board

The cork is an excellent sound absorber

The cloverleaf is really interesting - too bad there isn't a wye to connect it to the mainline - I am still playing through routes on it virtually -fun item of the layout

The cloverleaf is connected to the mainline. Under the trestle are two switches I have isolated from the mainline with plastic pins.

40B1BA2E-D6F2-4DC7-A413-C3B80AD31FF9

Getting all my accessories pulled out. As you can see, lots of lighting. May have to use two transformers just for the lights...lol.

B7F7FFFE-D4BF-4EEE-968E-55C6406E50D8

65C08828-D452-45DC-AD16-FB15BD579C6C

550BE4BD-E315-4175-A3B5-906D9F5761BD

A099C671-DCDA-4C76-9590-0966BC610CC8

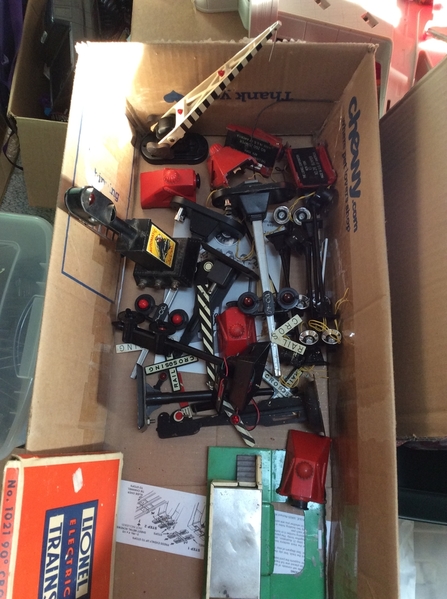
I also have a huge box of plasticville buildings that were handed down from my Grandfather.

Attachments

Images (5)
  • 40B1BA2E-D6F2-4DC7-A413-C3B80AD31FF9
  • B7F7FFFE-D4BF-4EEE-968E-55C6406E50D8
  • 65C08828-D452-45DC-AD16-FB15BD579C6C
  • 550BE4BD-E315-4175-A3B5-906D9F5761BD
  • A099C671-DCDA-4C76-9590-0966BC610CC8

Trolley line is in!

 594F190F-89E9-44B9-B9DA-A89D37D54D82

1615D2D6-6A92-4D4A-A857-52815A80A1B7

E15037EB-E609-4050-8723-8CC9B8015050

I changed the design of the mainline a little bit to make room for the trolley line. It’s a nice smooth curve with a half section, so I don’t think it will be a problem. The beauty of using paneling nails for the roadbed is it pulls right up and can be repositioned. 

I had to order two more sections of half curves for the new siding going in under the window. Also ordered another box of roadbed. I thought I would be able to do the whole layout with one box...I’m now on my third...lol.

Attachments

Images (3)
  • 594F190F-89E9-44B9-B9DA-A89D37D54D82
  • 1615D2D6-6A92-4D4A-A857-52815A80A1B7
  • E15037EB-E609-4050-8723-8CC9B8015050
Last edited by Asymair95

I like that design. 

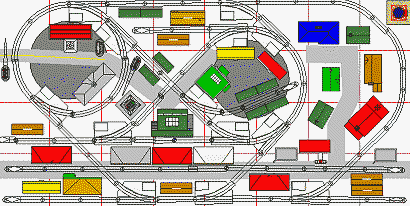
What I really wanted to do was add two 45 crossing sections as you enter the cloverleaf just after the switch that takes you from the mainline. It would of allowed a trolley line all the way across the cloverleaf to the other side of the table.

075439AE-B84C-41E9-B46E-CC0F597DAAE7

This was a design I found online some time ago. Towards the bottom you can see the three 45 sections they have installed. I tried it like this on mine, and it worked perfect. The track would have come underneath the trestle, hit these 45 sections and continued on to the cloverleaf. Problem was, It pushed the cloverleaf 8” or so further South, and I ran out of real estate. Would have been real slick though.

Attachments

Images (1)
  • 075439AE-B84C-41E9-B46E-CC0F597DAAE7

You can connect track lights to the single electrical box in the ceiling, then have lights run around the entire layout. With LED bulbs, I have 16 lights on my track, which takes half the power of my original 5 Halogen lights. I am using the smaller G20 type bulb, due to limited headroom in my attic train room. With track lights, you can move the light to where it is needed and aim the lights to get the effect you want. I have mostly the softer light colour, although I also have some of the "white" 5000 colour in use.

IMG_4588IMG_4589

Attachments

Images (2)
  • IMG_4588
  • IMG_4589

My two 6019 track sections came in yesterday. Once again, the eBay crooks got me. One of the sections was completely rotted through on the rail. I should have known something was up with the blurry dark pictures they posted.

I had a section of 6019 from my Grandfather, but it did not have the two blades on it to contact the truck shoes. Luckily, those were still good on the eBay one, so I swapped those over to my Grandfathers track. Installed a new wiring harness and she works like a champ.

Those pile switches are a bear to wire up! 

Tonight I will rewire the rcs track section for the operating milk car on the o31 track line. Also need to rewire an 1121 switch controller. Lots of soldering in my future...lol.

I didn’t leave any feedback, but I guess I could ask for a partial refund. Was thinking I could use the track as a static display. The coil works in it still, so I could have three sections of derelict track off to the side with an operating boxcar as I have a few of them, and my smoking caboose. The caboose would always smoke, and the kids could press a button to make the boxcar door open. Maybe have a yard light shining on it, and some guys around a camp fire next to it.

I got my 1121c switch controller wired up, as well as a section of rcs track. Those pile switches are a nightmare. 

311B74DA-9C27-4356-B1D5-063630303FF0

Got two sections of 6019 track installed and operating tonight also. This one for the saw mill.

38CA1536-C984-4B9A-9DD9-4666B99A3A02

Another 6019 for the log loader.

738D4681-46B6-4034-B464-FD1FD6B0F466

Buttons will be along the side for the kids.

25A9BEB8-FEAB-42B3-BCE6-234FE65802E5

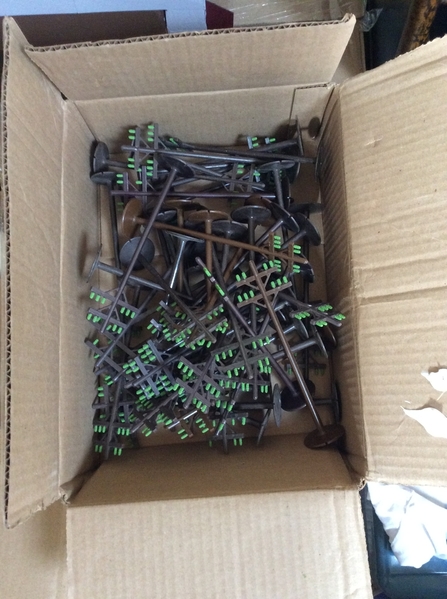
I added extra bents tonight so I can run the GG1 and F3 up here. I’ll spray the grey ones brown before I install them for good.BB40FD34-BA8B-4D87-A606-F5A91C2DB8D8

I almost had enough bents, short only two. I need a G and H size. If anyone has a partial set they would be willing to canabalize for me I would appreciate it

D872A032-31D5-4B2F-9C04-71CE2E0DB9C9

I got the rcs section installed for the o37 line, but my milk car platform will not fit under this section of rcs track. The molded in terminal block hits the side of the platform track channel. Guess I will just dremel out a piece to make room, unless this thing is backwards. Problem is it won’t fit in here the other way I don’t believe. 

Tomorrow is more roadbed work, and switch wiring.

Attachments

Images (6)
  • 311B74DA-9C27-4356-B1D5-063630303FF0
  • 38CA1536-C984-4B9A-9DD9-4666B99A3A02
  • 738D4681-46B6-4034-B464-FD1FD6B0F466
  • 25A9BEB8-FEAB-42B3-BCE6-234FE65802E5
  • BB40FD34-BA8B-4D87-A606-F5A91C2DB8D8
  • D872A032-31D5-4B2F-9C04-71CE2E0DB9C9

I appreciate your patience refurbishing the old controllers to keep the look. But, doorbell buttons are easy.
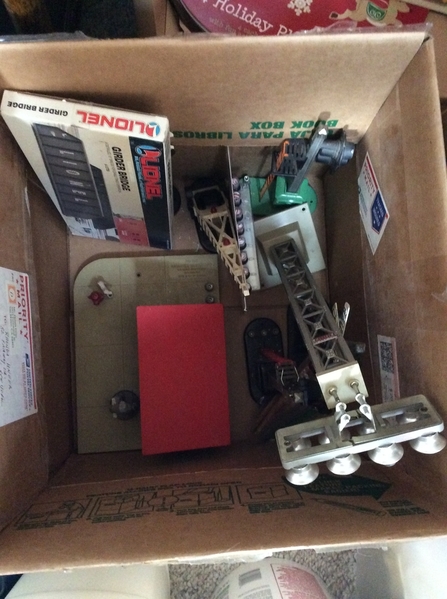
Good practice for tuning the accessories. A little lube, some tweaks and some have built-in adjustments will get them working reliably to ensure fun.

Do you have Olsen's website bookmarked? You can see the Lionel service documents there. Many of the tips for good operation included in the service documents sent to service stations.

Add Reply

Post
The Track Planning and Layout Design Forum is sponsored by

AN OGR FORUM CHARTER SPONSOR

OGR Publishing, Inc., 1310 Eastside Centre Ct, Suite 6, Mountain Home, AR 72653
800-980-OGRR (6477)
www.ogaugerr.com

×
×
×
×
Link copied to your clipboard.
×
×