A comment by Gustavflyer that his garage layout was level all the way around got me to wondering just how critical it is to level a layout. I understand the desire to have the base "fairly" level, but I've been doing that by making the legs equal lengths without adding adjustment bolts. As I expand the size of my table from 4x8 to 6x8 and eventually to 10x17, I'm beginning to think I may need to change my approach. I can understand the need to level yards and sidings so rolling stock "stays put", but my goal is to vary the height of the track surface to mimic reality. I've got a siding near me that appears to be about 2' lower than the main and I want to recreate that "look". Obviously, the layout will be fairly level, but is that good enough? Or do I need to take care to level the benchwork and then level between risers? Since I plan cookie-cutter style roadbed, I plan to simply vary the height of the risers up to 1/2" or so and have the 1/2" roadbed dip up/down accordingly. Given the size of the layout, is achieving this "realistic" look an unreal expectation and will it put undo stress on couplers, etc., for little gain in appearance? As I drive through Arizona and New Mexico along I-10 and I-40, I see trains dipping as they approach overpasses and I'd like to capture some of that if I can in such a small space.
Replies sorted oldest to newest
I'm still new to our fair hobby, but I think this falls under the "If you like it, it's right" category. Varying track elevation slightly will mean your consist speeds will vary slightly as gravity does her job. To you, that's realistic. I had never thought about that.
The point about rolling stock in yards staying put is a good one. Same goes for any accessories that rely on gravity for part of the action.
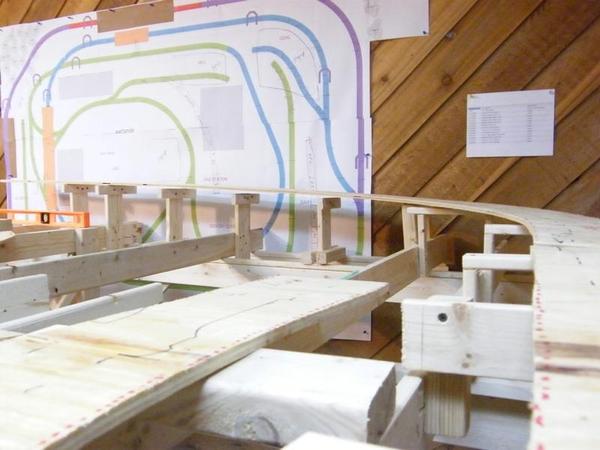
Dave, as you can see by the picture, I did open grid benchwork and then varied track height by using risers. I did try to make the joists level, but as you can see, it really did not matter in the end. It does make it more realistic if you have the room to vary the track height. I might try to add a video. All tracks are available to all trains.
Attachments
John, thanks for the comments and Rick, thanks for the video, they reinforced my thinking. Like I said, I plan to make things fairly level to start, but I won't get anal about it. I knew things like the waterwheel will need to be level in order to function properly, so that was never in doubt. Those kinds of structures will be mounted on separate scenery panels that will just drop into place and be shimmed from the bottom if needed. Thanks for commenting.
I guess as far as model RR goes you would want a yard to be level so cars don't run away. In real life a lot of yards are kinda shaped like a bowl. At least the ones I have had experience with. The reason being when cars are dropped off the conductor doesn't have to set hand brakes. And on the other hand when picking up cars the conductor doesn't have to waste time releasing all the hand brakes. Especially if the cars are going to be sorted out quickly. If a car did start to roll it would roll into the yard.
As far as main lines go they do tend to be as level as possible. But they also follow thy lay of the land somewhat.
Rick
I don't stress too much about the platform being perfectly level. It's really not that important.
OK, My now disassembled layout was anything but level.
I did have issues from that: Make sure that all connecting track (the length of your longest engine) is level to the switch, IE if the switch is at 1° up all 3 tracks connecting to it must match that grade.
Do that and All other grades are good as long as you enter and depart them gradually.
Enter to steep and the front of the engine shorts on the center rail, exit too fast and the trailing wheels or the tender may derail.
Beyond those limitations you can do any grade you desire that the engine can pull.
My stub yard actually ran downhill to the stops on the ends of the stubs.
If I dropped the consist with too much run before it hit the stop it could (and did) derail. (the stubs were also curved around to fit in the space)
Russell
That is exactly the problem,as you pointed out, electrical shorts and possible uncouple caused by about changes in track elevation.
Well geez, you don't want to be that out of level. Put a cue ball on your track. If it doesn't roll, you're good to go.
Thanks folks. I plan to test things out when I tear down the Christmas layout after the holidays. Since my eventual garage layout is going to be about 10x17, I'm going to rebuild my 6x8 "holiday" table using the same techniques I plan to use on the final layout and adjust them as necessary. If I do things right, I should be able to build the 6x8, add a duplicate module with a 1' overhang, and add two matching 4x modules. The layout would end up being 4 tables bolted together. If I can fit the reversing loop from the bottom level of my design in and just tie the ends together temporarily, I can actually start building the layout early and even run a train or two until the garage bay is vacated after next Christmas.
Your garage floor may be sloped towards the front, which is standard these days. Actually, I don't know. It may be a dirt floor. Put a 4' level on it in a couple of places to get a feel for it. If it is a big difference it might not be a bad idea to get it close to level. You don't have to use adjustable feet. Put temporary legs a little bit shorter than your end height under the platform and cut the permanent legs to fit as you go.
Well geez, you don't want to be that out of level. Put a cue ball on your track. If it doesn't roll, you're good to go.
Your garage floor may be sloped towards the front, which is standard these days. Actually, I don't know. It may be a dirt floor. Put a 4' level on it in a couple of places to get a feel for it. If it is a big difference it might not be a bad idea to get it close to level. You don't have to use adjustable feet. Put temporary legs a little bit shorter than your end height under the platform and cut the permanent legs to fit as you go.
I appreciate the advice. I've had my 6x8 Christmas layout in the garage (standard 3-car built in 1995) the past 2 years without any difficulties, no rolling stock moving on sidings, etc., so I'm confident it's level enough for layout use. Still, since I'll be constructing the layout benchwork in 4 separate modules, I'll take some care to make sure they all line up properly.
I do have to backtrack a bit on the idea of having undulating track on the straight runs because I don't think the straights will be long enough in 17' for it to make much difference in appearance or be worth the potential problems that have been mentioned. I hadn't thought about the pilot touching the center rail and I guess that's why the transition for grades are so important. I'll have to consider if it will be worth trying to recreate the siding I mentioned. I'd probably be better off trying to minimize potential problems rather than duplicate a particular scene.
Seems that there are two reasons for perfection in leveling a layout.
First one is Because I Can bragging rights, I have a laser level and know how to use it and my buddy brought in his transit to verify.
Second one is because I want to set up a train and keep it running at the same speed while I enjoy the camaraderie of my friends.
It's not like I'm planning to tilt the table 30 degrees or something, but I'm not going to go buy a laser level just for this, though I suppose a cheap one from Amazon might be useful. I figure if I level the ledger board, the outside rails, and risers the old-fashioned way, I'll be good to go. ![]()
I'm actually more concerned about constructing the grades, especially the transitions, because I have no experience with that at all. I always thought it was as simple as cookie-cutting out the 1/2" sub-roadbed and gradually adding risers to get to the desired height. I plan to use 18" spacing for my cross-members and plan to raise the sub-roadbed around 1/2" between cross-members to achieve grades of less than 3%. I guess I'll find out eventually when I start construction. Now matter how much one reads and reviews videos, there is usually still some trial and error involved. ![]()
Here is an excerpt from my old train blog that can give you some info from what I learned:
Finally time to start lifting the track in the correct places. We learned about “grade” and how to calculate the percent grade of an uplifting track. Most modern trains can handle 2.5% grade-4 % grade. At first our grade was 4.4% since we wanted the back track to rise to 8 inches and the track was 15 feet long. ( rise inches/run inches x 100) Lowering the rise to 7 inches brought the grade down to 3.8% and this was in a better range for all locomotives. This will still allow the track in front of it to be at 6 inches and fit with the height of the overpasses and bridges we had planned.
What we learned:
1.Math to understand % grade
2.Here is a good website on the correct measurements for scale models-http://www.urbaneagle.com/data/RRstddims.html
3.Here is a link to a discussion on grade-http://modeltrains.about.com/o.../tp/track_grades.htm
Here is an additional link to take a look at: http://www.centerrail.com/Fast...hart/GradeChart.aspx
By the way, I never had an issue of the front of the engine shorting on the center rail nor any uncoupling issues with my set-up. Certain engines may different in their requirements though.
Rick
Attachments
Thanks for the links, Rick, I'll take a look. I suspect I'm being unduly influenced by some of the comments without understanding all the factors that lead up to them. Given the size of the locomotives I plan to purchase and the size of my layout, I don't really expect any serious problems, it's just that I get curious when I read some of the comments. I'm sure once I start construction, things will begin to make more sense and that's when it would be better to ask such questions. Sometimes trying to get ahead of the game is kind of futile. I believe I understand the mechanics, it's just sometimes a little hard to envision things without wood and track in front of me.
A good example is my current table. I thought I could "get by" with shrinking the grid to 1'x1' and just cover that with 1" foam. While that works fairly well for my mobile 6x8 Christmas layout, I can see where it will not work for a "real" layout. The thing that makes understanding some of this a little difficult is that books, etc., all assume that one wants to spend the money to purchase 3/4" plywood, 1x4's, Homasote, etc. Most books are old and they rarely explore cheaper alternatives, such as paring things down a bit to use 1/2" plywood on 1x3's, cheaper sound deadening boards, etc. Then I see folks here saying that's exactly what they've used for years and it confuses things. ![]()
Many overbuild by using 3/4" plywood on top of 2 x 4 framing. L girder bench work is both economical and strong. For flat areas 1/4" plywood on top of the joists provides a firm foundation for foam, Homasote, or other soundboard.
Many overbuild by using 3/4" plywood on top of 2 x 4 framing. L girder bench work is both economical and strong. For flat areas 1/4" plywood on top of the joists provides a firm foundation for foam, Homasote, or other soundboard.
What joist spacing is being used with 1/4" plywood? While I don't intend to stand on it, 1/4" plywood seems like it would have some give spanning 18"-24" joists and tends to buckle. If it's good enough to span joists on flat areas though, wouldn't it be good enough to span risers on grades too? I happen to have a sheet of 1/4" laying around, so I might just buy a sheet of Blue Ridge for $10 to go with it and experiment after the holidays. I'm sure others will chime in though and maybe save me the effort. ![]()
I would only use 3/4" on risers. !/4" in conjunction with at least 1/2" layer of Homasote, or ceiling tile, etc. works fine for flat scenery areas with 12-16" joist spacing.
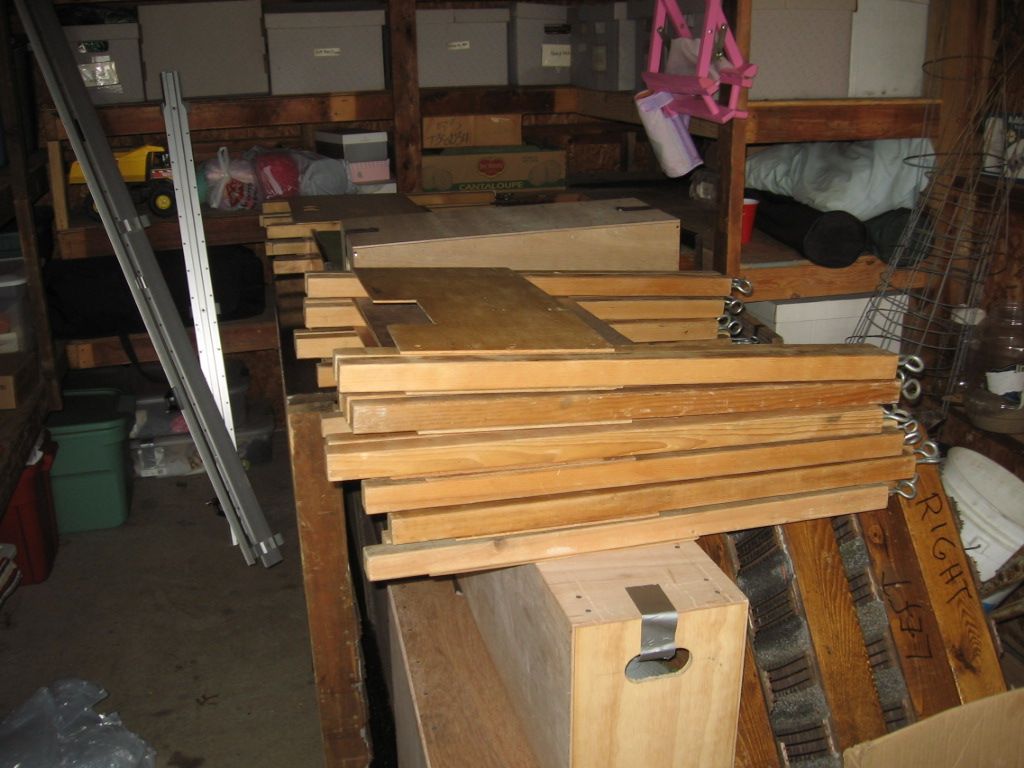
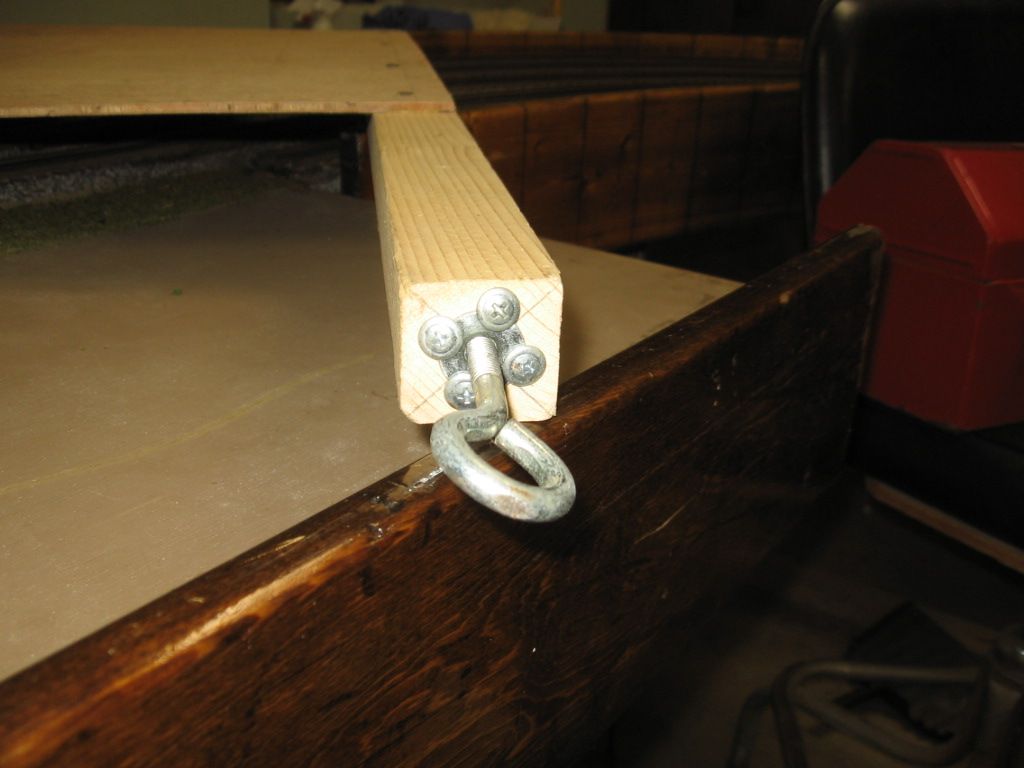
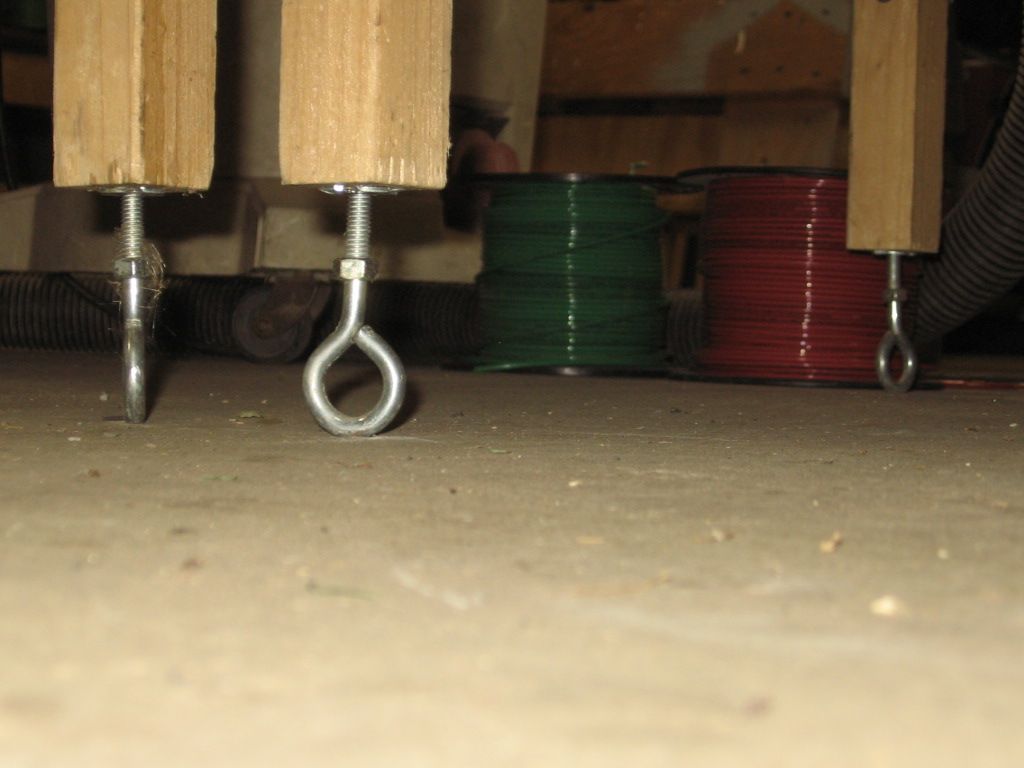
Leg's stack for storage, note the 5/16" eyebolts, bottom of the legs.


Set-up on my garage floor that slopes to two different floor drains.

I would only use 3/4" on risers. !/4" in conjunction with at least 1/2" layer of Homasote, or ceiling tile, etc. works fine for flat scenery areas with 12-16" joist spacing.
I just got through reviewing a thread where the OP is successfully using 1/2" luan covered with cork on his grades. So it seems like 1/2" plywood with 1/2" soundboard and cork would be more than enough. My guess is that 1/4" with the soundboard and cork would be enough purely from the standpoint of holding a locomotive. I suspect most folks go overboard simply to play it safe and not have unforeseen problems down the road. Many of these folks walk on their layouts, have the largest locomotives and attach a lot of heavy scenery to their grades. However, if one has no plans to do this stuff, then maybe something less than 3/4" will work just fine. I'm no penny-pincher, but I don't like throwing money away either. Yes, the cost of the benchwork is paltry compared to the cost of track and rolling stock, but it would still be wasting resources, something I try to avoid. Since I want to get rid of my 1/4" sheet of plywood anyway, I'm still going to experiment after the holidays and see for myself. My guess is I'll compromise and go with the 1/2". ![]()
Leg's stack for storage, note the 5/16" eyebolts, bottom of the legs.
I would never have thought of using eye-bolts, so thanks for the suggestion and photos. Even though I think my floor is level enough, I may just add these because there might come a time when I move the layout into a spare bedroom.
I understood that, but your comment made me wonder just how level is level. ![]()
Just build it. Put a cue ball on the track. If it rolls one way, kick a leg. Or put a shim under it.
Seriously, I would put a 4' level on the platform in a garage and cut your legs to fit if necessary. Start with them all the same length and adjust if you think you need to. Your garage floor is more likely to be sloped than your spare bedroom. I hope! Shims aren't a bad idea if you are going to move it to a level floor later.


