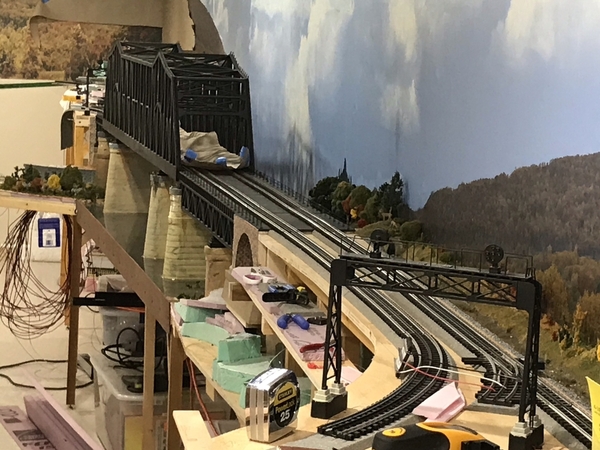
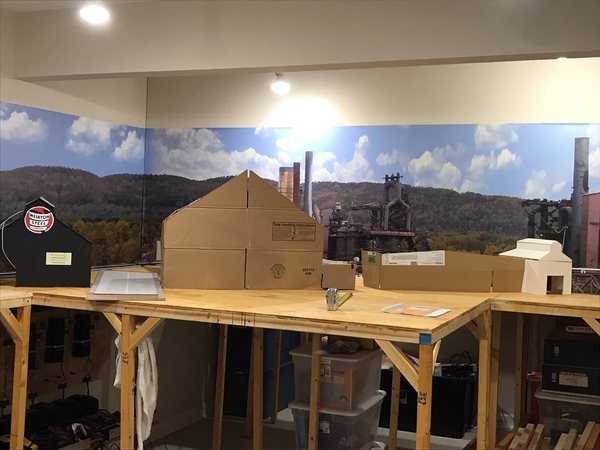
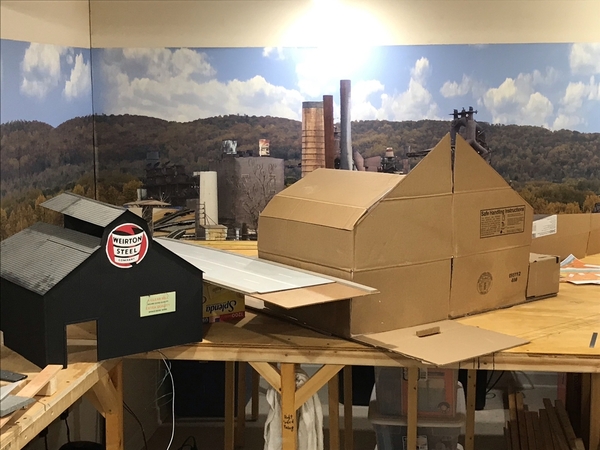
Nice work George! Every time I see that bridge I think about home. At this point are you able to run trains around the layout? I really have only seen the section of your layout with the bridge. Of course if this is your plan I understand and will wait patiently. However, it would be great to see a train through the bridge.

Dave

Hi Dave!  Thanks for the comments.

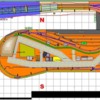
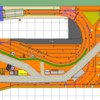
Unfortunately, at this point track extends roughly only the 47' length of the back wall (the backdrop).  The Staging Area is done as well, but I am nowhere close to driving the "golden spike".  Here's what's done (circled in red).  The only video of a train passing (partly) through the bridge can be found a few pages back in the thread.

PRR Panhandle 2.0 v111-progress

At this point, I can only get a train partially through the bridge in either direction.  I am constructing this layout in a very different way than Panhandle 1 (hopefully a lot better way, too).  It's not a matter of building all the bench work, followed by all the track, and then finishing with all the scenery.  There are areas between the track and the backdrop that must be completed first, before they become (relatively) inaccessible.  We are getting those sections done - the bridge was the largest - but the area behind Steubenville remains.  Once that is completed, I am hoping to make much faster progress on the rest of the layout.  I expect that to be built in the more traditional way.

At present, I am waiting on those Albion Catalog houses (HO) to arrive before tackling the Steubenville area behind the station.  And with the interlocking signal completed, I am focused on finishing the eastern approach and installing any last access holes under Weirton Steel.

George

Attachments

Images (1)
  • PRR Panhandle 2.0 v111-progress

Updated 7/29/2021:

Mark - the painful lessons stick with you.   And you are right, I would like to break from the disciplined approach, but I know where it leads.

Today, I put in a new access hatch.  I was originally going to put in a second, but I decided it wasn't needed.  The first one was tough enough.  Took much longer than I thought.  And now all the trains are (hopefully) safe in the Staging Area as we prepare for some bench and scenery work.

IMG_1279

It's time to think about closing in the benchwork at the front of the Eastern Approach.  I am thinking about how to cut the fascia for that section and its intersection with Standard Slag (the dark area).

Planned for Weirton

More when I know it. 

George

Attachments

Images (2)
  • IMG_1279
  • Planned for Weirton

Updated 7/31/2021:

Activities today weren't very glamorous but they were necessary.

  • Measured the next section of fascia (Eastern Approach) and marked it for cutting.  We'll check it again tomorrow and make the terrain profile cuts.

IMG_1301

  • Got the paint for the fascia, a Behr color called Moroccan Henna, re-shaken in anticipation of treating the fascia.
  • Put a number of small parts and items into labeled shop drawers (tedious, but vital to find them later).
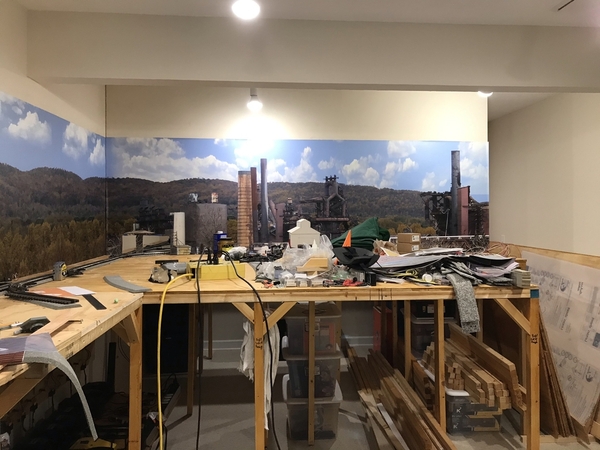
  • Pulled all the tools, parts, and junk off the Weirton Steel mill and yard area in anticipation of cutting a few access hatches and laying track.

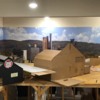
Here's a view of the Weirton Steel area before clean-up.

IMG_1283

And a view afterward.  Not only did I remove all the tools and materials, I used the shop vac to get the table top clean.

IMG_1296

And here are some photos taken from vantage points not likely to be seen again (from atop the Weirton Steel bench work looking west).

IMG_1291

Yes, I have covered the tracks on the bridge in anticipation of much saw dust and dirt being generated.  I will probably do the same for the eastern approach tracks.

IMG_1294

Like I said, not very glamorous, but needed in order to move ahead.

More when I know it.

George
Attachments

Images (6)
  • IMG_1283
  • IMG_1291
  • IMG_1294
  • IMG_1296
  • IMG_1299
  • IMG_1301

Updated 8/1/2021:

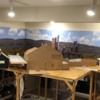
Thanks guys!  You motivated me to get on with making mill mock-ups.  We are still working out final placements and building sizes, but here are a few preliminary photos.

This is the mock-up of V2 of the Open Hearth (the old one is behind it).

IMG_1302

Left to right:  Blooming Mill, Crawford's Crossing (highway overpass), Open Hearth, Strip Steel, Power House.

IMG_1305

Here's another photo from a bit further away.  I think it ties into the backdrop pretty well.

IMG_1306

More when I know it.  

George
Attachments

Images (3)
  • IMG_1302
  • IMG_1305
  • IMG_1306
@BillYo414 posted:

Those mockups are cool. And they're probably more time and resource effective than building a model and shuffling it around the table.

Moving the model really makes me appreciate the original design that went into these plants.

Thanks Bill!

"Moving the model really makes me appreciate the original design that went into these plants."

You absolutely nailed that.  It's incredible how involved these buildings were.

George
George,

Things are looking good. Nice backdrop and the placement of mock-ups look good. Will you have a blast furnace? I've had my steel mill backdrop installed for about 4 years and need to move forward with the actual structures. I remember as a child, riding downtown Weirton and seeing the steel mill smoke and hoping I would see a train come through with slag cars. That was always a different kind of a train that what I saw elsewhere but I was still fascinated by it.

Dave

Updated 8/2/2021:

I spent some time today measuring the locations of the various mills in the Weirton Steel complex.  Then I cut out a full-size floor template of the Open Hearth, climbed up onto the bench work, and moved it around until it was correctly positioned.  Then I moved Crawford's Crossing (the highway overpass) next to it (that's using modeler's license) and established the location of the Blooming Mill (on the other side of overpass).  Using more ML, I positioned the Strip Steel next to the Open Hearth.  And next to it will be a foamcore building that I will use to hide the entry to the Staging Area and disguise as a power house.

IMG_1309

That flat area sticking out of the left front of the Open Hearth will actually be part of the structure - it's called the cracker.  And the floor template extends much farther towards the divider than can be seen.  The mill's footprint is 37" w x 50" long.  The cracker will extend another 12.5" out front.  Here's a photo of the prototype.

100_0376

IMG_1307

Finally here's a look at the approximate height of Crawford's Crossing as it passes between the buildings.

IMG_1312

More when I know it.

George
Attachments

Images (5)
  • IMG_1307
  • IMG_1308
  • IMG_1309
  • IMG_1312
  • 100_0376
@BillYo414 posted:

That is using modeler's license but honestly, the feel is just right! I spent three years looking UP at the tops of mill buildings before I drove through Weirton and only had to look out my car window while crossing the bridge haha That's going to be such a unique and interesting thing to see on a layout!

Thanks!  Now all we have to do is miniaturize you and get you into a slot car on the bridge... 

George

Updated 8/5/2021:

I did manage to cut the section of fascia to a more accurate shape and paint it yesterday.  As I was going to install it today, it occurred to me that I should wire the DZ-2500 pushbuttons into it and create a small section map of the area.  After lifting the track plan section from RR-Track, importing it into Visio, and adding a few labels, I printed it.  Then it was off to Staples to have it laminated.  Like the one for the Staging Area, this will have the DZ-2502 push-buttons installed so as to straddle the tracks they control.  Like below:
IMG_1319

Here's the painted fascia section lined up to go.

IMG_1318

And here's a better view of the "map" that will be mounted on the fascia as soon as I get all the details figured out.

WSX Yard East-Fascia Sign

By the way, if you like the PRR station sign, there's a free online tool for making them courtesy of Robert Schoenberg.

http://prr.railfan.net/makesign.html

Hopefully by tomorrow, we'll get the pushbuttons installed and wired and then install the fascia.

More when I know it. 

George

Attachments

Images (3)
  • IMG_1318
  • IMG_1319
  • WSX Yard East-Fascia Sign

Updated 8/7/2021:

Didn't get much building done today as our attention was diverted by the Beaver, PA car show.  But I am doing some thinking about the following items:

  • Will finally need to attach the Central Switch Bus (#2) to the layout.  It drives Switches #33, #34, and #35.
  • Originally #35 was meant to be paired and thrown with #10.  That is out the window.  They are too far away for that.
  • I am debating how or if to signal the Weirton Steel Yard, hence the thread on PRR yard (dwarf) signals.

More when I know it. 

George

Updated 8/8/2021:

I am in the process of acquiring a brass yard office / tower for use as the Weirton Steel Yard Tower.  The idea of a tower in the yard sort of grew on me.  A little research today confirmed the existence of such a yard office.  I will also place a sign in the yard advising inbound trains to the Blast Furnaces to report to the office first.

Began the work of installing Switch Bus #2 (Central).  That involved:

  • Hooking up Power (Red) & Ground (Black) 16 gauge wires to the Power Distribution Board (15 VAC).
  • Hooking up the Data Wire Driver (White) 16 gauge wire to the Power Distribution Board (DZ-2001 #2).
  • Re-organizing the Atlas 205 slide switch that permits debugging of Switches 3-19 and 33-35.
  • Scrapping the idea of having the WSX Run-Around track use 2 switches programmed with identical numbers.
  • Scrapping the idea of having the WSX Interchange track use 2 switches programmed with identical numbers.

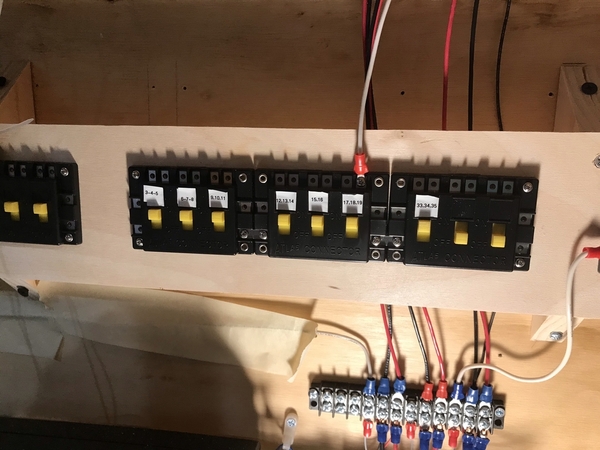
Photo below shows the Atlas 205 slide switches used by the DZ-2001 Data Wire Driver for the No. 2 Switch Bus.  The slide switches have all been labeled correctly.  Switches 17, 18, and 19 are furthest away from the board.

IMG_1363

Switch #34 has received its power & ground leads from the Switch Bus.  When we are finished, the conduit will get its cover.  The white 22 gauge wire leads to the switch's pushbutton.

IMG_1360

Switch #33 has also received its power and ground bus wires.  The triangular piece of masonite helps hold the access hatch cover in place.

IMG_1362

More when I know it.

George

Attachments

Images (3)
  • IMG_1363
  • IMG_1360
  • IMG_1362
@Mark Boyce posted:

I've never built a layout much bigger than my current 11x8.  the volume of everything is loud enough that you have to be well documented

Mark,

Without a systematic approach, the thought of tracking down a problem in such a large layout absolutely terrifies me.  Plus when you work on different things (scenery, wiring, bench work) and switch around among them, you tend to forget how (and why) you took certain approaches.  I confess that at times I have to revisit my notes.

George

@G3750 posted:

Mark,

Without a systematic approach, the thought of tracking down a problem in such a large layout absolutely terrifies me.  Plus when you work on different things (scenery, wiring, bench work) and switch around among them, you tend to forget how (and why) you took certain approaches.  I confess that at times I have to revisit my notes.

George

George,

Without a doubt, I am in total agreement with you!  I do not believe I would attempt a layout as large and complex as yours even if I had the space and resources to do it.  Maybe I am too closely removed from my working days.  Your layout project reminds me of designing, building, and testing a power substation control project or telecom central office link.  Documentation, documentation, documentation was totally necessary.  Too much for work me on a layout. 

On the other hand, I am totally fascinated with what you are building.  Must be why I keep commenting! 

Mark,

Now that I have truly retired, I find that anything I do on the layout is motivation for the next step.  Sometimes the progress can only be measured in inches, but I am resolved to keep going.  I am looking forward to various intermediate milestones - completing particular buildings, finishing an area's scenery, whatever.  And of course, I am thinking about the day that I can run a train completely around the layout.

I appreciate that you do keep commenting.

Everyone's comments and questions are welcome and invited.

So today from the "Inching Along Department", I managed to run power, ground, and data to Switches 33 & 34.  They now respond to my CAB-1.  And I have word that the 3 HO Albion Catalog houses are coming tomorrow.

More when I know it.

George

@G3750 posted:

Updated 8/5/2021:

I did manage to cut the section of fascia to a more accurate shape and paint it yesterday.  As I was going to install it today, it occurred to me that I should wire the DZ-2500 pushbuttons into it and create a small section map of the area.  After lifting the track plan section from RR-Track, importing it into Visio, and adding a few labels, I printed it.  Then it was off to Staples to have it laminated.  Like the one for the Staging Area, this will have the DZ-2502 push-buttons installed so as to straddle the tracks they control.  Like below:

IMG_1319

And here's a better view of the "map" that will be mounted on the fascia as soon as I get all the details figured out.

WSX Yard East-Fascia Sign

By the way, if you like the PRR station sign, there's a free online tool for making them courtesy of Robert Schoenberg.

http://prr.railfan.net/makesign.html

Hopefully by tomorrow, we'll get the pushbuttons installed and wired and then install the fascia.

More when I know it. 

George

Hey George, I'm curious here with switch 34 and the straight that leads up to it. Does just the roof overhang and that is what we see, or does it go over the rails on the corner of the building? I would imagine it is just the overhang as it doesn't seem like it would go inside then right back outside the building, but stranger things have happened.

Hey George, I'm curious here with switch 34 and the straight that leads up to it. Does just the roof overhang and that is what we see, or does it go over the rails on the corner of the building? I would imagine it is just the overhang as it doesn't seem like it would go inside then right back outside the building, but stranger things have happened.

Dave, you know how truth is always stranger than fiction?  And how there's a prototype for almost every situation?  Well, here's your proof.    I'm probably going to do a variation of one of these two corners.

Crawfords Crossing-Mill Entrance2

Neither actually are open to the traffic going by.  And in my case it will trains not automobiles.

George

Attachments

Images (1)
  • Crawfords Crossing-Mill Entrance2

Updated 8/12/2021:

I have a lot of things to report today.

First of all, the 3 LaserArt HO Albion Catalog House kits arrived yesterday.  Looks like shortly we will be doing some major house construction.  For the time being, that is on the back burner.

The new Alco S-2 Western Pacific switcher arrived.  It will be getting a new stack and I still need to determine what Weirton Steel road number it will receive.  It's stable mate is #208.  Here it is on its shake-out run on the Panhandle this afternoon.

IMG_1405

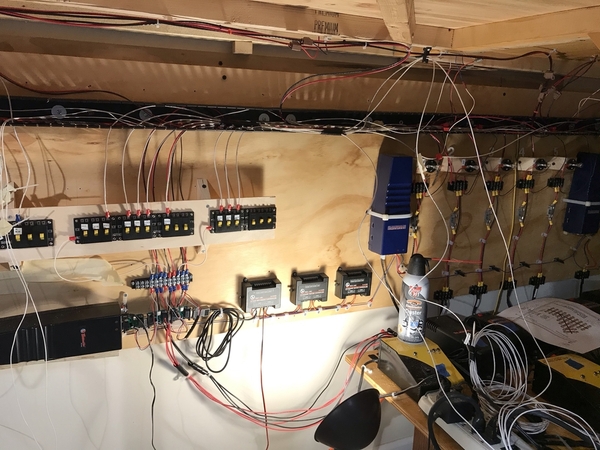
Most of yesterday and today have been spent on installing data wires for Switch Bus #2, which governs Switches 3-19 and 33-35.  Below is a look at the DZ-2001 data wire bus panel.  The white wires coming out of the top of the Atlas 205 slide switches go to "gangs" of 2-4 DZ-2500 switch machines.  The setup will help with debugging should one of the DZ-2500's get its mind "scrambled" and keep the rest operating correctly in the meantime.

IMG_1411

This photo shows some of the data wires awaiting connection to future switches.

IMG_1413[1)

Below is the fascia with the track map on it.  The DZ-2502 push buttons have been attached to the map at the switches they control.  I still have to put the fascia in place and wire the push buttons.

IMG_1410

More when I know it. 

George

Attachments

Images (4)
  • IMG_1405
  • IMG_1411
  • IMG_1413(1)
  • IMG_1410
@Mark Boyce posted:

You definitely were smart putting in wire management for that many.  Reminds me of the telephone company 😉

One ringy-dingy!  Two ringy-dingy! 

Yeah, I like the DZ-2500s but they are serial devices (ask Gunrunner John about the steps he's taken trying to simplify his life).  So if one in the middle of the chain gets "confused", the whole chain can stop working.  Then tracking down the culprit is a big game of "swap".  Uh, no thanks.  This way, I am only having to hunt among 4 switches rather than 15.

George

Updated 8/14/2021:

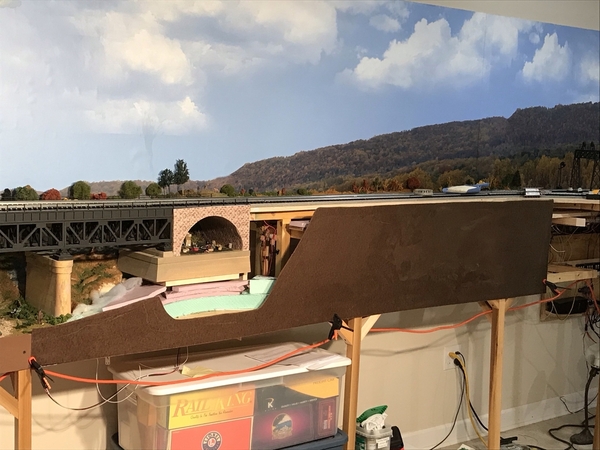
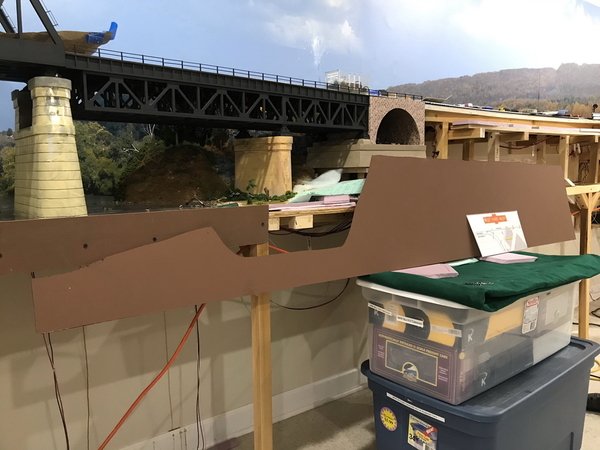
The Eastern Approach fascia is partially installed.  All 5 push-buttons for the affected switches are installed.  Four are operational (one needs the actual switch to be installed – a future step).

IMG_1420

The fascia has been partially installed.  It is attached at the bottom edge.

IMG_1433IMG_1432

This is the prototype in the area of the stone arch.  The backwater is in front of it.

IMG_3261

In this next photo of the model, the backwater in front of the stone arch can be seen.  I will use plastic wood or filler to make sure the plywood bottom is water-tight.  Then it will get some paint, scenery, wildlife, vegetation, and ultimately some Woodland Scenics Deep Pour (Murky) water.  I will use trees and undergrowth to blend everything together, hopefully representing the prototype.  Below in the edgewise view it can be seen that the top of the fascia still needs to be attached.

IMG_1434

More when I know it. 

George

Attachments

Images (5)
  • IMG_1434
  • IMG_1433
  • IMG_1432
  • IMG_1420
  • IMG_3261

Add Reply

Post

OGR Publishing, Inc., 1310 Eastside Centre Ct, Suite 6, Mountain Home, AR 72653
800-980-OGRR (6477)
www.ogaugerr.com

×
×
×
×
Link copied to your clipboard.
×
×