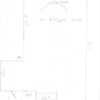
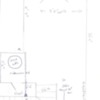
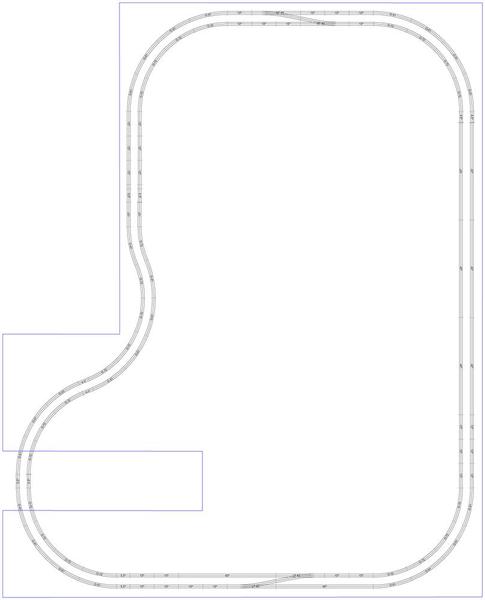
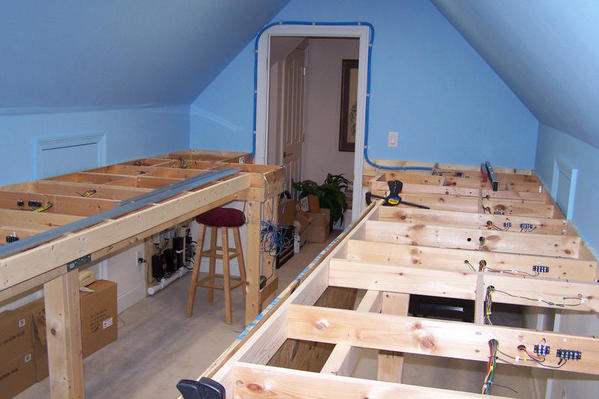
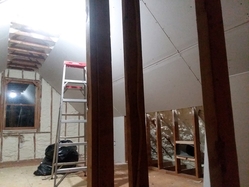
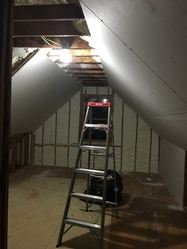
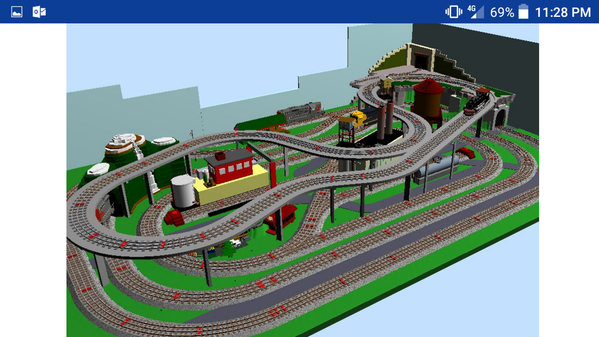
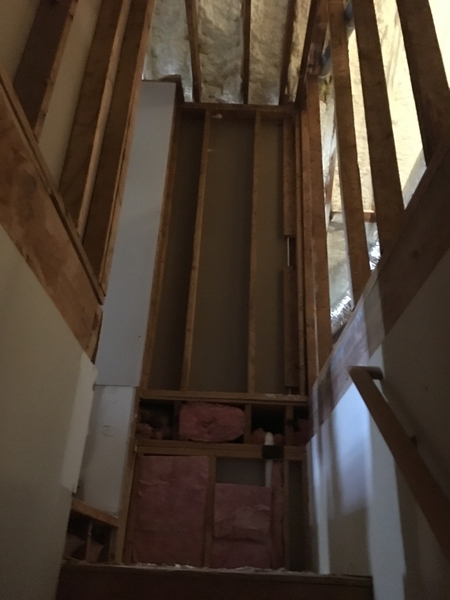
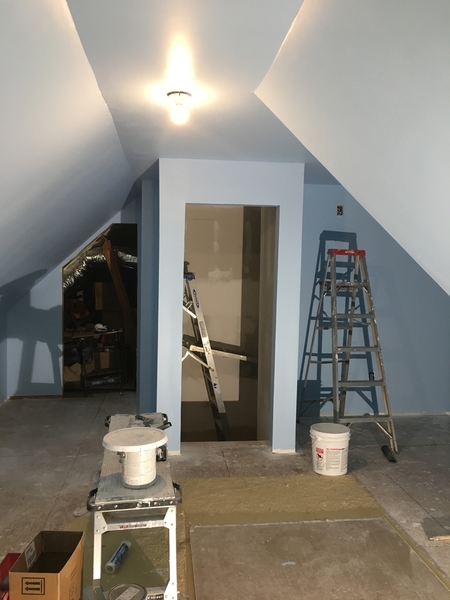
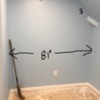
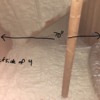
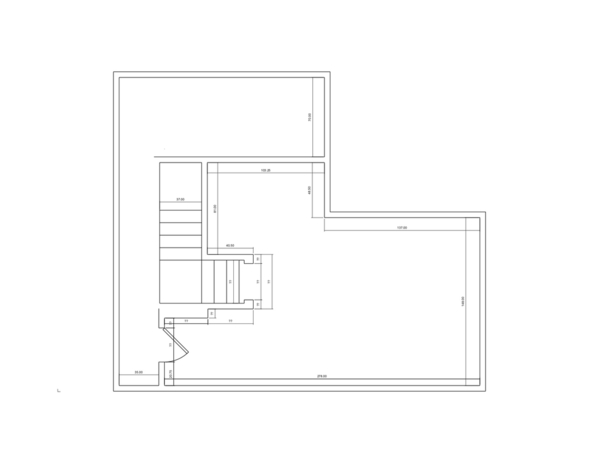
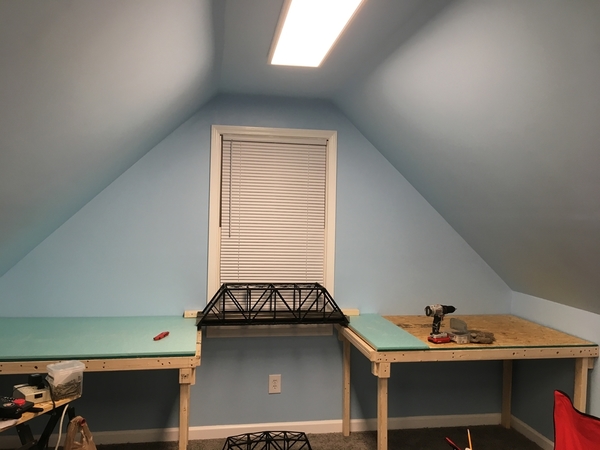
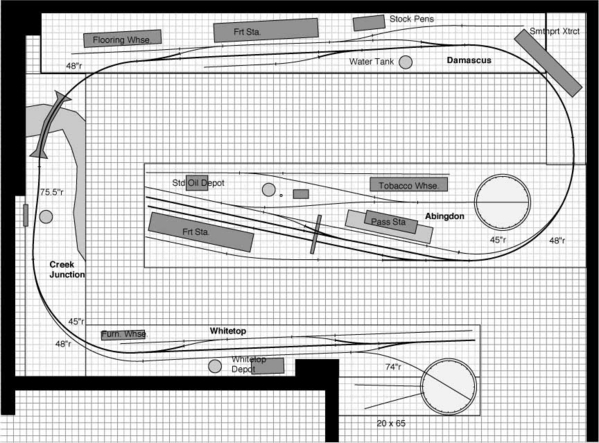
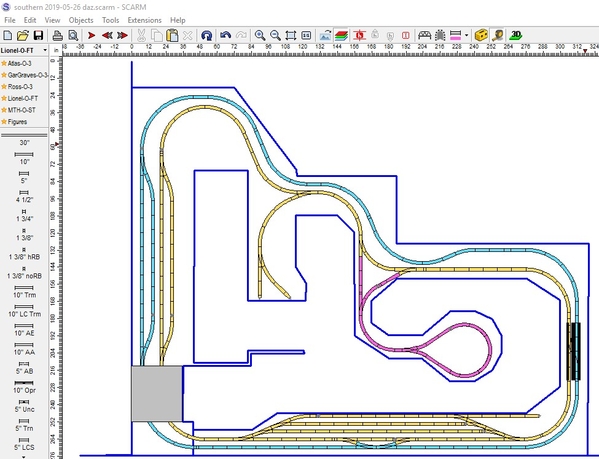
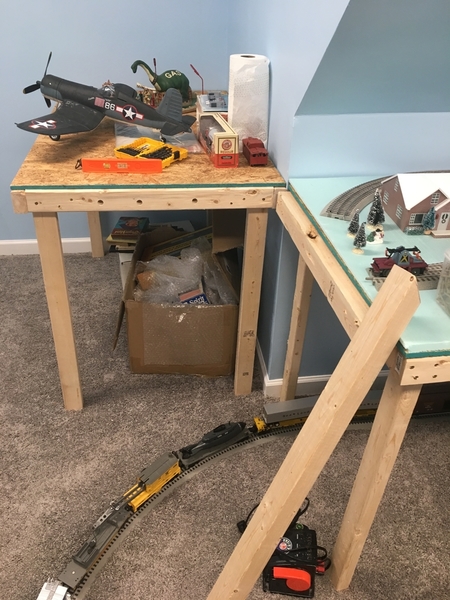
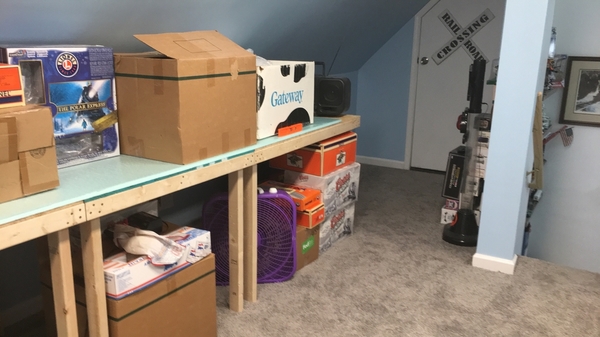
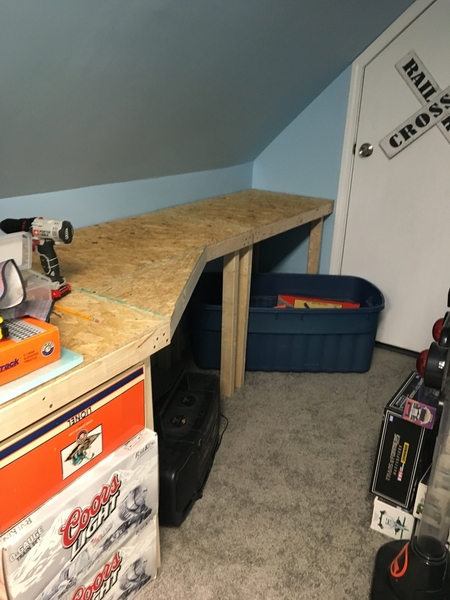
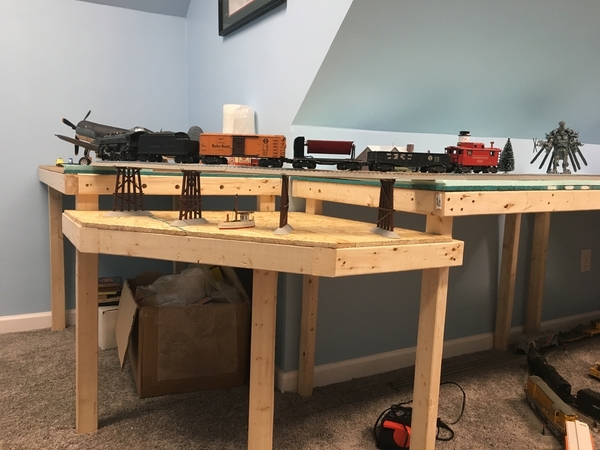
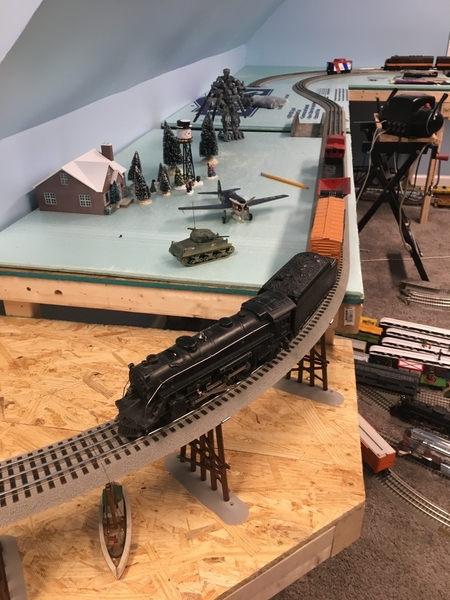
I went upstairs to do a rough sketch of the room. It is not finished and will need insulation and sheet rock but I wanted to get an idea of where to begin. I am having a company come out and foam insulate the whole attic. We will sheet rock it afterwards. I know you guys are full of ideas. I downloaded SCARM. I am hoping to find some tutorials on youtube. The room is kind of funky shaped because of the stairs leading up to it and also the framing of the house. Right now it is studded. I will take pictures of the room in the near future but here is the rough sketch and rough measurements. My wife wants the closet to be built but for now I would like to use the space. I will be able to get exact measurements once I move all the clutter into the attic. Right now the only scale loco I have requires 048 but I should have room to go larger. Any and all help would be appreciated. Thanks in advance.
Replies sorted oldest to newest
Sweet!
My preference is around the walls... a long run folded over dog bone... maybe you can fit a double decker with hidden staging?
Good luck on the new layout!
Congrats on the new train room. Looks like a great space to work with. Plenty of great guys here who will chime in also. You can do a really nice around the room layout maybe with a couple of peninsulas, starting to the right of the stairs and around the three walls. Leave the closet area free (keep the CEO happy), for a work bench and maybe a couple of chairs.
Looks like a typical attic room. If I read your measurement correctly the walls are 3'6"? That's a decent height for bench work. Track plans are very subjective and many of the experts can chime in. Use the largest radius you can fit. Everything I read says 060 min- 072. Do you like to loop run or point to point and switch industries? I would do both personally.
Don't forget AC and heat.
Good luck- Bob
Yeah i am completely open for advice from wiring to construction to track plans. I was thinking about leaving out the closet and come from the wall through the stairwell over a bridge and into the attic for a disappearing train effect.
I will also be running TMCC and DCS and one dedicated loop for my fathers 223E.
Remember that there is storage space below the layout, and you can use it to bargain for the "air rights" above it. I would choose a table height of 3 ft since the junction of the ceiling and walls will limit that space's usability.
I would go for an around the room with part of the loop crossing and hugging the stairs. That way you can have O72 curves and not limit your selection of equipment.
Jan
Southern4501,
Man that room screams for a shelf ceiling layout to get you started and then the nice floor layout also. Looks like it will be a nice Train Room.
Congrat on your new home!
Waited a long time for my Train Room also, and I am still working on the floor layouts. Construction continues.
Hope you have as much fun with your new Train Room as I am having with mine.
PCRR/Dave
Attachments
Jan
I have told her the closet can be added back later for re-sale value. It would make our house a 4 bedroom home. The way our house is built and where the hvac is there is tons of storage. I just have to lay down some plywood.
I had thought about using the closet area for control and a turntable across from the stairs in that same nook. This will be my first layout other than a 4x8. I would like to have running trains and point to point.
I'm with everyone else about a round the room layout, just put a lift or swing bridge at the top of the stairs and your good to go!![]()
I am in the planning stages, though getting closer to actual construction, and what I would recommend is to try and use the largest curves you can, from the layouts I have seen even 027 equipment looks better running on large curves, and an O48 min curve engine will look much better on O72 or larger, or if you ever get the hankering to run scale passenger cars or the big scale engines, this will allow that. My space is a lot smaller than yours, so to have large curves right now I am toying with U shape (well, a U where the bottom is flat) where the flat bottom of the U is 6' x 9, then the the two arms are roughly 3x7, and will bridge the open end. I have also thought of a folder dogbone, in the space I have I could easily do that with O72 curves on the mainline but would take away from something else I was thinking of doing. Given your space I would do an around the walls with maybe a peninsula to allow for a reverse loop at the top of your drawing, could lend itself to a lot of possibilities.
The only other thing I suggest (and that is all it is) is you don't necessarily have to jump into using all that space right off the bat, maybe design something that ultimately ends up room filling but you can build a smaller part of it now, to get your feet wet with the wiring and scenary and such of a bigger layout and in a different style than you have built, then expand it. I can only speak for myself, but now that I am contemplating building a larger layout (by my standards), I get overwhelmed at times looking at the things I am planning to do, using a track system I never have used before, wiring it for conventional block with an eye towards putting command control onto it, and trying to figure out whether to go open grid vs flat table top, etc.......![]() . A simple around the walls might be easier and then you can always expand it later...but in the end up to you, lot's of folks on here will have some great suggestions for you on what you can do.
. A simple around the walls might be easier and then you can always expand it later...but in the end up to you, lot's of folks on here will have some great suggestions for you on what you can do.
Southern4502,
BIGKID is giving you some good advise, you do not have to immediately construct every part of your Train Room layout at the same time. In fact I engineered and constructed 1/2 of my Train Room layouts, leaving a sitting area for watching the big screen TV and have now started the engineering planning on most of the rest of the Train Room. This also spreads out the cost, which in my case was a blessing.
PCRR/Dave
Building a nice Train Room today is not just nickels and dimes, it does cost some money.
Construction continues on the PCRR Train Room.
Attachments
It will only be a train room. No man cave or anything else. I do plan on shelves in some areas for my Hess collection and other stuff and trains. I am really wanting to get it all planned out and ready for bench work and electrical. I know my drawing is crude. I am trying to figure out Scarm or is there a easier track planner out there? I am lost lol. I am a visual person so seeing it is easier for me. It will pretty much be a flat layout because of the ceilings. I think it would look goofy to do backdrops on a angled ceiling. I think someone suggested to do the bench work at 36". That leaves about 6" for building height towards the back. Taller buildings can be against the window wall or where i put the roundhouse for now. I do have a Atlas double Pratt bridge I thought about using over the stairs if I don't build the closet for the disappearing train into the attic.
Attachments
Slow and steady wins the race. If this is your first large layout then some good advice has been posted already to start small. Get some bench work up and track down and run some trains. Just build what YOU want - almost like a modular layout and keep adding sections when you are ready.
If you don't want to do backdrops on the sloped ceiling then at least paint it sky blue with some clouds. Adds a lot to the scene in front of it.
Bob
i think I set your room up in SCARM. The notch on the left is where the closet would be. The track crosses over the stairs with plenty of headroom as the layout is at least 3 ft above the attic floor. The track hugs the stairwell wall on a shelf about 12 inches wide. If you make the attic door open into the attic then it shouldn't be a problem. Just put a lift out section.
The track is O81 and O72 so you could run anything you want. I used Atlas track but you could use any other system. A turntable will take up a space that's 6 ft by 3 ft. so I don't think it would work in the corner.
I attacked the SCARM file. Just right click on it and click Save as... to put it on your computer.
Jan
Attachments
NICE space for trains. I wish - like everyone else - I had that kind of blank canvas for my trains.
In any case, I would seriously look into MIANNE BENCHWORK (OGR sponsor) once you decide on a basic floor plan. You won't believe how easily customized Mianne is - not to mention the very real ease of building. Tim - the owner - typically will help you.
It will probably cost more than your local lumber-yard benchwork ... but SO worth it!
Check it out. 
072 or larger minimum, under bench work on track train storage, over the stairs, and skip the closet, storage under the layout as already suggested.
Rough-in wiring for wall receptacles and switched overhead lighting before installing insulation. Heat/cooling ducts? Paint ceiling and rafter slope sky blue post drywall. Then build round the wall like Jan shows in Scarm. Rough wire the benchwork framing before you cover up to reduce "trainback/train neck" working time under the layout. Since you are planning Command Control if desirable your power center can be located on the wall under the layout. To avoid an entry duckunder you can follow advice above and use a lift out, a lift up bridge or a hinged drop down as pictured below. Jim Barrett shows "how to" for up or down in OGR video #11. You will have walk around capability with the handheld remote.
Attachments
Dewey Trogdon posted:Rough-in wiring for wall receptacles and switched overhead lighting before installing insulation. Heat/cooling ducts? Paint ceiling and rafter slope sky blue post drywall. Then build round the wall like Jan shows in Scarm. Rough wire the benchwork framing before you cover up to reduce "trainback/train neck" working time under the layout. Since you are planning Command Control if desirable your power center can be located on the wall under the layout. To avoid an entry duckunder you can follow advice above and use a lift out, a lift up bridge or a hinged drop down as pictured below. Jim Barrett shows "how to" for up or down in OGR video #11.
Dewey, great looking train room! Nice work!![]()
Congratulations on the new room Southern4501! That is a nice space indeed! Everyone has given you good advice, and I think you are already one step ahead by posting your request for ideas and direction and are willing to take the suggestions! I'm looking forward to seeing what you do.
Ok. Time for a update. Insulation is in!!!!! We decided to foam the whole attic, not just the room. It is 1230pm and its about 76 up here. I am amazed. Now onto sheet rock and closing it in. I am really happy i will be able to have a dissappearing couple of lines. I want them to go through a tunnel out over the stairs and into the attic and come back in on thw other side of the room. With all the christmas village stuff and stuff my mom has made when i was young, we are planning a rendition for the polar express for the kids on one half and maybe hogwarts on the other side. A question that will arise soon is bridge width with passing trains. The Coors light has a big ol wide butt. I am curious if it can pass another train on the atlas double truss. If not i will have to come up with a different bridge over the stairs. I know its a little early for that question. 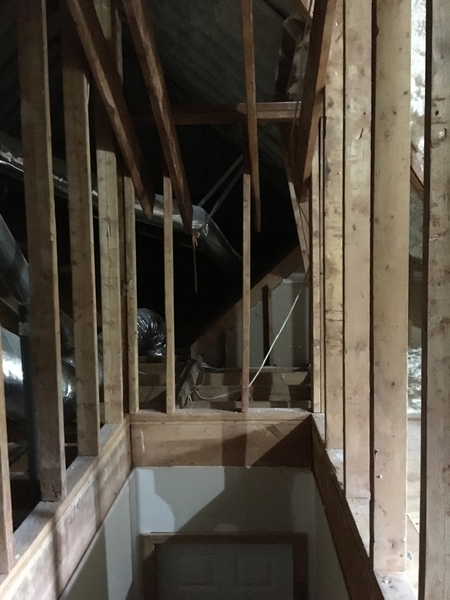
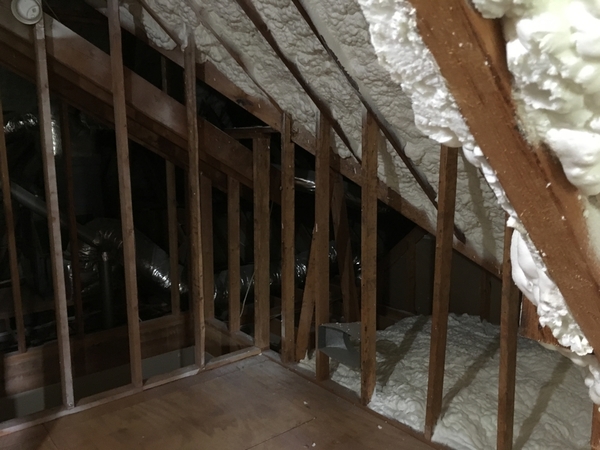
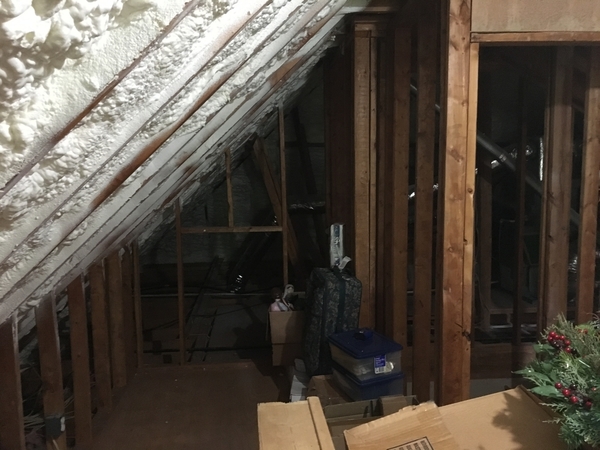
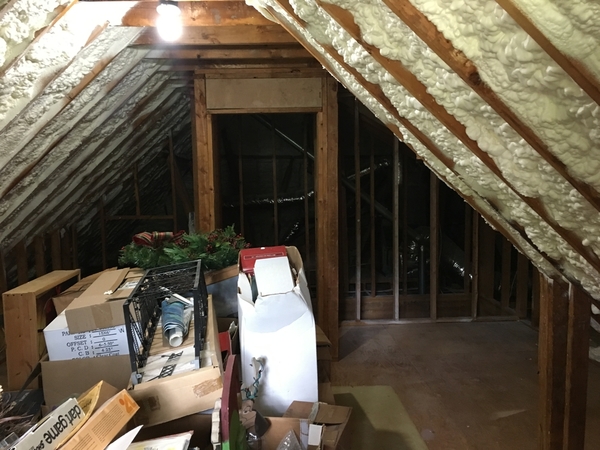
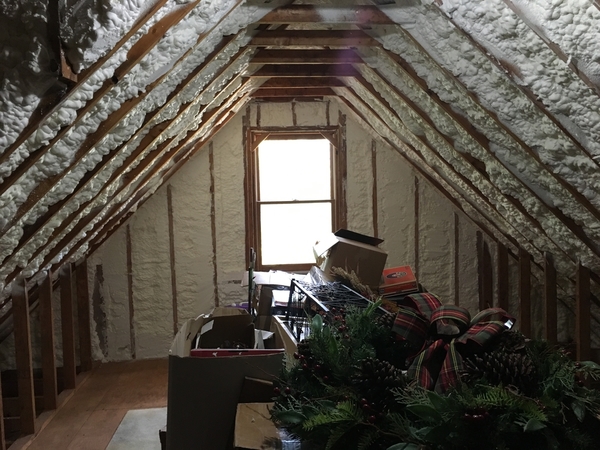
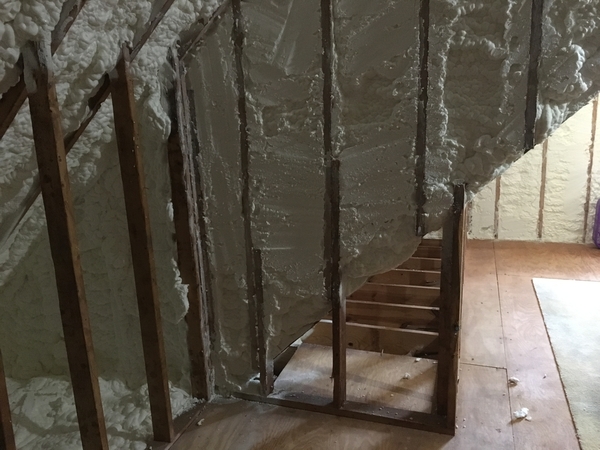
Attachments
The knee walls are short so the base of the layout is going to be around 36 inches. I wont know exact until we finish the room. We start on electrical next week and the attic door and closet🙄. So it will be a flat around the room layout. I want to start out the right way so here is what i have so far. I am going to be using TMCC and DCS. I wont have stacked shelve lines or a helix. I do have a old ZW right now but i i need electronic protection from shorts or over loads. Knowing i hate to fill holes if we have to take the layout down can you frame it and not attach it to the walls? How wide would you make the layout knowing the roof angle is taking up alot of the backspace. I havent figured out what to do about the background scenery.
We have lived in two houses like that. The first was a tiny cape cod and the bedrooms were in the attic area. The previous owner had put in fiberglas batting, and it wasn't too bad up there, but I did put in a window air conditioner. The second was a high peaked attic over a complete ranch, We discussed doing what you are doing for an attic train room. With the high ceiling it would have worked well, track going behind the stairwell and everything. Then 7 years ago, my mother-in-law wanted us to buy my wife's grandmother's house, and here we are. I'm looking forward to seeing what you do with the attic!!!!
I don't think the knee walls will be a problem and you can certainly build your frame w/o attaching it to the walls. It will essentially just be a series of table tops. It won't be as stable as attaching to the wall, but should not be a problem. Think of the modular layouts that are brought to train shows that have no wall support.
As far as electronic protection, there are numerous threads on the Forum that have discussed the need for fuses and TV suppressors, which you should be able to access for more information.
Most hobbyists will recommend staying at no more than 30" wide for your layout, but unless everyone is really short or physically challenged, you should be able to go to 36" with minimal effort. Even though the area under the roof wall will largely be unuseable for running trains, I would still build out almost to the edge of the wall because you can put all sorts of small, short items like sheds, picnic tables, abandoned trailers, tents, campgrounds, scenery, etc. in that area. In fact you might be able to go to 40" wide because that area will likely only have to be accessed one time for each item you install and the "workable area" you will have to repeatedly access will still only be 30" - 36" wide.
Just my $ 0.02
Oh how familiar that looks! I wish I had done the spray foam instead of the pink stuff. Looks like you have more headroom than me.
BTW I pulled a dedicated 20A circuit for the attic. More than enough for a 14x39 layout.
To span the stairwell, I used G Gauge Deck Girder Bridges from Garden Metal Products. The track is 5 rail GarGraves.
I'm one of the carpenters in our modular train club. It was natural for me to build a series of modules to go around the room. If you have the aptitude, you can buy a good power miter saw, Kreg Tool, lumber, and hardware for less than you'll spend for the factory built stuff. And in the end, you still have the tools!
Go with the biggest curves that will fit! On the far end of my layout I have 0120/0128/0138
BTW, decent lighting in the attic for photography is a bear. Good luck with that!
Attachments
Thanks Gilly for the idea. What length is that bridge. I went and measured the width in the stairs and it is just over 3ft.. The Atlas double truss is too long to go there. I have always loved the wooden bridges and trestles. Might try to find plans for that. I like Dewey's photos of the under framing. I think I am going that route. Modular and adjustable legs for leveling. We are going to start installing the electrical for the room this coming week. I am installing two bathroom fans, one towards each end to evacuate smoke when I am running it and also in case someone comes over that has breathing issues I can clear it out into the attic.
Gilly@N&W posted:Oh how familiar that looks! I wish I had done the spray foam instead of the pink stuff. Looks like you have more headroom than me.
BTW I pulled a dedicated 20A circuit for the attic. More than enough for a 14x39 layout.
To span the stairwell, I used G Gauge Deck Girder Bridges from Garden Metal Products. The track is 5 rail GarGraves.
I'm one of the carpenters in our modular train club. It was natural for me to build a series of modules to go around the room. If you have the aptitude, you can buy a good power miter saw, Kreg Tool, lumber, and hardware for less than you'll spend for the factory built stuff. And in the end, you still have the tools!
Go with the biggest curves that will fit! On the far end of my layout I have 0120/0128/0138
BTW, decent lighting in the attic for photography is a bear. Good luck with that!
What is the layout height and what is the distance from the layout till the roof starts to climb. I was thinking about doing the same thing. Leaving some vertical for trees and then let the roof angle up. Curious to what size your room is as well. My ceiling height is 9ft at the center. Thanks
The bridge is 35" long. My stairs are 36" +/- too.
The layout height is 32". I did that for three reasons. It makes viewing for my Granddaughters easier. IMHO the layout just looks better in the space. And, the lower height gives me a longer reach. I can easily reach things up to 42" from the edge.
The track to top of the knee wall is 12". More than enough for any train. My ceiling height is one big limitation. It is 6'8". Technically, not a room, but a storage area.
The main room area is 14'x18'; unfinished area is 14x21' giving me the O/A 14'x39'.
BTW I installed a bathroom exhaust fan as well. It does a great job of pulling smoke out of the space.
I took a lot of inspiration from Dewey Trogdon as well. Especially his yard area; so much so that I have named my yard "Trogdon Yard".
Attachments
Yeah when i saw the picture with the boxcar i was wondering of the height. I can not wait to get the room finished so i can get started. I will be able to get true measurements and see if we can come up with a track plan. Question about your can lights. Did you go LED and what size cans? Is it enough light and how bad are the shadows?
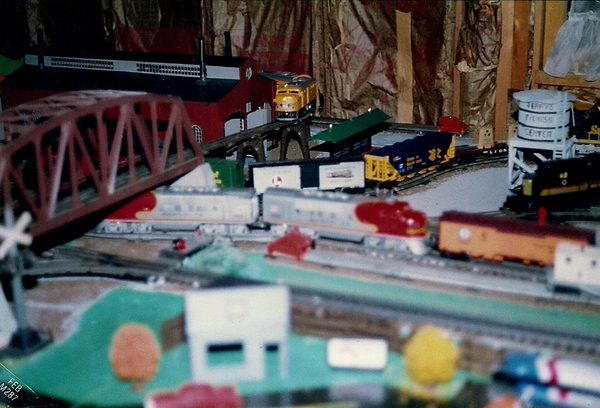
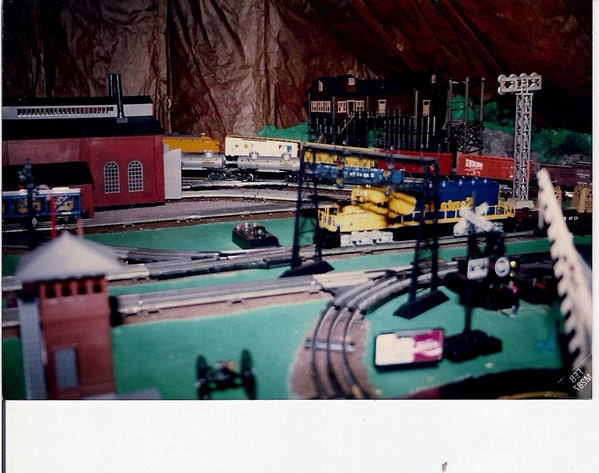
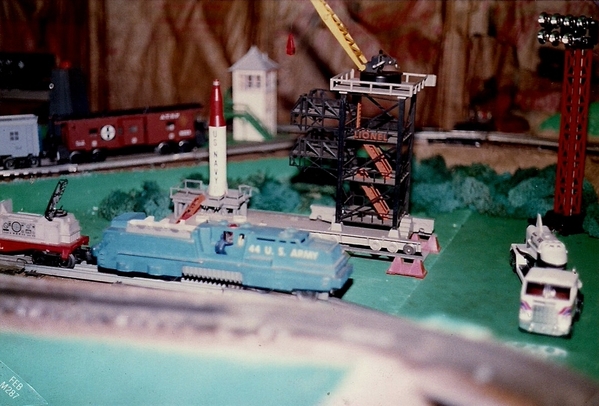
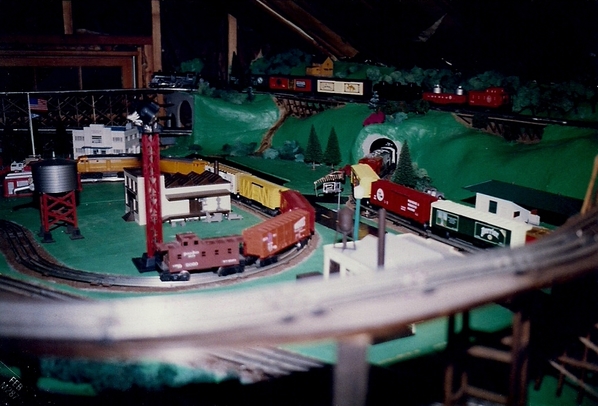
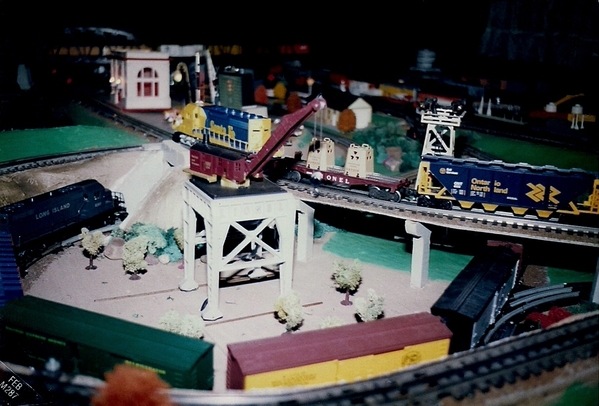
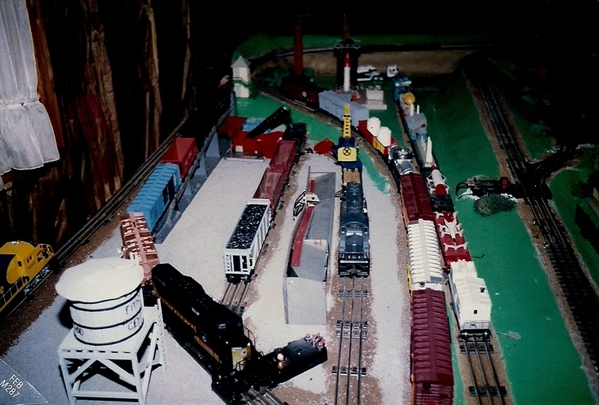
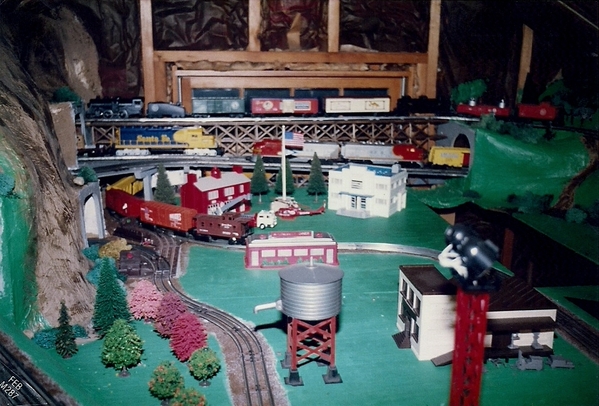
An attic layout is great! You guys inspired me to scan pics of my first layout in the attic of our first home. My father had built two in the basement of his first house. We both built the table and mountains in this one. There are 8 full 4X8's and pieces of three more. These pics are more than 30 years old. You can see how rudimentary things were in those days. My craftsmanship, available supplies, and budget were certainly issues that affected this pre-DCS and TMCC layout.
You can see the effects of no paneling on the attic walls. Backdrops? OGR forum? Never entered my mind. Roadbed was dried coffee grounds. Computers were useless at that time, and a cell was something found at your local police department. Nevertheless, that layout was huge and enormously fun. At the end, I could run eight engines independently. Everything was Lionel, and it included a bunch of the old operating accessories. Though I now have a large table layout, plus a large overhead layout in our basement, I still miss that great attic layout.
When you're in your 30's, it's easy to crawl under and pop up through that access hole...
It took me weeks to build that bridge in the background. The cool thing was that you could see the trains running across it from outside that small dormer window.
This pic shows the only surviving section of that old layout. We carried it into the basement of our current home. Twenty years later, I began a new layout with what was left over from the old one.
This is the first of three rooms for the newest table layout. It pretty much shows what that section looks like today. Of course, this one has multiple large backdrops, DCS, and LCP's. It requires 3 PWZW's, a Z4000, and a CW80 for a trolley line. I run 9 separate trains at a time.
Good luck on your new attic project, Southern4501. Try to keep posting on your progress.
Jerry
Attachments
All i can say is wow. What a Fun looking layout. That was huge and the new one looks huge too. Yeah i love the wood trestle. I think they are a work of art. I wish my window was lower so you could see the trains running. My goal is to have a fun layout for kids to come and visit during the Piedmont Pilgrimage here in georgia. There are not many layouts on the south side of atlanta and especially ones that a child might be able to operate. So I will have dedicated lines for the kids to run. We are looking at the 10th anniversary lionchief polar express and also the lionchief hogwarts. Trying to find a nice model of the hogwarts castle as well. One side will be winter wonderland and the other side octoberfest. But i do want more than just 2 loops.
Attachments
I agree, you need more lights! There is one fantastic club layout in my area that I am always disappointed that there isn't more light.
Anyrail used to offer a free version, limit by piece number. Screen shots and a photo app. get you a full visual on high piece counts.. but you must mind the measurements on your own that way.
SCARM starts out slow, and you may get stuck at times as things get deeper & tricks more numerous; but there is help here, and on the SCARM site as well as trick ortiented video there too. (the author is a member here.." mixy" or "mixey"?... Milan.) Once over the initial learning curve, it gets easier and faster. Each more in depth trick really makes huge impact on looks & speed alike.
Scarm is the most customizable and worth learning IMO. Trying others now will only confuse matters and slow learning it IMO.... just don't say it wasn't mentioned ![]() It allows you to build in a very "minecraft" manner .(looks wise..ive never used minecraft). Ive made custom building, bridge, car, and engine representations ...all custom in real life.. I don't think the other softwares can offer that ... unless of course they updated to keep up with the "upstart" competition. (to play devils advocate, SCARM needed to devolpe the "sandbox test mode" to get closer to RRTrack brand software level itself)
It allows you to build in a very "minecraft" manner .(looks wise..ive never used minecraft). Ive made custom building, bridge, car, and engine representations ...all custom in real life.. I don't think the other softwares can offer that ... unless of course they updated to keep up with the "upstart" competition. (to play devils advocate, SCARM needed to devolpe the "sandbox test mode" to get closer to RRTrack brand software level itself)
And congrats on the new place
This couldn't be done nearly as well on other software previously.
With some changes... like the gantry is gone & tunnel is back where it was. Crane too. Still enough like the above to see they are very much the same and with the zoomable multi axis view, using a farm you can't have a great idea of a view before you touch any supplies.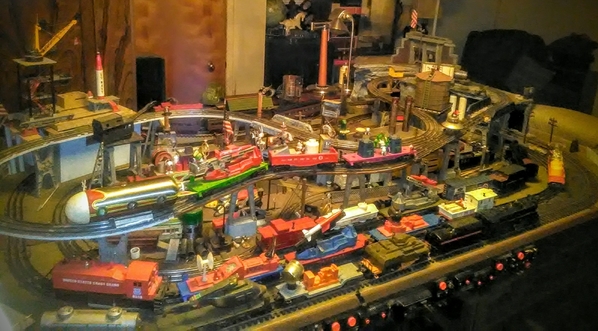
Attachments
A farm?.... Thank "spell-wreck" for that "joke"![]()
Unless you just desire to display your power and control center topside, I suggest it is a good idea to place it on the wall under the layout and save topside space. Also; what type of turnouts-- (track switches) are you planning and how many? Again, going under the layout with Tortoise motors leaves you room topside between sidings, and close tracks. Above you can mount switchstand lights on extended ties, lights which are mechanically rotated by the throwbar for the Tortoise motors that open and close the switch points. I have 17 tortoise motors easily operating from a small repurposed DC wall wart.
Just things to think about--not necessarily applicable for your railroad.
Tortoise motors mounted under one section of the Service Yard.
(1)Below: Organization and distribution of Layout Railpower and topside meter panel and Power Guard connections.
(2) below: overall Layout Power Center showing TMCC railpower components and connections for meters and TVS( transient voltage suppressor).
Topside, Homemade stuff: schematic with Tortoise toggle switch control, VAC and AAC meter panel, Power Guards(lights) and VDC meter for Tortoise power.
Position of toggle handle indicates at a glance whether turnout direction is to the main ("thru") or to siding ("out"). Simple: auto body striping on vinyl shelf liner.
Attachments
Very nice wiring Dewey!
J Daddy posted:Sweet!
My preference is around the walls... a long run folded over dog bone... maybe you can fit a double decker with hidden staging?
Good luck on the new layout!
Most of my staging is planned for the attic. Right now i am trying to figure out Mt Crumpit for whovillle and also the helix climb for the polar express.
Attachments
Attachments
Quick question. Is 15 amp service enough for the layout? Most if not all of my engines are modern except for my dads. Also led lighting is what i am shooting for.
The shelving nook is great! Am I looking at this correctly; Is that a landing partway up the stairs, then the stairs turn to the left to get to the attic floor? I know, it is a hard place to get a good photograph to show it all, but it will make a great place for shelving!
Yep you are correct. I took measurements where the studs are for the shelve supports to be attached. There used to be a 45 degree step there but we took it out. I think the shelves will be about 6” deep. Wont know till the sheetrock is hung and finished. Slow process. Painting the whole room sky blue and the stairwell white. I am going to use the shelves for all my hess trucks and texaco planes.
Those 45 degree steps are insanity!!! I'm glad you took it out early on!!
Yeah i have fell off them more times than i want to admit while trying to be careful
Well diabetes is a witch. I got an infection in my leg and some fluid of the bersa. Had to have surgery over thanksgiving and having to do injections every 24 hours till sometime in january. It was really bad. The ID doctor said it was very close to getting in the bone. It started on the saturday before turkey day and by turkey day it was my whole leg. Crazy.
My sheetrock guy is moving along for only being able to work 2 days a week. Here is the progress 


Attachments
I’m glad you are progressing from the infection. I know how bad diabetes can be from watching my father-in-law suffer with it over the years. Infection is bad news!
The drywall work looks great! It really makes a difference since you started posting. I’m looking forward to seeing the room ready for your new layout!
Sorry to hear about your infection, I hope it gets better soon! I like the progress of the dry wall I was there not to long ago. It sure makes a big difference! Really makes it start to look like a room. Next thing it will start to look like a train room!![]()
Southern4501 posted:Quick question. Is 15 amp service enough for the layout? Most if not all of my engines are modern except for my dads. Also led lighting is what i am shooting for.
For your layout, sure. If you're adding the lighting load too, probably. Using LEDs will help a lot on that.
Attachments
Two new additions to the building dept.
Looks like its going to be a merry Christmas!![]()
mike g. posted:Looks like its going to be a merry Christmas!
It really has been. My wife surprised me with the polar express train as well as a M1 garand (circa 1953). I am spoiled.
Also for anyone thinking about insulation in the attic, i can say this. Foam is the way to go. My attic is always about 2 degrees different. Well worth the money.
Well they finished the drywall today. They will be back out tomorrow to start on the painting. I am still down due to my leg otherwise I would paint the room myself. Then finish trimming it out and finish the stairs and carpet. I will post pictures when it gets a coat of paint or two. Scaffolding is in the way or I would attempt to snap some pictures of the finished prep.
Southern4501 posted:mike g. posted:Looks like its going to be a merry Christmas!
It really has been. My wife surprised me with the polar express train as well as a M1 garand (circa 1953). I am spoiled.
M1 Garand ![]()
![]()
![]() N I C E.......I have a circa 1944 still with the original wood stock my dad bought over 35+ years ago. It shoots like a dream then PING.......
N I C E.......I have a circa 1944 still with the original wood stock my dad bought over 35+ years ago. It shoots like a dream then PING.......![]()
Layout room is looking good.....
Attachments
Isn’t it amazing what a coat of paint will do for a room? It looks great!
It sure does Mark. I am glad my leg has healed enough to climb the stairs. I need to get accurate measurements so I can ask for help with the track plans.
Southern4501 posted:It sure does Mark. I am glad my leg has healed enough to climb the stairs. I need to get accurate measurements so I can ask for help with the track plans.
That sounds great!
I have a dedicated 15 amp circuit for my 22x12 layout and I have never had any problems. It runs to a switch in order to turn on the layout. My lighting is on a different breaker. I would suggest to keep them separate. I like the security of knowing there is no power to any part of my layout unless I turn that switch on.
WOW things are really looking nice there! A little trim, some floor covering and boom your going to be putting bench work up in no time! Nice work!![]()
New update.
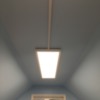
Base trim is finished. Stairs are tightened down and kick boards in. One light is hung. Attic door is installed. Still needs one more coat of paint for some touch ups. The lights i am using are flat panel 4k lumen led. They are very thin but come with crappy instructions. 1ftw by 4ftL. They come with a flush mount kit. They use 40w each and are dimmable. I wish i had setup a seperate circuit to dim them when you want to run trains in the dark. Just need a little more paint and lights finished and carpet put down. 
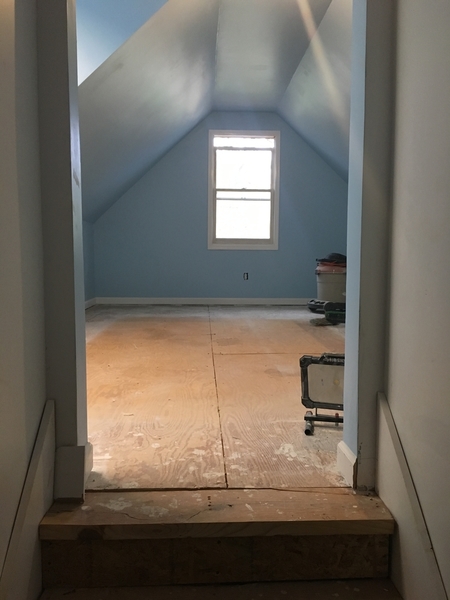


Attachments
It is looking great!!!
DL&W Pete posted:Southern4501 posted:mike g. posted:Looks like its going to be a merry Christmas!
It really has been. My wife surprised me with the polar express train as well as a M1 garand (circa 1953). I am spoiled.
M1 Garand
N I C E.......I have a circa 1944 still with the original wood stock my dad bought over 35+ years ago. It shoots like a dream then PING.......
Layout room is looking good.....
I picked up a Ruger pc9 for Christmas, I hope some day to own a garand. There is just something about owning a piece of WWII history, congrats!
Yes it is. I have been dreaming of owning one for awhile. Just like i have been dreaming of getting a AFT train in O. I have one in HO but its not the same.
Looking good! You will be putting up bench work in no time!![]()
Gilly@N&W posted:Oh how familiar that looks! I wish I had done the spray foam instead of the pink stuff. Looks like you have more headroom than me.
BTW I pulled a dedicated 20A circuit for the attic. More than enough for a 14x39 layout.
To span the stairwell, I used G Gauge Deck Girder Bridges from Garden Metal Products. The track is 5 rail GarGraves.
I'm one of the carpenters in our modular train club. It was natural for me to build a series of modules to go around the room. If you have the aptitude, you can buy a good power miter saw, Kreg Tool, lumber, and hardware for less than you'll spend for the factory built stuff. And in the end, you still have the tools!
Go with the biggest curves that will fit! On the far end of my layout I have 0120/0128/0138
BTW, decent lighting in the attic for photography is a bear. Good luck with that!

 Hey Gilly. Here is the lighting I am using. Each panel is 4k lumens. There are three panels. Two for the biggest area and one where the closet was going.
Attachments
Those are really nice looking lighting units. I have to get a lot more light in my dark paneled family room where the new layout is going.
Mark Boyce posted:Those are really nice looking lighting units. I have to get a lot more light in my dark paneled family room where the new layout is going.
I got them at lowes. They are for drop down ceilings but also have flush mount kits. They come in1x4, 2x4, and 2x2.
Thank you. I’ll take a look at them!
Jan posted:i think I set your room up in SCARM. The notch on the left is where the closet would be. The track crosses over the stairs with plenty of headroom as the layout is at least 3 ft above the attic floor. The track hugs the stairwell wall on a shelf about 12 inches wide. If you make the attic door open into the attic then it shouldn't be a problem. Just put a lift out section.
The track is O81 and O72 so you could run anything you want. I used Atlas track but you could use any other system. A turntable will take up a space that's 6 ft by 3 ft. so I don't think it would work in the corner.
I attacked the SCARM file. Just right click on it and click Save as... to put it on your computer.
Jan
Jan, I have the measurements now that they have finished the room except for carpet. I was looking at going out that left wall at the bottom before the stairs for a reversing loop as well. Also placing staging on the bottom while still keeping the two loops running through. I have the outside measurements as well for those areas.
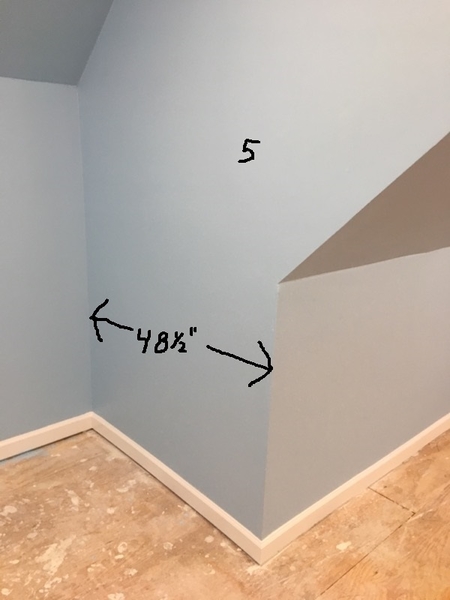
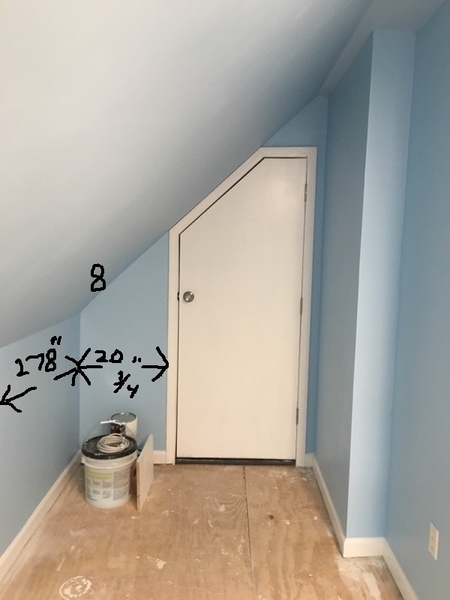
Here are the updated pictures with measurements to give an idea of the space i have available to get a better understanding from my first crude drawing lol. In the corner of picture 2 and 3 I want to try to build a mountain that resembles both mount crumpet ( the grinch movie) and the polar express movie. with a single helix layer climbing from the main table up around it and then onto a bridge back out into the main room for a island big enough to make a north pole area. So you see how much space i have. I like running trains but also would like some sidings as well. I am really thinking of going with two layers as well. I do need a dedicated run for my dads 223Eas well. It will be all winter scenes.
Attachments
I took a pass at drawing the plan from your photos but I think I need some more info to complete it. The dimensions with ?? need filling in! I've included a PDF if you download you can zoom in on the dimensions.
Attachments
Sothern, you sure got a nice room, and with a clean canvas almost anything is possible! I cant wait to see you start building! I know there is going to be a lot of planning so I can wait! How exciting!![]()
That’s a great space
atanz posted:
I went in and added the measurements that you had question marks on. When i did the first measurements on the door i only went to the outside of the trim. now the measurements are to the inside for both left and right. That is one heck of a drawing. My contractor did not even do it this well. I would take a guess at the wall thickness to be around 4 - 4.5 inches thick (stud and .5inch sheet rock on each side of it).
Thanks, Wayne
Attachments
I see that layout mainline shape looking something like this:
No sense invading access pathways or severely blocking the top of the stairs.
What are you thinking Southern?
The table height will low in the main area. 8" below lowest knee wall top of just below the window sill. It could decline into the window/low wall area and be at a higher level on the rest.
Attachments
Southern4501 posted:
Hope it's not too late, but some suggestions... Not only add more sockets, but be sure you have power available on multiple circuits (breakers). Also, put the lights on a separate circuit from the trains - if you trip a breaker, you still have lights.
I second MALLARDS suggestion. I put all my lights on one breaker, and put 12 outlets in my 12' x 24' train room. All the outlets are wired to a single light switch so when I leave the train room I throw the switch and everything in the room goes dead! I don't have to worry if I left something on!![]()
I also ran wire for track lighting for dimming so I can run train at night!![]()
The lights and outlets are on seperate breakers. There is an outlet every 4ft.
Southern4501 posted:The lights and outlets are on seperate breakers. There is an outlet every 4ft.
Great! Sounds like you really thought this out! Nice work!![]()
It has been a learning curve. I messed up with the lighting. I hope i can go back and seperate the stairwell lighting from the room. I didnt think that through for running trains with the lights off. 🙄 Install a clapper. 🤪
glad you thought of all the electrical requirements before the sheet rock ![]() now that all the messy work is finished, the fun part is next!
now that all the messy work is finished, the fun part is next!
i love drawing these plans, its a fun challenge, so i figured i'd give it a shot. i think i'm pretty close with this version, just the dimensions in red aren't working out with your photos. and i'm also still unsure whats going on behind the attic door! I've set the pdf up for 11"x17" paper size and the scale is 1/2"=1'-0" in case you want to print it out and take measurements.
I like the idea of keeping it simple as Moonman suggested, but I also like the idea of either hiding a main or reverse loop in the unfinished attic OR breaking through the wall by the attic door (to the right of wall 8), creating a shelf above the stair and popping back out at wall 3. that'd be cool.
anyway if you want to mark up the plan and let me know whats going on in the unfinished attic or if you figure out the couple of red dimensions I'd be glad to update.
Attachments
Well. I can not guarantee the room is completely square. It was framed when the house was built. I would have had to rip it all out but the measurements are extremely close. The attic behind the door is huge. It is where my hvac system is. So its a wide open space. I was going to use that space as the mainline return as well as a hidden staging area against the back of the stairs. Basically two mainlines will go through the wall on the right side above the recptical (#3 pic) over the stairs and into the attic and turn left towards the door. The two mains will come back in the room (#8 pic) to the left of the door and travel along the longest wall. The reverse loop would exit above the center of the hvac return (#4 pic) and come back in at the same point. You can see this in the picture that has the foam and ductwork in it. That space is roughly 70”x85”. It is larger but the rafters start right above and front of the hvac return.
I hope that helps some. I will try to draw it in paint from your and jans drawings.
Where the reverse loop is I measured from the stud next to the hvac return to the corner of the stairs on the outside. So I have roughly a 70" x 85" area to work with for that. I hope this drawing helps to get my idea across for outside the room. My biggest problem is I am having a hard time trying to figure out what to do past the the double mainlines that jan had drawn up. I have never had more than a 4x8 or around the room shelf layout. I am a visual person as well. So its hard for me to know what I can do in this space. I was thinking along the walls maximum of 36" deep tops for most of the layout. Probably 24" along wall #8 until it gets out into the main room. I have to keep in mind that at some point my hvac will have to be replaced so that is why we put in a 32" door. That area will have to be removable. Only the polar express will go to the north pole.
Attachments
That sure looks like a heck of a plan! I cant wait to watch you building it!![]()
That is one advantage of having an unfinished space to use for a layout. It is easy to wire as many lights, switches, outlets, and circuits as you want.
I had a bit of a hassle adding two LED track lights to the little room. Now that I have the larger family room, I have to figure out what to do before I get too far into the layout. I think I will bring up the problem on my topic I have a link to in my signature.
Southern4501 posted:Where the reverse loop is I measured from the stud next to the hvac return to the corner of the stairs on the outside. So I have roughly a 70" x 85" area to work with for that. I hope this drawing helps to get my idea across for outside the room. My biggest problem is I am having a hard time trying to figure out what to do past the the double mainlines that jan had drawn up. I have never had more than a 4x8 or around the room shelf layout. I am a visual person as well. So its hard for me to know what I can do in this space. I was thinking along the walls maximum of 36" deep tops for most of the layout. Probably 24" along wall #8 until it gets out into the main room. I have to keep in mind that at some point my hvac will have to be replaced so that is why we put in a 32" door. That area will have to be removable. Only the polar express will go to the north pole.
Okay, that gives a good idea of what you're looking to do with the space, but I've got a few concerns.
Not to nitpick, but your measurements still don't add up. The area by the door add up to 62.25" (25.5+32+4.75). Add the 7.5" bump, the 47" stairway and the 81" left side of the nook, you get a total of 197.75. However, the right side of the nook is 48.5" and the right side wall is 148". That adds up to only 196.5". Probably won't matter, just thought I'd point it out.
If the Polar Express is the ONLY train that will go to the North Pole, that makes that reversing loop useless for the rest of the layout the remaining loop is not enough,you need 2 in opposite directions.
If you block the hallway to the AC until, you also block access to the reversing loop. If you need to fix a derailment or something, you'll need to crawl under the storage tracks you plan to put in the hallway. It's one thing to make those tracks removable for access to the AC unit, but quite another for what could be every day access. I also think you'll need access to the AC unit more often than just replacing it in 12 years or so.
Have you given any thought to the brand of track you intend to use? Chances are someone will use SCARM or AnyRail to help with design and choice of track might make a difference. I assume you're going to want O72 minimum curves, so here's a rendition to show what kid of space those size curves require. It's one thing to draw ideas, but quite another to actually make the track fit. ![]() As you can see, storage for 5 full trains in the hallway is iffy at best, unless you want to back in or out with just one entry point. The reversing loop is also going to be problematic. O72 curves need upwards of 80" in width.
As you can see, storage for 5 full trains in the hallway is iffy at best, unless you want to back in or out with just one entry point. The reversing loop is also going to be problematic. O72 curves need upwards of 80" in width.
Attachments
Hey dave thanks for looking at this. I was going to build a liftout at the door to access the sidings and reverse loop. The attic is wide open. It really isnt a hallway. I have a pathway built now that i walk on where the sidings would be and also one for the hvac. It is very easy to get to. I can take a better picture. Im not sure why the room doesnt jive as far as the measurements. I didnt frame it. I will check them again. I dont have any locos that need curves above 054. My bigboy is the kline version. So outside of the main room can be smaller a smaller radius. Inside can be whatever that would make it fun for the kids. It is for me but I want to be able to share this with the neighbors and others to get kids in the hobby. The hidden sidings can be just for engine storage if needed. The single helix around the mountain can be a smaller radius too because the polar runs on 036 but that would probably be too steep. I am really not sure what all i can fit in the main space as an around the room. I will most likely be using gargraves to cut down on cost.
Thanks
I said "hallway" because the last photo shows it being 35" wide and 16' long. Those last 2 photos show insulation and open floors, so I assume those will be finished at some point, but 35" doesn't leave much room for the track and yard on the left side of the diagram. Not that the space can;t be used, just maybe nor exactly the way drawn. ![]()
Yeah its more of a pathway. Where the 35” is a verticle post. I can go wider but it would have to go around that post. Right now everything is piled up in the storage area because of waiting on carpet for me to get better pictures.
I was just trying to figure out how to have a dissappearing double main and maybe a siding or two outside the main room. I loved the idea of going out of the room and over the stairwell.
DoubleDAZ posted:Southern4501 posted:Where the reverse loop is I measured from the stud next to the hvac return to the corner of the stairs on the outside. So I have roughly a 70" x 85" area to work with for that. I hope this drawing helps to get my idea across for outside the room. My biggest problem is I am having a hard time trying to figure out what to do past the the double mainlines that jan had drawn up. I have never had more than a 4x8 or around the room shelf layout. I am a visual person as well. So its hard for me to know what I can do in this space. I was thinking along the walls maximum of 36" deep tops for most of the layout. Probably 24" along wall #8 until it gets out into the main room. I have to keep in mind that at some point my hvac will have to be replaced so that is why we put in a 32" door. That area will have to be removable. Only the polar express will go to the north pole.
Okay, that gives a good idea of what you're looking to do with the space, but I've got a few concerns.
Not to nitpick, but your measurements still don't add up. The area by the door add up to 62.25" (25.5+32+4.75). Add the 7.5" bump, the 47" stairway and the 81" left side of the nook, you get a total of 197.75. However, the right side of the nook is 48.5" and the right side wall is 148". That adds up to only 196.5". Probably won't matter, just thought I'd point it out.
If the Polar Express is the ONLY train that will go to the North Pole, that makes that reversing loop useless for the rest of the layout the remaining loop is not enough,you need 2 in opposite directions.
If you block the hallway to the AC until, you also block access to the reversing loop. If you need to fix a derailment or something, you'll need to crawl under the storage tracks you plan to put in the hallway. It's one thing to make those tracks removable for access to the AC unit, but quite another for what could be every day access. I also think you'll need access to the AC unit more often than just replacing it in 12 years or so.
Have you given any thought to the brand of track you intend to use? Chances are someone will use SCARM or AnyRail to help with design and choice of track might make a difference. I assume you're going to want O72 minimum curves, so here's a rendition to show what kid of space those size curves require. It's one thing to draw ideas, but quite another to actually make the track fit.
As you can see, storage for 5 full trains in the hallway is iffy at best, unless you want to back in or out with just one entry point. The reversing loop is also going to be problematic. O72 curves need upwards of 80" in width.
Do i need to get measurements of the inside of the stairwell and that might help with the skewed measurements?
Southern4501 posted:Do i need to get measurements of the inside of the stairwell and that might help with the skewed measurements?
Not at all. I believe you've already said the inside of the doorway was 31" and the stairway was 37", but it's the outside where the benchwork will go that matters and you have that at 47". The problem is that the 25.5" short wall to the left of the door, the 32" of the door, then the 4.25" of that little wall to the right of the door add up to 62.25". When you add that to the 7.5" of that small bump-in, the 47" of the stairway and the 81" of the side wall of the nook, it comes to 197.75 where as the 48.5" of the right side of the nook and the 148" (my diagram shows 137) of the right wall add up to 196.5. Granted, it's only 1.25" and the walls might just be off that much. Like I said, it probably won't matter much, but when you start cutting plywood for decking, it would be nice to know if the wall is straight or not. If the left end is deeper than the right, the doorway wall might not be 90° either. One way to check is to simply measure from the bottom wall to the top wall of the nook just in front of the stairway.
Attachments
I measured what you asked about in the red and its 196.5 I am thinking the opening is not square, it might be spread open a smidge. Im gonna get my framing square up there and see if it is that.
Okay, had some time today, so I fiddled with some of what you drew and said you wanted. Mind you, I make no judgement about the design ![]() , it's intended only to show what you're up against. I'm also not including the SCARM file because I don't want folks to get bogged down trying to make suggestions based on a design I don't think is going to work as drawn.
, it's intended only to show what you're up against. I'm also not including the SCARM file because I don't want folks to get bogged down trying to make suggestions based on a design I don't think is going to work as drawn.
That said, I used mostly GarGraves O54 curves, Ross 11° switches off the mainline as well as in the storage yard and Ross O54 switches in the reversing loops. Obviously, things will change using different brands of track, mostly the switches. I raised the track leading to the "helix" to 2" and then the helix goes up to 8" for the Polar Express "mountain". You can add more rings to the helix to go higher. I changed the yard to a storage yard rather then a through yard to provide maximum capacity. The green represents 30" deep decking. I had to change the direction of one of the reversing loops at the last minute, but didn't take the time to realign the tracks close to the wall by the stairway. Hopefully it all makes sense to you. ![]()
Attachments
Southern4501 posted:I measured what you asked about in the red and its 196.5 I am thinking the opening is not square, it might be spread open a smidge. Im gonna get my framing square up there and see if it is that.
Okay, thanks. At least now we know that the overall width matches on both the right and left. You should be able to deal with any out of square now that you know there might be some. It's not at all unusual, so don't stress about it. ![]()
DoubleDAZ posted:Okay, had some time today, so I fiddled with some of what you drew and said you wanted. Mind you, I make no judgement about the design
, it's intended only to show what you're up against. I'm also not including the SCARM file because I don't want folks to get bogged down trying to make suggestions based on a design I don't think is going to work as drawn.
That said, I used mostly GarGraves O54 curves, Ross 11° switches off the mainline as well as in the storage yard and Ross O54 switches in the reversing loops. Obviously, things will change using different brands of track, mostly the switches. I raised the track leading to the "helix" to 2" and then the helix goes up to 8" for the Polar Express "mountain". You can add more rings to the helix to go higher. I changed the yard to a storage yard rather then a through yard to provide maximum capacity. The green represents 30" deep decking. I had to change the direction of one of the reversing loops at the last minute, but didn't take the time to realign the tracks close to the wall by the stairway. Hopefully it all makes sense to you.
Yep an eye opener. I think the helix is definately not gonna work. Keep the mountain maybe but fit it in the corner like a quarter of the pie. There will be no walkway to that back corner if i install the helix and mountain. Maybe change the north pole loop to 048 or even 036 so there is room for some scenery and shortened for walk around clearence. Can the hidden reverse loop be flipped the other way? Can the main be a double? Say outside be 054 and inside be 048. Thanks for your help. I am open to all suggestions and help for sure.
I’ll see what I can do, but it might be awhile.
No problem there. Take your time. Im really thinking about dropping the north pole loop all together considering how much space it will eat up. I want to be able to run trains and be able to have people up there. That north pole loop takes up alot of room.
Thanks again Dave.
Okay, I need to stop. I believe I asked earlier, but never saw an answer or I may have missed it, but since you seem to want to expand on this design I need to know what track you plan to use.
You've mentioned O54 curves in the past, but just now you mentioned using O48 curves for the North Pole loop. That suggests you plan on using FasTrack since I believe it's the only brand that has O48 curves. If that's the case, it makes a big difference to the design software I use.
If you are going to use FasTrack, the outer main will have to be changed to O60 if you want to run anything that requires O54 or wider curves. The same applies to the reversing loops. All the switches will have to be changed and that will affect the loops and storage yard. It's not a big deal, but I'm not going to spend any more time changing things until I know what track library to use.
also just be aware the space where the reverse loop is drawn also needs to be double checked for size. i'm not sure how that works back there.
DoubleDAZ posted:Okay, I need to stop. I believe I asked earlier, but never saw an answer or I may have missed it, but since you seem to want to expand on this design I need to know what track you plan to use.
You've mentioned O54 curves in the past, but just now you mentioned using O48 curves for the North Pole loop. That suggests you plan on using FasTrack since I believe it's the only brand that has O48 curves. If that's the case, it makes a big difference to the design software I use.
If you are going to use FasTrack, the outer main will have to be changed to O60 if you want to run anything that requires O54 or wider curves. The same applies to the reversing loops. All the switches will have to be changed and that will affect the loops and storage yard. It's not a big deal, but I'm not going to spend any more time changing things until I know what track library to use.
Sorry about that Dave. I had put in there to use gargraves track when I was looking at the menu in scarm and I had atlas pulled up too. Its my fault.
I dont want to waist your time for sure or anyone elses. I am going to stick with atlas to get the tighter curves. I didnt realize what I was doing or up against trying something new. When the carpet is finished tuesday I am going to go up and lay down some painters tape on the floor to line out the bench work at 30” and 36” depths to see what will be left for walk around room.
Thanks Wayne
No problem Wayne, just couldn’t go any further until I knew what track to use. FWIW, I won’t mind it if you change your mind after you see what can be done with Atlas. GarGraves is the easiest to cut and their flex track is easiest to bend. You just confused me with the O48. I have some errands to run in a bit, but I’ll work on it after that. Since you have SCARM, I’ll post the file too so you can play with it. Let us know where you plan to use 30” and 36” depths.
Okay, finally got our errands done and was able to put this together using Atlas O45 for the inner run, O54 for the outer run, hidden loop and Polar Express loop, and O72 for the yard.
The purple tracks are the grades up to the Polar Express loop that has an 8" elevation. The biggest problem with the Polar Express loop is access the the hidden tracks, so I would make a removable mountain using rigid foam.
The red track in the crossover is a cut track because no combination would fit exactly. However, you might be able to use smaller pieces (10", 10", 4.5" & 1.75") if there's enough give in the track when connected.
To download the SCARM file, simply right-click on the filename and select Save File As or Save Link As, something to that effect.
Attachments
I think that is a nice plan around the walls, Dave. Southern4501, are you looking to just go around the walls or add a peninsula in the middle with a big 054 curve on the end?
I want to back up to the walls not being square. Since you had an agreement with the contractor, you can take it up with him as far as a discount, but I don’t see it as a problem with layout design. You will be able to make adjustments as you build. Just allow some space between the track closest to the wall and the wall.
Well I dont know if the grades will fit on the walls because of the roof starting to climb. I was planning on building the main 8” below the the roof climb for scenery. Im trying to figure out how to plan the north pole loop which seems to be taking up alot of room. Mark, I think your idea of the peninsula for the north pole might work better. Not sure.
I can work on that tomorrow, I forgot about the ceiling being low on the sides. I’ll see if a peninsula will fit.
No problem Dave. I saw it started climbing in the attic too and thought it would look goofy with two different height tunnels and I know I dont have room for that anyways. The expense of switches in that yard for not being able to run through them has got me thinking as well. I shortened them up a bit to get away from the door. I can always add them later. I was trying to save as much floor as I could for other things on the layout. With the way its looking right now it will only be two trains running at the same time. Im starting to watch the scarm tutorials.
Attachments
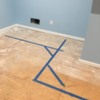
Went upstairs and taped off the table depths on five walls at 36” except for the 48.5” wall. Its depth is 24” unless the curves say more is needed. I dont think a peninsula will work coming from the wall with the window from the inner loop. I also cant reach the window from 36”. Stubby arms 😜. 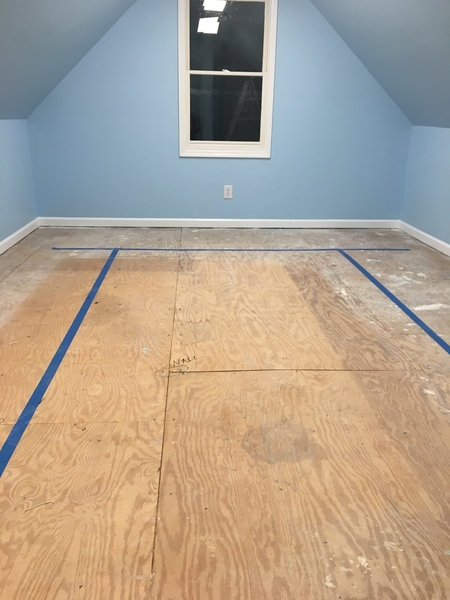

Attachments
Here's an Atlas 4 Way throat for a run through yard -
3 Wyes on each end
Having that or the cross-over and yard behind the wall will require a camera for operations or a bunch of location sensors.
Think that through when designing stuff for behind the wall.
Attachments
30" tables leave plenty for scenic items and buildings. 24" even works. 36" is only needed for a siding or to handle an area that where the track needs it. Like, the font where the roof slope is steepest. That will require at least 6" from the wall as the closet a track can be to permit clearance for engines and high cars. That leaves 30" for the track and scenery.
Try 30" on the sloped wall walls and 24" on the straight walls.
Here's a variation minimizing hidden track. The Polar Express loop uses O54 curves and O72 wyes. It can be done with O45 curves to get a little more aisle space, but then you wouldn't be able to run all your engines through it. The yard uses #5 switches. All tracks are at 0" elevation.
Happy Birthday Elvis! ![]()
Attachments
Southern4501 posted:I am trying to figure out Scarm or is there a easier track planner out there?
i played with scarm for a few days, then i played with xtrkcad for a few days. i liked xtrkcad better, but now i can't remember why. both are free, and either will do fine, but both have a learning curve and some time required before things are easy ![]()
Not sure why you like XTrackCAD better, unless they've improved it since the last time I used it. Each software package had is pros and cons. The big advantages to SCARM are that many folks here use it (probably because the beta was free for a long time) and it has a more realistic 3D simulation. AnyRail is probably the easiest for new folks to learn, but it had a lot of errors early on. It certainly does a better job with landscaping than the others, check Ken_OSCALE's designs.
DoubleDAZ posted:Here's a variation minimizing hidden track. The Polar Express loop uses O54 curves and O72 wyes. It can be done with O45 curves to get a little more aisle space, but then you wouldn't be able to run all your engines through it. The yard uses #5 switches. All tracks are at 0" elevation.
And the corner curves can probably be increased to O63/O72, though that really only affects the visual for engines with a lot of overhang. The Polar Express and hidden revering loop still need to be O54 or tighter, so that still limits the size engines you can run.
Carpet is in 🤩🤩. Carpet central here i come.
Attachments
The carpet looks great! I didn’t think of the window when I mentioned a peninsula. I understand completely having lived in two houses with sloping ceilings, one with an attic like yours, the other a cape cod with the bedrooms in the similar sloped ceiling space. I like the basic plan without the peninsula.
Looks great! Nice comfy and a perfect place to lose little screws and such! Lol I have berber in my train room and lose stuff all the time! Lol
I don't like the peninsula with or without the window, just fooling around. I didn't like the shrunken yard, not enough storage to justify the cost of switches and track. Still trying to figure out a way to make a single revering loop work.
Hey Dave. Can we try something like this but make it 054 and larger for the two mains. I forgot my Southern 4501 is min 048. I am sorry about that. I am so used to seeing 048 because of Fasttrack. That is my fault. Everything else can run on 036. After seeing the reverse loop for the North Pole I agree. Also I am still trying to figure out spacing between tracks for bridges. I have a Atlas double truss so I am trying to figure out how to get it in front of the window. I made the outer loop go through a different tunnel to change the timing of the trains running as they meet each other. I am guessing it will just be a around the room with some sidings and bump outs for other scenery. Im still having problems trying to figure out how to get some of the curves and straights to fit.
Attachments
Thought I'd try some variations:
I left all elevations at 0".
The Hidden Loop layer can be turned off by unchecking the box (I don't like it ![]() ). It is not connected to the main track.
). It is not connected to the main track.
Both loops are full reversing using a wye, so only one is needed.
The hidden loop doesn't really fit well. The original could be used there instead (I don't really like that one either ![]() ) and the one on the peninsula could be used without the wye (just the straight leg going down from the top).
) and the one on the peninsula could be used without the wye (just the straight leg going down from the top).
I added some hidden passing sidings rather than a "too small" hidden yard as an alternative to or in addition to the main yard.
The peninsula has approximately 24" wide aisles. Both loops use O54 curves and switches. I believe the curves for the inner main could be changed to O54 even if the curves might not be totally concentric as a result. Then all your engines could run on all tracks.
I didn't know what you planned to do with the nook, so I just added a couple of spurs.
Attachments
Southern4501 posted:Hey Dave. Can we try something like this but make it 054 and larger for the two mains.
I will work on changing my latest version using all O54 and adjusting the hidden main like your example, then you can delete what you don't like.
There is a thread with the dimensions of the Atlas truss double track bridge. I do know that it is based on 4" centers like most of the Atlas track geometry.
It is 40" long to work the valley spacing.
You can adjust the length of two straights in red to create the 4' center rail spacing to accommodate the bridge. See attached. The spacing now is ~ 5.21 or 5 1/4"
Attachments
Here goes. I left a lot of the recent changes in, so just let me know which ones you are not interested in pursuing. That way I can delete them and forget about them
All curves/switches are now O54 or wider. Be advised, there are quite a few cut tracks, so if you don't want to cut tracks, let me know that too. I will also replace the 10" tracks with 40" tracks, but I don't like doing that until we get closer to a final design.
Attachments
Dang, I wish you would have mentioned the bridge at the outset. Like Carl said though, it shouldn't be too much of a problem to adjust a section to 4" spacing wherever you want to put the bridge. The best location is somewhere along the all with the window, unless you decide to delete the yard or move the crossover. Most of the spacing now is based on the crossover. And don't forget the curves in the corners can probably be increased in size too since there are no reversing loops there to deal with anymore.
I am sorry about not mentioning the bridge. The first one we did was an incline and then the third one had the island coming off the middle. Seeing both of those and getting rid of them allowed for the bridge. I like the last two and trying to figure out how to best get them both to work. I like the two mains splitting up better then the reverse crossover loops.
Thanks again. I really do appreciate yours and everyone else's opinions and help.
Suffice it to say we can accommodate the bridge, so let us what you still want and what you want to delete.
Quick question about the north pole reverse loop. Since only the Polar Express is going to use that loop can it be downsized to 036 for more isle clearance? I was thinking making the deck to fit 045ish to circle the loop with buildings and the tree in the middle like the movie. I shortened the main yard some also to make room for going in and out the door.
Attachments
Southern4501 posted:Quick question about the north pole reverse loop. Since only the Polar Express is going to use that loop can it be downsized to 036 for more isle clearance? I was thinking making the deck to fit 045ish to circle the loop with buildings and the tree in the middle like the movie. I shortened the main yard some also to make room for going in and out the door.
Sure. I just want you to understand that if you do that, the rest of your trains will not be able to reverse directions, they'll just go round and round in the same direction. Not a problem as long as you're okay with it. Of course, with the yard and hidden passing sidings, you can always have trains set up for going in opposite directions to give you some variety.
Here you go. Don't forget there are some cut tracks in there. This photo doesn't show it, but I also swapped in the 40" tracks (see 2nd photo). I'd also like to point out the 1 problem I see, the slight "S" curve where the curve comes done to meet the Wye for the Polar Express run. I tried adding a 5.5" piece, but it throws off the geometry around the crossover. I still need to work in the bridge along the right side wall and I'll do that after I get some breakfast. ![]()
This photo shows what the curves would look like (in Red) if you changed to O72 for the outer run and O63 for the inner run. The Wye can't be changed though without some major surgery.
Attachments
Moonman posted:There is a thread with the dimensions of the Atlas truss double track bridge. I do know that it is based on 4" centers like most of the Atlas track geometry.
Carl, when I measure the center-to-center spacing in the RR-Track version of the bridge, it measures 4.5". I thought that was the standard Atlas spacing and I believe that's what Mike G's bridge is.
Southern, can you measure the center rails and let me know if they are 4.5" apart?
Yes sir, it is 4.5”.
Thanks.I just emailed Carl, didn't think you'd respond this quickly. ![]()
DoubleDAZ posted:Southern4501 posted:Quick question about the north pole reverse loop. Since only the Polar Express is going to use that loop can it be downsized to 036 for more isle clearance? I was thinking making the deck to fit 045ish to circle the loop with buildings and the tree in the middle like the movie. I shortened the main yard some also to make room for going in and out the door.
Sure. I just want you to understand that if you do that, the rest of your trains will not be able to reverse directions, they'll just go round and round in the same direction. Not a problem as long as you're okay with it. Of course, with the yard and hidden passing sidings, you can always have trains set up for going in opposite directions to give you some variety.
The only engine I have that requires larger curves is the 4501. Everything else is 036. You were saying you saw 1 problem with the polar wye. What about putting the crossover over at the yard? Will that help? I had thought about one of the first drawings and coming off the corner of the entry to the room but i didnt think the train could be reversed.
The crossover itself isn’t really the problem, but it can go anywhere and by the yard might work better overall. The idea behind the wye and polar loop was so all trains could be reversed with a single loop and they could then go in either direction around either main. This is more for variety because you can certainly run trains in opposite directions to have them pass each other up. I’ll fiddle with the wye and bridge as soon as Windows is finished updating.
I understand. I was trying to fit in what I can where I can and work with the space. I have to keep remembering that space is limited with oguage.
Did you like the larger curves or do you want to keep the O54? Are you okay with the spacing or would you like most of it to match the bridge? Are you okay with cutting track to fit? Where cuts are needed, I generally try to fill in as many smaller tracks as I can to reduce the number of joints.
Making the bridge fit at the window. I like the uneven spacing at other areas for scenery stuff. If its all the same spacing I think it will look square. Question about the tunnel entrances, can the track be curved at the entrances. When I am looking at them am I seeing that correctly with the larger curves?
DoubleDAZ posted:Moonman posted:There is a thread with the dimensions of the Atlas truss double track bridge. I do know that it is based on 4" centers like most of the Atlas track geometry.
Carl, when I measure the center-to-center spacing in the RR-Track version of the bridge, it measures 4.5". I thought that was the standard Atlas spacing and I believe that's what Mike G's bridge is.
Southern, can you measure the center rails and let me know if they are 4.5" apart?
Dave, YOU ARE CORRECT! IT IS 4.5"
SORRY FOR THE TYPO ERROR.
I see that Southern confirmed it for you.
I have been busy away from the computer.
Yes, you are seeing the tunnels correctly. It's up to you how you make them. Many folks use rigid foam with some kind of portal at the entrance, either bought or handmade. The only thing you have to worry about is making sure there is clearance. The tunnel doesn't have to begin/end at the wall itself, you just have to place the portal at an angle on the curve so the train is moving perpendicular to it and then fill in to the wall opening with foam or some other material. Photo 1 shows what I mean. In the meantime, photo 2 is my latest rendition with the bridge. Notice I changed the room to a polygon and redid the baseboard to go around the track. You will need to turn off some of the layers (like Room, Tunnels, etc.,) to make it easier to change things. For some reason I had to manually add tunnels because they weren't rendering right in 3D.
Attachments
Looks awesome. Thank you again. I think I need to shorten the hidden sidings a smidge to make room to get through the doorway but i like it so far.
No problem, let me know if you want the wider curves or not. Don’t get too hung up on the hidden sidings, I just threw them in because I wasn’t sure about the storage yard. I’m still having a hard time envisioning how access to that area is going to work and how you’re going to make it removable, but the important thing is you know. ![]()
I am looking at doing a lift out when the curves stop and the straights start.
Then you sure won't want the wider curves in that area.
Where is the turntable & round house going?![]()
Attachments
And here's another version with longer sidings and a different upper tunnel configuration. And with that I'm done for awhile. ![]()
Attachments
Southern,
I have been thinking about the design and wondering why small radius are used. I get it for the wye fitment, but the rest can either #5 one O72. For a crossover, two #5 create a 4.5" center naturally. Using them for the passing sidings behind the wall need a 5.5" and O72 half curve to bring it to parallel.
O72 for the yard doesn't take up much more space.
The cost of the switch is the relatively the same. #5's and O72's are smoother and handle any loco. Also, the passing sidings and the yard installation could be at later date to defer the expense of all of those switches.
if you get settled on plan, I would refit it as I am suggesting to demonstrate. I think that you are close.
Also remember, that the tables are currently larger than needed, so, there more aisle space for the current plan.
Carl, I used #5s in 1 early version, not sure why I went to O72s. I also offered a version with O63 and O72 curves, something he never said yay or nay to. I’ll have to look back, but I believe the #5s shortened all the storage tracks. The file has the wider curves in the Alternate layer.
Here it is with the #5 switches, except for the crossover. The Red tracks are what O63 and O72 curves would look like. He's already concerned about door access in the lower left and wider curves only make it worse, though I haven't looked deeper at that because I'm not sure exactly where he wants the lift-out in that area. On the left side, I don't know how to make the siding parallel other than using a half O72 curve. Without the straight pieces, I believe the siding is too close to the main. The same is true for the first yard track, but I didn't fiddle with it because I wasn't happy with how short the yard tracks are. I get preferring numbered switches, but I don't like how that configuration looks unless I lose the top track and then we lose a lot of storage. I had planned on redoing the crossover with #5s and then realigning all the others for 4.5" centers today, just haven't gotten there yet as we have been working on the overall design and just added the bridge.
Attachments
Southern4501 posted:Question about the tunnel entrances, can the track be curved at the entrances. When I am looking at them am I seeing that correctly with the larger curves?
BTW, I added tunnels in the lower left, but now I'm thinking you might not be overly concerned with how the hidden part of the layout is going to look and won't be doing much landscaping of that area. If it were me, I'd put a fairly large slot through the wall wide enough for both sets of tracks. Then I'd cover the slot in the main room with tunnel entrances, either 2 singles or a double, and leave the backside open for access.
Also, there's no reason your lift-out can't contain part of the curves, you just have to cut the track wherever you want the lift-out. You also need to make sure you have a good alignment system, metal pins, etc., for when you put the lift-out back in place.
The crossovers need them - I get that they shorten the yard spurs and storage - but O72 works as it is the same divergence curve arc. I just think that someday the layout will change and better to have the larger turnouts .
I think on the passing /storage sidings one wouldn't want to limit a large loco with a small switch
The #5's on the crossovers near the yard would set the double mainline to 4.5" for the bridge by default.
Southern, I think I see something I didn't before. I took another look at your photos and I’m assuming this is the photo of the section where the passing sidings are. If I'm correct, there’s the door at the top left (bottom left in the design) and the HVAC is to the right. That’s why you want the lift-out there so you can get stuff in/out of the HVAC area on the right. I initially thought that was where the reversing loop area was, but I see now how it’s oriented with the large area to the bottom left and not shown. You told me once you had access along the right side, so the passing sidings can take up the entire space. I see now what you were talking about and I can actually play with the entire space between the piping and the stud. I don’t think any of that area is going to be finished and the photo of the loop area shows it’s all sprayed in insulation, so I’m not sure you want to put too much back there. Am I seeing it correctly now?
Attachments
Yes sir. You are correct. Looking at that photo the door to the attic is in front of me and to the left. To my immediate right is the hvac. To the left is the stairs access and behind me to the left was the reversing loop. Now that the room is finished I have to go through all the stored stuff and get rid of junk from the move to the house. I will then be able to take better pictures and get a better idea of space. I might even be able to go around the hvac and come back in just with a bigger loop of track. That way there is no need for a liftout. Right now i like the inside plans for sure. The attic would be a temporary section run until i get it all cleared out. I am not too worried about those sidings.
Moonman posted:The crossovers need them - I get that they shorten the yard spurs and storage - but O72 works as it is the same divergence curve arc. I just think that someday the layout will change and better to have the larger turnouts .
I think on the passing /storage sidings one wouldn't want to limit a large loco with a small switch
The #5's on the crossovers near the yard would set the double mainline to 4.5" for the bridge by default.
Thats why I appreciate everyones ideas. Im hoping to get the attic cleanout done while I am out of work. Hopefully I will get released to back on the 23rd of this month. I am giving all my HO stuff to my best friend so that will free up alot of room. He said can you imagine the room in HO. I have to start sticking with only one scale. I have too much invested in O and I like all the bells and whistles.
Well, here's yet another version taking into account Carl's comments (#5 switches and O63/O72 curves), my new understanding of the space and your comment about not really liking all parallel tracks (upper right). If you can go around the HVAC, fine, but the lift-out is not really as a big a deal as it sounds. And if you decide not to use the passing sidings, that's fine too, every switch adds to the cost. At any rate, I'm done now until you ask for more changes/ideas. ![]()
BTW, those extra spur tracks in the yard are for engine storage; 1 on the left, 2 on the right.
Attachments
Okay now that there is a general track plan, my next question is gonna be frame work. Per my wife’s orders I wont be able to attach it to the walls. Tunnels are the only holes I can make lol. That being said what does the general frame work need to be made from?
The plan looks good, like you say general plan. They just about all chandelier while building.
Benchwork! You will find lots of opinions, but I think it comes down to two camps, but a custom kit offered by several reputable sources or go to the lumber yard and build your own. I have always built my own even though I have limited skills and tools, but this time I have ordered a kit off the shelf from Mianne, but will build my own section that I can roll from the wall that I don’t even know how to tell a custom builder what to do. I found the kits can be relatively inexpensive, but when you get into custom design it can get into some cost with someone else.
So tell us if you are handy with basic wood tools and construction and then we can know better how to help.
I forgot about that. Yes I have alot of tools to do the frame work. I will be building it myself.
I'm going to throw out a few more questions to see what you are thinking and what background you have.
What background do you have in layout benchwork building?
Do you mind attaching the benchwork to walls for support hopefully eliminating some legs, or would you rather keep everything freestanding so you don't mess up the pretty walls?
Are you going to want any track to follow any grades up and down?
Do you want to totally cover the top with plywood like a table top, or do you want to leave an open grid which can make for easier wiring and putting scenery below track levels?
That's a start. I hope this get s some conversation going with others. Once you get a few people following, then the ideas just start poring in on this Forum.
It will have to be free standing. I am not allowed to put a bunch of holes in the wall. It would be nice to not have so many legs. As far as grades go I wont be able to do that because of the sloping ceiling. Where I am at now is framing for the benchwork.
To get the conversation moving, here's some initial ideas for framing and leg placement. As you can see, this favors building in modules that can be bolted together and then topped with decking that will have some overhang in various areas. Note that I indented the legs along the walls to account for the carpeting tack strips, assuming they were used. And speaking of carpeting, have you given any thought to the legs leaving pretty much permanent indentations in the carpet?
Attachments
I agree with Dave on building modules you can unbolt and move around or out if you have to move to another home. So it sounds like you would do well to make a bunch of various sized tables with 1x3s or 1x4s then cover each with plywood or OSB. Then put legs with angled cross braces where Dave shows, and you would be ready to lay some roadbed and track.
Well I was thinking modules. Easier to handle. What about stringers in the modules. Every 16” on center? 2x2 legs?
I put mine at 16" centers. Some people put them farther apart, but that is if they are using a thick plywood top. I have used 2x2s for legs. Some folks have made "L" shaped legs using a 1x3 and a 1x2 saying they are more stable. I think either is good.
Food for thought, no endorsement either way:
An alternative to using 1x3s or 1x4s (which are never straight) is to rip 3/4" plywood into 3"-4" strips to use for framing. You can also glue/screw them together to form an "L" for legs and attach them to the corners of the framing using cleats (yellow/orange in 1st photo). That way all the weight rests on the legs and not on screws. Unfortunately, this would leave "L" shaped indents in the carpet.
Also. if you use 3/4" plywood for the decking and shrink the modules so there is 6" overhang along the front, those legs will be out of your way as you walk around.
An alternative to cross-bracing, etc., is to simply add rails 12" or so off the floor for shelves.
I forgot to consider the bridge. That area needs to be configured so the section below the bridge can be lowered (2nd photo).
Attachments
Nice drawing of that Dave. Yes I agree 1 by whatevers never seem to be straight.
I'd take the time to do the L, One piece legs just warp too easy unless its carefully prepared and chosen
You can add a square or V piece of wood for a pad under an L leg. It will help wrap even more as that end is the weakest place on the desgn.
Cut extra and halve those into Vs added mid height if the wood might be under-dried and warp prone.
The L-s are much less likely to warp over time than a 2x2 as each board width keeps the other board from being able to warp. The seperate grainings at the joint add strength too; so if you can visually oppose grains during selection, do it.
. The widths give more more natural crossbrace at the upper corners and the thinness makes lower crossbracing easier and can help prevent leg twist.
Glue is a huge joint boost, but not really "needed" unless you go to 1/2"x 4 imo.
A few of the 40yr old 2x2s used for mid layout support have lifted their footings from warp. They hang free now. With an L, the widths also add much more length sooner as the leg goes out of plumb; loosing footing further from plumb than the 2x2s
You might say Im partial
Mark Boyce posted:Nice drawing of that Dave.
Thanks. Here's a little different rendition with triangular-shaped cleats for added lateral support and with the floor protection piece Adriatic mentioned. I intend to add wheels to the floor protectors when I build my 4x8x12 "L" for the craft room this summer. That way I can roll the whole layout away from the corner when I need to work on it.
I haven't decided yet if I'm going to add shelving, but I'll probably add rails along the back and sides. Then I'll add some roll-out carts to store the empty boxes from the trains, buildings, etc. That way I'll be able to easily clear the underside when I need to repair wiring, etc.
On a side note, my framing is going to have an overhang along the front and sides to keep the legs out of the way.
Attachments
Gotcha. I dont have a table saw as of yet. I will have to haul all of the decking over to my dads. My first plan is to figure out the decking and when I rip it down to widths use the leftovers for the legs. Thanks Dave for the drawings of the legs. I like the idea of setting them in a little for clearence. I will take my time. Along the walls are 1/2” trim and also carpet tack strips. I plan on making the tables in 4ft sections so I can get it all upstairs without tearing up the walls and paint. The object is to stay out of the doghouse.
On a side note we hung some of the artwork and pictures I have. The water color of the General is from a friend of my moms John Haber. 
Attachments
I'm not trying to push ripping sheets of plywood, just passing along a technique some use. The same with the leg methodology. I've only used inexpensive 1x3s/2x4s from HD or Lowe's and found both to be very uneven. Even the poplar 1x4s I've looked at were very uneven.
Anyway, here's a couple of more renditions of both the layout and modules.
The 1st photo shows the layout a possible configuration of 18"x48" and 24"x48" modules. As you can imagine, this would then be covered with plywood decking that would be cut to shape. Module options are in the upper right. Obviously, some custom sized modules would be needed in places and could be used in other places to fit everything evenly.
The 2nd photo shows a 3D view of the layout with track height set at 36", note the modules peeking through.
The 3rd photo shows versions of the modules with extensions:
The lower module is 18"x48". It includes the full set of legs complete with cleats, etc. One set of legs for the extension doesn't have the cleats because the leg would be sandwiched with the full leg on the main module.
The middle module is 24"x48". It includes the cleats on one end, but no leg on the other because the end frame rails would be attached to each other.
The upper module is also 24"x48", but could easily be trimmed to 18"x48". It has no cleats because the legs are full height and attached inside the framing. Truth be told, that's probably all you really need, especially if you add the optional shelving.
I've included the layout file as well as the module file so you can take a closer look at just the modules if you want.
Attachments
Southern, Those are all very nice looking pictures! They look great going down the staircase!!
Dave, That is some nice work on the module suggestions!!!
Thanks, Mark, Just wanted to show it's possible to cover most of the layout with just 2 sizes of modules and 4 custom modules. Here's a little better rendition of where I'd put decking no matter that kind of benchwork is used. I should also mention that I believe HD and Lowe's will make up to 2 cuts per sheet of plywood for free. That means the sheets could be cut in half lengthwise to make handling easier for ripping. If they offset the cut a bit, each 4x8 sheet should yield 15 strips 3" wide or 11 strips 4" wide. If there are going to be legs every 48", I think 3" is probably wide enough. For $1/cut, I think they'll do all the cuts, though it doesn't take much to run a half sheet of ply through the table saw. ![]()
Attachments
BTW, what is going to be used for power and control? DCS? TMCC? Conventional?
I am running DCS and TMCC.
Thanks dave for the drawings. I went back to work on the 23rd. Work schedule doesnt leave too much time for fun at the moment. Working us 13 days one off. On a side not. Hitting the halt button on the remote will not stop a lionchief plus engine. Hung the first of some freefloating shelves in the nook. 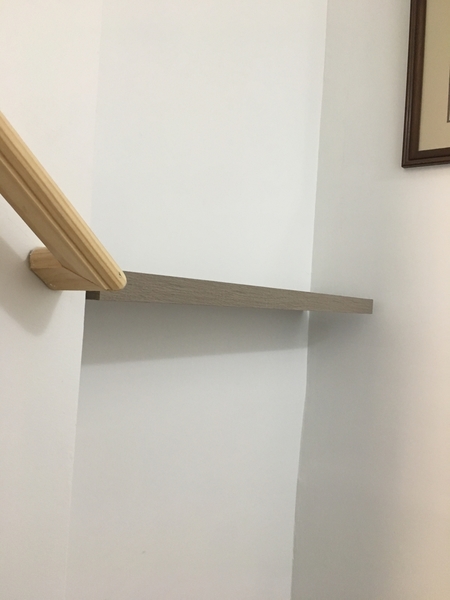
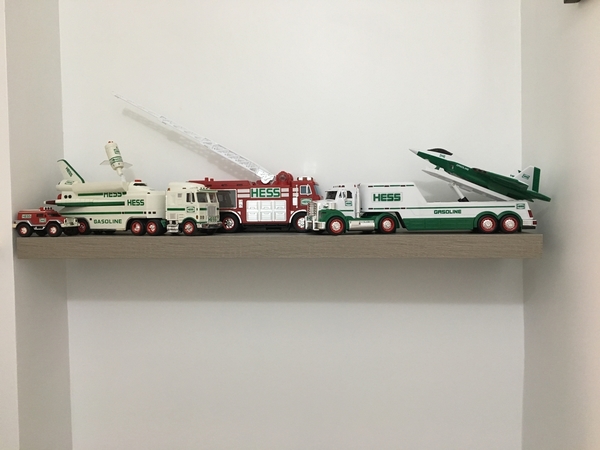
Attachments
 Well framing has begun. I am starting with the double pratt bridge at the window and working my way around from both sides. I have built the first two modules to go on either side of the bridge. Predrilled the holes for wiring.
 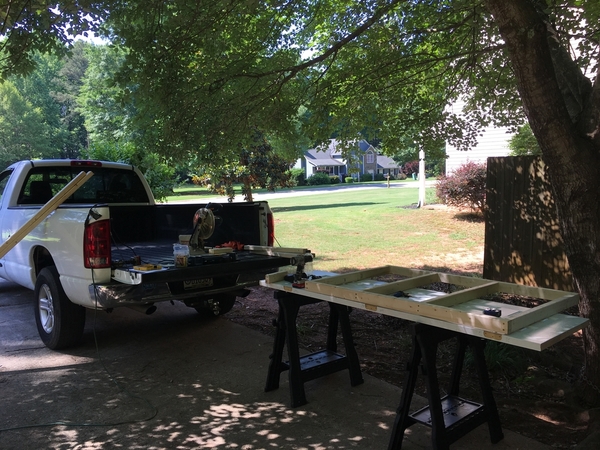 I will get a better picture when i get them upstairs and legs under them.
Attachments
Attachments
Suggestion for the window: I know a someone purchased an oversized room darkening roll up window shade and painted it to match his background. It was very effective!
Chris
LVHR
Maybe give some thought to some sort of over/under action. You have a lot of linear run. Consider a fly over or two.
Mike CT has a fine clean example in a space which appears not as spread out as the above prints.
Also think of cosmetic curves and right of ways which are not parallel to the platform edge.
Variation heightens the interest.
On the track plan below we canted the right of way to run at an angle to the bench work.
Place viewing obstructions to interrupt continuous viewing.
Gracious curves flying over lower tracks can provoke interest.
Attachments
TomTee I really love the sweeping curves and over under idea. My biggest issue is having the sloping roof on both sides. I will probably have a elevated line for my fathers train but thats about it. I will be doing some half curves so the long runs wont be straight. Right now just i am just getting the bench going to get the general shape made.
If you strongly desire the idea of elevated lines but you can not fit in the additional 6" of height due to a knee wall, then consider just making the entire main deck 6" lower.
Also, instead of a raised section consider a subway tunnel to cross a mainline under instead of over another one.
If you are using section track consider using flex track just for the cosmetic curve. In my experience, the MTH Scale Trax makes the easiest to install 3 rail cosmetic curves. I have used Atlas 3r flex but it is stupid difficult to work with. GG bends nicely against templates for fixed curves but tends to be kinky for cosmetic curves and takes a while to work it for a smooth ultra gentle curve.
For cosmetic curves I use 800" and 1100" radius templates.
Quick question. Screw the decking downing with just screws or screws and liquid nails? Also what do you use to mount the foam to the decking?
DoubleDAZ posted:BTW, what is going to be used for power and control? DCS? TMCC? Conventional?
Hey Dave, I tried to get rid of all my fasttrack and switches etc. Nothing has sold. So I guess I am stuck with using it. I have a complete circle of 072,060,048 and plenty of 036. So I am starting off using what I have. I am gonna use regular tubular track inside the attic to cut down on costs inside there. I am gonna go around the Hvac also to get rid of the liftout. Basically inside the room will be fastrack except for the double pratt bridge. Can I just use 072 switches for the crossovers and 072 wyes for the yard or will switches fit better in the yard for a longer yard? Im thinking 072 outer and 060 for inner loops. Just trying to figure out the s shaped corner now.
Here you go, Wayne. I substituted O-60, O-72. etc., where I could. I had to use O-48 for the peninsula though because there's no O-54. Take a look and see what you think.
Attachments
Attachments
Very nice Wayne. You are making good use of the unplanned time!
Hey there, Wayne. Glad to see you’re getting some time to work on your layout, though not too happy about the reasons why. Not sure how far you’ll get before things open again, but any progress is good.
Ad the amps of every power supply and ac item you use on the layout's circuit. That will tell you.
If real close to 15a total, I'd go for 20a; I'm a fan of overkill with electricals.
Sorry, a little late there. The thread didn't fully load before I wrote&posted
Here's a plan roughly 12 x 28 l shape, make use of a walk-in plan, you will soon become tired of a lift out or crawling around. Keep the height as high as possible 40 " minimum, you need to be able to sit up comfortably underneath. Also consider multiple levels, and make sure the entire length of the train is never fully visible at any time, its so much more interesting ! I am having trouble loading the track plan, I will work on it.
Attachments
Wayne, Very solid construction. The trestle is a good stand in until you get a better model.
Wayne, I take it that’s the corner where trains will eventually go out to the island on the peninsula. It’s nice to see it developing in reality vs on the computer.


