
@mike g. posted:

Afternoon guys,

Victor, then brackets for  your transformer looks great!

Dave Ripp, What great work! Would be a lovely place to be put to rest, right next to the tracks!

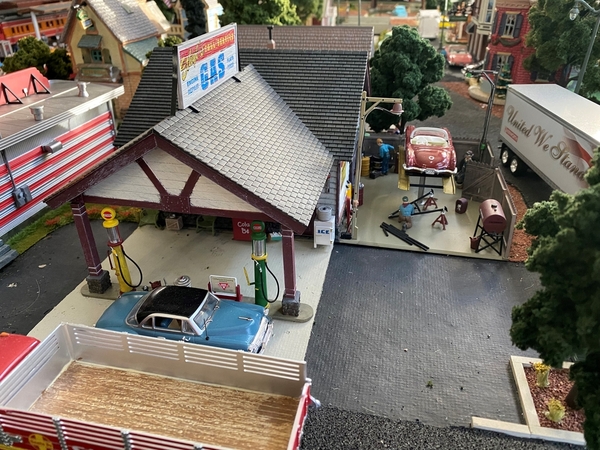
Well guys I spent all day working on building placement and wiring building lighting, I think I may have burned up a buck convertor but I will check it tomorrow as the weather man says heavy rain. So that means another day in the train room. I may just pull all the wire for teh buildings and start over, I have 3 buck convertors and they ran all my buildings before, so I will take one section at a time. Here are a couple photos and a really short video.

The lights look great Mike, I don't look forward to powering my buildings. I may do it as I put them in so it's not so daunting.

Last week, I could’ve sworn that I loaded my RS1 with smoke fluid before running it, but after an hour of operating, I realized there was no smoke.  Sure enough, I clearly burnt out the wick.  Well a quick search of this website turned me on to a cheap wick supply (Thanks Gunrunner John), which arrived yesterday, so today I thought I’d replace the burnt wick.  After installing and juicing up the wick today, I gave it a test run on the layout and noticed that the smoke wasn’t coming out right.  So back to my workbench and another search to find out the optimal wick placement for my MTH engine. Sure enough, I found this post by Gunnrunner John of an old photo taken by Marty Fitzhenry showing the correct way to place the wick -

4F4B3AE1-2A9C-4F02-AA1C-2C1C098F0719


I find it quite amazing that around the same time this forum has a thread about saving the late Marty Fitzenry’s layout and how much of an impact he had on the hobby, this man is able to continue to live on and help other hobbyist like me through this forum.  Sure enough, after disassembly and installation of the wick like Marty illustrated and Gunrunner John reposted, I was able to install it without obstructing the fan opening and now my switcher is emitting  more smoke than it ever did. Thanks Gunrunner and Marty!

This is a picture after I finalized the install. You can see how badly I burned up the old wick in this photo -

620FE6CE-FCF5-4B23-A22F-60E40FA45375

As an aside, I’m pretty impressed with how compact and tidy the interior of the newer mth PS3 diesels are.  I didn’t notice any loose wires and the shell came off pretty easily once I gently backed the wire handrails out of their slots. Everything aligned perfectly and all wires were nicely bound and well secured.  The interior lights were also not hooked into the shell like in prior models, further easing  the shell removal.  All in all a very “clean” and uncluttered  interior design. This is a nice improvement over my early PS2 diesels.  

Attachments

Images (2)
  • 4F4B3AE1-2A9C-4F02-AA1C-2C1C098F0719
  • 620FE6CE-FCF5-4B23-A22F-60E40FA45375

Dave Ripp, thank you very much! I hope things go smoother for you then me! LOL

Lou1985 Outstanding work area!

Strap Hanger, I am so glad you got it fixed! You are so right on how much there is to learn from folks here how and people like Marty that have left such a big foot print on this hobby!

Well I was able to get out to the train room this morning and talked to the power company. It took them awhile but they were able to get things figured out and was able to get power restored to the rest of the town and the Schnider and Fedex building.


IMG_20210919_121114IMG_20210919_121328

Its funny how many people show up when the power is turned back on!

I was right I burned up a buck convertor!

Attachments

Images (2)
  • IMG_20210919_121114
  • IMG_20210919_121328

I needed to add a gas station and had 2 to choose from Mobile or Menards.  I liked the Menards building but wanted a more modern  early 70's Sinclair. I changed the pumps with some key chain gas pumps then printed out signage to replace all the other brands. I also framed out a larger door and printed one to fit the opening. This all took much longer than I care to admit.

M1S4S1S2S3

Attachments

Images (5)
  • S4
  • S1
  • S2
  • S3
  • M1
Last edited by Dave Ripp.
@Dave Ripp. posted:

I needed to add a gas station and had 2 to choose from Mobile or Menards.  I liked the Menards building but wanted a more modern  early 70's Sinclair. I changed the pumps with some key chain gas pumps then printed out signage to replace all the other brands. I also framed out a larger door and printed one to fit the opening. This all took much longer than I care to admit.

S5S4S1S2S3

Hi Dave, neat modifications, I like it! But, isn't that a Woodland Scenics Ethyl's gas station, or does Menards have the same building? Here's a photo of mine that I added LED's to the outdoor lights, some guys welding, and a Corvette on the lift. This one is Woodland Scenics.

Scott

Attachments

Images (1)
  • mceclip0

Hi Dave, neat modifications, I like it! But, isn't that a Woodland Scenics Ethyl's gas station, or does Menards have the same building? Here's a photo of mine that I added LED's to the outdoor lights, some guys welding, and a Corvette on the lift. This one is Woodland Scenics.

Scott

Hey Scott, Menards had one also. I used a stock photo which is now corrected. Besides the roof sign they were pretty much the same. I really  like the welders I have some in one of my boxes. I'll put them to use eventually.

@Dave Ripp.- the gas station is a beauty.  The key chain pumps are great. What's the chance they were the right size to be in scale.
@mike g.- the power company is always the villain or the hero, depending on who has power.
@Radioman77- great classic post war layout. Looks like tons of fun.
@M. Mitchell Marmel- the new bench looks good. Better lighting too
@Strap Hanger- see that- Marty was looking down on you and your struggle with the smoke wick. Nice work.

Nothing new on the RSJ&B this weekend. I got as far as prepping the decals for the other side of the car and was immediately summoned for other tasks........

There's always tomorrow (or today)
Bob

@RSJB18 posted:

Did a couple of things last night. I made it over to Harbor Freight yesterday to pick up some wheel weights. They were out of stock on the 1/2 oz but I took two packs of the 1/4's. I added 5 oz to a ATSF box car that gave me some issues last Switcher Saturday. The car tracks much better now and doesn't derail when pushed.

I also started painting the pipes for the track cleaning car. Two coats down, one or two more to go. Hopefully I can get a first coat of blue on the car when I get home from work.

2021-09-08 07.31.122021-09-08 07.31.31

2021-09-07 20.46.12

A shout out to @gunrunnerjohn- I installed one of his isolated rail relays for my crossing signals the other day. What a huge improvement over the chattering ice-cube relay I had originally.

Bob

Impressive Bob.

Nice work on the track cleaning car and very smooth opration through the switches. 👍

Dave, The Sinclair gas station turned out Amazing looking! Well worth all the work you put into it!

Thanks Bob, I always count on the power company , sometimes I have to break out the generator during the winter. But thats ok!

Well guys after yesterdays work and getting all the cars put out I noticed that it looks strange without people so today I put out some more people, wired up the Menards jeep so the head lights and tail lights would come on.IMG_20210920_133110

Then I started working on the road that will be going down to the future park.

IMG_20210920_132728

And last but not least I started work on relocating the walking bridge onto the train bridge deck so its not hanging off the side. came off ok, had to do a little repair. But now I have to build an additional 22" of walking bridge! LOL Oh well, I am sure we all need something to do!

IMG_20210920_124010

I sure hope you all had a great day today!

Attachments

Images (3)
  • IMG_20210920_133110
  • IMG_20210920_132728
  • IMG_20210920_124010

The town and cars are looking great Mike. Can't wait to see what's next.

Welcome back Larry. Hope your time away was enjoyable.

I got more of the decals done last night. Getting closer to final assembly. I had picked up a load of decals from a forum member a few years ago so I dug through them and found some block letter sets along with a sheet of reporting numbers for a freight car.
I added MOW to the top tank and did the builders tags on one side of the car. I can flip it over and do the other side tonight. It's been a long time since I did water-slides. I forgot how fragile they are.

Bob

2021-09-20 20.44.212021-09-20 20.44.312021-09-20 20.44.422021-09-20 20.45.032021-09-20 20.52.14

Attachments

Images (5)
  • 2021-09-20 20.44.21
  • 2021-09-20 20.44.31
  • 2021-09-20 20.44.42
  • 2021-09-20 20.45.03
  • 2021-09-20 20.52.14

Completed installing the Evan Designs flashing lighting kit in my Meteor ambulance. The kit consists of three sets of double lights - head, tail and roof. Since the ambulance has a single roof light, I cut off one of those LED's. Each pair of lights is connected to a rectifier/resistor ("RR")and then has two wires to connect to a power source. The lights run off 9-18 AC voltage.   

First step was disassembly of the car. In this particular car, the roof (and windows) are a separate piece and not part of the metal shell. I removed the front and rear bumpers and headlight lenses which allowed me to choose where to drill holes to insert the 3mm LED's. Once the holes were drilled I CA glued and taped each set of lights to the body shell to hold them in place.

The RR is a little bulky, so finding a place to locate three of them can be challenging and finding a way to route the wires out of the car can also be challenging, especially the roof light where you don't want the wires exposed and hanging down in plain sight. The roof light wires were painted off-white to match the interior of the ambulance and taped in placed with white electrical tape. The wires were CA'd along the roof interior and then run down the the divider between two windows and then along the floor and out the rear of the interior. Three small holes were drilled in the chassis to route the wires out of the bottom of the car - one in front for the headlights and two in the rear on either side of the exhaust pipes - one for the taillights and the other for the roof light that went through the interior.

The car was then re-assembled and the six wires twisted together in two groups of three wires each. Each "group" was then soldered and shrink wrapped to a longer 18 gauge wire and the car was placed on the layout and a hole drilled through to connect to power. One wire went directly to power (I used a terminal strip connected to the 10 acv tap off my Z-4000).  I ran the other wire to a simple push button switch mounted in the layout fascia, so the flashing lights do not have to be on all the time and I can turn them on and off. Another wire was then run from the switch to the terminal strip.

The video shows the ambulance parked alongside the Lionelville Hospital where it's getting ready to make a run.

One small disaster - although I work on a towel and have barriers set up to catch flying parts, when I went to snap the rear bumper back in place, the tiny upper bullet lights on one side popped out and went flying somewhere never to be found. I heard it hit the table top, so its not on the floor but could have fallen into a crack somewhere. I made some replacement tips out of toothpick points painted red.

AMB 1AMB 2AMB 3AMB 4AMB 6AMB 8AMB 9AMB 10AMB 11 INKEDAMB 12AMB 13

Attachments

Images (11)
  • AMB 1
  • AMB 2
  • AMB 3
  • AMB 4
  • AMB 6
  • AMB 8
  • AMB 9
  • AMB 10
  • AMB 11 INKED
  • AMB 12
  • AMB 13
Videos (1)
Video (16)

I haven't run a train or worked on my layout since July 4th.  So many things need work on my layout.  I have two O22 switches, on the lowest level, in the back,  that must be removed and repaired.    This will require the removal of the upper two layers of track.  I need to clean all of my track.  I will add more power drops and correct some lighting issues.  I know this must be done to have smooth operations.  I need a kick start.  My "want-to" is low on fluid.  Any encouragement out there?

Bill

Last edited by Odenville Bill

I haven't run a train or worked on my layout since July 4th.  So many things need work on my layout.  I have two O22 switches, on the lowest level, in the back,  that must be removed and repaired.    This will require the removal of the upper two layers of track.  I need to clean all of my track.  I will add more power drops and correct some lighting issues.  I know this must be done to have smooth operations.  I need a kick start.  My "want-to" is low on fluid.  Any encouragement out there?

Bill

That's a good little rest Bill. I had a simalar layoff partly due to medical and partly a lot of different excuses. I started working hard a few weeks ago and really enjoy it. I watched your posts in the past so I know you can do the same.

Odenville Bill...Hey, I would be the last one to claim never to have procrastinated or let projects sit too long.  So the following advice is just from my personal experience and I used this method both at work and at home.  I sit down, normally with a morning cup of coffee, and make a paper list of all the things I need to get done in some reasonable period.  Like say 2 weeks or so. That keeps the list finite and moves away from huge jobs like say "painting the house".  I then take those tasks and simply do one at a time over the period, taking time and care to CROSS THEM OFF as they are completed, which gives me a sense of accomplishment and some incentive to keep moving through the list.  To me, taking the time to write out what needs to be done and making a paper list to cross off accomplishments is what keeps me moving.  The list tells me..."no its not an infinite amount of work" and crossing tasks off tells me..."yes , I am getting some things done".

Anyway that's what works for me.  Best regards

Don

I haven't run a train or worked on my layout since July 4th.  So many things need work on my layout.  I have two O22 switches, on the lowest level, in the back,  that must be removed and repaired.    This will require the removal of the upper two layers of track.  I need to clean all of my track.  I will add more power drops and correct some lighting issues.  I know this must be done to have smooth operations.  I need a kick start.  My "want-to" is low on fluid.  Any encouragement out there?

Bill

I have 2 friends that make a great inspiration for me. More fun if you have help.

Your not alone. I am taking an extended break from another hobby to work on my trains, it seems that I can't get motivated for the other one. I dabble with it a little as it is where this computer(my main one) so I am not completely disconnected. I normally would spend a good portion of my free time on my radio's either fixing up or using. Now all of my time is spent "playing trains" it is very relaxing, even though I have had several problems to trouble shoot and fix. Hopefully I will soon recover the enthusiasm for equally for both hobbies. John

Worked again on my machine shop boiler house. An RC Metal Smoke Generator Unit for Henglong 3918 1:16 RC Tank Hobby Model (eBay for 12 bucks) and a 10" piece of 1/2 conduit makes for pretty good smoking stack. Covered with a shack of your choice and voila!!

I have run it continuously on 5 VDC and is works fabulous. If you turn it up to 7.5VDC, it will smoke you out of the house. If it only lasts a few months, well they're cheap. The only drawback is blower sound, but that can be abated somewhat with foam under the foundation.....which is still a work-in-progress....like everything else!!

Very cool. Had you considered a smoke unit from an engine? I would think you could get the same results.
Bob

I haven't run a train or worked on my layout since July 4th.  So many things need work on my layout.  I have two O22 switches, on the lowest level, in the back,  that must be removed and repaired.    This will require the removal of the upper two layers of track.  I need to clean all of my track.  I will add more power drops and correct some lighting issues.  I know this must be done to have smooth operations.  I need a kick start.  My "want-to" is low on fluid.  Any encouragement out there?

Bill

Rip off the band-aid Bill!!!!!!

I faced a similar issue with a back corner that I had been putting of for a long time. I had to build a platform so that I could climb up on the table to reach. One day a grabbed some plywood and scrap 2X4's and built what I needed. It was off to the races from there.

Before and after shots

2020-12-06 13.04.082021-04-01 08.05.43

Attachments

Images (2)
  • 2020-12-06 13.04.08
  • 2021-04-01 08.05.43

Hi Guys, I hope everyone is having a great day!

FarmerJohn, The plane looks great! I was thinking it doesn't have to fly. Maybe you can just hook it to a small motor, some fishing line and you could make it Taxing down the run way with the prop spinning! Either way looks great!

Larry, for being away for awhile it must be nice to be able to come home to such an Amazing layout! I could just get lost just watching your trains on your layout!

JP, Thank you sir!

Bob, thanks you also! Your track cleaning car is really looking sharp! It is truly going to be nice to see the finished product!

Richie C, First off the finished product looks Outstanding! Second thank you for taking the time to do an How To for the Evens Designs flashing lights!

Dave Ripp, Man the grass sure grows fast in your neck of the woods! I guess it's ok it will give the MOW crew something to do! LOL Looking good!

Bill, like others have said been there also. My advice is don't jump all in, you need to remember winter is coming and your going to need something to do inside when its cold and snow is on the ground! Just take it slow and easy and enjoy!

As for me I worked on the road coming down to the park and the walking bridge for the train bridge. But as it has been said before by many, no pictures it never happened. So I will get pictures poster later today!

I hope you all have a great day and find time to have fun with your layouts and trains!

Add Reply

Post

OGR Publishing, Inc., 1310 Eastside Centre Ct, Suite 6, Mountain Home, AR 72653
800-980-OGRR (6477)
www.ogaugerr.com

×
×
×
×
Link copied to your clipboard.
×
×