WP posted:

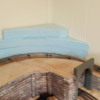
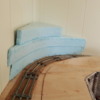
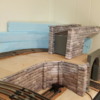
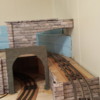
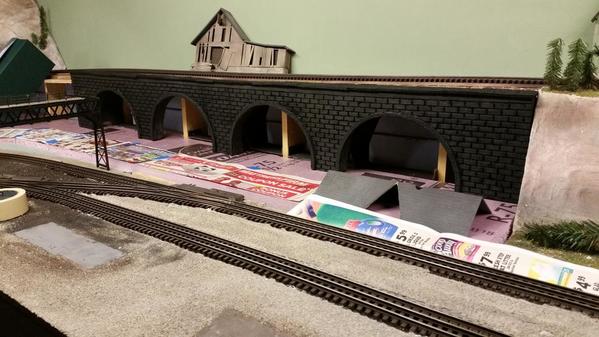
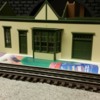
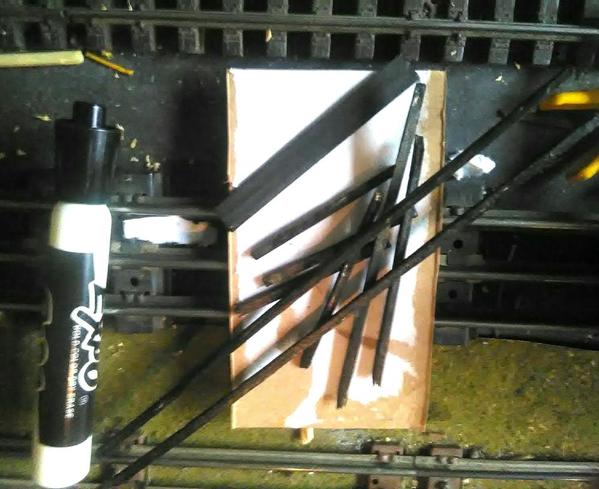
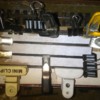
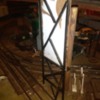
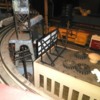
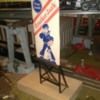
IMG_0330IMG_0360IMG_0358IMG_0357Hi Folks:   I've been working on the river on the right side of the round the wall layout. I finally added some color to the river bed, and tomorrow I'll start adding the first coat of gloss acrylic medium. There is a stream section under the truss bridge at the entrance to our train shed, and I have experimented with that small area first. That's the first picture.

WP,

Beautiful work, I can't wait to see more. Everything from your sample water feature to the shadowing in your backdrop is just awesome.

Thank you for the inspiration.

Aflyer

Aflyer posted:
WP posted:

IMG_0330Hi Folks:   I've been working on the river on the right side of the round the wall layout. I finally added some color to the river bed, and tomorrow I'll start adding the first coat of gloss acrylic medium. There is a stream section under the truss bridge at the entrance to our train shed, and I have experimented with that small area first. That's the first picture.

WP,

Beautiful work, I can't wait to see more. Everything from your sample water feature to the shadowing in your backdrop is just awesome.

Thank you for the inspiration.

Aflyer

Thank you Aflyer! I enjoy seeing everyone's pictures. I've also searched the forum and read everything available on modeling water and using gloss acrylic medium. I just love the OGR forum and all the help people give to us. 

WP posted:
Aflyer posted:
WP posted:

IMG_0330Hi Folks:   I've been working on the river on the right side of the round the wall layout. I finally added some color to the river bed, and tomorrow I'll start adding the first coat of gloss acrylic medium. There is a stream section under the truss bridge at the entrance to our train shed, and I have experimented with that small area first. That's the first picture.

WP,

Beautiful work, I can't wait to see more. Everything from your sample water feature to the shadowing in your backdrop is just awesome.

Thank you for the inspiration.

Aflyer

Thank you Aflyer! I enjoy seeing everyone's pictures. I've also searched the forum and read everything available on modeling water and using gloss acrylic medium. I just love the OGR forum and all the help people give to us. 

Sorry I missed this. This came out really great. Almost looks real. So how's the fishing?

suzukovich posted:
WP posted:
Aflyer posted:
WP posted:

IMG_0330Hi Folks:   I've been working on the river on the right side of the round the wall layout. I finally added some color to the river bed, and tomorrow I'll start adding the first coat of gloss acrylic medium. There is a stream section under the truss bridge at the entrance to our train shed, and I have experimented with that small area first. That's the first picture.

WP,

Beautiful work, I can't wait to see more. Everything from your sample water feature to the shadowing in your backdrop is just awesome.

Thank you for the inspiration.

Aflyer

Thank you Aflyer! I enjoy seeing everyone's pictures. I've also searched the forum and read everything available on modeling water and using gloss acrylic medium. I just love the OGR forum and all the help people give to us. 

Sorry I missed this. This came out really great. Almost looks real. So how's the fishing?

Thank you Suzukovich! You all are very kind!!  Haha, no fisherman there yet!

Today was a short work day. Spent part of the afternoon running a  couple of trains while looking for some more Woodland Scenics earth paints. No luck I will have to order some more. Went down to the basement and mixed up enough plaster to do behind the track all the way to the end of ballasting. Dry overnight and tomorrow lay down track through there . Pics.....Paul

DSCN0064DSCN0065DSCN0066

Attachments

Images (3)
  • DSCN0064
  • DSCN0065
  • DSCN0066

Paul2: I feel your pain. Colors are tough for me. The layout lighting affects the color differently from place to place on my pike.

As for my progress, I did some planning on road location on my problem corner and ordered a Walthers Golden Valley depot, cream and green, and ordered a Lionel Rico Station depot that I will modify by leaving off the freight extension. The Walthers depot will serve as a rural station and the main portion of the Rico station will be located nearby as a combo restaurant and small hotel for rr travelers. The freight extension will be located trackside across the tracks from the Walthers depot.  Tomorrow I hope to rough in some hillsides and retaining walls in the problem corner.

pennsynut posted:
Mo985 posted:

Got my rock wall finished around my new portals, and the base finished for our "homestead". 

imageimage

Fantastic result.  Any advice on painting process and the colors.  The design and detailing is well done. I have a problem corner and section where I need another retaining wall. Can't wait to see more of your work.

Pennsynut,

The stone walls and portals are from Scenic Express, their "Pennsy" system. The blocks that the walls are sitting on are 1" foam. 

I used a sheet of foam behind the wall, then glued the bottom "block" on to get the walls the right height to match the top.

The foam was painted with acrylics, made a dark color for the base coat, then daubed two lighter colors with a foam brush in random spots. 

Glued the rock wall to the pink foam, then foam to the supports for the upper level. 

If you use their wall sections, I suggest the "seam sealers". The "interlocking" fingers don't really go together well, it took a lot of sanding and trimming on each block to get the fit just right. Plus it seems that the paint they put on is thin or not even there at the edges. 

I still plan on putting vines and bushes running up, to help hide the gaps, especially where the wall and double portal meet. There is about a half inch gap.

I was able to reuse my painted/crumpled foil for my tunnel interiors! 

Ran trains a bit and took photos for the Team Track Tuesday thread.  Had lots of fun as usual!!

Later I'll go back to the train room and tidy up a bit.  I have quests coming to see the layout today and tomorrow.  

Btw - My layout is featured in the most recent issue of OGR on page 57 .... 9 pages with 17 photos in the print edition .... 39 photos in the digital edition. 


Steamer posted:
handyandy posted:

Latest project

handyandy posted:

Latest project...

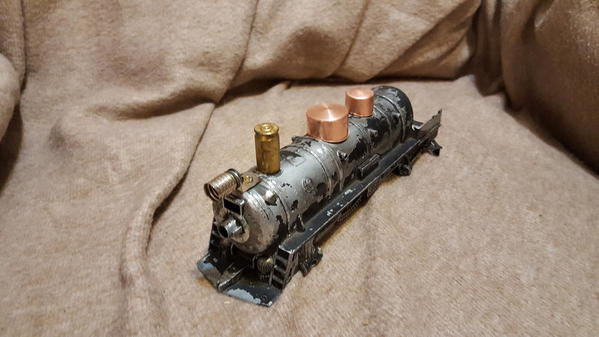
20161223_183632

not so fast.....we need some details!!

Okay, okay. First thing the brass stack is a used .45 APC casing that fit perfectly over the original stack! I have since cut the primer end off of it. Another will be used to shroud the new headlight socket too.

The project began with a Marx 999. I have several mid '20's AF 6.5" cars that sit very tall on the track and none of my steamers are really tall enough to look right (at least to me) with them. Actually, to my formerly scale modeler eyes, original 1920's cast iron steamers look a little short hitched up to these cars too. So this 999 shell is getting a make over to gain some height and look older. A new cab and pilot from styrene will soon be built. The original headlight on the smokebox front will be removed and the hole filled in. The brass stack and the copper domes (pipe caps) will be blended into the shell and the whole thing painted glossy black to look more like a vintage cast iron loco that would be more "age appropriate" for my cars.

Today with the plaster dry I got two coats on the last plaster I applied and now have three coats on the first plaster I did. Still trying to figure out why the difference between the two layouts. Using the same Woodland Scenics earth color as on the attic layout. PENNYSNUT now I am wondering if light can cause change in the way color looks. On the attic  layout I have Fluorescent lights and on the basement layout I have gone with LED shop lights. But anyways I am letting the coloring sink in for the night. It is Tuesday night and another train get together night. I'll see what it looks like in the morning and go from there. Some more pics................Paul

DSCN0067DSCN0068DSCN0069DSCN0070DSCN0071

Attachments

Images (5)
  • DSCN0067
  • DSCN0068
  • DSCN0069
  • DSCN0070
  • DSCN0071
Mo985 posted:
mike g. posted:
Mo985 posted:

Got my rock wall finished around my new portals, and the base finished for our "homestead". 

imageimage

Looking good Mo, just one question so I can learn, why the 2 different foam boards?

Mike,

Pink vs. Green?  If so, pink = H.D. and green = lowes. 

Thanks Mo, I thought it might be different strength! INYO which one is better to carve?

trumptrain posted:
Pat Kn posted:

I saw the article in O Gauge. Great article and a great layout Pat. Congratulations. 

Thanks so much Pat!  It was a great honor for me to be included among the pages of OGR.  

Happy New Year to you!

Pat:

Also, my congratulations on the OGR article. The photos complemented the story well. My main regret is that you were not mentioned on the cover. Again, Bravo!!!!!!

Larry Sr. posted:

Lately as time permits I been bashing six G scale cars that I got from a forum member and attempting to make something that looks like Military???  At least I got them olive drab so far.

One of many work in progress plans for this  winter

Larry


DSCN4997


DSCN4998DSCN5098

Ok Larry, Things are looking great at your house and the cars are just wonderful! But what's going on the flat car? A tank, A helo, A jeep, Some hot dancing girls? Please do tell!

Larry Sr. posted:

That's some good ideas Mike. Currently I don't have a clue yet.

Maybe a 106 mounted on a mule?

Some old Nam guys probably seen one or two  of those  during their tour.


We will see ?????

Happy New Year and of course Semper Fi!

Larry

PS or a bad *** M50 Ontos with 6 of them bad boys

Image result for ontos

LOL now your talking!!!!!

Semper Fi! Larry And I hope you have a great New Year!

Larry Sr. posted:

Lately as time permits I been bashing six G scale cars that I got from a forum member and attempting to make something that looks like Military???  At least I got them olive drab so far.


DSCN4997


DSCN4998DSCN5098

Nice paint jobs, but generally, stateside railroad equipment for the military was usually painted black or grey during WW1 and WW2. They only became OD green in the 1950s and to a smaller degree during the occupation after WW2.

trainroomgary posted:

Congratulations Patrick, on an excellent article and photos.

Patrick Whitehead OGR Feb March 2017 Run 290 Page 65

I like how you use a lot of figures to tell your story, along with all the special details to the structures. 

Gary

I fave expressed what Gary said before.  You just come up with an endless number of action scenes! Great article Pat!!  I also listened to some of your jazz after Googling you!  Very good too!

paul 2 posted:

Today with the plaster dry I got two coats on the last plaster I applied and now have three coats on the first plaster I did. Still trying to figure out why the difference between the two layouts. Using the same Woodland Scenics earth color as on the attic layout. PENNYSNUT now I am wondering if light can cause change in the way color looks. On the attic  layout I have Fluorescent lights and on the basement layout I have gone with LED shop lights. But anyways I am letting the coloring sink in for the night. It is Tuesday night and another train get together night. I'll see what it looks like in the morning and go from there. Some more pics................Paul

Paul,

I have read when studying photography a bit, lighting will make color look different.  I am a novice on the subject, but I have noticed the difference much more now that I have cataracts.  I definitely want to get the cataracts removed before I start scenery on the new layout!  Who knows what things will look like to me then!  lol

Work continues on the Buffalo Creek Station (SMMRRC) layout amid building construction. The main lines are just about completely wired and we've almost finished the sidings, passenger station lines, and various spurs. Tonight we finalized the spurs leading into the harbor area and beyond to the coal unloading ramp next to the American Power Station and a Grain Mill.  Harold has begun laying out out the many buildings for the urban area and Jerry was working on the elevated station platform where the smaller GCT will be located.

IMG_4736IMG_4737IMG_4738IMG_4739IMG_4741IMG_4744


Attachments

Images (6)
  • IMG_4736
  • IMG_4737
  • IMG_4738
  • IMG_4739
  • IMG_4741
  • IMG_4744

Engine tuneup day today.  Took the clogged-with-pellet-residue smoke unit in my 2065 and installed new fiberglass matting and a smoke fluid element and chimney.   My 2025 is now converted from a screw lamp to bayonet lamp socket, and my 1666 sports a new green front jewel...

On the prewar front, I replaced the brush holder on my 253, but the motor still isn't running right.  I think the armature will need rewinding...

Mitch

Randy Harrison posted:
trumptrain posted:
Pat Kn posted:

I saw the article in O Gauge. Great article and a great layout Pat. Congratulations. 

Thanks so much Pat!  It was a great honor for me to be included among the pages of OGR.  

Happy New Year to you!

Pat:

Also, my congratulations on the OGR article. The photos complemented the story well. My main regret is that you were not mentioned on the cover. Again, Bravo!!!!!!

Thank you Randy!!  AND a HUGE thanks for all your help with building the layout!! 

Mark Boyce posted:
trainroomgary posted:

Congratulations Patrick, on an excellent article and photos.

Patrick Whitehead OGR Feb March 2017 Run 290 Page 65

I like how you use a lot of figures to tell your story, along with all the special details to the structures. 

Gary

I fave expressed what Gary said before.  You just come up with an endless number of action scenes! Great article Pat!!  I also listened to some of your jazz after Googling you!  Very good too!

Thanks so very much Mark!  I love to create action in a scene.  IMHO action energizes a scene bringing it ( the scene ) to life.   With music; the music either is alive or dead.  I think the same way with a scene .... it either lives or not.  Of course I've created  lots of scenes that did not live either :-) 

PS - thanks for checking out my music and glad you liked it!

Paul 2- The color difference you are seeing is probably due to your lighting.

You mentioned fluorescent in the attic and LED in the basement. Both lighting sources can produce very different color light. Fluorescent can range from warm- almost pink light, to cool blue. LED color range is endless with the uses of phosphors that the manufacturers place in front of the LED's to produce the desired color. Look at the markings on the fluorescent tube and see if it says WW (warm white)/ CW (Cool white),  or maybe a 3 digit number like 835, 841. The higher the number the cooler blue the light will be.

Same for the LED's too. Most shop lights (the basic Home Depot fixtures) are made with cool white chips. They have more blue in the light they produce and will change how our eyes interpret color. The same number codes are used to indicate color temperature.

I have been  a electrician for close to 30 years and have done a lot of lighting design. The concept is called efficacy and can drastically change the way we see colors. I took a lighting design class years ago at Philips Lighting's design studio in New Jersey. It is amazing what can be done with the appearance of a color just by changing the light source shining on it.

https://en.wikipedia.org/wiki/Luminous_efficacy

You can actually use this to your advantage to change the lighting effects in different areas on your layout.

Hope this help so that you don't drive yourself to drink trying to match the colors. Take a sample from your basement and look at it under the  attic lighting and see if there is a difference.

Good Luck,

Bob

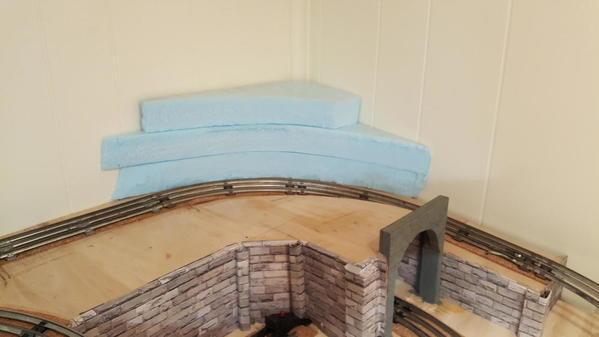
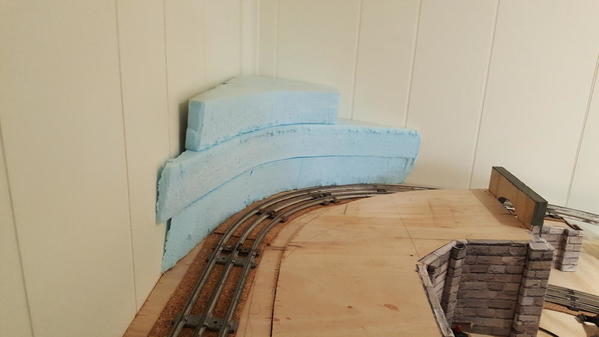
Started building a rock cliff for a corner of the layout. The bridge is a work in progress too.

Fixed a truck on my postwar 2-6-4 Prairie Steamer. The front truck on the tender would always derail when I backed it up. I discovered that one of the wheels was a little to wide and was walking off of the switch points. Took it apart and tapped the wheel down the shaft a bit. Works great now. 

2016-12-26 17.23.422016-12-26 17.23.482016-12-26 17.24.002016-12-26 17.24.07

Attachments

Images (4)
  • 2016-12-26 17.23.42
  • 2016-12-26 17.23.48
  • 2016-12-26 17.24.00
  • 2016-12-26 17.24.07

   RSJB18, that blue corner piece looks too tight to the track..and wall. You had better check for forward overhang clearance on pilots, rear clearance on roofs, and all over on diesel steps and railings.

   If its close, see if you can shift the loco on its gauge to get it to hit, they don't track the same on each pass. My worst offenders, all at different heights, are the pilot on Generals, railings on an E-33 rectifier, and the roof on a Berk or Hudson. I think that the Berk is worse. It is hard to say though, I didn't check again close after they cleared, but each check took all of those engines being run, and once in each direction too.

I used a 2x4 on end plus ⅛-¼" to space my 027 from the wall. The corner curves need MORE clearance, and that actually extends past the curves and into the straights an inch or two.

I'm still loving the "stonework", lol.


Yes guys I know its tight. I just cut the rough pieces and still have to carve a good half inch off of the face. I wanted to leave enough material to work with.  I actually ran my longest diesel, a RS-3 around the corner by hand and traced the overhang of the steps with a pencil. I'm all 0-27 so tight is the name of the game.

learned my lesson on the tunnel portal when I put the first longer diesel through it. Notice the right leg is narrower than the left

Good eye though, thanks for the feedback.

Bob

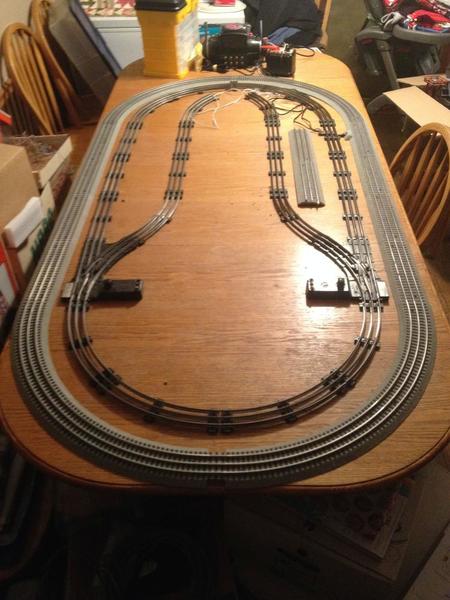
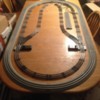
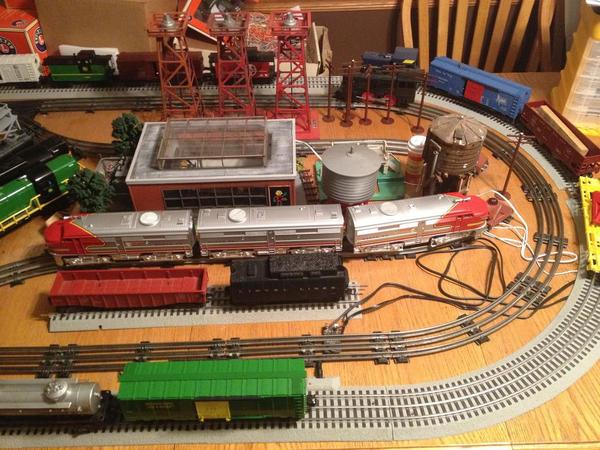
We've used the dining room table as a "temporary" layout since Christmas last year, when my wife gave me a postwar Lionel train set that she got from a friend of hers. ("We" being my almost 3 yr old grandson and I) Since then, we've expanded a bit, adding a Lion Chief John Deere train set, several items of rolling stock and a few engines, most purchased either at DuPage Train Show or a couple of local hobby shops. The time has come to make a bit more permanent layout, or maybe less temporary might be a better description, as it will still reside on the dining room table. Here's a couple pictures before demolition.partial 1st layout with some trains1st layout, bare tracks
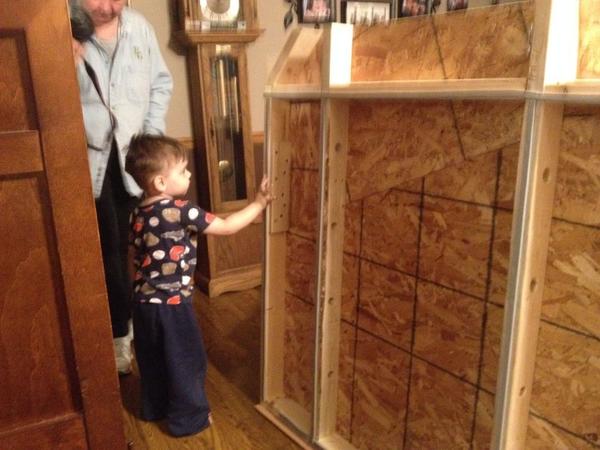
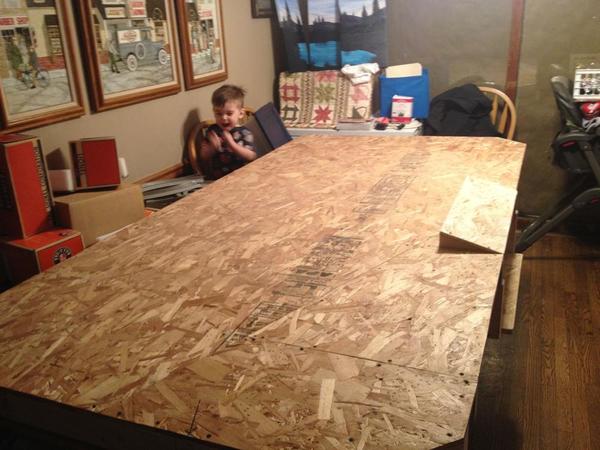
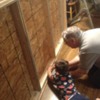
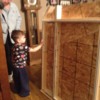
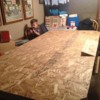
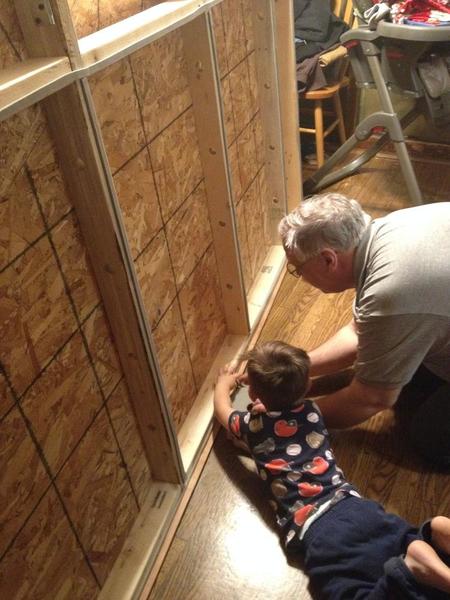
Then a couple pictures of my grandson Rex helping with putting on sticky-back foam weather strip tape to the bottom of the framework. The idea is to protect the top of the dining room table, and perhaps to help reduce sound a bit. The framework was built from scraps of wood and chipboard that were left over from set construction of several plays that I was involved with. Holes are drilled for wiring to pass through, although I did just figure out I missed making a couple right near the drop shelf. The slanted section is for mounting of switch controls, operating accessory switches, circuit breakers, etc. The detachable drop shelf is for holding the transformers, which will have quick disconnects so the whole shelf with transformers can be easily removed for safe playing while I'm not home. putting foam tape on bottom of frameworkRex smoothing foam tape on bottom of frameworkRex pleased with new board in place
The last picture is of a test fitting for the track layout. I wanted to incorporate both traditional tube track and FastTrack, with the latter being in a perimeter loop for easy access to push train cars around. Rex likes to make LONG trains... He will be allowed to push cars around on the inner tube track layout, as with the previous layout. However, he is still just starting to learn how switches work, so I may still leave the square switch light/operators off unless I'm there so he doesn't accidentally force something in the wrong direction. He LOVES playing trains with me, which is a pure joy for both of us. Of course, he somehow settles for playing trains by himself when I'm not there...

I've thought about maybe making this layout journey a separate thread, as I've been inspired by quite a few threads here, very enjoyable.aerial view of tet fitting of new track layout
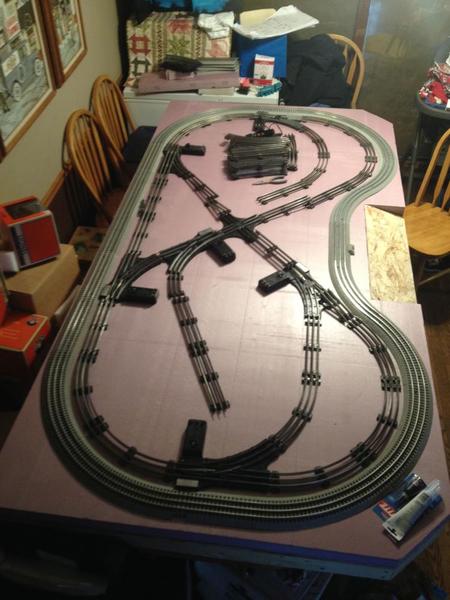
Attachments

Images (7)
  • partial 1st layout with some trains
  • 1st layout, bare tracks
  • putting foam tape on bottom of framework
  • Rex smoothing foam tape on bottom of framework
  • Rex pleased with new board in place
  • foam board fitted to framework
  • aerial view of tet fitting of new track layout

After over a year of inactivity, I am going to start working on my layout again.  There was no reason for the long delay except my enthusiasm was at an all time low, I guess I was a little "burnt out".  I am going to attempt to begin a "sprint to the finish" on getting into the scenery aspects of my layout.  I have one switch left to cut in for a second siding at my flour mill, one track for incoming grain covered hoppers and the other for outbound covered flour hoppers.  Add and relocate sidings in my industrial area.  Redo all my control panels and upgrade my building wiring.  An upcoming get-together will help keep the pressure on me to get things done.  Will post pictures as things progress.

Art

Slowhands,

  Have you checked overhang clearances with engines? Yours seems very close too. Could just be the FT roadbed fooling me, and having the same issues making me parinoid for others. Butt check pilots, diesel/electric railings, and the cab roofs on steam. Big locos on the inner loop, and the longest wheel base stock you have on the FT .(worst inside overhang on the FT; worst outside overhang on the tube track.) Note different locos have the overhang at different heights too, the more stock you check, the better.

Anyhow, its nice to see a kid properly train spoiled like I was

If you do start a seperate thread on progresses, give me a heads up, eh?

Went to the back cracker for the last time and then to Walmart. Oh Joy,,, Then when I got home I set up the 252 crossing gate from RT and the 145 Giant Gateman on a corner of the layout and set it up to work off a push bottom switch for 3 year old grand-son Jordan. So this will make HIM, the Gateman. I think he will like it. It is to bad they made it so far out of scale, but he won't care.  Smile, Wink & Grin and I don't anymore, it is about the fun not the perfection.

Last edited by KRM
trumptrain posted:
Mark Boyce posted:
trainroomgary posted:

Congratulations Patrick, on an excellent article and photos.

Patrick Whitehead OGR Feb March 2017 Run 290 Page 65

I like how you use a lot of figures to tell your story, along with all the special details to the structures. 

Gary

I fave expressed what Gary said before.  You just come up with an endless number of action scenes! Great article Pat!!  I also listened to some of your jazz after Googling you!  Very good too!

Thanks so very much Mark!  I love to create action in a scene.  IMHO action energizes a scene bringing it ( the scene ) to life.   With music; the music either is alive or dead.  I think the same way with a scene .... it either lives or not.  Of course I've created  lots of scenes that did not live either :-) 

PS - thanks for checking out my music and glad you liked it!

Pat,

Having a musician daughter and an artist daughter, I can see your point on any art, model train layout building included, can be alive or dead.  Excellent observation we call all take as advice!

Adriatic posted:

Slowhands,

  Have you checked overhang clearances with engines? Yours seems very close too. Could just be the FT roadbed fooling me, and having the same issues making me parinoid for others. Butt check pilots, diesel/electric railings, and the cab roofs on steam. Big locos on the inner loop, and the longest wheel base stock you have on the FT .(worst inside overhang on the FT; worst outside overhang on the tube track.) Note different locos have the overhang at different heights too, the more stock you check, the better.

Anyhow, its nice to see a kid properly train spoiled like I was

If you do start a seperate thread on progresses, give me a heads up, eh?

Adriatic, thanks for your thoughts. The clearances are going to be close, definitely a concern of mine. My 2055 steam engine and the 2338 diesel have the most overhang, and I believe our operating brakeman boxcar might be the longest wheel base in rolling stock. The Lion Chief John Deere loco has quite a bit of inner curve overhang, so it will be used to check clearances as well. We'll be checking clearances and making adjustments after the tracks are fastened temporarily to the Homasote that will be put over the pink foam board.

This afternoon I glued down the pink foam board with a compatible adhesive. After it set for a while, I fitted and glued down the largest piece of Homasote (48"x71") that I had. Forehead slap for not thinking about clamps since the board had a little bit of warping, so ended up weighting it down with boxes and boxes of stuff. The other two pieces to fill in the remainder of the board will either go on later tonight or possibly tomorrow night.

My grandson and his mom (my daughter) both have hinted at either some kind of tunnel or an upper level or both. I wonder who prompted who?

Finished some Christmas Shopping yesterday and added a few more cars to our collection.  With the addition of cars (A trip to Stockyard Express with the kids and some Christmas money in hand) this was also the first time we were able to run three trains on the layout.  The initial Christmas presents were the passenger station from Menard's and the matching NS 8065 (one of my son's presents) from Lionel for our NS 8056 we bought last year. 

Here is the video I shot to celebrate

https://youtu.be/ZeE7BPz1yjI

And a few pics of our new items. 

Now I realize we have room to add another locomotive.  Hoping to score a new Lionel SD-90, Indiana 9003!


IMG_1596IMG_1597IMG_1598

Attachments

Images (3)
  • IMG_1596
  • IMG_1597
  • IMG_1598
Adriatic posted:

White squirrels,  lol.  The Blue Ridge IS the only place Ive seen them white. Or black, or deep red. I cant really recall which,  but one color of them were huge compared to any Northern squirrel, or the other colors seen down there.

These squirrels are grey, but the lighting makes it hard to tell in those cell shots.

Mo985 posted:

Built an escalator!!

On my city street level, I'm going to have an MTH police station, as my passenger station. The escalator will be from inside the station, down to the platform. I hadn't planned on detailing the interior of the station, so the top of the escalator won't be visible.

imageimageimage

That's cool. From what I can tell including Alan's layout (Leavingtracks/OGR ADMAN) nobody's done this in O Scale.

suzukovich posted:
Mo985 posted:

Built an escalator!!

On my city street level, I'm going to have an MTH police station, as my passenger station. The escalator will be from inside the station, down to the platform. I hadn't planned on detailing the interior of the station, so the top of the escalator won't be visible.

imageimageimage

That's cool. From what I can tell including Alan's layout (Leavingtracks/OGR ADMAN) nobody's done this in O Scale.

Now that some out of the box thinking. I don't think I have ever seen them on a layout, great scratch build Mo!

I wish I had a need for them on my future layout, I sure would try to build them!

suzukovich posted:
Mo985 posted:

Built an escalator!!

On my city street level, I'm going to have an MTH police station, as my passenger station. The escalator will be from inside the station, down to the platform. I hadn't planned on detailing the interior of the station, so the top of the escalator won't be visible.


That's cool. From what I can tell including Alan's layout (Leavingtracks/OGR ADMAN) nobody's done this in O Scale.

That is really cool! I'm sure you'll be getting how to requests.

Don

suzukovich posted:
p51 posted:

I just added what the old folks would have called, "a mess o' Critters" on the layout. And this isn't all of them.1228162309-1_resized1228162310-1_resized

Now you need have a small scene showing pest control, I mean squirrel/possum hunting as I real sure that was part of the areas food chain.

Yep, they'd hunted deer and black bear completely during the depression. My Dad hunted and trapped all over those hills in the 40s and he confirmed you never even saw tracks from either until long after the war was over and people were no longer starving to death without hunting. He said it was well into the 50s before people even thought of hunting just for sport. Critters was all there was. Nobody hunted anything you couldn't eat. Yes, I have some critters out in the daytime you normally wouldn't see, but it's a detail so many layouts forget and I had to do it. I still need to find some good rabbits in that scale and some more squirrels, I think.

The old timers used to say, "The Depression hit here long before there was a 10-dollar word for it," and the area is pretty depressed to this day. All the industry is long gone, the railroad is gone (I'm gonna cry the next time I get back there and see a trail where the ET&WNC tracks used to be through Elizabethton). It's all just service-related jobs there now.

Mark Boyce posted:
trumptrain posted:
Mark Boyce posted:
trainroomgary posted:

Congratulations Patrick, on an excellent article and photos.

Patrick Whitehead OGR Feb March 2017 Run 290 Page 65

I like how you use a lot of figures to tell your story, along with all the special details to the structures. 

Gary

I fave expressed what Gary said before.  You just come up with an endless number of action scenes! Great article Pat!!  I also listened to some of your jazz after Googling you!  Very good too!

Thanks so very much Mark!  I love to create action in a scene.  IMHO action energizes a scene bringing it ( the scene ) to life.   With music; the music either is alive or dead.  I think the same way with a scene .... it either lives or not.  Of course I've created  lots of scenes that did not live either :-) 

PS - thanks for checking out my music and glad you liked it!

Pat,

Having a musician daughter and an artist daughter, I can see your point on any art, model train layout building included, can be alive or dead.  Excellent observation we call all take as advice!

Patrick,

Gret to read about your layout an see it imprint. I was able to tie in those past you had on this section with the layout at large. Also, checked youtube ad saw some of your posted videos, great horn work my friend. Was that a member of the group's wedding where you performing?

Again congratulation for such recognition of another fine layout.

jeff

The past couple of days I worked on laying track and switches. So at least this part is actually down. Not sure of what is the next phase. But I did get the track for the scrap yard in place. I will be taking it up because I am painting that whole area black. I also made the curve sharp coming in because I won't be running any big engines into there. I also thought that a lot of sidings have sharper curves. I did notice in the one pic I have a slight curve in the mainline but after thinking about it I am leaving it as is. After all nothing is perfectly straight all the time. Pics of work so far, well not really work more like fun.......................Paul

DSCN0079DSCN0080DSCN0081DSCN0082DSCN0077DSCN0078

Attachments

Images (6)
  • DSCN0079
  • DSCN0080
  • DSCN0081
  • DSCN0082
  • DSCN0077
  • DSCN0078

Patrick,

Gret to read about your layout an see it imprint. I was able to tie in those past you had on this section with the layout at large. Also, checked youtube ad saw some of your posted videos, great horn work my friend. Was that a member of the group's wedding where you performing?

Again congratulation for such recognition of another fine layout.

jeff

Jeff - thanks so much for your compliment!  I'm thrilled to hear you like the OGR article and that you took the time to check out some of my music.  Yes, what you must have scene/heard on Youtube must have at the wedding for the tuba player in my quintet.  Thank for taking time to stop look and listen pun intended.

Tonight after searching for a can of black paint I knew I bought but couldn't figure out where it was I pulled up the scrap yard track and painted the whole area black. I'll start laying down cinders tomorrow in the whole area. Pic. Does anyone know who possibly makes fencing for scrap yards or is there an easy way to make some fencing. Thanks................Paul

DSCN0083

Attachments

Images (1)
  • DSCN0083

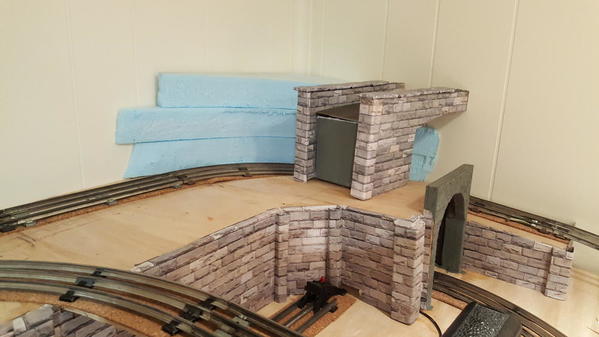
Last night I painted this retaining wall and hit with some flat black mist in spots. This morning I smudged it with some chalk but not too much. After I installed that, I made a companion section with a 2 lane auto tunnel. From the end of the installed section, it steps up 1.5 inches, then another 2 inches over the tunnel and then steps down. I used the same primer on the same masonite but it looks a little orange as it is freshly painted. I hope it looks better tomorrow after I mist it with flat black, chaulk and glue the trim work.

Next I will work on the curved part of problem corner. I think I will glue foam pieces on the base foam to form a rather steep rock face and cover it with left over hydrocal cloth. 20161229_20544220161229_205502

Attachments

Images (2)
  • 20161229_205442
  • 20161229_205502

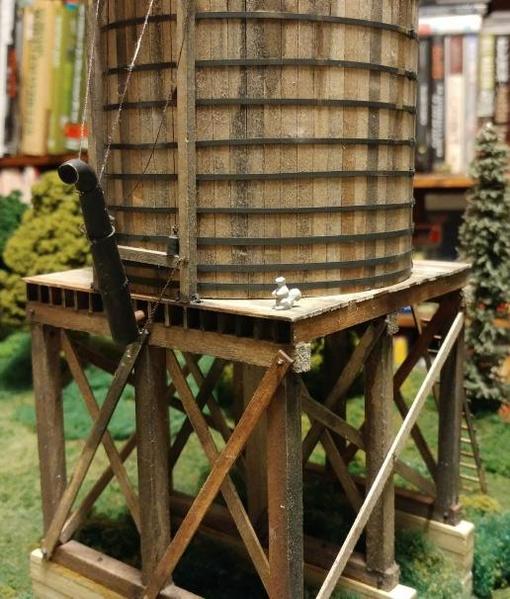
I moved the squirrels on my layout to more realistic positions (under a tree and another on a water tower adjacent to the top of another tree).

1230162248-1_resized1230162249-1_resized

1230162309_resized

Yes, I know that raccoons are generally nocturnal, but I have seen them in that part of the country out of the daylight hours. At least he's well away from people, which would be quite correct, especially near a trashcan which would probably be too tempting for him if he was that hungry.

Also, the local NMRA region put photos of my layout On the gallery section of their site...

Attachments

Images (3)
  • 1230162248-1_resized
  • 1230162249-1_resized
  • 1230162309_resized
Last edited by p51
RSJB18 posted:

First time doing anything like this. I've impressed myself too lol. I used a Dremmel multi-max with a 1" straight blade and carved away till I was satisfied. Painted with flat acrylics. I started with a light grey base and mixed whites and blacks till it was done. 

Thanks for the compliments.

nice color choice

Nothing on the layout but something on a layout project.

Got the last powered A-unit finished today from an idea of 8N's.

 Great idea and makes for a great set.

Works Great but sure lets the ZW know it is feeding something with it and six lit passenger cars behind it.. Laugh I had a 218 shell on a frame with a 2 position e-unit motor in it that I pulled the motor, pick up truck and e-unit out of and installed the new motor, A unit dummy front truck and wired pigtails to the motor so it all runs off the E-unit in the lead engine. So there is 8 axles with magnets pulling. So a post war 218 leads the way for the twin motor 8021 B unit and 8020 powered A unit. Works GREAT!!!

RSJB18 posted:

Painted the cliff. Yes I carved out the 1/2 inch I thought I would have to. Ran the RS-3 back and fourth till it didn't hit anything anymore. Tried a couple other locos just to be sure too. Hope to set it in place tomorrow after adding some greenery and trees. More photos to come.

20161230_17015020161230_17014020161230_170134

Looks great, very real looking! Just do me a favor and don't fall off the top when planting trees. Again looks wonderful!

dobermann posted:
RSJB18 posted:

First time doing anything like this. I've impressed myself too lol. I used a Dremmel multi-max with a 1" straight blade and carved away till I was satisfied. Painted with flat acrylics. I started with a light grey base and mixed whites and blacks till it was done. 

Thanks for the compliments.

nice color choice

I agree the carving and coloring look great!  Your 1:48 railroad construction crew really had to blast away at solid rock to make this part of the ROW!  My hat is off to them!  

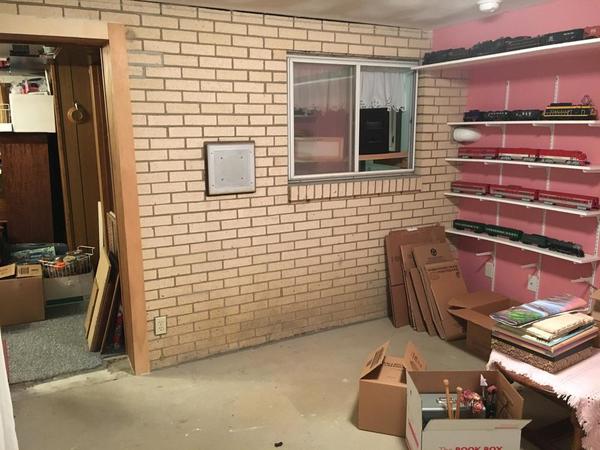
I helped my daughter and son-in-law move almost everything left in her art studio on the rear of our house to their house last evening.  I decided to take some photos of the room after I placed some trains on some shelves she left behind.  Yes, the pink paint will be covered with blue.  I plan to start a topic soon for layout planning for this 11' 6" x 11' 4" room.  As the photos show, there is a door to the basement in one corner and a big sliding glass door on an adjacent wall.  The brick wall was the exterior of the house before my in-laws put on the addition, and the washer and dryer are on the other side of the brick wall.  The Ceiling Central RR is in the wood paneled room right outside the small door.

2016-12-29 23.13.372016-12-29 23.14.162016-12-29 23.15.032016-12-29 23.15.36

Attachments

Images (4)
  • 2016-12-29 23.13.37
  • 2016-12-29 23.14.16
  • 2016-12-29 23.15.03
  • 2016-12-29 23.15.36
KRM posted:

Nothing on the layout but something on a layout project.

Got the last powered A-unit finished today from an idea of 8N's.

 Great idea and makes for a great set.

Works Great but sure lets the ZW know it is feeding something with it and six lit passenger cars behind it.. Laugh I had a 218 shell on a frame with a 2 position e-unit motor in it that I pulled the motor, pick up truck and e-unit out of and installed the new motor, A unit dummy front truck and wired pigtails to the motor so it all runs off the E-unit in the lead engine. So there is 8 axles with magnets pulling. So a post war 218 leads the way for the twin motor 8021 B unit and 8020 powered A unit. Works GREAT!!!

Bet that dims the lights when you shove the lever forwards...

In local news, I finally finished a project that I've been futzing about with for months:

GEDC2759

This proves that a Corgi diecast Birney can be powered using an Atlas handcar truck while keeping the interior and HB Lifeguard fenders, long as you don't mind it riding a tad high and the sideframes not quite lining up...

Mitch

Attachments

Images (1)
  • GEDC2759
Last edited by M. Mitchell Marmel

The basement is messy but I am close to completing the rough in for improvement of problem corner.

1. Increased height of water tower by lengthening support legs. But I may redo that. 2. Disassembled for painting some parts of a walthers golden valley built up depot that came today. 3. Looked over the Lionel Rico station kit that also came today. Looking forward to painting and assembling. 4. Installed last section of a retaining wall with tunnel.  5. Glued foam pieces to foam base for rock face foundation.

Someday I hope to run a train or two.20161230_15163520161230_22425120161230_22430320161230_224308


Attachments

Images (4)
  • 20161230_151635
  • 20161230_224251
  • 20161230_224303
  • 20161230_224308

What did I do on my layout today? Well I am pleased to say I finally started my layout! One module at a time. Started with a five foot module today. Got it all framed up and foam on. But still have to get the legs installed tomorrow and get the holes drilled in the bench work for wiring and such. Will post pics tomorrow to show the first bits of progress. The big thing will be scratch building the 15 foot long 32 inch high grain elivator on the 5 foot sections. This is gonna be fun! 

paul 2 posted:

Yesterday I got the stone down and glued in the scrap yard. Today I have to get a few more shelves in under the tables so I can get the boxes on the table under the table so I can start working on that section next. Pics. Now I am just waiting for my crane and sound building to come...................Paul

DSCN0086DSCN0090

Looking good Paul, cant wait to see the crane in place!

Mark Boyce posted:

I helped my daughter and son-in-law move almost everything left in her art studio on the rear of our house to their house last evening.  I decided to take some photos of the room after I placed some trains on some shelves she left behind.  Yes, the pink paint will be covered with blue.  I plan to start a topic soon for layout planning for this 11' 6" x 11' 4" room.  As the photos show, there is a door to the basement in one corner and a big sliding glass door on an adjacent wall.  The brick wall was the exterior of the house before my in-laws put on the addition, and the washer and dryer are on the other side of the brick wall.  The Ceiling Central RR is in the wood paneled room right outside the small door.


Mark- The day every father dreams of.

When the kids move out and we get the spare room for more trains ! Good luck with the project, can't wait to see progress photos.

Bob

RSJB18 posted:
Mark Boyce posted:

I helped my daughter and son-in-law move almost everything left in her art studio on the rear of our house to their house last evening.  I decided to take some photos of the room after I placed some trains on some shelves she left behind.  Yes, the pink paint will be covered with blue.  I plan to start a topic soon for layout planning for this 11' 6" x 11' 4" room.  As the photos show, there is a door to the basement in one corner and a big sliding glass door on an adjacent wall.  The brick wall was the exterior of the house before my in-laws put on the addition, and the washer and dryer are on the other side of the brick wall.  The Ceiling Central RR is in the wood paneled room right outside the small door.


Mark- The day every father dreams of.

When the kids move out and we get the spare room for more trains ! Good luck with the project, can't wait to see progress photos.

Bob

Bob,

Thank you!  I think progress will be slower than I had hoped due to obligations to elderly relatives, but I do see that the room will not be encroached on in the meantime.  For the last 25 years, every time I thought I had found some space for trains, a growing family (and their stuff) kind of took over my space.   I was glad to give up the space to help them and my wife with their interests and needs.

KRM posted:

Nothing on the layout but something on a layout project.

Got the last powered A-unit finished today from an idea of 8N's.

 Great idea and makes for a great set.

Works Great but sure lets the ZW know it is feeding something with it and six lit passenger cars behind it.. Laugh I had a 218 shell on a frame with a 2 position e-unit motor in it that I pulled the motor, pick up truck and e-unit out of and installed the new motor, A unit dummy front truck and wired pigtails to the motor so it all runs off the E-unit in the lead engine. So there is 8 axles with magnets pulling. So a post war 218 leads the way for the twin motor 8021 B unit and 8020 powered A unit. Works GREAT!!!


KRM- nice project. My 218 just died the other day. May be an idea for the repair project. My set is an A/ A dummy so we will see.

Bob

I saw the signs.

Well actually I used shears.

Pointy ones .

Im allowed now

White glue & Gel CA, it took 3 15 min. sessions. One more session for weathering after the thiings fully cure. Maybe a grain of wheat above the tall one, and  cat & sconces on the wide one.

IMG_20161231_064745IMG_20161231_065026IMG_20161231_070316IMG_20161231_070700IMG_20161231_065640


IMG_20161231_071608IMG_20161231_073752IMG_20161231_072725

Now I need delivery trucks. I'm thinking truck #101 of McAuliffe's "NUTS" Delivery, and the #82 of Carter Families Peanuts might be sparring for buisness ?  Any farmer figurers with a huge smile?
Attachments

Images (8)
  • IMG_20161231_064745
  • IMG_20161231_065026
  • IMG_20161231_070316
  • IMG_20161231_070700
  • IMG_20161231_065640
  • IMG_20161231_071608
  • IMG_20161231_073752
  • IMG_20161231_072725

Finally started placing buildings and accessories on the "Valley of Bridges" layout.  I will mark the table for each building footprint, then drill holes for powering lights. I need to trim the upper ridgeline plywood back some more to allow for the hillside slope down to the "Village of Deichman".  I also placed buildings in the industrial area, but this is subject to change as I build the elevated bridgework extension on the upper ridgeline reverse loop by the docks.  After placing buildings, I will run wire to the Atlas O Signals on the upper ridgeline before I do the rock quarry wall, sealing some of the access to the wiring. I made more progress in the last two days, then in the last three months.

Attachments

Images (8)
  • DSCN2142: C&O H7 #1578 steams into Village of Deichman.
  • DSCN2140: Village of Deichman nestled below the ridgeline upper track.
  • DSCN2139: Newly moved siding to accommodate Bethlehem Steel Culvert Unloader/Loader.
  • DSCN2133: Open area ready for Bethlehem Trackside Crane, either along river in foreground or open space in yard.
  • DSCN2131: Interlocking Tower a single Pratt Truss Swing Bridge across river.
  • DSCN2132: Swing Bridge at middle bridge Interlock.
  • DSCN2138: Upper ridgeline Country store and Logging Camp. Hillside not built yet.
  • DSCN2128: Dockside industrial area. T-square locates future elevated reverse loop off bridge in background.
RSJB18 posted:

Mark- I have one in College and one in Middle School. I've got a few years to go but I get it, family first.

Bob

Bob,

Yes, I wished our girls had been interested in trains, but my dad wished I had been interested in fishing, and I bought trains instead.  We helped them develop their own interests and talents.  Now I am a young 60, and you can call me Nester!  lol

Started mocking my module up. Pulled out the RS3 project to gain some motivation on it as well. Basically I am planning this to be the far end of a 15 foot industrial complex. There will be a drainage ditch between the tracks as is common in the northern Oregon area. It will come out of a culvert at the end of the module. Lots of overgrown grass and shrouds and debris to break the scene up. Anyways. Here is a few pics of everything just sitting in place to give a idea of what's coming next. IMAG0065
IMAG0061IMAG0053

Attachments

Images (3)
  • IMAG0065
  • IMAG0061
  • IMAG0053

Thank you Mark. 


What does the RS3 project entail? Well here is a run down lol. 

First it is a older weaver model so,cracked gears replaced was the first thing.

Now what's left to finish.

All brass grab irons. Door handles. Stanchions,handrails and lift rings 

Semi scratch built fuel tank.

P & D hobbies brass fan grill and fan. 

Brass breather.

PSC exhaust stack 

Brass sand fill hatches. 

Detailed cab interior.

Brass horn and bracket.

New pilot details. Coupler lift bars. Mu hoses. Overland models plows. 

Replace the brake cylinders on the trucks. Brake chain hanger and such for the trucks as well. 

TMCC conversion and sound coming later. 

P and D window kit. Wiper blades. 

New dual sealed beam headlight castings. 

Ditch lights. And of course paint and weathering. Still adding to the parts Pile so it may be a while longer till it's done. And who knows what else I will change.  


Add Reply

Post

OGR Publishing, Inc., 1310 Eastside Centre Ct, Suite 6, Mountain Home, AR 72653
800-980-OGRR (6477)
www.ogaugerr.com

×
×
×
×
Link copied to your clipboard.
×
×