TedW posted:
mike g. posted:

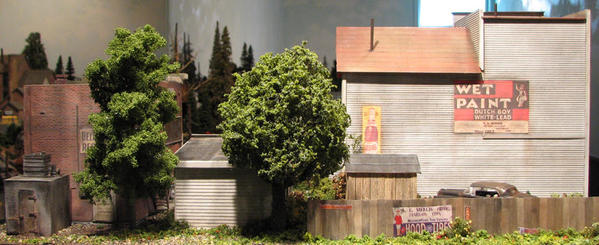
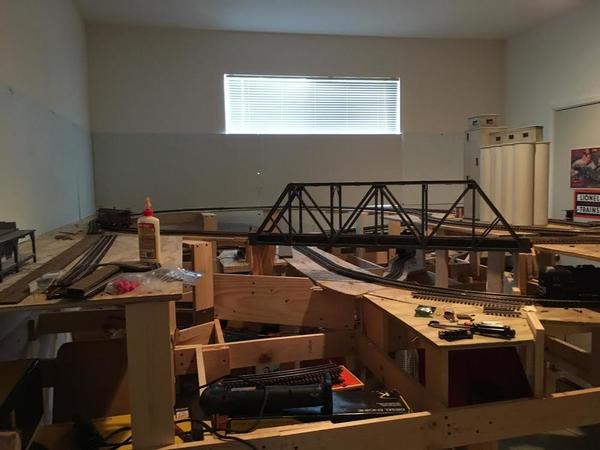
Looking good Ted, now all you need is some cars and a couple of folks standing around!

Thx Mike.  Where can I look for cars?  Michaels, Hobby Lobby or internet?  Need 1/48 or what's acceptable close in scale?  And school me on weathering powder. Is it brushed(make up) on, rubbed on(finger tips or cloth) dusted, or what?  Thx in advance for the help. 

Sometimes the Dollar General has vehicles in their toy section. Cheap too!

I guess this might qualify for something I did on my layout.  I was in Lancaster, PA last weekend for a wedding and took a day trip to Strasburg.  I saw the well restored PRR #460.  I have the Lionel Lindbergh Atlantic on my layout. It has a RPO, a combine baggage/coach and a couple of coaches behind it. The museum is really nice.  Iconic locos and well restored passenger cars.  A real treat.

Over the last few months, I've been kit bashing a Lionel Rico Station that I bought roughly assembled at a yard sale.  My plan was to divide the station into a warehouse for my Morrison's DOORS Factory and a country station to be finished some time in the future.  I finished the back of the warehouse with a brick wall.  I used Woodland Scenics window glazing material on all the windows & WS cinders and coarse grass on the edges.  To get rid of the original plastic colors, I used a variety of subtle latex paints.  Finally, I added a wood stove pipe through the roof & lit it up!  This building has an additional purpose - it hides an MTH power distribution board.

IMG_1246

IMG_0569IMG_0825IMG_0826IMG_0827IMG_0828

IMG_0830IMG_0834IMG_0835IMG_0837IMG_0838

IMG_0564

Attachments

Images (13)
  • IMG_1233
  • IMG_1246
  • IMG_0569
  • IMG_0825
  • IMG_0826
  • IMG_0827
  • IMG_0828
  • IMG_0830
  • IMG_0834
  • IMG_0835
  • IMG_0837
  • IMG_0838
  • IMG_0564

Went to a friends house to help wire up some miller engineering signs. Things did not go as planed. I only got one sign working instead of three. It took a long time to figure out just where to place the Steve's lay out sign and then it took for ever to cut the hole in the base board. Then I hook up that sign wrong and burnt up the control board. hooked up rail road crossing flashing lights. Did get the National Bo sign mounted ready to be wired. will have to back next week to finish up. sorry no pictures Steve may post his own pictures. now it is time for me to get to work on my layout tyding up little things. I will try to post pictures of what I do today.

pennsynut posted:

I guess this might qualify for something I did on my layout.  I was in Lancaster, PA last weekend for a wedding and took a day trip to Strasburg.  I saw the well restored PRR #460.  I have the Lionel Lindbergh Atlantic on my layout. It has a RPO, a combine baggage/coach and a couple of coaches behind it. The museum is really nice.  Iconic locos and well restored passenger cars.  A real treat.

Any photos? The last time I was there, that loco was still in the shop so I didn't get to see it.

pennsynut posted:

I guess this might qualify for something I did on my layout.  I was in Lancaster, PA last weekend for a wedding and took a day trip to Strasburg.  I saw the well restored PRR #460.  I have the Lionel Lindbergh Atlantic on my layout. It has a RPO, a combine baggage/coach and a couple of coaches behind it. The museum is really nice.  Iconic locos and well restored passenger cars.  A real treat.

Love that museum and the Strasburg RR!

TedW posted:
mike g. posted:

Looking good Ted, now all you need is some cars and a couple of folks standing around!

Thx Mike.  Where can I look for cars?  Michaels, Hobby Lobby or internet?  Need 1/48 or what's acceptable close in scale?  And school me on weathering powder. Is it brushed(make up) on, rubbed on(finger tips or cloth) dusted, or what?  Thx in advance for the help. 

Ted,

Take a look at this video regarding weathering with chalks/powders:

https://www.youtube.com/watch?v=Kqzy3SHCCf

I prefer the powders from Bragdon Enterprises.

Make sure to seal your work after completed with a spray on matte finish clear coating.

As to the cars, many of us use 1:43 scale vehicles due to cost and availability even though they are slightly larger than1:48.

Last edited by HMorgan125
HMorgan125 posted:
TedW posted:
mike g. posted:

Looking good Ted, now all you need is some cars and a couple of folks standing around!

Thx Mike.  Where can I look for cars?  Michaels, Hobby Lobby or internet?  Need 1/48 or what's acceptable close in scale?  And school me on weathering powder. Is it brushed(make up) on, rubbed on(finger tips or cloth) dusted, or what?  Thx in advance for the help. 

Ted,

Take a look at this video regarding weathering with chalks/powders:

https://www.youtube.com/watch?v=Kqzy3SHCCf

I prefer the powders from Bragdon Enterprises.

Make sure to seal your work after completed with a spray on matte finish clear coating.

As to the cars, many of us use 1:43 scale vehicles due to cost and availability even though they are slightly larger than1:48.

Appreciate the link(help). I'll watch it. I was thinking something close to 1/48 would be ok(acceptable).  Thx again. 

TedW posted:
HMorgan125 posted:
TedW posted:
mike g. posted:

Looking good Ted, now all you need is some cars and a couple of folks standing around!

Thx Mike.  Where can I look for cars?  Michaels, Hobby Lobby or internet?  Need 1/48 or what's acceptable close in scale?  And school me on weathering powder. Is it brushed(make up) on, rubbed on(finger tips or cloth) dusted, or what?  Thx in advance for the help. 

Ted,

Take a look at this video regardingweathering with chalks/powders:

https://www.youtube.com/watch?v=Kqzy3SHCCf

I prefer the powders from Bragdon Enterprises.

Make sure to seal your work after completed with a spray on matte finish clear coating.

....

Appreciate the link(help). I'll watch it. I was thinking something close to 1/48 would be ok(acceptable).  Thx again. 

Hi TedW, Exactly what HMorgan has explained is what I do, too.

IMG_0943

FrankM


Attachments

Images (1)
  • IMG_0943
HMorgan125 posted:
TedW posted:
mike g. posted:

Looking good Ted, now all you need is some cars and a couple of folks standing around!

Thx Mike.  Where can I look for cars?  Michaels, Hobby Lobby or internet?  Need 1/48 or what's acceptable close in scale?  And school me on weathering powder. Is it brushed(make up) on, rubbed on(finger tips or cloth) dusted, or what?  Thx in advance for the help. 

Ted,

Take a look at this video regarding weathering with chalks/powders:

https://www.youtube.com/watch?v=Kqzy3SHCCf

I prefer the powders from Bragdon Enterprises.

Make sure to seal your work after completed with a spray on matte finish clear coating.

As to the cars, many of us use 1:43 scale vehicles due to cost and availability even though they are slightly larger than1:48.

Wow, and here I thought it some sort of dry application. Makes a whole lot more sense now after a little primer watching some YT videos of the process.  Will have to figure out a way to practice first before the layout attempt. Thx again for the info. Ted

I got my braces on the bottom of the legs. It is a tight spot to start with so I started little by little easing the table into place. But in order to get it into position I am going to have to whittle a  bit off the corner where the sewer pipe is. Once I get it into place I can level it and bolt it to the other table. But it feels good to almost be done with that. My next project is to build the bridge between the two tables by the washer and dryer. Pics..........Paul

DSCN0679DSCN0681

Attachments

Images (2)
  • DSCN0679
  • DSCN0681

Mark thanks, once that table is in position there will be hardly any space around it because it is under the stairs. That is why I did all the track, ballast and ground turf first. But under the one section where I put the cross braces on I will have a shelf to store at least a few things. I will eventually be adding more table to the front that is exposed so I can run the siding with the black ballast out and around to the back of the basement. My idea right now is to place a coal mine there so I can pull loaded coal hoppers out of it but bringing them through the smaller opening. As to a plan for this layout I sort of have one but nothing set in stone. I am sort of winging it and in a couple of spots I'll be changing a few things........Paul

paul 2 posted:

Mark thanks, once that table is in position there will be hardly any space around it because it is under the stairs. That is why I did all the track, ballast and ground turf first. But under the one section where I put the cross braces on I will have a shelf to store at least a few things. I will eventually be adding more table to the front that is exposed so I can run the siding with the black ballast out and around to the back of the basement. My idea right now is to place a coal mine there so I can pull loaded coal hoppers out of it but bringing them through the smaller opening. As to a plan for this layout I sort of have one but nothing set in stone. I am sort of winging it and in a couple of spots I'll be changing a few things........Paul

That sounds nice, Paul!  Thank you!

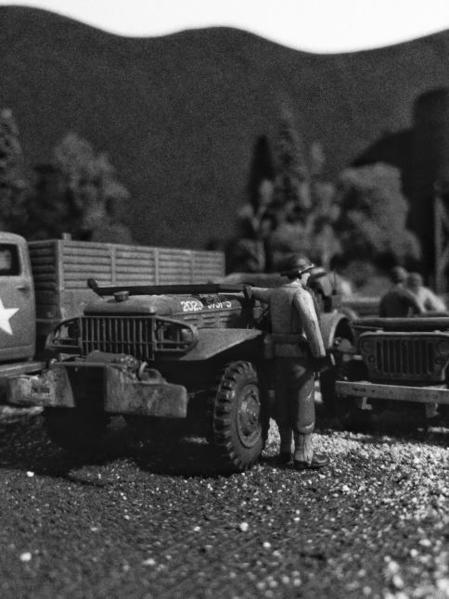
I got tired of several figures leaning up against vehicles, so last night, I glued several down to where I want them standing for quite a while.

The GI's are mostly leaning on stuff for now as I still need to place a Quonset hut I'm working on and will need to determine the placement of them after it's in place...

0809172311a_Burst01-1-01_resized0809172311-1-01_resized

Attachments

Images (2)
  • 0809172311a_Burst01-1-01_resized
  • 0809172311-1-01_resized
Last edited by p51

I'm sitting here with that loopy whistle tone from "Moonlight Drive" going in my head and its all Decoy's fault. 

  Chalks and powders can kinda wait for a decision in permenancy before sealing. Some folks don't seal, and re weather when they feel it. Sealing usually darkens things a bit fyi. Folks use just about everything from hairspray to lacquer too.

I was busy, but stopped mid stride to turn the layout on.

I blew a whistle, shut if down, and got busy again, but was now smiling

p51 posted:
pennsynut posted:

I guess this might qualify for something I did on my layout.  I was in Lancaster, PA last weekend for a wedding and took a day trip to Strasburg.  I saw the well restored PRR #460.  I have the Lionel Lindbergh Atlantic on my layout. It has a RPO, a combine baggage/coach and a couple of coaches behind it. The museum is really nice.  Iconic locos and well restored passenger cars.  A real treat.

Any photos? The last time I was there, that loco was still in the shop so I didn't get to see it.

Thanks for replying guys. I will post a photo but it shows front and just a little of one side. The loco shines. 


Attachments

Images (1)
  • IMG953509

Well I had planned to get out early but slept in till 9 AM, then by the time I put the clean laundry away, washed and put the dishes away  then got my  bedridden companion settled for the morning   it was 11:30  before I went out to uncover the train table

first taking the plastic cover from the extension part, I tackled the  older  part of the table, taking the tarps off, then the plastic  so I could remove the wood toping and finally the skeleton sticks supporting the covering.

I was then able to bring out some of the buildings and set things up so when I ran the  train  it was not just on a bare table ..

I made one video  but it was a bit large for the forum  so I posted on you tube at this address

https://youtu.be/nslwevnT4Bw

and as I always do when I  finish placing the buildings is take pictures  so I  see how it looked and if I want to change anything ...


it was a  bit windy and my sail  boating girls had a hard time staying up right


August 12 2017 001August 12 2017 002August 12 2017 003August 12 2017 004August 12 2017 005August 12 2017 006August 12 2017 007August 12 2017 009August 12 2017 010August 12 2017 011August 12 2017 012August 12 2017 013August 12 2017 014August 12 2017 015August 12 2017 016August 12 2017 017August 12 2017 018August 12 2017 019August 12 2017 020August 12 2017 021August 12 2017 022August 12 2017 023August 12 2017 024August 12 2017 025August 12 2017 026

Attachments

Images (25)
  • August 12 2017 001: new extension protected by plastic
  • August 12 2017 002: lay out not yet complete  too many idea in head  causing structual blocl
  • August 12 2017 003: green tarps in about photo  have been taken off
  • August 12 2017 004
  • August 12 2017 005: plastic off  leaving me with wooden  tops far end
  • August 12 2017 006: near end
  • August 12 2017 007: skeleton structure support for covering
  • August 12 2017 009: finally  table it ready  to work on
  • August 12 2017 010: start of new extension
  • August 12 2017 011: of course my light house at end of all this
  • August 12 2017 012: first try at placeing buildings
  • August 12 2017 013: these represent copies of building on main street at Heritage Park  in Calgary
  • August 12 2017 014: a few  Clever models
  • August 12 2017 015
  • August 12 2017 016
  • August 12 2017 017
  • August 12 2017 018
  • August 12 2017 019
  • August 12 2017 020: haunted house up on mountain
  • August 12 2017 021: tried my hand at creating a sea gull
  • August 12 2017 022: the row houses were an attempt at  copying the colorful houses in Newfoundland
  • August 12 2017 023: Of course can never forget Speedway
  • August 12 2017 024
  • August 12 2017 025
  • August 12 2017 026: tried to take shot of  my tunnel
TedW posted:
HMorgan125 posted:
TedW posted:
mike g. posted:

Looking good Ted, now all you need is some cars and a couple of folks standing around!

Thx Mike.  Where can I look for cars?  Michaels, Hobby Lobby or internet?  Need 1/48 or what's acceptable close in scale?  And school me on weathering powder. Is it brushed(make up) on, rubbed on(finger tips or cloth) dusted, or what?  Thx in advance for the help. 

Ted,

Take a look at this video regarding weathering with chalks/powders:

https://www.youtube.com/watch?v=Kqzy3SHCCf

I prefer the powders from Bragdon Enterprises.

Make sure to seal your work after completed with a spray on matte finish clear coating.

As to the cars, many of us use 1:43 scale vehicles due to cost and availability even though they are slightly larger than1:48.

Wow, and here I thought it some sort of dry application. Makes a whole lot more sense now after a little primer watching some YT videos of the process.  Will have to figure out a way to practice first before the layout attempt. Thx again for the info. Ted

I went to that Bragdon website and they have "kits" of powders. What would I buy as a beginner that would give me the basics to get me started?  Here's an example of their page.  Thx again for the help  Ted

IMG_2137


Attachments

Images (1)
  • IMG_2137

Hi Ted. There are a lot of great choices there. Your guess is as good as mine. I also want to tell you about another weathering medium. Several years ago I read in the Railroad Model Craftsman magazine, about using eye makeup.It does work great and it can be had inexpensively at dollar stores and other bargain outlets. I'ved used off the wall colors such as blue to replicate effects such as the sun bleached paint on a B&O engine. The ideas are endless and are only limited by your imagenation.

Mike

 
TedW posted;

 Where can I look for cars?  Michaels, Hobby Lobby or internet?  Need 1/48 or what's acceptable close in scale? 

1:50s is ok going the other way. 1.60s is a little small imo, unless your running lots of semi scale.

You can keep the big ones closer and the smaller ones further away for a better cohesion by forced perspective.

Mike welkie posted:

Hi Ted. There are a lot of great choices there. Your guess is as good as mine. I also want to tell you about another weathering medium. Several years ago I read in the Railroad Model Craftsman magazine, about using eye makeup.It does work great and it can be had inexpensively at dollar stores and other bargain outlets. I'ved used off the wall colors such as blue to replicate effects such as the sun bleached paint on a B&O engine. The ideas are endless and are only limited by your imagenation.

Mike

That's a very good tip, Mike.  I've never heard of it before.

I must check it out.

Cheers

Yes, Max and they're cheap with an infinate amount of colors available. Some of the earthy ,fleshy colors are great for dust effects as well as sand streaks down the side of a locomotive from a sand box. The other colors are great for faded paint effects. The ideas are endless,and like I said the prices are cheap and can be had at the dollar store and other outlets.

Mike

Mike welkie posted:

Hi Ted. There are a lot of great choices there. Your guess is as good as mine. I also want to tell you about another weathering medium. Several years ago I read in the Railroad Model Craftsman magazine, about using eye makeup.It does work great and it can be had inexpensively at dollar stores and other bargain outlets. I'ved used off the wall colors such as blue to replicate effects such as the sun bleached paint on a B&O engine. The ideas are endless and are only limited by your imagenation.

Mike

Interesting, Mike.  Do you apply them with water or is makeup "waterproof". Or, just dry with the softbrush supplied?  Whats the process?  Any pics you can post?

Not purely waterproof, persay ,but should be sealed as with chalk ,if the item is to be handled a bit. There are no special application techniques. Just use the little foam applicator brush that normally comes with the makeup. As with chalk, makeup is very foregiving and can be removed prior to sealing like chalk, if you don't like the results. Just start over again. Sorry, dont have anything to post as a how to video. There are tons of unorthodox things you can add to your modelers bag of tricks. Another thing I've learned is to sprinkle loose powdered cement around the hatches of a covered hopper to represent spilled lading. Sometimes at a home improvement store, you may find a burst bag, and you can sweep up a little bit without purchacing a whole bag.

Mike


TedW posted:
Train Nut posted:

Tore it down. Layout in the trash. Trains destination climate controlled storage. Final Destination Unknown.

Was it something I said?  

No, you're good!


Trying to sell the house for a while. Sold it.  Trouble finding a new house to our liking.  Going to a rent for a month or two. Hopefully we'll have a home soon and a new layout in the works!

Use whatever you'd feel comfortable with. I've heard nothing but good about the bragdon powders! I'm always open to other techniques that I read about or learn in clinics. That's what so wonderfull about this hobby. There is a wealth of information out there and everyday we can learn and share with others! This forum is priceless for such knowledge, and the talented modelers here !

Mike

Mike welkie posted:

Use whatever you'd feel comfortable with. I've heard nothing but good about the bragdon powders! I'm always open to other techniques that I read about or learn in clinics. That's what so wonderfull about this hobby. There is a wealth of information out there and everyday we can learn and share with others! This forum is priceless for such knowledge, and the talented modelers here !

Mike

Yup, I like to know what all's out there. Only way to learn.  Variety. 

I've used and like the Bragdon powders. Light ash is the one i use the most, but also use black, light rust and dark rust. I believe Joel made me up a small assortment with those in it. A little goes a very long way. The photo of a GP9 i have for sale shows my first attempt using them on the trucks and couplers.

P1000130

Attachments

Images (1)
  • P1000130
Last edited by modeltrainsparts

Yes Sir Ted. Variety is the spice of life . We cannot stop learning, from yourself as well as the other fine modelers on here! We are so fortunate to have this forum a medium to share our infinite abilities . Be it Myles with all of the tech that he brings with his projects, or Mitch with his whimsy and geraffe, or Bigboy with his tremendous wiring expertise ! These only name a few from the vast melting pot that we know as the ogauge forums!

Mike

Moonson posted:

TEDW, Just as Jackson said, "A little goes a long way," Here is a variety of examples of my using the Bragdon line and trying my best to restrain myself from over-doing it with them...HHH

IMG_0173

IMG_0360

IMG_0361_edited-1

IMG_0758

IMG_3904

IMG_7669IMG_0234ced_edited-1

I hope these are helpful in offering you a perspective on using those powders.

FrankM

Terrific photos. I especially like the alley photo!

gandydancer1950 posted:
Moonson posted:

TEDW, Just as Jackson said, "A little goes a long way," Here is a variety of examples of my using the Bragdon line and trying my best to restrain myself from over-doing it with them...

IMG_0758

I hope these are helpful in offering you a perspective on using those powders.

FrankM

Terrific photos. I especially like the alley photo!

Thank You, Gandydancer! Here are a couple shots of that real estate, from a different angle...

Village neighbors, rear

IMG_0752

FrankM

Attachments

Images (2)
  • Village neighbors, rear
  • IMG_0752

   I used to use chaulks for artwork on paper. Scraping it off and into a pile for brushing.

  A good art supply store might be a good alternative for those without a good modeling shop.

  Not quite so patient or fussy anymore, I like washes and drybrushing with water based craft acrlyics. Paint, but not extremely durable, over time, touching things up with "maintance paint" or working with the new imperfections to look more "aged" is needed from daily handling.

  Not on everything, but I like slowly ageing things in stages too; spred over months, with running in between. Then spruce up paint of say...just the steps and hand rails. A month later, add a grime wash layer, and after it dries, freshly paint the window frame. etc.

It's is kinda fun doing both Maintenance freshening, and ageing/weathering at the same time.

One tip, sealing coatS, plural, not 1 coat, but many mistings. Go slow, no "wet" look till its mostly sealed by "dot" accumulation from a few layers. Wetness can cause a smeary look and/or washout.

Moonson posted:

TEDW, Just as Jackson said, "A little goes a long way," Here is a variety of examples of my using the Bragdon line and trying my best to restrain myself from over-doing it with them...HHH

IMG_0173

I hope these are helpful in offering you a perspective on using those powders.

FrankM

I like these two also. Your work is really impressive, along with the photography, equally so.  The "layout in my head" will benefit from this dicussion. Thank you all.  Ted

MaxSouthOz posted:
Moonson posted:

TEDW, Just as Jackson said, "A little goes a long way," Here is a variety of examples of my using the Bragdon line and trying my best to restrain myself from over-doing it with them...

I hope these are helpful in offering you a perspective on using those powders.

FrankM

Excellent work, Frank.

Max, your work can not be undersold also.  It's excellent.  Those of you who haven't should check out his build thread.  Very nice.  

Moonson posted:
gandydancer1950 posted:
Moonson posted:

TEDW, Just as Jackson said, "A little goes a long way," Here is a variety of examples of my using the Bragdon line and trying my best to restrain myself from over-doing it with them...

IMG_0758

I hope these are helpful in offering you a perspective on using those powders.

FrankM

Terrific photos. I especially like the alley photo!

Thank You, Gandydancer! Here are a couple shots of that real estate, from a different angle...

Village neighbors, rear

IMG_0752

FrankM

Great scene!!!!!!

Train Nut posted:
TedW posted:
Train Nut posted:

Tore it down. Layout in the trash. Trains destination climate controlled storage. Final Destination Unknown.

Was it something I said?  

No, you're good!


Trying to sell the house for a while. Sold it.  Trouble finding a new house to our liking.  Going to a rent for a month or two. Hopefully we'll have a home soon and a new layout in the works!

Ah yes, we were in a similar position once.  We kept most of our things boxed up while in the rental.  Look for a house with a big basement.  I got stuck with a spare room!  I wish you the best!!

Had friends over last night to play trains and a cook out. I do believe every one had a good time and seem to like my layout. Trains ran great as they should that is why I love my all MTH layout. My friend took a lot of pictures as soon as he sends them to me I will try and post some of them. All the responses from every body sure mad me proud. I can now rest a lot easer. pictures will follow as soon as I get them.
Carl Machen posted:

Had friends over last night to play trains and a cook out. I do believe every one had a good time and seem to like my layout. Trains ran great as they should that is why I love my all MTH layout. My friend took a lot of pictures as soon as he sends them to me I will try and post some of them. All the responses from every body sure mad me proud. I can now rest a lot easer. pictures will follow as soon as I get them.

All the preparation paid off Carl.  Glad everyone had a great time.  I look forward to the pics.  


Moonson posted:

TEDW, Just as Jackson said, "A little goes a long way," Here is a variety of examples of my using the Bragdon line and trying my best to restrain myself from over-doing it with them...HHH

IMG_0173

IMG_0360

IMG_0361_edited-1

IMG_0758

IMG_3904

IMG_7669IMG_0234ced_edited-1

I hope these are helpful in offering you a perspective on using those powders.

FrankM

Frank,

Your weathering is absolutely fantastic and very inspirational!!!

Ted,

To answer your question regarding the Bragdon powders...I bought a grimy gray, soot black, and medium rust (all 2 oz) and they have lasted a long time as you do not need to use very much at one time.  I use make-up application pads, brushes, and foam applicators and use several light coats of the matte sealer when finished.

I like the powders vs chalk as they adhere better although sometimes you need to mist a shiny surface first with the matte spray, let it dry, and then apply the powders (use painters tape to protect plastic windows before spraying).

I lightly misted the foam streets and parking lots with the Rustoleum "aged iron" metallic spray paint before weathering to create the look of asphalt.  This will make it harder to get the auto pinstriping tape to stick to the foam, however, so you may need add white glue or matte medium to the striping or paint the stripes between strips of painters tape.  I added any weathering chalk after the striping was finished.

TedW posted:
Carl Machen posted:

Had friends over last night to play trains and a cook out. I do believe every one had a good time and seem to like my layout. Trains ran great as they should that is why I love my all MTH layout. My friend took a lot of pictures as soon as he sends them to me I will try and post some of them. All the responses from every body sure mad me proud. I can now rest a lot easer. pictures will follow as soon as I get them.

All the preparation paid off Carl.  Glad everyone had a great time.  I look forward to the pics.  


Carl:


Terry Chris and I all had a GREAT time.Thanks for the open house, food, friends and trains!

paul 2 posted:

Working on getting the table into position but hit a slight snag. My measurements were too good. I didn't allow for swinging the table into the spot. So I have to figure how I can cut back the partial wall a bit more so I can swing the table into place without cutting the PVC sewer line. The trials and errors of building a layout. LOL.............Paul

Paul, if you just whip out the Jig saw and  go to town your there man! I am sure everything up stairs will be fine!

Mike welkie posted:

Looks great Terry! I like the look or vibe I get from it. I don't know why but I get the feel of a vintage layout from the fifties or early sixties.Maybe its the backdrop. Was it done by yourself ? Is the layout located in your garage and do you have any trouble with temperature swings?

Thanks;

Mike

That is the half that is in the garage.  The garage is insulated and I have a small air conditioner that makes it bearable most of the time.  We live in Beaumont, Ca. so hot is a way of life.  I model Southern Pacific in the central valley so that is pretty much what the hills look like. If it gets too hot I just close the door and work on the section that is in the house (picture attached)  That is a pretty early picture.  Things have progressed since then.


unnamed copy

Attachments

Images (1)
  • unnamed copy
Carl Machen posted:

Had friends over last night to play trains and a cook out. I do believe every one had a good time and seem to like my layout. Trains ran great as they should that is why I love my all MTH layout. My friend took a lot of pictures as soon as he sends them to me I will try and post some of them. All the responses from every body sure mad me proud. I can now rest a lot easer. pictures will follow as soon as I get them.

Carl and his lovely wife Judy did a wonderful job of hosting the August Meeting of the NCHR Train Club.

Carl's layout has changed quite a bit since the last time I was at his house taking pictures of the layout. While I have not edited all of the pictures I took at Carl's house I will post some of the ones I did edit. 

Carl's layout is very interesting with at least four long trains running at once and a customized MTH Firehouse which has been updated to have the Fire Engine and the Fire Chiefs car light up during operation.

His layout features an elevated section of track and also an incline in the rear of the layout. His new Esso Gas & Oil depot really catches your eye as does his military trains. He runs a lot of B&O, Western Maryland and Pennsylvania RR locos. His walls are filled with various road names of engines, freight cars and passenger cars.

Hopefully these photos taken with my Nikon D5100 DSLR will give you an idea as to the time and effort it took to build this entertaining layout. I'm hoping to spend a day with Carl photographing the layout with my studio umbrella lights for greater depth of field and natural lighting.

SteveDSC_6636DSC_6637DSC_6638DSC_6639DSC_6640DSC_6645DSC_6649DSC_6650DSC_6651DSC_6662DSC_6653DSC_6672DSC_6676DSC_6681DSC_6682DSC_6683DSC_6684DSC_6697DSC_6698DSC_6716DSC_6710DSC_6713DSC_6717DSC_6719DSC_6720DSC_6722DSC_6729DSC_6639


DSC_6645


Attachments

Images (27)
  • DSC_6636
  • DSC_6637
  • DSC_6638
  • DSC_6639
  • DSC_6640
  • DSC_6645
  • DSC_6649
  • DSC_6650
  • DSC_6651
  • DSC_6662
  • DSC_6653
  • DSC_6672
  • DSC_6676
  • DSC_6681
  • DSC_6682
  • DSC_6683
  • DSC_6684
  • DSC_6697
  • DSC_6698
  • DSC_6716
  • DSC_6710
  • DSC_6713
  • DSC_6717
  • DSC_6719
  • DSC_6720
  • DSC_6722
  • DSC_6729
RSJB18 posted:
paul 2 posted:

RSJB18, if I had that view close to me I would take time off from trains to enjoy it too..............Paul

Thanks Paul. It's 5 hours from home but worth the trip.  

Lake George N.Y.  

BOB

Looks great, Bob!  We visited Lake George 5 years ago, and loved it.  We were planning a trip this summer, but both my parents were in the hospital, and we just got them into a personal care home, plus my widowed moth-in-law lives across the road and depends on us for most things; so we scraped the idea.  I was considering the Trout House this time.  We will try again another year.

It was my youngest grandson's Bar Mitzvah weekend and we had lots of family and friends in from out of town. Got to show off the layout and the latest work. Everyone was properly impressed, but I had problems running the trains. The misaligning rails at the swing gate caused the Super Chief to derail and drag the derailed cars into the tunnel. I couldn't pull it out by hand due to the angles of the cars jamming into the supports inside the tunnel, so I had to go under the layout and reach up into the track work and pull out the cars causing the problem. I did this while still wearing my suit just coming from Temple, therefore, I couldn't get down on my knees or sit on the floor. I did it and didn't get hurt in the process.

I found out that if I used a speed restriction, the train would negotiate the joint without derailing. It wasn't the misalignment per ce causing the problem. It's the velocity of the wheels hopping and what direction they were facing when they come back down. When I went slow the hop was insignificant.

Then I tried to run the Centipede and due to the length of the time it's been sitting in the same spot and not running, it ran terribly. It would go in one direction, but then spun its wheels when trying to go in the other when one of the units motors were not running in that direction. I then got it going and forgot to align the switch it was approaching and it derailed. When that multi-wheeled monstrosity derails, all the kings horses and all the kings men couldn't get it back on the tracks again. I finally got all of its wheels back on the track and pulled it back into its siding to sit for another couple of months until I get in the mood to find out what's going on with it.

After initial teething pains, a revisit to my can motored 8977 was in order this weekend.  All the previous work in adapting small toothed gears couldn't be made to run smoothly or quietly.   It ran fine at a crawl but set up a grinding noise at speed that translated into a slight visible binding....definitely too much stress put on a small motor.

I returned to using the stock Lionel larger toothed gears.  A little heat from my propane torch persuaded the small brass gear off the armature shaft of the Pullmor and with a few short pieces of brass tubing, it was soldered to the shaft of the can motor.  One unfortunate trait of the poor little B6 is its lack of traction, what with no traction tires or Magnetraction.   The 2 lead weights in the ample boiler space makes puling a 6 car train up my 3% grades with only a bit of wheel slip.  After removing the U joint from the now back end of the motor, some more heat and a few taps with the hammer got the brass flywheel installed.  A number of other tweaks and re-engineering tasks were performed, flaws that came to lite in tests with the small toothed gear design.  My first motor mount design proved ideal for adjusting gear mesh and a brass cab floor supports a foam rubber pad for the motor to lightly rest upon.

All buttoned back up, the protruding flywheel is an unfortunate compromise, but with the Pullmor gone, there's enough room for a crew and some backhead detail if desired.  ERR Cruise Commander  ( no sounds ) takes up space in the tender, which can probably be shuffled just enough to fit in a sound board and speaker.   Electro-couplers, a whole nuther story, were applied for switching duties anywhere.   I replaced the cast coal load with real coal on electrically isolated screen for the antenna.  LED headlights installed front and rear topped off the job....for now.  The noisiest thing about her now is clicks from the smoke puffer mechanism and the pickup rollers over track joints.  Smooth and silent!

Bruce


Trainman2001 posted:

It was my youngest grandson's Bar Mitzvah weekend and we hadlots of family and friends in from out of town. Got to show off the layout and the latest work. Everyone was properly impressed, but I had problems running the trains. The misaligning rails at the swing gate caused theSuper Chief to derail and drag the derailed cars into the tunnel. I couldn't pull it out by hand due to the angles of the cars jamming into the supports inside the tunnel, so I had to go under the layout and reach up into the track work and pull out the cars causing the problem. I did this while still wearing my suit just coming from Temple, therefore, I couldn't get down on my knees or sit on the floor. I did it and didn't get hurt in the process.

We all know that'ssome kind of rule, inflicted on us in several stages, right?

(1.) Derail during company.

(2) Derail and drag crippled/motion-challenged cars into tunnels.

(3) Derailments cannot  be reached by thrusting an arm into a tunnel,

(4) Disappointed operator MUST have to crawl under the layout to dislodge the offending cars.

(5.) Hobbyist emerges from layout underworld crestfallen and feeling silly.

Yeeeegods, when will we ever learn. Learn what? I have NO idea.

Case closed. Errrr, well, rather, case continued, on infinitum.

Apparently.

FrankM.

No doubt there's some kind of cosmic intervention working. Possibly due to the upcoming solar eclipse that will affect the Commonwealth of KY particularly this time. I'm going to buy a de-humidifier for the basement to help control the dimensional changes of the swing door in the Summer season. The test will be if the door shrinks back into alignment in the winter.

Myles,

Congratulations to your grandson!  I'm sorry you had trouble when visitors were at the layout.  I visited a local Forum member this week for the first time.  He has an outstanding collection of engines and rolling stock, much of which he custom painted and weathered.  He ran some trains for me.  One stopped in a corner.  Another suffered a derailment.  He brushed it off as it only happens for visitors.  I agreed.  The last visitor to see my Ceiling Central RR witnessed two trains gently sideswipe and one derailed and shorted out the hot and neutral.  I had run those two trains several times with no trouble, and I told him so.  I attribute it to our old nemesis, Murphy!  Upcoming eclipse, sun spots, whatever!  Actually I don't believe any of those, but it is a strange phenomenon indeed!  We are all with you!  Your ideas on the humidity is really a probable cause in your case.  Mine is running two tracks above my head in I low ceiling basement room where I can't see exactly how close the tracks are at points, though I don't run anything longer than 40' boxcars.

steve tapper posted:
Carl Machen posted:

Had friends over last night to play trains and a cook out. I do believe every one had a good time and seem to like my layout. Trains ran great as they should that is why I love my all MTH layout. My friend took a lot of pictures as soon as he sends them to me I will try and post some of them. All the responses from every body sure mad me proud. I can now rest a lot easer. pictures will follow as soon as I get them.

Carl and his lovely wife Judy did a wonderful job of hosting the August Meeting of the NCHR Train Club.

Carl's layout has changed quite a bit since the last time I was at his house taking pictures of the layout. While I have not edited all of the pictures I took at Carl's house I will post some of the ones I did edit. 

Carl's layout is very interesting with at least four long trains running at once and a customized MTH Firehouse which has been updated to have the Fire Engine and the Fire Chiefs car light up during operation.

His layout features an elevated section of track and also an incline in the rear of the layout. His new Esso Gas & Oil depot really catches your eye as does his military trains. He runs a lot of B&O, Western Maryland and Pennsylvania RR locos. His walls are filled with various road names of engines, freight cars and passenger cars.

Hopefully these photos taken with my Nikon D5100 DSLR will give you an idea as to the time and effort it took to build this entertaining layout. I'm hoping to spend a day with Carl photographing the layout with my studio umbrella lights for greater depth of field and natural lighting.

SteveDSC_6636DSC_6637DSC_6638DSC_6639DSC_6640DSC_6645DSC_6649DSC_6650DSC_6651DSC_6662DSC_6653DSC_6672DSC_6676DSC_6681DSC_6682DSC_6683DSC_6684DSC_6697DSC_6698DSC_6716DSC_6710DSC_6713DSC_6717DSC_6719DSC_6720DSC_6722DSC_6729DSC_6639


DSC_6645


Steve I can not thank you enough for taking these pictures. I enjoyed having everybody over playing trains. The fire house is the work of my sun in law Justin who is playing around with LEDs. I think this is  just the begining with him and LEDs I would like to thank him now for all his help and my Grand daughter Elizabeth who at the age of 6 started doing all the ground cover with fusion fiber. She did such a great job I named a town after her along with her sister and brother. They are what inspired me to name the railroad after them. the EA&J RR Elizabeth, Abigale  and Johnathan. thanks again Steve

brwebster posted:

After initial teething pains, a revisit to my can motored 8977 was in order this weekend.  All the previous work in adapting small toothed gears couldn't be made to run smoothly or quietly.   It ran fine at a crawl but set up a grinding noise at speed that translated into a slight visible binding....definitely too much stress put on a small motor.

I returned to using the stock Lionel larger toothed gears.  A little heat from my propane torch persuaded the small brass gear off the armature shaft of the Pullmor and with a few short pieces of brass tubing, it was soldered to the shaft of the can motor.  One unfortunate trait of the poor little B6 is its lack of traction, what with no traction tires or Magnetraction.   The 2 lead weights in the ample boiler space makes puling a 6 car train up my 3% grades with only a bit of wheel slip.  After removing the U joint from the now back end of the motor, some more heat and a few taps with the hammer got the brass flywheel installed.  A number of other tweaks and re-engineering tasks were performed, flaws that came to lite in tests with the small toothed gear design.  My first motor mount design proved ideal for adjusting gear mesh and a brass cab floor supports a foam rubber pad for the motor to lightly rest upon.

All buttoned back up, the protruding flywheel is an unfortunate compromise, but with the Pullmor gone, there's enough room for a crew and some backhead detail if desired.  ERR Cruise Commander  ( no sounds ) takes up space in the tender, which can probably be shuffled just enough to fit in a sound board and speaker.   Electro-couplers, a whole nuther story, were applied for switching duties anywhere.   I replaced the cast coal load with real coal on electrically isolated screen for the antenna.  LED headlights installed front and rear topped off the job....for now.  The noisiest thing about her now is clicks from the smoke puffer mechanism and the pickup rollers over track joints.  Smooth and silent!

Bruce

Nice job, Bruce.

I'm sure some black paint on the flywheel will help a lot. 

You're welcome Carl. Just glad that I was able to share these pictures here with you on the OGR Forum.

You have a terrific layout and it gets better every time I see it! Everyone had a great time at your party ans I especially enjoyed my conversation with your friend Bernie. I'm hoping to see his layout some day.

Here are a few more pictures of your layout and some of the neat trains you had running. I really liked the military cars from MTH and Menards.


SteveDSC_6646DSC_6647DSC_6648DSC_6657DSC_6659DSC_6655DSC_6671DSC_6674DSC_6693DSC_6712DSC_6705DSC_6703DSC_6721DSC_6665

Attachments

Images (12)
  • DSC_6648
  • DSC_6657
  • DSC_6659
  • DSC_6655
  • DSC_6671
  • DSC_6674
  • DSC_6693
  • DSC_6712
  • DSC_6705
  • DSC_6703
  • DSC_6721
  • DSC_6665
Carl Machen posted:
steve tapper posted:
Carl Machen posted:

Had friends over last night to play trains and a cook out. I do believe every one had a good time and seem to like my layout. Trains ran great as they should that is why I love my all MTH layout. My friend took a lot of pictures as soon as he sends them to me I will try and post some of them. All the responses from every body sure mad me proud. I can now rest a lot easer. pictures will follow as soon as I get them.

Carl and his lovely wife Judy did a wonderful job of hosting the August Meeting of the NCHR Train Club.

Carl's layout has changed quite a bit since the last time I was at his house taking pictures of the layout. While I have not edited all of the pictures I took at Carl's house I will post some of the ones I did edit. 

Carl's layout is very interesting with at least four long trains running at once and a customized MTH Firehouse which has been updated to have the Fire Engine and the Fire Chiefs car light up during operation.

His layout features an elevated section of track and also an incline in the rear of the layout. His new Esso Gas & Oil depot really catches your eye as does his military trains. He runs a lot of B&O, Western Maryland and Pennsylvania RR locos. His walls are filled with various road names of engines, freight cars and passenger cars.

Hopefully these photos taken with my Nikon D5100 DSLR will give you an idea as to the time and effort it took to build this entertaining layout. I'm hoping to spend a day with Carl photographing the layout with my studio umbrella lights for greater depth of field and natural lighting.

SteveDSC_6636DSC_6637DSC_6638DSC_6639DSC_6640DSC_6645DSC_6649DSC_6650DSC_6651DSC_6662DSC_6653DSC_6672DSC_6676DSC_6681DSC_6682DSC_6683DSC_6684DSC_6697DSC_6698DSC_6716DSC_6710DSC_6713DSC_6717DSC_6719DSC_6720DSC_6722DSC_6729DSC_6639


DSC_6645


Steve I can not thank you enough for taking these pictures. I enjoyed having everybody over playing trains. The fire house is the work of my sun in law Justin who is playing around with LEDs. I think this is  just the begining with him and LEDs I would like to thank him now for all his help and my Grand daughter Elizabeth who at the age of 6 started doing all the ground cover with fusion fiber. She did such a great job I named a town after her along with her sister and brother. They are what inspired me to name the railroad after them. the EA&J RR Elizabeth, Abigale  and Johnathan. thanks again Steve

Carl:

My wife, son and I had a GREAT time at your open house on Saturday. Though we are no longer an official member of the Northern central Hi-Railers, thank you for including us. It was great to see Craig, Steve and Dave again. What you have accomplished on your layout is stunning! Justin's LED work is outstanding.  I do believe an O Gauge Railroading magazine is in your future.

Over the last few days, I expanded the rail yard, well sort of, up on the wall! 

My first idea was to use a 1"X4"X8', which I decided against.  I then used a 1"X8"X8' so that I could get 2 side by rails to be used for rolling stock that I wanted to use but not on a day by day basis.  First series of pictures show this, but before I even loaded up the rolling stock, I removed the rail closest to the wall and went to the next level.

I added a 2"X3"X8' in place of the rear rail.  That way, I can see clearly what is on the back rail.  I also want to add a safety railing for both levels.  I'm glad that I didn't dispose of the 027 track from back in the 40's & 50's.  My dad converted to tubular O gauge in the late 50's.

IMG_0843IMG_0844IMG_0845IMG_0846IMG_0847IMG_0848

The 2 cars in the photo are test subjects, but most likely will not be up there.  The actual yard is directly below the new "shelf yard", I need to use the hand switcher.


Attachments

Images (6)
  • IMG_0843
  • IMG_0844
  • IMG_0845
  • IMG_0846
  • IMG_0847
  • IMG_0848

This morning the first thing I did was to run trains, albeit for 5 minutes, they were a fun filled five!!  

Just received a new ( to me ) MTH Premier Western Maryland boxcar from the Bay and a new MTH B&O side door caboose with an air whistle.  The side door caboose works well behind my B&O C-16 docksider which has no whistle .... at least until now ... pretty darn cool!

On the project list for this month: install DCS system.

Randy Harrison posted:
Carl Machen posted:
steve tapper posted:
Carl Machen posted:

Had friends over last night to play trains and a cook out. I do believe every one had a good time and seem to like my layout. Trains ran great as they should that is why I love my all MTH layout. My friend took a lot of pictures as soon as he sends them to me I will try and post some of them. All the responses from every body sure mad me proud. I can now rest a lot easer. pictures will follow as soon as I get them.

Carl and his lovely wife Judy did a wonderful job of hosting the August Meeting of the NCHR Train Club.

Carl's layout has changed quite a bit since the last time I was at his house taking pictures of the layout. While I have not edited all of the pictures I took at Carl's house I will post some of the ones I did edit. 

Carl's layout is very interesting with at least four long trains running at once and a customized MTH Firehouse which has been updated to have the Fire Engine and the Fire Chiefs car light up during operation.

His layout features an elevated section of track and also an incline in the rear of the layout. His new Esso Gas & Oil depot really catches your eye as does his military trains. He runs a lot of B&O, Western Maryland and Pennsylvania RR locos. His walls are filled with various road names of engines, freight cars and passenger cars.

Hopefully these photos taken with my Nikon D5100 DSLR will give you an idea as to the time and effort it took to build this entertaining layout. I'm hoping to spend a day with Carl photographing the layout with my studio umbrella lights for greater depth of field and natural lighting.

SteveDSC_6636DSC_6637DSC_6638DSC_6639DSC_6640DSC_6645DSC_6649DSC_6650DSC_6651DSC_6662DSC_6653DSC_6672DSC_6676DSC_6681DSC_6682DSC_6683DSC_6684DSC_6697DSC_6698DSC_6716DSC_6710DSC_6713DSC_6717DSC_6719DSC_6720DSC_6722DSC_6729DSC_6639


DSC_6645


Steve I can not thank you enough for taking these pictures. I enjoyed having everybody over playing trains. The fire house is the work of my sun in law Justin who is playing around with LEDs. I think this is  just the begining with him and LEDs I would like to thank him now for all his help and my Grand daughter Elizabeth who at the age of 6 started doing all the ground cover with fusion fiber. She did such a great job I named a town after her along with her sister and brother. They are what inspired me to name the railroad after them. the EA&J RR Elizabeth, Abigale  and Johnathan. thanks again Steve

Carl:

My wife, son and I had a GREAT time at your open house on Saturday. Though we are no longer an official member of the Northern central Hi-Railers, thank you for including us. It was great to see Craig, Steve and Dave again. What you have accomplished on your layout is stunning! Justin's LED work is outstanding.  I do believe an O Gauge Railroading magazine is in your future.

Carl's layout is certainly worthy of being featured in OGR magazine Randy. That is why I want to photograph the layout with my studio umbrella lights and assist Carl with his personal story of how he became involved in the hobby and how he built his layout.

As someone who has had their layout featured in OGR magazine, Run #247 January 2011, I know that I can help him accomplish this goal.

Steve


Spent the morning doing what Mother Nature was suppose to do for me.........rain. Well no such luck so I spent the morning and part of the afternoon watering. I didn't get down to the layout till late in the afternoon. I was able to get more wood cut off the wall. Worked the table into place but had to move it out to cut a bit more wood. I finally got it in after the third cut but then had trouble sliding it into the opening. For the life of me I could not figure what was hanging it up. Finally found the problem. The Masonite back drop was too tall for the opening. But after tugging and pushing to fit it in I decided to call it a day. Tomorrow I am going to work through the opening with a Dremel drill and trim the Masonite so it will fit into the opening. On a high note my Angie track side flats came today. Pics......Paul

DSCN0682DSCN0683DSCN0684DSCN0685DSCN0686

Attachments

Images (5)
  • DSCN0682
  • DSCN0683
  • DSCN0684
  • DSCN0685
  • DSCN0686
paul 2 posted:

Spent the morning doing what Mother Nature was suppose to do for me.........rain. Well no such luck so I spent the morning and part of the afternoon watering. I didn't get down to the layout till late in the afternoon. I was able to get more wood cut off the wall. Worked the table into place but had to move it out to cut a bit more wood. I finally got it in after the third cut but then had trouble sliding it into the opening. For the life of me I could not figure what was hanging it up. Finally found the problem. The Masonite back drop was too tall for the opening. But after tugging and pushing to fit it in I decided to call it a day. Tomorrow I am going to work through the opening with a Dremel drill and trim the Masonite so it will fit into the opening. On a high note my Angie track side flats came today. Pics......Paul

DSCN0682DSCN0683DSCN0684DSCN0685DSCN0686

Hey there Paul, those flats look just wonderful! I hope you post some pictures when you have them in place! That sawsall work doesn't look bad either! LOL Dad would be proud of you!

Add Reply

Post

OGR Publishing, Inc., 1310 Eastside Centre Ct, Suite 6, Mountain Home, AR 72653
800-980-OGRR (6477)
www.ogaugerr.com

×
×
×
×
Link copied to your clipboard.
×
×