


MIKE G, thanks but I see I have to clean off the top of the dryer. LOL And those are not Seahawks towels just old micro fiber towels. I am a Packers fan since 1965. I have to blend in the mirror some more. .......Paul


Adriatic posted:I worked my fingers to the bones
actually, it was bloody easy.
Not to worry, he's surrounded by as much sunshine as I can manage ......without real Daylight..or sunlight
You should enter TrainWorld's Halloween Layout Photo Contest! As much as I would like to win, you (and some others on here) are orders of magnitude above me!
Adriatic posted:I worked my fingers to the bones
actually, it was bloody easy.
Not to worry, he's surrounded by as much sunshine as I can manage ......without real Daylight..or sunlight
Why do vampires need cold medicine?
For their coffin. ![]()
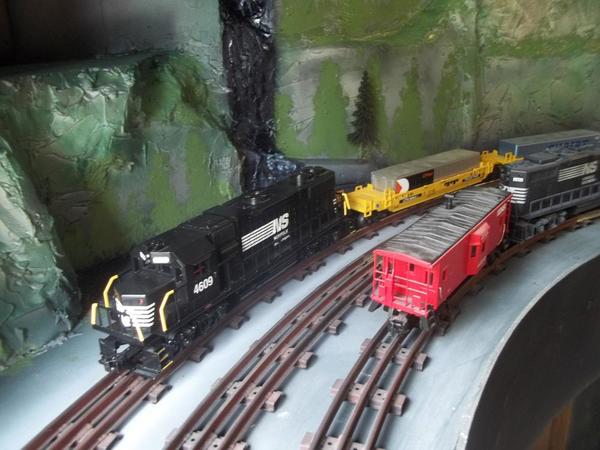
paul 2 posted:Went out and got my piece of mirror to experiment with. After putting the mirror up I have to fine tune the area next to it adding some pieces of sidewalk. So for now this area is on hold till my brick walls come from Scenic express so I guess later this afternoon I add more ground turf to areas of the layout that are already started. Pics.........Paul


Nice job with the mirror Paul. First time I saw the illusion used was by ERICS TRAINS in a Tunnel, the track disappeared into blackness. Once you populate the roadway and side walks, I'm sure you'll be happy.
I installed my Menards 2 building unit. Really good value. Now I need to figure a way to dim the lights a little

Attachments
Images (2)


Al Galli posted:I installed my Menards 2 building unit. Really good value. Now I need to figure a way to dim the lights a little
Hook one of these up in-between your voltage source and the building.

Or, one of these if your source voltage is DC. DC to DC voltage step down adjustment.

Attachments
Images (2)
TedW posted:Al Galli posted:I installed my Menards 2 building unit. Really good value. Now I need to figure a way to dim the lights a little
Hook one of these up in-between your voltage source and the building.
Ted where do you get that. Are small LED lights dimable?
Al
Al Galli posted:TedW posted:Al Galli posted:I installed my Menards 2 building unit. Really good value. Now I need to figure a way to dim the lights a little
Hook one of these up in-between your voltage source and the building.
Ted where do you get that. Are small LED lights dimable?
Al
Yes they are dimmable. Menard’s power their buildings at 4.5 vdc. I step down to about 2.75vdc, which matches the WS buildings I have. They are available off the “bay” from Asia for a buck or so apiece. Shipping usually free, but may take 2-4 weeks to get. Search AC/DC to DC Buck Converter Step Down Module LM2596 Power Supply Output DC1.5-27V or dc to dc step down module.
EDIT: Others may have a more elegant solution with resistors/diodes, etc., but this works for me.

Attachments
Images (1)
Those cranes are wonderful! If I did it over again, I'd be collecting construction models. At this point, that train, as they say, has left the station. Only one major hobby focus at a time.
RSJB18 postedWhy do vampires need cold medicine?
For their coffin.
This one threw me...I've had an empty container for the immunity medicine "Airborne" floating around the layouts junkpiles. You had me looking to see if was in a shot ![]()
John D. postedYou should enter TrainWorld's Halloween Layout Photo Contest! As much as I would like to win, you (and some others on here) are orders of magnitude above me!
"What can you make of this?......." A hat, a broach, a pterodactyl" ![]()
Thank you for the vote of confidence, and the heads up; but, you're safe.
I wanted to enter the contest just to see some others, but I don't do FB anymore, won't do FB again. I have joined two or three times, but never lasted more than week or so. Wading through F Req.s etc. and wrangling of it, the spammy-ness of it all;...it's too much "work" to be any fun for me. I also get dissapointed at the limitations it has began to present me as more businesses feel the need to only launch campains and info within FB exclusively; and my biggest hangup, if you aren't a member, you can't even read about it at random anymore. Same for Yahoo clubs. I won't ever join a site if I can't read within the site/group to decide to join.
Exclusion, exclusive; I'm too much a U.S. commoner to enjoy the words often. I won't even use a "club" store closed to non-member cash sales (no discount is fine) because they exclude. Not even those cards supplied for free by work got used.
In conclusion, I like inclusiveness, and my inclusion too, so thanks again.. ![]()
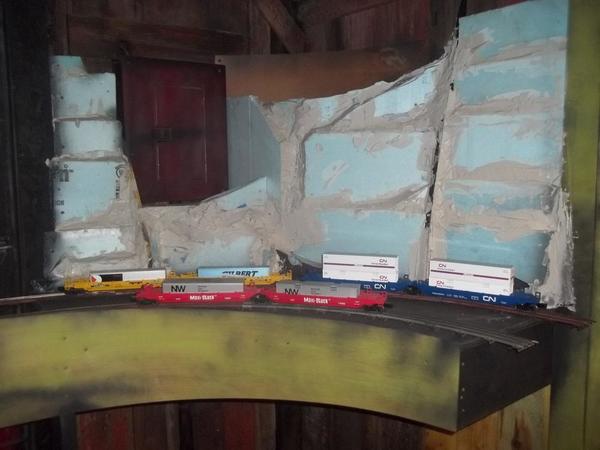
Hit Sam's club today and while there picked up another shop light. And my package from Scenic Express came with the flex walls, a couple of tunnel portals and their extra long girder. I also got a embossed stone sheet to apply to the back of the walls at street level because there is no stone detail on the back. The long girder I'll be cutting to fit over the tracks on the front side and I think the portals will work when I cut them down and blend them in to the flex walls. So this weekend is wall time. Pics.............Paul


Attachments
Images (6)
After experimenting with the addition of temporary ground planes it was time to do some major track design reworking. To refresh, here's what I began with. The 3 parallel lines on the grade just couldn't be wedged in without the inside circle ( 072) causing issues for larger locos. Another compromise that proved inconvenient was an 072 "Y" turnout positioned under the upper level at the left.

Here's the extent of disassembly involved in the rework. The previous track work position evident by the sprayed outline of ties. Even table top reworking was required.

By basically removing the inner circle and installing turnouts at either end the mainline shifted to the middle circle. This also broke up 1 long passing siding into 2 ample sized ones. A 3rd turnout originally positioned on the overpass was moved to the outer circle at the right, providing a longer spur. The "Y" was replaced with a regular GG RH#100 out in the open at the lower front.

The necessary redo really ended up providing several design improvements that greatly enhance operations. Now, back to wiring in ground planes for signal strength.
Bruce
Today I helped a friend finish wiring his miller engineering signs. Tomorrow he can plug them up. Should work okay. need time for epoxy to fully cure. now I'm home working on my own wiring so I can run trains. Having withdraws not running trains. That will be cured by tomorrow. Will take pictures and post I hope.
Finished up work on some Magooville town roads. Still some touch up to do.


Attachments
Images (2)
Steve,
The Mayor has the streets in Magooville in great shape ready fr winter!
Thanks Mark. Winter? I'd better get those convertible's tops up!
I'd like to be the owner of the car wash in that town; hose cars look nice and freshly washed.!!!!

wednesday night after work.....


free paint, boy what an ugly color......
my Dad was having back surgery Thursday at 7:30 am and had to be there around 6:00. I knew I had to get up around 5:00, so I just stayed up all night working on the trains, time sure went by fast......


sure was tired thursday......Dad's surgery was went from 7:30 till a little after 2:00, then was in recovery for about another 1 hr and half.....everything went GOOD !!!
he said his therapy will be running trains and I have 2 weeks to get some trains running out here.....going back up to see him for a while, then back home to work on the trains...... I will have trains running for him to run when he's ready to come over....can't wait till he is here running trains !!!!!!!!!!!!!


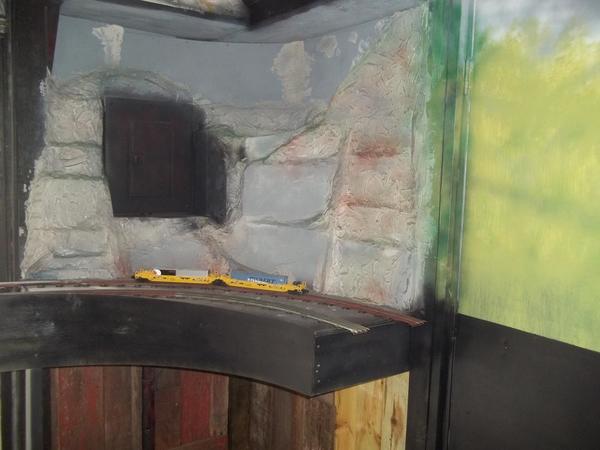
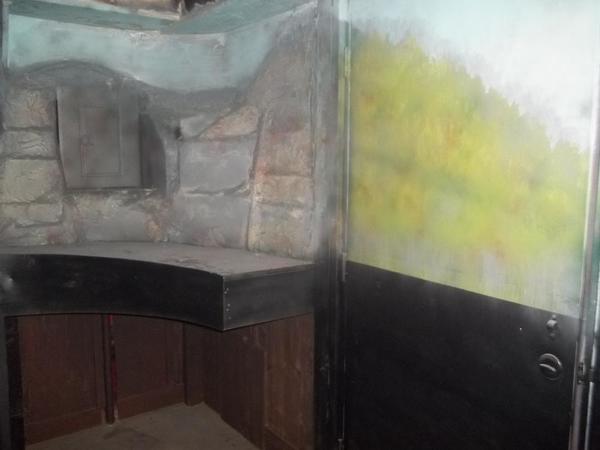
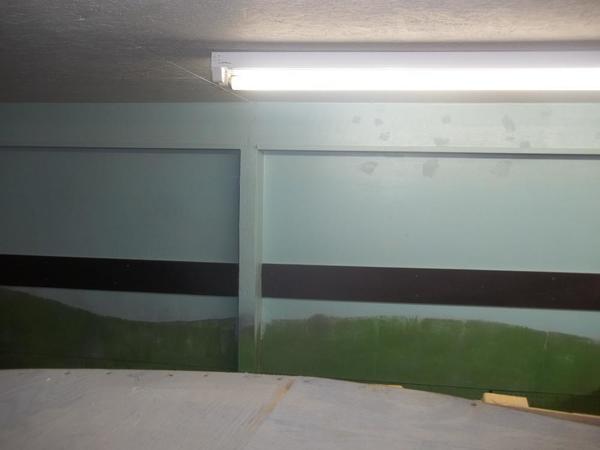
tonight, the removable mountain insert in front of the electrical box, and some more painting.......

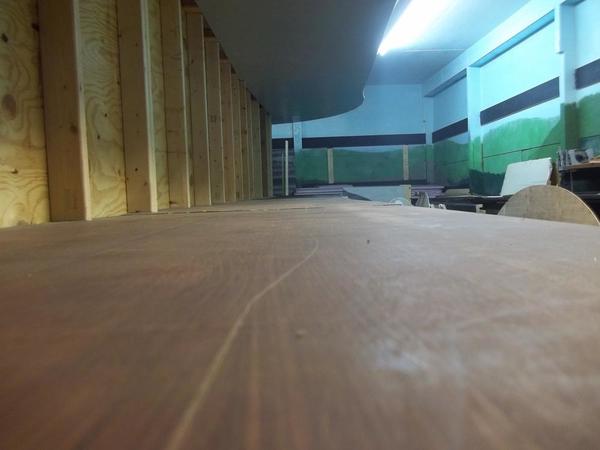
hopefully this weekend, I need to move the layout section seen here on the left to the garage door wall, then the train shelves get moved down to the floor. That wall will be cut out in spring for the new addition, giving me another 12'x30'.....For now I will just have a temporary 18" wide area above the moved shelves for the trains down this wall to get the trains running.......
also would like to get the hinged section in the doorway this weekend......
Attachments
Images (21)


You sure work fast, Brian! I'm glad your Dad's surgery went alright, and he can come run trains with you soon!
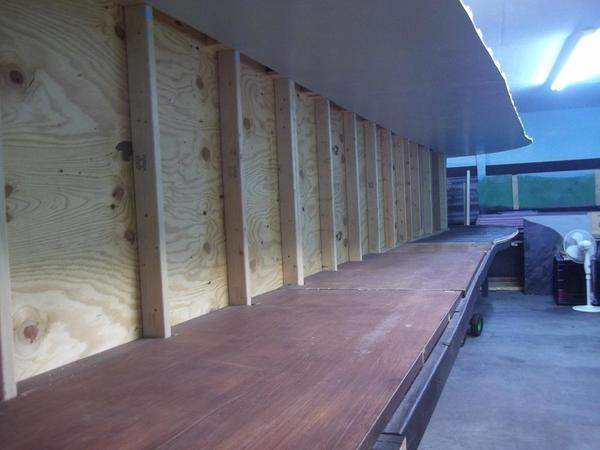
Today I went back to building up the wall with some 2X4's. Had to notch them out to get a flush wall. Where the Sauerkraut factory is I am going to add a section of table at the end to line up with the backdrop. And that switch at the front of the table is coming out and I am going to run side by side tracks to the next table. I realized the freight yard on the other side of the wall would not have a long enough yard lead track to work the sidings. Maybe after dinner I'll start working on the brick walls................Pic............Paul

Attachments
Images (1)
Last night I delighted in watching a very slow freight comprised 3 locomotives, 22 boxcars, and a caboose creep around my layout. Running freights slowly creates the illusion of a very long train. Fun times!!
Paul2, Hint: when clamping the sidewalks or any glue up job, consider initially pinning or doweling the assembly together dry first for a precision check. Then disassemble , glue & clamp with dowels or pins in place. I do this all the time when routing decks with pattern bits to conform to curved edges using 1/4" or 5/16" wooden dowels. This way you can put a stack of layers together w/o shifting.
Works with Homosote topping also. With Homosote I hold a Shop-Vac hose with a freshly cleaned filter immediately next to the spinning bit. Photos upon request.
Dad is still pretty sore today![]() might get to come home tomorrow
might get to come home tomorrow![]()

he will be over running trains soon ![]()
![]()
![]()

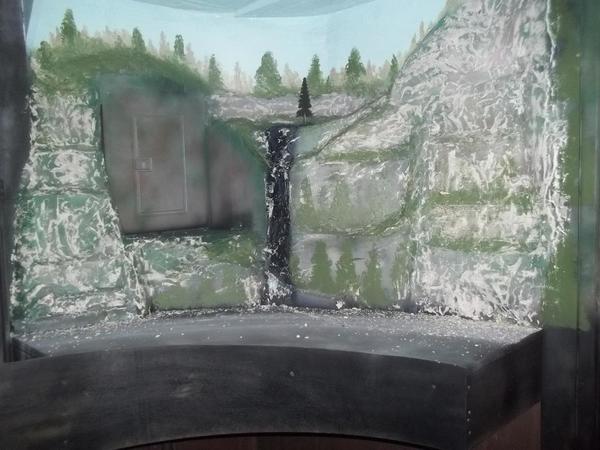
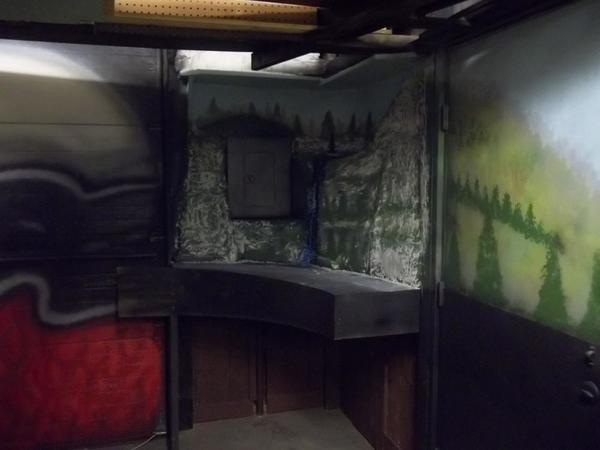
worked on mountain a little bit....long way to go......


will start blending the door and hill together next.....
started roughing in the upper level mountain......

goes up to the ceiling......![]()
Attachments
Images (10)


Brian, I am glad to here your Dad is getting better and that he will be running trains with you! The mountain is looking wonderful! I like watching all your post as you go along, keep up the great work!![]()
Thank you, Mike ! the last time my Dad went in the hospital, I stayed up all that night and made him a 2' x 3' N gauge layout to take up to him so he could run trains while he was there, the plaster mountain was still wet taking it there, he still has that little layout.....
briansilvermustang posted:Thank you, Mike ! the last time my Dad went in the hospital, I stayed up all that night and made him a 2' x 3' N gauge layout to take up to him so he could run trains while he was there, the plaster mountain was still wet taking it there, he still has that little layout.....
That's very cool Brian, Things like that are stuff you both will remember forever!![]()
briansilvermustang posted:... the last time my Dad went in the hospital, I stayed up all that night and made him a 2' x 3' N gauge layout to take up to him so he could run trains while he was there, the plaster mountain was still wet taking it there,he still has that little layout.....
Recently, I've heard this said:
What people remember most about us is how we made them feel.
![]()
briansilvermustang posted:
Dad is still pretty sore today
might get to come home tomorrow
he will be over running trains soon, worked on mountain a little bit....long way to go......
will start blending the door and hill together next.....
started roughing in the upper level mountain......
goes up to the ceiling......
Like the fuse box. Will there be a removable section there?
Give my best to your dad. I miss mine when I run trains.
Thank you Matt ! I will. yes, I am planning on making a removable mountain insert to cover the fuse box, hopefully later tonight....
briansilvermustang posted:Thank you Matt ! I will. yes, I am planning on making a removable mountain insert to cover the fuse box, hopefully later tonight....
Jeepers, slow down Brian, you’ll be joining your Dad in the hospital! ![]()
You’re putting us all to shame with the amount of work getting done. I bought three sheets of the cheapest paneling I could find and threw it up on the bare studded wall. Then some shelving came in so am putting that up. Got 6 more sections to do. Had to go to Menards for the shelf screws and, crap, train stuff IS out, so you know...


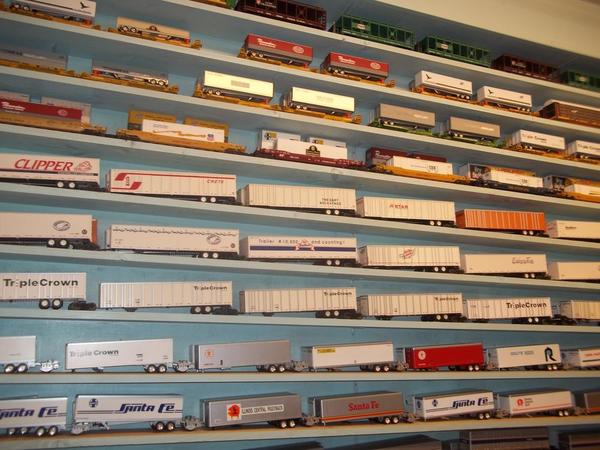
Finished the shelving, and put up some trains.

Attachments
Images (3)
I am at work resting up right now......![]()

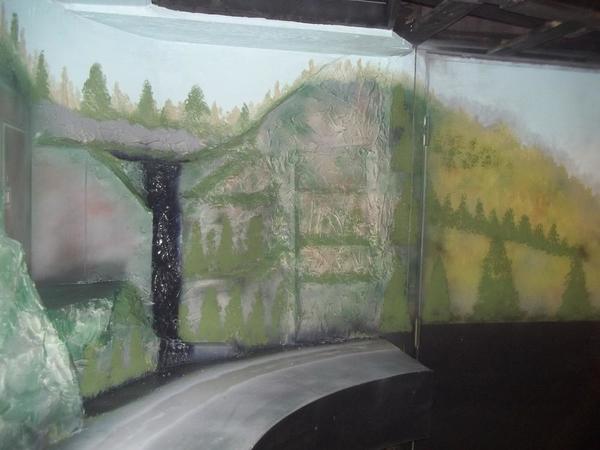
my inspiration........this is what I am striving for on my upper level of the layout.......about 32' long down one wall, 3 to 4' down from the ceiling.....

eventually........will need a lot of  's.........

the painted black 1x6's are the bottom of the upper level area, which will come out 24 to 30"'s from the wall, with the mountain scenery going up to the ceiling....
Attachments
Images (3)


Very impressive goal Brian. Looks like it will be fun to build. we have some great mountains here in NH. There is a train ride from North Conway up to Fabian that has scenery that I wish I could replicate.
Not much I can do with two loops of 8X8' of tube track but decided to go all out. Bought a piece of outdoor carpet at HD, cut 4 strips of 8"x 8' the gray carpet and put it under the track to look a little like ballast. So now I have real carpet, heavy cardboard and a layer of green and a layer of gray outdoor carpet. Trains run pretty good on it if I don't trip them or kick the track. Nice thing about this set up-NO DUCKUNDERS !!
briansilvermustang posted:
my inspiration........this is what I am striving for on my upper level of the layout.......about 32' long down one wall, 3 to 4' down from the ceiling.....
eventually........will need a lot of
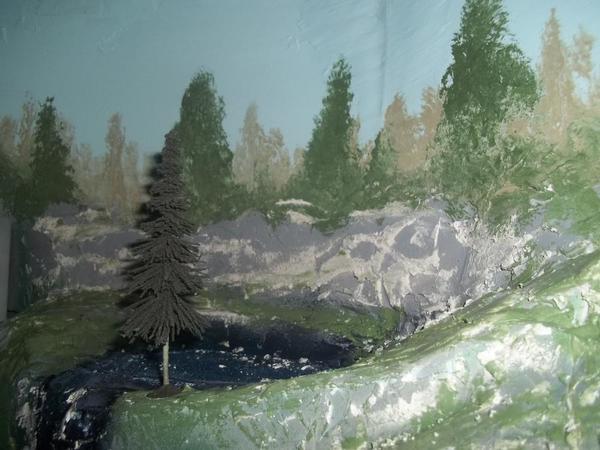
Brain, If I may offer you a perspective about the trees, take a look at these photos of some forestry logging scenery I accomplished.
 Since the subject was forestry, I knew I'd need plenty of trees, of course.

So, what I learned along the way, as I began modeling, was that if I varied the species of trees - conifers and deciduous - as well as the colors and hues and tones of the trees, the tree-scape looked fuller than it might actually have been if one were to count the actual trees.

Plus, I was generous with the undergrowth, too. Every woods and forest I have ever seen in the Midwest and Northeastern states (like Ohio, PA, NJ, and NY) have had forests that contained myriad tree species.


My resource for all these trees and attendant lower foliage has been Scenic Express.


If you contact Jim Elster directly, he may have ways to help you achieve such a verdant tree presence.
FrankM.
Attachments
Images (7)
thank you Frank for the info and photo's. VERY NICE scenes and scenery. I have this saved for use when it is time to populate the hillsides with trees, thanks again, Brian
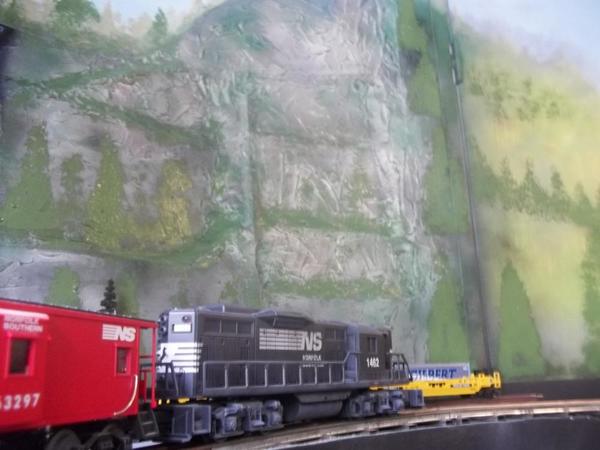
here is some of the area planned for the mountainous scenery.......from the black boards up, which are all on a 1% grade up.......going around the room left to right, taken from the raised floor area of the upper level....


here is the upper mountain area that I started above the entrance doorway....

the garage door will be taken out in spring, removing these door tracks![]()
please don't mind the crude construction method, but it is all free scrap wood,
this area will be a coal mine area in a valley......

view from ground level.....

view entering the train room....coal tipple area above door way,
upper yard area will be above the blue sky.......making a horseshoe shaped yard with a passenger station.......
Attachments
Images (9)


the reason for raising the layout, so I can put in another level which will be alot of intermodal area, a lower level passenger station, and will be the bottom return loop with some yard areas.... Trains will start from the lower level climbing a constant 1% grade to get from level to level. the layout will have 3 main levels, with hillsides and multiple level on each of the 3 main levels.....I might build a room 10'x10' just for a helix area if needed.....the trains will get to the top level, the mountainous level, which is the top return loop around the whole room......
Attachments
Images (1)


tonight is the last day of the old garage theme, as it is now becoming a temporary train back drop.....do miss the ole car garage, but I have a new area for that now...
Attachments
Images (1)

briansilvermustang posted:
the reason for raising the layout, so I can put in another level which will be alot of intermodal area, a lower level passenger station, and will be the bottom return loop with some yard areas.... Trains will start from the lower level climbing a constant 1% grade to get from level to level. the layout will have 3 main levels, with hillsides and multiple level on each of the 3 main levels.....I might build a room 10'x10' just for a helix area if needed.....the trains will get to the top level, the mountainous level, which is the top return loop around the whole room......
Brian- I heard a rumor that you will be running a connector to Elliot's layout in Minnesota. You may give him a run for biggest layout. ![]()
no, he's got me beat by along run, and i doubt mine will ever be as sophisticated of a layout that his is........he has had a lot more practice at layout building that I will ever have......
Wow Brian! You are getting a lot done!! Looks good! I'm sure your dad will like it!
thanks Mark, he is getting pretty anxious, he has already over did it a little at the hospital with therapy... he is ready to get out of there, tomorrow ![]() but he needs to go home and lay flat for a while.....
but he needs to go home and lay flat for a while.....![]() it will be very hard for him to sit still.....
it will be very hard for him to sit still.....
Heck Brian, I thought you were putting in a skyride. Ya got everything else! ![]()

Attachments
Images (1)
guess I could make that area a ski resort with lift chairs.....a good excuse to get a
"SKI Train "![]()
Zip-Line
RSJB18 posted:Zip-Line
Ding!! ![]()
![]()
Ran my new to me K-line LIRR MP-15.
Attachments
Videos (1)

Brian, a speedy recovery to your Dad. Mine will be 80 in November, he still gets around pretty good. He still works on lawnmowers and small engines, he definitely keeps himself busy doing that.
Rusty
Moonson posted:briansilvermustang posted:
my inspiration........this is what I am striving for on my upper level of the layout.......about 32' long down one wall, 3 to 4' down from the ceiling.....
eventually........will need a lot of
Brain, If I may offer you a perspective about the trees, take a look at these photos of some forestry logging scenery I accomplished.
Since the subject was forestry, I knew I'd need plenty of trees, of course.
So, what I learned along the way, as I began modeling, was that if I varied the species of trees - conifers and deciduous - as well as the colors and hues and tones of the trees, the tree-scape looked fuller than it might actually have been if one were to count the actual trees.
Plus, I was generous with the undergrowth, too. Every woods and forest I have ever seen in the Midwest and Northeastern states (like Ohio, PA, NJ, and NY) have had forests that contained myriad tree species.
My resource for all these trees and attendant lower foliage has been Scenic Express.
If you contact Jim Elster directly, he may have ways to help you achieve such a verdant tree presence.
FrankM.
Great advise on creating realistic forestry. Your results turned out fantastic, Frank. Tricking the eye into perceiving the illusion of more real estate than there actually is sure matters more in O scale than smaller ones. Color factors into that more importantly than one might think at a casual glance.
Bruce
My repairman, Tom Schwartz, stopped by this morning and did some minor work on some MTH switchers. I was going to have him look at my Lionel 0-8-0 switcher because it was not running at all, however, all he had to do was walk into the train room and WHAHLA it runs like a champ .... without Tom even touching it!! Go figure! It's nice to have those 3 switchers back in service again!
Tonight I ran trains and tinkered on the layout for a bit and made up a B&O work train. Here's some shots of the now in service switchers. 


Attachments
Images (3)
Been busy working on the layout all week. My ADD was in full swing as I jumped from project to project.
I finally busted out the paint again, and put a final coat of semi-gloss black on the fascia. I got 80% of the installed fascia done. Then it was time to bust out the letters, and start naming the places.


The hard drive on my old computer died. Today I installed a new one. The TMCC base and C/MRI are connected. I still have a lot of software to load, but I'm on my way. At least I have my iTunes working again. I have a hard time being down there without some background noise.

I spent a lot of time stringing these gray communication lines for the C/MRI. Three of the four nodes are now wired. I just have one connection left to make. This is the "C" node.

When we removed these panels from enterTRAINment 24 years ago, the wires were just lopped off, leaving stubs attached to terminal blocks. I've made up five new sets of ends like this. Just one to go.

This card is called a USIC (Universal Serial Interface Card). Each of the four nodes will have one of these. They pack and unpack the bit data that goes to and from the computer over those serial lines.

This is a Micro Mark combination shear / brake for cutting and bending sheet metal.

I used the shear to make my own brass strips from sheet. This is a first attempt at a maintenance platform for my signals. I'm not quite happy with this yet. Needs work.

Attachments
Images (13)
I had a sale table and a model train show today, so I didn't get much accomplished. I did, however, sell several access items and walked away with a decent chunk of money. I managed to find three 1943 dated railroad magazines, in excellent condition.
I found this light switch at Hobby Lobby this evening after the show, and it seems quite fitting for the master light switch for the layout room.
Attachments
Images (1)
Started working on cutting the wall to piece under the road. Pic............Paul
Attachments
Images (1)
Diverging Clear posted:Brian, a speedy recovery to your Dad. Mine will be 80 in November, he still gets around pretty good. He still works on lawnmowers and small engines, he definitely keeps himself busy doing that.
Rusty
thank you Rusty. He is supposed to able to come home sometime today ![]()
hopefully he will go home and get his much needed rest, as he is one that does not sit still....he will be over running trains soon, I need to get busy.....
some more painting and cleaning.......

got the garage door repainted, a big difference from this.......


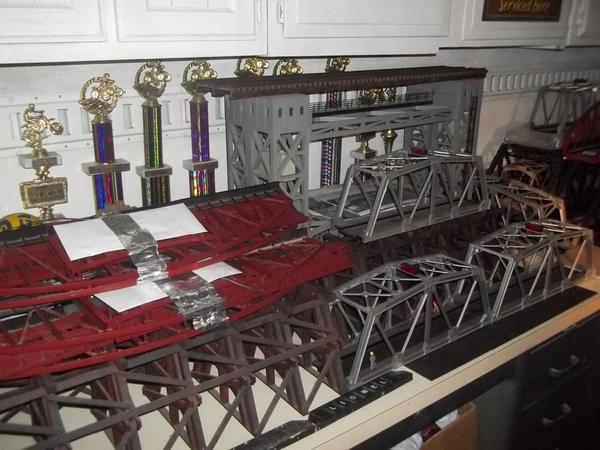
I am thinking this will be a static narrow gauge log line, good spot to park a shay and some log cars.....
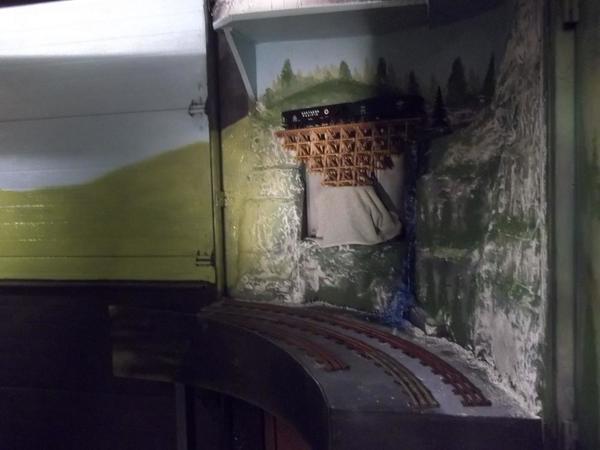
yes, I think a on30 shay and some logging cars would look a lot better here....

got a lot of cleaning done, clearing of bench tops ready for some track.....


trains will be running soon, hopefully by next weekend.....


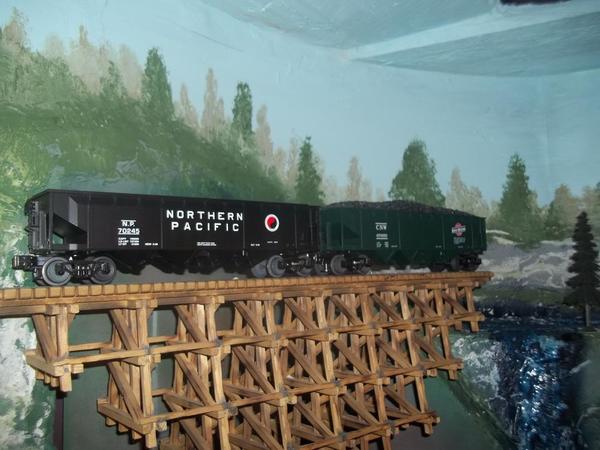
some bridges waiting for their new homes.......

Attachments
Images (15)


tonight, I need to move all these trains, then take down the shelves
and the bench along that wall. The bench gets moved along the garage door....
in spring, that wall is getting cut out, expanding out another 12'x30'........
the garage door will also be removed then, and that wall studded in ......

Attachments
Images (3)


I decided to add some wood between the posts to give the walls more places for glue and stability. I had a piece of embossed paper that looks like stone. I cut it into strips to glue on the back of the flex walls because there is no brick pattern on the back. I want to glue the paper on with Weldwood contact cement. But am asking here if this will attack the foam of the flex walls. I want to add this to the back because the walls will be sticking up about a 1/2 inch above the sidewalks. Any help appreciated. For the time being I am going to work on something else till I find out if the contact cement is safe to use. Thanks Paul........Pics


Attachments
Images (5)
paul 2 posted:I decided to add some wood between the posts to give the walls more places for glue and stability. I had a piece of embossed paper that looks like stone. I cut it into strips to glue on the back of the flex walls because there is no brick pattern on the back. I want to glue the paper on with Weldwood contact cement. But am asking here if this will attack the foam of the flex walls. I want to add this to the back because the walls will be sticking up about a 1/2 inch above the sidewalks. Any help appreciated. For the time being I am going to work on something else till I find out if the contact cement is safe to use. Thanks Paul........Pics
Here’s what happens on blue foam. ![]() Of course you don’t ask how I knew this...
Of course you don’t ask how I knew this...


For kicks I tried a slice of comercial foam portal, and didn’t seem to have an effect after a few minutes.


Attachments
Images (4)
Videos (2)


Paul, what about a simple glue stick like the kids use in school or some two-sided tape?
TED, thanks for the info and video. I was not totally sure about contact cement but figured it had to contain petroleum. THADDEUS, thanks for those suggestions too. I have niether I have Elmer's white glue so I am going to try that........Paul
paul 2 posted:TED, thanks for the info and video. I was not totally sure about contact cement but figured it had to contain petroleum. THADDEUS, thanks for those suggestions too. I have niether I have Elmer's white glue so I am going to try that........Paul
Paul, just checked again, and there is NO melting on the commercial foam portal after half an hour, but the cement seemed to soak in, cause it wasn’t tacky. FWIW...
First thing I did this morning was run trains for 10 minutes. Had fun!!
Funny , my new trolley got a 5hr run because I fell asleep ![]()
TEDW, even though it did not look like any bad reaction happened I went with the white glue. I put two beads down and press the paper. Any excess glue I wiped away. As I did it I noticed the paper was curling up on the ends so I flipped over the sections and put some light weight on top. I think it is going to work. Guess I was leery about losing walls. Later this afternoon I'll check on the drying. Guys thanks for the help. It pays to ask. Saves problems later on. I think I will do what TRUMPTRAIN did and go run trains for a bit to relax. ELLIOT, good to see your continuing posts. Really starting to look gosh darn good .................Paul
Before I slept I freshly lubed the new trolley, and while it was apart, I also swapped shells for a bit just to see if I wanted a B or 2-B electric under ithis eventually.
and another Halloween load. A broken "Goth Girl" bracelet, she was dateing a guy I knew and the glass skulls ended up in my model stuff..


Attachments
Images (2)
Videos (1)

briansilvermustang posted:
some more painting and cleaning.......
got the garage door repainted, a big difference from this.......
I am thinking this will be a static narrow gauge log line, good spot to park a shay and some log cars.....
yes, I think a on30 shay and some logging cars would look a lot better here.... trains will be running soon, hopefully by next weekend....
Looks good Brian. Does the trestle and the bump pop out to get at the breaker box? Is that trestle track hot or just for parking? Nice start on the scenery. Start looking for trees.
Thanks Paul. I just hope I can knock out scenery as fast as you. My layout needs to green up by April in order to be on tour for the National Narrow Gauge Convention, Labor Day weekend.
Thanks Matt ! yes the trestle will be on an insert that is removable for the fuse box.
i am going to park a narrow gauge train on it, probably not powered......
yes, i will need a lot of trees.....
Brian, you might go "through" the area too with two portals. I just like bi-level fall background ![]() ....or try right out of the door with a mines portal and ore dump to below, etc.
....or try right out of the door with a mines portal and ore dump to below, etc.
An easy build as a "static foam module" and I'd bet easier to pull too.


Attachments
Images (2)
Adriatic posted:Brian, you might go "through" the area too with two portals. I just like bi-level fall background
....or try right out of the door with a mines portal and ore dump to below, etc.
An easy build as a "static foam module" and I'd bet easier to pull too.
I like that one, pretty cool...
paul 2 posted:I decided to add some wood between the posts to give the walls more places for glue and stability. I had a piece of embossed paper that looks like stone. I cut it into strips to glue on the back of the flex walls because there is no brick pattern on the back. I want to glue the paper on with Weldwood contact cement. But am asking here if this will attack the foam of the flex walls. I want to add this to the back because the walls will be sticking up about a 1/2 inch above the sidewalks. Any help appreciated. For the time being I am going to work on something else till I find out if the contact cement is safe to use. Thanks Paul........Pics
I very much doubt that is foam safe. It is great for laminates and layers of similar hard materials, but very volatile in general.
I don't think traditional rubber cement would work out either.
They make foam safe adhesive in caulk tubes, available in big box store paint sections.
You could adhere the paper to thick contruction paper or thin, raw art board (shoebox thick cardboard) with rubber cement, then attach the board with the much thicker foam adheasive to keep things smooth and flat. This would allow for some toe nailed divits in the foam for a better bond too.
Rubber cement is an old school printers staple. It works excellent for paper and thinly appied, doesn't shrink and pull paper causing warp (roller burnishing the excess out). Just keep it off inks to be safe, but most are fine with it IME,, The excess dries fast and rubbing the drying excess will ball it up to be brushed away, leaving a very clean edge if done with care. At times, more excess actually helps leave a cleaner edge and surface sometimes; like a wet eraser to clean with.
Brian, I don't know where you get the energy to do all the work you do in one day! It all looks great and sounds like you have quite a bit of more on your plate! I will be watching as I learn from most of you here.
Paul, looks like your on the right track! I hope things hold together for you and your happy with the out come!
As for me there were no train stuff today! I spent the day with my very new GRANDDAUGHTER! what a little thing but has a great smile!

Attachments
Images (2)
Mike, Congratulations on the new granddaughter!! Do you have other grandchildren besides those three?
Mark Boyce posted:Mike, Congratulations on the new granddaughter!! Do you have other grandchildren besides those three?
Thanks Mark, she is a beautiful young lady! This is number 4, and they say the last one. LOL Of course that's what they said after number 3. Then we have to see what happens with the son when and if he ever gets married!![]()
I added some new Glenn Snyder Shelving to the walls.

Ran trains ![]() while I did my physical therapy
while I did my physical therapy ![]()
Clem
Fitted the walls under the overpass in. Tomorrow I'll glue them into place. Pic..............Pau
Attachments
Images (1)
Paul, Did you try the cement? Did it work?
Missed it was textured paper the first time. The caulk-like adheasive applied thin would work ok I'd bet.
.
ADRIATIC, I didn't use that cement. I used Elmer's White glue full strength. Flipped the walls over and lightly weighted them down to keep the ends of the paper stock from curling up................Paul
Mike, Congratulations with your new granddaughter ![]()

Attachments
Images (2)


found some new Menards Helo's yesterday. I'm going to find some fish line and hang them above the layout tonite.
paul 2 posted:ADRIATIC, I didn't use that cement. I used Elmer's White glue full strength. Flipped the walls over and lightly weighted them down to keep the ends of the paper stock from curling up................Paul
Paul: Try Elmers yellow sometime, It dries faster and doesn't curl the paper as much
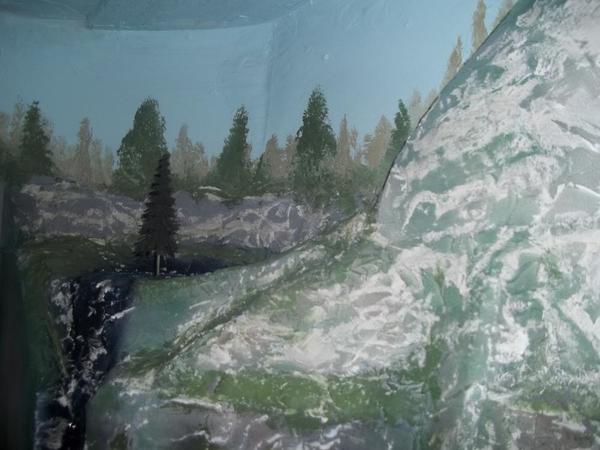
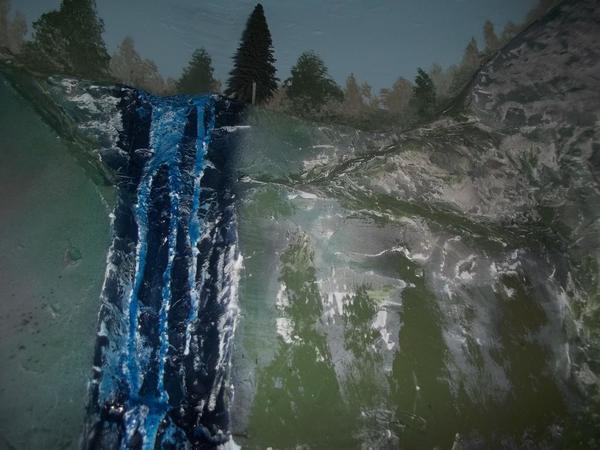
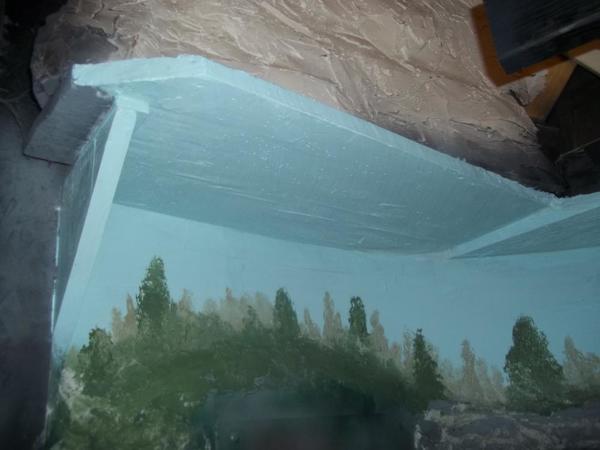
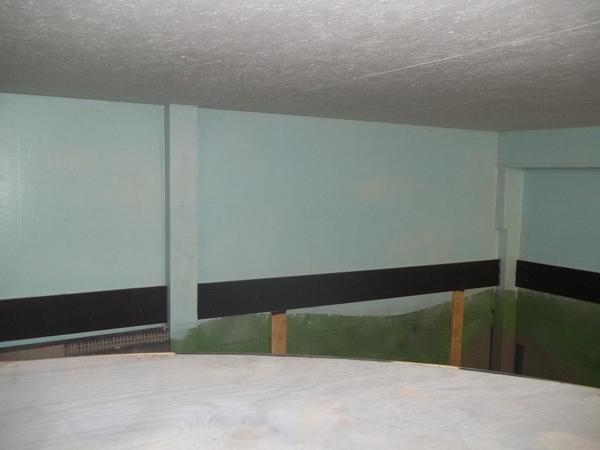
I've finally added a river bottom to my layout! Anyone who's seen my layout (see link to my Harpers Ferry layout) has noticed that I had a 4' gap representing the Potomac River. RR bridges were suspended on planks of wood. Well now there is a solid platform for bridge supports. Next I plan to get a sheet of Aquatex cut to fit to model the actual river. River banks will be made of cut foam to fill gaps between river and table top. I'm considering putting the river bottom 'sub table' on wheels so I can slide it out if I need access to back of layout.![IMG_1380[1]](https://ogrforum.ogaugerr.com/fileSendAction/fcType/0/fcOid/12129987997660671/filePointer/75340558627254008/fodoid/75340558627254001/imageType/LARGE/inlineImage/true/IMG_1380%255B1%255D.JPG "IMG_1380[1]")
![IMG_1379[1]](https://ogrforum.ogaugerr.com/fileSendAction/fcType/0/fcOid/12129987997660671/filePointer/75340558627254009/fodoid/75340558627254002/imageType/LARGE/inlineImage/true/IMG_1379%255B1%255D.JPG "IMG_1379[1]")
![IMG_1382[1]](https://ogrforum.ogaugerr.com/fileSendAction/fcType/0/fcOid/12129987997660671/filePointer/75340558627254010/fodoid/75340558627254003/imageType/LARGE/inlineImage/true/IMG_1382%255B1%255D.JPG "IMG_1382[1]")
![IMG_1383[1]](https://ogrforum.ogaugerr.com/fileSendAction/fcType/0/fcOid/12129987997660671/filePointer/75340558627254011/fodoid/75340558627254004/imageType/LARGE/inlineImage/true/IMG_1383%255B1%255D.JPG "IMG_1383[1]")
Attachments
Images (4)
![IMG_1380[1]](https://ogrforum.ogaugerr.com/fileSendAction/fcType/0/fcOid/12129987997660671/filePointer/75340558627254008/fodoid/75340558627254001/imageType/LARGE/inlineImage/true/IMG_1380%5B1%5D.JPG "IMG_1380[1]")
![IMG_1379[1]](https://ogrforum.ogaugerr.com/fileSendAction/fcType/0/fcOid/12129987997660671/filePointer/75340558627254009/fodoid/75340558627254002/imageType/LARGE/inlineImage/true/IMG_1379%5B1%5D.JPG "IMG_1379[1]")
![IMG_1382[1]](https://ogrforum.ogaugerr.com/fileSendAction/fcType/0/fcOid/12129987997660671/filePointer/75340558627254010/fodoid/75340558627254003/imageType/LARGE/inlineImage/true/IMG_1382%5B1%5D.JPG "IMG_1382[1]")
![IMG_1383[1]](https://ogrforum.ogaugerr.com/fileSendAction/fcType/0/fcOid/12129987997660671/filePointer/75340558627254011/fodoid/75340558627254004/imageType/LARGE/inlineImage/true/IMG_1383%5B1%5D.JPG "IMG_1383[1]")
Yes, I recall your Harpers Ferry layout. The platform for the river looks great. Since it is a separate piece of bench work, I agree making it roll out would be pretty easy to do. How much more access would that give you?
Congratulations Mike.
Pat Kn posted:Congratulations Mike.
Thanks Pat, and thank you to everyone else! She sure made for a wonderful weekend! ![]()
mike g. posted:Brian, I don't know where you get the energy to do all the work you do in one day! It all looks great and sounds like you have quite a bit of more on your plate! I will be watching as I learn from most of you here.
Paul, looks like your on the right track! I hope things hold together for you and your happy with the out come!
As for me there were no train stuff today! I spent the day with my very new GRANDDAUGHTER! what a little thing but has a great smile!
Congrats Mike! More future O gauge modelers! ![]()
Bob
Dad is home ![]() a little tired and sore
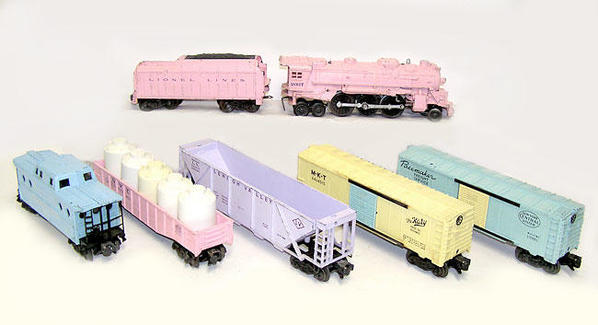
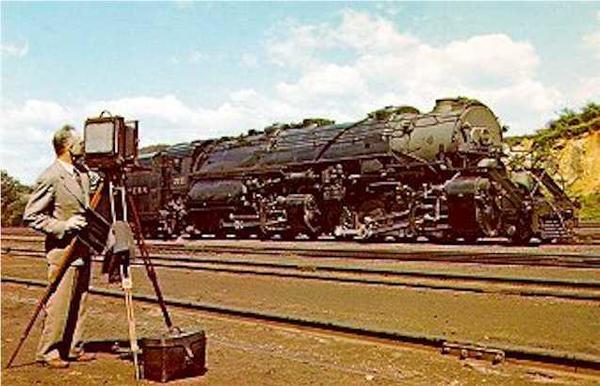
a little tired and sore![]() He gave me his 1st train request for when he is able to come over, a n&w y6b steamer with long coal hopper train !
He gave me his 1st train request for when he is able to come over, a n&w y6b steamer with long coal hopper train !
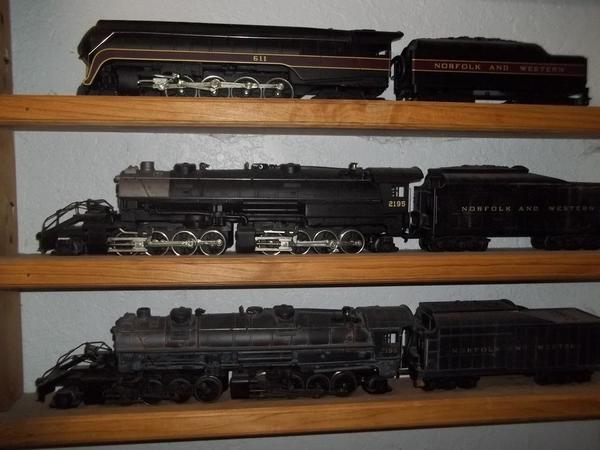
I will have one of these y6b's ready for him with 50 N&W hoppers ready for him ![]()
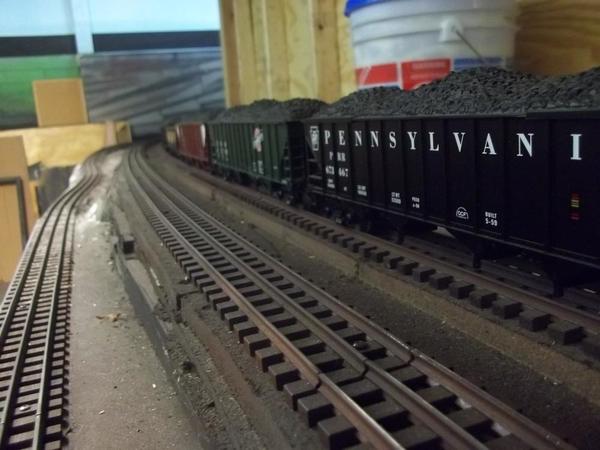
can't wait till he can come over and run some trains !!!!!

going home from work now and getting busy.....
Attachments
Images (4)


Mark Boyce posted:Yes, I recall your Harpers Ferry layout. The platform for the river looks great. Since it is a separate piece of bench work, I agree making it roll out would be pretty easy to do. How much more access would that give you?
Before I put in the river floor I could climb under and come up between B&O double main line bridge along wall and Shenandoah sub truss bridge. My plan for future access is to suspend the supports for the B&O bridge from the existing wood plank support. Those supports will simply rest on top of the Aquatex river surface. The supports for the Shenandoah and Bollman Truss (silver) bridge may 'slide' on surface of river when I slowly pull river bed table out. This means that I will not glue or attach supports or scenery to river. For now I'll just be glad to get the aquatex installed. Will post progress pics.
Okay, so you will be leaving the tracks and bridges intact, and just moving the scenery out of the way for access. I like that.
Took a long several month hiatus during the summer, it was cycling season. Now that I have to heal from a torn rotator cuff and separated shoulder I am cleaning the track to prepare for a lot of one armed projects. Test run should be later this evening.
necrails posted:Took a long several month hiatus during the summer, it was cycling season. Now that I have to heal from a torn rotator cuff and separated shoulder I am cleaning the track to prepare for a lot of one armed projects. Test run should be later this evening.
Wow! I'm sorry you were injured! That is a hard way to make time for trains!!
Had to start the day getting the car ready for York but I did manage to find a bit of time to work on the layout, a little not much. I finished gluing the stone paper to the backs of all the walls. So far Elmer's white glue is holding firm. I had some prairie grass left so I added some near the Morton Salt building. Probably will not do too much more tonight and for that matter tomorrow because we will be heading for York Wednesday morning. Got my list of wants ready to go but I always seem to find more stuff off my list then on LOL.............Paul
RSJB18 posted:mike g. posted:Brian, I don't know where you get the energy to do all the work you do in one day! It all looks great and sounds like you have quite a bit of more on your plate! I will be watching as I learn from most of you here.
Paul, looks like your on the right track! I hope things hold together for you and your happy with the out come!
As for me there were no train stuff today! I spent the day with my very new GRANDDAUGHTER! what a little thing but has a great smile!
Congrats Mike! More future O gauge modelers!
Bob
That's for sure Bob, I have 3 on the hook already! The one problem I have is I don't have a lap big enough for them all and that's where they all want to sit! LOL![]()
paul 2 posted:Had to start the day getting the car ready for York but I did manage to find a bit of time to work on the layout, a little not much. I finished gluing the stone paper to the backs of all the walls. So far Elmer's white glue is holding firm. I had some prairie grass left so I added some near the Morton Salt building. Probably will not do too much more tonight and for that matter tomorrow because we will be heading for York Wednesday morning. Got my list of wants ready to go but I always seem to find more stuff off my list then on LOL.............Paul
Come on Paul, spend a boat load at York! I am sure dad will back you with whatever you need there! If not you can always as Playtrains for a loan! LOL I sure hope you have a great time there!![]()
paul 2 posted:Had to start the day getting the car ready for York but I did manage to find a bit of time to work on the layout, a little not much. I finished gluing the stone paper to the backs of all the walls. So far Elmer's white glue is holding firm. I had some prairie grass left so I added some near the Morton Salt building. Probably will not do too much more tonight and for that matter tomorrow because we will be heading for York Wednesday morning. Got my list of wants ready to go but I always seem to find more stuff off my list then on LOL.............Paul
Paul,
Have a great time at York! Look for me, since I don't know what you look like.
Loaded ice.....

Attachments
Images (2)
Add Reply
Sign In To Reply
