M. Mitchell Marmel posted:It's no worse than what Norma gets up to...
Norma seems to be able to tip toe around the layout with aplomb, however. Although, I’ve noticed when she plants her butt, it’s a good thing you have low voltage. ![]()


|
|
M. Mitchell Marmel posted:It's no worse than what Norma gets up to...
Norma seems to be able to tip toe around the layout with aplomb, however. Although, I’ve noticed when she plants her butt, it’s a good thing you have low voltage. ![]()
86TA355SR posted:BRIANSILVERMUSTANG:
You have an astonishing train room! Love your work!
thank you !
Some shots of my custom DeWitt Clinton tender in action!
http://mitchmarmel.com/mmgallery/2017_dewit_clinton


Mitch


very cool Mitchell !
M. Mitchell Marmel posted:Some shots of my custom DeWitt Clinton tender in action!
http://mitchmarmel.com/mmgallery/2017_dewit_clinton
Looking good! Hope to see you at the TCA show in Memphis on Dec. 2nd.
The local clubs are also having a big open house on Nov 18th. You'd be welcome to bring a train and run it on the big Casey Jones layout, if you would like.
Nice looking work there Mitch! Thanks for the pictures and videos! Very Cool!![]()
My wife and I love all your dogs. We now only have one, a bagel, Gracie, and she is very spoiled.

Trains do not impress her unless a gondola is carrying dog treats.

Our grand cat, KC (Kitty Cat), likes to nap under the tree no matter what is rolling on the rails.
briansilvermustang posted:very cool Mitchell !
Thankee! ![]()
Len B posted:Looking good! Hope to see you at the TCA show in Memphis on Dec. 2nd.
The local clubs are also having a big open house on Nov 18th. You'd be welcome to bring a train and run it on the big Casey Jones layout, if you would like.
Love to, but time and funds forbid. Will be running gi-raffes at the Children's Christmas Train in Springdale, AR on 2 December, though!
mike g. posted:Nice looking work there Mitch! Thanks for the pictures and videos! Very Cool!
Thanks to Joe D. for the pics, videos and website work! ![]()
Mitch
Nice work Mitch. I see Norma is up to her usual high-jinx too ![]()
Mitch- if those were beer barrels you would have more passengers on your RR !
jim pastorius posted:Mitch- if those were beer barrels you would have more passengers on your RR !
;-)
Mitch
Picked up this beauty today from a local hobby store.

ran my NYC Pacific.....

a boring night of pulling nails and screws to reuse the wood......

tried to straighten up some.....

put down a couple more pieces of track....


we got the rest of the shelf boards painted, should get them up tonight....![]()


Morning Brian, Nice job with the clean up. That's always the toughest job keeping up. By the way, you may have answered this in the past, what is the 2x4 shoring up a rafter from the table in picture #2? Keep up the good work.
hello Matt....
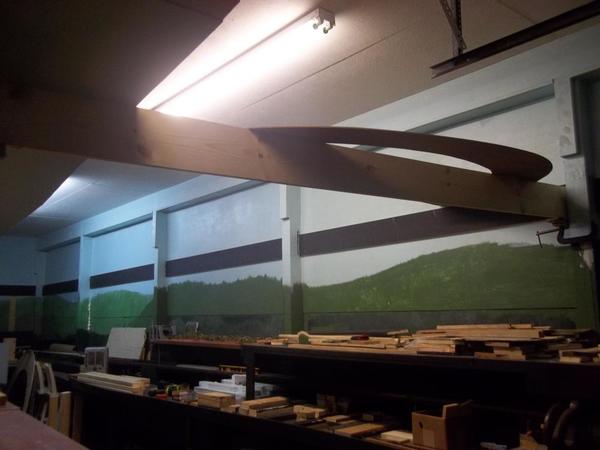
that board is holding mock up of the start of the decent down from the upper level....
those black boards go down on a 1% grade most of the way around the room....
hope to be working on this more this week, then it will be easier to see this section...

view from upper level, floor is raised 3' here.....
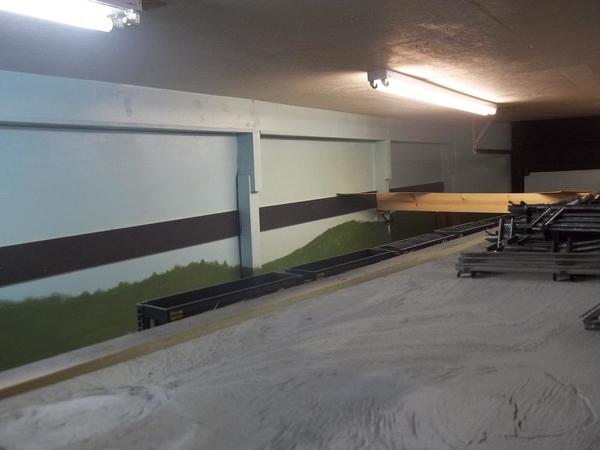

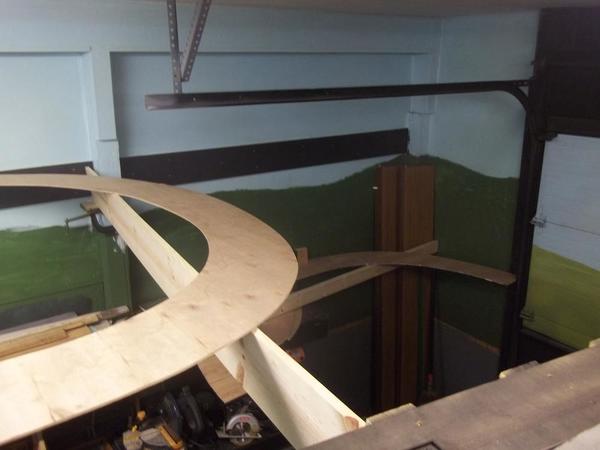


the coal cars will go down, left around the u turn, then start the 1 % decent down the back wall
down to the next corner, turn left......

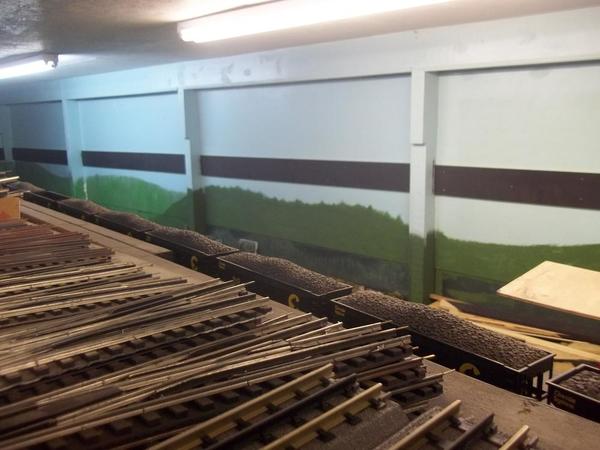
still going down the next wall....

more pics coming soon on this decent to the next level.....


This morning I headed to the attic to look for paint for the building I am doing. Couldn't find any so Ill have to get some somewhere. But I decided that while I was up there I would run trains for a while. Sort of knocking the dust off that settled on them. Since I can't finish the building right now this afternoon I am going to measure for a table to go in front of the table running under the stairs............Paul
Good deal, Paul! Acquiring new real estate!!
Installed a new TIU and new remote. Thank goodness for DCS Loader which let me copy the contents of my old emote over to the new one. Too many locomotives, switches, etc to re-enter by hand.
No photos as this is all under the layout.
Installed a fourth/new Lionel 180 watt brick. The 4th loop I added this year had been running off one side of my Z-4000 (which is my backup plan "B") but now it has the same setup as the others.

My old TIU has at least one channel that's burnt out and my old remote is almost falling apart but still works!
-RM
Do you also have a layout in the,attic, Paul? Any pictures?
Mike
Mike, I do have an attic layout. It is about 90 complete and running. I will have to look for pictures.......Paul
Cool ! Looking forward to seeing them ,as I know they will be awesome like the rest of your work! I always anxiously look forward to each new post by you.
Mike
Brian - thanks for the reply. I figured it was a temporary fix. 1% grade is very prototypical. With toy/model trains, most engines can pull a much steeper grade. Looking forward to more progress.
Mike, here are a few pics of the attic layout................Paul


Paul, You made great use of that attic space!! I really like the attic layout!! What are the overall dimensions?
Mark, the dimensions of the attic layout are 27' X 12'. The alcove where I have the station is approximately 6' X 6'.....Paul
Paul : That's a great looking layout too !! Nice work..
Absolutely georgeous, Paul! The big truss bridge,is that from a Miami Valley kit. I've been wanting to get one of those.
Mike
Paul, That is even bigger than I thought! It looks great!
Mike, it is an early Miami Valley bridge kit..........Paul
I thought so. They are very nice. If you ever want to change it out for something else, drop me a line. Keep up the good work !
Mike
OK- can we agree that Paul has been holding out on us? Very nice work sir. ![]() Guess you've been so focused on the basement that you forgot to share the attic layout with us. I like how you hid the chimney too.
Guess you've been so focused on the basement that you forgot to share the attic layout with us. I like how you hid the chimney too.
Bob
RSJB18 posted:OK- can we agree that Paul has been holding out on us? Very nice work sir.
Guess you've been so focused on the basement that you forgot to share the attic layout with us. I like how you hid the chimney too.
Bob
Paul, That's a real nice attic layout. I think a 6' diameter HELIX could connect the basement to the attic.
Matt, I already tried that but the CEO said no to the idea............Paul
Bob, it was not kept a secret. Two years ago or more I was posting work on the attic layout. At that time I re wired the tracks and re did all the scenery..............Paul
Yes Paul, I do recall your attic re-work now that you mention it. I'm glad you mentioned the attic layout to refresh my memory!!
I modified a Lionel plate girder bridge to be wide enough to clear my Premier PRR T1. You can read how that went in my thread that begins "I needed a topic for a new thread." Then I began replacement of the Miller Engineering Breyers Ice Cream sign I fried in the process. At this point I'm upstairs for the evening!
Paul, and here I thought you just played in the Basement! LOL Great looking trains upstairs! Now I know why your always so happy, you have a layout to play on when you get tired of build!![]()
Having marked up the curves for the upper level at the far end of the layout , today we placed the cork roadbed and put the track in place on the roadbed. I used sectional Gargraves 089 diameter . Did a little leveling and adjusting of track joints to insure smooth curve joints and the proper diameter since a little miss alignment in joining two sections can multiply in the curves.
Did some test rolling of freight and passenger cars on this track area and it seems good. Tommorrow we will put a few screws in to hold the track in place.


I've just completed a stretch of 30 consecutive days with at least of one hour of work on the layout. Today I put in six hours. I feel like I'm really on a roll.
After the hard drive failure of my train room computer, I ended up getting a new one. I installed a twin 9 pin serial card, one port for the TMCC base, and the other for C/MRI. JMRI will communicate with both ports, and could eventually run some trains by itself. Unfortunately, after I installed the card, the solid state drive quit working. I was thinking I was going to take it in to get it fixed, then I remembered, I had bumped the drive's connector. Oops. Went back in and got it after a couple tries. Now everything is working.
Saturday I did a bunch of things, including moving trains around. I hadn't had track power on in weeks. I started to smell something burning. It was horrible, but I wasn't sure where it was coming from. Then I went over to aisle 4 to check on a train I had just parked in the small hidden yard, and discovered what it was. I had been going through some of my C/MRI cards, and I left one across the rails. So when I turned the power on, a couple chips took 17 VAC. It was so bad, my wife smelled it upstairs.
It's not quite so obvious from the top, but the third chip top row, and the second chip second row are fried.

You can see it better from the bottom.

I took one of my signals and used some liquid electrical tape to fix the wires in place as well as seal off the light from leaking out the back of the LED. I'll get in there and trim off some of the excess, then paint it all silver.

I also put some on the wires coming out of the bottom, to keep them together.

Then I soldered on my Arduino plugs, and soldered some Cat5 to the socket. Again this is just a single test unit. Mass production will be coming in the next few months.

I call this "rainbow spaghetti". These are the salvaged C/MRI wires from enterTRAINment. I've been cutting the old tie wraps and marking tape from 25 years ago.

The part I'm really after is the Molex connector. This connects to the input and output cards. There are three of these 8 pin units on each 24 bit card.

This trash can used to be full to the top. I've still got some work to do.

Time to get back to the Searchlight Signal Driver cards my wife and I built over the last year and a half. Today was partly spent testing each circuit. I got through half of the eighteen cards.

My test LED.

Now that my computer is working, I made up this chart listing the defects in my handywork. There were only two cards out of the first nine where all 12 circuits worked. The problems only came in a few different types, no light, one light R or G, and one light with no active input. Now if only I knew how to troubleshoot them. I know what it does, I just have no clue as to HOW it does it.![]()
![]()
![]()

Finally, some carpentry (which I totally understand). I did a little tweaking along the south wall behind Hastings.

I also added part of the base for the Mississippi River. This is only one of two areas where the river is actually going to be represented on the layout. In spite of the fact that most of the railroad follows the river very closely, it is almost always in the aisle, and not on the benchwork. BTW, this is going to be a winter scene.

I started the last section of backdrop on the entire layout. It was a humble beginning, but important. Before...

and after. There will be one or two more of these supports over to the left, where this section will just end behind the ConAgra Mill and Elevator (out of frame left). Before I can hang this section, the small control panel for the helix turnouts will have to be moved. A much easier task than the other panel that used to be here. Just need to cut some tie wraps, and no wires, secure it in its new location below, and tie up the excess.

Stay tuned.
Wow Elliot. You're really on a roll. Great progress. Regarding your statement: "Now if only I knew how to troubleshoot them. I know what it does, I just have no clue as to HOW it does it." Since this is a new build from a kit, I would start be checking your solder joints. You may have some bad or cold solder connections. Resolder anything that is in question or anything in the path of the error. Look for dull solder.
Zeke posted:Started working on some scenery
Zeke That is really nice work
Al Galli
Pat is right, WOW! For one hour a day you sure got a lot done, it amazes me the size and complexity of your layout! I look at all that wire and I just start sweating ! LOL I sure am glad you know what your doing, cause I would be lost, but then again that's why I fallow your post so maybe I can learn something along the way. Great work Elliot!![]()
Big_Boy_4005 posted:I've just completed a stretch of 30 consecutive days with at least of one hour of work on the layout. Today I put in six hours. I feel like I'm really on a roll.
After the hard drive failure of my train room computer, I ended up getting a new one. I installed a twin 9 pin serial card, one port for the TMCC base, and the other for C/MRI. JMRI will communicate with both ports, and could eventually run some trains by itself. Unfortunately, after I installed the card, the solid state drive quit working. I was thinking I was going to take it in to get it fixed, then I remembered, I had bumped the drive's connector. Oops. Went back in and got it after a couple tries. Now everything is working.
Saturday I did a bunch of things, including moving trains around. I hadn't had track power on in weeks. I started to smell something burning. It was horrible, but I wasn't sure where it was coming from. Then I went over to aisle 4 to check on a train I had just parked in the small hidden yard, and discovered what it was. I had been going through some of my C/MRI cards, and I left one across the rails. So when I turned the power on, a couple chips took 17 VAC. It was so bad, my wife smelled it upstairs.
It's not quite so obvious from the top, but the third chip top row, and the second chip second row are fried.
You can see it better from the bottom.
Nothing like the smell of burning G-10 or FR-4 (circuit board materials) in the Morning! Having manufactured circuit boards and semi-conductors for over 30 years, I can remember that smell well. It takes a while to make that smell go away, too. If you repair the burned board with new components, use epoxy or solder mask to coat any burned areas to keep moisture out of the base material.
Everything else is looking good.
Thanks Al!

slow night, only got the next set of shelves in....

gave my knees a break and ran some trains.....![]()


and worked on a little project,

making my own 5 car sets, replacing the couplers with drawbars......
may not be prototypical, but I like how they will look when I am done.....


paul 2 posted:Bob, it was not kept a secret. Two years ago or more I was posting work on the attic layout. At that time I re wired the tracks and re did all the scenery..............Paul
Well I joined the forum about a year ago so my loss. Still very nice work!
Sean, the grass and backdrop look fantastic!
LIRR, That GarGraves looks great! I can't wait to get my pile of GarGraves installed. First I need my benchwork! LOL
Elliot, Wow!!! I'll say you got back on track! So you let the smoke out of the chips!! It happens. Are these old cards from way back, or did you build them new? You probably covered that, but I forget. Yes the colored spaghetti is a good name. I am so glad to see you back on a roll!!
Brian, I am guessing the inspector said enough! I really like your idea for the draw bars! I have been thinking about trying to take 2 flat cars and put them together with just 3 sets of trucks just to see how it would look!
Don't forget Ice cream for the inspector! LOL![]()
Al Galli posted:Zeke posted:Started working on some scenery
Zeke That is really nice work
Al Galli
Seeing Al's post prompts me to say it again! That really looks great!!

Mike, she could barely keep her eyes open after her treat, a "push-up", her favorite....![]()

Al Galli posted:Zeke posted:Started working on some scenery
Zeke That is really nice work
Al Galli
blended very nicely
into your backdrop!
Elliot- good to see the work progressing. I too remember the smell of burning circuit boards all to well. That and old magnetic fluorescent ballasts. I love the smell of PCB's in the morning.
Bob
Elliot, you get a lot done in a one hour session. Sorry you fried that board but when you consider it could of been worse. I wish I had you stamina for wiring.
Brian, your another one that zips through things. Like your idea of joining the cars together.
Zeke, you got a good eye for blending scenery together. You nailed it.
Mark, I see table construction in your near future. You're ready to roll up your sleeves.
Nothing from me today. All you guys have made me tired LOL. Not really you guys inspire. I just have some outdoor chores to do today.............Paul
Big_Boy_4005 posted:I've just completed a stretch of 30 consecutive days with at least of one hour of work on the layout. Today I put in six hours. I feel like I'm really on a roll.
After the hard drive failure of my train room computer, I ended up getting a new one. I installed a twin 9 pin serial card, one port for the TMCC base, and the other for C/MRI. JMRI will communicate with both ports, and could eventually run some trains by itself. Unfortunately, after I installed the card, the solid state drive quit working. I was thinking I was going to take it in to get it fixed, then I remembered, I had bumped the drive's connector. Oops. Went back in and got it after a couple tries. Now everything is working.
Saturday I did a bunch of things, including moving trains around. I hadn't had track power on in weeks. I started to smell something burning. It was horrible, but I wasn't sure where it was coming from. Then I went over to aisle 4 to check on a train I had just parked in the small hidden yard, and discovered what it was. I had been going through some of my C/MRI cards, and I left one across the rails. So when I turned the power on, a couple chips took 17 VAC. It was so bad, my wife smelled it upstairs.
It's not quite so obvious from the top, but the third chip top row, and the second chip second row are fried.
You can see it better from the bottom.
I took one of my signals and used some liquid electrical tape to fix the wires in place as well as seal off the light from leaking out the back of the LED. I'll get in there and trim off some of the excess, then paint it all silver.
I also put some on the wires coming out of the bottom, to keep them together.
Then I soldered on my Arduino plugs, and soldered some Cat5 to the socket. Again this is just a single test unit. Mass production will be coming in the next few months.
I call this "rainbow spaghetti". These are the salvaged C/MRI wires from enterTRAINment. I've been cutting the old tie wraps and marking tape from 25 years ago.
The part I'm really after is the Molex connector. This connects to the input and output cards. There are three of these 8 pin units on each 24 bit card.
This trash can used to be full to the top. I've still got some work to do.
Time to get back to the Searchlight Signal Driver cards my wife and I built over the last year and a half. Today was partly spent testing each circuit. I got through half of the eighteen cards.
My test LED.
Now that my computer is working, I made up this chart listing the defects in my handywork. There were only two cards out of the first nine where all 12 circuits worked. The problems only came in a few different types, no light, one light R or G, and one light with no active input. Now if only I knew how to troubleshoot them. I know what it does, I just have no clue as to HOW it does it.
Finally, some carpentry (which I totally understand). I did a little tweaking along the south wall behind Hastings.
I also added part of the base for the Mississippi River. This is only one of two areas where the river is actually going to be represented on the layout. In spite of the fact that most of the railroad follows the river very closely, it is almost always in the aisle, and not on the benchwork. BTW, this is going to be a winter scene.
I started the last section of backdrop on the entire layout. It was a humble beginning, but important. Before...
and after. There will be one or two more of these supports over to the left, where this section will just end behind the ConAgra Mill and Elevator (out of frame left). Before I can hang this section, the small control panel for the helix turnouts will have to be moved. A much easier task than the other panel that used to be here. Just need to cut some tie wraps, and no wires, secure it in its new location below, and tie up the excess.
Stay tuned.
Elliot, you never cease to amaze me and for that matter, probably the entire forum membership, with the scale of your project and the technology that you incorporate into your layout. I still have many fond memories of my visits to EnterTRAINment when you were at the MOA. Everything seemed to run smoothly and like clockwork. You are making great progress with the Twin Cities Central and I am looking forward to another visit sometime in the near future. Looking forward to seeing the new signals in operation. Until then, keep up the good work and hope you continue to feel better daily!
Dave
Thanks guys! A few of you may have misunderstood part of what I said regarding the hours of work I put in during the last 30 days. I meant it was aminimum of one hour each day. Most days it was 2 or 3. There were a bunch of days of 5 or 6, and even one ten hour day. I'm just not fast enough to get all that done in 30 hours.![]()
Pat - I already checked solder joints, and they all looked good. In that initial inspection, I located a number of accidental solder connections. I'm not sure what is on each path. The instructions may offer some troubleshooting ideas. I'll look. I suspect that each different problem is rather specific. Fix one of that type, and most will be the same.
Mike - I swear, nothing I'm doing is very complicated in and of itself. What makes it look complicated is, there's a lot of it.![]() Wires are color coded to help keep track.
Wires are color coded to help keep track.
Matt - I will be repairing those boards, sometime in the future, as I'd like to have them available as spares. The one that burnt the worst, I was lucky that it didn't the big chip installed, because I may not be able to replace that. I have two other boards I picked up last Sunday, from a buddy that does layout salvage. Funny story about one of those two boards: Back in the late 90's, I sold off some of my excess C/MRI boards. All of the pieces I sold, I scratched my initials and the date in a blank corner of cladding. One was "repatriated". The cool part is my buddy just gave it to me.
Mark - The card I fried is old, as are all the input and output cards. The only new ones are the ones I built with my wife, for the signals. The ones that need debugging.![]()
Bob - I believe all the damage is repairable. I may even have the parts in my stash. Good thing I have the the old books that cover that stuff. New books don't cover that, and I don't think Chubb sells those anymore. His new stuff is 32 line instead of 24.
Paul - The rainbow spaghetti isn't wiring (yet), it's just wire.![]() As soon as I get my layout schematic drawn for JMRI, I can start using it to hook up my turnouts. Then comes the detection, and finally the signals.
As soon as I get my layout schematic drawn for JMRI, I can start using it to hook up my turnouts. Then comes the detection, and finally the signals.
Dave - enterTRAINment was fun while it lasted, but in truth, I like this one a whole lot better. No rent to pay, and no chance of being evicted, no outside pressure, just what I put on myself. It did take a few months at the mall to get things running smoothly. You have no idea how many engines we went through using postwar stuff. Eventually, I had to give up running them. But the show went on. Let me know when you're coming up. White Bear show?
briansilvermustang posted:
Mike, she could barely keep her eyes open after her treat, a "push-up", her favorite....
I see you know how to bribe the inspector! What a great DAD!![]()
And watch the sharp solder points as well as the dull stuff ![]()
...What? Those things are pokey sometimes ![]()
![]()
![]()
(ok![]() .....dull & oxidated is suspect
.....dull & oxidated is suspect ![]() )
)
Played around with a small camera to get video from the engineer's perspective.
I need to get better, but it gives the first view of the layout from this angle ever taken.
Really nice video, Lee. The layout looks great from that perspective.

got another section of shelves up.......

c'om on, let's get these up on the shelves.......
they've only been in boxes for a couple years now.......


Adriatic posted:And watch the sharp solder points as well as the dull stuff
...What? Those things are pokey sometimes


(ok
.....dull & oxidated is suspect
)
Pokey! As in sharp and irritating if you touch them? Yes! And so are component leads that stick out a bit from the solder "blob"! My guess is Elliot has already experienced that many times over in his years of this. ![]()
![]()
![]()
Pat Kn posted:Really nice video, Lee. The layout looks great from that perspective.
As usual, I totally agree with Pat!! He and I seem to be cut from the same cloth! Your Video really shows of the great job you have done, Lee!!
Brian, So the inspector is also the supervisor as well!! Get this place cleaned up, Brian, she says!!! Great job!!
Finished up the downtown area with the addition of the village pet clinic, St. Margaret’s Church and a set of carolers. I’m calling the figure out front of the church, a deacon, as my wife’s Dad was a deacon at Our Lady of Grace church in El Cajon, CA. Maybe that will get me a Legacy engine! Yeah, I am shameless. Remember, it’s a wellness. ![]()


![]() GO for it Ted
GO for it Ted ![]()
Lee, Now that's what I am talking about! Great video of your layout!![]()
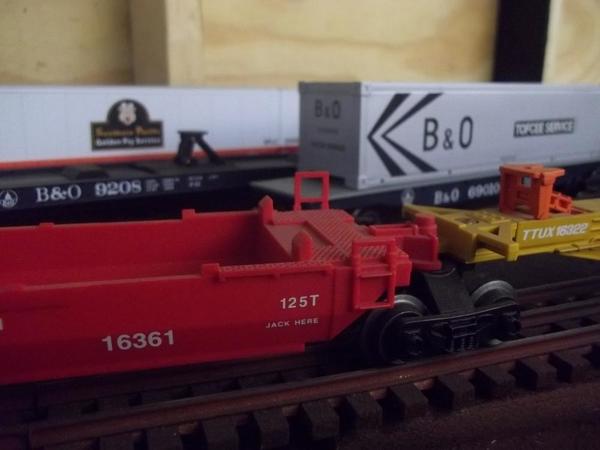
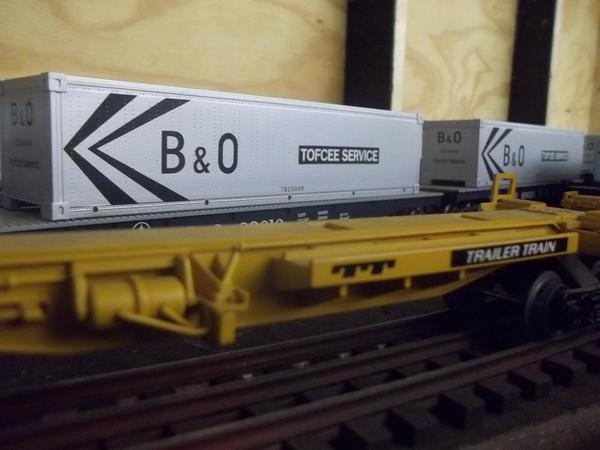
Brian, nice work, just wondering how many container cars you have? looks liken you have enough for everyone on the forum!![]()
Ted, great looking village! I love the winter look. I would thing your moving in then right direction for that new engine!![]()
mike g. posted:Brian, nice work, just wondering how many container cars you have? looks liken you have enough for everyone on the forum!
over 300 intermodal cars, Dad's favorite and he wants to run long trains.....
hoping to be able to run 50 scale size car trains, and 100 of the 027 size cars trains...

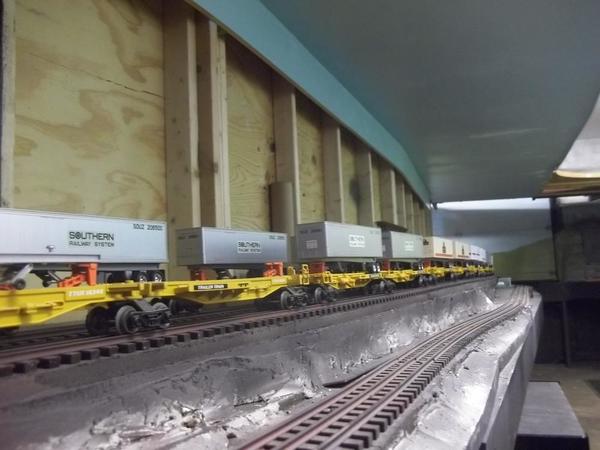
there are about 40 Triple Crown TOFC cars, a pretty neat train all together......
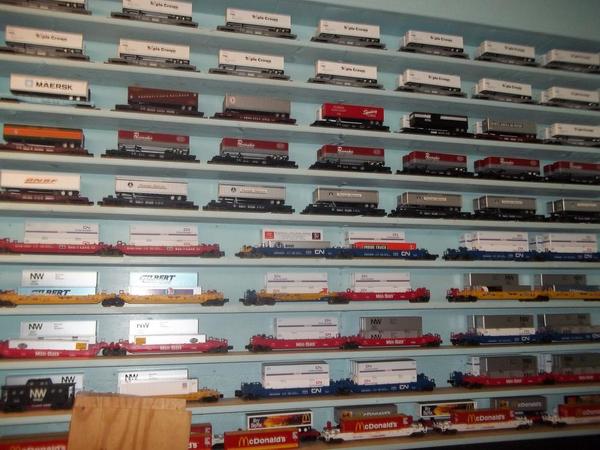


want to try and run 30 -50 car roadrailer car trains......
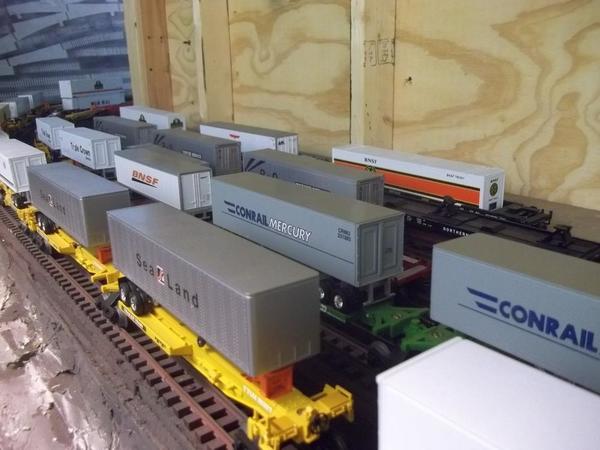
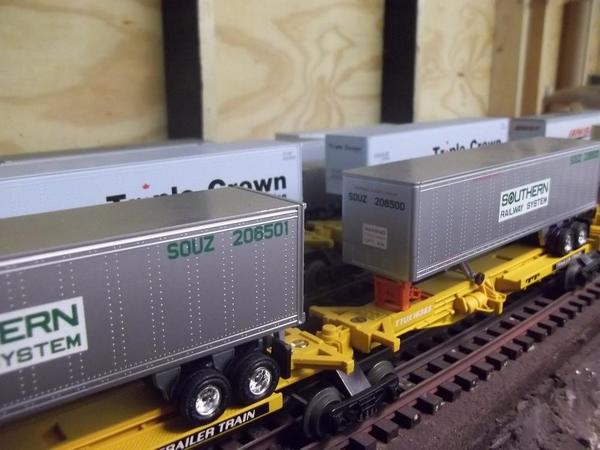
50 sets of these spline cars, 100 truck trailers, should be a neat looking train ![]()
there are still a lot more upstairs under the Alaska layout to get out yet.....


Mark Boyce posted:Adriatic posted:And watch the sharp solder points as well as the dull stuff
...What? Those things are pokey sometimes
(ok
Pokey! As in sharp and irritating if you touch them? Yes! And so are component leads that stick out a bit from the solder "blob"! My guess is Elliot has already experienced that many times over in his years of this.
Actually, not so much with the circuit boards. I have a bunch of small cuts on the back of my hands from reaching into a small space on the layout to fish the switch machine wires for the hump yard. The screws I used to construct the layout are just a little too long, and stick through the bottom of the wood.
Now, that's pokey!![]()
Lee, just got to watch your video. Nice tour of the layout and the scenery is top notch...........Paul
p51 posted:Played around with a small camera to get video from the engineer's perspective.
I need to get better, but it gives the first view of the layout from this angle ever taken.
outstanding Lee!
Brian, you da MAN! Great looking cars and what a great way to think of your dad and spend time with him! Way to go!![]()
Big_Boy_4005 posted:Mark Boyce posted:Adriatic posted:And watch the sharp solder points as well as the dull stuff
...What? Those things are pokey sometimes
(ok
Pokey! As in sharp and irritating if you touch them? Yes! And so are component leads that stick out a bit from the solder "blob"! My guess is Elliot has already experienced that many times over in his years of this.
Actually, not so much with the circuit boards. I have a bunch of small cuts on the back of my hands from reaching into a small space on the layout to fish the switch machine wires for the hump yard. The screws I used to construct the layout are just a little too long, and stick through the bottom of the wood.
Now, that's pokey!
I used to manage that it in dashboards all the thime. I used to pull my dripping hand out and call for my sugar kit while trying to keeep blood off the interior ![]() .
.
I'll bleed smiling "for the wrench" ![]()
...but one less poke over that sugar crap is one less poke eh?. ![]()
mike g. posted:Brian, you da MAN! Great looking cars and what a great way to think of your dad and spend time with him! Way to go!

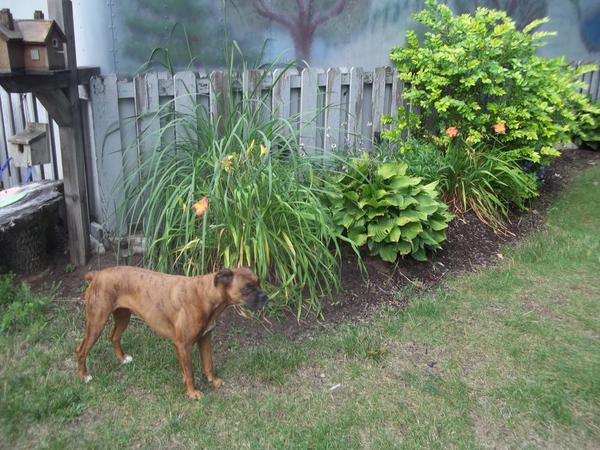
I have two driveways and I put 6' shadow box privacy fence completely around the yard with gates on each driveway. Dad has a 40' camper, this spring he will be able to back in on the 2nd drive, in front of the garage, close the gate, and set up with water and electric from the garage, and run trains when ever he wants ![]()
![]()
![]()
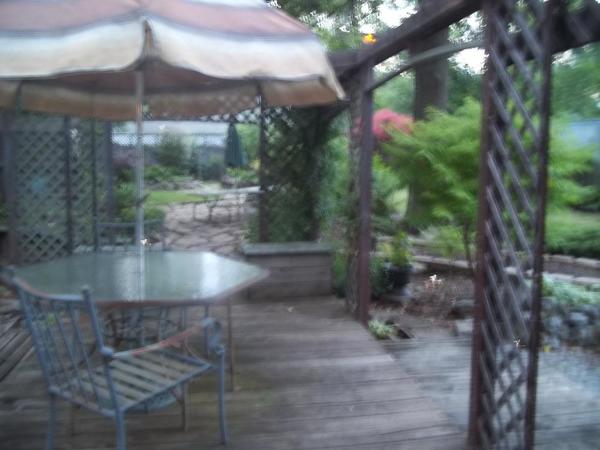


Mom will have this side of the yard to work on flowers with Sherri in spring ![]()


the train room workshop....slowly camouflaging it into the yard....


cannot wait till spring !!


Nice Brian, way to think about Mom and Dad! Great looking yard also and I love the out side layout! But let me guess, then inspector makes sure you get the lawn mowed so it looks nice for when Mom and Dad are there!
They must be proud to have you as there son! They are really lucky!![]()
Lee, neat video, well done, I like your layout...Thanks for posting as I like your photography, your scenes are unique...Wow.
Lee- great video. The layout looks great from any angle. I like how the lighting changed when the train came out of the bend too.
Brian- I think you need to train the dog to open the boxes for you. If she's gonna just stand around anyway you might as well put her to work. ![]()
![]() . Great yard too. You need to run the trains onto the bar so you can make/ receive deliveries while you're running trains.
. Great yard too. You need to run the trains onto the bar so you can make/ receive deliveries while you're running trains.
Bob
Brian....What is the the inspectors name? Did you go the Steve Martin route? Name her Girl?; or what? Our "Puppi" just refused to answer to Apollo; too snooty... Nor Lenny (of mice&men); too smart for that nonsense, his name was Puppi ![]()
I've been tackleing the mine shaft elevator after two years of looking at it. As it turns out the ladder frame is very close to O gage, a 16th" narrrow, but I worked it out laying rails on the frame like ties.
So, I ran new the wood for rails up the frame, and used some deep flange AF plastic whelsets on O axles. I made an operating ore lift/dump bucket and more than one trolley ("a vertical ore cart) eventually trimming the bucket down 1/3 to clearance for the rails and heavy bucket linkage/arms needed to dump.
It was in need of weight to have the trolley wheels remain seated while being near vertical & dangleing by a rope. I didn't like those trolleys I had come up with, though they worked. It needed two more rails; a channel had to be made to trap the wheels. I didn't have enough ⅛" wood for two more rails and supports, but to eyball a distance I used some O 0-27 and the solution presented itself nicely. the wheels tread dia. fit nicely in between the 0-27 inner and outer rails. The wheel flange rides the rail head, the tread rides the inside edge of each rail.


Great set-up Brian. Some of my favorite cars are Husky Stacks.
As far as the setup for your Dad goes, that's first rate. Let me know when he's off camping, I'll get a pass from my wife and move in while he's gone. I am a trained & qualified DAD & Granddad! I can run trains too. Is your outdoor railway O gauge?
Mark Boyce posted:Pat Kn posted:Really nice video, Lee. The layout looks great from that perspective.
As usual, I totally agree with Pat!! He and I seem to be cut from the same cloth! Your Video really shows of the great job you have done, Lee!!
Thanks guys, that means a lot!
Big_Boy_4005 posted:Mark Boyce posted:Adriatic posted:And watch the sharp solder points as well as the dull stuff
...What? Those things are pokey sometimes
(ok
Pokey! As in sharp and irritating if you touch them? Yes! And so are component leads that stick out a bit from the solder "blob"! My guess is Elliot has already experienced that many times over in his years of this.
Actually, not so much with the circuit boards. I have a bunch of small cuts on the back of my hands from reaching into a small space on the layout to fish the switch machine wires for the hump yard. The screws I used to construct the layout are just a little too long, and stick through the bottom of the wood.
Now, that's pokey!
Yes that would really be bad!!
RSJB18 posted:paul 2 posted:Bob, it was not kept a secret. Two years ago or more I was posting work on the attic layout. At that time I re wired the tracks and re did all the scenery..............Paul
Well I joined the forum about a year ago so my loss. Still very nice work!
Not really. Use the search "attic" & Paul and you will likely find it.
I think I will have a dumping vertical ore cart when I sit down to it again. I need to bend a spreader bar, open a pivot hole more, cut 2 screws to length, and then glue/paint it.
Since the holidays are approaching, it's time to dust off the Christmas Train...

With, of course, the dubious assistance of Norma Bates Kitteh. ![]()


The "Emphysema Express" is, well, smoking like a chimney... ;-)

And, of course, the K-Line Hanukkah boxcar in the interests of ecumenism. ;-)

Mitch


I put in another 10 hour day today. Eight of those hours were spent testing and debugging the SSD cards. At first I thought I had a lot of bad circuits, like 30% of 216 total, but that wasn't really the case.

What happened was I only pressed the LED I was using against the terminal screws. It wasn't making good contact. There were still a few bad ones where I had to flip the board over and inspect my work. In the end, I was able to fix all but two circuits. They both had the same issue, where the red light was on with no input applied, and I could never get a green. I may revisit those two with a better light and my Opti-visor.
The other two hours were spent hashing over operations with Gary. Back at the beginning of October he gave me the schedule and train orders he made up for the layout. Then he asked the $64,000 question: when did I think the layout would be ready to have an operating session? I had hoped to do that by the end of this year, but it's looking more and more like it will be spring or summer of next year. I know the uncouplers are a must have, but I would also like to have the entire C/MRI - JMRI system running too.
Just gotta keep after it!![]()
Big_Boy_4005 posted:I put in another 10 hour day today. Eight of those hours were spent testing and debugging the SSD cards. At first I thought I had a lot of bad circuits, like 30% of 216 total, but that wasn't really the case.
What happened was I only pressed the LED I was using against the terminal screws. It wasn't making good contact. There were still a few bad ones where I had to flip the board over and inspect my work. In the end, I was able to fix all but two circuits. They both had the same issue, where the red light was on with no input applied, and I could never get a green. I may revisit those two with a better light and my Opti-visor.
The other two hours were spent hashing over operations with Gary. Back at the beginning of October he gave me the schedule and train orders he made up for the layout. Then he asked the $64,000 question: when did I think the layout would be ready to have an operating session? I had hoped to do that by the end of this year, but it's looking more and more like it will be spring or summer of next year. I know the uncouplers are a must have, but I would also like to have the entire C/MRI - JMRI system running too.
Just gotta keep after it!
Poor contact on low voltage will get you every time. Glad it wasn't as bad as you thought Elliot.
Remember- slow and steady wins the race!
Bob
RSJB18 posted:Brian- I think you need to train the dog to open the boxes for you. If she's gonna just stand around anyway you might as well put her to work.

Bob

delivery on the way ![]()


Elliot, its nice that the boards were not that bad off, everyone needs to catch a break now and then! Bob is right, slow and steady wins!![]()
Let Gary known it will be ready when its ready! LOL![]()

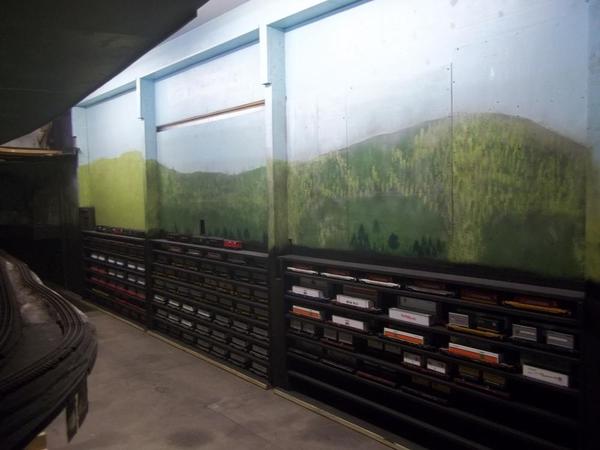
patched up the wall and added some temporary color to it....


Adriatic posted:Brian....What is the the inspectors name? Did you go the Steve Martin route? Name her Girl?; or what? Our "Puppi" just refused to answer to Apollo; too snooty... Nor Lenny (of mice&men); too smart for that nonsense, his name was Puppi

Izabelle

inspector " IZZY"

Patch job looks good Brian, I bet you ran some trains also from the pictures you sent! LOL![]()
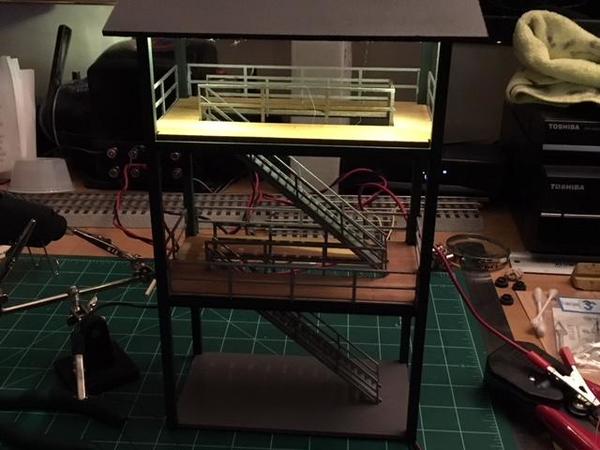
I finished installing lights on a station platform I ordered at York. Jim Robinson, Bridgeboss did a super job building it.
I installed 2 LEDs.
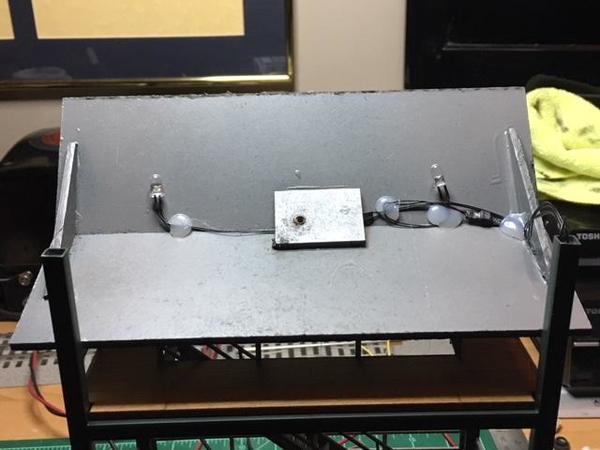
Here's the final product:
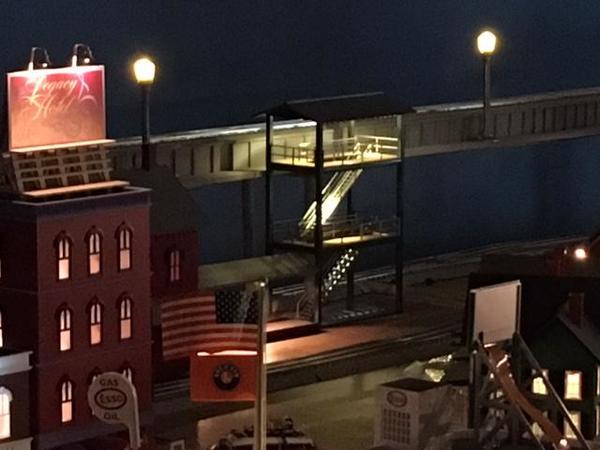
and how it appears on the layout...trolley stop feeds the train station. And yes, you can see that the Ghostbusters just arrived at the hotel...![]()


Got the layout ready for an open house on Sunday.
ToledoEd posted:I finished installing lights on a station platform I ordered at York. Jim Robinson, Bridgeboss did a super job building it.
I installed 2 LEDs.
Here's the final product:
and how it appears on the layout...trolley stop feeds the train station. And yes, you can see that the Ghostbusters just arrived at the hotel...
What buildings did you use in your picture?
Took up the one track to curve it more toward the front of the table. Cork is down and if the glue is dry later tonight I can get paint on it and put the track down. Waiting for that I'll start measuring pieces to make the table frame in front of it. Pics................Paul
Darn I hate senior moments. Hit the wrong button again........I did that this morning when I sent a happy anniversary message to a friend and ended up sending it three times in a row. I really hate computers............Paul


Looks good Paul, what are you going to put where the track was?![]()
MIKE G, I will be laying down plaster and ground foam in that spot......Paul
Access to this requires an OGR Forum Supporting Membership


