Mo985 posted:

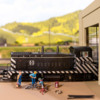
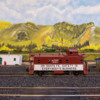
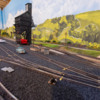
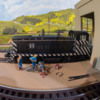
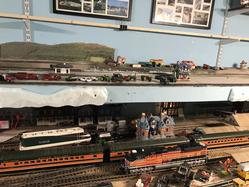
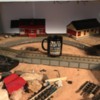
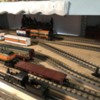
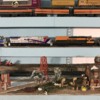
Busy busy 'round the P&L.

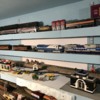
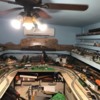
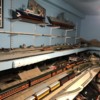
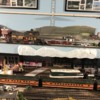
All the track is laid, powered, and switches wired, but only half of it is ballasted. Shifting focus to scenery.

Township was out patching holes, and finished painting the grade crossings. Also, prepping for crossing signal placement. 

image

Got my Pepsi plant in last week. Didn't fit where I had planned originally, so added some track after my better half pointed out that the lights and signs should be seen from the front. Working on some scratch built flats for the empty wall area and siding in the background. image

Got the power company trucks labeled, next is some color and weathering.

image

Got the hill up to Linglestown roughed in, and the auto tunnel installedimage

And lastly, the zoning board approved our plans for a new gas station. We expect groundbreaking as soon as the ground thaws.image

Mo,

The roads at your grade crossings are well done. Please share your technique.

Dave

Rick Bivins posted:

Jim

The building is a 16' by 27' pole barn with insulated walls and ceiling and a Concrete floor. I built it me-self I did! . I used white tri-rib metal to cover the interior. I have an 8' by 18' addition as well. The addition is where the "new bench work" is located. This room is also my work space and equipment storage. In Kentucky...we have three seasons in one week! Last week we went from 61* on Thursday with rain to 1* Friday with ice and 4" of snow. 3" more by Saturday evening! As for heat...Oh Yeah...I have heat. A Natural Gas forced air furnace keeps the shed roasty-toasty!

Rick

Cool !!  Is the 8x18 an addition to an existing layout??  And yes we have forced air heat at work and I love it! I built a 36x16 building with about 1/3 of it being without a floor where I park my lawn mowers and stuff.   Was planned to be a train building but I got into blow molds and they filled up that building.    Now I'm putting the trains in a extra bedroom that is about 17x11, around the room layout.  Trying to dodge a odd corner and leave room for the door to open : ) 

Jim

A day of a few things. Had to take the car in for its 6 month maintenance. When I got home I dragged my feet going down to do layout work. Finally got my switches and caboose industries ground throws. and later in the afternoon my car I won bidding on the BAY arrived. Two packages in one day. Double Christmas. All I got done today was got a second coat of black on one side of the girder, took Bobs advice and placed a support pole across the street from the pole I added to the top of. Using the smallest drill bit I had I drilled holes on the poles so I could string a support wire between the two poles. Set the 0-31 switch down and it is workable and should give me storage for two hoppers.  Glued some more parts to the oil storage tanks. Tomorrow I won't get to work till later in the afternoon. Got to hit the grocery store first then a trip down to Menards to take advantage of the 15% off in the bag sale. I need more white and wood glue along with more 1 inch dry wall screws. Plus they have a nice heavy duty two step step ladder. Pics..............Paul

DSCN1315DSCN1320DSCN1317DSCN1318DSCN1319DSCN1321DSCN1322DSCN1323


Attachments

Images (8)
  • DSCN1315
  • DSCN1320
  • DSCN1317
  • DSCN1318
  • DSCN1319
  • DSCN1321
  • DSCN1322
  • DSCN1323
Rick Bivins posted:

imageI added an L shaped addition to my layout.  This area will house a steel mill industry set in a 50s Lionel display themed environment.

Rick. 

Rick, all the layouts I visited in Australia while I lived there, were housed in sheds like yours. Of course, they don't have the winters we have, but they do have the summers. Good that you have the AirCon!!

Dr. Joe 

TRACK CAME IN FINALLY at about 6:10!   Still had to do some more bench work. Put a permanent angled support and a temporary support/duck under at the door opening!   Got all the track together and hooked up!  Got to run my new LC+ Southern 4501 Mikado steam engine and my new LC+ Southern 2401a switcher!    Just got done running them for a few.   Will post pictures Tomorrow after work!   11 days to take down a 6x12 table layout, tearing down a wall, and now building all the bench work and getting to run trains a bit on the new 17x11 around the room layout.  What a relief!  HAPPY HAPPY HAPPY!!!!!!!!!!!!!!!!!!!!!!!!! 

Jim 

Last edited by carsntrains

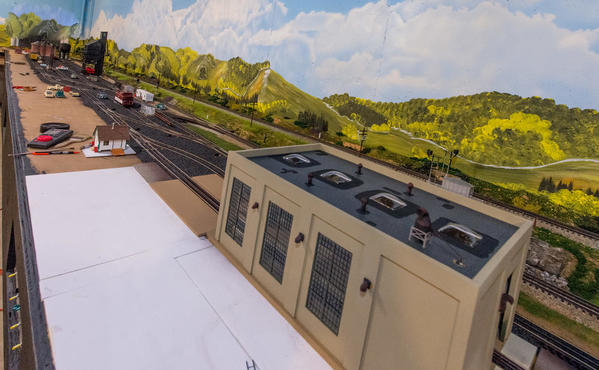
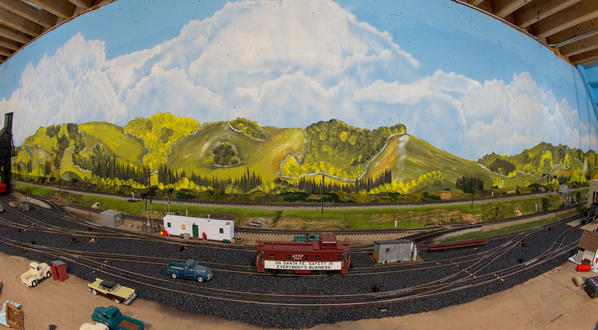
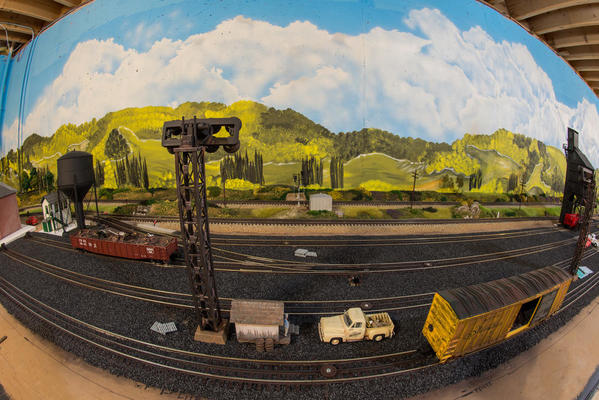
Been working on my yard for the last several weeks.  Finally got all the ballast in.  Built 5 kits (4 buildings/structures and the water tower) for the yard.  Still have to weather the kits and have to work on detailing the yard in the coming weeks.  Also have some electrical to do.  Because of the length of the yard, I used wide angle and fisheye lenses for these pictures.  The distortion is intentional.  

20180118-Train Layout-320180118-Train Layout-520180118-Train Layout-620180118-Train Layout-920180118-Train Layout-1020180118-Train Layout-1120180118-Train Layout-1320180118-Train Layout-1420180118-Train Layout-1720180118-Train Layout-1920180118-Train Layout-2020180118-Train Layout-2120180118-Train Layout-22

Attachments

Images (13)
  • 20180118-Train Layout-3
  • 20180118-Train Layout-5
  • 20180118-Train Layout-6
  • 20180118-Train Layout-9
  • 20180118-Train Layout-10
  • 20180118-Train Layout-11
  • 20180118-Train Layout-13
  • 20180118-Train Layout-14
  • 20180118-Train Layout-17
  • 20180118-Train Layout-19
  • 20180118-Train Layout-20
  • 20180118-Train Layout-21
  • 20180118-Train Layout-22
Last edited by Boo Man
jim pastorius posted:

Pulled up my Standard gauge carpet railroad and packed the last engines and freight cars away. Nothing until I relocate to Pa. in a couple of weeks. Nothing against NC but I will be right in the middle of real trains and toy trains. Will miss a pretty lass I met down here, though.

You DOG, Jim!  Glad to hear that there's still some hot coals in the fire box.....

paul 2 posted:

A day of a few things. Had to take the car in for its 6 month maintenance. When I got home I dragged my feet going down to do layout work. Finally got my switches and caboose industries ground throws. and later in the afternoon my car I won bidding on the BAY arrived. Two packages in one day. Double Christmas. All I got done today was got a second coat of black on one side of the girder, took Bobs advice and placed a support pole across the street from the pole I added to the top of. Using the smallest drill bit I had I drilled holes on the poles so I could string a support wire between the two poles. Set the 0-31 switch down and it is workable and should give me storage for two hoppers.  Glued some more parts to the oil storage tanks. Tomorrow I won't get to work till later in the afternoon. Got to hit the grocery store first then a trip down to Menards to take advantage of the 15% off in the bag sale. I need more white and wood glue along with more 1 inch dry wall screws. Plus they have a nice heavy duty two step step ladder. Pics..............Paul

DSCN1315DSCN1320DSCN1317DSCN1318DSCN1319DSCN1321DSCN1322DSCN1323


Paul, That is certainly a handsome trailer!!!  Yes, I like the guy pole across the street!! Yes, I would say the visitor needs to see the guy wire in this case to realize what the pole is for.  All the rest is looking good too!

John D. posted:

Someone posted on the Facebook Tips and Tricks group something about braided fishing line that comes in black and actually has a realistic sag to it.  I can't find the post right now...I'll keep looking.

Two seconds after I hit "post" I tried a search for "braided line" in facebook and found this post:


Link:


https://www.amazon.com/PLUSINN...ativeASIN=B01MQYM7LU


TinyURL:

https://tinyurl.com/y7eq797y


Last edited by John D.
carsntrains posted:

TRACK CAME IN FINALLY at about 6:10!   Still had to do some more bench work. Put a permanent angled support and a temporary support/duck under at the door opening!   Got all the track together and hooked up!  Got to run my new LC+ Southern 4501 Mikado steam engine and my new LC+ Southern 2401a switcher!    Just got done running them for a few.   Will post pictures Tomorrow after work!   9 days to take down a 6x12 table layout, tearing down a wall, and now building all the bench work and getting to run trains a bit on the new 17x11 around the room layout.  What a relief!  HAPPY HAPPY HAPPY!!!!!!!!!!!!!!!!!!!!!!!!! 

Jim 

Congrats Jim, you sure did a lot of work in short time! Glad to hear you running trains!


Boo Man posted:

Been working on my yard for the last several weeks.  Finally got all the ballast in.  Built 5 kits (4 buildings/structures and the water tower) for the yard.  Still have to weather the kits and have to work on detailing the yard in the coming weeks.  Also have some electrical to do.  Because of the length of the yard, I used wide angle and fisheye lenses for these pictures.  The distortion is intentional.  

20180118-Train Layout-320180118-Train Layout-520180118-Train Layout-620180118-Train Layout-920180118-Train Layout-1020180118-Train Layout-1120180118-Train Layout-1320180118-Train Layout-1420180118-Train Layout-1720180118-Train Layout-1920180118-Train Layout-2020180118-Train Layout-2120180118-Train Layout-22

Boo Man your yard looks great, when you get down it will be even better! I love the fisheye lens pictures. It really makes it look like ART hanging on the wall! Great Job!~

Boo Man posted:

Been working on my yard for the last several weeks.  Finally got all the ballast in.  Built 5 kits (4 buildings/structures and the water tower) for the yard.  Still have to weather the kits and have to work on detailing the yard in the coming weeks.  Also have some electrical to do.  Because of the length of the yard, I used wide angle and fisheye lenses for these pictures.  The distortion is intentional.  

20180118-Train Layout-320180118-Train Layout-520180118-Train Layout-620180118-Train Layout-920180118-Train Layout-1020180118-Train Layout-1120180118-Train Layout-1320180118-Train Layout-1420180118-Train Layout-1720180118-Train Layout-1920180118-Train Layout-2020180118-Train Layout-2120180118-Train Layout-22

Bob, everything in your yard looks absolutely great!!!

John D. posted:
John D. posted:

Someone posted on the Facebook Tips and Tricks group something about braided fishing line that comes in black and actually has a realistic sag to it.  I can't find the post right now...I'll keep looking.

Two seconds after I hit "post" I tried a search for "braided line" in facebook and found this post:

braided line

Link:


https://www.amazon.com/PLUSINN...ativeASIN=B01MQYM7LU


TinyURL:

https://tinyurl.com/y7eq797y


John, I missed that topic on Tips and Tricks.  Thank you!!!  Although, I won't get to that point for a long time, and by then my arthritis will be so bad, I'll end up in Torrance State Mental Hospital!  

Last evening I actually got some time to watch Bob Phillips on TM Legacy video and got my Western Maryland GP7 programmed with my new Legacy system.  I had them working on a used TMCC controller I bought from gunrunnerjohn a couple years ago.  Everything else I have is DCS. 

No video because I have a full yard, so to speak with freight and passenger cars I moved onto the Ceiling Central RR to make room for Christmas trains on the multi-function 4x8 RR.  I still have to do my WM F7 ABA set.  I'm still trying to moves stuff around so I don't break something when I start bringing lumber in for the new layout build.  

I've spent a good chunk of the last three days plowing through the Scenic Express catalog, all 300+ pages. Big project! I have tons of Woodland Scenics materials packed away, but the static grasses look so much better. I'll still use the old stuff, but the newer materials should add a real pop.

It's a very handy feature that S.E. has where you can create a wish list. I filled mine up with a bunch of items, and many times all the colors, because I'm modelling all four seasons. Soon as I'm done with this post, I'm going to fill my cart with a monster order.

In prep for scenery, the cardboard and plaster cloth treatment continued yesterday.

I added plywood strips to the back of the fascia for a stapling surface.

IMG_7994

Then got ten feet of cardboard installed.

IMG_7995

I only got four feet of it covered with the plaster cloth, but the rest should be quick.

IMG_7996

There are just a few more holes in Newport left to fill. Then I'll probably go back around the corner to Cottage Grove, and fill it in.

IMG_7998

The plaster cloth that did get done.

IMG_7997

The other thing I worked on was the fascia above Red Wing, filling in all the holes. A little sanding and it's ready for paint.

IMG_7993

Attachments

Images (6)
  • IMG_7994
  • IMG_7995
  • IMG_7996
  • IMG_7998
  • IMG_7997
  • IMG_7993
mike g. posted:

Mitch hats off to you, I would never think of going that far! I would have to send it out to get it fixed!

Well, being impoverished, I need to shift for myself, repairs-wise...  ^.^ 

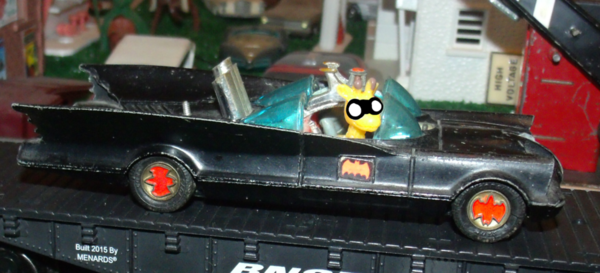
In other news, someone on another forum asked if, since Fortescue was riding alongside Batman,  this made him the new Robin. 

Gi-raffe_wonder

The answer, of course, is, "Why...yes.  Yes, he is!" 

Mitch 

Attachments

Images (1)
  • Gi-raffe_wonder
Big_Boy_4005 posted:

I've spent a good chunk of the last three days plowing through the Scenic Express catalog, all 300+ pages. Big project! I have tons of Woodland Scenics materials packed away, but the static grasses look so much better. I'll still use the old stuff, but the newer materials should add a real pop.

IMG_7997

The other thing I worked on was the fascia above Red Wing, filling in all the holes. A little sanding and it's ready for paint.

Elliot, fun to see the landscape fill in around your track work.  Are you top dressing your plaster cloth with Sculptamold modeling compound?   I used it and it provides a nice texture and it is ideal for filling in small gaps near the roadbed, around rock castings, etc.  BTW, did you find a solution for hiding the two backdrop openings behind the lead up to the hump yard?    Dave

Boo Man posted:

Been working on my yard for the last several weeks.  Finally got all the ballast in.  Built 5 kits (4 buildings/structures and the water tower) for the yard.  Still have to weather the kits and have to work on detailing the yard in the coming weeks.  Also have some electrical to do.  Because of the length of the yard, I used wide angle and fisheye lenses for these pictures.  The distortion is intentional.  

20180118-Train Layout-520180118-Train Layout-620180118-Train Layout-10

Hey Bob...

Who's Diesel Shop is that?

Is it a Berkshire Valley?

Regardless, what paint did you use for the concrete. It looks great!!

Donald


darlander posted:
Big_Boy_4005 posted:

I've spent a good chunk of the last three days plowing through the Scenic Express catalog, all 300+ pages. Big project! I have tons of Woodland Scenics materials packed away, but the static grasses look so much better. I'll still use the old stuff, but the newer materials should add a real pop.

IMG_7997

The other thing I worked on was the fascia above Red Wing, filling in all the holes. A little sanding and it's ready for paint.

Elliot, fun to see the landscape fill in around your track work.  Are you top dressing your plaster cloth with Sculptamold modeling compound?   I used it and it provides a nice texture and it is ideal for filling in small gaps near the roadbed, around rock castings, etc.  BTW, did you find a solution for hiding the two backdrop openings behind the lead up to the hump yard?    Dave

I was just going to go with a top coat of plaster of Paris. I'm looking for mainly smooth terrain, so I'll use my taping knife.

Except for the snow area, I'll add some brown to the mix in case of chipping.

I don't plan on rock castings, for the little bit of rock I need, I was going to mix up some Durabond, like we did back at enterTRAINment. You carve it just as it begins to set. Tint that too.

I haven't really looked at those openings again. Been working over in the next aisle.

3rail 2 posted:
Boo Man posted:

Been working on my yard for the last several weeks.  Finally got all the ballast in.  Built 5 kits (4 buildings/structures and the water tower) for the yard.  Still have to weather the kits and have to work on detailing the yard in the coming weeks.  Also have some electrical to do.  Because of the length of the yard, I used wide angle and fisheye lenses for these pictures.  The distortion is intentional.  

20180118-Train Layout-520180118-Train Layout-620180118-Train Layout-10

Hey Bob...

Who's Diesel Shop is that?

Is it a Berkshire Valley?

Regardless, what paint did you use for the concrete. It looks great!!

Donald


Don,

It is Bershire Valley's, but I used .125 styrene for the roof and used trusses from plastruct to support the roof.  The kits cardboard roof sags rather quickly and has no support from the perimeter wood.  

I used Rustoleum camo.  The concrete pad in front and back were painted with Uline spray paint.   I still have to chalk and detail it yet.   


Big_Boy_4005 posted:
darlander posted:
Big_Boy_4005 posted:

I've spent a good chunk of the last three days plowing through the Scenic Express catalog, all 300+ pages. Big project! I have tons of Woodland Scenics materials packed away, but the static grasses look so much better. I'll still use the old stuff, but the newer materials should add a real pop.

IMG_7997

The other thing I worked on was the fascia above Red Wing, filling in all the holes. A little sanding and it's ready for paint.

Elliot, fun to see the landscape fill in around your track work.  Are you top dressing your plaster cloth with Sculptamold modeling compound?   I used it and it provides a nice texture and it is ideal for filling in small gaps near the roadbed, around rock castings, etc.  BTW, did you find a solution for hiding the two backdrop openings behind the lead up to the hump yard?    Dave

I was just going to go with a top coat of plaster of Paris. I'm looking for mainly smooth terrain, so I'll use my taping knife.

Except for the snow area, I'll add some brown to the mix in case of chipping.

I don't plan on rock castings, for the little bit of rock I need, I was going to mix up some Durabond, like we did back at enterTRAINment. You carve it just as it begins to set. Tint that too.

I haven't really looked at those openings again. Been working over in the next aisle.

Sounds good, keep up the good pace!   My experience with Durabond is that it very strong but difficult to sand or carve.   Your carving it before it sets would be the only way - didn't think of that.    I have used it to set the tape when taping sheet rock joints.    It even hardens under water, like concrete.    The other nice thing is that it comes in a variety of set times, i.e. 90 min, 120 min, etc.   Sorry to bother you with questions and post replies - now get back to work!     Dave

P.S.  I'm enjoying the warm spell.   Got my Taconite plant yard track ballasted today in the garage.   Need to get it back on the layout later tonight as our great-grand-son is coming to see the trains tomorrow!   Also applied the finish coat to my plant buildings.  

darlander posted:
Big_Boy_4005 posted:
darlander posted:
Big_Boy_4005 posted:

I've spent a good chunk of the last three days plowing through the Scenic Express catalog, all 300+ pages. Big project! I have tons of Woodland Scenics materials packed away, but the static grasses look so much better. I'll still use the old stuff, but the newer materials should add a real pop.

IMG_7997

The other thing I worked on was the fascia above Red Wing, filling in all the holes. A little sanding and it's ready for paint.

Elliot, fun to see the landscape fill in around your track work.  Are you top dressing your plaster cloth with Sculptamold modeling compound?   I used it and it provides a nice texture and it is ideal for filling in small gaps near the roadbed, around rock castings, etc.  BTW, did you find a solution for hiding the two backdrop openings behind the lead up to the hump yard?    Dave

I was just going to go with a top coat of plaster of Paris. I'm looking for mainly smooth terrain, so I'll use my taping knife.

Except for the snow area, I'll add some brown to the mix in case of chipping.

I don't plan on rock castings, for the little bit of rock I need, I was going to mix up some Durabond, like we did back at enterTRAINment. You carve it just as it begins to set. Tint that too.

I haven't really looked at those openings again. Been working over in the next aisle.

Sounds good, keep up the good pace!   My experience with Durabond is that it very strong but difficult to sand or carve.   Your carving it before it sets would be the only way - didn't think of that.    I have used it to set the tape when taping sheet rock joints.    It even hardens under water, like concrete.    The other nice thing is that it comes in a variety of set times, i.e. 90 min, 120 min, etc.   Sorry to bother you with questions and post replies - now get back to work!     Dave

P.S.  I'm enjoying the warm spell.   Got my Taconite plant yard track ballasted today in the garage.   Need to get it back on the layout later tonight as our great-grand-son is coming to see the trains tomorrow!   Also applied the finish coat to my plant buildings.  

Dave, my consecutive days worked streak, with at least one hour, and many 5 - 8 hour days,is well into its fourth month. The last day I didn't work was October 9th. Dialysis days, MWF, I'm usually so wiped out after dinner, that I don't go downstairs. Those days I try to get in between 1 - 3 hours during my run. If I don't, I make a point to get in some time after my nap. Tuesday, Thursday and Saturday are the big days. Sundays are a tossup. This week I expect a short day.

Usually, you want your Durabond to go on fairly smooth when you apply it as directed. otta think outside the box or bag as it were. I want to say we used 45. I still have a couple 25 year old bags downstairs. Wonder if they are still powder or have gone solid.

Anxious to see the latest pics of the Taconite plant. It really looked great the last time I saw it.

Last edited by Big_Boy_4005

Took a ride to Menards this afternoon to take advantage of their 15%  off if it fits in the bag. But as my luck goes I got everything on my list except they only had one bottle of white glue left. So I bought the bag and at the top of my list was a two step step ladder. Well being a person who will try something I placed the ladder in the bag and it fit but it hung out the top a bit. Cashier tried to scan it but it didn't work so I had to pay regular price but that was alright because I needed it so I could reach and start working on the larger tables. I also got the second and last side painted a second coat on the girder so when it dries I can put it in place. Pics............Paul

DSCN1324DSCN1325DSCN1326

Attachments

Images (3)
  • DSCN1324
  • DSCN1325
  • DSCN1326
luvindemtrains posted:
Mo985 posted:

Busy busy 'round the P&L.

All the track is laid, powered, and switches wired, but only half of it is ballasted. Shifting focus to scenery.

Township was out patching holes, and finished painting the grade crossings. Also, prepping for crossing signal placement. 

image

Got my Pepsi plant in last week. Didn't fit where I had planned originally, so added some track after my better half pointed out that the lights and signs should be seen from the front. Working on some scratch built flats for the empty wall area and siding in the background. image

Got the power company trucks labeled, next is some color and weathering.

image

Got the hill up to Linglestown roughed in, and the auto tunnel installedimage

And lastly, the zoning board approved our plans for a new gas station. We expect groundbreaking as soon as the ground thaws.image

Mo,

The roads at your grade crossings are well done. Please share your technique.

Dave

Dave,

I wrote up a thread on it, which you can find here.

paul 2 posted:

Took a ride to Menards this afternoon to take advantage of their 15%  off if it fits in the bag. But as my luck goes I got everything on my list except they only had one bottle of white glue left. So I bought the bag and at the top of my list was a two step step ladder. Well being a person who will try something I placed the ladder in the bag and it fit but it hung out the top a bit. Cashier tried to scan it but it didn't work so I had to pay regular price but that was alright because I needed it so I could reach and start working on the larger tables. I also got the second and last side painted a second coat on the girder so when it dries I can put it in place. Pics............Paul

DSCN1324DSCN1325DSCN1326

All in all it sounds like a good day Paul!

Boo Man posted:
3rail 2 posted:
Boo Man posted:

Been working on my yard for the last several weeks.  Finally got all the ballast in.  Built 5 kits (4 buildings/structures and the water tower) for the yard.  Still have to weather the kits and have to work on detailing the yard in the coming weeks.  Also have some electrical to do.  Because of the length of the yard, I used wide angle and fisheye lenses for these pictures.  The distortion is intentional.  


Hey Bob...

Who's Diesel Shop is that?

Is it a Berkshire Valley?

Regardless, what paint did you use for the concrete. It looks great!!

Donald


Don,

It is Bershire Valley's, but I used .125 styrene for the roof and used trusses from plastruct to support the roof.  The kits cardboard roof sags rather quickly and has no support from the perimeter wood.  

I used Rustoleum camo.  The concrete pad in front and back were painted with Uline spray paint.   I still have to chalk and detail it yet.   


Excellent Bob. Thank you very much for the information. I have one to build and now I know how to make it look good!

Sorry if it turns out a replica but I will give all credit to you!

Donald

Thanks to the good weather (40 degrees F) the past two days, I was able to work in the garage.  The taconite rail yard received lights and the tracks are ballasted.  Still have scenic work to do but needed to relocate the summit back to the layout as we are entertaining our great-grandson tomorrow. I use to claim all are grand kids as “Greats”.   Our children are wonderful, but grand kids are GREAT! But now we have a real 2 year old great-grandson, and it is really Great plus, he loves trains!

I have much more scenery to add to the summit and the buildings have been painted but no weathering at this point.   I am taking baby steps and will get that done later this summer.   I need to connect the building and yard lights to power plus add trees, ground cover and greenery.   Ordered an Atheran HO DM&IR SD38AC to do the switching duties at the Mountain Iron Taconite Plant.   That is scheduled for a July arrival.

I also changed out all my switch and track power switches.   I converted all to rocker switches as the toggles would occasionally get caught on clothing, belt loops, etc.   Now I have smooth passages as I move around the layout.    With the DCS system and using hand held iPads and phones for train control, there is no longer a need for a central control panel.   Plus having switch controls located around the layout, provides young & old engineers an active role in operating the railroad.

Better get to bed and rest up for tomorrows arrival of the active two year old!

Dave

DSC02245DSC02244DSC02250DSC02255DSC02264DSC02265DSC02266DSC02268

GOOD NIGHT!

Attachments

Images (9)
  • DSC02245
  • DSC02244
  • DSC02254
  • DSC02250
  • DSC02255
  • DSC02264
  • DSC02265
  • DSC02266
  • DSC02268

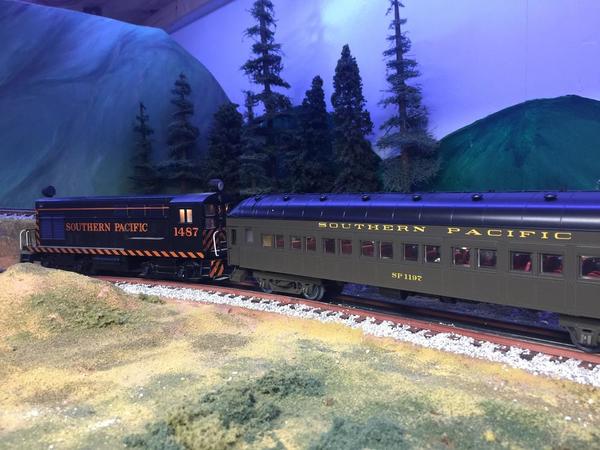
26048C7A-2C57-4B4E-BC16-78D0ABC62AB2Today, I finally unpacked my new Golden Gate Depot SP Harriman coaches and tried them on the layout. I just used the closest engine, an SP H-12-44, but we will probably use our SP GP-9 or SP Consolidation when we run our passenger train. These cars are very nice and were worth waiting for a year and a half to receive. They run well. 

Attachments

Images (1)
  • 26048C7A-2C57-4B4E-BC16-78D0ABC62AB2
Videos (1)
D9F65C35-C906-4CB3-8233-BCF486399CCD

Dave, sure is nice to hear your getting better weather back there! the time it gave you to do some work turned out looking wonderful!

Sam, that is one amazing ore Dock! Did you scratch build it? Not that I am going to, its just great!

John, nice looking cars and thanks for the little video! Its always fun to see others layouts on video!

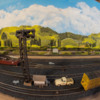
This morning so far it has been one little job after another. The girder dried over night and I put it back in its spot. Now that I had the switch I was able to lay down the cork, waiting for that to dry so I can paint it. Put the last end caps on the storage tanks. Once dried I can paint them. I had a bunch of gar graves ties sitting around so I decided to cut them to make some mini bumpers for the sidings on this table rather then the Gar Graves ones. I had some aged concrete in a bottle which was still good so I painted the two bottoms to the  Walthers oil storage kit. So those things took up the morning but I still have the rest of the day to putter around. Pics.............Paul
DSCN1327DSCN1328DSCN1329DSCN1330DSCN1331DSCN1332 

Attachments

Images (6)
  • DSCN1327
  • DSCN1328
  • DSCN1329
  • DSCN1330
  • DSCN1331
  • DSCN1332

Thanks Mike for that compliment. Your right about one thing I am taking it slow because I have a vague plan of what I want. Nothing set in stone. A couple of places I winged it not knowing if it would work or not.  And in a couple of other places I redid it a bit. One thing is that my brewery is going to take up the one table I am working on right now and around the corner from it I had put in two small sidings for a couple of industries but now I have decided to incorporate them into the brewery.................Paul

paul 2 posted:

Thanks Mike for that compliment. Your right about one thing I am taking it slow because I have a vague plan of what I want. Nothing set in stone. A couple of places I winged it not knowing if it would work or not.  And in a couple of other places I redid it a bit. One thing is that my brewery is going to take up the one table I am working on right now and around the corner from it I had put in two small sidings for a couple of industries but now I have decided to incorporate them into the brewery.................Paul

Nice Paul, do you have a picture of your Brewery in its future location?

It's coming along. Last stretch of O27 will need me to get on the table.  Adding a small bit of trestle to elevate the short extension bridge. Thought I had O31 curve, but it was all O36 so I can't finish the long siding until my O31 comes from Mario's. 

Once the track is complete, it's time to accessorize and then when everything has found a place ... wire underneath the table.20180120_131223

When the remote switches from Apples55 (Thank you, Paul!) arrive, I will pull out the switch at the front of the track and make a siding that connects on both sides to the track.

Attachments

Images (1)
  • 20180120_131223
Last edited by Deuce

The Razorback Traction Co. FrankenBirney project is complete! 

 GEDC0017GEDC0018

From the top:

-Trolley poles from K-Line interurban, mounted in Bowser bases

-Shell from one Birney

-Floor from another Birney

-Truck parts from at least 2, maybe 3 Birneys

-Motor from Lionel Polar Express, flywheel and upper shaft removed

-Radio Shack bridge rectifier, as old rectifier was fried when previous motor grenaded

-Worm gear bushing from old Japanese slot car motor 

For all that, the little indefinite zooms cheerfully along! 

Mitch 


Attachments

Images (2)
  • GEDC0017
  • GEDC0018

Looks like a lot of us are getting a bunch done!  I see lots of cool stuff posted!   I spent the evening yesterday cleaning and plotting my next move.   Had to work half a day today so when I got home I made that move!  Cut a 6 x 6 notch out of the remaining wall at table level.  This made it so I could move the track in that direction 6 inches.   Doesn't sound like much.  But something I had been thinking about doing since I took that wall down.  To imitate a cliff overhang on the little river railroad that used to run in Walland TN.  Its just roughed in at this point. Have a tiny  piece of plywood to add.                                                                                    Jim                                   

Attachments

Images (1)
  • mceclip0
M. Mitchell Marmel posted:
coach joe posted:

Mitch dare I ask?  If Fortescue is the new Robin, does that make you the new Batman?

I'm sorry, citizen, but I cannot reveal my secret identity!  

To the Batmobile, Fortescue!  

-Batman

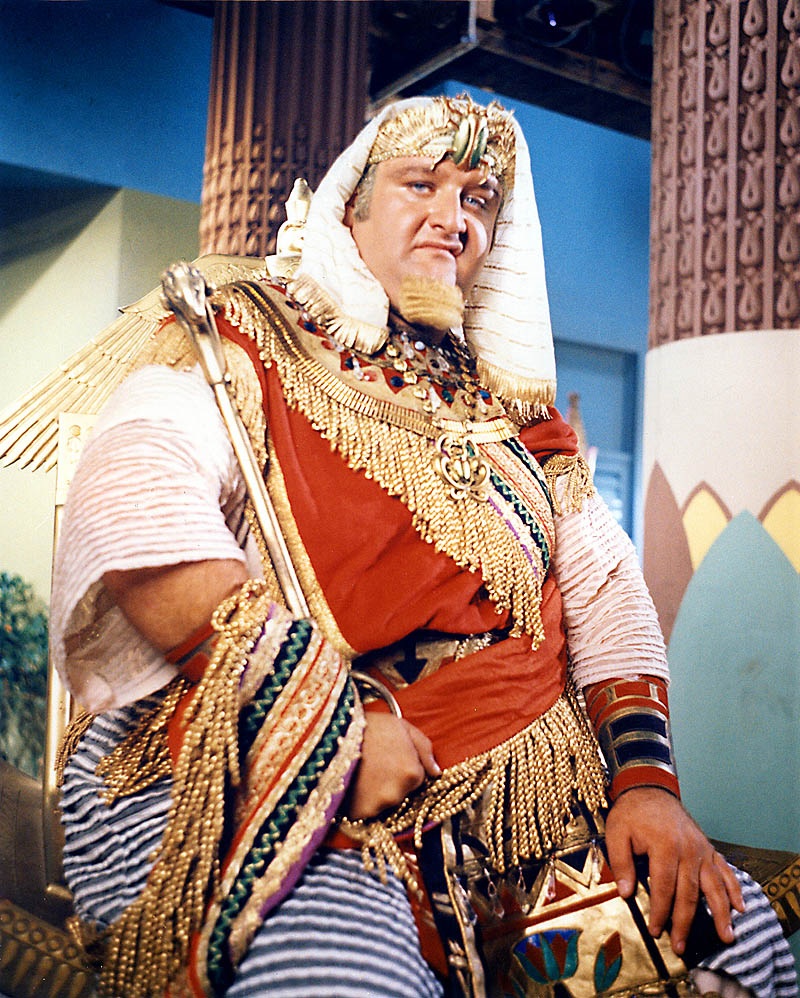
I don't see it. Based on his avatar, I think Mitch may be King Tut (not sure if he is the pre or post getting whacked on the head with a flower pot version)…

IMG_0861

Attachments

Images (1)
  • IMG_0861

After lunch it was painting mode. Got the cork and area painted. Then decided to paint the storage tanks and the stands for the tanks. Later they should be dry and I can finish off the parts I didn't paint yet. Wife has a Cavs game at 3:30 so I should be able to get down the last of the track in the brewery area. Then I'll measure to see what the length of the area to see how many buildings fronts or backs I'll need. Pics................Paul

DSCN1333DSCN1334DSCN1335

Attachments

Images (3)
  • DSCN1333
  • DSCN1334
  • DSCN1335
carsntrains posted:
mike g. posted:

Hey Jim, you gota to do what you gota do! Looks like it will make things better in the long run!

Thanks Mike!   I may need some advice on building a lift gate.   Plan to take some pictures tonight and you can see what I'm working with! 

Jim 

Sounds good Jim, if you want you can just send it in e-mail!

Deuce posted:

It's coming along. Last stretch of O27 will need me to get on the table.  Adding a small bit of trestle to elevate the short extension bridge. Thought I had O31 curve, but it was all O36 so I can't finish the long siding until my O31 comes from Mario's. 

Once the track is complete, it's time to accessorize and then when everything has found a place ... wire underneath the table.20180120_131223

When the remote switches from Apples55 (Thank you, Paul!) arrive, I will pull out the switch at the front of the track and make a siding that connects on both sides to the track.

Deuce- It might just be the angle of the photo but did you check the clearance on the 027 loop where it passes the siding that Thomas is sitting on in the  photo? It looks pretty tight.

Bob

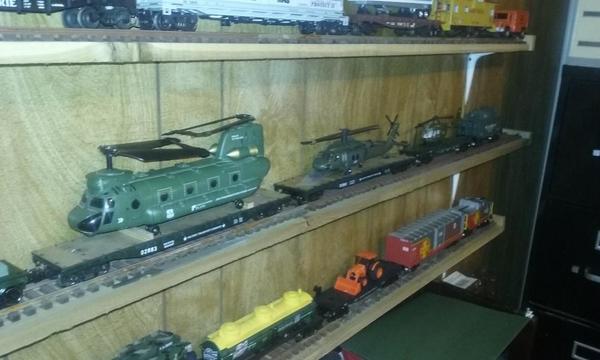
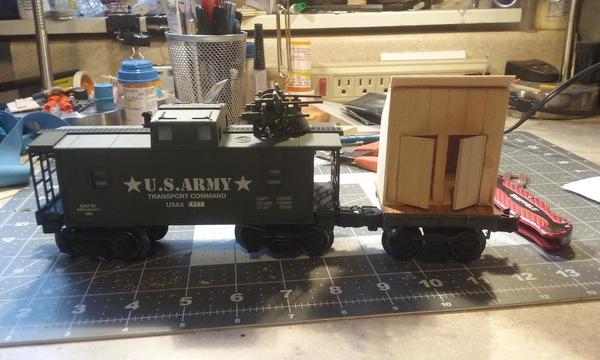
So I got some work done on the cars I got from Cabinet Bob. Got the Chinook mounted, got the trucks and vans mounted on the car carrier Bob built. This left a custom car from Cabinet Bob. Took me a little while to figure out what it was going to be. But you might be able to tell from the last picture! LOL20180119_15173820180119_13102520180120_13541320180120_144648

Attachments

Images (4)
  • 20180119_151738
  • 20180119_131025
  • 20180120_135413
  • 20180120_144648

I got a bit more done and none too soon. Cavs are losing and the wife is not happy so that means I am pretty sure I am done for the night. I will have to console her and for a very good reason she is the CEO of the layouts. All the track work for the brewery is done and I got all the ground throws on the switches to boot without gluing my fingers together. And I finish off the storage tanks. Tomorrow I am going to have to go through and start a new list of supplies again. Especially track I only have two sections left. Mike, those are good looking projects you completed. Pics............Paul

DSCN1336DSCN1337DSCN1338DSCN1339DSCN1340DSCN1341

Attachments

Images (6)
  • DSCN1336
  • DSCN1337
  • DSCN1338
  • DSCN1339
  • DSCN1340
  • DSCN1341
M. Mitchell Marmel posted:
Apples55 posted:

I don't see it. Based on his avatar, I think Mitch may be King Tut (not sure if he is the pre or post getting whacked on the head with a flower pot version)…

Nonsense!  You never see me going about in a robe and headdress! 

Oh, wait...  ;^.^ 

Mitch 

hmmmmm......

now we know why The Caped Crusaders are lurking about.....

I placed my 93.2% complete, scratch built, background building on the layout. It needs some final adjustments (I need to work an uncoupling track in, I can't reach that siding) and, I'm still parusing the Miller billboards to decide what company owns the building.

I know it looks very similar to one of our beloved forum sponsors offerings,  which I did consider, however this one is custom sized to the space I had. And don't they say that "imitation is the sincerest form of flattery" ?

I used 3/16" luan, 1/8" hardboard, foam board, and plastic canvas (for the windows).

imageimage

Attachments

Images (2)
  • image
  • image

It has been a busy day for me, I finally got my layout up and running before the end of the year and here are some photos that I got done today and now it up to detail all the changes. 


IMG_4427

Well I started out the day with a good cup of coffee, you are looking at a turntable that a friend of mine built for me.


IMG_4426

This is the round house and I finally got it light up. Next will do track power. 


IMG_4428IMG_4429IMG_4430IMG_4431IMG_4432IMG_4433

IMG_4434IMG_4435IMG_4436

They layout is four scales and it is "tong in cheek" All High Rail....the N, HO and S are all higher than scale rails. This was a days work, I reconfigured the O Scale track with a mixture of Scale trax and Real trax, HO is Bachmann and N is Kato, and yes the S scale is MTH and Lionel. I had give the real trax to my nephew and it got returned so be the frugal I used it. I am interested in drains of different scales and each scale reminds me of someone that had inspired me into doing trains. It is now ready for detailing. You wounder why I did it well, I wanted to have it done and now I have it running. 

It is a whimsical layout with some force perspective.  In one of the photos there are a picture of two 1/8" scale war ships I built when I was doing that kind of modeling they are both RC and I have had fun running them. 

Attachments

Images (11)
  • IMG_4426
  • IMG_4427
  • IMG_4428
  • IMG_4429
  • IMG_4430
  • IMG_4431
  • IMG_4432
  • IMG_4433
  • IMG_4434
  • IMG_4435
  • IMG_4436

I was going to tear apart the big workbench at my mother-in-law’s this weekend, but a bad sinus infection has knocked me down.  It’s no big deal, I just didn’t feel like a big job.  I decided instead to continue scenery on the 2 x 4 diorama I want for photography of engines and rolling stock.  I took off some of the edges of the foam, then started covering it with Woodland Scenics plaster cloth.  I never used it before, but I like it better than plaster soaked paper towels.  I had two rolls, and here are photographs of the results after using up each roll.  I’ll have to get some more.

D2CE9B31-CE37-42B5-8EA4-55BBF77CC9E8E4AFAA8E-2E50-4DF5-B2D5-5BB091971F92

Attachments

Images (2)
  • D2CE9B31-CE37-42B5-8EA4-55BBF77CC9E8
  • E4AFAA8E-2E50-4DF5-B2D5-5BB091971F92

Add Reply

Post

OGR Publishing, Inc., 1310 Eastside Centre Ct, Suite 6, Mountain Home, AR 72653
800-980-OGRR (6477)
www.ogaugerr.com

×
×
×
×
Link copied to your clipboard.
×
×