


LOU1985, the redo came out great...........Paul

Lou I m with Paul, The rebuild it looing good!![]()
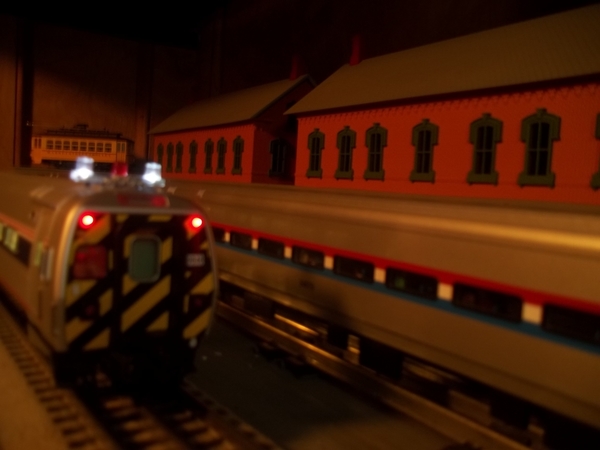
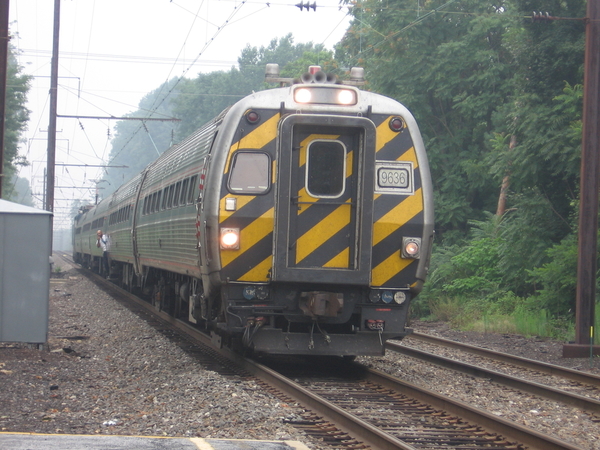
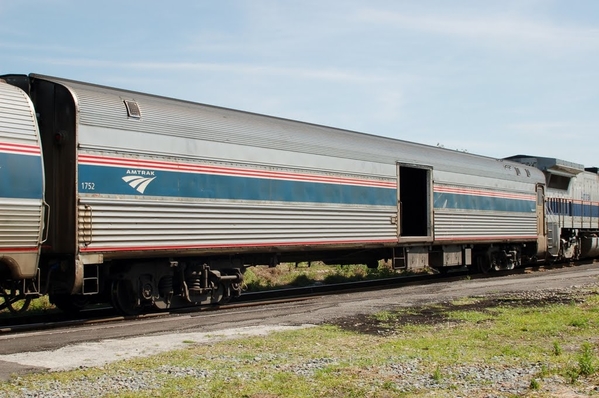
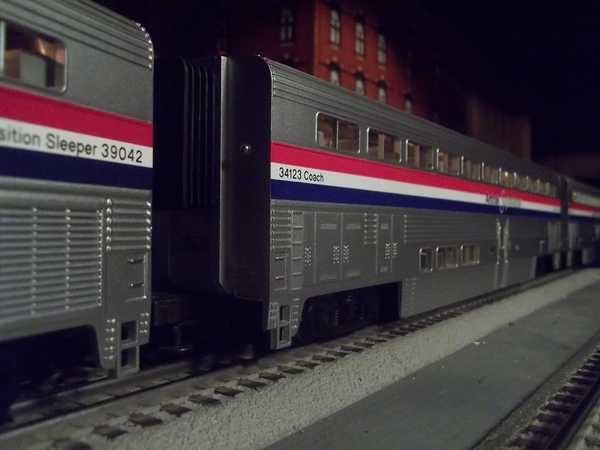
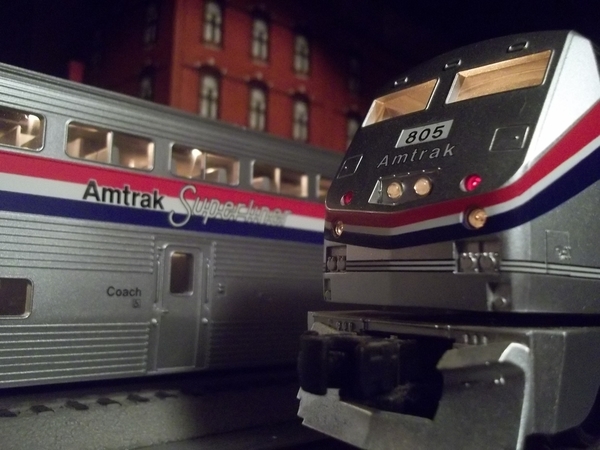
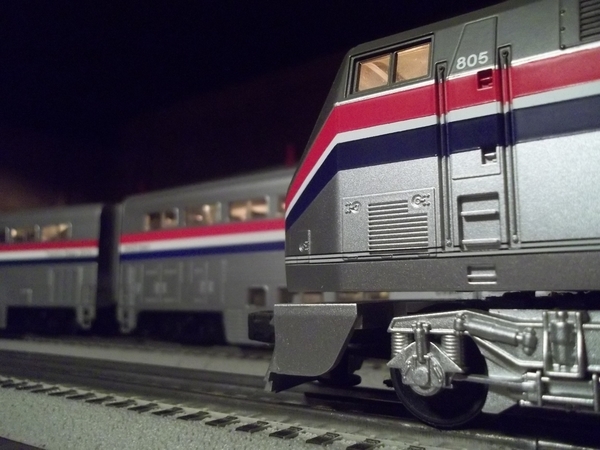
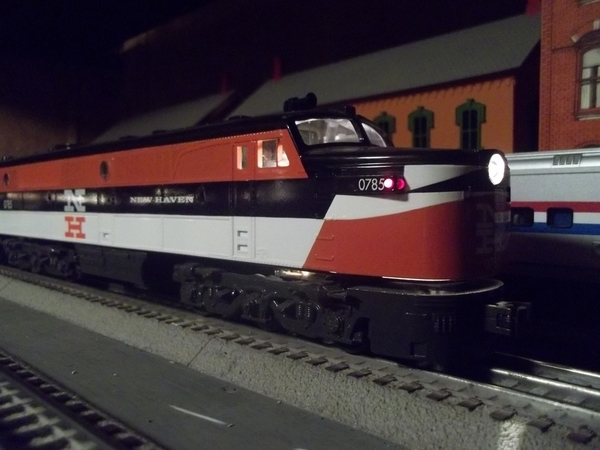
briansilvermustang posted:mike g. posted:Brian, can you explain the lights on top of the last passenger car? Is that normal as I have never seen one like that!
Metroliner Cab Car...
https://youtu.be/7kLIoWS3dwE https://youtu.be/-zA-JrYGb2s

Thanks Brian, Must be a East Coast thing!
Lou, Your new terminal area is looking great! I’m sure you will have lots of action there soon!
Tom, upgrading from 036 to 072 will really make your trains look better besides letting you run longer equipment!
Brian, As always, great photographs of models and the prototype!!


Attachments
Images (13)


Panther97 posted:It took me a few years. I finally purchased the last ride for my amusement park at York! Next s the scenery.....
I may be able to fit an o-scale free fall ride!
Just watched the video....nicely done!!!
I got a few hours in on Saturday, and made some serious progress on my girder viaduct.
My painted parts are almost all used up.

I had to splice three pieces together to get the length I needed.

Now the fun part, getting my feeders reinstalled. I took a very long drill bit, and went through block on top of the pier, then through the pier, and finally through the plywood. I made four of these holes, one hot, one ground, and two detection.


Then I soldered them onto the web below the tie line. I used a dental pick to scrape the rail clean, it even took off the black coating from the center rail.

I glued the front girder to the frame. I still have to do the back one, but it's cut to length and ready to go.


Both ends of this thing still need their abutments, then I just have to clean up the paint and weather it. The good news is the auto rack makes it around, no problem. I'll have to check a Superliner.

Attachments
Images (8)
Lou, your layout is obviously a labor of love. Looking great!
Mike ![]()
Elliiot, nice work...!
Mike ![]()
Guys my layout isn't that nice. Especially compared to most of the ones on here. It's only a 12'x16' tabletop with a 4'x5' extension for the passenger terminal/downtown. It's got two loops (072 outer, 054 inner) and conventional power with a ZW and Z. But at least all the trains are scale sized, except the 60' passenger cars ![]() .
.
I'm hoping to fill/smooth out joints, paint the supports and platforms, and wire the tracks in the terminal this week.
The bridge is coming together nicely Elliot. ![]()
Great Work Elliot! The bridge it looking great! I needed a long drill bit for my last layout and a friend took a welding rod took all the outside welding stuff off, then ground a Paddle bit out of it! It's 16" long so to go threw my old raised section all the way threw the plywood all in one hole!![]()
But then again it doesn't matter you have great work going there!![]()
The bridge looks great Elliot. That’s good concealing wires.
Finally got all the LED's installed in the background buildings and got them wired through an adjustable AC/DC buck converter. Added a 3 rd floor to the brick building over the tracks so it wasn't so "square", and weathered the large girder beam supporting the building .... Time to start building more layout at the other end of the room. Tried to take some night time photos but it's challenging ...... Also finally found a reasonable formula for ballasting the tracks in the engine service facility..... 


Attachments
Images (5)

Things are looking good Chris! I agree that night pictures are hard! One day when you get a chance if you can make a video of your layout! Everything looks so great!![]()
Lou1985 posted:Guys my layout isn't that nice. Especially compared to most of the ones on here. It's only a 12'x16' tabletop with a 4'x5' extension for the passenger terminal/downtown. It's got two loops (072 outer, 054 inner) and conventional power with a ZW and Z. But at least all the trains are scale sized, except the 60' passenger cars
.
Lou, Don't sell yourself short. Layouts are a reflection of what each of us likes about the hobby and our talents as well as the time put into them. Some are detailed. Some are toy train like. Most are never finished. The best layouts are the results of many years of improvements and changes that reflect our increased knowledge and talent in the hobby. You have a great looking layout. Better than most and capable of growing into much more.
Pat Kn posted:Lou1985 posted:Guys my layout isn't that nice. Especially compared to most of the ones on here. It's only a 12'x16' tabletop with a 4'x5' extension for the passenger terminal/downtown. It's got two loops (072 outer, 054 inner) and conventional power with a ZW and Z. But at least all the trains are scale sized, except the 60' passenger cars
Lou, Don't sell yourself short. Layouts are a reflection of what each of us likes about the hobby and our talents as well as the time put into them. Some are detailed. Some are toy train like. Most are never finished. The best layouts are the results of many years of improvements and changes that reflect our increased knowledge and talent in the hobby. You have a great looking layout. Better than most and capable of growing into much more.
Hear! Hear! You are definitely too modest Lou. Your layout is very nice and will only get better with time.
Bob
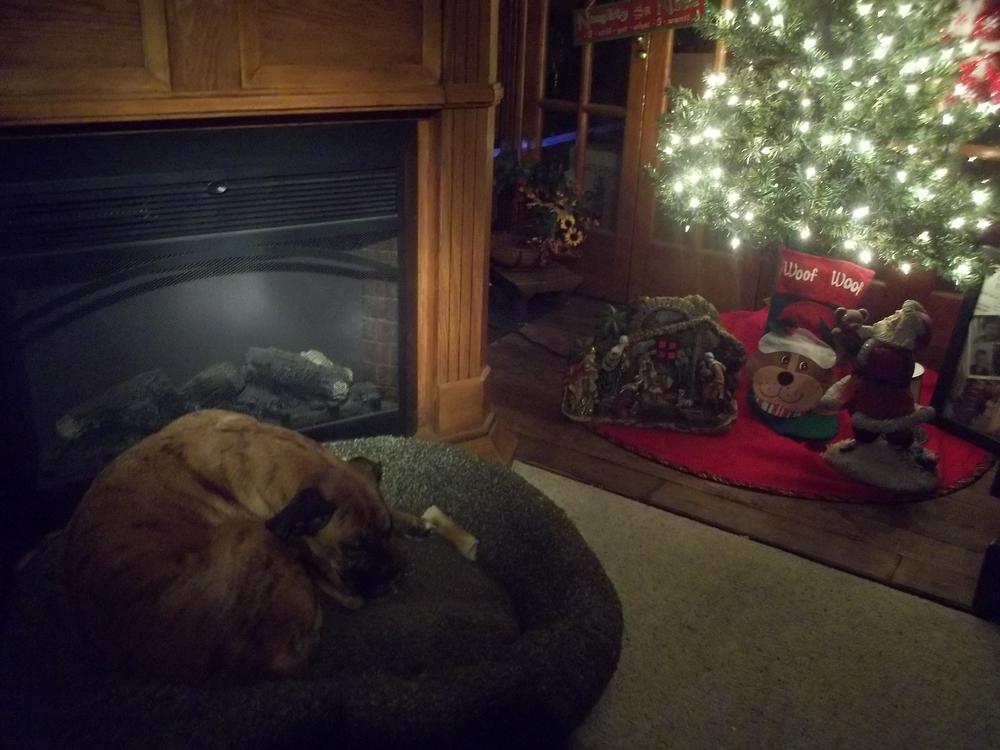
Today: April 24, 2018 • Lunch with Grandpa in the Train Room


After lunch we went to the backyard to hangout and just have old fashion fun.

Then the rain came and back inside we went.........
Gary
Attachments
Images (4)


Ok! Now I want to come play at Grandpa Gary's house! What a great deal that you can share this with your grandsons! I wish mine would get into it! It takes everything to get them outside to play! Darn computers!![]()
Priceless Gary! Your Grandsons have a great grandpa!! I agree with Mike! I never had a grandpa!
trainroomgary posted:Today: April 24, 2018 • Lunch with Grandpa in the Train Room
After lunch we went to the backyard to hangout and just have old fashion fun.
Then the rain came and back inside we went.........
Gary
Awww so precious.
I have been working on my new layout, it is basically a shelf around my reloading/storage room. I think it is 12x20. One part is the last remaining piece of my old O scale trolley line, the rail is code 148. I think I can use it as kind of a homage to my past. I have been blown away at the quality of everyone`s railroads, you all are quite an inspiration. I`ll get pictures this weekend and post them.
Mike
Dobermann, that sure did turn out nice! Great Job!![]()
mike g. posted:Dobermann, that sure did turn out nice! Great Job!
Thanks.
Really nice looking building, Doberman.
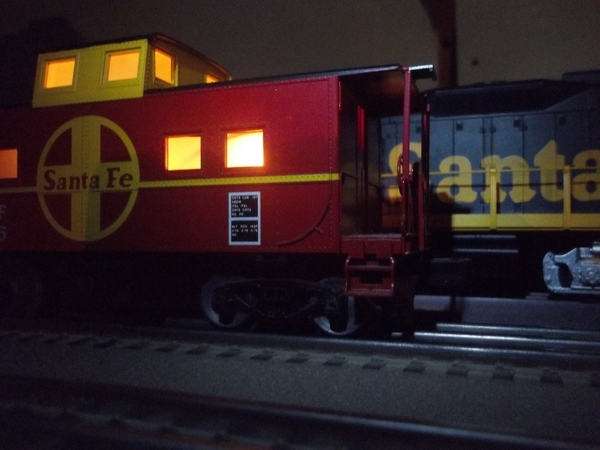
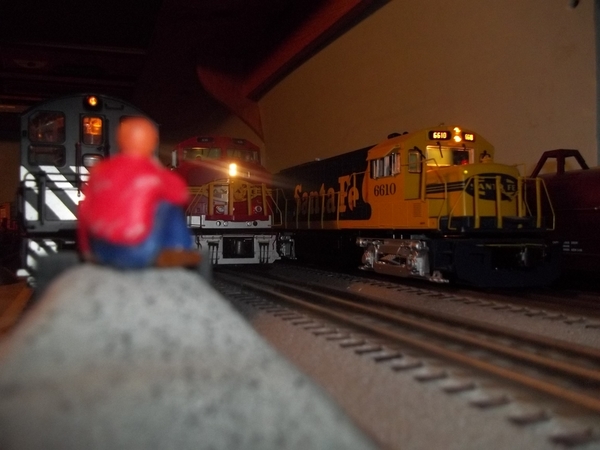
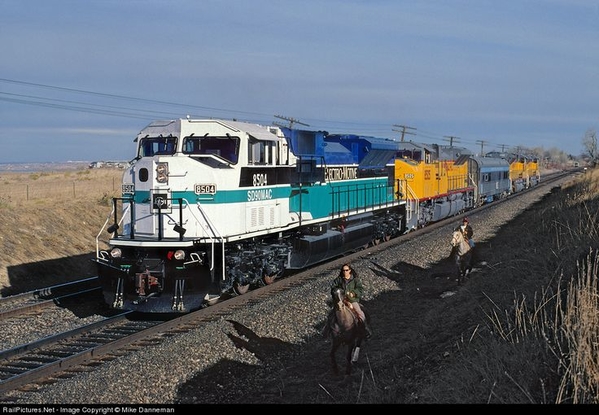
some early morning train watching...
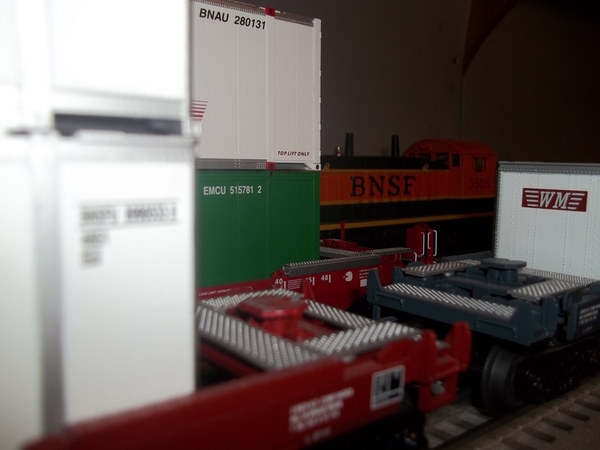
down at the freight yard... looks like a busy day here...
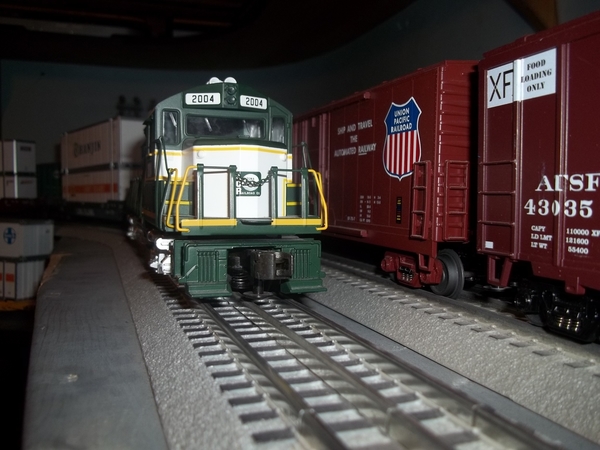
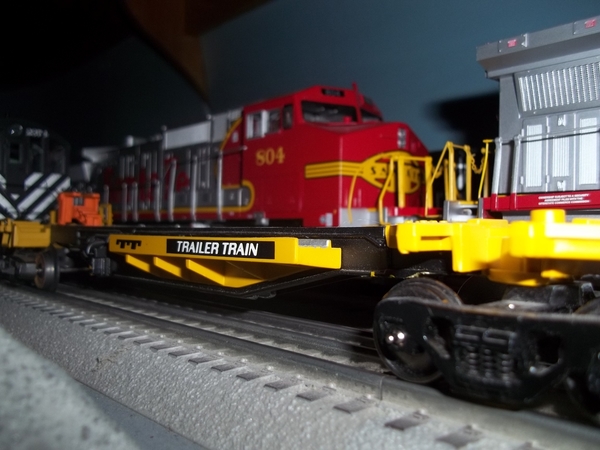

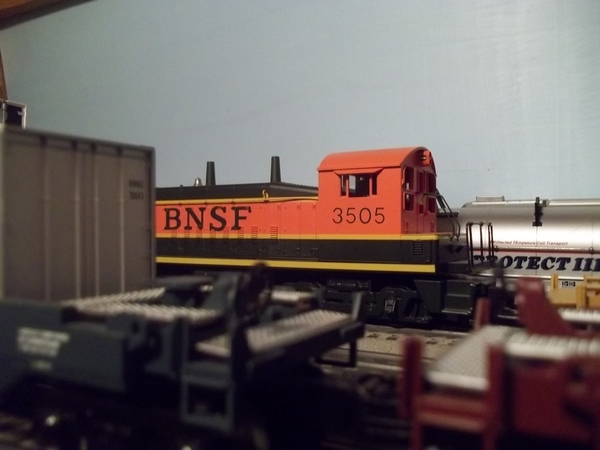

and then caught a neat surprise coming through the yard... ![]()

Attachments
Images (9)


Well I have to hand it to Paul 2, he did a fabulous job hosting our Tuesday night train group last night. Great food and train conversation and honestly the pictures he posts online don't do his layout justice. The man is a machine churning out area after area in his basement. Maybe not as big as the Treaty of Versailles but look what I saw when I arrived last night. I guess roughing him up at the last meeting paid off.

Attachments
Images (1)
Bryan in Ohio posted:Well I have to hand it to Paul 2, he did a fabulous job hosting our Tuesday night train group last night. Great food and train conversation and honestly the pictures he posts online don't do his layout justice. The man is a machine churning out area after area in his basement. Maybe not as big as the Treaty of Versailles but look what I saw when I arrived last night. I guess roughing him up at the last meeting paid off.
I’m glad everyone had a good time at Paul’s house last evening! Great job Paul!
btw Mark our offer still stands if you want to venture over this way this summer and check out a few layouts.
Bryan in Ohio posted:Well I have to hand it to Paul 2, he did a fabulous job hosting our Tuesday night train group last night. Great food and train conversation and honestly the pictures he posts online don't do his layout justice. The man is a machine churning out area after area in his basement. Maybe not as big as the Treaty of Versailles but look what I saw when I arrived last night. I guess roughing him up at the last meeting paid off.
I guess his security detail had the night off. ![]()
Bob
briansilvermustang posted:
Great shots as always, but I just have to ask, is it ever daytime on your layout?
Bryan in Ohio posted:btw Mark our offer still stands if you want to venture over this way this summer and check out a few layouts.
Bryan, Thank you again! I hope to be able to take you up on that offer!
Paul, sure sounds like you stepped up to the plate! I sure am glad you all had a great time!![]()
hey Mark, you get that close, you can also stop by and see Clem and I ... ![]()
p51 posted:briansilvermustang posted:
Great shots as always, but I just have to ask, is it ever daytime on your layout?
not very often, it is usually later in the evening by the time I get to the trains...

Attachments
Images (1)

briansilvermustang posted:hey Mark, you get that close, you can also stop by and see Clem and I ...
Well let’s see; I think Paul said he lives in Cuyahoga Falls. That is about 2 hours away. Bryan is somewhere nearby. Toledo is 2 hours from Cuyahoga Falls, and Clem is just over the state line. Minimum driving is 4 hours one way. Wow, that’s a lot of railroading!! Thank you Brian!!
see you soon... ![]()
"ROAD TRIP" Mark, pack a lunch.............Paul

Attachments
Images (1)

paul 2 posted:"ROAD TRIP" Mark, pack a lunch.............Paul
See Paul is back to his old ways of NON hospitality ....if you do stop over I would provide lunch.
I thank Bryan for the compliments. And Bryan said it for me. Whenever you get time to see layouts you are more then welcome. Hosting the Tuesday night crew went without a hitch. So with the morning behind me now and I got pretty much everything cleaned up plus it is wet outside from the rain that means I can go to the basement and work on the layout the rest of the day. Got a few things that I can get into since I cleaned off the tables so everyone could see the layout. Maybe I'll have some pics later in the day.............Paul
Treat you nice Bryan with a happy face and this is how you treat me. I feel like Caesar LOL. Armed guards ( new younger ones ) will be at the door at my next night to host to escort you out of town. Mark is welcome to come. And I meant to pack something in case a person gets hungry on the road. Mark will be treated to good food but you if allowed in will only get water and some old bread.............LOL................Paul
Got all the "concrete" painted before work today. Now I just need to wire the track, ballast the terminal tracks, and repair the scenery next to the support area. Then I can mount the plywood top and start rebuilding the downtown area. So yeah, almost done ![]()
![20180425_105741[1]](https://ogrforum.ogaugerr.com/fileSendAction/fcType/0/fcOid/12129987997660671/filePointer/79142442609064189/fodoid/79142442609064183/imageType/LARGE/inlineImage/true/20180425_105741%255B1%255D.jpg "20180425_105741[1]")
![20180425_105817[1]](https://ogrforum.ogaugerr.com/fileSendAction/fcType/0/fcOid/12129987997660671/filePointer/79142442609064190/fodoid/79142442609064184/imageType/LARGE/inlineImage/true/20180425_105817%255B1%255D.jpg "20180425_105817[1]")
![20180425_105829[1]](https://ogrforum.ogaugerr.com/fileSendAction/fcType/0/fcOid/12129987997660671/filePointer/79142442609064191/fodoid/79142442609064185/imageType/LARGE/inlineImage/true/20180425_105829%255B1%255D.jpg "20180425_105829[1]")
Attachments
Images (3)
![20180425_105741[1]](https://ogrforum.ogaugerr.com/fileSendAction/fcType/0/fcOid/12129987997660671/filePointer/79142442609064189/fodoid/79142442609064183/imageType/LARGE/inlineImage/true/20180425_105741%5B1%5D.jpg "20180425_105741[1]")
![20180425_105817[1]](https://ogrforum.ogaugerr.com/fileSendAction/fcType/0/fcOid/12129987997660671/filePointer/79142442609064190/fodoid/79142442609064184/imageType/LARGE/inlineImage/true/20180425_105817%5B1%5D.jpg "20180425_105817[1]")
![20180425_105829[1]](https://ogrforum.ogaugerr.com/fileSendAction/fcType/0/fcOid/12129987997660671/filePointer/79142442609064191/fodoid/79142442609064185/imageType/LARGE/inlineImage/true/20180425_105829%5B1%5D.jpg "20180425_105829[1]")
Brian, Bryan, and Paul!! Thank you each and every one of you!! I needed that tee shirt last week when I went to York. ![]() 4 1/2 hours each way! Yes, that is what I did, packed food, coffee, and pop. On two days, I only bought a meal at the OGR Quaker Steak and Lube and a burger on the Turnpike on the way home, since I ran out of groceries!
4 1/2 hours each way! Yes, that is what I did, packed food, coffee, and pop. On two days, I only bought a meal at the OGR Quaker Steak and Lube and a burger on the Turnpike on the way home, since I ran out of groceries! ![]()
Lou, your track and "concrete" look great!! I'll look forward to the city above the tracks!!
Mark Boyce posted:briansilvermustang posted:hey Mark, you get that close, you can also stop by and see Clem and I ...
Well let’s see; I think Paul said he lives in Cuyahoga Falls. That is about 2 hours away. Bryan is somewhere nearby. Toledo is 2 hours from Cuyahoga Falls, and Clem is just over the state line. Minimum driving is 4 hours one way. Wow, that’s a lot of railroading!! Thank you Brian!!
No worries Mark- if you make it to Brian's (silvermustang), I'm sure you can bunk with Izzy ![]()
Lou1985 posted:Got all the "concrete" painted before work today. Now I just need to wire the track, ballast the terminal tracks, and repair the scenery next to the support area. Then I can mount the plywood top and start rebuilding the downtown area. So yeah, almost done
Looks great so far!
Lou1985 posted:Got all the "concrete" painted before work today. Now I just need to wire the track, ballast the terminal tracks, and repair the scenery next to the support area. Then I can mount the plywood top and start rebuilding the downtown area. So yeah, almost done
Looking good Lou. I like what you did with the switch. I have the same 5121's but I only ballasted up to the body of the switch. Yours blend in to the scene better.

Attachments
Images (1)

RSJB18 posted:Mark Boyce posted:briansilvermustang posted:hey Mark, you get that close, you can also stop by and see Clem and I ...
Well let’s see; I think Paul said he lives in Cuyahoga Falls. That is about 2 hours away. Bryan is somewhere nearby. Toledo is 2 hours from Cuyahoga Falls, and Clem is just over the state line. Minimum driving is 4 hours one way. Wow, that’s a lot of railroading!! Thank you Brian!!
No worries Mark- if you make it to Brian's (silvermustang), I'm sure you can bunk with Izzy
![]()
![]()
He! He! ![]()
Thanks Mike, Bob, Mike and Mark.
Yesterday was the big day, my guy came over to take the photos for the convention (for the second time). This time he seemed more excited. I staged some trains for him, and I think he got some good shots. Now they'll be sent to the webmaster for selection. As soon as they are up, I'll put a new link in my signature.
When that was done, I did a couple of small projects. I got some more 3.5 gallon buckets. I use them to store scenic materials. So I spent some time putting away most of what I sorted a couple weeks ago. It's nice not having boxes full of random stuff.
After Patrick and I carved the roadbed, some of the lettering that I had applied to the fascia was messed up. The vinyl letters don't really like to stick to the semi-gloss paint. My solution was to go over them with Mod Podge, and secure them once and for all. So I repaired the damage in aisle three, and locked down aisle four. After that, I started fresh in aisle two, and got all of that done.
It's not too difficult, but it is time consuming, getting everything just right. I cut a strip of Masonite, and just clamp it on to serve as a guide. You can't really see it, but there's a small pencil mark where I wanted the center of the words to be. There are 14 letters in University Jct. The space counts as one.


I did Shoreham. Here it is with wet Mod Podge.

Same for Pig's Eye, as well as Red Wing and 35th Avenue. I still have to get the semi-gloss over in aisle one before I can finish over there.

Remember the last thing I said in my previous post from Monday, about the clearance on the new bridge? There's about a 1/4" gap for the auto rack...

but only an 1/8" for the Superliner. WHEW!!! May need to do some more testing using other passenger cars with skirts.

Attachments
Images (6)
Lou, looking good. Elliot, you never know till you run a car over your work whether you allowed for the right clearance. Sometimes it is trial and error but better to catch it at the beginning. Today I installed a set of weaver three rail die cast trucks I got off EBAY on a Weaver flat I picked up at York that was for 2 rail. I also started placing more trees and shrubs on the other side of the bridge abutment. Tonight the wife has a game so that gives me a train night in the basement. Pics..............Paul


Attachments
Images (2)
Lue, things are looking really nice!![]()
Paul, the car and shrubs look wonderful!![]()
Mark, Izzy might share her bed with you, but don't count on getting any of her ice cream!![]()
Big_Boy_4005 posted:Thanks Mike, Bob, Mike and Mark.
Yesterday was the big day, my guy came over to take the photos for the convention (for the second time). This time he seemed more excited. I staged some trains for him, and I think he got some good shots. Now they'll be sent to the webmaster for selection. As soon as they are up, I'll put a new link in my signature.
When that was done, I did a couple of small projects. I got some more 3.5 gallon buckets. I use them to store scenic materials. So I spent some time putting away most of what I sorted a couple weeks ago. It's nice not having boxes full of random stuff.
After Patrick and I carved the roadbed, some of the lettering that I had applied to the fascia was messed up. The vinyl letters don't really like to stick to the semi-gloss paint. My solution was to go over them with Mod Podge, and secure them once and for all. So I repaired the damage in aisle three, and locked down aisle four. After that, I started fresh in aisle two, and got all of that done.
It's not too difficult, but it is time consuming, getting everything just right. I cut a strip of Masonite, and just clamp it on to serve as a guide. You can't really see it, but there's a small pencil mark where I wanted the center of the words to be. There are 14 letters in University Jct. The space counts as one.
I did Shoreham. Here it is with wet Mod Podge.
Same for Pig's Eye, as well as Red Wing and 35th Avenue. I still have to get the semi-gloss over in aisle one before I can finish over there.
Remember the last thing I said in my previous post from Monday, about the clearance on the new bridge? There's about a 1/4" gap for the auto rack...
but only an 1/8" for the Superliner. WHEW!!! May need to do some more testing using other passenger cars with skirts.
Elliot, things are looking great! I hope the bridge isn't going to become a problem as it looks so nice! If they don't chose you for the tour, just let us know! We can go find him and have a little chat!![]()
The car and the scenery look great Paul!
Elliot, I’m glad the inquisition were all smiles when they visited!!
So while the wife watched the Cavs I got some work done. I spent the evening adding a bit more to the first bridge abutment I was working on. Then I jumped to the other side and started adding tree, a couple of bushes and ground turf. I still have to glue it down. I took a minute to add the coal loads I got from Don Kane to my AC&Y hoppers.He makes great loads. So the game is over and the wife wants me to spend time with her watching some TV. Can't say no. Pics of the work tonight............Paul


Attachments
Images (9)
Paul, The scenery is looking better and better. Yes Don makes dandy loads. I have a few. I’m glad you are keeping Mum happy!
Elliot, it looks great! I thought that I had all my clearances checked out and then found that my new Atlas 21" California Zephyr cars hits my tunnel liner on my freight mainline. I hadn't checked running passenger cars in the reverse direction on my freight line, but had checked everywhere on the passenger line. It does make a difference what direction you are running on some bridges and tunnels as the cars swing out on curves. I didn't have enough straight track before the bridge on one.
Art
Former Member
I had an interesting, cleansing train day. I had several items ending on the bay
today. Nothing sold even tho I had some nice things priced to sell, not make money on.
And the shipping I charge is so low I usually end up contributing. Anyway, after realizing
I have spent a lot of time trying to sell this stuff, I have decided to take a break from selling.
I sorted thru the stuff and actually threw some in the trash. I started my Fortescue Foundation
box of stuff for him to donate to the Museum. ((coming soon Mitch)). It was actually kind of
uplifting to throw some stuff away, fill the Fortescue box and know tomorrow I don't have to
check my "all selling" on the bay. I even started breaking down and discarding boxes I had been
hoarding to ship things. My life is good.![]()
Took some photos of buildings I bought at York last week. I integrated these buildings into Patburg's Westend neighborhood.... a fire house and three town houses. I also angled mirrors to give a down hill effect on one of the streets and the other mirror was angled to give the impression that a Ford T bird is making a right had turn. 


Attachments
Images (4)
Paul2- the bridge area is looking good. Funny- I think that's where you where when I started following your build a couple of years ago.
Patrick- I didn't think Patsburg had any vacant lots. The new construction looks good. The mirrors are a neat touch too.
Beardog- sometimes a good clean up is the best thing.
Art and Elliot- We can all sympathize with you about spots on our layouts where the scenery interferes with the trains. The reverse travel issue Art had is particularly annoying. Just when you think you checked everything BOOM!
Bob


Attachments
Images (6)


I had to go back after looking at the last pics I took of the last hill I was working on. The big trees in the back just looked out of place so I pulled them out and added smaller trees. I can live with that now. Pic before and pic after......Paul


Attachments
Images (2)
I put new tires on my NYC GP20 and added double pick-up rollers to a NYC caboose so the lights would stop blinking.
Dennis
Paul, the bridge abutment is looking really nice! I really like all the bushes and trees you are putting up!![]()
Patrick, sure looks like you got some great deals ! I really like the mirrors!![]()
Lou1985 posted:Got all the "concrete" painted before work today. Now I just need to wire the track, ballast the terminal tracks, and repair the scenery next to the support area. Then I can mount the plywood top and start rebuilding the downtown area. So yeah, almost done
Your track looks good! I enjoy seeing layouts using 027.
A Northern Pacific 44 ton diesel hauling some of Lionel's more unusual postwar freight cars.....
Attachments
Images (1)
balidas posted:Lou1985 posted:Got all the "concrete" painted before work today. Now I just need to wire the track, ballast the terminal tracks, and repair the scenery next to the support area. Then I can mount the plywood top and start rebuilding the downtown area. So yeah, almost done
Your track looks good! I enjoy seeing layouts using 027.
027 profile track. Outer main line has 072 curves, inner 054. Lets me run scale sized equipment. I went with 027 profile because it's shorter and looks much better than 0 tubular track.
I did get the three terminal tracks wired in this evening. Tomorrow I hope to ballast and finish up scenery repair. Then next week I'll be on to mounting plywood and starting on the downtown area.
I am pleased to announce that, with the able assistance of Fortescue (and friend), I have successfully resuscitated a DeWitt Clinton belonging to our own John D.'s dad...

Sylvia Siamese was on hand for the initial test flight... ![]()
Mitch
Attachments
Images (1)
Videos (1)

Former Member
and the friendly and helpful flamingos slowly assimilate into the
local populations..................


Nice job, Mitch.
M. Mitchell Marmel posted:I am pleased to announce that, with the able assistance of Fortescue (and friend), I have successfully resuscitated a DeWitt Clinton belonging to our own John D.'s dad...
Mitch
I'd forgotten it was out of commission! Thanks for your help!!
Let the trains run as I do physical therapy for my rotator cuff injury.

had therapy running trains... ![]()
Attachments
Images (2)


clem k posted:Let the trains run as I do physical therapy for my rotator cuff injury.
hope you're getting better Clem !!! 

Attachments
Images (1)

Chugman posted:Elliot, it looks great! I thought that I had all my clearances checked out and then found that my new Atlas 21" California Zephyr cars hits my tunnel liner on my freight mainline. I hadn't checked running passenger cars in the reverse direction on my freight line, but had checked everywhere on the passenger line. It does make a difference what direction you are running on some bridges and tunnels as the cars swing out on curves. I didn't have enough straight track before the bridge on one.
Art
Good morning Art....If you use those really cool switch track lanterns from Ross make sure you move them far away from the track.
Clem
beardog posted:and the friendly and helpful flamingos slowly assimilate into the
local populations..................
![]()
Pat Kn posted:Nice job, Mitch.
Thankee! ![]()
If anyone else has problems with their DeWitt Clinton, let me know; I am now familiar with the innards of the thing. ![]()
John D. posted:I'd forgotten it was out of commission! Thanks for your help!!
My pleasure! The tricky bit was resoldering the plug... and then reassembling the little indefinite... ![]()
briansilvermustang posted:hope you're getting better Clem !!!
Seconded!
Mitch
 A little bridge work... I dug out my atlas industrial rail track for this layout, but was missing one straight. I noticed this track uses the same pins and has almost the same rail profile as gargraves track, which I have a few sections of, so I cut a piece to match the missing straight, and immediately thought "gee, those sure look like bridge ties compared to the atlas track"... a few scraps of wood and some paint and now I have a bridge!
Attachments
Images (1)
Jon, nice work! Way to think out of the box!![]()
Thanks guys.
Yesterday I worked on a few things. I started with the girder on the back side of the bridge, and got it glued in place. The big cars were still OK for clearance, but of all things, the track cleaning car was hitting in a couple spots on the newly installed back girder. The car is only six inches long, but it has thumb screws sticking out the side, that were the problem. I just popped the glue joint in those spots on the bridge, and solved the problem. There are still some cars that will need testing.

I got my paints out and weathered the bridge. I only used two colors to do all of this, a bright rusty red-orange, and black.

Blending the two colors together, I got a range of rusty browns. I used a stippling technique to get this effect. I think I over did it on the piers though. I'll have to go back and fix that.

I spent a couple hours over at Hoffman, cleaning track and switches after ballast touch ups. Nothing like a dental pick for getting switches unstuck. Then I touched up paint on guard rails and frogs, where the track cleaning car scratched it off.

I just used a foam scrap as a pallet for the afternoon. The small brush was for the rail touch ups.

Finally, I totally switched gears, and soldered some plugs on one of my signal bridges. Seems like forever ago that I touched the signals. I'd like to get these off my workbench and onto the layout. They will make things look better.

Here's the best picture from Tuesday's photo session. I wish I could have had the signals lit up. That's a lot of work, but if I plan my time carefully, it could be done.

Attachments
Images (7)
Good question. That was lifted from an email sent to me by the photographer. I'll have my wife check it out. If she can't see it, I'll try and fix it.
She couldn't. I'll work on it. Check back in a little while, it's worth it.![]()
Ran my MTH UP passenger train with Lionel Station sound diner, finished filming my video review of diner sound car.
started the wiring for the upper level today. Have the holes drilled for the power leads from below and the jumper leads cut from the number 14 stranded reels for 6 or 7 connections planned. Installed and soldered two of the connections and ran some temp connections from the track below with alligator clips. Just to check out the running of the train.So far so good.
It's fixed.
clem k posted:Let the trains run as I do physical therapy for my rotator cuff injury.
Work hard, Clem! I went through is about 10 years ago! Fell on the ice. The rotator cuff still gives me pain when I move a certain way. Let the trains run!
Elliot, the bridge is really taking shape. You did a nice job with the painting. I really like the pic of the finished cliff area with one of my favorite railroads going through....CP Rail. Tonight I got a chance to work again on the layout. Wife watched the Cavs, Because I had the table top pretty much cleaned off I finally decided which two buildings I would put in that area. The Sur Sweet and the creamery from Walthers ( now Atlas ). Once I got them positioned I laid down some cork and glued it down. Once I lay down track I am going to extend the rail loading dock so I can spot two reefers there at one time. Then I glued down the ground turf I put down yesterday or the day before. Tomorrow morning I can pull the nails and paint the cork and should sometime during the day put down some ballast. Pics........Paul


Attachments
Images (4)
Elliot, thing are looking great! Love the picture of the signal bridge! Who could ask for more!![]()
Paul, I think your trying to give Elliot a run for the money! Things are looking great at your place! I bet you guys have been trading secrets! LOL![]()
Got the new terminal tracks ballasted and repaired the scenery damaged by removal of the mountain. Glue is still wet in the pictures. I've got to paint the underside of plywood base for the downtown area before I mount it. Also paint "rust" on the rails of the new track. Not bad for two weeks of progress. I probably won't get much done this week as I'll be busy. I'll hopefully make some progress again next weekend.


Attachments
Images (4)
Lou- looking good. Amazing want we can accomplish when we put our minds to it. Helps to have the free time too.
Paul- I notice mostly ground throws on your switches. Are you leaving them or adding motors? Can't believe you have another new area under construction ![]()
Elliot- the cliff photo looks great. Really brings your masterpiece to life.
Bob, this layout will have mostly manual ground throws. However there will be a spot where the switches will have switch motors because they will be out of arms reach. Paul
Lou, things are looking very nice! You cant eve tell there was damage from where the mountain was! Great Job! I cant wait to see the city growing above the tracks!![]()
Got the cork roadbed painted. Now just waiting for it to dry. Pics........Paul


Attachments
Images (3)
Looking good Paul! While your waiting you might as well go up stairs and run some trains! LOL![]()
The ballast is down and glued. I'll have to let it dry a bit before I start to put down track. So mike now I will go up and run some trains for a while. Pics...........Paul


Attachments
Images (5)
Looks good Paul, I just have a question for you, do you go back and Ballast between the ties and rails?![]()
Mike, I do not ballast the track. I just ballast beveled sides of the cork.............Paul
The buildings and spurs look good Paul!!
Remember this dummy? I rounded up some more LEDs and added headlights & ditch lights. There's a selector switch in the chassis that turns on either red for stop/reverse or headlights for forward/go. Whenever I convert a powered unit to a dummy and I see a slider switch I leave it there for future use - like today!


Attachments
Images (2)


Add Reply
Sign In To Reply
