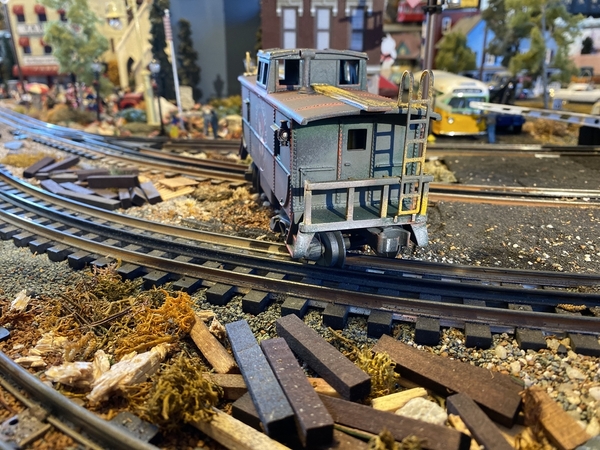
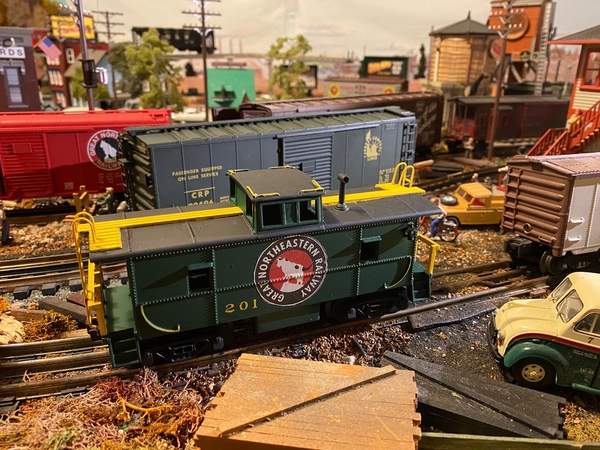
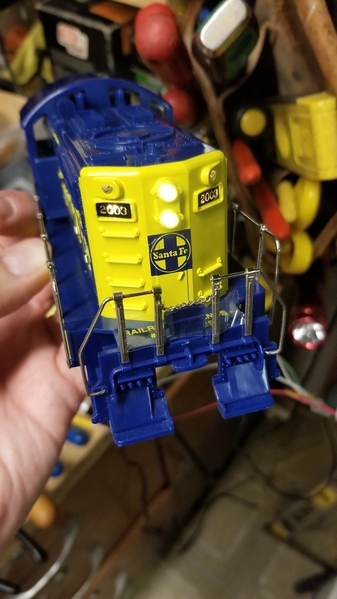
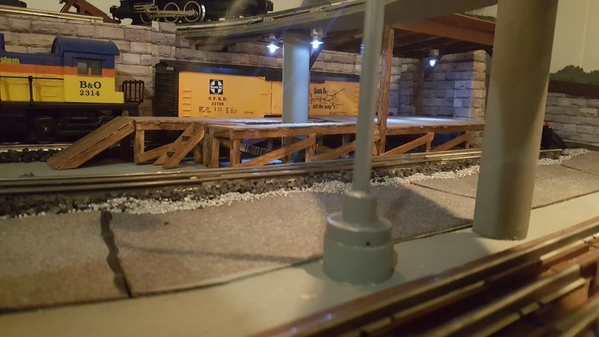
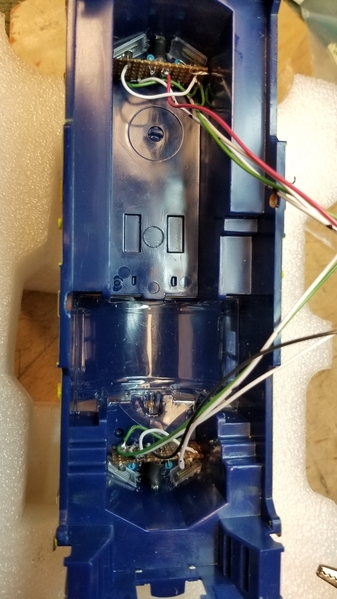
That’s an impressive undertaking Bob. That had to be difficult making the adjustments to the shoes.

Actually it was very easy. I took the pick up off the engine and held the roller against the grinding wheel in my Dremel. Other than burning my fingers a little it was not bad.

@Dave Ripp. posted:

Bob, I've got a good # of Beeps and like what your doing. Great ideas for the future.

They are like a blank canvas. Very easy to work on and full of potential.

Thanks gents.

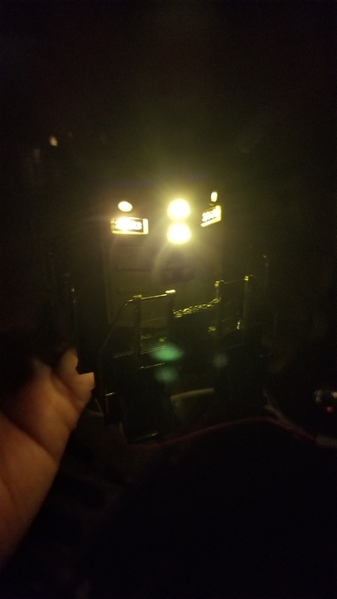
Bob, Nice job on grinding those pickup rollers.  Your mockup of the LEDs is a good idea.

Bill, Yes, all mine are within easy reach, and I left some manual too.  I don't have any scenery in yet to have to remove for access, but I forgot to drill holes in the lower level to accept the wires coming from the upper level.  Strange I didn't think of it, I drilled holes for track power.  I do have enough room behind the layout next to the wall, so some of the switch machine wires are going down there.  It's just a long 30" reach

Morning guys, sure is alot of work for one day! LOL

Vinny26, looking good. Now you have a clean slate to make any changes your really want to!

Bob, thats a great idea, maybe down the road like everything else! LOL Your Beep project is really coming along I can't wait to see the lights installed and glowing!

Dave Ripp, for not feeling like doing any real work it sure looks good! Wonderful building placement!

Farmer John, Thank you Sir! I got the idea for the drop down from you and your river build! As for the motor it came out of a mini Quadcopter that my son had crashed and asked me to fix. I took a look at it and told him it was beyond fixing and he said throw it away. I knew better and that somewhere down the road I could use the motors for something! I used 2 of them, one for the helicopter and the other one for the plane. I had to make a backing plate for the prop as the mounting hole was to big. Both are powered by a 8.4 cell phone charger.

Third rail, Bill thank you! The steel mill building is a great addition to the present one! Looks right in place!

Well I don't know if I will get anything done today, but it is still early! LOL

I hope you all have a great day and fun with your layouts and trains!

@mike g. posted:

Thanks for the kind words guys! It really means a lot to me!

Mark, don't worry it will all come together!

@trumpettrain,Patrick just in case you missed it, the first flight! LOL

WOW  Mike.   🤤

All that work , all that planning , all that artistry and all that engineered functioning equipment ........really is beautiful.

I have to admit when you had the movement for the plane actuated in the early stages I had my doubts that this was going to be much to watch............OUCH...........boy was I way off base.      That is one great SMOOTH takeoff .

Really nice Mike. 😉


Thanks! It took longer then I thought between all the errors! But I am happy with it, but most of all the wife thinks it's cool!


@mike g. posted:

Thanks! It took longer then I thought between all the errors! But I am happy with it, but most of all the wife thinks it's cool!

D@Dallas Joseph posted:

" the wife thinks it's cool "  ..........can't beat that kind of positive reinforcement for your hobby Mike. 😉

That's always one of my goals also. Then if the OGR Forum folks like it it's a bounus.

@Dave Ripp. posted:

I love the utility poles. Did you string them yourself? I have dozens in various sizes and manufactureres for future detail work. It's nice to see how they could look you've done a great job.

Yes I did. Drilled 120 0.5mm holes in the 10 poles through the  insulators then strung 10 pound test fishing line through them. I put in all the lines first then spaced them out, drilled holes & glued them in place. After the glue set up,  I pulled the lines taught then tied each one off finished with a drop of CA  glue. Thanks for the compliment.

Dave, I really like those birch trees! Did you purchase them ready made or make them yourself? That is a super cool scene!

I got them at Menards several years ago. They came bare I brush a little glue on and dip them in fall flock.

Lemax 34967 WINTER BIRCH TREE 9” Bare White Christmas Village Scenery

Last edited by Dave Ripp.

Good looking produce stand Dave.  🤓  Are the little containers of fruit something you made ?

The church with that parking lot and then the cemetery next door sure was something I saw many times riding the motorcycle through parts of Pennsylvania.

Thanks Dallas, It was an unpainted kit by Plasticville. All I did was glue, paint and add figures. I don't know why but I've always liked cemeterys and I needed a church for weddings and funerals. I have details for both.

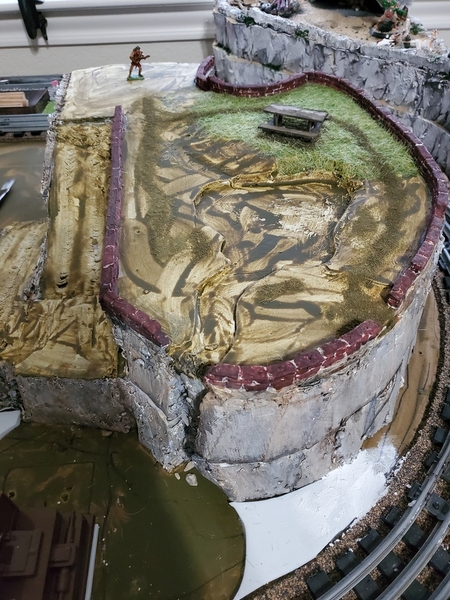
I've got the Mesa placed on the layout and have started doing the landscaping. Last night while making paths, I had a thought, flagstone would look cool along the flat bank of the pond. I whipped up some plaster stuff and spread it thin on wrinkled then flattened aluminum foil and spread it about an 1/8 of an inch think. Now wondering how into flagstone. Having a beer and contemplating possible methods.... stay tuned!20211111_163336

Attachments

Images (1)
  • 20211111_163336
@CR Cole posted:

I've got the Mesa placed on the layout and have started doing the landscaping. Last night while making paths, I had a thought, flagstone would look cool along the flat bank of the pond. I whipped up some plaster stuff and spread it thin on wrinkled then flattened aluminum foil and spread it about an 1/8 of an inch think. Now wondering how into flagstone. Having a beer and contemplating possible methods.... stay tuned!20211111_163336

.........and the inventiveness continues .......good ideas here CR.       (  I do find a beer ....MOLSON XXX .....in my case , does seem to stimulate the inspiration on occasion 😁 )

Surprisingly, I broke the knuckle on a LIONEL passenger train coupler--I say surprisingly since it occurred while trying a "hand of God" coupling operation and the operation didn't seem particularly harsh.

Anyway, I used a favorite YouTube video demonstrating how to make the repair in under a minute once the coupler was ready to accept the new knuckle--the key being to dab a tiny amount of Red N Tacky or similar substance on the tip of the rivet to secure the spring while inserting the knuckle.

I respectfully refer to the video as Shaky Hands since I too have unsteady hands at times.  Go to about 22:00 of the video for the gist of this successful technique.

Last edited by Pingman

@Dave Ripp., the produce stand looks great, but I am a little worried as it looks like someone fell down in the parking lot! Better check on him be a lawsuit comes up!

@CR Cole, the Mesa is looking great! You are moving right along with that project!

@fast freight, wonderful scene! Now that looks like it could be fun!

@RSJB18, Bob, that looks OUTSTANDING! I wish I wasn't so scared to open engines up! LOL

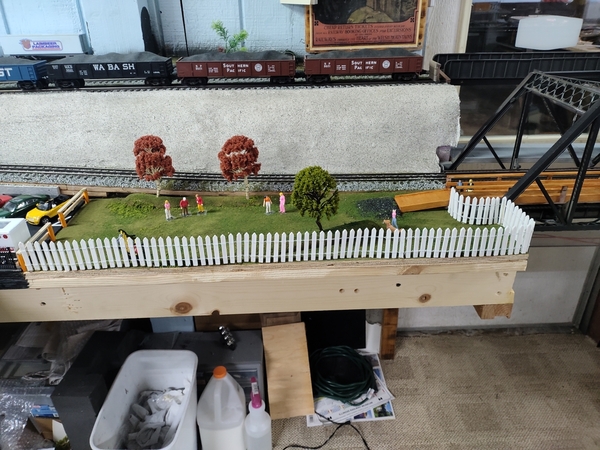
Well guys I got out to the train room this morning and added some fencing around the park and along the airfield. Not a big deal but it looks better with it in place!

IMG_20211112_082238IMG_20211112_082252

Then when I was done with that, I ran the track cleaning car around the layout as I have some friends coming over this weekend to visit and see the train room. I found out that if I don't run it, they always seem to stop somewhere and make me look bad! LOL But they ran just fine this morning, just hope for no problems tomorrow!

I hope everyone has a great weekend and fun times with their layouts and trains!

Attachments

Images (2)
  • IMG_20211112_082238
  • IMG_20211112_082252
@mike g. posted:

IMG_20211112_082252

Then when I was done with that, I ran the track cleaning car around the layout as I have some friends coming over this weekend to visit and see the train room. I found out that if I don't run it, they always seem to stop somewhere and make me look bad! LOL But they ran just fine this morning, just hope for no problems tomorrow!

I hope everyone has a great weekend and fun times with their layouts and trains!

Watch out for those gremlins Mike. They tend to appear every time the layout is shown to friends and relatives.

Here's the rest of the update on my BEEP.

Bob

@mike g. posted:

@Dave Ripp., the produce stand looks great, but I am a little worried as it looks like someone fell down in the parking lot! Better check on him be a lawsuit comes up!

@CR Cole, the Mesa is looking great! You are moving right along with that project!

@fast freight, wonderful scene! Now that looks like it could be fun!

@RSJB18, Bob, that looks OUTSTANDING! I wish I wasn't so scared to open engines up! LOL

Well guys I got out to the train room this morning and added some fencing around the park and along the airfield. Not a big deal but it looks better with it in place!

IMG_20211112_082238IMG_20211112_082252

Then when I was done with that, I ran the track cleaning car around the layout as I have some friends coming over this weekend to visit and see the train room. I found out that if I don't run it, they always seem to stop somewhere and make me look bad! LOL But they ran just fine this morning, just hope for no problems tomorrow!

I hope everyone has a great weekend and fun times with their layouts and trains!

Here's hoping you have a great run on the rails for your friends tomorrow Mike . 👍😁

That’s called guided discovery learning Bob. Good job.

How did the LEDs burn out Bob .....and how can you tell when you are getting a brain cramp ?

The brain cramp occurred when a certain dumb#$@ realized that he wired the resistor in parallel, not series with the marker LEDs. Once the cramp was removed,🤯🤯 the wiring was corrected and all was right in the world again. 🤣🤣

If you cant make fun of yourself, who can you.....👍

Last edited by RSJB18
@RSJB18 posted:

The brain cramp occurred when the dumb#$@ realized that he wired the resistor in parallel, not series with the marker LEDs. Once the cramp was removed,🤯🤯 the wiring was corrected and all was right in the world again. 🤣🤣

If you cant make fun of yourself, who can you.....👍

I have some resistors coming in the mail Bob .                               I was wondering if I could get your permission  to use your verses in one of my next replies on my lighting my ps2 with LEDs ?  🙃😉

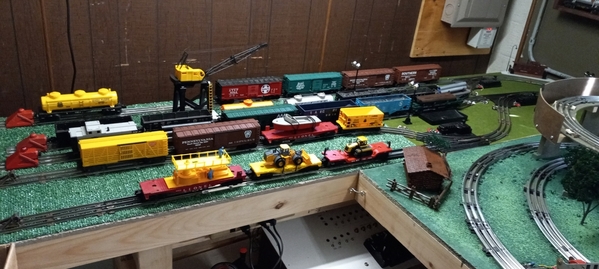
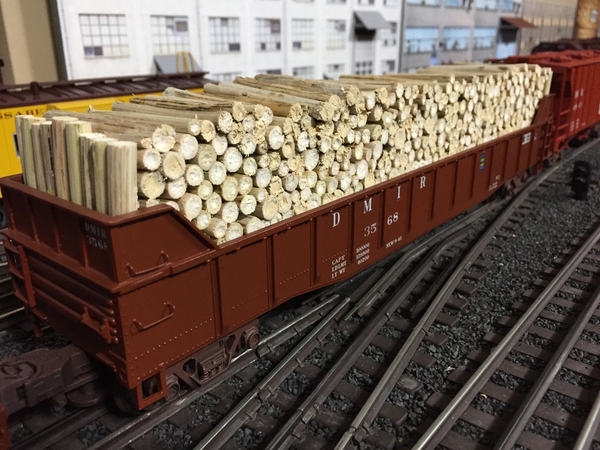
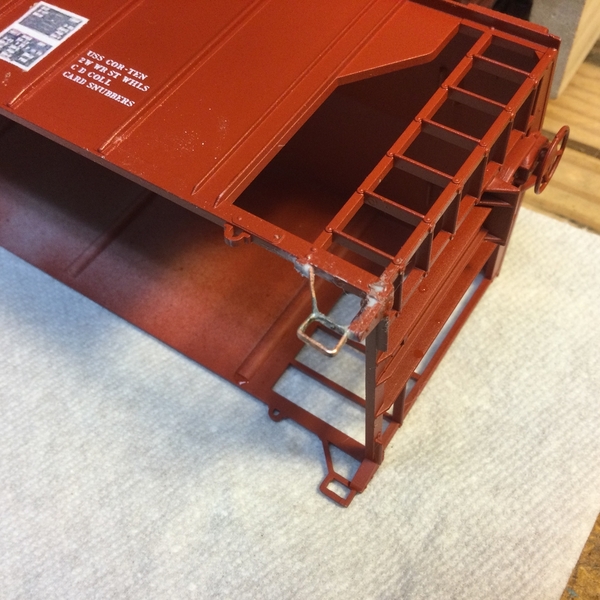
Still working on repainting and assigning cars to the DM&IR.    Finished the pulpwood car, two potable water tank cars, and I’m almost done lettering three box cars.    

Had a setback yesterday as my "traction sand hopper" took a tumble and broke off one of the corner step.   I cut a strip off of a copper sheet, shaped and soldered up a new one.   Epoxied it in place last night so I'm good to go again this afternoon.   Will prime the corner section after it dries from a wash.   

Cheers, Dave

IMG_0815IMG_0808IMG_0804IMG_5541

Attachments

Images (4)
  • IMG_0815
  • IMG_0808
  • IMG_0804
  • IMG_5541
Last edited by darlander

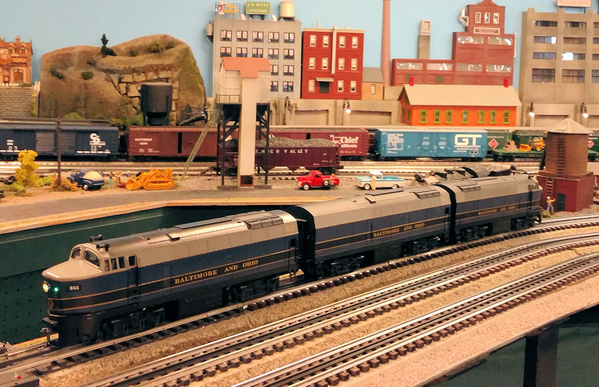
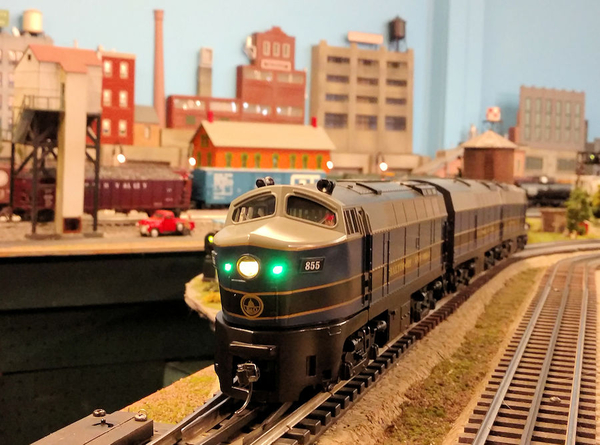
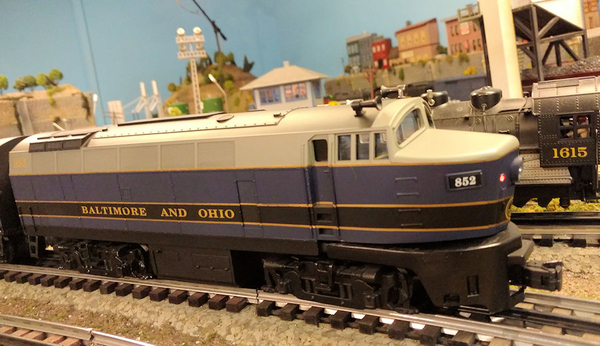
Updates to this Williams B&O Shark A-B-A are complete. The final step was conversion to MTH PS 3.  This unit differs from stock with: LED headlight & marker lights, cab figures, fixed pilot with scale Kadee coupler and now DCS.  There is no smoke unit and I don't really care about smoke on a diesel anyway. While the lead, powered unit has green marker lights I installed red lights in the trailing, dummy A unit. Marker or "classification" lights on a freight locomotive may be dubious but I just think they look cool and hey, it's my railroad anyway. Like most Williams locos this is a stronger puller. With the addition of the PS3 upgrade I now have speed control,  good sounds and an operating coupler on the rear of the engine.

BO Shark 20211114_124345BO Shark 20211114_124256

BO Shark 20211114_124436

Attachments

Images (4)
  • BO Shark 20211114_124425
  • BO Shark 20211114_124345
  • BO Shark 20211114_124256
  • BO Shark 20211114_124436
Last edited by Ralph M

I have some resistors coming in the mail Bob .                               I was wondering if I could get your permission  to use your verses in one of my next replies on my lighting my ps2 with LEDs ? 🙃😉

Help yourself. No copyright infringement to worry about here.

RSJB18...that process you went through is called..."experimential learning"

Don

True but with my experience it was a rookie mistake.

@darlander posted:

Still working on repainting and assigning cars to the DM&IR.    Finished the pulpwood car, two potable water tank cars, and I’m almost done lettering three box cars.    

Had a setback yesterday as my "traction sand hopper" took a tumble and broke off one of the corner step.   I cut a strip off of a copper sheet, shaped and soldered up a new one.   Epoxied it in place last night so I'm good to go again this afternoon.   Will prime the corner section after it dries from a wash.   


Nice job Dave.    😉IMG_5541

@Radioman77 posted:

It has been a rough 2 weeks, between my dyslexia and add I finally got my yard wired and running.  Now for some details. Just finished this scratch built loading dock for it. Have a few loads and such in progress. All the other ideas have inspired me to move further with the detailing than I had planned. John20211114_111652_00220211114_112313_003

Good looking loading dock John. 🤓  It's always nice to see a project like this turn out well.

Afternoon guys, I hope everyone is having a good weekend!

@RSJB18, I am glad to hear the brain cramp went away and you were able to get the lights fixed! As for the gremlins, they showed there ugly head! More about that later! LOL

@Dave Ripp., The landscaping around the produce stand looks outstanding!

@leapinlarry, Sure are some nice additions to your layout and you cant beat there prices!

@Radioman77,Looking good, I really love the scratch built loading dock!

@darlander, Dave your skills never quit! Great fix and the pulpwood car turned out amazing!

@Ralph M, Those sure look great! I wish I would have left a rear operating coupler on my ES44AC when I changed it over to fixed pilots and kadees!

Ok guys as for my friends visit yesterday really didn't go very well, I will start out with the good stuff first. While I was cleaning up I found the 2 ambulances I had for my crash scene so I place that and hooked up the lights! Here is a little video that and the rest of the train room as it sits now!

They loved all the lighted building and cars, really loved the airfield and the plane taking off!

Now for the gremlins, I started up the lower level engine and got it rolling nice and slow, then started up the upper level engine and got it going at a faster pace. Things were looking good, great sounds, lots of smoke, then BANG the gremlins showed there ugly heads! First the upper engine stopped and went silent, I figure I will deal with it later as I still had the lower engine to run. Next thing I know its dead in the water! Now I am ****ed! LOL removed the engines, hand cleaned the track in those areas and still nothing!

Went out this morning and you guys tell me what are the chances of 2 power drops coming lose on 2 different tracks with in a couple minutes of each other! LOL Oh well they are fixed this morning!

I hope you all had better luck then I did!

Have a great Sunday!

Attachments

Videos (1)
VID_20211114_085150
@mike g. posted:

Great night time action Mike.   Love all the lights!   Your runway takeoff is a winner!!!!  

Cheers, Dave

PS:  Fixing flaws and combating gremlins is part of the joys of this hobby.   Combating & conquering gremlins and miss-haps  is part of the "feel-good" experience!     A chance to toast the joys of accomplishment!

Last edited by darlander

Sorry to hear the gremlins reared their ugly heads @mike g.

Bugs Bunny - Falling Hare [1943) - Looney Tunes Classic Animated Cartoon - YouTube

The layout looks great regardless. At least it was an easy fix.

@darlander- your work on the cars looks terrific. Glad you could fix the broken ladder too.

@Radioman77- nice loading dock. I did a similar one on my team tracks.

2017-02-18 18.04.37

@Ralph M- great looking Sharks. Your RR your rules.

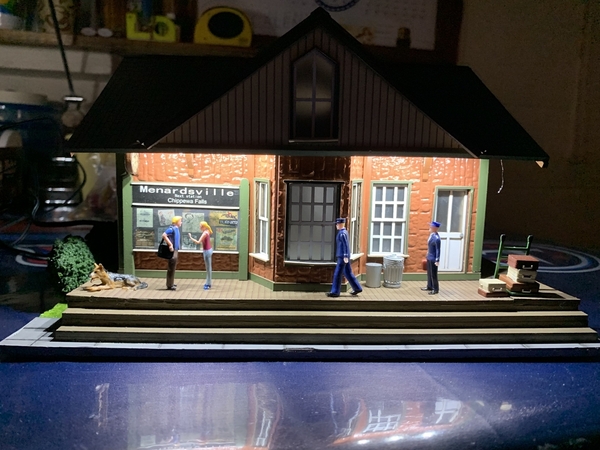
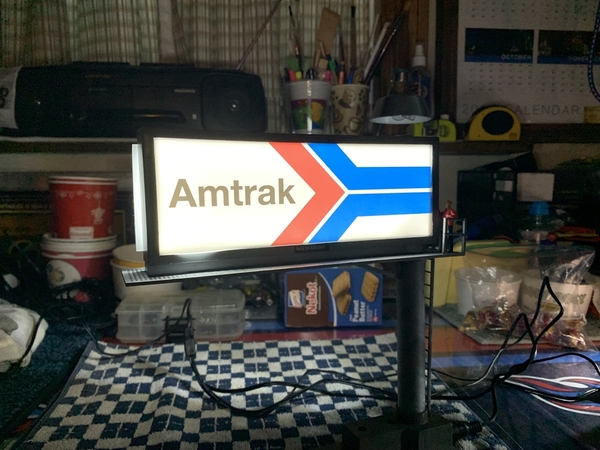
Set the two light boards in place on the BEEP last night, nothing else to report at the moment.

2021-11-13 20.21.39

Attachments

Images (2)
  • 2017-02-18 18.04.37
  • 2021-11-13 20.21.39

Today I continued getting bugs out of the CTC Dispatch software. The latest additions are control point Time Lock ("Running Time") and control point automatic All Stop ("Control Point "Stick"). In addition, the USB serial port software has been buggy, so I worked on that too.

I'm nearly complete with the Level 1 software, which is stand-alone Layout Control with CTC Dispatch. Level 1 stand-alone Locomotive Cab Control is operational with some enhancements left to do.

The next big step will be Level 2 software where the Layout interacts with the Locomotive Cab Control. This will enable in-cab signaling, Positive Train Control (PTC), and automatic locomotive operations.  My goal is to have that complete by the end of the year.

You lost me after....today I continued....

😂😂😂😂

Sounds like an interesting project.

@Snkbittin posted:

Finally got the Arch, railings and Cab on the Turntable ..still need to do the motors and bull gears ..along with 5000 other things I need to doEB2442A3-2BF5-42D0-BF04-4063DBB4CEC4

Very nice. 4 year olds are the boss after all.

That's a lot of great projects this weekend everyone!!

I did some more wiring on turnout control with both push buttons and AIU.  I have 11 done and two to go, except I don't have an more pushbuttons left.  I thought I had the same number of DZ1002 push buttons as DZ1000 switch machines.   Right now the pushbuttons are just hanging by the wires at various places around the layout.  I should mount them to the sides temporarily since I don't want to put up a nice looking fascia yet.

Thanks for all the comments and encouragement. The dock surprised me as to how fast it went First real scratch built project. Cut all the framing from a piece of 2x4. Now to rebuild the control panel for the main layout. Also trying to figure out how to activate some block signals without using the Lionel contactors. Seem to be a bear to adjust. Hope to make them myself. John

Morning Guys, sure is some nice work going on and some I dont understand and would never try! LOL I am more of a KISS guy!

@RSJB18, Bob, nice work! It's very impressive to me and out of my league!

@Snkbittin, Looks great! I wish I had room and could afford one!

@Dave Ripp.,Great job on the weathering! I like your selection of autos!

@Dallas Joseph, Thanks you sir! Yes it did make me feel very humble! LOL

Well guys I got out this morning and finished ballasting all the track I got down, something I had been putting off as it's not the most exciting thing to do! LOL Sorry no photo as I am sure everyone have seen it before!

I hope your all having a great day, its just pouring rain here with wind! Have fun with your layout and trains!

Got my Fastrack layout design finished so everything fits together okay on the layout. Starting wiring the insulated and isolated rail sections first for crossing lights and gates. I remembered to remove all the outer rail common straps before I started soldering! I'm soldering 18 gauge track feeders and jumper wires between each piece of track in 6 piece track sections. Running conventional so running 12 gauge wires 10 Amp fuse protected buss wires to 4 dual row barrier strips each for both my hot and common for each of my 2 loops from my MTH Z-1000 Transformers, still need to add the barrier strips for the crossing accessories, have it figured out on paper how to wire them. My colored write on wire tags should arrive tomorrow so I'll be able to label all my wires to make it easier if and when I need to troubleshoot or change something in the future.

Today I repainted and reweathered the green car in the photo. The paints still a little wet it'll look better dry.  I changed out some birch trees as I'm looking through boxes I found some I liked better. Of coarce I didn't find what I was looking for. I also added a small freight station and a few details to different spots.

A2A3A4A5A6A7A8A9

Attachments

Images (9)
  • A1
  • A2
  • A3
  • A4
  • A5
  • A6
  • A7
  • A8
  • A9
@Dave Ripp. posted:

Today I repainted and reweathered the green car in the photo. The paints still a little wet it'll look better dry.  I changed out some birch trees as I'm looking through boxes I found some I liked better. Of coarce I didn't find what I was looking for. I also added a small freight station and a few details to different spots.


Dave, the patina on the green car looks great, nice redo! We all do redo's, it's part of the hobby, experience, and discovery. I still love the birch trees, they really pop! The freight station looks great too, and I spy Jack the Sheppard? The playground and basketball court are really nice features. Something I'd like to do eventually.

Your layout is making fast progress! Run any trains lately?

Scott

Thanks Scott, I havn't run any for a couple of weeks. I was actually cleaning and did these things as I put stuff away.  That is Jack and I also found the small dog I added to the park. The bigger trees are department 56 I added fkock to pretty them up.

@mike g. posted:

@Dave Ripp., Outstanding  layout Dave! You have done so much from the day I started fallowing you. Your scenery looks amazing and I see you have an auto car, is that on a siding or are you just storing it there? Either way it looks great!

Thanks Mike, It's just parked there I think it's to short time will tell. I'm keeping that other siding area unfinished for a future prodject.

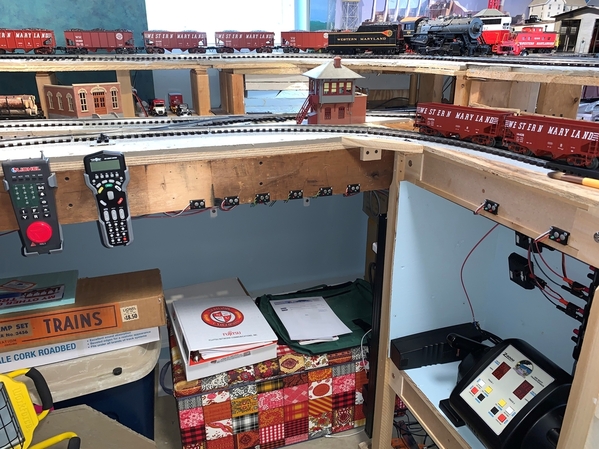
Dave, I'm not quite finished with the turnout control wiring.  Today I temporarily mounted the push buttons to the layout frame.  There are 3 more on the other side of the layout.  These all work.  I am going to make labels for them since so many are so close together.  The other side they are spaced apart, so it is obvious which turnout they control.  The remote control through the AIU works too.  I just looked through everything for the two missing DZ1002 pushbuttons, but didn't find them.  Maybe they fell down behind something.  So two more need to be finished.

2021-11-15 13.48.45

Attachments

Images (1)
  • 2021-11-15 13.48.45
@Mark Boyce posted:

Dave, I'm not quite finished with the turnout control wiring.  Today I temporarily mounted the push buttons to the layout frame.  There are 3 more on the other side of the layout.  These all work.  I am going to make labels for them since so many are so close together.  The other side they are spaced apart, so it is obvious which turnout they control.  The remote control through the AIU works too.  I just looked through everything for the two missing DZ1002 pushbuttons, but didn't find them.  Maybe they fell down behind something.  So two more need to be finished.

2021-11-15 13.48.45

Lots of turnouts good place for the control tower. You may need one on the top level to.

Thank you Mike and Dave!

Mike, I'll find them as soon as I buy two more! 

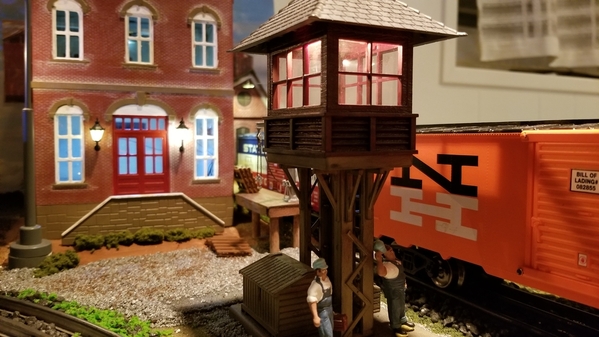
Dave, I have a smaller tower on the upper level.  You can just make out a gray hip roof right above the smokebox of the Consolidation.  The red, white , and black diesel behind the Consolidation is blocking the rest of the tower.  Here it is behind the Chessie caboose.

2021-04-21 10.10.45 crop

Attachments

Images (1)
  • 2021-04-21 10.10.45 crop

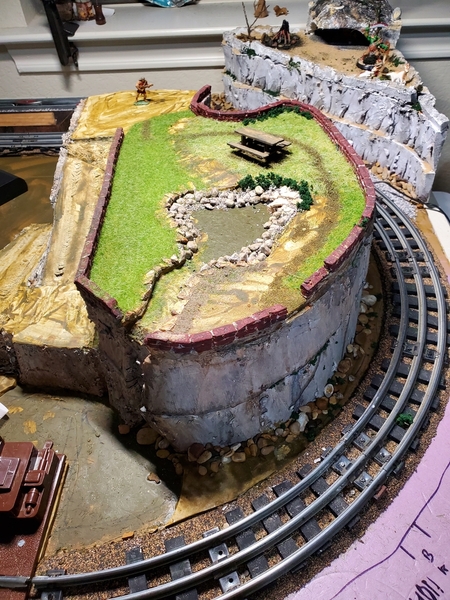
I still am very humbled by what you all do!. I have to say, those that get into the complex wiring, the AI and sometimes I have no clue what you are talking about! Anyway, been working on the landscaping of the Mesa when I can. A lot of doing and waiting g for stuff to dry, but I think I got the flagstone right!😁20211115_194316

Attachments

Images (1)
  • 20211115_194316
@CR Cole posted:

I still am very humbled by what you all do!. I have to say, those that get into the complex wiring, the AI and sometimes I have no clue what you are talking about! Anyway, been working on the landscaping of the Mesa when I can. A lot of doing and waiting g for stuff to dry, but I think I got the flagstone right!😁

Looks like your doing fine. Keep clearance in mind I always test with my largest cars.

Last edited by Dave Ripp.

Mark - thanks! I hate wiring, half the time I cant see the small wires on the LEDs! And crawling under the table is painful! I would rather do scenery although the going is slow!

Dave- the clearance is actually something I had forsight to check before everything was glue down, plenty of room!

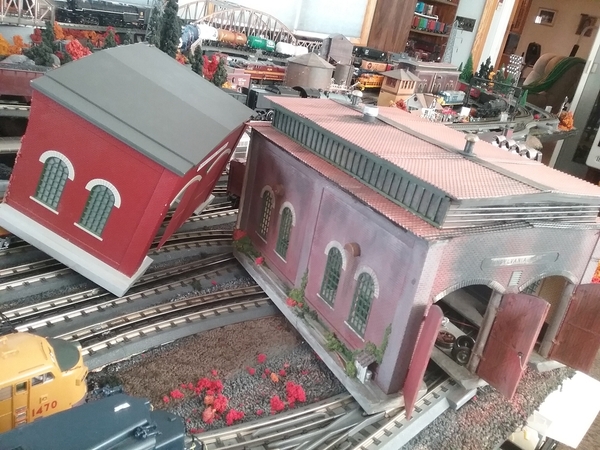
EARTHQUAKE  LEVELS  BUILDINGS  AT  TWIN BRIDGES  RAILYARD. 😨

Actually needed a short twin stall engine house for a couple of switchers.............so..........I got an MTH  LONG twin stall ENGINE HOUSE .................and a SAW.

Still working on it but I hope I can get it done before we have more snow.

It looks like everything else is in order Dallas. Much neater than when I'm building.

Last edited by Dave Ripp.

Radioman 77. I activate my block signals using the 022 switch circuits. (This is not occupancy, just switch position. I am using semaphores for occupancy and have used the "insulated rail" to activate the semaphore signal. That won't work for the block signal unless you use a relay.

I have been working on the "Lost Creek Trestle" for the last couple of weeks. All of the short bents and associated beams and track attachment points are installed. I am just starting to do the design of the timber bridge over the "interconnect" track. Then the abutments and end spans. The trestle is scratchbuilt using basswood. The Basswood is easy to work with, strong enough, stains and glues well and is straight.

I have not installed the cross bracing between the bents yet because I want to paint between the bents and the bracing will really be in the way.Overall view 11 16 2021Inside elevation 11 16 2021

Attachments

Images (2)
  • Overall view 11 16 2021: Overall view
  • Inside elevation 11 16 2021: Inside elevation view

EARTHQUAKE  LEVELS  BUILDINGS  AT  TWIN BRIDGES  RAILYARD. 😨

Actually needed a short twin stall engine house for a couple of switchers.............so..........I got an MTH  LONG twin stall ENGINE HOUSE .................and a SAW.

Still working on it but I hope I can get it done before we have more snow.

"Oh, the humanity!!!!"

@CR Cole, Outstanding job! Looks like a wonderful place to camp!

@Dave Ripp. Looking good! I built the frame for my chain Link fence out of metal coat hangers!

@Dallas Joseph, Looks like a great start, I am sure it will be as nice as your long engine shed! Also great shot of your layout!

@Victor Bertolina, The Trestle is looking outstanding! Sure is a lot of wood to cut and glue!

Well guys nothing new from me, I have to do some windstorm clean up and help my 96 year old friend down the road clean up his place. So I am not sure when I will get back to the train room, but I hope its soon!

I hope everyone is having a great day!

@mike g. posted:

Morning Guys, sure is some nice work going on and some I dont understand and would never try! LOL I am more of a KISS guy!

@RSJB18, Bob, nice work! It's very impressive to me and out of my league!

@Snkbittin, Looks great! I wish I had room and could afford one!

@Dave Ripp.,Great job on the weathering! I like your selection of autos!

@Dallas Joseph, Thanks you sir! Yes it did make me feel very humble! LOL

Well guys I got out this morning and finished ballasting all the track I got down, something I had been putting off as it's not the most exciting thing to do! LOL Sorry no photo as I am sure everyone have seen it before!

I hope your all having a great day, its just pouring rain here with wind! Have fun with your layout and trains!

Thanks Mike! ..And Thank you for your service

I HAD to have a Turntable..and I have some big Steam so its a 34"..I Made room on my plan although it changed 20 times ..My wife Loves the layout and gave me the shims to buy it..I see all these awesome layouts and its just fuel for me to get moving!!

@mike g. posted:

@CR Cole, Outstanding job! Looks like a wonderful place to camp!

@Dave Ripp. Looking good! I built the frame for my chain Link fence out of metal coat hangers!

@Dallas Joseph, Looks like a great start, I am sure it will be as nice as your long engine shed! Also great shot of your layout!

@Victor Bertolina, The Trestle is looking outstanding! Sure is a lot of wood to cut and glue!

Well guys nothing new from me, I have to do some windstorm clean up and help my 96 year old friend down the road clean up his place. So I am not sure when I will get back to the train room, but I hope its soon!

I hope everyone is having a great day!

Thanks Mike.

" help my 96 year old friend "................still of " service "  Mike ?     Hard to get it out of your psyche after all that great training so long ago........that was probably something you had to begin with though.🤔

Where was all the wind located ?

How many feet ( miles ) of track do you have ?      Hope you have a good time laying down that ballast . 

Finally installed the fence around the airport. I'm not crazy with the airport on the table but the kids like it. I'll add some bushes along the fence eventually.

Then I built some simple stands for the racetrack we are working on, just need to find some fans.

Lastly, I added some small leds to light the post office and hardware store.

Attachments

Images (3)
  • 20211117_201607
  • 20211117_201627
  • 20211117_203721

Add Reply

Post

OGR Publishing, Inc., 1310 Eastside Centre Ct, Suite 6, Mountain Home, AR 72653
800-980-OGRR (6477)
www.ogaugerr.com

×
×
×
×
Link copied to your clipboard.
×
×